Aga Masterchef deluxe df manual 04-09 EINS 515138.pdf - Rayburn
Aga Masterchef deluxe df manual 04-09 EINS 515138.pdf - Rayburn
Aga Masterchef deluxe df manual 04-09 EINS 515138.pdf - Rayburn

You also want an ePaper? Increase the reach of your titles
YUMPU automatically turns print PDFs into web optimized ePapers that Google loves.
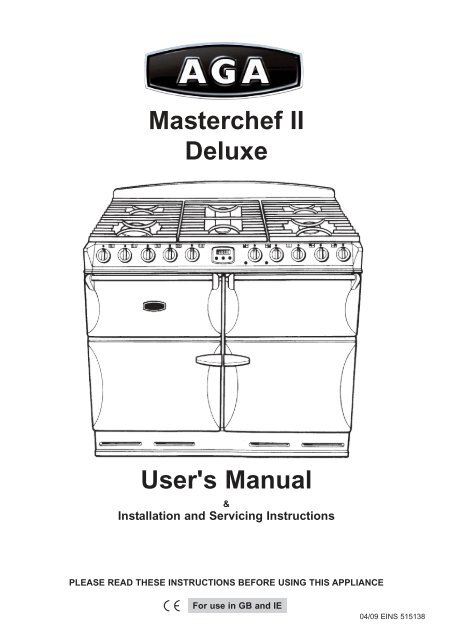
<strong>Masterchef</strong> II<br />
Deluxe<br />
User's Manual<br />
&<br />
Installation and Servicing Instructions<br />
PLEASE READ THESE INSTRUCTIONS BEFORE USING THIS APPLIANCE<br />
For use in GB and IE<br />
<strong>04</strong>/<strong>09</strong> <strong>EINS</strong> 515138
Be safe<br />
Warning<br />
Accessible parts will become hot in use. To avoid burns and scalds children should be kept away.<br />
You need clean fresh air - so does your cooker. Burner flames produce exhaust gases, heat and moisture. Make sure<br />
that the kitchen is well ventilated: keep natural ventilation holes open or install a powered cooker hood that vents<br />
outside. If you have several burners on or use the cooker for a long time, open a window or turn on an extractor fan.<br />
For more detail see the Installation Instructions.<br />
We recommend you read the 'General Safety Instructions' section if you have not used a gas cooker before.<br />
We describe some basic guidelines on how to use a gas cooker safely.<br />
Gas and Electricity<br />
Make sure that the gas supply is turned on and that the cooker is wired in and switched on. The cooker needs electricity.<br />
Peculiar smells<br />
When you first use your cooker it may give off a slight odour and a little smoke. This is normal and harmless (from oven<br />
lagging and starch binder on the element insulation) and will cease after a short period of use.<br />
2
Contents<br />
Users Guide<br />
Hotplate Burners Page 4<br />
The Griddle Page 5<br />
The Slow Cooking Oven Page 6<br />
Ideas for the Slow Cooking Oven Page 7<br />
The Grill (Top Right) Page 11<br />
Setting up the Cooker for Use Page 12<br />
The Fan Ovens Page 13<br />
The Automatic Cooking Control Page 14<br />
Oven Cooking Guide Page 16<br />
Fan oven cooking chart Page 19<br />
Cleaning the cooker Page 20<br />
Troubleshooting Page 24<br />
General Safety Instructions Page 26<br />
Installation Guide<br />
Installation Page 28<br />
Servicing Page 35<br />
Circuit Diagram Page 39<br />
Technical Data Page 42<br />
3
Hotplate Burners<br />
Always position pan handles away from the front of the<br />
cooker, out of reach of small children.<br />
Pan and kettles with concave bases or down turned base<br />
rims should not be used.<br />
The drawing above each knob indicates which burner that<br />
knob controls. There is a spark ignition system that works<br />
when the knob is pressed in. Each burner also has a<br />
special safety device that stops the flow of gas if the flame<br />
goes out.<br />
Push in and turn a knob to<br />
the large flame symbol<br />
( ).<br />
Keep holding the knob<br />
pressed in to let the gas<br />
through to the burner for a<br />
few seconds. The igniter will<br />
spark and light the gas<br />
automatically.<br />
If, when you let go of the control knob, the burner goes<br />
out, the safety device has not held in. Turn the control to<br />
the off position and wait one minute, then try again this<br />
time holding in the control<br />
knob for slightly longer.<br />
Adjust the flame height to<br />
suit by turning the knob.<br />
On this cooker the low<br />
position is beyond high, not<br />
between high and off. The<br />
small flame ( ) marks the<br />
‘low position’.<br />
Turn the knob<br />
towards it after the<br />
contents of a pan<br />
have boiled.<br />
Place all pans<br />
centrally over the<br />
burners. The flames<br />
must be on the base<br />
of the pan. Do not allow the flames to go up the sides of<br />
the pan.<br />
Simmering aids, such as asbestos or mesh mats, are NOT<br />
recommended. They will reduce burner performance and<br />
could damage the pan supports.<br />
Avoid using unstable and misshapen pans that may tilt<br />
easily and pans with a very small base diameter e.g. milk<br />
pans, single egg poachers.<br />
Minimum pan sizes<br />
The minimum pan diameter recommended is 120mm<br />
(about 4 3 /4”).<br />
When the hotplate control knob is pressed in, sparks will<br />
be made at every burner, this is normal.<br />
If, after lighting the hotplate burner flame goes out, turn it<br />
off and leave it for one minute before relighting it.<br />
IMPORTANT: The cast iron pan supports on the<br />
appliance are of a professional design and much<br />
heavier than most if not all gas hob cookers.<br />
Therefore care must be taken when removing or refitting<br />
them from or to the hob. It is important that they<br />
are lifted from the appliance. Do not drag them across<br />
adjacent enamelled components as this could<br />
damage the enamel.<br />
You can remove the burner head for cleaning. See the<br />
‘Cleaning your cooker’ section of these instructions<br />
for removal and fitting of the pan supports and burner<br />
parts.<br />
You should wipe the top surface of the cooker around the<br />
hotplate burners as soon as possible after spills occur. Try<br />
to wipe them off while the hotplate is still warm.<br />
Using a lid will help the contents boil more quickly.<br />
4
Deep Fat Frying<br />
• Use a deep pan large enough to completely cover the<br />
appropriate heating area.<br />
• Never fill the pan more than one-third full of fat or oil.<br />
• Never leave fat or oil unattended during the heating<br />
or cooking period.<br />
The Griddle<br />
The griddle fits the central fish kettle/griddle pan support,<br />
front to back. It is designed for cooking food on directly. Do<br />
not use pans of any kind on it. The griddle surface is nonstick<br />
and metal cooking utensils (e.g. spatulas) will<br />
damage the surface. Use heat resistant plastic or wood<br />
utensils.<br />
• Never use a lid on the pan.<br />
• IMPORTANT: Oil is a fire risk; do not leave pans<br />
containing oil unattended.<br />
• In the event of fire cover with a lid and turn OFF the<br />
appliance.<br />
Do not attempt to extinguish the fire using water.<br />
Smother the flames on the hob, rather than attempting to<br />
remove the pan to the outside.<br />
Burns and injuries are caused almost invariably by picking<br />
up the burning pan to carry outside.<br />
• Do not try to fry too much food at a time, especially<br />
frozen food. This only lowers the temperature of the oil<br />
or fat too much, resulting in greasy food.<br />
• Always dry food thoroughly before frying and lower it<br />
slowly into the hot oil or fat. Frozen foods in particular,<br />
will cause frothing or spitting, if added too quickly.<br />
• Keep the outside of the pan, clean and free from<br />
streaks of oil or fat.<br />
NOTE: Use of aluminium pans may cause metallic<br />
marking of the pan supports. This does not affect the<br />
durability of the enamel and may be cleaned off with a<br />
metal cleaner such as ‘Brasso’ or an enamel rubber which<br />
can be purchased from <strong>Aga</strong> Cook Shops.<br />
Fish Kettle Burner<br />
The central hotplate burner can be used to cook whole<br />
salmon, trout, etc. in a fish kettle. The fish kettle must not<br />
exceed 14.5cm in width and 46cm in length.<br />
Suggested Method for cooking whole Salmon<br />
Place the gutted and cleaned fish, with or without head<br />
and tail in to the kettle with sufficient water to almost cover<br />
the fish. Season with salt and pepper and add a few<br />
pieces of carrot, onion and parsley to give flavour. Bring to<br />
the boil, covered and simmer for 8 - 10 mins per 450g (1<br />
lb).<br />
When cooked, leave to cool in the liquid before draining,<br />
and removing the skin. Decorate as desired.<br />
It should be positioned on the pan supports as shown to<br />
ensure correct and safe operation.<br />
• Do not put it crossways - it will not fit properly and will<br />
be unstable.<br />
• Do not put it on the Wok burner - it is not designed to<br />
fit the Wok burner pan support.<br />
Light the burner and adjust the flame height to suit.<br />
It should not be necessary to use extra fat when griddle<br />
cooking. This will effect the non-stick coating property and<br />
will make cleaning more difficult, Brush the food with fat/oil<br />
and not the griddle.<br />
Pre-heat the griddle for 5 to 10 minutes before adding<br />
food.<br />
You can reduce the heat by turning the control knobs<br />
towards the lower position (marked with the small flame<br />
symbol).<br />
Always leave space around the griddle for the gases to<br />
escape. Never fit two griddles side by side. Large pans<br />
should also be spaced well apart.<br />
• Experience will soon familiarise you with the correct<br />
setting to use for cooking.<br />
• After cooking, allow the griddle to cool before cleaning.<br />
5
All dishes cooked by the slow cooking method should be<br />
cooked for a minimum of 6 hours. They will ‘hold’ at this<br />
setting for a further 1-2 hours but marked deterioration in<br />
appearance will be notice in some cases.<br />
Joints of meat and poultry should be cooked at 180°C for<br />
30 minutes before transferring to the slow cooking oven.<br />
Meat over 2.7 kg (6lbs) and poultry over 2kg (4lbs 8ozs)<br />
are unsuitable for the slow cooking method.<br />
Always stand covered joints on a rack over a meat tin, to<br />
allow good air circulation.<br />
The Slow Cooking Oven<br />
Make sure that pork and poultry reach an internal<br />
temperature of at least 90°C.<br />
Slow cooking is unsuitable for stuffed meat and poultry.<br />
Always bring soups, casseroles and liquids to the boil<br />
before putting in the oven. When casseroles are used,<br />
cover the food first with foil and then the lid to prevent loss<br />
of moisture.<br />
Always thaw frozen food completely before cooking.<br />
Root vegetables will cook better if cut into small pieces.<br />
This oven is for long, slow cooking over 6-8 hours,<br />
keeping food warm and warming plates for short periods.<br />
Extra care must be taken when warming bone china -<br />
use the lowest setting.<br />
Using the Slow Cooking Setting<br />
The slow cooking setting<br />
is the area marked<br />
between 110°C - 120°C<br />
on the oven control knob.<br />
Adjust seasonings and thickenings at the end of the<br />
cooking time.<br />
Egg and fish dishes need only 1-5 hours cooking and<br />
should be included in day cooking sessions, where they<br />
can be observed from time to time.<br />
Dried red kidney beans must be boiled for a minimum of<br />
ten minutes, after soaking, and before inclusion in any<br />
dish.<br />
Storage and Re-Heating of Food<br />
If food is to be frozen or not served immediately, cool it in<br />
a clean container as quickly as possible.<br />
Thaw frozen food completely in the refrigerator before reheating.<br />
The Slow Cooking oven has side panels that are coated<br />
with a special enamel that partly cleans itself. For more on<br />
cleaning the ovens see the ‘Cleaning your cooker’ section<br />
of these instructions.<br />
Points to bear in mind when preparing food.<br />
Re-heat food thoroughly and quickly either on the hotplate<br />
or in a hot oven 200°C (180°C fan oven), and then serve<br />
immediately.<br />
Only re-heat food once.<br />
Do not place dishes directly on to the oven base. Always<br />
place onto shelf supplied.<br />
The shelf is designed to lock in place, but is removable for<br />
cleaning. See the ‘Cleaning your cooker’ section of these<br />
instructions.<br />
Push dishes well back in the oven to ensure that they are<br />
positioned over the element beneath the base plate.<br />
Make sure all dishes will fit into the oven before preparing<br />
the food.<br />
6
Ideas for the Slow Cooking Oven<br />
Many favourite recipes can be adapted for this type of cooking:<br />
Slow Cooking Oven Recipes - Meal 1<br />
6 - 8 hours cooking time<br />
Ragout of Beef in Ale<br />
Baked Potatoes<br />
Rice Pudding<br />
Ingredients<br />
Ragout of Beef in Ale<br />
30ml (2tbsps) oil<br />
675g (1 1 /2 lbs) chuck steak, cubed<br />
1 clove of garlic, crushed<br />
2 carrots, sliced<br />
100g (4oz) mushrooms, quartered<br />
2 medium onions, sliced<br />
40g (1 1 /2 ozs) plain flour<br />
5ml (1 tsp) coarse-grained mustard<br />
10ml (1 dsp) Demerara sugar<br />
30ml (2tbsps) tomato purée<br />
450ml ( 3 /4 pt) brown ale<br />
salt and freshly ground pepper<br />
Baked Potatoes<br />
4 medium sized potatoes<br />
Method<br />
1. Sauté the meat in a casserole in hot oil until brown.<br />
Remove.<br />
2. Sauté the garlic, onions, carrots and mushrooms until<br />
brown.<br />
3. Stir in flour and mix well.<br />
4. Add mustard, sugar and tomato purée.<br />
5. Stir in the ale and seasoning. Return meat.<br />
6. Bring to the boiler and cover. Transfer to the oven.<br />
1. Wash and prick well all over.<br />
2. Wrap in one layer of foil.<br />
3. Place directly on the shelf in between the casserole<br />
and rice pudding.<br />
Rice Pudding<br />
*40-50g (1 1 /2 - 2 ozs) pudding rice<br />
25g (1oz) sugar<br />
550ml (1 pt) milk<br />
nutmeg<br />
knob of butter<br />
25g (1oz) sultanas (optional)<br />
1. Wash the rice in cold water and place in an 850ml (1<br />
1/2 pt) pie dish.<br />
2. Add the sugar, milk and sultanas if using.<br />
3. Sprinkle with nutmeg and add a good knob of butter.<br />
* If cooking for 8 hours or more use 40g (1 1 /2oz) rice only<br />
7
Slow Cooking Oven Recipes - Meal 2<br />
6 - 8 hours cooking time<br />
Roast Fillet of Lamb<br />
Dauphinoise Potatoes<br />
Bread and Butter Pudding<br />
Ingredients<br />
Roast fillet of Lamb<br />
900g - 1.25 kg (2 - 2 1 /2lbs) lamb<br />
Method<br />
1. Season and wrap the lamb in foil.<br />
2. Stand meat on a rack over a small roasting tin.<br />
Dauphinoise Potatoes<br />
450g (1 lb) potatoes, thinly sliced<br />
1-2 cloves of garlic, crushed<br />
125ml ( 1 /4 pt) double cream<br />
salt and freshly ground black pepper<br />
1. Grease a shallow oval or rectangular dish.<br />
2. Arrange layers of potatoes, seasoning and garlic in the<br />
dish, ending with potatoes.<br />
3. Pour over the cream and cover well with foil.<br />
Bread and Butter Pudding<br />
6-8 medium slices of wholemeal bread<br />
Approx 50g (2ozs) butter, melted<br />
Grated rind of one orange (optional)<br />
25g (1oz) desiccated coconut<br />
50 - 100g (2 - 4oz) luxury/tropical mixed fruit<br />
50g (2oz) soft brown sugar<br />
450ml ( 3 /4 pt) milk<br />
2 eggs<br />
1. Grease a shallow oval or rectangular dish.<br />
2. Cut the crusts off the bread and divide into<br />
rectangles/triangles.<br />
3. Dip enough pieces of bread in the butter on one side to<br />
cover the base of the dish, butter side up.<br />
4. Sprinkle with half of the fruit, coconut, sugar and<br />
orange rind.<br />
5. Cover with a second layer of bread dipped in the butter<br />
and then the remaining rind, fruit, coconut and sugar.<br />
6. Whisk the eggs and milk together and pour over the<br />
bread, Stand for 1 /2 hour before baking. Leave<br />
uncovered in the oven.<br />
8
Slow Cooking Oven Recipes - Meal 3<br />
6 - 8 hours cooking time<br />
Gammon and Apricot Pie<br />
Braised Red Cabbage<br />
St. Clements Pudding<br />
Ingredients<br />
Gammon and Apricot Pie<br />
2 gammon rashers approx 15mm ( 1 /2”) thick<br />
100g (4oz) no-soak dried apricots<br />
25g (1oz) sultanas<br />
3 large potatoes, thinly sliced<br />
300ml ( 1 /2 pt) chicken stock<br />
50g (2oz) butter, melted<br />
Method<br />
1. Remove the rind from the gammon. Nick the edges<br />
and lay them in a shallow dish.<br />
2. Sprinkle with apricots, sultanas and pepper.<br />
3. Overlap the sliced potatoes on top of the gammon.<br />
Pour over stock.<br />
4. Brush with melted butter, place in the oven<br />
Braised Red Cabbage<br />
350g (3/4 lb) red cabbage<br />
25g (1oz) butter<br />
1 medium onion, sliced<br />
1 medium cooking apple, sliced<br />
30ml (2 tbsps) cider vinegar<br />
45ml (3 tbsps) honey<br />
salt and pepper<br />
1. Slice the red cabbage finely.<br />
2. Melt the butter in an oval casserole dish and sauté the<br />
onion and apple until starting to soften.<br />
3. Add the cabbage and cook for a further 2 minutes.<br />
4. Mix in the vinegar, honey and seasoning.<br />
5. Cover with buttered greaseproof paper and a tightly<br />
fitting lid, covered in foil. Place in the oven.<br />
St Clements Pudding<br />
2 rounds of thick sliced wholemeal bread<br />
a little milk<br />
50g (2oz) butter or margarine<br />
50g (2oz) soft brown sugar<br />
grated rind and juice of 1 lemon<br />
grated rind and juice of 1 orange<br />
3 eggs, separated<br />
caster sugar for sprinkling<br />
1. Grease a shallow ovenproof dish and line the base<br />
with fingers of bread.<br />
2. Pour over sufficient milk to be absorbed by the bread.<br />
3. Cream the fat and sugar.<br />
4. Add the yolks, grated rind and juice of orange and<br />
lemon. Beat.<br />
5. Whisk the egg whites stiffly and fold most of them into<br />
the creamed mixture.<br />
6. Spread the mixture over the bread.<br />
7. Finish with a layer of the remaining egg white, thickly<br />
dredged with sugar. Leave uncovered. Place in the<br />
oven.<br />
9
Slow Cooking Oven Recipes - Meal 4<br />
6 - 8 hours cooking time<br />
Chilli Con Carne<br />
Oven Rice<br />
Frangipane and Apple Pudding<br />
Ingredients<br />
Chilli Con Carne<br />
450g (1 lb) minced beef<br />
1 x 400g (14 oz) tin tomatoes<br />
1 x 400g (14oz) tin kidney beans<br />
1 packed Chilli con carne spice mix<br />
100ml (4 fl oz) water<br />
Method<br />
1. Brown the minced beef in an oval casserole dish.<br />
2. Stir in the spice mix.<br />
3. Add beans drained, tomatoes and water.<br />
4. Mix well together. Bring to boil, cover well and place in<br />
oven.<br />
Oven Rice<br />
225g (8oz) long grain rice<br />
350ml (12 fl ozs) water<br />
seasoning<br />
1. Wash rice and place in an oval casserole dish.<br />
2. Pour on water, seasoning and bring to the boil.<br />
3. Cover well and place in oven.<br />
Frangipane and Apple Pudding<br />
450g (1 lb) cooking apples, grated<br />
50g (2 oz) vanilla fudge, chopped<br />
50g (2 oz) softened butter<br />
50g (2 oz) soft brown sugar<br />
50g (2 oz) ground almonds<br />
12g ( 1 /2 oz) plain flour<br />
1 egg<br />
almond essence<br />
1. Grease a shallow oven dish.<br />
2. Mix the apples and fudge together and place into the<br />
dish.<br />
3. Cream the rest of the ingredients and add a few drops<br />
of almond essence.<br />
4. Carefully spread over the apple. Leave uncovered and<br />
place in oven.<br />
10
Most food is cooked at a high setting but for thicker pieces<br />
of meat/poultry and for food such as well done steak the<br />
heat can be reduced by turning the control down to a<br />
lower setting.<br />
For best results pre-heat at a high setting for<br />
approximately 2 minutes.<br />
The Grill (Top Right)<br />
CAUTION: Accessible parts may be hot when the grill<br />
is in use. Young children should be kept away.<br />
If you find a crack in the glass surface of the grill<br />
immediately disconnect the appliance from the electricity<br />
supply. Do not reconnect the appliance until it is repaired.<br />
THE GRILL COMPARTMENT DOOR MUST BE KEPT<br />
OPEN WHEN THE GRILL IS ON.<br />
The grill pan fits on the shelf supplied (shown out of the<br />
grill chamber for clarity).<br />
The shelf is designed to lock in place, but is removable for<br />
cleaning. See the ‘Cleaning the cooker’ section of these<br />
instructions.<br />
Make sure the grill pan is pushed right to the back of the<br />
grill chamber.<br />
The very high speed instant grill<br />
is divided into two areas to save<br />
energy and to suit individual<br />
grilling requirements.<br />
Turn the grill control clockwise<br />
and the whole of the grilling<br />
area can be used for large<br />
amounts of food.<br />
Food should be cooked on the grid or in the base of the<br />
grill pan. You can brown the top of dishes, cooked in the<br />
oven, under the grill by placing the dish onto the base of<br />
the grill pan, which can easily slide along the floor of the<br />
grill cavity.<br />
The grill chamber has side panels that are coated with a<br />
special enamel that partly cleans itself. For more on<br />
cleaning the cooker see the ‘Cleaning the cooker’ section<br />
of these instructions.<br />
For small amounts of food e.g.<br />
2 slices of toast, one or two<br />
chops etc. turn the control anticlockwise.<br />
Only the middle<br />
area of the grill heats up.<br />
11
Setting up the cooker for use<br />
Before the fan oven can be used, it will be necessary to set the ‘time-of-day-clock’.<br />
This is a 24-hour clock, and when the power supply is initially switched on, or after an interrruption in supply, the clock will<br />
show 12.00 and the LED bar 4 will flash above the sign.<br />
SETTING THE TIME OF DAY<br />
1. Whilst the LED bar 4 is flashing, press the plus + and/or minus buttons until the display shows the correct time of<br />
day.<br />
2. After 5 seconds, the bar 4 will stop flashing.<br />
The setting can be altered at any time by using the MODE button until the LED bar 4 flashes and pressing the plus + and<br />
minus - buttons.<br />
The cooker is now ready for use.<br />
12
NOTE: The recommended<br />
cooking temperatures for<br />
fan ovens are generally<br />
lower than non-fanned<br />
ovens. (See Page 16).<br />
Turn the oven temperature<br />
knob to the temperature you<br />
need.<br />
The oven indicator light will<br />
glow until the oven has<br />
reached the temperature<br />
you selected.<br />
The Fan Ovens<br />
During use the appliance becomes hot. Care should<br />
be taken to avoid touching the heating elements<br />
inside the ovens.<br />
The clock must be set to the time of day before the left<br />
hand oven will work. See ‘The Clock’ section of these<br />
instructions for how to set the clock.<br />
It will then cycle on and off<br />
during cooking.<br />
The Oven Lights<br />
Turn the oven light knob to the left for the left hand oven<br />
light and to the right for the right hand oven light. To turn<br />
Both the lower ovens are fan ovens. The fans circulate hot<br />
air continuously, which means faster more even cooking.<br />
It is only necessary to pre-heat the ovens for food such as<br />
scones, puff pastry, Yorkshire Pudding, bread etc.<br />
To operate either oven<br />
on both lights turn the knob to the bottom position.<br />
Before using for the first time, heat the ovens to 200ºC for<br />
30 minutes to dispel manufacturing odours.<br />
13
The Automatic Cooking Control<br />
This control includes a minute timer, a time-of-day clock<br />
as well as an automatic cooking control.<br />
There are three buttons which operate the timer.<br />
The buttons are used for the following purposes.<br />
• • •<br />
- Mode<br />
+<br />
By using these buttons the following functions can be<br />
selected:<br />
• Minute timer<br />
• Automatic cooking time<br />
• End of automatic cooking time<br />
• Time-of-day clock<br />
Every time the MODE button is pressed a small LED bar<br />
will light up to show which function has been chosen.<br />
The setting of any of the functions can be adjusted by<br />
using the plus + or - minus buttons.<br />
Setting the automatic cooking control<br />
This can be used to set an automatic cooking programme<br />
in the fan oven only. It switches the electricity on and off<br />
at pre-set times.<br />
To Set an Automatic Cooking Programme<br />
The STOP time or cooking time can be entered first.<br />
Each setting will remain displayed for 5 seconds, before<br />
changing back to displaying the time of day.<br />
Example<br />
The food needs 2 hours 30 mins at 140ºC and is required<br />
to be ready by 18.00 hours.<br />
1. Place the food on the correct shelves in the oven.<br />
2. Check that the clock is telling the correct time of day.<br />
3. Press the MODE button repeatedly until the LED bar 2<br />
flashes and then press the plus + button until 2 hours<br />
30 mins is displayed. After 5 seconds the LED bar will<br />
stop flashing.<br />
4. Press the MODE button repeatedly until the LED bar 3<br />
flashes and then press the plus + button until 18.00<br />
hours is displayed. After 5 seconds the LED bar will<br />
stop flashing.<br />
5. Set the oven control to 140ºC.<br />
6. The time of day will remain displayed throughout the<br />
cooking programme.<br />
7. When the cooking has finished, a beep will sound and<br />
continue for 2 minutes, unless cancelled <strong>manual</strong>ly.<br />
8. To stop the beep <strong>manual</strong>ly, press any of the buttons.<br />
9. Return the oven control knob to the OFF position.<br />
Programmes can be changed at any time by pressing<br />
the appropriate buttons and the plus + and minus -<br />
buttons as already described.<br />
NOTE: It is not possible to change/set the time of day<br />
whilst an automatic programme is taking place.<br />
The maximum length of cooking programme which can be<br />
set is 23 hours and 59 minutes e.g. delay time + cooking<br />
time = max - 23 hours 59 minutes.<br />
Before setting a programme, check that the clock is telling<br />
the correct time of day, and have the following information<br />
to hand:<br />
• the length of time the food needs to cook.<br />
• the time that the food is to finish cooking.<br />
• the oven control setting required.<br />
14
Setting a Stop Time Only<br />
1. Place the food on the correct shelves in the oven.<br />
2. Press the MODE button repeatedly until the LED bar 3<br />
flashes and then press the plus + button until the time at<br />
which the cooking is to end. After 5 seconds the LED will<br />
stop flashing.<br />
3. Set the oven temperature control. Cooking will start<br />
immediately.<br />
4. At the of the cooking time, a beep will sound and will<br />
continue for 2 minutes unless cancelled <strong>manual</strong>ly. This<br />
can be cancelled by pressing any of the buttons.<br />
5. Return the oven control knob to the OFF position.<br />
To cancel any automatic programme, press the MODE<br />
button and then the minus - button until the display shows<br />
the time of day. A signal will sound.<br />
Setting the Minute Timer<br />
The minute timer can be set to time periods from 1 minute<br />
to 23.59 hours.<br />
1. Press the MODE button repeatedly until the LED bar 1<br />
flashes, above the sign. Set the required time by<br />
using the plus + and minus - buttons. (NOTE: The LED<br />
bar 1 will disappear if the plus + and minus - buttons are<br />
not pressed within 5 seconds. The setting will then have<br />
to be repeated.<br />
2. The set time will now remain displayed, the LED bar will<br />
remain steady and the timer will start to count down.<br />
3. At the end of the set time, a beep will be beard (2 beeps<br />
every 2 seconds) and will continue sounding for 2<br />
minutes unless cancelled.<br />
4. Press any of the buttons to stop the beep. The LED bar<br />
light will go out.<br />
The minute timer can be used at any time, even if an<br />
automatic cooking programme has been set.<br />
15
Oven Cooking Guide<br />
Cooking Hints<br />
When using the fan ovens, reduce conventional oven<br />
settings by 10ºC - 20ºC and cooking time by up to 10<br />
minutes for every hour.<br />
Fan oven cooking is particularly suitable for baking on<br />
several shelves at one time.<br />
The wire shelves should always be pushed firmly to the<br />
back of the oven.<br />
Baking trays, meat tins etc. should be placed level<br />
centrally on the oven shelves. Keep all trays and<br />
containers away from the sides of the oven, as<br />
ovenbrowning of the food may occur.<br />
For even browning, the maximum recommended size of<br />
baking tray is 300mm x 240mm (12” x 9 1 /2”).<br />
When the oven is on, do not leave the door open for<br />
longer than necessary, otherwise the knobs may get very<br />
hot.<br />
Always leave a ‘fingers width’ between dishes on the<br />
same shelf, and between dishes and the sides of the<br />
oven, this allows the heat to circulate freely around them.<br />
The base of a pastry dish can be browned by pre-heating<br />
the baking tray for 15 minutes before placing the dish in<br />
the centre of the tray.<br />
Where dishes may boil and spill over during cooking,<br />
place them on a baking tray.<br />
Steam<br />
When cooking foods with high water content (e.g. oven<br />
chips) there may be some steam visible at the grille at the<br />
rear of the hotplate.<br />
Condensation may form on the cooker. This is quite<br />
normal and nothing to worry about. The condensation<br />
forms when heat and moisture are present. Whenever<br />
possible try to make sure that food which contains a lot of<br />
moisture for example casseroles are covered. If you do<br />
notice any condensation, wipe it up straight away. Do not<br />
leave food in the oven to cool after it has been switched<br />
off.<br />
Cooking high moisture content foods can create a ‘steam<br />
burst’, when the oven door is opened. When opening the<br />
oven stand well back and allow any steam to disperse.<br />
General<br />
The fan ovens are fitted with side, roof and back panels<br />
that are coated with a special enamel that partly cleans<br />
itself. The oven liners (see Cleaning the cooker) work<br />
better when fat splashes are avoided. Cover meat when<br />
cooking.<br />
To reduce fat splashing when you add vegetables to hot<br />
fat around a roast, dry them thoroughly and brush lightly<br />
with cooking oil.<br />
For more on cleaning the ovens see the ‘Cleaning the<br />
cooker’ section of these instructions.<br />
Do not allow young children to stand on the drop<br />
down oven doors.<br />
Please remember that all cookers vary - temperatures in<br />
the new <strong>Aga</strong> <strong>Masterchef</strong> ovens may differ to those other<br />
cookers. Settings and cooking times can be changed to<br />
suit individual tastes. It is important to check that food is<br />
piping hot before serving.<br />
The cooking chart is a general guide but times and<br />
temperatures may vary according to individual recipes.<br />
The meat sections should be used as a general guide but<br />
may vary according to the size, shape of joint on or off the<br />
bone.<br />
Thaw frozen joints before cooking them.<br />
The times are for open roasting, If covered allow extra<br />
time.<br />
The turkey/chicken is cooked when the juices run clear<br />
when pierced with a skewer. If the juices are still pink<br />
continue to cook checking every 15 minutes.<br />
Do not place the shelf or food on the base of the ovens.<br />
16
The Fan Oven shelves<br />
To re-fit the shelf, hold it so that it is slightly up at the front<br />
and rest the back of the shelf on the side wires. Push the<br />
shelf to the back of the oven and then lower the front so<br />
that it is resting on the side wires.<br />
The shelves should not be fitted directly one above the<br />
other. When cooking on more than one shelf always leave<br />
at least one runner space between them.<br />
The oven shelves are retained when pulled forward but<br />
can easily be removed and re-fitted.<br />
To remove a shelf first make sure that it is pushed fully<br />
back, so that the shelf stop is in line with the kink in the<br />
side of the shelf.<br />
Lift up the front of the shelf so the shelf will pass over the<br />
shelf stop.<br />
Pull the shelf forward.<br />
17
The oven control settings and cooking times given in the table are intended to be used<br />
only as a guide. Individual tastes may require the temperature to be altered to provide a<br />
preferred result.<br />
There may be a slight difference in the results between the two ovens. This is due to<br />
manufacturing tolerances and it may be necessary to alter times and temperature settings to<br />
allow for this.<br />
Food is cooked at a lower temperature in a fan oven than in a conventional oven. When using recipes,<br />
reduce the temperature by 10ºC - 20ºC. The temperature in the fan oven does not vary with height<br />
in the oven - so you can use any shelf.<br />
Always leave at least one runner space between shelves when 2 tier cooking. Place baking<br />
trays, individual cake tins or baking dishes on the oven shelf. For best results pre-heat<br />
the oven until the oven indicator light goes out.<br />
18
Fan oven cooking chart<br />
FOOD SETTING ºC APPROXIMATE COOKING TIME<br />
FISH<br />
Whole Fish e.g. trout, mackerel 170 25 - 30 mins depending on size<br />
Steaks<br />
170 20 - 25 mins depending on thickness<br />
Oven-fried fish 210 25 mins depending on packet instructions<br />
Salmon (2.7kg) 140 - 150 15 - 18 mins per 450g<br />
MEAT & POULTRY<br />
Beef<br />
170 - 180 30 mins per 450g + 30 mins over (medium rare)<br />
Lamb<br />
Pork<br />
Chicken<br />
Turkey<br />
Duck & Goose<br />
Casserole<br />
PUDDING<br />
170 - 180<br />
170 - 180<br />
170 - 180<br />
160<br />
170 - 180<br />
130 -140<br />
25 mins per 450g + 25 mins over<br />
30 - 35 mins per 450g + 35 mins over<br />
20 - 25 mins per 450g + 20 mins over<br />
15 - 18 mins per 450g + 15 mins over<br />
25 mins per lb + 25 mins over<br />
1 1 /2 - 3 hours depending on recipe<br />
Milk Puddings<br />
Baked Custard<br />
Baked Sponge Pudding<br />
Fruit Crumble<br />
Meringue Toppings<br />
140<br />
130<br />
170<br />
170 - 180<br />
130<br />
2 hours<br />
35 mins<br />
45 mins - 1 hour using raw fruit<br />
45 mins - 1 hour<br />
45 mins<br />
Meringue 80 - 90 3 - 4 hours - Turn meringues over as soon as they are set<br />
YEAST MIXTURES<br />
Bread - loaves 200 - 210 30 - 45 mins<br />
Bread - rolls 200 - 210 15 - 20 mins<br />
Chelsea Buns etc. 180 25 - 35 mins<br />
CAKES, PASTRIES, BISCUITS & SCONES<br />
Small Cakes 170<br />
Victoria Sandwich (250mm) 160 - 170<br />
Swiss Roll 200<br />
Fatless Sponge (180mm) 170<br />
Scones 200<br />
Maderia Cake 160<br />
Med. Rich Fruit Cake 130<br />
Christmas Cake (205mm) 130<br />
Gingerbread 130 - 140<br />
Shortbread 130<br />
Biscuits 150 - 170<br />
Tray Bakes & Tea Breads 160 - 170<br />
Shortcrust Pastry 190<br />
Rich Shortcrust Pastry 180<br />
Flaky/Puff Pastry 200<br />
Choux Pastry 190<br />
MISCELLANEOUS<br />
Yorkshire Pudding - Large 200<br />
Yorkshire Pudding - Individual 200<br />
Soufflés 170<br />
20 - 25 mins<br />
25 - 30 mins<br />
7 - 10 mins<br />
20 mins<br />
10 - 15 mins<br />
1 hour - Place on a piece of citron peel after 20 mins<br />
2 - 2 1 /2 hours<br />
4 - 4 1 /2 hours<br />
1 - 1 1 /2 hours<br />
1 1 /4 - 1 1 /2 hours<br />
15 - 25 mins depending on recipe<br />
30 mins - 1 1 /2 hours depending on recipe<br />
Small Tarts 20 - 25 mins depending on recipe<br />
Pies 45 - 50 mins depending on recipe<br />
25 mins<br />
8 - 10 mins depending on recipe<br />
25 - 35 mins<br />
45 mins<br />
20 - 25 mins<br />
45 mins<br />
19
Cleaning the cooker<br />
Essential Information<br />
Before thorough cleaning isolate the electricity supply.<br />
Remember to switch on the electricity supply before use.<br />
Never use paint solvents, washing soda, caustic cleaners,<br />
biological powders, bleach, chlorine based bleach<br />
cleaners, coarse abrasives or salt. Don’t mix different<br />
cleaning products - they may react together with<br />
hazardous results.<br />
Recommended cleaning materials are shown in the table<br />
at the end of this section.<br />
If you want to move your cooker for cleaning, see the<br />
section called ‘Positioning the cooker’.<br />
All parts of the cooker can be cleaned with hot soapy<br />
water - but take care that no surplus water seeps into<br />
the appliance.<br />
The position of each support on the hotplate is clearly<br />
marked on the underside, and can only be fitted in one<br />
way.<br />
For cleaning materials see the ‘Cleaning Table’ at the end<br />
of this section.<br />
To Remove and Replace Pan Supports<br />
IMPORTANT: The cast iron pan supports on the appliance<br />
are of professional design and much heavier than most if<br />
not all gas hotplate cookers. Therefore care must be taken<br />
when removing or re-fitting them from or to the hotplate. It<br />
is important that they are lifted from the appliance. Do not<br />
drag them across adjacent enamelled components as this<br />
could damage the enamel.<br />
Lift off the bar at the back of the middle pan support, then<br />
remove the middle pan support, which is in one piece.<br />
Do not clean pan supports in a dishwasher. See the<br />
‘Cleaning Table’.<br />
NOTE: Aluminium pans may cause a metallic marking on<br />
the pan supports. This will not affect the durability of the<br />
enamel. The appliance warranty does not cover misuse of<br />
the pan supports.<br />
Remove the left and right hand individual pan supports.<br />
Replace the supports in reverse order.<br />
20
Hotplate burners<br />
The burner heads and caps can be removed for cleaning.<br />
Make sure they are absolutely dry before replacing.<br />
Wok burner<br />
Fish kettle burner<br />
When fitting the burner head, make sure it locates<br />
properly within the bezel. Take care not to damage the<br />
ignition electrode or the flame safety device probe.<br />
General<br />
Check burner ports are not blocked. If blockage occurs,<br />
remove stubborn particles using a piece of fuse wire.<br />
Stubborn marks on the aluminium burner rings can be<br />
removed using a proprietary cleaner such as Brasso.<br />
21
The Slow Cooking Oven and the Grill<br />
The slow cooking oven and the grill have side panels that<br />
are coated with a special enamel that partly cleans itself.<br />
Do not use any cleaning material which may clog the<br />
pores of the special coating e.g. Pastes and powders,<br />
soap filled pads, wire wool, spray cleaners, brush-on oven<br />
cleaners, caustic solutions, metal scrapers/knives, and<br />
prevent the continuous cleaning action.<br />
The Fan Ovens<br />
The ovens have panels which have been coated with a<br />
special enamel that partly cleans itself. This does not stop<br />
all marks on the lining, but helps to reduce the amount of<br />
<strong>manual</strong> cleaning needed.<br />
The panels work best if a pattern of low and high<br />
temperature cooking is followed. Occasionally wipe with a<br />
lint free cloth and hot soapy water. When the panels are<br />
dry, heat the ovens to 200ºC for about one hour. This will<br />
ensure the panels are working effectively.<br />
Do not use steel wool (Brillo) or any other materials that<br />
will scratch the surface. Do not use oven cleaning pads.<br />
The shelf is designed to lock in place, but is removable for<br />
cleaning. To remove lift up at the front then pull forward.<br />
The grill pan and grid should be washed in hot soapy<br />
water.<br />
After grilling meat or any food that soils, leave the grill pan<br />
to soak for a few minutes in the sink immediately after use.<br />
Stubborn particles may be removed from the grid by using<br />
a nylon brush.<br />
Control Panel and Oven Doors<br />
For best results liquid detergents should be used.<br />
The control panel and control knobs should only be<br />
cleaned with a soft cloth wrung out in clean hot soapy<br />
water - but take care that no surplus water seeps into the<br />
appliance. Wipe with a clean dampened cloth then polish<br />
with a dry cloth. The oven doors should only be cleaned<br />
with a soft cloth wrung out in clean hot soapy water.<br />
22
Cleaning Table<br />
Hotplate<br />
Part<br />
Hotplate top<br />
Pan supports, wok cradle<br />
(some models only)<br />
Finish<br />
Enamel<br />
Enamel coated<br />
cast iron<br />
Recommended Cleaning Material<br />
Hot soapy water, soft cloth. Any stubborn stains remove gently with<br />
a nylon scourer.<br />
Cream cleaner and a nylon scourer or<br />
Well soaped Brillo pad<br />
Burner caps<br />
Burner trim rings (some<br />
models only) and burner<br />
head<br />
Outside of cooker<br />
Part<br />
Door, door surround<br />
Door front frame<br />
Sides<br />
Rear grille, plinth<br />
Control panel<br />
Enamel<br />
Aluminium<br />
Finish<br />
Enamel or paint<br />
Painted surface<br />
Enamel<br />
Enamel<br />
Cream Cleaner, nylon scourer, dishwasher<br />
Cream cleaner with a soft cloth. Be careful not to be over vigorous<br />
Recommended Cleaning Material<br />
Hot soapy water, soft cloth.<br />
Any stubborn stains, remove gently with a liquid detergent.<br />
Hot soapy water, soft cloth<br />
Hot soapy water, soft cloth. Cream cleaner, with care if necessary.<br />
Warm soapy water. Do not use abrasive cleaners on lettering.<br />
Control knobs/handles<br />
Plastic/chrome<br />
Do not use an “enamel rubber” on this appliance.<br />
‘Cook & Clean’ oven panels<br />
Special enamel<br />
that partly cleans<br />
itself<br />
Warm soapy water, soft cloth.<br />
Oven and Grill<br />
Part Finish Recommended Cleaning Material<br />
This surface cleans itself at 200ºC and above, or the panels can be<br />
washed with hot soapy water and a nylon brush. (See ‘The Ovens’<br />
in ‘Cleaning your cooker’).<br />
Oven shelves, grill trivet Chrome An oven interior cleaner that is suitable for chrome. Soap filled pad.<br />
Dishwasher.<br />
Grill pan/meat tin Enamel Hot soapy water. Soap filled pad (Brillo). Dishwasher.<br />
Cleaners listed are available from supermarkets or electrical retailers as stated. Cleaner manufacturer in Italics.<br />
For enamelled surfaces use a cleaner that is approved for use on vitreous enamel. The Vitreous Enamel Association has<br />
a list of approved cleaners. Contact them via their website www.ive.org.uk or telephone 01527 893031.<br />
Regular cleaning is recommended. For easier cleaning, wipe up any spillages immediately.<br />
To help keep your oven clean, cover meat when roasting, with foil or use a roasting bag. Brush vegetables with fat<br />
before placing around the meat.<br />
23
Troubleshooting<br />
Steam is coming from the oven<br />
When cooking foods with a high water content (e.g. oven<br />
chips) there may be some steam visible at the rear grille.<br />
Take care when opening the oven door, as there may be<br />
a momentary puff of steam when the oven door is opened.<br />
Stand well back and allow any steam to disperse.<br />
The oven fan is noisy<br />
The note of the oven fan may change as the oven heats<br />
up - this is perfectly normal.<br />
The knobs get hot when I use the oven or the grill, can<br />
I avoid this?<br />
Yes, this is caused by heat rising from the oven or the grill,<br />
and heating them up. Do not leave the oven door open.<br />
Make sure that the grill is pushed right back to the<br />
‘backstop’ when grilling.<br />
If there is an installation problem and I don’t get my<br />
original installer to come back to fix it who pays?<br />
You do. Service organisations will charge for their calls out<br />
if they are correcting work carried out by the original<br />
installer. It is advisable to track down the original installer.<br />
Current Operated Earth Leakage Breakers<br />
Where the cooker installation is protected by a 30-<br />
milliamp sensitivity residual current device (RCD), the<br />
combined use of your cooker and other domestic<br />
appliances may occasionally cause nuisance tripping. In<br />
these instances the cooker circuit may need to be<br />
protected by fitting 100mA device. This work should be<br />
carried out by a qualified electrician.<br />
Food is cooking too slowly, too quickly, or burning<br />
Cooking times may differ from your previous oven.<br />
Individual tastes may require the temperature to be<br />
altered either way, to get the results you want. Try cooking<br />
at different temperature setting.<br />
The fan ovens are not cooking evenly<br />
Do not use a tin or tray larger than 300mm x 240mm (12”<br />
x 9 1/2”).<br />
If you are cooking a large item, be prepared to turn it<br />
round during cooking.<br />
If two shelves are used, check that space has been left for<br />
the heat to circulate. When a baking tray is put into the<br />
oven, make sure it is placed centrally on the shelf.<br />
Check that the door seal is not damaged and that the door<br />
catch is adjusted so that the door is held firmly against the<br />
seal.<br />
A dish of water when placed on the shelf should be the<br />
same depth all over. (For example, if it is deeper at the<br />
back, then the back of the cooker should be raised up or<br />
the front lowered). If the cooker is not level arrange for<br />
your supplier to level it for you.<br />
Oven temperature getting hotter as the cooker gets<br />
older<br />
If turning the knob down has not worked or only worked for<br />
a short time then the cooker may need a new thermostat.<br />
This should be fitted by a service person.<br />
Grill not cooking properly<br />
Are you using the pan and trivet supplied with the cooker?<br />
Is the pan being used on the grill carriage, not the floor of<br />
the compartment? Is the grill tray fully back to the stop?<br />
Hotplate ignition or hotplate burners faulty<br />
Is the power on?<br />
Are the sparker (ignition electrode) or burner slots blocked<br />
by debris?<br />
Are the burner caps correctly located?<br />
Hotplate burners will not light<br />
If only one or all the hotplate burners will not light, make<br />
sure that the parts have been replaced correctly after<br />
wiping or removing for cleaning.<br />
Check that there is not a problem with the gas supply. This<br />
can be done by making sure that other gas appliances are<br />
working.<br />
Do the burners spark when the control knob is pushed in?<br />
If not, check the power is on.<br />
24
The oven light is not working<br />
The bulb has probably blown. A replacement bulb (which<br />
is not covered under the guarantee) can be purchased<br />
from a good electrical shop. Ask for a 25W, 230V, 300ºC,<br />
FOR OVENS. It must be a special bulb, heat resistant to<br />
300ºC.<br />
Open the oven door and remove the oven shelves.<br />
Turn off the power supply.<br />
Unclip the lamp lens and unscrew the light bulb. Fit the<br />
new light bulb and re-fit lens.<br />
Turn on the electricity supply and check that the bulb now<br />
lights.<br />
Power Failure<br />
In the event of a power failure in the electrical supply the<br />
hotplate may be lit using a match.<br />
What cleaning materials are recommended for the<br />
cooker?<br />
See the ‘Cleaning the cooker’ section for recommended<br />
cleaning materials. We do not recommend Mr. Muscle, as<br />
it contains chemicals that may damage the surfaces of<br />
your cooker.<br />
25
General Safety Instructions<br />
In the UK the cooker must be installed by a Gas Safe<br />
Registered engineer. In the Repblic of Ireland, the<br />
installation must be carried out by a Competent Person.<br />
The installation must be in accordance with the<br />
installation instructions and comply with the relevant<br />
regulations and also, the local gas and electricity supply<br />
companies requirements.<br />
If you smell gas<br />
Do not turn electric switches on or off.<br />
Do not smoke<br />
Do not use naked flames.<br />
Do turn off the gas at the meter or cylinder.<br />
Do open door and windows to get rid of the gas.<br />
Call your gas supplier.<br />
If you are using natural gas in the UK ring British Gas -<br />
Transco on<br />
0800 111 999<br />
This appliance is designed for domestic cooking only. Use<br />
for any other purpose could invalidate any warranty or<br />
liability claim.<br />
The use of a gas cooking appliance results in the<br />
production of heat and moisture in the room in which it is<br />
used. Ensure that the kitchen is well ventilated: keep<br />
natural ventilation holes open or install a mechanical<br />
ventilation device, (mechanical extractor hood).<br />
Prolonged intensive use may call for additional ventilation,<br />
for example opening a window. Use extractor fans or<br />
hoods when fitted.<br />
The cooker should be serviced by a qualified service<br />
engineer and only approved spare parts used. Have the<br />
installer show you the location of the cooker control<br />
switch. Mark it for easy reference. Always allow the cooker<br />
to cool and then switch off at the mains before cleaning or<br />
carrying out any maintenance work, unless specified<br />
otherwise in this guide.<br />
Use dry oven gloves where applicable - using damp<br />
gloves will result in steam burns when you touch a hot<br />
surface. Never operate the cooker with wet hands.<br />
Do not use a towel or other bulky cloth in place of a glove.<br />
They might catch fire if they touch a hot surface.<br />
Clean with caution. If a wet sponge or cloth is used to wipe<br />
up spills on a hot surface, be careful to avoid steam burns.<br />
Some cleansers can produce noxious fumes if applied to<br />
a hot surface.<br />
Do not use unstable saucepans and position the handles<br />
away from the edge of the hotplate.<br />
Babies, toddlers and young children should not be<br />
allowed near the cooker at any time. They should never<br />
be allowed to sit or stand on any part of the appliance.<br />
Teach them not to play with controls or any other part of<br />
the cooker.<br />
Never store anything of interest to children in cabinets<br />
above a cooker - children climbing on the cooker to reach<br />
them could be seriously injured.<br />
Clean only parts listed in this guide.<br />
In the interests of hygiene and safety the cooker should be<br />
kept clean at all times as a build up in fats and other food<br />
stuffs could result in a fire.<br />
Always keep combustible wall coverings or curtains etc. a<br />
safe distance away from your cooker.<br />
Do not spray aerosols in the vicinity of the cooker while it<br />
is on.<br />
Do not store or use combustible materials, or flammable<br />
liquids in the vincinty of this appliance.<br />
Do not use water on grease fires. Never pick up a flaming<br />
dish. Turn the controls off. Smother a flaming pan on a<br />
surface unit by covering the pan completely with a well<br />
fitting lid or baking tray. If available use a multi-purpose<br />
dry chemical or foam type fire extinguisher.<br />
Never leave the hotplate unattended at high heat settings.<br />
Pans boiling over can cause smoking and greasy spills<br />
and may catch fire.<br />
All parts of the cooker become hot with use and will retain<br />
heat even after cooking has finished.<br />
Take care when touching the cooker, to minimise the<br />
possibility of burns, always be certain that the controls are<br />
in the OFF position and that it is cool before attempting to<br />
clean the cooker.<br />
26
Never wear loose-fitting or hanging clothes while using<br />
the appliance. Be careful when reaching for items stored<br />
in cabinets over the hotplate. Flammable material could<br />
be ignited if brought in contact with a hot surface unit and<br />
may cause severe burns.<br />
Take great care when heating fats and oils, as they will<br />
ignite if they get too hot.<br />
The specification of this cooker should not be altered.<br />
This appliance is heavy, take care when moving it.<br />
When the cooker is not in use, ensure that the control<br />
knobs are in the OFF position.<br />
Use a deep fat thermometer whenever possible to prevent<br />
overheating fat beyond the smoking point.<br />
Never leave a chip pan unattended. Always heat fat<br />
slowly, and watch as it heats up. Deep fry pans should be<br />
only one third full of fat. Filling the pan too full of fat can<br />
cause a spill-over when food is added. If a combination of<br />
oil or fats are used in frying, stir them together before<br />
heating, or as the fats melt.<br />
Foods for frying should be as dry as possible. Frost on<br />
frozen foods or moisture on fresh foods can cause hot fat<br />
to bubble up and over the sides of the pan. Carefully<br />
watch for spills or overheating of foods when frying at high<br />
or medium high temperatures. Never try to move a pan of<br />
hot fat, especially a deep fat fryer. Wait until the fat is cool.<br />
When the grill is on, do not use the top of the flue (the slot<br />
along the back of the cooker) for warming plates, dishes,<br />
drying tea towels or softening butter.<br />
When using an electrical appliance near the hotplate, be<br />
sure that the cord of the appliance does not come into<br />
contact with the hotplate.<br />
Take care that no water seeps into the appliance.<br />
Only certain types of glass, glass-ceramic, earthenware or<br />
other glazed containers are suitable for hotplate cooking;<br />
others may break because of the sudden change in<br />
temperature.<br />
Do not allow anyone to climb, stand or hang on any part<br />
of the cooker.<br />
Do not use aluminium foil to cover shelves, linings or the<br />
oven roof.<br />
Never heat unopened food containers. Pressure build-up<br />
may make the container to burst and cause injury.<br />
The cooker is designed for cooking foods only and must<br />
not be used for any other purpose.<br />
The oven should NOT be used for heating the kitchen.<br />
This wastes fuel and the control knobs may become<br />
overheated.<br />
When the oven is on DO NOT leave the oven door open<br />
for longer than necessary.<br />
27
Installation<br />
You must be aware of the following safety<br />
requirements and regulations.<br />
In the Republic of Ireland, the installation must<br />
be carried out by a Competent Person and installed in<br />
accordance with the current edition of I.S. 813<br />
“Domestic Gas Installations”, the current Building<br />
Regulations and reference should be made to the<br />
current ETCI rules for electrical installation.<br />
Prior to installation, ensure that the local distribution<br />
conditions (nature of gas and gas pressure) and the<br />
adjustment of the appliance are compatible. See the<br />
appliance data badge.<br />
This appliance shall be installed in accordance with the<br />
regulations in force and only in a well ventilated space.<br />
Read the instructions before installing or using this<br />
appliance.<br />
In the UK - the regulations and standards are as<br />
follows:-<br />
In your own interest and that of safety, it is law that all<br />
gas appliances be installed by competent persons. Gas<br />
Safe Registered installers undertake to work to safe and<br />
satisfactory standards. Failure to install the appliance<br />
correctly could invalidate any warranty or liability claims<br />
and lead to prosecution. The cooker must be installed in<br />
accordance with:<br />
• All relevant British Standards / Codes of Practice,<br />
in particular BS 5440 Part 2 2000,<br />
• or Natural Gas - BS 6172 : 1990 and BS 6891 :<br />
1998<br />
• For LP Gas - BS 5482-1: 1994 (when the<br />
installation is a permanent dwelling), BS 5482-2:<br />
1977, (when the installation is in a caravan or<br />
other non permanent dwelling), or BS 5482-3:<br />
1999, (when the installation is in a boat).<br />
• The Gas Safety (Installation and Use) regulations<br />
1998.<br />
• The relevant Building / IEE regulations.<br />
Provision of Ventilation<br />
This appliance is not connected to a combustion<br />
products evacuation device. Particular attention shall<br />
be given to the relevant requirements regarding<br />
ventilation.<br />
In the UK<br />
The room containing the cooker should have an air<br />
supply in accordance with BS 5440 Part 2: 2000. All<br />
rooms require an openable window or equivalent, while<br />
some rooms require a permanent vent in addition to the<br />
openable window. The cooker should not be installed in<br />
a bedsitting room with volume less than 20m 3 . If it is<br />
installed in a room of volume less than 5m 3 an air vent<br />
of effective area 100cm 2 is required; if it is installed in a<br />
room of volume between 5m 3 and 10m 3 , an air vent of<br />
effective area 50cm 2 is required; while if the volume<br />
exceeds 11m 3 , no air vent is required.<br />
If there are any other fuel burning appliances in the<br />
same room, BS 5440 Part 2 : 2000 should be consulted<br />
to determine the requisite air vent requirements.<br />
In the Republic of Ireland<br />
Reference should be made to the current edition of IS<br />
813 which makes clear the conditions that must be met<br />
to demonstrate that sufficient ventilation is available.<br />
Location of Cooker<br />
The cooker may be installed in a kitchen/kitchen diner<br />
but NOT in a room containing a bath or shower.<br />
NOTE:<br />
An appliance for use on LPG shall not be installed<br />
in a room or internal space below ground level. e.g.<br />
in a basement.<br />
All models are supplied set for use on either group H natural gas or for use on LP gas.<br />
See the appliance data badge.<br />
This appliance is designed for domestic cooking only. Use for any other purpose could invalidate any warranty<br />
or liability claim.<br />
28
Dear Installer<br />
Before you start your installation, please complete the details BELOW.<br />
If your customer has a problem relating to your installation they will be able to contact<br />
you easily.<br />
Thank you<br />
Installer's Name<br />
Installer's Company<br />
Installer's Telephone number<br />
You will only need the following equipment to complete the cooker installation satisfactorily.<br />
STABILITY BRACKET<br />
If the cooker is to be<br />
supplied with gas through<br />
a flexible hose, a stability<br />
bracket or chain must be<br />
fitted.<br />
These are supplied not<br />
with the cooker but are<br />
available at most builders<br />
merchants.<br />
GAS PRESSURE<br />
TESTER<br />
It is important the gas<br />
pressure is set correctly.<br />
FLEXIBLE GAS HOSE<br />
Must be in accordance<br />
with the relevant<br />
standards. For LP Gas it<br />
should be suitable for<br />
LPG, capable of 50 mbar<br />
pressure, 70ºC<br />
temperature rise and carry<br />
a red stripe, band or label.<br />
A hose is not supplied<br />
with the cooker.<br />
MULTIMETER<br />
(for electrical checks)<br />
Make sure the installation<br />
is electrically safe.<br />
You will also need the following tools:<br />
1. Electric drill 5. Flat head screwdriver<br />
2. Masonry drill bit & rawlplugs 6. Spirit level<br />
(only required if fitting the<br />
7. Pencil<br />
cooker on a stone or concrete 8. Adjustable spanner<br />
floor)<br />
9. Screws for fitting stability bracket<br />
3. Steel tape measure<br />
4. Cross head screwdriver<br />
29
Positioning the Cooker<br />
The diagrams show the minimum recommended distance<br />
from the cooker to nearby surfaces.<br />
A minimum space of 650mm is required between the top<br />
of the hotplate and a horizontal combustible surface.<br />
Any cooker hood should be installed in accordance with<br />
the hood manufacturers instructions.<br />
Surfaces of furniture and walls at the sides and rear of the<br />
appliance should be heat, splash and steam resistant.<br />
Certain types of vinyl or laminate kitchen furniture are<br />
particularly prone to heat damage and discolouration. We<br />
cannot accept responsibility for damage caused by normal<br />
use of the cooker to any material that de-laminates or<br />
discolours at temperatures less than 65ºC above room<br />
temperature.<br />
For safety reasons curtains must not be fitted immediately<br />
behind the cooker.<br />
We recommend a gap of 1006mm between units to allow<br />
for moving the cooker. Do not box the cooker in, it must be<br />
possible to move the cooker in and out for cleaning and<br />
servicing. The cooker should not be placed on a base.<br />
Unpacking the Cooker<br />
Do not take any packaging off the cooker until it is directly<br />
in front of the place it is to be installed (unless it will not fit<br />
through a door in its outer packaging).<br />
Levelling<br />
The <strong>Masterchef</strong> is designed to stand on a flat and level<br />
surface; however any unevenness maybe overcome by<br />
adjusting the four mobility wheels, one at each corner of<br />
the base plate. The adjusting screws are accessed by<br />
removing the plinth (two screws).<br />
The hotplate surround should be level with, or above, any<br />
adjacent work surface. Above hotplate level a gap of<br />
60mm should be left between each side of the cooker and<br />
any adjacent vertical surface.<br />
For non-combustible surfaces (such as unpainted metal or<br />
ceramic tiles) this can be reduced to 25mm.<br />
*NOTE: WALL SPACER MUST BE FITTED TO REAR<br />
OF SIDE PLATES.<br />
Fitting instructions for Rear Spacer<br />
The AGA<br />
<strong>Masterchef</strong> Deluxe<br />
requires<br />
two spacers to be<br />
fitted to the rear of<br />
the appliance<br />
Remove screw and<br />
fix spacers provided<br />
as shown, one per<br />
side.<br />
30
Fitting the splashback (optional)<br />
To fit the splashback, the appliance must be moved out<br />
slightly to gain access to the rear of the appliance.<br />
To raise the cooker turn screw clockwise, to lower turn<br />
screw anti-clockwise.<br />
Remove 2 screws as shown.<br />
Fit new splashback as shown.<br />
When the cooker is level and in the correct position, the<br />
two feet at the front corners of the cooker MUST be<br />
lowered to come into contact with the floor and support the<br />
cooker (tighten the locknuts). The two front mobility<br />
wheels must then be raised by at least one turn (anticlockwise<br />
of the adjusting screw) to ensure that the<br />
cooker is locked in place and cannot accidentally roll out<br />
of position.<br />
31
Gas Connection<br />
Fitting a stability bracket<br />
A stability bracket or chain (not supplied with the cooker)<br />
should be fitted when the cooker is connected to a flexible<br />
gas supply. Any restraining device should be secured to<br />
the fabric of the building and should be able to be released<br />
so that the cooker can be pulled out for cleaning and<br />
maintenance.<br />
When fitting a stability bracket read these instructions<br />
together with the leaflet supplied with the bracket.<br />
a. Position and level the appliance.<br />
b. Draw a pencil line along the front edge of the base of<br />
the cooker and along the right hand edge.<br />
c. Remove the range.<br />
d. Mark off 495mm from the RH side of the unit to indicate<br />
the centre line for the bracket.<br />
e. Mark off 415mm to locate the front edge of the lower<br />
bracket. Fix bracket to floor.<br />
f. Measure the height from floor level to the bottom of the<br />
opening in the cooker back. Add 3mm to this<br />
dimension and assemble the stability bracket to this<br />
height (i.e. from floor level to underside of top<br />
member).<br />
Gas Connection<br />
The gas supply need to terminate with a down facing<br />
bayonet. The rear cover boxes limit the position of the<br />
supply point.<br />
32
Because the height of the cooker can be adjusted and<br />
each connection is different it is difficult to give precise<br />
dimensions. Ideally the house supply bayonet should be<br />
in the shaded area shown in the diagram. This hose<br />
should be fitted so that both inlet and outlet connections<br />
are vertical so that the hose hangs downwards in a ‘U’<br />
shape. A 3ft hose will need to be connected from the side.<br />
For Natural Gas the flexible hose must be in accordance<br />
with B.S. 689.<br />
For LP Gas it should be capable of 50mbar pressure,<br />
70ºC temperature rise and carry a red stripe, band or<br />
label.<br />
If in doubt contact, your supplier.<br />
Screw connect the threaded end of the hose into the gas<br />
inlet in the underside of the connector block on the back<br />
of the cooker.<br />
Electrical Connection<br />
This appliance must be installed by a qualified electrician<br />
to comply with the relevant regulations and also the local<br />
electricity supply company requirements.<br />
WARNING: THIS APPLIANCE MUST BE EARTHED.<br />
NOTE: The cooker must be connected to the correct<br />
electrical supply as stated on the voltage label on the<br />
cooker, through a suitable cooker control unit<br />
incorporating a double pole switch having a contact<br />
separation of at least 3mm in all poles. This cooker must<br />
not be connected to an ordinary domestic power point.<br />
The total electrical load of the appliance is approximately<br />
8.8 kW. The cable size used should be suitable for this<br />
load and comply with all local requirements.<br />
Access to the mains terminal is gained by removing the<br />
electrical terminal cover box on the back panel.<br />
After completing the gas connection, check the cooker is<br />
gas sound with a pressure test. When checking for gas<br />
leaks do not use washing up liquid - this can corrode. Use<br />
a product specifically manufactured for leak detection.<br />
Pressure Testing<br />
The gas pressure can be measured at the fish kettle<br />
burner jet. Make sure that the cooker is not connected to<br />
the electricity supply. Lift off the burner head. Fit the<br />
pressure gauge to the jet. Turn on one of the other burners<br />
and light it with a match. Turn on the control for the fish<br />
kettle burner and press in the knob to allow the gas<br />
through and register the pressure on the gauge.<br />
For Natural gas cookers the pressure should be 20mbar.<br />
For LP gas (propane) the pressure should be 37mbar.<br />
Re-assemble burner top, making sure it is re-assembled<br />
in the correct way on the burner body.<br />
Connect the mains cable to the correct terminals for your<br />
electrical supply type.<br />
33
SERVICING - WARNING<br />
Disconnect from electricity and gas before servicing. Check appliance is safe when you have finished<br />
Grill<br />
Open the grill compartment door. Turn on the grill control<br />
and check that the grill heats up.<br />
Oven Check<br />
Turn on the ovens and check that they start to heat up.<br />
Turn off the ovens.<br />
Single Phase<br />
Fitting the plinth<br />
Remove the 2 screws along the front bottom edge of the<br />
cooker. Hold the plinth in place and refit the 2 screws.<br />
Customer care<br />
Please inform the user how to operate the cooker and<br />
hand over these instructions.<br />
Thank you.<br />
Three Phase<br />
Check that the links are correctly fitted and that the<br />
terminal screws are tight. Secure the mains cable using<br />
the cable clamp.<br />
Current Operated Earth Leakage Breakers<br />
Where the installation is protected by a 30-milliamp<br />
sensitivity residual current device (RCD), the combined<br />
use of your cooker and other domestic appliances may<br />
occasionally cause nuisance tripping. In these instances<br />
the cooker circuit may need to be protected by fitting a<br />
100mA device. This work should be carried out by a<br />
qualified electrician.<br />
Hotplate<br />
Check each burner in turn. There is a flame safety device<br />
that stops the flow of gas to the burner if the flame goes<br />
out. There is also a spark ignition system that works when<br />
the knob is pressed in.<br />
For each burner, push in and turn the knob to the large<br />
flame symbol ( ).<br />
The igniter should spark and light the gas. Keep holding<br />
the knob pressed in to let the gas through to the burner for<br />
a few seconds.<br />
If, when you let go of the control knob, the burner goes<br />
out, the safety device has not held in. Turn the control to<br />
the off position and wait one minute, then try again this<br />
time holding in the control knob for slightly longer.<br />
34
SERVICING - WARNING<br />
Disconnect from electricity and gas before servicing. Check appliance is safe when you have finished<br />
Servicing<br />
3. Remove fixing screws and lift off side panel.<br />
4. Re-assemble in reverse order.<br />
When servicing or replacing gas carrying components<br />
disconnect from the gas supply before commencing<br />
operation.<br />
Check the appliance is gas sound after completion of<br />
service. When checking for gas leaks do not use washing<br />
up liquid - this can corrode. Use a product specifically<br />
manufactured for leak detection.<br />
CAUTION: DO NOT USE A FLAME TO CHECK FOR<br />
GAS LEAKS.<br />
C. To Remove Facia Castings<br />
1. Isolate from electric supply.<br />
2. Proceed as ‘TO REMOVE HOTPLATE’.<br />
3. Proceed as ‘TO REMOVE SIDE PANELS’.<br />
4. Pull off control knobs.<br />
5. Remove control panel fixing screws (see fig. below).<br />
Support facia when removing screws.<br />
NOTE: When removing facia, the oven indicator neons<br />
and timer require disconnecting from the facia, hold the<br />
cables at their entry into the neon twist and pull, this<br />
will disengage the neon assembly.<br />
Do not use re-conditioned or un-authorised gas controls.<br />
Disconnect from the electricity supply before commencing<br />
servicing, particularly before removing any of the<br />
following:- control panel, side panels, hotplate tray or any<br />
electrical components or covers.<br />
Before electrical re-connection, check that the appliance<br />
is electrically safe.<br />
NOTE: References to LH and RH oven apply as viewed<br />
from the front.<br />
BEFORE SERVICING ANY GAS CARRYING<br />
COMPONENTS, TURN OFF THE GAS SUPPLY.<br />
A. To Remove Hotplate<br />
1. Isolate from electric supply.<br />
2. Remove pan supports and burner caps.<br />
3. Remove burner fixing screws (14) and hotplate fixing<br />
screws (4).<br />
4. Lift off hotplate taking care to lift clear of burner<br />
electrodes.<br />
5. Re-assemble in reverse order.<br />
D. To Remove Gas Taps/Ignition Switches<br />
1. Isolate from electric supply.<br />
2. Proceed as ‘TO REMOVE HOTPLATE’.<br />
3. Proceed as ‘TO REMOVE SIDE PANEL’.<br />
4. Undo burner gas pipe to tap (15mm nuts).<br />
5. Remove two screws securing tap to gas rail.<br />
6. Withdraw gas tap from gas rail taking care not to<br />
strain ignition switch cables.<br />
7. Disconnect ignition switch cables and slide off switch<br />
activating collar from spindle of tap.<br />
8. Re-assemble in reverse order.<br />
NOTE: Always fit new ‘O’ ring seal and check for gas<br />
soundness.<br />
E. To Remove Grill Regulator/Light Switch<br />
1. Isolate from electric supply.<br />
2. Proceed as ‘TO REMOVE FACIA CASTINGS’.<br />
3. Remove two screws securing control to control<br />
mounting panel.<br />
4. Withdraw control and cables taking care not to strain<br />
the cables.<br />
5. Disconnect cables from the control.<br />
NOTE: Take care to identify terminations.<br />
6. Re-assemble in reverse order.<br />
B. To Remove Side Panels<br />
1. Isolate from electric supply.<br />
2. Lower front mobility wheels see section ‘MOBILITY<br />
WHEELS’ in the users instructions.<br />
NOTE: It may be necessary to disconnect the flexible<br />
gas connection to allow the cooker to be withdrawn<br />
from between the kitchen units.<br />
35
SERVICING - WARNING<br />
Disconnect from electricity and gas before servicing. Check appliance is safe when you have finished<br />
F. To Remove Oven Thermostats<br />
1. Isolate from electric supply.<br />
2. Proceed as ‘TO REMOVE GRILL REGULATOR’.<br />
3. Remove (10) back panel screws.<br />
4. Remove thermostat phial and capillary through back of<br />
cooker, note correct capillary route.<br />
5. Re-assemble in reverse order.<br />
G. To Remove Spark Generator<br />
1. Isolate from electric supply.<br />
2. Lower front mobility wheels (see section ‘MOBILITY<br />
WHEELS’ in Users Instructions) and pull cooker<br />
forwards to gain access to the rear of the cooker.<br />
CAUTION: DO NOT STRAIN FLEXIBLE GAS<br />
CONNECTION disconnect if necessary.<br />
3. Remove mains cable inlet cover, 8 screws.<br />
4. Disconnect electric cables to generator.<br />
5. Remove two screws securing generator mounting<br />
bracket to cooker frame and carefully withdraw<br />
generator sufficiently to disconnect electrode leads.<br />
6. Re-assemble in reverse order.<br />
H. To Remove Electrode<br />
1. Isolate from electric supply.<br />
2. Proceed as ‘TO REMOVE SPARK GENERATOR’<br />
disconnect the appropriate electrode lead.<br />
3. Proceed as TO REMOVE THE HOTPLATE’.<br />
4. Withdraw clip securing electrode to burner and<br />
withdraw lead and electrode (see fig. below).<br />
5. Re-assemble in reverse order.<br />
I. To Remove Grill Element<br />
1. Isolate from electric supply.<br />
2. Remove two screws securing grill pelmet and remove<br />
pelmet.<br />
3. Remove two screws securing grill element fixing to<br />
carrier to grill cavity and allow element and carrier to<br />
hinge down from the rear.<br />
4. The element can now be lifted out of the carrier to<br />
allow access to the electric terminals at the rear.<br />
5. Disconnect the terminals taking note of their<br />
termination sequence and routing to avoid trapping<br />
cables during re-assembly.<br />
6. Re-assemble in reverse order.<br />
36
SERVICING - WARNING<br />
Disconnect from electricity and gas before servicing. Check appliance is safe when you have finished<br />
J. To Remove Upper Doors<br />
1. Open door fully.<br />
2. Rotate hinge locking disc 90º clockwise on both door<br />
hinges to lock door in open position.<br />
3. Carefully close door and at approximately half closed<br />
the hinges will release themselves from the cooker<br />
frame.<br />
4. Re-assemble in reverse order.<br />
L. To Remove Upper Door/Grill Liners<br />
1. Proceed as ‘TO REMOVE DOORS’.<br />
2. Remove door seal (upper oven only) by unhooking<br />
from the front frame at the four corners.<br />
3. Remove LH and RH shelf runners (2 screws per<br />
runner). The liners can now be withdrawn. Also remove<br />
4 top fixing screws.<br />
K. To Remove Oven Door Seal<br />
1. Open oven door. The seal is held in place by small<br />
hooks on the rear face. At the corner pull seal<br />
diagonally away from the door centre until the hook is<br />
released.<br />
2. Proceed to the next hook and release it in a similar<br />
way, and so on. Use force if the hooks are stiff, as the<br />
old seal will be discarded.<br />
3. Hook the new seal in one of the corner holes of the<br />
door and proceed round the door opening snapping<br />
each hook in turn.<br />
M. To Remove Lower Oven Liners<br />
1. Proceed as ‘TO REMOVE DOORS’.<br />
2. Remove door seal by unhooking from its four corners.<br />
3. Remove screws securing shelf runners (4 each side).<br />
4. Remove rear liner 4 screws.<br />
5. Remove rear liner mounting brackets 2 screws each<br />
side.<br />
6. Whilst supporting the roof liner remove side linings and<br />
roof liner.<br />
7. Re-assemble in reverse order.<br />
37
SERVICING - WARNING<br />
Disconnect from electricity and gas before servicing. Check appliance is safe when you have finished<br />
N. To Remove Upper Oven Elements<br />
1. Isolate from electric supply.<br />
2. Proceed as ‘TO REMOVE UPPER OVEN LINERS’.<br />
3. Lift out oven base to gain access to the oven element.<br />
4. Remove screw securing element to frame.<br />
5. Carefully withdraw element from frame so that the<br />
electric terminals can be disconnected, take care not to<br />
allow the cables to drop down the back of the<br />
appliance.<br />
O. To Remove Fan Oven Element<br />
1. Isolate from electric supply.<br />
2. Proceed as ‘TO REMOVE OVEN LINERS’.<br />
R. To Remove Oven Lamp<br />
1. Isolate from electric supply.<br />
2. Procees as ‘TO REMOVAL TOP OVEN/GRILL<br />
LINERS’.<br />
3. Remove door seal if necessary by unhooking from the<br />
four corners.<br />
4. Lift out base panel to gain access to lamp electrical<br />
terminals and disconnect cables.<br />
5. Remove lamp lens.<br />
6. The lamp body can now be removed by depressing<br />
four retaining tags on the lamp body.<br />
7. Re-assemble in reverse order.<br />
S. To Remove Spark Generator<br />
1. Isolate from electric supply.<br />
2. Lower front mobility wheels (See Section ‘MOBILITY<br />
WHEELS’ in Users Instructions) and pull cooker<br />
forward to gain access to the rear of the cooker.<br />
CAUTION: DO NOT STRAIN FLEXIBLE GAS<br />
CONNECTION disconnect if necessary.<br />
3. Remove mains cable inlet cover, 8 screws.<br />
4. Disconnect electric cables to generator.<br />
5. Remove two screws securing generator mounting<br />
bracket to cooker frame and carefully withdraw<br />
generator sufficiently to disconnect electrode leads.<br />
6. Re-assemble in reverse order.<br />
3. Remove 3 screws securing element to frame and<br />
carefully withdraw element until access can be made<br />
to the electrical terminals.<br />
4. Disconnect terminals taking care not to allow the cable<br />
to fall down the rear of the appliance.<br />
5. Re-assemble in reverse order.<br />
P. To Remove Oven Fan<br />
1. Isolate from electric supply.<br />
2. Proceed as ‘TO REMOVE OVEN ELEMENT’.<br />
3. Remove 4 fixing screws securing fan assembly to<br />
frame.<br />
4. Withdraw fan assembly sufficiently to gain access to<br />
motor electrical terminals and disconnect cables.<br />
5. Remove fan blade.<br />
NOTE: Fan blade fixing nuts is LH thread.<br />
6. Remove motor from mounting plate screws.<br />
7. Re-assemble in reverse order.<br />
Q. To Remove Door Liners/Door Handles/Door Glass<br />
1. Proceed as ‘TO REMOVE DOORS’.<br />
2. Remove liner fixing screws (4 screws upper oven door,<br />
6 screws lower oven door).<br />
3. Access can now be made to fixing screws of the<br />
hinges, door glass and handle.<br />
4. Re-assemble in reverse order.<br />
38
SERVICING - WARNING<br />
Disconnect from electricity and gas before servicing. Check appliance is safe when you have finished<br />
Circuit Diagram<br />
39
SERVICING - WARNING<br />
Disconnect from electricity and gas before servicing. Check appliance is safe when you have finished<br />
A Grill energy regulator Colour Code<br />
B Outer grill element b Blue<br />
C Inner grill element bl Black<br />
D Slow cooking oven thermostat br Brown<br />
F Slow cooking oven element gr Grey<br />
G Oven light switches g/y Green/Yellow<br />
H1 Right hand oven light or Orange<br />
H2 Left hand oven light v Violet<br />
M Left hand oven thermostat w White<br />
O Left hand oven element y Yellow<br />
P Left hand oven fan<br />
I Right hand oven thermostat<br />
J Right hand oven fan<br />
K Right hand oven element<br />
Q Clock<br />
R Ignition switches<br />
S Spark generator<br />
T Terminal<br />
U1 Right hand oven neon<br />
U2 Left hand oven neon<br />
Y Mains terminal<br />
X Cut out<br />
40
SERVICING - WARNING<br />
Disconnect from electricity and gas before servicing. Check appliance is safe when you have finished<br />
41
Technical Data<br />
This cooker is either Cat I2H (Nat. Gas) or I3+ (LP Gas)<br />
Check the appliance data badge.<br />
INSTALLER: Please leave these instructions with the User.<br />
DATA BADGE LOCATION: Behind plinth panel, serial number repeater badge below right hand oven opening.<br />
Country of Destination: GB/IE<br />
Gas<br />
Natural Gas 20mbar<br />
Propane 37mbar<br />
Butane<br />
28 - 30mbar<br />
Electric<br />
220 - 240V 50Hz<br />
(See appliance data badge for test pressures)<br />
Dimensions<br />
Overall height<br />
Overall width<br />
Overall depth including handles<br />
Overall depth excluding handles<br />
Space for fixing<br />
Minimum space above hotplate<br />
minimum 915mm maximum 940mm<br />
1000mm See ‘Positioning of Cooker’<br />
660mm<br />
600mm<br />
See ‘Positioning of Cooker’<br />
800mm<br />
Connections<br />
Gas<br />
Rp 1 /2 at rear right-hand side<br />
Electric<br />
220 - 240V 50Hz<br />
Ratings<br />
Natural Gas<br />
Propane Gas<br />
Hotplate<br />
Input<br />
Injector<br />
Bypass<br />
Input<br />
Injector<br />
Bypass<br />
Left hand front wok<br />
3.5 kW<br />
130<br />
96<br />
3.5 kW (250g/h)<br />
95<br />
57<br />
Right hand front Rapide<br />
3.0 kW<br />
116<br />
54<br />
3.0 kW (214g/h)<br />
85<br />
40<br />
Rear Semi-Rapide<br />
1.75 kW<br />
<strong>09</strong>7<br />
39<br />
1.75 kW (125g/h)<br />
65<br />
32<br />
Centre Fish Burner<br />
2.6 kW<br />
108<br />
70<br />
2.6 kW (186g/h)<br />
80<br />
47<br />
Gas burner inputs based on Gross Calorific Value<br />
Fan Ovens<br />
Energy efficiency class on a scale of A (more efficient) to G (less efficient)<br />
Energy Consumption based on a standard load<br />
Usable Volume (litres)<br />
Size<br />
Time to cook standard load<br />
Surface area of the grid<br />
Forced air convection<br />
2.5 kW<br />
B<br />
1.05 kWh<br />
49<br />
Medium<br />
50 minutes<br />
720cm 2<br />
Grill<br />
Slow cooking oven<br />
2.5kW<br />
1.2kW<br />
Maximum total electrical load at 230V 8.5 kW (approximate total including oven lights, etc.)<br />
42
For further advice or information contact your local<br />
distributor/stockist<br />
With <strong>Aga</strong>’s policy of continuous product<br />
improvement, the Company reserves the right to<br />
change specifications and make modifications to<br />
the appliance described and illustrated at any time.<br />
Manufactured By<br />
<strong>Aga</strong><br />
Station Road<br />
Ketley Telford<br />
Shropshire TF1 5AQ<br />
England<br />
www.aga-web.co.uk<br />
www.agacookshop.co.uk<br />
www.agalinks.com<br />
44