Thin-Set Mortar Admix - Custom Building Products
Thin-Set Mortar Admix - Custom Building Products
Thin-Set Mortar Admix - Custom Building Products

You also want an ePaper? Increase the reach of your titles
YUMPU automatically turns print PDFs into web optimized ePapers that Google loves.
TILING 09 30 00<br />
<strong>Thin</strong>-<strong>Set</strong> <strong>Mortar</strong> <strong>Admix</strong><br />
<strong>Set</strong>ting / TDS-175<br />
1 Product Name<br />
<strong>Thin</strong>-<strong>Set</strong> <strong>Mortar</strong> <strong>Admix</strong><br />
2 Manufacturer<br />
<strong>Custom</strong> <strong>Building</strong> <strong>Products</strong><br />
13001 Seal Beach Blvd.<br />
Seal Beach, CA 90740-2757<br />
<strong>Custom</strong>er Support: 800-272-8786<br />
Technical Services: 800-282-8786<br />
Fax: 800- 200-7765<br />
Email: contactus@cbpmail.net<br />
custombuildingproducts.com<br />
3 Product Description<br />
A liquid polymer designed to be used in place of water to increase<br />
performance of cement mortar beds, non-modified, thin-set mortars<br />
and cement-based grouts. It improves working characteristics and<br />
performance of cement-based mixes to boost water resistance, shock<br />
resistance and freeze-thaw capabilities for tile, stone or masonry<br />
installations. Increases performance of non-modified thin-set mortars<br />
for setting dense tile and setting over hard-to-bond surfaces. <strong>Thin</strong>-<strong>Set</strong><br />
<strong>Mortar</strong> <strong>Admix</strong> can be used with non-modified, thin-set mortars such<br />
as, <strong>Custom</strong>Blend® <strong>Thin</strong><strong>Set</strong> <strong>Mortar</strong> and Uncoupling Mat <strong>Mortar</strong>. It can<br />
also be used with Saltillo Grout Mix.<br />
Suitable Tile Types<br />
Vitreous, semi-vitreous or non-vitreous tile: ceramic, mosaic, quarry,<br />
cement body tile<br />
Impervious porcelain and glass tile<br />
Brick and stone veneer<br />
Cement-based precast terrazzo<br />
Natural stone tile<br />
Suitable Substrates<br />
Concrete, mortar beds, masonry, Portland cement plaster<br />
WonderBoard®, cement backerboards<br />
Liquid applied waterproofing membranes such as RedGard® and<br />
<strong>Custom</strong>® 9240<br />
Crack prevention sheet membranes such as Crack Buster® Pro<br />
Exterior Grade Plywood (interior residential and light commercial dry<br />
areas)<br />
Gypsum wallboard (interior dry areas)<br />
Existing ceramic tile<br />
Fully-bonded sheet vinyl flooring<br />
Plastic laminates<br />
Cutback adhesive (see preparation instructions)<br />
Composition of Product<br />
Liquid Latex<br />
Installation of hard-to-bond tiles<br />
Interior and exterior applications<br />
Limitations to the Product<br />
Do not bond directly to hardwood, Luan plywood, particle board,<br />
parquet, cushion or sponge-back vinyl flooring, metal, fiberglass,<br />
plastic or OSB panels.<br />
When setting moisture sensitive natural stone, cement or agglomerate<br />
tile use EBMLite® Epoxy Bonding <strong>Mortar</strong> 100% Solids or CEGLite®<br />
100% Solids Commercial Epoxy Grout.<br />
Do not use to install resinbacked stone use EBMLite® Epoxy Bonding<br />
<strong>Mortar</strong> 100% Solids, CEGLite® 100% Solids Commercial Epoxy Grout<br />
or contact <strong>Custom</strong>'s® Technical Services for recommendations.<br />
When setting glass tile larger than 6" x 6" (15 x 15 cm), contact<br />
<strong>Custom</strong>'s® Technical Services for recommendations.<br />
When setting dimensional stone larger than 12" x 12" (30 x 30 cm),<br />
contact <strong>Custom</strong>'s® Technical Services for recommendations regarding<br />
subfloor deflection requirements.<br />
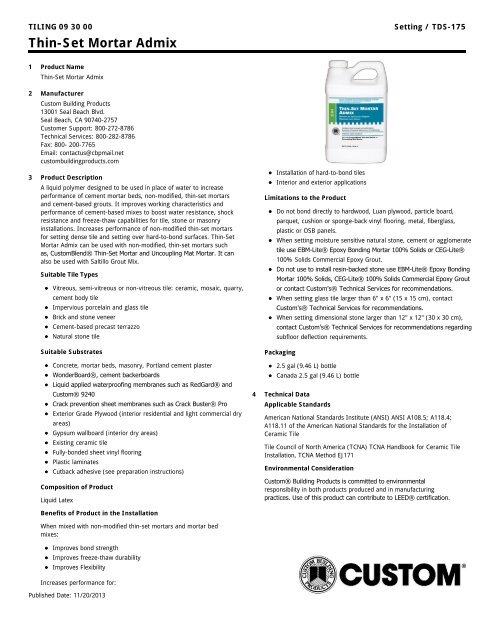
Packaging<br />
2.5 gal (9.46 L) bottle<br />
Canada 2.5 gal (9.46 L) bottle<br />
4 Technical Data<br />
Applicable Standards<br />
American National Standards Institute (ANSI) ANSI A108.5; A118.4;<br />
A118.11 of the American National Standards for the Installation of<br />
Ceramic Tile<br />
Tile Council of North America (TCNA) TCNA Handbook for Ceramic Tile<br />
Installation, TCNA Method EJ171<br />
Environmental Consideration<br />
<strong>Custom</strong>® <strong>Building</strong> <strong>Products</strong> is committed to environmental<br />
responsibility in both products produced and in manufacturing<br />
practices. Use of this product can contribute to LEED® certification.<br />
Benefits of Product in the Installation<br />
When mixed with non-modified thin-set mortars and mortar bed<br />
mixes:<br />
Improves bond strength<br />
Improves freeze-thaw durability<br />
Improves Flexibility<br />
Increases performance for:<br />
Published Date: 11/20/2013
TILING 09 30 00<br />
<strong>Thin</strong>-<strong>Set</strong> <strong>Mortar</strong> <strong>Admix</strong><br />
5 Instructions<br />
General Surface Prep<br />
Surfaces must be structurally sound, clean, dry and free from grease,<br />
oil, dirt, curing compounds, sealers, adhesives or any other<br />
contaminant that would prevent a good bond. Glossy or painted<br />
surfaces must be sanded, stripped and cleaned of waxes, dirt or any<br />
contaminants. Concrete must be cured 28 days and accept water<br />
penetration. Concrete must be free of efflorescence and not subject to<br />
hydrostatic pressure. Concrete slabs should have a broomed or<br />
brushed finish to enhance the bond. Plywood flooring including those<br />
under resilient flooring must be structurally sound and meet all ANSI<br />
and deflection requirements. For questions about proper subfloor<br />
installation, call Technical Services. Smooth concrete surfaces, existing<br />
glazed tile, terrazzo, or polished stone should be roughened or<br />
scarified. Sheet vinyl must be-well bonded and stripped of old finish.<br />
Roughen the surface by sanding or scarifying, rinse and allow to dry.<br />
Expansion joints should never be bridged with setting material. Do not<br />
sand flooring materials containing asbestos. Ambient temperature,<br />
surfaces and materials should be maintained at a temperature above<br />
50° F (10° C) or below 100° F (38° C) for 72 hours.<br />
Bonding to Cement Surfaces<br />
Concrete or plaster must be fully cured and must accept water<br />
penetration. Test by sprinkling water on various areas of the substrate.<br />
If water penetrates, then a good bond can be achieved; if water<br />
beads, surface contaminants are present, and loss of adhesion may<br />
occur. Contaminants should be mechanically removed before<br />
installation. Concrete must be free of efflorescence and not subject to<br />
hydrostatic pressure. Concrete slabs should have a broomed or<br />
brushed finish to enhance the bond. Smooth concrete slabs must be<br />
mechanically abraded to ensure a good bond.<br />
Bonding to Plywood Surfaces<br />
Plywood floors, including those under resilient flooring, must be<br />
structurally sound and must meet all ANSI A108.01 Part 3.4<br />
requirements. See TCNA F150. For questions about proper subfloor<br />
installation, call <strong>Custom</strong>® <strong>Building</strong> <strong>Products</strong>.<br />
Bonding to Backerboards<br />
Tile backerboards such as WonderBoard® and are a superior<br />
alternative to using a second layer of plywood as a final substrate for<br />
tile installation. EasyMat® is an underlayment that can be used in the<br />
same regard. Each provide unique benefits to tile installation but all<br />
can be installed over plywood to ensure that maximum bond strengths<br />
and performance are achieved. Refer to respective data sheet for<br />
installation information.<br />
Bonding to Existing Surfacing Material<br />
Plywood flooring must be structurally sound and meet all ANSI and<br />
deflection requirements. Resilient flooring or plastic laminates must be<br />
well-bonded, clean and free of all contaminates. Roughen the surface<br />
by sanding or scarifying, rinse and allow to dry. Do not sand flooring<br />
containing asbestos. For existing well-bonded ceramic tile,<br />
mechanically abrade with carborundum stone. Rinse and allow to dry.<br />
When sanding we recommend the use of an approved respirator.<br />
Bonding to Cutback Adhesive<br />
<strong>Set</strong>ting / TDS-175<br />
Adhesive layers must be removed as they reduce mortar bond strength<br />
to cement surfaces. Use extreme caution as adhesives may contain<br />
asbestos fibers. Do not sand or grind adhesive residue, as harmful<br />
dust may result. Never use adhesive removers or solvents, as they<br />
soften the adhesive and may cause it to penetrate into the concrete.<br />
Adhesive residue must be wet-scraped to the finished surface of the<br />
concrete, leaving only the transparent staining from the glue. Do a test<br />
bond area first, to determine desirable results. Refer to the RFCI<br />
Pamphlet, "Recommended Work Practices for Removal of Resilient<br />
Floor Coverings", for further information.<br />
Expansion Joint placement<br />
Expansion joints, control joints and cold joints should never be bridged<br />
with setting material. They must be brought through the tile work and<br />
filled with an appropriate elastomeric sealant.<br />
Mixing Procedures<br />
FOR USE AS AN ADMIX WITH NON-MODIFIED THIN SET MORTAR<br />
Refer to individual product instructions. Mixing details for <strong>Thin</strong>-<strong>Set</strong><br />
<strong>Mortar</strong> <strong>Admix</strong> will vary dependant upon non-modified mortar used. See<br />
the mixing instructions on <strong>Custom</strong>Blend® or Uncoupling Mat <strong>Mortar</strong><br />
bag or data sheet for specific directions.<br />
FOR USE WITH PORTLAND CEMENT AND SAND MORTAR MIXES<br />
<strong>Thin</strong>-<strong>Set</strong> <strong>Mortar</strong> <strong>Admix</strong> may be used as a fortifying additive to sitemixed<br />
or bagged Portland cement and sand mixtures common to<br />
masonry or floated mortar beds. Mix 1 part <strong>Thin</strong>-<strong>Set</strong> <strong>Mortar</strong> <strong>Admix</strong><br />
with 1 part clean water and use as a direct replacement for the water<br />
requirement in any mortar mix. <strong>Thin</strong>-<strong>Set</strong> <strong>Mortar</strong> <strong>Admix</strong> can be used full<br />
strength for improved performance.<br />
The total amount of liquid added will vary.<br />
FOR USE AS AN UNMODIFIED TILE GROUT ADMIX<br />
When installing tile over wood substrates and when increased tensile<br />
and flexural grout qualities are necessary, use <strong>Thin</strong>-<strong>Set</strong> <strong>Mortar</strong> <strong>Admix</strong><br />
with water. Mix 1 part clean water with 1 part <strong>Thin</strong>-<strong>Set</strong> <strong>Mortar</strong> <strong>Admix</strong><br />
prior to mixing liquid with Portland cement grout. Remove excess grout<br />
from surface of tile as soon as possible after grouting, as latex-fortified<br />
grout becomes extremely difficult to remove when dry. Not for use<br />
with <strong>Custom</strong>'s® Polyblend® Grout or Prism® SureColor® Grout.<br />
Cleaning of equipment<br />
Clean with water before material dries.<br />
<strong>Mortar</strong>: Clean with water while mortar is fresh.<br />
Grout: Refer to instructions of non-modified grout for installation and<br />
cleaning instructions.<br />
Storage<br />
Keep from freezing. Close container after each use.<br />
Published Date: 11/20/2013
TILING 09 30 00<br />
<strong>Thin</strong>-<strong>Set</strong> <strong>Mortar</strong> <strong>Admix</strong><br />
<strong>Set</strong>ting / TDS-175<br />
Health Precautions<br />
Contains latex emulsions. Wear rubber gloves and eye protection.<br />
Avoid eye and skin contact. If eye contact occurs, immediately flush<br />
with water for 15 minutes and consult a physician immediately. If skin<br />
contact occurs, wash immediately with soap and water. Dried material<br />
becomes extremely difficult to remove. KEEP OUT OF REACH OF<br />
CHILDREN.<br />
6 Availability & Cost<br />
Location Item Code Size Package<br />
USA AMA2 2.5 gallon (9.46 L) Bottle<br />
Canada CAMA2 2.5 gallon (9.46 L) Bottle<br />
7 Product Warranty<br />
<strong>Custom</strong>® <strong>Building</strong> <strong>Products</strong> warrants to the original consumer<br />
purchaser that its product shall be free from defects in material and<br />
workmanship under normal and proper usage for a period of one year<br />
following the date of original purchase. <strong>Custom</strong>'s® sole liability under<br />
this warranty shall be limited to the replacement of the product. Some<br />
states, countries or territories do not allow the exclusion or limitation<br />
of incidental or consequential damages, so the above limitation or<br />
exclusion may not apply to you. This warranty will not extend to any<br />
product which has been modified in any way or which has not been<br />
used in accordance with <strong>Custom</strong>'s® printed instructions. <strong>Custom</strong>®<br />
makes no other warranties either expressed or implied. This warranty<br />
gives you specific legal rights, and you may have other rights that vary<br />
from state to state or from one country/territory to another. Click for<br />
details and complete warranty information.<br />
8 Product Maintenance<br />
Properly installed product requires no special maintenance.<br />
9 Technical Services Information<br />
For technical assistance, contact <strong>Custom</strong>® <strong>Building</strong> <strong>Products</strong>.<br />
10 Filing System<br />
Additional product information is available from the manufacturer upon<br />
request.<br />
Expected Wear<br />
Properly installed tile will last for more than 60 years.<br />
Related <strong>Products</strong><br />
Uncoupling Mat <strong>Mortar</strong><br />
<strong>Custom</strong>Blend® Standard <strong>Thin</strong><strong>Set</strong> <strong>Mortar</strong><br />
Saltillo Grout Mix<br />
Polyblend® Sanded Grout<br />
Published Date: 11/20/2013
TILING 09 30 00<br />
<strong>Thin</strong>-<strong>Set</strong> <strong>Mortar</strong> <strong>Admix</strong><br />
<strong>Set</strong>ting / TDS-175<br />
Coverage<br />
Refer to <strong>Custom</strong>Blend® Standard <strong>Thin</strong><strong>Set</strong> <strong>Mortar</strong> or Uncoupling Mat <strong>Mortar</strong>. Coverage for mortar beds will vary dependent upon quantity mixed.<br />
Published Date: 11/20/2013