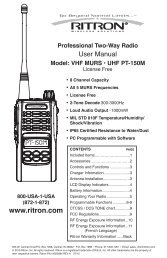
Download Manual - Ritron
Download Manual - Ritron
Download Manual - Ritron

You also want an ePaper? Increase the reach of your titles
YUMPU automatically turns print PDFs into web optimized ePapers that Google loves.
Refer to FIG–1<br />
®<br />
OutPost Basic Owner’s <strong>Manual</strong><br />
IDENTIFICATION OF CONTROLS AND CONNECTIONS<br />
1 ANTENNA CONNECTOR<br />
The antenna radiates radio signals Before using<br />
the OUTPOST, make sure the antenna is securely<br />
fastened into the connector If the OUTPOST is to<br />
be used outdoors, see page 6 for instructions<br />
on properly sealing the antenna connector<br />
2 PROGRAM BUTTON (RQX-150/450/446)<br />
This button is used to enter frequency and Quiet<br />
Call code information<br />
3 OFF BUTTON (RQX-150/450/446)<br />
This button is used to turn the OUTPOST OFF<br />
when programming is complete<br />
4 PROGRAM SAVE BUTTON (RQX-150/450/446)<br />
This button is used to save the programmed<br />
information<br />
5 PROGRAM ENABLE BUTTON (RQX-150/450/446)<br />
Pressing this button when the unit is ON puts the<br />
OUTPOST into Programming Mode<br />
NOTE: Model RQX-454 must be programmed by<br />
a RITRON Dealer<br />
6 SPEAKER<br />
After a message has been sent from the OUTPOST,<br />
any reply from another radio may be heard through<br />
the speaker<br />
7 MICROPHONE ("MIC")<br />
For best communication, speak as closely as<br />
possible into the microphone The OUTPOST is<br />
designed so you will be heard clearly when you<br />
speak, while pressing the ON/PTT Button, at a<br />
distance of up to 3 feet from the microphone<br />
8 ON/ PTT BUTTON<br />
The OUTPOST is OFF until the user turns it ON<br />
by pressing and holding the ON/PTT Button The<br />
unit sounds an audible “beep” to confirm it is ready<br />
for a message; when the user is finished speaking,<br />
he releases the button to wait for a reply If<br />
there is no reply within 10 seconds, the unit<br />
sounds an audible “beep” and automatically shuts<br />
OFF<br />
9 IN-LINE BATTERY CONNECTOR<br />
The in-line battery connector connects the radio to<br />
the Battery<br />
10 MOUNTING HOLES<br />
Mounting holes accommodate #6 panhead screws<br />
to securely mount the unit to a variety of surfaces<br />
11 BATTERY HOLDER<br />
The rugged battery holder securely holds six (6)<br />
D-cell batteries in place<br />
1 ANTENNA CONNECTOR<br />
2 PROGRAM BUTTON<br />
3 OFF BUTTON<br />
4 SAVE BUTTON<br />
5 ENABLE BUTTON<br />
MUSHROOM-HEAD FASTENER STRIP (3)<br />
6 SPEAKER<br />
7 MICROPHONE<br />
8 ON/PTT BUTTON<br />
9 IN-LINE BATTERY CONNECTOR<br />
(Front View of Top Half)<br />
CAPTIVE SCREWS (4)<br />
(CONNECTED TO ON/ PTT BUTTON)<br />
(CONNECTED TO RADIO BOARD)<br />
(SEE PAGE 3 FOR ITEMS 10 AND 11)<br />
(Internal View of Top Half)<br />
FIG–1: OUTPOST FRONT HOUSING CONTROLS & CONNECTORS<br />
For assistance, call RITRON at 800-872-1872, or go to wwwritroncom<br />
Page 3