1450 Incubator Manual English - Mesa Labs
1450 Incubator Manual English - Mesa Labs
1450 Incubator Manual English - Mesa Labs

You also want an ePaper? Increase the reach of your titles
YUMPU automatically turns print PDFs into web optimized ePapers that Google loves.
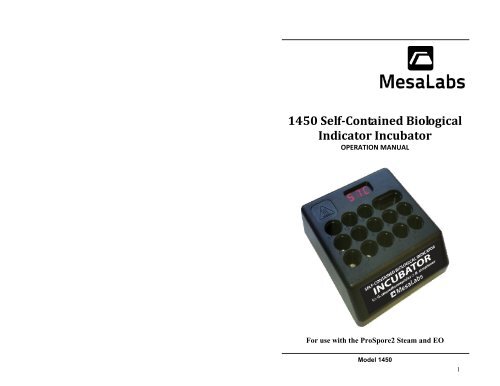
<strong>1450</strong> Self-Contained Biological<br />
Indicator <strong>Incubator</strong><br />
OPERATION MANUAL<br />
For use with the ProSpore2 Steam and EO<br />
Model <strong>1450</strong><br />
1
Biological Indicators Products<br />
Model <strong>1450</strong><br />
2
Model <strong>1450</strong><br />
3
Table of Contents<br />
Introduction 3<br />
Safety Information 4<br />
Installation & Warm Up 5<br />
Temperature Selection 6<br />
Operation 7<br />
Maintenance & Service 9<br />
Warranty 11<br />
Specifications 12<br />
Introduction<br />
The <strong>Mesa</strong> <strong>Labs</strong> <strong>1450</strong> biological indicator incubator is designed for<br />
convenient and effective incubation of self-contained biological<br />
indicators requiring incubation temperatures of 37°C, 57°C, or 60°C.<br />
The incubator features a built-in thermometer with LED display, 13<br />
incubation cavities, and an integrated activation (crushing) cavity.<br />
A self-contained biological indicator consists of a capped thermoplastic<br />
culturing vial containing a glass media ampoule and a carrier inoculated<br />
with bacterial spores. Upon removal from the sterilizer, the indicator is<br />
sealed then activated by flexing the plastic culturing vial to crush the<br />
inner glass ampoule which allows the growth medium to contact the<br />
spore carrier. The activated indicator is then incubated for a specified<br />
length of time at the recommended incubation temperature and<br />
observed for color change of the growth medium. If the medium turns<br />
yellow during incubation, the test is positive indicating growth and<br />
inadequate sterilization.<br />
Omaha Manufacturing Facility<br />
Omaha, NE 68127 USA<br />
(303) 987-8000<br />
FAX: (402) 593-0995<br />
www.mesalabs.com<br />
Model <strong>1450</strong><br />
4<br />
Model <strong>1450</strong><br />
17
This page intentionally blank.<br />
Safety Information<br />
Handle with caution. The surface of the incubator may become hot to<br />
the touch.<br />
The incubator has been designed with function, reliability, and safety in<br />
mind. It is the user’s responsibility to install it in conformance with local<br />
electrical codes. For safe operation, please pay attention to the alert<br />
boxes throughout the manual.<br />
Warning<br />
!<br />
Caution<br />
<br />
Refer to manual.<br />
Cautions alert you to potential<br />
equipment damage and hazards.<br />
Note<br />
<br />
Notes alert you to<br />
pertinent facts and<br />
conditions.<br />
Use Only as Directed<br />
Indoor use only.<br />
Temperature 10°C to 35°C.<br />
Maximum relative humidity 80% for temperatures up to 31°C<br />
decreasing linearly to 50% relative humidity at 35°C.<br />
Main power supply voltage fluctuations not to exceed ±10%<br />
of the nominal voltage.<br />
Installation class II service.<br />
Polution-Degree 2 environments.<br />
Altitude less than 2000m.<br />
Model <strong>1450</strong><br />
16<br />
Model <strong>1450</strong><br />
5
Installation and Warm Up<br />
This page intentionally blank.<br />
The inc ubator is designed for continuous opera<br />
tion and does not have a<br />
power switch. The incubator will power on<br />
when it is<br />
plugged into a<br />
power source.<br />
<br />
Note: the incubator must be installed in a location where temperature is<br />
maintained between 10°C (50°F) and 35°C (95°F).<br />
1. Remove the incubator from its packaging.<br />
2. Unpack the power supply. The power supply includes four<br />
interchangeable blades (plugs). Select the appropriate blades<br />
for your region and attach the blades to the power supply.<br />
3. Plug the power supply into a power source.<br />
4. Insert the small connector from the power supply into the<br />
matching receptical in the back of the incubator (see Figure 1).<br />
5. The incubator will automatically power on and perform a selfwill<br />
be<br />
test. Upon completion, the installed firmware revision<br />
displayed on the LED screen for two seconds.<br />
6. The incubator will begin its warm-up phase. During this time<br />
the configured temperature setpoint will fade in and out on the<br />
LED screen.<br />
7. The incubator is ready to use when the configured setpoint is<br />
no longer fading in and out, and the LED screen displays the<br />
current operating temperature of the incubator.<br />
<br />
Note: it may take approximately 30 minutes for the incubator to warm up to<br />
operating temperature, depending on the selected incubation temperature and<br />
the temperature of the environment in which the incubator is installed.<br />
Model <strong>1450</strong><br />
6<br />
Model <strong>1450</strong><br />
15
This page intentionally blank.<br />
Temperature Selection<br />
The incubator can be configured to operate at 37°C for biological<br />
indicators containing Bacillus atrophaeus, or 57°C or 60°C for biological<br />
indicators containing Geobacillus stearothermophilus. The incubator is<br />
initially configured to operate at 57°C.<br />
<br />
Caution: failure to set the correct incubation temperature will yield invalid test<br />
results. It is not possible to incubate at multiple temperatures simultaneously.<br />
Refer to the instructions for use for your biological indicators to select the<br />
appropriate incubation temperature.<br />
1. With the incubator powered on, simultaneously press and hold<br />
the two small buttons on the rear of the incubator (see Figure<br />
1) for ~2 seconds until the currently selected temperature<br />
setpoint blinks on the LED display.<br />
2. Release the buttons, then press either button repeatedly to<br />
toggle between the available temperature setpoints (37°C,<br />
57°C, or 60°C).<br />
3. When the desired temperature setpoint is blinking on the<br />
display, press and hold both buttons for ~2 seconds.<br />
4. The configured setpoint will fade in and out on the LED screen<br />
until the incubator has reached temperature, upon which the<br />
actual temperature of the incubator will be displayed.<br />
Figure 1 - Rear of <strong>Incubator</strong><br />
Model <strong>1450</strong><br />
14<br />
Model <strong>1450</strong><br />
7
Operation<br />
<br />
<br />
Note: refer to the instructions for use supplied with your biological indicators<br />
for information on processing, incubation, interpretation of results, and using<br />
positive controls.<br />
When the incubator has reached the configured temperature, the actual<br />
temperature of the incubator will be shown on the LED display,<br />
indicating that the unit is ready to accept biological indicators. Verify<br />
that the temperature displayed is within the allowable range for your<br />
biological indicator before proceeding (see the instructions for use<br />
supplied with your biological indicators).<br />
B iological Indicator Activation<br />
Prior to incubation, the biological indicator must be sealed then<br />
activated by crushing its internal glass medium ampoule (see biological<br />
indicator instructions for use). This allows the color-change medium<br />
from the ampoule to contact the spore carrier.<br />
!<br />
WARNING: allow a processed BI to cool for at least 10 minutes upon removal<br />
from the sterilizer. Failure to do so may cause the glass medium ampoule to<br />
burst during activation, resulting in injury from hot liquid or flying debris.<br />
The incubator contains an activation (crushing) cavity to simplify<br />
activation (see Figure 2). After sealing the unit, place the processed or<br />
positive control biological indicator into the left side of the activation<br />
cavity and flex the indicator to the right until the glass ampoule breaks.<br />
Note: you may have to grip the incubator by the base while activating a BI so that<br />
it does not tip over.<br />
Incubation<br />
To confirm adequate sterilization (negative result), self-contained<br />
biological indicators must be incubated for the appropriate length of<br />
time (“incubation time”). Please refer to the instructions for use that<br />
Specifications<br />
<strong>Incubator</strong><br />
Catalog Number<br />
Overall Dimensions<br />
Incubation Cavities<br />
I<strong>1450</strong><br />
Width<br />
3.5 in / 9 cm<br />
Height<br />
2.0 in / 5.08 cm<br />
Depth<br />
4.0 in / 10.2 cm<br />
Weight<br />
0.89 lb / 0.4 kg<br />
Number 13<br />
Diameter<br />
.49 in / 1.25 cm<br />
Depth<br />
.94 in / 2.39 cm<br />
Thermometer Accuracy + / - 1ºC<br />
Electrical Ratings Volts<br />
12VDC<br />
(for use with certified Watts 18.0<br />
class 2 power supply)<br />
Amps<br />
1500 mA<br />
Operating Range Temperature 37ºC / 57ºC / 60ºC<br />
Environmental<br />
Ambient Temperature 10ºC - 35ºC<br />
Conditions<br />
Relative Humidity 20% - 80%<br />
Non-condensing<br />
Conformance<br />
CSA/C/US, CE, RoHS, FCC Part 15 Class A, ICES-003 Class A<br />
Power Supply<br />
Catalog Number<br />
I-<strong>1450</strong>-M<br />
Rated Input Voltage 100 – 240VAC<br />
Input Voltage Range 90 – 264VAC<br />
Rated Frequency<br />
50-60Hz<br />
Rated Input Current 1.0A<br />
Output Voltage<br />
12VDC<br />
Max Output Current 2.5A<br />
Max Output Wattage<br />
30W<br />
Safety Approvals<br />
UL/cUL, GS, CCC, RCM<br />
EMC/EMI<br />
FCC class B, CE, VCC I class II<br />
RoHS Compliant<br />
Yes<br />
Storage Temperature -10°C – 70°C<br />
Storage Humidity 10 – 90%<br />
Operating Temperature 0 – 40°C<br />
Operating Relative Humidity 20 – 80%<br />
Model <strong>1450</strong><br />
8<br />
Model <strong>1450</strong><br />
13
Warranty<br />
<strong>Mesa</strong> <strong>Labs</strong> expressly warrants the Model <strong>1450</strong> biological indicator<br />
incubator manufactured by it as set forth herein. <strong>Mesa</strong> <strong>Labs</strong> makes no<br />
other warranties, either express or implied. No warranty as to<br />
merchantability or fitness for a particular purpose shall apply. In<br />
addition, the following shall constitute the exclusive remedies of buyer<br />
for any breach by <strong>Mesa</strong> <strong>Labs</strong> of its warranty hereunder.<br />
Material and Workmanship: <strong>Mesa</strong> <strong>Labs</strong> warrants the Model <strong>1450</strong><br />
incubator manufactured by <strong>Mesa</strong> <strong>Labs</strong> shall be free from defects in<br />
material and workmanship, under normal use and service, for a period<br />
of fifteen (15) months from the date the product shipped from <strong>Mesa</strong><br />
<strong>Labs</strong>. If any part of the equipment is returned within this time and<br />
found by <strong>Mesa</strong> <strong>Labs</strong> to be defective in workmanship or material, it will<br />
be replaced or repaired, free of charge and returned F.O.B. your plant.<br />
Any equipment or part thereof so replaced or repaired shall be<br />
warranted by <strong>Mesa</strong> <strong>Labs</strong> for the remainder of the original warranty<br />
period. All replacements or repairs necessitated by inadequate<br />
preventive maintenance, or by normal wear and usage, or deterioration<br />
under unsuitable environmental conditions shall be at Buyer's expense.<br />
Buyer may incur service charge for evaluation of returned equipment<br />
not found to be defective. <strong>Mesa</strong> <strong>Labs</strong> shall not be obligated to pay any<br />
charges incurred by Buyer except as may be agreed upon in writing in<br />
advance by <strong>Mesa</strong> <strong>Labs</strong>.<br />
Limitation of Remedy: <strong>Mesa</strong> <strong>Labs</strong> shall not be liable for damages caused<br />
by delay in performance. The sole and exclusive remedy for breach of<br />
contract shall be limited to repair or replacement under the standard<br />
warranty clause. In no case shall <strong>Mesa</strong> <strong>Labs</strong> liability exceed the price to<br />
buyer of the specific goods manufactured by <strong>Mesa</strong> <strong>Labs</strong> giving rise to<br />
the cause of action. Buyer agrees that in no event shall <strong>Mesa</strong> <strong>Labs</strong><br />
liability extend to include incidental or consequential damages.<br />
came with your biological indicators for the proper incubation time.<br />
Immediately upon activation, place the indicator into one of the thirteen<br />
numbered incubation cavities (see Figure 2). Record the incubation<br />
start time and cavity number.<br />
Observe the color of the growth medium in the BI at regular intervals<br />
during incubation. A color change to yellow during the incubation time<br />
indicates bacterial growth (positive test). If the incubation time expires<br />
and no color change to yellow is observed, this indicates a negative test.<br />
<br />
Caution: if a positive control does not grow, do not use the remaining units<br />
from the box and contact your dealer immediately. A positive control that<br />
does not turn yellow is a serious problem. Fortunately, the causes are few: a<br />
grossly malfunctioning incubator, inadvertent sterilization of the control vial,<br />
inadvertent sterilization of the box of indicators, or improper storage. If the control is<br />
negative because of one of the latter two causes, do not use any of the other biological<br />
indicators from the same box.<br />
Figure 2 – Top of <strong>Incubator</strong><br />
Dispose of positive or negative BIs immediately per the instructions for<br />
use that accompany each box of indicators, or per your organization’s<br />
policy.<br />
Model <strong>1450</strong><br />
12<br />
Model <strong>1450</strong><br />
9
Maintenance & Service<br />
The in<br />
cubator requires no maintenance other<br />
than cleaning as<br />
necessary.<br />
Cleaning<br />
1 . Unplug the incubator before cleaning.<br />
2. To clean the exterior, use a cloth dampened with isopropyl<br />
alcohol.<br />
3. To clean the incubation and activation cavities, use a cotton<br />
swab dampened with isopropyl alcohol.<br />
Service<br />
The incubator is not field-servicable. In the event of an incubator<br />
malfunction, please contact your dealer immediately.<br />
When requesting service, please have ready the model and serial<br />
number of the incubator. The model and serial number are located on<br />
the bottom of the unit.<br />
Prior to returning any materials, a Return Goods Authorization (RGA)<br />
must be obtained from your dealer. Any materials returned without an<br />
RGA will be refused.<br />
!<br />
WARNING: DO NOT IMMERSE THE UNIT IN ANY LIQUID AND DO NOT SPRAY<br />
OR POUR LIQUID DIRECTLY ONTO THE UNIT. DOING SO MAY DAMAGE THE<br />
INCUBATOR AND VOID YOUR WARRANTY.<br />
Replacement Parts<br />
Description Quantity Required Part Number<br />
Power Supply 1<br />
P6-1000<br />
Temperature Verification<br />
The incubator, including the LED temperature display, is factory<br />
calibrated using a NIST traceable temperature standard and does not<br />
require user calibration.<br />
Incubation temperature can be verified by placing an NIST traceable<br />
thermometer into one of the incubation cavities and allowing 30<br />
minutes for temperature stabilization. The temperature reading should<br />
be within +/- 2°C of the incubator set-point temperature.<br />
Model <strong>1450</strong><br />
10<br />
Model <strong>1450</strong><br />
11