User manual Diagnostic system OBD Manual version 1.5 Eng
User manual Diagnostic system OBD Manual version 1.5 Eng
User manual Diagnostic system OBD Manual version 1.5 Eng

You also want an ePaper? Increase the reach of your titles
YUMPU automatically turns print PDFs into web optimized ePapers that Google loves.
<strong>Manual</strong><br />
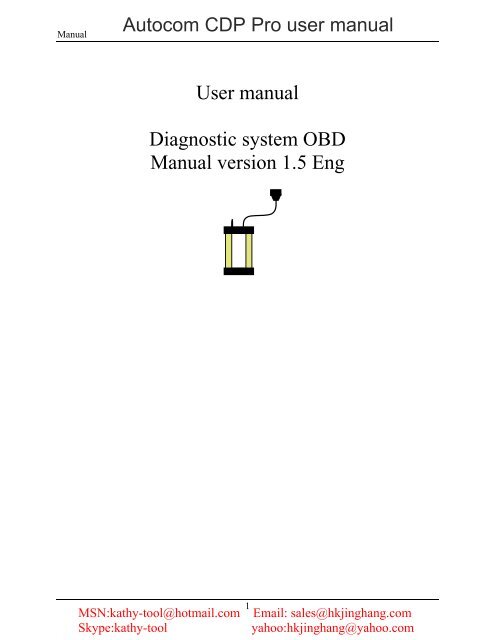
Autocom CDP Pro user <strong>manual</strong><br />
<strong>User</strong> <strong>manual</strong><br />
<strong>Diagnostic</strong> <strong>system</strong> <strong>OBD</strong><br />
<strong>Manual</strong> <strong>version</strong> <strong>1.5</strong> <strong>Eng</strong><br />
MSN:kathy-tool@hotmail.com<br />
Skype:kathy-tool<br />
1<br />
Email: sales@hkjinghang.com<br />
yahoo:hkjinghang@yahoo.com
<strong>Manual</strong><br />
www.hkjinghang.com<br />
JINGHANG TECHNOLOGY (HK) CO.,LTD.<br />
<strong>User</strong> <strong>manual</strong><br />
<strong>Diagnostic</strong> <strong>system</strong> <strong>OBD</strong> Release v<strong>1.5</strong><br />
Copyright © 2010 Autocom <strong>Diagnostic</strong> Partner AB<br />
MSN:kathy-tool@hotmail.com<br />
Skype:kathy-tool<br />
2<br />
Email: sales@hkjinghang.com<br />
yahoo:hkjinghang@yahoo.com
<strong>Manual</strong><br />
www.hkjinghang.com<br />
JINGHANG TECHNOLOGY (HK) CO.,LTD.<br />
Table of contents<br />
Table of contents ............................................................................................................................. 3<br />
1 Important information ........................................................................................................... 6<br />
1.1 Agreement ......................................................................................................... 6<br />
1.2 Copyright ........................................................................................................... 6<br />
1.3 Program <strong>version</strong>s .............................................................................................. 6<br />
1.4 Responsibility and liability ................................................................................. 6<br />
<strong>1.5</strong> Warranty ............................................................................................................ 6<br />
1.6 WEEE (Waste Electrical and Electronic Equipment) ......................................... 7<br />
2 System requirements .............................................................................................................. 8<br />
2.1 Minimum ............................................................................................................ 8<br />
2.2 Recommended .................................................................................................. 8<br />
2.3 Supplementary programs .................................................................................. 8<br />
3 Installation .............................................................................................................................. 9<br />
3.1 Installation using DVD ....................................................................................... 9<br />
4 Hardware .............................................................................................................................. 10<br />
4.1 Introduction ..................................................................................................... 10<br />
4.2 Connections .................................................................................................... 10<br />
5 Computer configuration ...................................................................................................... 11<br />
5.1 Bluetooth ......................................................................................................... 11<br />
5.2 USB ................................................................................................................. 12<br />
6 General use of the program ................................................................................................. 13<br />
6.1 Introduction ..................................................................................................... 13<br />
6.2 Program design ............................................................................................... 13<br />
6.3 Navigation ....................................................................................................... 14<br />
7 General functionality ........................................................................................................... 15<br />
7.1 Program help ................................................................................................... 15<br />
7.2 Save & print test report .................................................................................... 15<br />
7.3 Open saved test report .................................................................................... 15<br />
7.4 External programs ........................................................................................... 15<br />
7.5 Demo mode ..................................................................................................... 15<br />
7.6 License ............................................................................................................ 15<br />
8 Program configuration ........................................................................................................ 16<br />
8.1 Workshop information ..................................................................................... 16<br />
8.2 Language ........................................................................................................ 16<br />
8.3 Hardware settings ........................................................................................... 16<br />
MSN:kathy-tool@hotmail.com<br />
Skype:kathy-tool<br />
3<br />
Email: sales@hkjinghang.com<br />
yahoo:hkjinghang@yahoo.com
<strong>Manual</strong><br />
www.hkjinghang.com<br />
JINGHANG TECHNOLOGY (HK) CO.,LTD.<br />
9 Vehicle choice ........................................................................................................................ 17<br />
9.1 Introduction ..................................................................................................... 17<br />
9.2 Classic mode ................................................................................................... 17<br />
9.3 Information/Tree structure ............................................................................... 17<br />
9.4 History ............................................................................................................. 17<br />
10 <strong>OBD</strong> – On Board <strong>Diagnostic</strong>s .............................................................................................. 18<br />
10.1 Introduction ..................................................................................................... 18<br />
10.2 Connection ...................................................................................................... 18<br />
10.3 Distributed control <strong>system</strong>s ............................................................................. 18<br />
10.4 <strong>Diagnostic</strong> functions ........................................................................................ 18<br />
11 Generic <strong>OBD</strong> ......................................................................................................................... 23<br />
11.1 Introduction ..................................................................................................... 23<br />
11.2 Connecting to vehicle ...................................................................................... 23<br />
11.3 General use of the program ............................................................................ 23<br />
12 Technical specification ......................................................................................................... 27<br />
MSN:kathy-tool@hotmail.com<br />
Skype:kathy-tool<br />
4<br />
Email: sales@hkjinghang.com<br />
yahoo:hkjinghang@yahoo.com
<strong>Manual</strong><br />
www.hkjinghang.com<br />
JINGHANG TECHNOLOGY (HK) CO.,LTD.<br />
Thank you for choosing our products!<br />
We are certain that you will have great use of this diagnostic equipment for a long time. We will make sure that<br />
updated vehicle databases always are available, with the absolutely best coverage on your specific market.<br />
MSN:kathy-tool@hotmail.com<br />
Skype:kathy-tool<br />
5<br />
Email: sales@hkjinghang.com<br />
yahoo:hkjinghang@yahoo.com
<strong>Manual</strong><br />
www.hkjinghang.com<br />
JINGHANG TECHNOLOGY (HK) CO.,LTD.<br />
1 Important information<br />
Always read the user <strong>manual</strong> carefully before connecting, starting up, and using the diagnostic equipment, to<br />
eliminate any doubts and risks associated with the diagnostic equipment. All use, including connecting the diagnostic<br />
unit near the engine or ignition <strong>system</strong>, should take place when the engine is not running and when the ignition is off.<br />
Any person who hands over the diagnostic equipment to another person should also hand over safety instructions and<br />
necessary information for how the diagnostic equipment should be used according to its intended use.<br />
1.1 Agreement<br />
By using this product you accept the following terms:<br />
1.2 Copyright<br />
Software and data are the property of the supplier, and are protected against unauthorised copying by copyright<br />
legislation, international contract regulations, and other national rules. Copying or sales of data, or software or parts<br />
thereof, is punishable by law. In case of any violation, the supplier reserves the right to prosecute and demand<br />
compensation for damages.<br />
1.3 Program <strong>version</strong>s<br />
We always do the outmost to optimise our products to suit the market and region where the products are<br />
sold and used.<br />
As a step in this process, we have automated the setup of geographical preferences during the installation.<br />
The only choice the person installing the software has to do is to choose the applicable country.<br />
By making a correct choice of country during installation of the software the customer is ensured to have<br />
the best setup to fit regional conditions, regarding content of the vehicle database as well as the<br />
functionality of the program to fit the applicable vehicle population and local conditions.<br />
1.4 Responsibility and liability<br />
To the greatest possible extent, all data in the program is based on information from car manufacturers. The supplier<br />
does not guarantee that data or software are correct or complete. The supplier does not accept liability for damages<br />
caused by defective software or incorrect data. In all cases liability is limited to the amount that the buyer has paid<br />
for the product at the time of purchase. This exemption from liability does not include damages caused intentionally<br />
or by gross neglect on the part of the customer.<br />
<strong>1.5</strong> Warranty<br />
All use of hardware and/or software that has not been approved by the supplier is a modification of our products, and<br />
thus no warranties are valid. Our products may not be modified in any way. Only genuine accessories and spare parts<br />
may be used, which also applies to adapter cables. All breaches of this will void any claims. The diagnostic<br />
equipment may only be used with operative <strong>system</strong>s approved by the supplier. If the diagnostic equipment is used<br />
with an operative <strong>system</strong> that is not approved by the supplier, the warranty ceases to be valid. Also, the supplier does<br />
not accept any liability or responsibility for damages and consequences thereof that have arisen due to the use of a<br />
non-approved operative <strong>system</strong>.<br />
Note that the vehicle manufacturer's instructions must be followed when working on the vehicle. The supplier does<br />
not accept any liability or responsibility for damages and consequences thereof that have arisen due to not following<br />
the vehicle manufacturer's instructions for the vehicle.<br />
MSN:kathy-tool@hotmail.com<br />
Skype:kathy-tool<br />
6<br />
Email: sales@hkjinghang.com<br />
yahoo:hkjinghang@yahoo.com
<strong>Manual</strong><br />
www.hkjinghang.com<br />
JINGHANG TECHNOLOGY (HK) CO.,LTD.<br />
1.6 WEEE (Waste Electrical and Electronic<br />
Equipment)<br />
This label shows that the product is manufactured after August 13, 2005, and therefore it shall be<br />
recycled according to WEEE (EU Directive 2002/96/EC regarding waste from Electrical and<br />
Electronic equipment). Contact your local dealer for more information.<br />
MSN:kathy-tool@hotmail.com<br />
Skype:kathy-tool<br />
7<br />
Email: sales@hkjinghang.com<br />
yahoo:hkjinghang@yahoo.com
<strong>Manual</strong><br />
www.hkjinghang.com<br />
JINGHANG TECHNOLOGY (HK) CO.,LTD.<br />
2 System requirements<br />
2.1 Minimum<br />
Intel® Pentium® II 400 MHz (or similar)<br />
Windows 7, Windows Vista®, Windows 2003 Server, Windows® XP(*) SP3<br />
128-512 MB RAM (depending on operating <strong>system</strong>)<br />
500 MB free hard disk space<br />
Screen with resolution 800 x 600<br />
DVD-unit<br />
Bluetooth (SPP) or USB<br />
Microsoft .NET Framework 3.5 or later (included in installation)<br />
Adobe Acrobat Reader 4.0 or later<br />
2.2 Recommended<br />
Intel® Pentium® 4 1.7 GHz or better (or similar)<br />
Windows 7, Windows Vista®, Windows® XP(*) SP3<br />
1024-2048 MB RAM (depending on operating <strong>system</strong>)<br />
500 MB free hard disk space<br />
Screen with resolution 1024 x 768 or better<br />
DVD-unit<br />
Bluetooth (SPP) or USB<br />
Microsoft .NET Framework 3.5 or later (included in installation)<br />
Adobe Acrobat Reader 4.0 or later<br />
(*) Windows® XP Media Center Edition and its different <strong>version</strong> are not supported!<br />
Note! Both 32-bit and 64-bit operating <strong>system</strong>s are supported, note that 64-bit OS require special handling during<br />
installation of USB drivers.<br />
Note! The program can only be started from accounts with administrator or limited user rights. It is not possible to<br />
start the program from a Guest account.<br />
2.3 Supplementary programs<br />
Where do I find the necessary supplementary programs?<br />
- Microsoft .NET Framework 3.5<br />
http://www.microsoft.com<br />
- Adobe Acrobat Reader<br />
http://www.adobe.com<br />
MSN:kathy-tool@hotmail.com<br />
Skype:kathy-tool<br />
8<br />
Email: sales@hkjinghang.com<br />
yahoo:hkjinghang@yahoo.com
<strong>Manual</strong><br />
www.hkjinghang.com<br />
JINGHANG TECHNOLOGY (HK) CO.,LTD.<br />
3 Installation<br />
3.1 Installation using DVD<br />
NB! On certain computers, antivirus programs and other similar programs may sometimes cause the automatic<br />
start-up to not work or take a long time. In any such cases, deactivate these programs. Programs known to cause<br />
problems are McAfee VirusScan and ZoneAlarm. After installation, the antivirus programs can be reactivated.<br />
1. Insert the DVD in the computer's DVD reader. The installation starts automatically. (If the installation does not<br />
start, choose "Run" in the "Start"-menu and write D:\Start. Applies if the DVD reader is designated as unit D).<br />
2. Enter your Product-ID, serial number, and hardware key. Then choose country and press "Next" to continue.<br />
3. Check in the next window that correct product is chosen. From this window it is possible to show application<br />
tables, user <strong>manual</strong>s, release information, etc. This is done by choosing a document in the list and then pressing<br />
"View". Before continuing, it is important that you have read the <strong>system</strong> requirements. Press the button "View"<br />
under the heading "System requirements" to show the <strong>system</strong> requirements. Then confirm that you have read the<br />
<strong>system</strong> requirements and press "Next" to start the installation guide. Follow the guide to finish the installation.<br />
MSN:kathy-tool@hotmail.com<br />
Skype:kathy-tool<br />
9<br />
Email: sales@hkjinghang.com<br />
yahoo:hkjinghang@yahoo.com
<strong>Manual</strong><br />
www.hkjinghang.com<br />
JINGHANG TECHNOLOGY (HK) CO.,LTD.<br />
4 Hardware<br />
4.1 Introduction<br />
The diagnostic unit has built-in interfaces for most communications available on the market that are used for <strong>OBD</strong><br />
(On Board <strong>Diagnostic</strong>). For certain vehicle models, specific connectors are used for <strong>OBD</strong>. As accessories there are<br />
many unique cables enabling connection to the car's diagnostic connection.<br />
Connection to PC takes place using any of the alternatives USB (Universal Serial Bus) or Bluetooth (wireless<br />
communication).<br />
4.2 Connections<br />
1. Bluetooth antenna<br />
2. <strong>OBD</strong> 16-pin <strong>OBD</strong>-II connector (SAE J1962)<br />
3. Green/Yellow LED Yellow light Indicates communication using USB<br />
Green/Yellow LED Green light Indicates communication using Bluetooth<br />
4. Red LED Power<br />
5. Green LED Test<br />
6. USB-connection for PC<br />
1 2<br />
3 4 5 6<br />
MSN:kathy-tool@hotmail.com<br />
Skype:kathy-tool<br />
10<br />
Email: sales@hkjinghang.com<br />
yahoo:hkjinghang@yahoo.com
<strong>Manual</strong><br />
www.hkjinghang.com<br />
JINGHANG TECHNOLOGY (HK) CO.,LTD.<br />
5 Computer configuration<br />
5.1 Bluetooth<br />
5.1.1 Introduction<br />
To succeed with the Bluetooth configuration, the Bluetooth card in the computer must be installed correctly and<br />
support the service Bluetooth SPP – Serial Port Profile (Virtual Comport). 'Bluetooth card' refers to both internal<br />
Bluetooth cards that, e.g., are found in laptop computers as well as Bluetooth-USB-adapter and other types of<br />
Bluetooth cards. NB! For pin code/passkey, only "0" (one zero) shall be used.<br />
5.1.2 Configuration<br />
The following is a description of Bluetooth configuration. Note that the configuration may vary depending on the<br />
Bluetooth card in the computer.<br />
• Start the Bluetooth manager, usually by choosing Start -> Settings -> Control panel -> Bluetooth.<br />
• In the Bluetooth manager, choose to add new unit. Check that the diagnostic unit is connected to a vehicle or other<br />
type of voltage source (power source) before you proceed to search for Bluetooth units.<br />
• When the search is finished, a list is shown with the units that were found. Select and choose the diagnostic unit<br />
you want to add.<br />
MSN:kathy-tool@hotmail.com<br />
Skype:kathy-tool<br />
11<br />
Email: sales@hkjinghang.com<br />
yahoo:hkjinghang@yahoo.com
<strong>Manual</strong><br />
www.hkjinghang.com<br />
JINGHANG TECHNOLOGY (HK) CO.,LTD.<br />
• If you are asked to use passkey you shall use your own passkey. For passkey, only "0" (one zero) shall be used .<br />
• If everything went well the Bluetooth configuration is now finished, and you can go on to the chapter about<br />
program configuration and the section hardware settings to search for diagnostic unit.<br />
5.2 USB<br />
5.2.1 Introduction<br />
NB! It is important that the installation of software has been finished before performing the following steps.<br />
5.2.2 Microsoft Windows XP/Vista<br />
When installing on Microsoft Windows XP, and Vista, it is possible to pre-install the USB-drivers during the<br />
installation. If pre-installation has been chosen, installation of drivers takes place automatically when the diagnostic<br />
unit is connected for the first time. Regardless of if the drivers are pre-installed or not, the drivers are always copied<br />
to the program directory for the program and added in the subdirectory "/Drivers/USB/".<br />
MSN:kathy-tool@hotmail.com<br />
Skype:kathy-tool<br />
12<br />
Email: sales@hkjinghang.com<br />
yahoo:hkjinghang@yahoo.com
<strong>Manual</strong><br />
www.hkjinghang.com<br />
JINGHANG TECHNOLOGY (HK) CO.,LTD.<br />
6 General use of the program<br />
6.1 Introduction<br />
In order to start the program you double-click on the icon found on the desktop. It is also possible to start the<br />
program using the start menu. The user <strong>manual</strong>s are also grouped in the start menu. The program is designed to make<br />
it easy for you to use the program. Great effort has been put into making a user-friendly product where the user<br />
always is in focus.<br />
6.2 Program design<br />
The program is designed using of a number of elements that are found and look the same throughout the whole<br />
program. These are shown in the figure below.<br />
(1) Main menu: This menu contains the following submenus: File, Settings, External programs, and Help.<br />
Under the menu alternative "File", you find functions to open saved tests and to exit the program. Under<br />
Settings there are functions for entering workshop information, choosing language, as well as configuring<br />
the hardware.<br />
External programs contains links to third party programs, if such links are installed.<br />
The last menu alternative, which is Help, contains link to the program help, activation of demo mode,<br />
license handling, as well as information about the program.<br />
(2) At the top right in the program window you find general functions such as Generic <strong>OBD</strong>, a button to start<br />
the Help function, and an activity indicator.<br />
(3) The middle of the program shows the work area which is used to, among other things, present information.<br />
(4) The left button menu in the program is called function menu 1 and contains the different main functions you<br />
can choose. At the bottom in the menu there is a button to go back/exit. The function of the button depends<br />
on where in the program you are.<br />
(5) The button menu at the bottom right is called function menu 2 and contains the functions connected to the<br />
main function as well as that which is shown in the work area.<br />
(1)<br />
(2)<br />
(4)<br />
(3)<br />
(5)<br />
MSN:kathy-tool@hotmail.com<br />
Skype:kathy-tool<br />
13<br />
Email: sales@hkjinghang.com<br />
yahoo:hkjinghang@yahoo.com
<strong>Manual</strong><br />
www.hkjinghang.com<br />
JINGHANG TECHNOLOGY (HK) CO.,LTD.<br />
6.3 Navigation<br />
In order to facilitate navigation in the program, there are some supplements to what you normally find in other<br />
programs. An example is the red marker that shows where in the program you are, what you have chosen, or what is<br />
active. The marker is seen as a red frame. The red marker's function varies, depending on if you use the mouse or the<br />
keyboard to move around in the program. If you use the keyboard to navigate in the program, the red marker moves<br />
directly, e.g., to the button you choose.You can navigate by pressing the TAB-key or the arrow keys. In general, the<br />
arrows are used to navigate within a field or a work area. The TAB-key is used to switch between menus, etc. The<br />
button highlighted by the red marker is activated by pressing Enter . If you use the mouse, a dashed red marker is<br />
moved to the button or component that the mouse is over. First when you have pressed on, e.g., the button, then the<br />
whole red marker moves.<br />
MSN:kathy-tool@hotmail.com<br />
Skype:kathy-tool<br />
14<br />
Email: sales@hkjinghang.com<br />
yahoo:hkjinghang@yahoo.com
<strong>Manual</strong><br />
www.hkjinghang.com<br />
JINGHANG TECHNOLOGY (HK) CO.,LTD.<br />
7 General functionality<br />
7.1 Program help<br />
The easiest way to access help in the program is to press the help button in the program,found at the top right.<br />
Another way is to use the key "F1" on the keyboard. The same help in the form of a user <strong>manual</strong> (PDF) is also<br />
available using the start menu.<br />
7.2 Save & print test report<br />
To be able to give the customer a report of what was found and done to the car, it is possible to generate test reports<br />
in the program. These test reports can either be printed out immediately when you have done the test, or saved for<br />
future use. If you choose to save a test report, a PDF file is generated. It can be read using Adobe Acrobat Reader,<br />
which can be downloaded for free from www.adobe.com.<br />
Two different types of test reports can be saved: <strong>OBD</strong>-test, as well as Generic <strong>OBD</strong>. More information on its<br />
function is found ahead in the <strong>manual</strong>. To save or print a test report you press the button "Print/Save". The function<br />
may vary, depending which type of test you have chosen to save or print. Common for all tests is that you can add<br />
information about the test that was done, e.g., information about the car, driving distance, or general information<br />
about what has been fixed. For <strong>OBD</strong>-test it is also possible to choose which <strong>system</strong>s you want to include in the test<br />
report, on the condition that several <strong>system</strong>s have been tested. This makes it easy to compile a complete test report of<br />
all <strong>system</strong>s in the car. It is also possible to print the help instructions available for certain diagnostic functions.<br />
7.3 Open saved test report<br />
To access saved test reports, the easiest way is to go to the main menu and choose "File" and then "Open saved test".<br />
If the suggested search path has been used to save a test report it is found in the directory that opens. Select test<br />
report to be opened, and click on "Open".<br />
7.4 External programs<br />
Depending on the type of installation and license, the program may include links to other external programs. These<br />
may be, e.g., information <strong>system</strong>s, parts catalogues, etc.<br />
7.5 Demo mode<br />
By enabling the program in demo mode you can run most functions in a simulation. Note that regardless of which car<br />
or function you chose, the same simulated information and values will be shown. When the program is enabled in<br />
demo mode, a dialogue is shown before you choose function that tells you that the program is running in demo<br />
mode.<br />
7.6 License<br />
You need a valid hardware key to be able to use the program. Should it be that you need to enter the hardware key at<br />
a later time, go to the main menu and choose "Help", and then "License".<br />
Enter the hardware key consisting of twelve (12) letters and press "OK".<br />
MSN:kathy-tool@hotmail.com<br />
Skype:kathy-tool<br />
15<br />
Email: sales@hkjinghang.com<br />
yahoo:hkjinghang@yahoo.com
<strong>Manual</strong><br />
www.hkjinghang.com<br />
JINGHANG TECHNOLOGY (HK) CO.,LTD.<br />
8 Program configuration<br />
Functions for program configuration are accessed using the main menu and "Settings".<br />
8.1 Workshop information<br />
Under the tab "Workshop" you can change/enter information about the workshop as well as add mechanics. This<br />
information is used, among others, when you print or save test reports. To add a new mechanic you click on the plus<br />
(+). Then a window appears where you can enter information. To delete a mechanic, select the name in the list and<br />
then click on the recycle bin.<br />
8.2 Language<br />
Under the tab "Language" you can choose the languages installed in the program. Choose language and then press<br />
"OK" to save the selection. Note that you have to restart the program after choosing new language, only then does<br />
the language selection change.<br />
8.3 Hardware settings<br />
Under the tab "Hardware configuration" you can set COM-port for the diagnostic unit as well as update connected<br />
diagnostic unit with new software (firmware). There are two ways to set COM-port: "Automatic" and "<strong>Manual</strong>".<br />
If you choose "Automatic", the program automatically searches for a diagnostic unit to connect to and then shows<br />
information about the diagnostic unit that was found. In "<strong>Manual</strong>" mode, it is possible to <strong>manual</strong>ly choose a specific<br />
COM-port as well as test the connection by pressing "Test". Note that for both cases, the diagnostic unit must be<br />
configured to the computer as well as supplied with voltage (power).<br />
If the program still does not find a diagnostic unit, you may have to troubleshoot using the unit manager. In that<br />
case, contact your distributor for more information. Also see the chapter on Computer configuration.<br />
MSN:kathy-tool@hotmail.com<br />
Skype:kathy-tool<br />
16<br />
Email: sales@hkjinghang.com<br />
yahoo:hkjinghang@yahoo.com
<strong>Manual</strong><br />
www.hkjinghang.com<br />
JINGHANG TECHNOLOGY (HK) CO.,LTD.<br />
9 Vehicle choice<br />
9.1 Introduction<br />
There are three (3) different ways to choose vehicle: classic mode, information/tree structure, as well as history.<br />
From all modes you can chose to start a test. The choice remains when changing between the different display<br />
modes. For example, you can chose vehicle in classic mode and change to information/tree structure to get more<br />
detailed information.<br />
9.2 Classic mode<br />
In classic mode the different vehicle choices are shown as lists. This alternative gives a fast overview of what<br />
<strong>system</strong>s there are. Choose the car you want for troubleshooting and click on the desired function in function menu 2.<br />
9.3 Information/Tree structure<br />
This mode shows the same information as in classic mode, but in addition to that also the diagnostic functions that<br />
can be performed on the vehicle, as well as an information section. By right-clicking in the tree structure, you can<br />
choose to start a new test as well as collapse the tree. The information section consists of, among others, position of<br />
diagnostic socket, engine code, as well as which cable shall be used. On certain vehicles there is also a photo of the<br />
diagnostic position.<br />
9.4 History<br />
This mode shows all previously used vehicles. Sorting is done by clicking on each column. To delete the whole list,<br />
press the recycle bin. To delete a specific vehicle, select the vehicle you want to delete from the list, right-click and<br />
chose "Delete". Note that the list for history is deleted when updating the software.<br />
MSN:kathy-tool@hotmail.com<br />
Skype:kathy-tool<br />
17<br />
Email: sales@hkjinghang.com<br />
yahoo:hkjinghang@yahoo.com
<strong>Manual</strong><br />
www.hkjinghang.com<br />
JINGHANG TECHNOLOGY (HK) CO.,LTD.<br />
10 <strong>OBD</strong> – On Board <strong>Diagnostic</strong>s<br />
10.1 Introduction<br />
A modern vehicle uses electronic control <strong>system</strong>s, e.g., fuel control <strong>system</strong>s, brake control <strong>system</strong>s, climate control<br />
<strong>system</strong>s, and control <strong>system</strong>s for automatic transmissions to control the vehicle's different functions. The control<br />
<strong>system</strong>s use a variety of sensors and actuators (input and output signals) to control the control <strong>system</strong>'s function.<br />
When a sensor is defective, it may result in the sensor not being able to report correct information to the control<br />
<strong>system</strong>, which affects the possibility to correctly calculate an output signal to the <strong>system</strong>'s different actuators. This<br />
results in incorrect or lost function for the control <strong>system</strong>.<br />
<strong>OBD</strong> is really about monitoring these input and output signals to assess the control <strong>system</strong>'s functionality. Thus, in<br />
addition to controlling a certain function in the vehicle based on the control <strong>system</strong>'s input and output signals, the<br />
<strong>system</strong> has a built-in self-diagnosis, the function of which is to monitor the control <strong>system</strong>'s own function and<br />
indicate to the user that something is wrong. This normally takes place with a flashing <strong>system</strong> symbol/MIL<br />
(Malfunction Indicator Lamp) in the vehicle's instrumentation, or other indication to the driver that the vehicle<br />
should be brought to a workshop. Thus, the <strong>OBD</strong>-<strong>system</strong> indicates that something in the <strong>system</strong> is wrong, not what<br />
or how serious the fault is. To obtain information about what is wrong, a special-purpose tool has to be connected to<br />
the vehicle's diagnostic socket and the required information about the <strong>system</strong>'s status has to be read out.<br />
10.2 Connection<br />
Throughout the years, vehicle manufacturers have had different ways of connecting troubleshooting tools to their<br />
vehicles. The connection/connector has been developed in-house to fit the individual vehicle manufacturer's need for<br />
connection. Since the middle of the nineties several vehicle manufacturers have chosen to use the standardised<br />
diagnostic socket J1962(SAE)/15031-3(ISO), depending on legal requirements in the USA/1996 and in the EU/2001<br />
for gasoline-powered vehicles up to 3,500 kg, as well as USA/2004 and EU/2005/2006 for diesel-powered vehicles<br />
up to 3,500 kg. The vehicle manufacturer must use the standardised diagnostic socket to enable primarily<br />
government authorities to connect with a general tool and read off statutory emission-related information from the<br />
vehicle. This is still not a requirement for other control <strong>system</strong>s in the vehicle, such as brake control <strong>system</strong>s or<br />
climate control <strong>system</strong>s,however, a majority of vehicle manufacturers have decided to use one type of connection in<br />
their vehicles.<br />
10.3 Distributed control <strong>system</strong>s<br />
Control <strong>system</strong>s may be so-called distributed control <strong>system</strong>s, meaning that they handle several <strong>system</strong> functions in<br />
the vehicle. This is managed in many different ways by different vehicle manufacturers, e.g., by grouping all<br />
functions around the right A-pillar in a control <strong>system</strong>, such as external rear-view mirror, front side airbag, and door<br />
electronics such as power windows, locks, and side airbag. The designation of such a <strong>system</strong> may become ”Airbag,<br />
right front”. The designation may be due to the airbag being regarded as the most critical <strong>system</strong> in the context, but<br />
information from the control <strong>system</strong> may also be related to, e.g., power windows and not only airbag. In cases where<br />
the control <strong>system</strong> is a so-called distributed control <strong>system</strong>, this shall be stated in the information for the chosen<br />
control <strong>system</strong> in the diagnostic <strong>system</strong>.<br />
10.4 <strong>Diagnostic</strong> functions<br />
The diagnostic <strong>system</strong> is able to perform the functions, ”Read fault codes”, ”Delete fault codes”, ”Real time data”,<br />
”Component activation”, ”Adjust”, and ”Write to ECU”. That which is possible to do depends on what is available in<br />
the control <strong>system</strong> in question. This varies between different control <strong>system</strong>s, but also between vehicle<br />
manufacturers, where strategies are different for what information is required to maintain its vehicles on the<br />
aftermarket. The terms ”Read fault codes”, ”Delete fault codes”, ”Real time data”, ”Component activation”,<br />
MSN:kathy-tool@hotmail.com<br />
Skype:kathy-tool<br />
18<br />
Email: sales@hkjinghang.com<br />
yahoo:hkjinghang@yahoo.com
<strong>Manual</strong><br />
www.hkjinghang.com<br />
JINGHANG TECHNOLOGY (HK) CO.,LTD.<br />
”Adjust”, and ”Write to ECU” are found in this diagnostic <strong>system</strong>, but may be described differently in other<br />
diagnostic tools available on the market.<br />
10.4.1 DTC - Read fault codes<br />
Fault codes consists of information stored when the <strong>OBD</strong>-<strong>system</strong> senses that the control <strong>system</strong> works outside valid<br />
limit value. When the trouble code is stored, in principle this means that the malfunction lamp is lit in the vehicle's<br />
instrumentation. Malfunction lamp is most often not available for all control <strong>system</strong>s in the vehicle, but normally<br />
only for <strong>system</strong>s that affect the vehicle with regards to operation and safety. Other <strong>system</strong>s store fault codes, but it is<br />
customer requests based on malfunction symptoms in the control <strong>system</strong>'s function that is the basis for reading out<br />
fault codes.<br />
Read-outs of fault codes from the vehicle's control <strong>system</strong> may be presented in different ways depending on how<br />
much information that the vehicle's control <strong>system</strong> can supply. In most cases the presentation shows a fault code<br />
number, component description, and information about the fault code's status, that is, if it is ”Permanent” or<br />
”Intermittent”.<br />
Ex.<br />
C1016 Brake light switch, intermittent<br />
In some cases there is additional fault description in the form of, e.g., short-circuiting to ground or open circuit.<br />
Ex.<br />
C1016 Brake light switch, intermittent<br />
- Open circuit<br />
More information about so-called ”frozen data”, i.e., data that shows parts of the vehicle's status when the problem<br />
occurred, such as engine temperature or rpm, may appear.<br />
Ex.<br />
C1016 Brake light switch, intermittent<br />
- Open circuit<br />
Vehicle speed 87 km/h<br />
Brake pedal position On<br />
Which information and to what extent the information is presented in the diagnostic <strong>system</strong> depends on what the<br />
vehicle's control <strong>system</strong> is able to present.<br />
10.4.2 DTC - Delete trouble codes<br />
”Deleting trouble codes” will delete saved malfunction information from the control <strong>system</strong>'s memory. In most cases<br />
the control <strong>system</strong>'s memory is deleted directly, however, there are control <strong>system</strong>s that first require an action from a<br />
connected diagnostic <strong>system</strong>, then to be followed by a mechanical action, for example. ”Ignition off for 10 seconds”<br />
thereafter ”Ignition on”. When mechanical or other action is required, this shall be stated in the information for the<br />
chosen control <strong>system</strong> in the diagnostic <strong>system</strong>. When trouble code recurs immediately when reading trouble codes<br />
after deleting, it is likely that the trouble code is permanent and that the <strong>OBD</strong>-<strong>system</strong> senses the malfunction during<br />
its self-test and immediately stores the trouble code again.<br />
MSN:kathy-tool@hotmail.com<br />
Skype:kathy-tool<br />
19<br />
Email: sales@hkjinghang.com<br />
yahoo:hkjinghang@yahoo.com
<strong>Manual</strong><br />
www.hkjinghang.com<br />
JINGHANG TECHNOLOGY (HK) CO.,LTD.<br />
10.4.3 RTD - Real time data<br />
”Real time data” is a partial quantity of the input and output signals that the control <strong>system</strong> uses to calculate and<br />
regulate its control. Real time data presents how the control <strong>system</strong> experiences the input signals that are the basis for<br />
what the output signals should look like.<br />
In diagnostic <strong>system</strong>s, real time data may be presented in different ways when different input and output signals are<br />
suitable for analysis in different ways. For this purpose, the presentation may be a graph or a numerical list. The<br />
predefined groups found in the diagnostic <strong>system</strong> is the most optimal grouping from an update perspective. That is,<br />
the or those parameters that are presented at the same time are presented/updated as fast as possible. The number of<br />
parameters that are presented together and updating (reading) frequency in the predefined groups vary depending on<br />
the control <strong>system</strong>'s design and not the diagnostic <strong>system</strong>. Using the diagnostic <strong>system</strong>, it is possible to create a<br />
”customer defined” group composed of different parameters, and these groups can also be presented in the form of a<br />
graph or numerical list.<br />
Note! Creating a ”Customer defined” group may mean that the updating (reading) frequency of real time data<br />
deteriorates radically. Keep this in mind, primarily when presenting components that are to be changed cyclically,<br />
such as lambda (oxygen) sensors. In a worst case, the diagnostic <strong>system</strong> can update real time data from the lambda<br />
(oxygen) sensor at the same time in its cycle, which then results in presentation of a constant value for a component<br />
that is expected to change periodically.<br />
To show display mode, use function buttons (1) and (2). Button (1) to show numerical list and button (2) to show<br />
graphs. Parameters without numerical values, e.g., status Active/Inactive, are shown as text even in graph mode.<br />
Button (3) opens a list with all parameters that are available in the control <strong>system</strong>. By selecting parameters and<br />
moving to selected parameters with the arrow keys (5) you create a personally defined list. Use the recycle bin (4) to<br />
empty the list. When the list is done, use the buttons (1) and (2) to show the real time data.<br />
(5)<br />
(4)<br />
(1) (2) (3)<br />
MSN:kathy-tool@hotmail.com<br />
Skype:kathy-tool<br />
20<br />
Email: sales@hkjinghang.com<br />
yahoo:hkjinghang@yahoo.com
<strong>Manual</strong><br />
www.hkjinghang.com<br />
JINGHANG TECHNOLOGY (HK) CO.,LTD.<br />
10.4.4 ACT - Component activation<br />
”Component activation” is a way for the diagnostic <strong>system</strong> to force the control <strong>system</strong> to bypass its own control<br />
function and to let the diagnostic <strong>system</strong> control/change the output signal. In this way, the diagnostic <strong>system</strong> can<br />
”force start”, e.g, the engine's cooling fan. Which components and how activation is designed depends on the control<br />
<strong>system</strong>'s design. In most activation cases the diagnostic <strong>system</strong> presents a number of components that are possible to<br />
active, the choice of component controls what is activated in the vehicle. It is also possible that the diagnostic <strong>system</strong><br />
only has the choice to start the activation, then the control <strong>system</strong> starts a cyclical activation of different components<br />
for the control <strong>system</strong>, which cannot be affected except that it is possible to cancel the cycle. Some actuators require<br />
a certain vehicle status to be activated, e.g., that the engine is running. The basic mode is always ”<strong>Eng</strong>ine<br />
off”/”Ignition on”. If other conditions apply, this is stated either in the connection instructions or in an information<br />
dialogue in connection with activation. Certain activations are time-fixed and cannot be cancelled. A sequence<br />
indicator (5) is shown in these cases. In other cases activations are controlled with buttons (1), (2), (3), and (4) in the<br />
work area.<br />
(1) (2) (3) (4)<br />
(5)<br />
10.4.5 ADJ - Adjust<br />
”Adjust” is an advanced function where the diagnostic <strong>system</strong> is used to change the control <strong>system</strong>'s functionality,<br />
temporarily turn off functions in the control <strong>system</strong>, or control <strong>system</strong> functions in the control <strong>system</strong>. These<br />
functions may be required to finish replacement/repair of defective components or when doing service work. Before<br />
an adjustment function is performed, it is important to read through the help instructions and to follow the<br />
instructions in the diagnostic <strong>system</strong>. Not following instructions and directions from the diagnostic <strong>system</strong> means<br />
risk of damaging the vehicle's control <strong>system</strong>.<br />
MSN:kathy-tool@hotmail.com<br />
Skype:kathy-tool<br />
21<br />
Email: sales@hkjinghang.com<br />
yahoo:hkjinghang@yahoo.com
<strong>Manual</strong><br />
www.hkjinghang.com<br />
JINGHANG TECHNOLOGY (HK) CO.,LTD.<br />
10.4.6 COD - Write to ECU<br />
The function ”Write to ECU”, also called coding, is an advanced function where the diagnostic <strong>system</strong> is sued to add<br />
new information to the control <strong>system</strong>. Examples of coding functions are injector coding, key coding, or replacement<br />
of a complete control <strong>system</strong>/actuator. Before a coding function is performed, it is important to read through the help<br />
instructions and to follow the instructions in the diagnostic <strong>system</strong>. Not following instructions and directions from<br />
the diagnostic <strong>system</strong> means risk of damaging the vehicle's control <strong>system</strong>.<br />
10.4.7 ISS (Intelligent System Scan)<br />
For some vehicle brands there is ISS (Intelligent System Scan). For the vehicle brands where ISS is available, there<br />
is a <strong>system</strong> choice which is called “All Systems”, that is always found at the top in the choice of <strong>system</strong> type.<br />
When you have chosen this <strong>system</strong> type, the ISS button is activated in the right corner at the bottom.<br />
The function scan through the control <strong>system</strong>s that are chosen/marked in the list in ISS. The scan is started with the<br />
button in the right corner at the bottom. Communication is established with the control units and the software reads<br />
out fault codes stored in the control <strong>system</strong>s. The result is presented with one of four colors marked for the chosen<br />
control <strong>system</strong>s.<br />
Green implies that the control <strong>system</strong> answers correctly and there are no fault codes stored.<br />
Red implies that the control <strong>system</strong> answers correctly with fault codes stored in the <strong>system</strong>.<br />
Orange implies that it is not possible to identify the control <strong>system</strong> in a single-valued way. The user must<br />
make a choice.<br />
Grey implies that the control <strong>system</strong> does not answer.<br />
To see the stored fault codes, click on the arrow for each respective <strong>system</strong>. It is possible to erase fault codes by<br />
clicking on the symbol for erasing fault codes in the right corner at the bottom. It is also possible to go straight to<br />
complete <strong>OBD</strong>. There are further instructions in the software for each respective part.<br />
Glossary<br />
Permanent: Irreversible – Present<br />
Intermittent: Periodically recurring – Comes and goes<br />
<strong>OBD</strong>: On Board <strong>Diagnostic</strong>s<br />
MIL: Malfunction Indicator Lamp – Lamp for indicating malfunction<br />
DTC: <strong>Diagnostic</strong> Trouble Code – Fault code<br />
RTD: Real Time Data – Real time data<br />
ACT: Activation – Activation<br />
ADJ: Adjustment – Adjustment<br />
COD: Coding – Coding<br />
ECU: Electronic Control Unit – Control <strong>system</strong>, controller (actuator)<br />
SAE: Society of Automotive <strong>Eng</strong>ineers<br />
ISO: International Organization for Standardization<br />
MSN:kathy-tool@hotmail.com<br />
Skype:kathy-tool<br />
22<br />
Email: sales@hkjinghang.com<br />
yahoo:hkjinghang@yahoo.com
<strong>Manual</strong><br />
www.hkjinghang.com<br />
JINGHANG TECHNOLOGY (HK) CO.,LTD.<br />
11 Generic <strong>OBD</strong><br />
11.1 Introduction<br />
Generic <strong>OBD</strong> is a program used to read out data from the car's built-in statutory diagnostic function, the primary<br />
function of which is to monitor emission-related components' function. In Europe this standard function is called<br />
e<strong>OBD</strong>, in the USA it is called <strong>OBD</strong>2, and in Japan it is called J<strong>OBD</strong>. We have decided to collect these standards in<br />
one and the same software. It also contains all standards for reading out statutory <strong>OBD</strong> on heavy vehicles.<br />
11.2 Connecting to vehicle<br />
Immediately when G<strong>OBD</strong> is chosen, either using the function key in the top right corner or using the car selection,<br />
connection to the vehicle is started. Therefore, it is important that the vehicle has been prepared for diagnosis before<br />
you press the button. The vehicle shall have the ignition on or the engine running to enable connection to all <strong>system</strong>s.<br />
11.3 General use of the program<br />
The program is controlled using the function buttons in function menu 1, function menu 2, and with buttons in the<br />
work area. Each function/mode is described below. Generic <strong>OBD</strong> is available in two user levels. To change level, go<br />
to the Settings menu and select/deselect “Generic <strong>OBD</strong> Advanced mode”. When the program is in Advanced mode<br />
all functions are available. In <strong>User</strong> mode functions for legislated verification of the vehicle manufacturer is hidden.<br />
We highly recommend <strong>User</strong> mode for use in workshops and with the intention to diagnose the vehicle. Note that<br />
when the car does not support chosen function/mode, then ”not supported by vehicle” is shown.<br />
11.3.1 Information<br />
The first window that appears is the information window containing general information about the vehicle you are<br />
connected to.<br />
Available control units. The list with available control units includes all those control units that support the e<strong>OBD</strong><br />
standard.<br />
Information. In the list under the heading information, specific data is shown for the chosen ECU. To choose<br />
another ECU, click on it in the list with available control units. This box shows three different values, such as:<br />
MIL status, quantity of fault codes (permanent), as well as which communication standard is being used.<br />
Main information. Main information shows which communication type that the vehicle uses to communicate and<br />
the total quantity of fault codes from all control units. This also shows if the MIL is lit.<br />
Readiness tests. The list for readiness tests shows tests for chosen ECU, and if they are supported by the control<br />
unit. The different values that can be assumed are done or not done. The following tests are standard in <strong>OBD</strong><br />
II/e<strong>OBD</strong>:<br />
• Misfires<br />
• Fuel <strong>system</strong><br />
• Component test<br />
• Catalytic converter<br />
• Preheated catalytic converter<br />
• EVAP<br />
• Secondary air <strong>system</strong><br />
• AC-<strong>system</strong><br />
• Preheated lambda (oxygen) sensor<br />
• EGR-<strong>system</strong><br />
MSN:kathy-tool@hotmail.com<br />
Skype:kathy-tool<br />
23<br />
Email: sales@hkjinghang.com<br />
yahoo:hkjinghang@yahoo.com
<strong>Manual</strong><br />
www.hkjinghang.com<br />
JINGHANG TECHNOLOGY (HK) CO.,LTD.<br />
11.3.2 Reading fault codes<br />
This lists both permanent and intermittent fault codes from the control units that support the e<strong>OBD</strong> standard. They<br />
are shown with ECU-number, fault code number, as well as a description of the fault code in plain text.<br />
Permanent fault codes (1). The fault codes shown in this list are stored fault codes.<br />
Intermittent fault codes (2). The fault codes shown in this list are fault codes that must be set for a certain<br />
time or a certain number of times to be stored as a permanent fault code.<br />
It is possible to save and print a list with fault codes (3).<br />
(1)<br />
(2)<br />
(3)<br />
11.3.3 Deleting diagnostic information<br />
With this function you can delete fault codes and diagnostic information. Pressing the button delete will delete the<br />
fault codes shown under reading fault codes. If this should fail, a message is shown detailing which control units<br />
have deleted successfully and which have failed to delete. If all control units successfully delete diagnostic<br />
information, a message is shown telling you that all went well. This function not only deletes fault codes, it also<br />
deletes the readiness tests as well as frozen data. To perform the readiness tests again, the car has to be run through<br />
driving cycles. Some tests are more advanced than other, and therefore take longer time to complete.<br />
MSN:kathy-tool@hotmail.com<br />
Skype:kathy-tool<br />
24<br />
Email: sales@hkjinghang.com<br />
yahoo:hkjinghang@yahoo.com
<strong>Manual</strong><br />
www.hkjinghang.com<br />
JINGHANG TECHNOLOGY (HK) CO.,LTD.<br />
11.3.4 Real time parameters<br />
Here you can read data from the chosen ECU and chosen value. The values are updated continuously. If a value is<br />
chosen the activity indicator will start to spin again in the top right corner of the window that indicates that<br />
continuous reading from the vehicle is in progress.<br />
11.3.4.1 Data list<br />
The function consists of three different parts, Values, Current data, and Information. The value list lists the real time<br />
parameters that the user can chose, arranged per ECU. The current data list includes the chosen values that the user<br />
has chosen, and the information box shows information about the values that have additional explanation. To be able<br />
to see a value, it must be chosen in the box under the heading values. All these values do not have a number value as<br />
a result, it may also be a text message, or a value that refers to a text. In order to know if the value refers to a text or a<br />
specific value, you can check this in the column for unit. If it reads INFO, you can click on this row and information<br />
about the value is shown in the box for information.<br />
11.3.4.2 Graph<br />
Another function is that you can see a graph of up to three chosen values from the list for current data. To chose<br />
these, click on the row in the current data list with the value you are interested in. If it is not chosen this may be due<br />
to that the chosen value cannot be shown in a graph. A hint informing that the value cannot be chosen is shown to get<br />
quick information about this. Then, when one to three values are chosen in the list you can press on the tab graph.<br />
When this is done, the graph is shown. With the graph function it is possible to stop and start the graph. It is also<br />
possible to go to the beginning or end of the graph. Min. and Max. values change continuously during the graph<br />
cycle.<br />
11.3.5 Frozen data<br />
Here you can read stored data values belonging to permanent fault codes from different control units. Control units<br />
with stored fault codes are shown in the list ”Available control units”. Values belonging to a chosen ECU are shown<br />
in a list. When the fault code is set, current data is stored in the control unit, which then can be read out and used<br />
when troubleshooting the vehicle. The list number states which list is shown. A fault code can store up to 255<br />
different lists. The user can scroll between these lists with the buttons Previous and Next.<br />
MSN:kathy-tool@hotmail.com<br />
Skype:kathy-tool<br />
25<br />
Email: sales@hkjinghang.com<br />
yahoo:hkjinghang@yahoo.com
<strong>Manual</strong><br />
www.hkjinghang.com<br />
JINGHANG TECHNOLOGY (HK) CO.,LTD.<br />
11.3.6 Lambda<br />
In Lambda you can read out values from the lambda (oxygen) sensor. Values that can be chosen are found in the list<br />
”Oxygen sensors”. These can be chosen and are then added to the list ”Values”, where they are read continuously.<br />
The recycle bin empties the list with values.<br />
11.3.7 Non-continuous tests<br />
These test values are read when the button for the function is pressed down and are indicated with TID- and CIDnumbers<br />
that are defined by the vehicle supplier. The column Results indicates if the test has an approved value or a<br />
non-approved value. If there are no limit values, then ”---” is shown in the column. To interpret the values, the user<br />
of the program is referred to the vehicle's documentation.<br />
11.3.8 <strong>Diagnostic</strong> check<br />
The list ”Tests” includes the tests that are available per ECU. The standardised functions are presented with a text,<br />
while others are presented with TID-number and the text ”Car specific”. To see a test, click on the test in the list.<br />
Then the test will be moved to the value list. The recycle bin empties the list with tests.<br />
11.3.9 Car information<br />
This function can show three manufacturer-specified values per ECU, and these are:<br />
• Chassis number<br />
• Calibration identification number<br />
• Calibration verification number<br />
MSN:kathy-tool@hotmail.com<br />
Skype:kathy-tool<br />
26<br />
Email: sales@hkjinghang.com<br />
yahoo:hkjinghang@yahoo.com
<strong>Manual</strong><br />
www.hkjinghang.com<br />
JINGHANG TECHNOLOGY (HK) CO.,LTD.<br />
12 Technical specification<br />
• Meets EU Directive 89/336/EEG and 73/23/EEG<br />
• Dimensions: 180 x 90 x 30 (mm)<br />
• Weight: 0.5 kg<br />
• Voltage feed: 10-32 Volt<br />
• Current consumption: 100 mA<br />
• Operating temperature: 0-50 ºC<br />
MSN:kathy-tool@hotmail.com<br />
Skype:kathy-tool<br />
27<br />
Email: sales@hkjinghang.com<br />
yahoo:hkjinghang@yahoo.com