G-SCAN USER MANUAL.pdf - Jinghang Technology (HK) Co.,Ltd
G-SCAN USER MANUAL.pdf - Jinghang Technology (HK) Co.,Ltd
G-SCAN USER MANUAL.pdf - Jinghang Technology (HK) Co.,Ltd

Create successful ePaper yourself
Turn your PDF publications into a flip-book with our unique Google optimized e-Paper software.
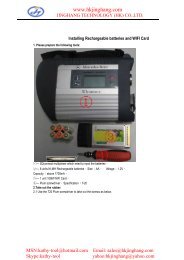
www.hkjinghang.comJINGHANG TECHNOLOGY (<strong>HK</strong>) CO.,LTD.ABOUT USWelcome to JINGHANG TECHNOLOGY (<strong>HK</strong>) CO.,LTD !We are professional producer and exporter auto diagnostic tools in China,located in shenzhen city. we supply all kinds of Launch x431 scanners,Car key programmer, auto diagnostic tools, ECU tuning tool, codescanner, airbag reset kit, odometer correction kit, Eprom programmer andadapters, auto dashboard repair parts, motocycle scanner, obd ii cables,fuel injector cleaner and tester and other auto tools.Now the below is the details of product instructions,Hope you have a good reading.Regards<strong>Jinghang</strong> <strong>Technology</strong> <strong>Co</strong>mpanyMSN:kathy-tool@hotmail.comSkype:kathy-toolEmail: sales@hkjinghang.comyahoo:hkjinghang@yahoo.com
G-scan User Manualwww.hkjinghang.com<strong>Co</strong>ntentsChapter 1. Getting Started with G-Scan 3Read me first 4Introduction to G-Scan 5Safety Warnings and Cautions 6Warnings for environment protection 8Chapter 2. G-Scan Basic Functions 10Specifications 11Parts and <strong>Co</strong>mponents 12Details of the base unit 19Power supply to G-Scan 22Recharge Indications 25<strong>Co</strong>nnecting with the car 26Power On/Off 28Chapter 3. G-Scan Basic Operations 29Main menu and basic tools 30Flight Recording 35OBD-II and EOBD 38Vehicle Diagnosis 44<strong>Co</strong>nfiguration 45Om-Screen User’s Guide 56MSN:kathy-tool@hotmail.comSkype:kathy-tool1Email: sales@hkjinghang.comyahoo:hkjinghang@yahoo.com
G-scan User Manualwww.hkjinghang.comChapter 4. G-Scan PC Utility Software 57Installation and Removal 58Main menu 64Recorded Data Viewer 66Captured Screen Viewer 76Software Update 81SD Card Recovery 86PC Utility <strong>Co</strong>nfiguration 93Chapter 5. Appendix 99Lithium-ion Battery Replacement 100Cigarette Lighter Fuse Replacement 103G-Scan OS Update 104G-Scan Limited Warranty 108MSN:kathy-tool@hotmail.comSkype:kathy-tool2Email: sales@hkjinghang.comyahoo:hkjinghang@yahoo.com
G-scan User Manualwww.hkjinghang.comChapter 1. Getting started with G-scan1.1. Read me first1.2. Introduction to G-scan1.3. Safety warnings and cautions1.4. Warnings for environment protectionMSN:kathy-tool@hotmail.comSkype:kathy-tool3Email: sales@hkjinghang.comyahoo:hkjinghang@yahoo.com
G-scan User Manualwww.hkjinghang.com1.1 Read me firstGetting started with G-ScanAA-1-1. Read me firstPreface• Thank you for purchasing G-Scan supplied by GiT(Global Information <strong>Technology</strong> <strong>Co</strong>., <strong>Ltd</strong>)• This manual contains information needed for using G-Scan. We recommend you to read thismanual and comprehend the provided functionality before start using G-Scan in order to get themaximum performance out of the product.Notice on intellectual property• GiT owns the intellectual property including but not limited to patents, trademarks and copyrightcontained in this user’s manual.• No part of this manual may be photocopied, reproduced, or translated to another language in anyway without the prior written consent of GiT.• Purchase of this user’s manual shall not be assumed as granting or transferring the rights toutilize intellectual property of GiT contained in this manual.• G-scan is the registered trademark of GiT (Global Information <strong>Technology</strong> <strong>Co</strong>., <strong>Ltd</strong>.).c 2007, Global Information <strong>Technology</strong> <strong>Co</strong>., <strong>Ltd</strong>. All rights reserved.Disclaimer• GiT reserves the right to change, modify, replace or remove the content of this instruction manualincluding but not limited to description and graphical illustrations for product enhancement withoutnotice.• Whenever this user’s manual is updated, it is reflected on G-Scan’s on-screen user guide.Therefore we recommend you to keep the G-Scan software applications always up to date.MSN:kathy-tool@hotmail.comSkype:kathy-tool4Email: sales@hkjinghang.comyahoo:hkjinghang@yahoo.com
G-scan User Manualwww.hkjinghang.com1.2. Introduction to G-ScanGetting started with G-ScanAA-1-2. Introduction to G-ScanFunctionalityImproved user interface is the most outstanding feature of G-Scan, which was designed andconstructed for easier and handy operation. G-Scan was developed to provides greater userexperience of highly efficient repair service through quick and simple access to the advanceddiagnostic functions for the cars of multiple brandsOperated by Touch ScreenMenu selection is done by simply touching the screen. Intuitive Touch Screen eliminates complicatedbutton pressing procedure for making selections in the menu.Big size 5.6″ <strong>Co</strong>lor TFT LCDG-Scan is equipped with the 5.6” large scale <strong>Co</strong>lor TFT LCD, which provides greater readability andmore convenient user interface.USB ExpandabilityG-Scan provides multiple USB slots for functional expansion by connecting with the external devicesthat will become available in the future.• Check and erase the self-diagnostic fault codes contained in the electronic control unitsthat support communication with the external diagnostic devices.• Provision of standard diagnostic functions for OBD-II and EOBD compliant cars.• Display and record of actual driving condition data (Flight record)• Provision of advanced diagnostic functions• Provision of actuator test functionsMSN:kathy-tool@hotmail.comSkype:kathy-tool5Email: sales@hkjinghang.comyahoo:hkjinghang@yahoo.com
G-scan User Manualwww.hkjinghang.com1.3. Safety Warnings and CautionsGetting Started with G-ScanAA-1-3. Safety Warnings and CautionsThis section contains warnings and cautions for safe and proper use of this product, therefore it isrecommended that every user should read this section carefully before using the product and makesure that such warnings and precautions are well observed and comprehended.WarningDangerous consequences may arise, with the possibility of fire, death or serious injury to the user,if the product is not handled properly as instructed below.The user shall be fully liable for any direct or consequential damage or loss caused by not followingthe instructions provided in this G-Scan user’s manual.• Place the G-Scan at a secured location and keep clearance with any moving part of the vehicle orhazardous environment when using G-Scan with the vehicle.• Use the power adapter and cables supplied by GiT only when supplying power from then externalsource.• Make secure connections of all cables and connectors. Be careful not to let the DLC cable orpower cable gets disconnected while the G-Scan is operating.• Do not disassemble or dismantle the G-Scan base unit in any case.• Supply stable power from the external source (using AC/DC adapter) when updating G-scansoftware (Operating System, Firmware and Application updates).• Use only the parts and accessories authorized by GiT.• Keep G-Scan within the specified storage temperature when not in use (See spec sheet)• Use G-Scan only for the original purposes as it was designed for.• Beware that the user shall be fully liable for any direct or consequential damage or loss caused bynot following the instructions provided in this G-Scan user’s manual.• Beware that only the service personnel authorized by GiT is entitled to provide aftersales servicefor G-Scan.• Observe the instructions of this user’s manual when replacing the rechargeable battery.• Do not use the rechargeable battery other than GiT supplies.• Do not disassemble the rechargeable battery in any case.• Do not put the rechargeable battery in the water and keep away from moisture.MSN:kathy-tool@hotmail.comSkype:kathy-tool6Email: sales@hkjinghang.comyahoo:hkjinghang@yahoo.com
G-scan User Manualwww.hkjinghang.com• Keep the rechargeable battery from the heat.• Do not apply physical impact to the rechargeable battery or pierce with a sharp object.• Do not put the rechargeable battery in the microwave oven or high-voltage container.• In case any smell, heat, distortion or discoloration is observed with the rechargeable battery, stopusing it. If such a symptom is witnessed when charging or operating, remove the battery fromthe base unit.• Be careful not to put the rechargeable battery polarity reversed.• Be careful not to short-circuit the rechargeable battery terminals.• Do not connect the rechargeable battery terminals directly with the external power sources.• Do not put the rechargeable battery in fire or expose it to direct sun light.• GiT is not liable for any loss or damage cause from using parts or accessories that GiT has notsupplied.CautionDangerous consequences may arise, with the possibility of serious injury to the user and ordamage to the product, if the equipment is not handheld correctly as instructed below.The user shall be fully liable for any direct or consequential damage or loss caused by not followingthe instructions provided in this G-Scan user’s manual.• Put G-scan base unit on a secure place and avoid unstable, inclined or slippery place.Be careful not to drop the G-Scan base unit.• Avoid humidity and dusts when storing and using G-scan in order to prevent electric shock or fire.• Use the stylus pen supplied as the basic accessory of G-Scan when touching the screen. Use ofsharp or pointed object may cause serious and irrecoverable damage to the touch screen film.• Do not put heavy objects such as hand tools on G-Scan base unit.• Be careful not to cause damages to the cables by heat from the engine or the moving parts in theengine compartment when G-Scan connection is made under the hood.• Securely tighten the screw lockers when connecting the DLC main cable to the G-Scan base unit.• When supplying power from the vehicle battery, check the connection for correct polarity.• Stow the parts and accessories that are not in use in the G-Scan carry case.• Do not use the cables connected to the G-scan base unit as the handle.• Avoid following hazards for storing G-Scan.- Very high or low temperature (See Spec sheet)- Very high or low humidity (See Spec sheet)MSN:kathy-tool@hotmail.comSkype:kathy-tool7Email: sales@hkjinghang.comyahoo:hkjinghang@yahoo.com
G-scan User Manualwww.hkjinghang.com- Exposure to direct sunlight• Avoid physical impart and vibration when carrying G-Scan.• Keep away from moisture when storing or using G-Scan.• Keep away from flammable substances or static inducing environment when storing or using G-Scan.• Keep away from chemical or acid material that may damage G-Scan base unit or accessories.• Do not expose G-Scan to X-ray or microwave, otherwise it may cause serious damage• Do not put the SD card upside down when inserting to the base unit.• Use only the AC/DC adapter that is supplied with G-Scan when supplying power from AC source.• Storing the rechargeable battery in a hot place may shorten its lifetime.• Observe the storage conditions (Temp:23±5℃, Humid:65±20%RH, Battery Indicator :2 steps ormore) when storing G-Scan with the battery loaded for a long period of more than 3 months.• In case battery liquid gets in the eyes, do not rub and wash them with fresh running water. Andsee the doctor immediately.• Keep LCD away from liquid or splash of water.• Liquid Crystal may run from the broken LCD. Do not touch the LCD when it is broken, and becareful not to get liquid crystal in the eyes or mouth. If contaminated by liquid crystal on the skin,remove them immediately using soap and running water.• Use soft fabric and alcohol to clean the surface of the LCD• Do not use volatile solvents other than alcohol when cleaning the LCD.• Do not put heavy object on the LCD• Perform Touch Screen Calibration when the touched point is not coordinated correctly. The touchscreen needs zeroing when used for an extensive period of time.MSN:kathy-tool@hotmail.comSkype:kathy-tool8Email: sales@hkjinghang.comyahoo:hkjinghang@yahoo.com
G-scan User Manualwww.hkjinghang.com1.4. Warnings for environment protectionGetting Started with G-ScanAA-1-4. Warnings for environment protectionWhen the product has been used up to its lifetime and needs to be disposed, the rules and regulationsthat the government of each country has set forth for material recirculation, wasted electric/electronicproduct disposal or other related legal procedure shall be checked and followed. When disposing thewasted product, please observe the warning message below.Warning• When disposing G-Scan, do not dump it among the daily wastes. In many countries, iteither shall be approved by local authorities or recollected by the local distributor.• Disposal by burning or burying it underground without authorization is not generally allowedin most of the countries.• <strong>Co</strong>ntact your local distributor to consult the proper procedure for G-scan disposal.MSN:kathy-tool@hotmail.comSkype:kathy-tool9Email: sales@hkjinghang.comyahoo:hkjinghang@yahoo.com
G-scan User Manualwww.hkjinghang.comChapter 2. G-scan Basic Functions2.1. Specifications2.2. Parts and <strong>Co</strong>mponents2.3. Details of Base unit2.4. Power Supply to G-<strong>SCAN</strong>2.5. Recharge Indications2.6. <strong>Co</strong>nnecting with the car2.7. Power On / OffMSN:kathy-tool@hotmail.comSkype:kathy-tool10Email: sales@hkjinghang.comyahoo:hkjinghang@yahoo.com
G-scan User Manualwww.hkjinghang.com2.1. SpecificationsG-scan Basic FunctionsAA-2-1. SpecificationsG-scan Base UnitGeneral SpecificationCategoryMicro <strong>Co</strong>ntrollerSystem MemoryExternal MemoryLCDInput DevicesIndication LampsSoundRechargeable BatteryOperating voltageHousing MaterialDimensionWeightDual CPUNOR Flash 16MBNAND Flash 64MBSDRAM 32MB×2SpecificationsMain control Board2GB SD Card (Up to 4GB)5.6” TFT LCD (480×234 pixel)ARM9 @400MHz<strong>Co</strong>mmunication Board ARM9 @208MHzTouch ScreenPower ON/OFF key, ENTER and ESC keys4 way directional keys , 6 function keys2 <strong>Co</strong>lor LED × 3 (Power, DLC, Option)Single tone buzzerLi-Ion Polymer 2100mAh 1cell7 ~ 35V DCPC + ABS resin with rubber shrouds194×129×59mmApprox. 900g<strong>Co</strong>nnectivityExternal COM port 1X USB master and 2 X USB slave (USB 1.1)AC/DC Power AdapterInput PowerFrequencyInput CurrentOutput VoltageOutput Current100~240V AC50/60 Hz0.8 A12V DC3 AMSN:kathy-tool@hotmail.comSkype:kathy-tool11Email: sales@hkjinghang.comyahoo:hkjinghang@yahoo.com
G-scan User Manualwww.hkjinghang.com2.2. Parts and <strong>Co</strong>mponentsG-scan Basic FunctionsAA-2-2. Parts and <strong>Co</strong>mponentsBasic SuppliesParts included in the Basic Kit.Part Part Number Description Q’tyPart Name: G-Scan Base UnitG1PZFMN001G-Scan base unitIncludes the battery and charger circuitAnd SD Card1Part Name: SD CardA2MDT2SD102Provided included in the base unit.A memory card that contains softwareand data for diagnostic functions.Part Name: Battery Pack1G1PZKMN001Provided included in the base unit.Rechargeable / Detachable batterypackage that contains lithium-ionbattery and the charger circuit.Part Name: Battery, Lithium-ion1G1PDDMM006Provided included in the battery pack.Supplies power to the base unit whenexternal power is not supplied.Part Name: Cable – DLC Main Cable1G1PDDCA006The main cabled used for connectingthe G-scan base unit and the car’sOBD2 connector.1MSN:kathy-tool@hotmail.comSkype:kathy-tool12Email: sales@hkjinghang.comyahoo:hkjinghang@yahoo.com
G-scan User Manualwww.hkjinghang.comPart Name: SD Card ReaderA2MDK1NMSD1G1PDDMK020A USB card reader used for connectingthe SD Card to the PC.(Specs can be changed without notice)Part Name: Stylus PenUsed for input through touch screenAlways recommended to use thisPart Name: Cleaner – LCD11G1PDDMN005A fabric used for cleaning the G-scanLCD screen.1Part Name: String – StylusG1PDDMN003An elastic string used for bindingStylus Pen with the G-Scan base unitPart Name: Hand Strap1G1PDDMN002A safety device for tighter grip thatprevents accidental fall off andconsequent damage.1Part Name: Cable – Self TestG1CDDPA008A cable used for self test of G-Scanbase unit and the cable connection.Do not use this cable for vehiclediagnostic functionsPart Name: Cable – Battery1G2SDDCA003A power supply cable used togetherwith the Cigarette Lighter Cable whensupplying power from the car’s battery.1MSN:kathy-tool@hotmail.comSkype:kathy-tool13Email: sales@hkjinghang.comyahoo:hkjinghang@yahoo.com
G-scan User Manualwww.hkjinghang.comPart Name: Cable-Cigarette LighterG1PDDCA002A power supply cable used whensupplying power from the car’scigarette lighter socket.1Part Name: G-Scan User’s ManualG1PZGZN101G1PZGDP001(CD)G1PZGVA001(CD Case)A guide to safe and proper use of G-Scan. <strong>Co</strong>ntains how to use information,features, functions, warrantycertificates, etc.Part Name: CD (S/W)A CD that contains the G-Scan PCutility installation program and softcopy of user’s guide for each carmake.Part Name: Carrying Case11G1PZGHA001A portable and heavy duty hard casethat contains G-scan base unit andparts.1Part Name: AC/DC AdapterG1CDDPA011An AC to DC converter that is used forsupply of AC power to the G-Scanbase unit.1G1CDECA001Part Name: AC Power CableAn AC socket plug used together withthe AC/DC adapter for supply of ACpower to G-Scan base unitSpec: IEC 60320 C131MSN:kathy-tool@hotmail.comSkype:kathy-tool14Email: sales@hkjinghang.comyahoo:hkjinghang@yahoo.com
G-scan User Manualwww.hkjinghang.comAsian Car OBD AdaptersParts included in the Asian Kit (Not included in Basic Kit)Part Part Number Description Q’tyHONDA/ACCURA 3PG1PZFPA003Used for communication with oldHonda and Acura cars with the 3-pin or5-pin diagnostic connector.1MAZDA 17PG1PZFPA004Used for communication with oldMazda cars with the 17-pin round(semi-circular) type diagnosticconnector.1MITSUBISHI 12P+16PG1PZDPA002Used for communication with oldMitsubishi or Hyundai cars with the 12-pin single or 12+16pin dual diagnosticconnector.1NISSAN 14PG1PZFPA007Used for communication with oldNissan or Infiniti cars with the 14-pindiagnostic connector.1SUBARU 9PG1PZFPA005Used for communication with oldSubaru cars with the 9-pin diagnosticconnector.1MSN:kathy-tool@hotmail.comSkype:kathy-tool15Email: sales@hkjinghang.comyahoo:hkjinghang@yahoo.com
G-scan User Manualwww.hkjinghang.comTOYOTA 17P RG1PZFPA002Used for communication with oldToyota and Lexus cars with the 17-pin“Round (Semi-circular)” typediagnostic connector.1TOYOTA 17+1PIN SquareG1PZDPA001Used for communication with oldToyota and Lexus cars with 17+1 pin“Square (rectangular)” type diagnosticconnector in the engine compartment. 1Kia 6P <strong>Co</strong>nnectorG1CDDPA005Used for communication with old Kiacars with 6 pin diagnostic connector inthe engine compartment.1Kia 20P-A type <strong>Co</strong>nnectorG1PZDPA003Used for communication with old Kiacars with 20 pin diagnostic connectorin the engine compartment.1Kia 20P-B type <strong>Co</strong>nnectorG1PZDPA004Generally used for ‘99 ~ ‘02 MY cars.A-type is colored blueUsed for communication with old Kiacars with 20 pin diagnostic connectorin the engine compartment.1Generally used for ‘03 ~ ‘05 MY cars.B-Type is colored yellowMSN:kathy-tool@hotmail.comSkype:kathy-tool16Email: sales@hkjinghang.comyahoo:hkjinghang@yahoo.com
G-scan User Manualwww.hkjinghang.comPart Part Number Description Q’tyDaewoo 12P <strong>Co</strong>nnectorG2WDDCN008Used for communication with oldDaewoo cars with 12 pin diagnosticconnector1Ssangyong 14P <strong>Co</strong>nnectorG2WDDCN006Used for communication with oldSsangyong cars with 14 pin circulardiagnostic connector in the enginecompartment1Ssangyong 20P <strong>Co</strong>nnectorG2WDDCN007Used for communication with oldSsangyong cars with 20 pin squarediagnostic connector in the enginecompartment1Hyundai Keyless <strong>Co</strong>nnectorG2SDDCA024Used for some old Hyundai modelsthat require special connector forkeyless entry remote control coding1Kia Keyless <strong>Co</strong>nnectorG2SDDCA025Used for some old Kia models thatrequire special connector for keylessentry remote control coding1MSN:kathy-tool@hotmail.comSkype:kathy-tool17Email: sales@hkjinghang.comyahoo:hkjinghang@yahoo.com
G-scan User Manualwww.hkjinghang.comEuropean Car OBD AdaptersParts included in the Full Kit (Not included in Basic or Asian Kit)BMW 20PUsed for communication with oldBMW cars with the 20-pin circulardiagnostic connector.G1PZEPA001.1AUDI/VW 4PBENZ 38PG1PZEPA002G1PZEPA003Used for communication with oldVolkswagen, Audi, Seat or Skoda1cars with the 2 X 2 pin diagnosticconnector.Used for communication with oldMercedes Benz cars with the 38-pincircular diagnostic connector in theengine compartment. 1MSN:kathy-tool@hotmail.comSkype:kathy-tool18Email: sales@hkjinghang.comyahoo:hkjinghang@yahoo.com
G-scan User Manualwww.hkjinghang.com2.3. Details of the base unitG-scan Basic FunctionsAA-2-3. Details of the base unitTouch screen and input buttons98761542[Figure 1] Front view of G-scan3123Touch ScreenTouch with the specified stylus pen when selecting a icon or amenu button appears on the screenPress the corresponding button when selecting the functiondescribed in the bottom of the screenTurns power on / off4An LED light that indicates the status of power supplyMSN:kathy-tool@hotmail.comSkype:kathy-tool19Email: sales@hkjinghang.comyahoo:hkjinghang@yahoo.com
G-scan User Manual56789www.hkjinghang.com<strong>Co</strong>nfirms the selection that is currently highlighted on the menu orProceeds to the next step at a queryNavigate up/down/left/right on the menu by moving the highlightedselection. Press the ENTER key to confirm.Press Up/Down to scroll the screen up and down in Live Datadisplay function. Left/Right keys are used for Page up/down.Returns to the previous menu.Aborts the currently running function.Indicates the status of communication with the carIndicates the status of communication with the optional devicesconnected to G-scanPower LED IndicationsBattery Pack External Power When charging Fully chargedInstalledExternal Power Supplied Red LED ON Green LED ONExternal Power not suppliedLED OFFNot installedExternal Power SuppliedExternal Power not suppliedGreen LED ONDevice will not turn ON (LED OFF)DLC LED Indications<strong>Co</strong>mmunication with the car<strong>Co</strong>mmunicating with the car<strong>Co</strong>mmunication with the car endedLED indicationGreen LED flashesLED OFFOption LED IndicationsUSB external device<strong>Co</strong>mmunicating with the external deviceOtherwiseLED indicationGreen LED FlashesLED OFFMSN:kathy-tool@hotmail.comSkype:kathy-tool20Email: sales@hkjinghang.comyahoo:hkjinghang@yahoo.com
G-scan User Manualwww.hkjinghang.com<strong>Co</strong>mmunication Terminals, SD Memory slot and Reset button3412[Fig 2] Top view of G-scan65[Fig. 3] Bottom view of G-scan1 D-Sub for DLC D-Sub connector for Main DLC cable2 OPTION USB master slot for optional device extension34DOWNLOADReserved USB slave slot for G-scan maintenance and functionextension (not used at the moment of this manual publication)PASS-THRUReserved USB slave slot for wired PC interface through G-scan(not used at the moment of this manual publication)5 SD Memory Card Slot Insertion / ejection slot for the SD memory cardIn case of system failure, the system can be shut-down by6Reset Hole force by pressing the button inside the hole. Then G-Scan mayrestart when POWER key is pressed.• To remove the SD Card from the slot, press the SD card inward for ejection.• Use of the stylus pen for pressing the Reset Button is recommended.MSN:kathy-tool@hotmail.comSkype:kathy-tool21Email: sales@hkjinghang.comyahoo:hkjinghang@yahoo.com
G-scan User Manualwww.hkjinghang.com2.4. Power supply to G-scanG-scan Basic FunctionsAA-2-4. Power Supply to G-ScanPower supply to G-scan is available from 4 different sources:• From diagnostic connector• From DC-12V cigarette lighter socket• From vehicle battery• From AC outlet (through AC/DC converter)[Fig. 1] Delivery of power to G-scanMSN:kathy-tool@hotmail.comSkype:kathy-tool22Email: sales@hkjinghang.comyahoo:hkjinghang@yahoo.com
G-scan User Manualwww.hkjinghang.comFrom the diagnostic adapter1. Extend the G-Scan main cable to the vehicle side diagnostic adapter (DLC: Data Link<strong>Co</strong>nnector/Cable) using the paring connector.2. Turn the ignition key to ACC or ON position, and power is supplied to G-Scan3. All OBD-2 / EOMB compliant cars are designed to supply power through the diagnostic adapter.4. The vehicle side DLC connector is recommended to be placed within 1 meter from the driver’sseat. It is generally found under the dashboard. However, be reminded that there are exceptions.From the cigarette lighter socket1. <strong>Co</strong>nnect the cigarette lighter power cable to G-Scan by the DC jack.2. Extend the cigarette lighter cable and insert the connector to the vehicle side DC-12V socket3. Turn the ignition key to ACC or ON position, and power is supplied to G-Scan.4. In case of drawing power from the DC-12V socket, the power is lost when cranking the enginecausing G-Scan to turn off. It is recommended to use the other power source if rechargeablebattery pack is not installed to G-Scan.Caution• Beware of bad contact caused by dirt, debris, corrosion and different form of contaminationinside the DC 12V socket.From the vehicle battery1. <strong>Co</strong>nnect the cigarette lighter power cable to G-Scan by the DC jack.2. Attach the battery cable with the alligator clips to the end of the cigarette lighter power cable.3. Beware of the battery polarity, and extend the red clip to the (+) terminal of the vehicle battery andthe black one to the (-) terminal.4. Turn the ignition key to ACC or ON position, and power is supplied to G-Scan.MSN:kathy-tool@hotmail.comSkype:kathy-tool23Email: sales@hkjinghang.comyahoo:hkjinghang@yahoo.com
G-scan User Manualwww.hkjinghang.comCaution• Never connect the battery cable clips to the revers ed polarity terminalsIt may cause serious and fatal damage to G-scan.From AC outlet1. <strong>Co</strong>nnect the DC Jack of the AC/DC converter to G-scan2. Extend the AC adapter plug of the AC/DC converter to the AC outlet.3. Power is supplied to G-ScanCaution• Make sure to use the AC/DC converter that is supplied with G-Scan. Damage caused fromuse of unapproved AC/DC converter is not recognizable for warranty service.MSN:kathy-tool@hotmail.comSkype:kathy-tool24Email: sales@hkjinghang.comyahoo:hkjinghang@yahoo.com
G-scan User Manualwww.hkjinghang.com2.5. Recharge IndicationsG-scan Basic FunctionsAA-2-5. Recharge IndicationsG-Scan includes the Li-Ion Polymer rechargeable battery pack as the basic supply, and it enables thedevice operational when the external power supply is lost.(However, make sure to draw power from the car for communication stability)1. <strong>Co</strong>nnect DC Jack of the AC/DC <strong>Co</strong>nverter to G-Scan external power input socket.2. Extend the adapter plug of the AC/DC <strong>Co</strong>nverter to the AC outlet.3. Red POWER LED turns on when charging the battery. When fully charged, the POWER LEDcolor turns to Green.POWER LED[Fig. 1] POWER LEDPOWER LED IndicationCharging Fully ChargedRed LED On Green LED On※It takes 3 hours for a full-charge from low-battery[Fig. 2] Low Battery pop-up warningThe warning message as shown in Fig.2 indicates that the battery voltage is low. Recharge thebattery immediately by supplying external power, otherwise G-Scan will turn off automatically.MSN:kathy-tool@hotmail.comSkype:kathy-tool25Email: sales@hkjinghang.comyahoo:hkjinghang@yahoo.com
G-scan User Manualwww.hkjinghang.com2.6. <strong>Co</strong>nnecting with the carG-scan Basic FunctionsAA-2-6. <strong>Co</strong>nnecting with the car1) <strong>Co</strong>nnect the DLC main cable to the G-Scan D-Sub connector, and secure the connection byfastening the 3 screws.[Fig. 1] <strong>Co</strong>nnecting DLC main cableWarningDo not hold the G-Scan base unit by the main cable when carrying the product.Make sure to hold the base unit or the hand strap.MSN:kathy-tool@hotmail.comSkype:kathy-tool26Email: sales@hkjinghang.comyahoo:hkjinghang@yahoo.com
G-scan User Manualwww.hkjinghang.com2) Extend the DLC main cable connected to the G-Scan to the vehicle side DLC connector.※ Different types of diagnostic adapter may be used for different models and makes. If the caris not OBD-2 / EOBD compliant cars, identify and attach the matching adapter, then connect itattached to the main cable.[Fig. 2] <strong>Co</strong>nnecting with the carMSN:kathy-tool@hotmail.comSkype:kathy-tool27Email: sales@hkjinghang.comyahoo:hkjinghang@yahoo.com
G-scan User Manualwww.hkjinghang.com2.7. Power ON/OFFG-scan Basic FunctionsAA-2-7. Power ON/OFF1) You can turn G-scan ON by pressing the POWER button for 0.5 seconds. The POWER LEDturns from amber to green, and then G-Scan turns ON.Refer to the『Power supply to G-Scan』part hereinbefore for the details of power supply.DLC LEDOPTION LEDPOWER button[Fig. 1] G-scan POWER Button2) The main menu follows when G-Scan turns on.[Fig. 2] G-scan main menu3) Hold down the POWER button for 2.5 seconds to turn G-scan OFF.MSN:kathy-tool@hotmail.comSkype:kathy-tool28Email: sales@hkjinghang.comyahoo:hkjinghang@yahoo.com
G-scan User Manualwww.hkjinghang.comChapter 3 G-scan Basic Operations3.1. Main menu and basic tools3.2. Flight Recording3.3. OBD-II and EOBD3.4. Vehicle Diagnosis3.5. <strong>Co</strong>nfiguration3.6. On-screen User’s GuideMSN:kathy-tool@hotmail.comSkype:kathy-tool29Email: sales@hkjinghang.comyahoo:hkjinghang@yahoo.com
G-scan User Manualwww.hkjinghang.com3.1. Main menu and basic toolsG-scan Basic OperationsAA-3-1. Main menu and basic toolsMain menu[Fig. 1] G-scan main menuIcon Title DescriptionFlight RecodingCARB OBD-IIDiagnosis<strong>Co</strong>nfigurationUser GuideReview Captured Imageand saved flight record dataPerform basic diagnosis of Powertrain system for the OBD-II orEOBD compliant carsPerform diagnosis of multiple systems by use of trouble code,Current Data, actuation test, system reset and other manufacturerspecific functions available with the car.Check and change the different setting for use of G-scanView on-screen user guide for the basic functions and operationsof G-scanCharging (Red)Battery MeterFully charged (Green)3-step indication meter of rechargeable batteryRechargeable battery is not installed※ Refer to『Recharge Indications』part in the previous chapter for further details about charging.MSN:kathy-tool@hotmail.comSkype:kathy-tool30Email: sales@hkjinghang.comyahoo:hkjinghang@yahoo.com
G-scan User Manualwww.hkjinghang.comTool Set Buttons[Fig 2] Tool Set ButtonsIcon Title DescriptionLanguage modeMemo ModePrevious pageImage DataTexts listed on the screen opt between primary language and English.Supported languages are preset differently in the regional marketsCaptures the current frame and begins “hand writing” memo modeCaptured Imageand memo are saved to the SD card.Moves to the previous menuWorks the same as the key.Captures the current screen and saves to the SD card as a BMP(bitmap picture) fileLanguage ModeWhen the icon is touched in the diagnostic display, the texts that are listed in primary language(Korean as an example in this chapter) are converted to English.When the icon is touched, vice versa: the English texts are replaced by the primary language.※ Graphical menus and icons are not converted to the other language.MSN:kathy-tool@hotmail.comSkype:kathy-tool31Email: sales@hkjinghang.comyahoo:hkjinghang@yahoo.com
G-scan User Manualwww.hkjinghang.com[Fig. 3] Language Mode icon – convert to English[Fig. 4] Language Mode icon – convert to Korean※ If the primary language is set to English in the configuration, the Language Mode isdeactivated and G-Scan supports only English.[Fig. 5] Setting language in the configuration menuMSN:kathy-tool@hotmail.comSkype:kathy-tool32Email: sales@hkjinghang.comyahoo:hkjinghang@yahoo.com
G-scan User Manualwww.hkjinghang.comPen ModeWhen the icon is touched in the diagnostic display, the current frame is captured and G-Scanswitches to the Pen Mode.Adding the handwritten notes, memo and drawings on the Captured Imageare possible using thestylus pen.[Fig. 5] Pen ModeIconDescriptionSelect the thickness of penSelect the color of penClears and handwritten objectsTouch theicon when completed, the screen is captured and stored in the SD card for review.[Fig. 6] Pen More Screen SaveMSN:kathy-tool@hotmail.comSkype:kathy-tool33Email: sales@hkjinghang.comyahoo:hkjinghang@yahoo.com
G-scan User Manualwww.hkjinghang.comImage DataCurrent screen is captured whenicon is touched , and it can be stored to the SD card.[Fig. 7] Captured ImageIconAt the query asking for confirmation, touch the “OK” button, then the Captured Imageis saved as aBMP file in the SD card to the [G-scanImage] folder.[Fig. 8] Pop-up query for save Image DataMSN:kathy-tool@hotmail.comSkype:kathy-tool34Email: sales@hkjinghang.comyahoo:hkjinghang@yahoo.com
G-scan User Manualwww.hkjinghang.com3.2. Flight RecordingG-scan Basic OperationsAA-3-2. Flight RecordingCaptured Imagepictures and recorded Current Data frames can be reloaded for review by selectingthis Flight Recording function.Select “Flight Recording” and press the ENTER key (or double touch) from the main menu.[Fig.1] Flight Recording function selectedData type query follows. Select either “Image Data” or “Record Data”, and press the ENTER key toproceed.[Fig. 2] Data type selection• : Reloads the Captured Imageincluding the handwritten notes madefrom Pen Mode.• : Reloads the live data frames recorded during the diagnosis. Thedetails on how to record live data is provided in the individual user’s manual for each car make(provided in the PC utility CD)MSN:kathy-tool@hotmail.comSkype:kathy-tool35Email: sales@hkjinghang.comyahoo:hkjinghang@yahoo.com
G-scan User Manualwww.hkjinghang.comThe list of car make folders that contain the selected type of flight record follows as shown below.Touch the folder name and touch the OK button.[Fig. 3] Car make folder selectionRegional version (Area) selection menu follows the car make selection. Touch the right versionmarket (Area) and touch the OK button.[Fig. 4] Regional version (area) selectionThen the names of the record file are listed. Select the file name, and touch the OK button.[Fig.5] File name selectionMSN:kathy-tool@hotmail.comSkype:kathy-tool36Email: sales@hkjinghang.comyahoo:hkjinghang@yahoo.com
G-scan User Manualwww.hkjinghang.comSelected file is loaded and the Record Data is displayed as shown in Fig. 6 and 7.Fig. 6 illustrates the reloaded Image Data, and Fig. 7 is the example of the recorded Current Data.Press the “ESC” key to return to the file name list.[Fig. 6] Captured ImagereloadIconDescriptionShows the previous Captured ImagefileShows the next Captured ImagefileThe file name of the currently viewed Image Data[Fig. 7] Record data reloadedIconDescriptionMoves to the triggered frame - the moment when the trigger button was touchedSwitches to the graphical displayFile information of the Record Data※ Details on how to record Current Data is provided in the individual user’s manual for each car make.MSN:kathy-tool@hotmail.comSkype:kathy-tool37Email: sales@hkjinghang.comyahoo:hkjinghang@yahoo.com
G-scan User Manualwww.hkjinghang.com3.3. OBD-II and EOBDG-scan Basic OperationsAA-3-3. OBD-II and EOBDCARB OBD-II function is used for diagnostics of OBD-II or EOBD complaint car’s emission-relatedpowertrain control system supporting the industrial standard protocols including ISO9141-2,ISO14230-4(KWP2000),SAE J1850 VPW, SAE J1850 PWM and ISO15765-4(CAN)Make the connection with the car using the main DLC cable, and select the “CARB OBD-II” icon andpress the ENTER key (or double touch).[Fig. 1] Selected CARB OBD-IIThe diagnostic modes supported by CARB OBD-II function are listed as shown in Fig.2. Select themode and press the ENTER key.[Fig. 2] CARB OBD-II diagnostic modesMSN:kathy-tool@hotmail.comSkype:kathy-tool38Email: sales@hkjinghang.comyahoo:hkjinghang@yahoo.com
G-scan User Manualwww.hkjinghang.comOBD-IIOriginally, OBD and OBD-II are the titles of law that were legislated in the USA for the emission control.On Board Diagnostics was designed and mandated in order to monitor malfunction or failure of thecar’s emission control system. By illuminating the warning lamp on the dashboard, the OBD systemalerts the driver in case the emission control system is failing or inefficient, allows the ordinarymechanic may immediately comprehend what is the problem by use of a proper diagnostic device,consequently contributes to minimizing the chance of emitting excessive exhaust gas.OBD-II was introduced as an update of OBD in a way of increasing the efficiency of OBDsystem by standardization. Thanks to the efforts made for standardization, a mechanic canget the fault code information and data from all the cars that support ISO and SAE industrialstandards regardless of brand or car make.The shortcoming of standardization is the narrowed scope of information: what you can get isthe emission related minimum scope of information based on “commonly found in every car”concept.OBD-II Fault <strong>Co</strong>desSAE and ISO industrial standard documents define the OBD-II and EOBD codes are consisted of athree-digit numeric code preceded by an alpha-numeric designator.The alpha-numeric designators are "P0~P3", "B0~B3", "C0~ C3" and "U0~ U3" corresponding toPowertrain, Body, Chassis, Network <strong>Co</strong>mmunication systems.<strong>Co</strong>des system Included sub-systems (examples)P0*** ~ P3*** Powertrain Engine, TransmissionC0*** ~ C3*** Chassis ABS, Suspension, TractionB0*** ~ B3*** Body Airbag, Air conditioning, lightingU0*** ~ U3*** Network CAN, Inter-system communicationManufacturer Specific Fault <strong>Co</strong>desNot all the fault codes were standardized. The fault codes that can be commonly applied to any“exhaust gas emitting” car were defined as standard codes. This is also called as “Generic codes” or‘<strong>Co</strong>re codesMSN:kathy-tool@hotmail.comSkype:kathy-tool39Email: sales@hkjinghang.comyahoo:hkjinghang@yahoo.com
G-scan User Manualwww.hkjinghang.comThe larger portion of the entire codes was not standardized due to fundamental differences of each carmake’s system design or diagnostic strategy. The codes that are reserved for each car manufacturer’sown definition are called “Enhanced <strong>Co</strong>des” or “Non-standard codes”C0*** and B0*** codes are also defined as the Generic <strong>Co</strong>des. However the actual list of the standardcodes for these Body and Chassis control systems has not been released to public yet.Therefore, it is assumed that there are no known Generic <strong>Co</strong>des for these systems.The codes that [Generic OBD2 / EOBD] function can access are just the Generic <strong>Co</strong>des.If any enhanced (or non-standard code) is detected, the scan tool shows it as an “Undefined” or“Unknown code” because these non-standard codes are defined differently by the car manufacturers.Enhanced <strong>Co</strong>des can be properly read in accordance with the manufacturer’s own definitions, pleaseselect the [Diagnosis] from the initial menu and follow the model selection procedure.EOBD and OBD-II RevisionVersion 1996The generic (standard) codes were originally defined by the SAE (Society of Automotive Engineers)document J2012 published by in 1992.At the time of publication of the document, P2*** and P3*** codes were reserved for future use and notincluded in the standard codes.Revision in 2002, after EOBD implementationWhen the EOBD was mandated in 2001, the EOBD generic codes were suggested in accordance withthe ISO/DIS15031-6 document and the original American SAE J2012 document was also revised foruniformity to form the global standard.The P2*** and the P3*** codes were included in the list of standard codes in the revised documents.OBD-II / EOBD code break-downAfter the revision, the range of generic (standard) codes and enhanced (non-standard) codes now canbe categorized as below:<strong>Co</strong>de No.Defined SystemsP00XXFuel and Air metering and Auxiliary Emission <strong>Co</strong>ntrolsP01XX ~ P02XX Fuel and Air meteringP03XXIgnition System or MisfireP04XXAuxiliary Emission <strong>Co</strong>ntrolsP05XXVehicle Speed, Idle <strong>Co</strong>ntrol and Auxiliary InputsP06XX<strong>Co</strong>mputer and Auxiliary OutputsMSN:kathy-tool@hotmail.comSkype:kathy-tool40Email: sales@hkjinghang.comyahoo:hkjinghang@yahoo.com
G-scan User ManualP07XX ~ P09XXP0AXXP0BXX ~ P0FXXP1XXXP20XXP21XX ~ P22XXP23XXP24XXP25XXP26XXP27XX ~ P29XXP30XX ~ P33XXP34XXP35XX ~ P39XXU00XXU01XX ~ U02XXU03XXU04XXwww.hkjinghang.comTransmissionHybrid PropulsionReserved (for Standard <strong>Co</strong>des)Manufacturer (Enhanced) <strong>Co</strong>deFuel and Air metering and Auxiliary Emission <strong>Co</strong>ntrolsFuel and Air meteringIgnition System or MisfireAuxiliary Emission <strong>Co</strong>ntrolsVehicle Speed, Idle <strong>Co</strong>ntrol and Auxiliary Inputs<strong>Co</strong>mputer and Auxiliary OutputsTransmissionManufacturer (Enhanced) <strong>Co</strong>deCylinder DeactivationReserved (for Standard <strong>Co</strong>des)Network ElectricalNetwork <strong>Co</strong>mmunicationNetwork SoftwareNetwork DataOBD-II / EOBD Current (Live) DataWhen [2. Current Data] is selected from the OBD-II/EOBD menu, the live data of the sensors andparameters are listed as shown below:[Fig. 3] Current Data ListMSN:kathy-tool@hotmail.comSkype:kathy-tool41Email: sales@hkjinghang.comyahoo:hkjinghang@yahoo.com
G-scan User Manualwww.hkjinghang.comInconDescriptionSelect the highlighted parameter for conversion to graphical display modeSplit the screen left and right for more parameters readings on screen<strong>Co</strong>nverts the selected parameters from numeric to graphical display modeCAUTION• When a function was selected from the CARB OBD-II menu, the result may come up with“NOT SUPPORTED” reading as illustrated in Fig. 4, which means the selected function is notsupported by the car that is being tested.[Fig. 4] Function is not supported by the carIn order to view the Current Data in graphical form, select the parameters by locating the highlightedbar on the desired parameter and pressing the F1 button or touching theselected parameters are lifted to the top of the screen as illustrated below:icon. The[Fig. 5] Selecting ParametersMSN:kathy-tool@hotmail.comSkype:kathy-tool42Email: sales@hkjinghang.comyahoo:hkjinghang@yahoo.com
G-scan User Manualwww.hkjinghang.combutton will convert the display more to alpha-Press the F4 button or touchgraphical mode as illustrated in Fig. 6.Pressing the F4 button again or touchingnumerical display mode.icon, then the Current Data display is converted to the[Fig. 6] Graphical Display ModeMSN:kathy-tool@hotmail.comSkype:kathy-tool43Email: sales@hkjinghang.comyahoo:hkjinghang@yahoo.com
G-scan User Manualwww.hkjinghang.com3.4. Vehicle DiagnosisG-scan Basic FunctionsAA-3-4. Vehicle DiagnosisNon-standard manufacturer specific diagnostic functions such as Fault <strong>Co</strong>de, Live Data, Actuation Test,Reset or <strong>Co</strong>ding are provided when “Vehicle Diagnosis” is selected from the main menu.Select “Vehicle Diagnosis” from the G-scan main menu, and press ENTER (or double touch).※ Different diagnostic functions are provided in different ways peculiar to each car make.Refer to the individual user’s manual for each car make supplied in a CD or DVD in the G-Scankit for the details of diagnostic functions of each brand.[Fig. 1] Diagnosis Selected[Fig. 2] Car make (brand) Selection menuMSN:kathy-tool@hotmail.comSkype:kathy-tool44Email: sales@hkjinghang.comyahoo:hkjinghang@yahoo.com
G-scan User Manualwww.hkjinghang.com3.5. <strong>Co</strong>nfigurationG-scan Basic FunctionsAA-3-5. <strong>Co</strong>nfigurationG-Scan base unit settings and user information can be reviewed and modified by selecting<strong>Co</strong>nfiguration from the main menu. Version number check and Self Test function are also provided.Select “<strong>Co</strong>nfiguration” from the main menu and press the ENTER button (or double touch).[Fig. 1] <strong>Co</strong>nfiguration selectedThe basic display of configuration follows as illustrated below, which includes tabs for Setup, user info,version and self test in the top of the screen.[Fig. 2] <strong>Co</strong>nfiguration basic displayMSN:kathy-tool@hotmail.comSkype:kathy-tool45Email: sales@hkjinghang.comyahoo:hkjinghang@yahoo.com
G-scan User Manualwww.hkjinghang.comSetupGeneral G-Scan settings can be changed for LCD backlight brightness adjustment, Languageselection, Keypad test, Touch screen calibration, Measuring unit conversion and buzzer on/off toggle.[Fig. 3] SetuopIconDescriptionAdjust the LCD brightnessSelect the language (Supported languages are different by regions)Test the keypadPerform “Zero” calibration for touch screenToggle On/Off the Current Data measuring unit and soundMove to the next tab: Setting User info version Self testMSN:kathy-tool@hotmail.comSkype:kathy-tool46Email: sales@hkjinghang.comyahoo:hkjinghang@yahoo.com
G-scan User Manualwww.hkjinghang.comLCD Backlight brightnessThe brightness of G-scan LCD backlight is adjustable in 5 stepsTouchbutton or press the F1 key from the Setting menu. When “Back Light (F1)” ishighlighted amber, adjust the brightness of the LCD backlight by using the and buttons or bytouching the slide bar with the stylus pen.[Fig. 4] LCD Backlight brightnessLanguageSelect the preferred language among the supported language versions. The languages aresupported in different set by regions. Generally English is the primary language with the locallanguage supported as the secondary.Touchicon or press the F2 button to change the language, and the “Language (F2)” ishighlighted amber. Use the preferred one among the supported languages using thebuttons or the stylus pen.[Fig. 5] Language SelectionMSN:kathy-tool@hotmail.comSkype:kathy-tool47Email: sales@hkjinghang.comyahoo:hkjinghang@yahoo.com
G-scan User Manualwww.hkjinghang.comKeypad TestTouchicon or press the F3 button, then the “Keypad Test (F3)” is activated andhighlighted in amber. Press F1 ~ F6 keys andbuttons in turn andcheck the response to each key press on the screen.Press F1 andkeys together to end keypad test.[Fig. 5] Keypad TestTouch Screen CalibrationTouch theicon or press the F4 button. Calibration screen follows, then touch the centerpoints of crosshair one after another as instructed on the screen as shown in Fig. 6.[Fig. 6] Touch Screen CalibrationMSN:kathy-tool@hotmail.comSkype:kathy-tool48Email: sales@hkjinghang.comyahoo:hkjinghang@yahoo.com
G-scan User Manualwww.hkjinghang.comBuzz / UnitTouchicon or press the F5 button, then the pop-up window for measuring unitconversion and buzzer On/Off option appears as shown in Fig. 7.[Fig. 7] Unit / BuzzerSelect the preferred unit (imperial or metric) using thekeys or touching thescreen.Pressure Speed Temperature Air masskPammHginHgPsimbarMPHkm/hC (Celsius)F (Fahrenheit)gm/slb/sAlso select sound On/Off in the same way.When completed, touch theicon or press the F6 button to move to “User Information”tab. Touching the other tab in the top of the screen also works.Press the ESC key to move back to the main menu.MSN:kathy-tool@hotmail.comSkype:kathy-tool49Email: sales@hkjinghang.comyahoo:hkjinghang@yahoo.com
G-scan User Manualwww.hkjinghang.comUser InfoUser information can be recorded or modified.[Fig.8] User information inputSelect the data field to input or modify by using the stylus pen or thekeys.Touch the input column or press the button, then the virtual keyboard appears as illustrated in Fig.9 for alpha numeric data input. Use the stylus pen to select the letter or number to type in.[Fig. 9] User information virtual keyboardMSN:kathy-tool@hotmail.comSkype:kathy-tool50Email: sales@hkjinghang.comyahoo:hkjinghang@yahoo.com
G-scan User Manualwww.hkjinghang.comVersionG-Scan serial number and Operating System, Software, Firmware and individual application versionnumbers by selecting “Version” from the configuration menu.[Fig. 10] Version CheckTouch the drop down menu button of the Maker Version field, then all applications for individual carmake and the version number of which are listed as shown in Fig. 11.[Fig.11] Individual application version numberMSN:kathy-tool@hotmail.comSkype:kathy-tool51Email: sales@hkjinghang.comyahoo:hkjinghang@yahoo.com
G-scan User Manualwww.hkjinghang.comSelf TestSelf Test function helps the user to identify whether the communication problem is caused by thedefective DLC main cable or the malfunction of the G-Scan base unit. (This function does not tellwhich part of G-scan is defective)Self test is designed on Loop Back system, with which G-Scan sends off signals from the base unitthrough the DLC cable, and the self-test adapter returns the signal back to the base unit. By sendingsignals from different channels and lines, and verifying the correctness of every signal echoed fromthis looped connection in each case, it becomes identifiable where the communication failureoriginated.Cautions• Loop back test is not supported in some cars with High Speed CAN, Low Speed CAN, SAE -J1708 communication system.• Self-test can be used with OBD-II / EOBD compliant cars only. Cannot be used with OBD1generation cars with non-standard adapters.[Fig. 12] Self TestIconStep-AStep-BResultDescriptionChecks the internal communication control circuit of G-scan base unitChecks the signal delivery circuit of the DLC main cableBegins Self-test procedureShows the Self-Test resultMSN:kathy-tool@hotmail.comSkype:kathy-tool52Email: sales@hkjinghang.comyahoo:hkjinghang@yahoo.com
G-scan User Manualwww.hkjinghang.comSelf Test ProcedureSelf-test requires the completion of 2 step procedures to get the correct self-diagnosis result.Select “Self-Test” from the <strong>Co</strong>nfiguration menu.• Step-A : Checks the internal communication control circuit of G-scan base unit• Step-B : Checks the signal delivery circuit of the DLC main cableSelf-Test function is not used for finding which part or which circuit is defective in detail, but just forhelping the user identify which part is wrong: Base Unit or the DLC cable. Also this function is justfor testing. The function itself does not solve or cure the problem. If any problem is found usingSelf-Test function, please contact the local GIT distributor for support.1. <strong>Co</strong>nnect the DLC cable with the G-scan base unit2. Attach the Self-Test adapter to the OBD2 connector in the end of DLC cable3. Extend the Self-Test adapter’s OBD-II connector head to the vehicle side connector.DLC main cableSelf Test CableG-scan Base unitVehicle Side OBDⅡ(16pin)DLC connector[Fig. 13] Cabling for Self Test4. Turn the ignition key ON (engine running)5. Check the Self-Test cable if the red LED is turned onCaution• Make sure to connect the Self-Test adapter to the car’s OBD-II/EOBD 16-pin connector• Make sure to use the Self-Test adapter only for self test function.Never use it for vehicle diagnostic functions.MSN:kathy-tool@hotmail.comSkype:kathy-tool53Email: sales@hkjinghang.comyahoo:hkjinghang@yahoo.com
G-scan User Manualwww.hkjinghang.comStep-AStep A is a process testing the G-Scan base unit’s communication control circuit to check if the baseunit is functioning properly. (Note that this is not testing all parts or all circuits of the base unit)If ready for Self-Test function, touchicon or press the F1 button to start the testprocedure. Then “Self Testing…” message appears as shown in [Fig. 14] and the test begins.[Fig. 14] Step-A Self Test in progressWhen Step-A Self-Test is completed, the result is indicated in the bottom-right of the screen asillustrated in Fig. 15.[Fig. 15] Step-A Self Test resultStep-A Test retultNo error foundError foundDescriptionG-scan base unit is OK. Proceed to Step-B to test the main DLC cable.G-scan base unit’s communication control circuit is defective.<strong>Co</strong>ntact with GIT’s local distributor for supportMSN:kathy-tool@hotmail.comSkype:kathy-tool54Email: sales@hkjinghang.comyahoo:hkjinghang@yahoo.com
G-scan User ManualStep-Bwww.hkjinghang.comStep-B is a process testing the continuity of cables and the signal delivery circuit of the main DLCcable, provided that the G-Scan base unit is not defective.※ For more reliable test result, gently wag the DLC cable during the test.Touch the Step-B icon, and touch theicon or press the F1 button to begin the testThen “Self Testing…” message appears as shown in [Fig. 14] and the test begins.[Fig. 16] Step-B Self-Test in progressWhen Step-B Self-Test is completed, the result is indicated in the bottom-right of the screen asillustrated in Fig. 17.[Fig. 17] Step-B Self-Test resultStep-B Test retultNo error foundError foundDescriptionDLC main cable is OK.It is recommended to wag and move the cable gently while testing in orderto regenerate the intermittent problems.If Step-A test result was OK, then it can be concluded that the main DLCcable is defective. <strong>Co</strong>ntact GIT local distributor for support.MSN:kathy-tool@hotmail.comSkype:kathy-tool55Email: sales@hkjinghang.comyahoo:hkjinghang@yahoo.com
G-scan User Manualwww.hkjinghang.com3.6. On-screen User’s GuideG-scan Basic FunctionsAA-3-6. User’s GuideG-Scan user’s manual is supported on screen, and the instructions for use of each function areprovided.G-scan user’s manual is provided in the form of PDF, and it may take more than 10 seconds whenloaded for the first time. (The details of this function can be changed for better performance)Select “User’s Guide” from the G-scan Main Menu and press the ENTER button (or double touch)[Fig. 1] User’s Guide selectedThe user’s manual follows on the screen as shown in the Fig. 2.[Fig. 2] User’s manualMSN:kathy-tool@hotmail.comSkype:kathy-tool56Email: sales@hkjinghang.comyahoo:hkjinghang@yahoo.com
G-scan User Manualwww.hkjinghang.comChapter 4.G-scan PC Utility Software4.1. Installation and Removal4.2. Main menu4.3. Recorded Data Viewer4.4. Captured Screen Viewer4.5. Software Update4.6. SD Card Recovery4.7. PC Utility <strong>Co</strong>nfigurationMSN:kathy-tool@hotmail.comSkype:kathy-tool57Email: sales@hkjinghang.comyahoo:hkjinghang@yahoo.com
G-scan User Manualwww.hkjinghang.com4.1. Installation and RemovalG-scan PC Utility SoftwareAA-4-1. Installation and RemovalG-Scan PC Utility program provides Record Data and Captured Imagereview, G-scan software updateand SD card recovery services..[Fig. 1] G-scan PC Utility SoftwarePC Utility Software InstallationInsert the G-Scan Utility Software CD provided in the kit to the PC’s CD/DVD drive, and the installationwizard is automatically executed.<strong>Co</strong>mpatible PC Operating System• Windows 2000 Service Pack 4 or newer• Windows XP Professional (or Home Edition)• Windows Vista 32bit (64bit system is not supported)MSN:kathy-tool@hotmail.comSkype:kathy-tool58Email: sales@hkjinghang.comyahoo:hkjinghang@yahoo.com
G-scan User Manualwww.hkjinghang.comClick “Next (N)” button to initiate the installation procedure.[Fig. 1] Installation InitiatedSelect the folder to which PC Utility Software is installed, and click “Next (N)” to confirm.[Fig. 2] Installation Folder SelectionClick “Install (I)” to begin copying files.[Fig. 3] Installation beginsMSN:kathy-tool@hotmail.comSkype:kathy-tool59Email: sales@hkjinghang.comyahoo:hkjinghang@yahoo.com
G-scan User Manualwww.hkjinghang.com[Fig. 4] G-scan PC Utility Software being installed.“Microsoft Visual C++ 2005” installation guide follows the installation. Click “Next (N)” to continue.[Fig. 5] Microsoft Visual C++ Installation guidePC Utility may not function properly if “Microsoft Visual C++ 2005” is not installed. Click “Yes(Y)” toaccept and proceed with installation.[Fig. 6] Microsoft Visual C++ Installation <strong>Co</strong>nfirmationMSN:kathy-tool@hotmail.comSkype:kathy-tool60Email: sales@hkjinghang.comyahoo:hkjinghang@yahoo.com
G-scan User Manualwww.hkjinghang.comClick “Finish” to complete PC Utility Software installation.[Fig. 7] G-scan PC Utility Software Installation <strong>Co</strong>mpletedCheck if the PC Utility Software shortcut icon is created on the desktop PC[Fig. 8] PC Utility Software Shortcut IconPC Utility Software RemovalClick “Program Add/Remove” from the <strong>Co</strong>ntrol Panel to remove PC Utility Software from the PC.[Fig. 9] <strong>Co</strong>ntrol Panel - Add or Remove ProgramMSN:kathy-tool@hotmail.comSkype:kathy-tool61Email: sales@hkjinghang.comyahoo:hkjinghang@yahoo.com
G-scan User Manualwww.hkjinghang.comThe programs installed on the PC are listed as shown in Fig.10, select “G-scan PC Utility” and click“Remove” button to uninstall the program.[Fig. 10] Select G-scan PC Utility to RemoveClick “Yes(Y)” to confirm PC Utility Software removal at the pop-up query as shown in Fig.11.[Fig. 11] <strong>Co</strong>nfirm to remove G-scan PC UtilityProgress bar of uninstall process follows the confirmation[Fig. 12] G-scan PC Utility is being removedMSN:kathy-tool@hotmail.comSkype:kathy-tool62Email: sales@hkjinghang.comyahoo:hkjinghang@yahoo.com
G-scan User Manualwww.hkjinghang.comClick “Finish” to finalize the PC Utility Software removing process as shown in Fig. 13.[Fig. 13] G-scan PC Utility - RemovedMSN:kathy-tool@hotmail.comSkype:kathy-tool63Email: sales@hkjinghang.comyahoo:hkjinghang@yahoo.com
G-scan User Manualwww.hkjinghang.com4.2. Main MenuG-scan PC Utility SoftwareAA-4-2. Main MenuRun the “G-scan PC Utility” by a double click on the shortcut icon on the PC desktop, then theprogram is loaded and the main menu as shown in Fig. 1 follows.[Fig. 1] G-scan PC Utility Software Main MenuIconDescriptionLoads on-screen user manual for each brand for referenceSerial number of G-Scan is indicated as saved in the configuration menuExpiry date of update subscription is indicatedLoads Record Data frames from the SD Card for review and print.Loads Captured Imagefrom the SD Card for review and print.Updates the software applications in the SD CardRecovers SD Card’s original condition in case of memory card failureChanges user settings for G-scan PC Utility SoftwareMSN:kathy-tool@hotmail.comSkype:kathy-tool64Email: sales@hkjinghang.comyahoo:hkjinghang@yahoo.com
G-scan User Manualwww.hkjinghang.comGIT Website:Close (X)Redirects to the website of GIT: Version number of PC Utility Software is indicatedQuits PC Utility SoftwareManualA new window opens and the user manual files are listed when the “Manual” button is clicked asshown in Fig. 2. Select the car make from the file names, and open the file.The manual files are provided in the form of PDF which can be opened by “Acrobat Reader®” program.If the program is not installed on the PC, note that the installation program “Adobe Acrobat Rdr” isincluded in the provided CD.The PDF version user manual for each brand may take more than 10 seconds to open when loadedthe first time.[Fig. 2] User’s manual for each car makeMSN:kathy-tool@hotmail.comSkype:kathy-tool65Email: sales@hkjinghang.comyahoo:hkjinghang@yahoo.com
G-scan User Manualwww.hkjinghang.com4.3. Recorded Data ViewerG-scan PC Utility SoftwareAA-4-3. Recorded Data ViewerCurrent Data frames recorded in the SD Card memory while using G-scan’s diagnostic function can beloaded to the PC for review, file format conversion and print.1. Turn G-Scan power OFF and remove the SD Card from the base unit2. Insert the SD Card to the provided Card Reader3. Insert the Card Reader to a USB slot of the PC[Fig. 1] SD Card inserted to PCCaution• Make sure to move the SD Card Write Protection Tab to the UNLOCK position beforeinserting to the PC as illustrated in Fig. 2.• PC Utility may not function properly if the write protection tab is at the LOCKED position[Fig. 2] SD Card Write Protection TabMSN:kathy-tool@hotmail.comSkype:kathy-tool66Email: sales@hkjinghang.comyahoo:hkjinghang@yahoo.com
G-scan User Manualwww.hkjinghang.comWhen the SD Card is inserted to the PC using the Card Reader, select the “Recorded Data Viewer”from the main menu as shown in Fig. 3.[Fig. 3] Recorded Data Viewer SelectedWhen loaded, Recorded Data Viewer comes up with the file selection menu as shown in Fig. 4[Fig. 4] Recorded Data Viewer – File selectionIconDescriptionThe Record Data files contained in the PC are listed<strong>Co</strong>pies the Record Data files contained in the SD card to the PCDeletes the Record Data folder or the fileThe Record Data files contained in the SD Card are listedOpens the selected Record Data fileQuits the Record Data Viewer programMSN:kathy-tool@hotmail.comSkype:kathy-tool67Email: sales@hkjinghang.comyahoo:hkjinghang@yahoo.com
G-scan User Manualwww.hkjinghang.comSelect the file to open among the list of folders and files contained in either PC or SD card, and click“Open” to load the file. For easier recognition, the Files are saved in the folders of the same namesas the user has made selections for the communication with the test vehicle.[Fig. 5] Recorded Data File selectionWhen the file is loaded, the live data parameters and values come up in the graphical form as shownin the Fig. 6[Fig. 6] Recorded Data loaded in graphic modeMSN:kathy-tool@hotmail.comSkype:kathy-tool68Email: sales@hkjinghang.comyahoo:hkjinghang@yahoo.com
G-scan User ManualIconDescriptionFile name of the selected Recorded Datawww.hkjinghang.comTime in seconds per grid on the graphs (graphic mode only)Time elapsed until the triggered pointLength of the Recorded DataLength of time elapsed from Cursor A till Cursor BReplay controls: Rewind | Rev. Play | Stop | Play | Fast ForwardHorizontally Zoom in / out of the graphs (graphic mode only)<strong>Co</strong>verts to Alpha-numerical text display mode.<strong>Co</strong>verts to graphical display mode.Resets the minimum / Maximum readings (graphic mode only)Moves the cursor to the triggered pointShows the information of the opened Recorded Data file/ Switches between parameter list and data readingDisplay modeSelectamong the upper control buttons, then the Recoded Data is converted to a Textbased display mode in the similar way as G-Scan’s normal data reading function as illustrated in Fig.7.[Fig. 7] Recorded Data loaded in text modeMSN:kathy-tool@hotmail.comSkype:kathy-tool69Email: sales@hkjinghang.comyahoo:hkjinghang@yahoo.com
G-scan User Manualwww.hkjinghang.comDisplay mode is converted to a graphical mode when thebutton is selected.In order to select particular data parameters among the data list and view them in graphic mode, markthe check box in the head of each line as illustrated in Fig. 8. The selected parameters are moved tothe top of the screen and vice versa.[Fig. 8] Data parameter moved to top screenThe selected parameters come up in graphs when the display mode is changed to the graphical mode.Note that up to 8 parameters at a time can be displayed in the graphical mode.[Fig. 9] Selected parameters come up in graphsMSN:kathy-tool@hotmail.comSkype:kathy-tool70Email: sales@hkjinghang.comyahoo:hkjinghang@yahoo.com
G-scan User Manualwww.hkjinghang.comAdding, removing or replacing the parameter is possible in the graphical display mode by selecting thebutton in the top right of the screen.The parameters that are currently shown in graphs are indicated with the star (*) mark in the head ofthe name as shown in Fig. 10. Click on a parameter name with the star mark will exclude theparameter from the list, and the number of graphs that appear on the screen is decreased as much,and vice versa.[Fig. 10] Graphing parameters listed[Fig. 11] A few parameters deselected for graphingMSN:kathy-tool@hotmail.comSkype:kathy-tool71Email: sales@hkjinghang.comyahoo:hkjinghang@yahoo.com
G-scan User Manualwww.hkjinghang.comCursorsCursors are available in graphical display mode only.Cursor in this function refers to the parameter reading on a particular moment on the time(x) axis ofthe graphs.Pressing the left mouse button after placing the mouse pointer on any particular coordinate on thegraphs turns the Cursor A on, which appears are a dotted vertical red line.Time elapsed until the Cursor A point is indicated in the top of the screen as “ ”Also the data readings of each parameter at the Cursor A point are displayed on the right side of thescreen as illustrated in Fig. 12.[Fig. 12] Cursor A appearedThe readings of each parameter at the moment cursor A is pointing are displayed on the right side ofscreen in blue bold letters.Max and Min values are indicating:With cursor A only: The lowest and the highest points that appear on the current screen.With cursor A and B: The minimum and the maximum values between the Cursor A and Cursor Bpoints.* Selecting the button resets the min/Max values to the reading of the first frame.MSN:kathy-tool@hotmail.comSkype:kathy-tool72Email: sales@hkjinghang.comyahoo:hkjinghang@yahoo.com
G-scan User Manualwww.hkjinghang.comThe Cursor B appears as the dotted blue vertical line when the right mouse button is pressed, anddisappears when the button pressed again as shown in Fig. 13.The time difference between the cursors is indicated in the top of the screen -[Fig. 13] Cursor A and BGo to TriggerA trigger refers to the particular moment when the user pressed the Trigger button while recording livedata, and selectingbutton instantly moves the cursor to the Triggered point.[Fig. 14] Cursor A moved to the triggered pointMSN:kathy-tool@hotmail.comSkype:kathy-tool73Email: sales@hkjinghang.comyahoo:hkjinghang@yahoo.com
G-scan User Manualwww.hkjinghang.comIn the text display mode, the parameters and data reading of the frame (page) at the trigger point willbe displayed.File InfoA window with the details of the Recorded Data file pops-up when theis selected asshown in the Fig. 15.The location of the file in the SD card, file size, data run time as well as the tested vehicle informationsuch as car make, model name and engine type are provided.[Fig. 15] Recorded Data File Info.Recorded Data file copy to PC and deleteRecorded Data files contained in the SD card can be copied to the PC.Select the Recorded Data folder or files on the SD card file list (right half of the screen) and clickbutton. Fig. 16 illustrates the Record Data files copied to PC.Record Data files contained in the PC or the SD card can be removed when button is selected.It is followed by the confirmation query for deleting the selected file - click “OK” to confirm and deletethe selected files.MSN:kathy-tool@hotmail.comSkype:kathy-tool74Email: sales@hkjinghang.comyahoo:hkjinghang@yahoo.com
G-scan User Manualwww.hkjinghang.com[Fig. 16] Recorded Data copied from SD card to PC[Fig. 17] <strong>Co</strong>nfirm to delete the selected filesMSN:kathy-tool@hotmail.comSkype:kathy-tool75Email: sales@hkjinghang.comyahoo:hkjinghang@yahoo.com
76G-scan User Manualwww.hkjinghang.com4.4. Captured Screen ViewerG-scan PC Utility SoftwareAA-4-4. Captured Screen ViewerScreen shots captured and saved in the SD Card memory while using G-scan’s diagnostic functioncan be loaded to the PC for review, file format conversion and print.1. Turn G-Scan power OFF and remove the SD Card from the base unit2. Insert the SD Card to the provided Card Reader3. Insert the Card Reader to a USB slot of the PC[Fig. 1] SD Card inserted to PCCaution• Make sure to move the SD Card Write Protection Tab to the UNLOCK position beforeinserting to the PC as illustrated in Fig. 2.• PC Utility may not function properly if the write protection tab is at the LOCKED position[Fig. 2] SD Card Write Protection TabMSN:kathy-tool@hotmail.comSkype:kathy-toolEmail: sales@hkjinghang.comyahoo:hkjinghang@yahoo.com
G-scan User Manualwww.hkjinghang.comWhen the SD Card is inserted to the PC using the Card Reader, select the “Captured Screen Viewer”from the main menu as shown in Fig. 3.[Fig. 3] Captured Image Viewer selectedWhen the program loaded, the initial display of Captured Screen Viewer appears as shown in Fig. 4[Fig. 4] Captured Screen Viewer initiatedMSN:kathy-tool@hotmail.comSkype:kathy-tool77Email: sales@hkjinghang.comyahoo:hkjinghang@yahoo.com
78G-scan User Manualwww.hkjinghang.comIconDescriptionThe Captured Screen files contained in the PC are listed<strong>Co</strong>pies the Captured Screen files contained in the SD card to the PCDeletes the Captured Screen folder or the fileThe Captured Screen files contained in the SD Card are listedShows the selected Captured Screen filePrints the selected Captured Screen fileQuits Captured Screen ViewerSelect the Captured Screen file contained either in the PC or the SD card.The selected Captured Screen file is viewed in the preview window as shown in Fig. 5[Fig. 5] Captured Screen PreviewMSN:kathy-tool@hotmail.comSkype:kathy-toolEmail: sales@hkjinghang.comyahoo:hkjinghang@yahoo.com
G-scan User Manualwww.hkjinghang.comPrintClick “Print” button to print the Captured Screen that is selected as appears in the preview window.When the printer selection and setup dialog appears for confirmation, check the selected printer andits properties, and click “OK” to print.[Fig. 6] Captured Screen printCaptured Screen file copy to PC and deleteCaptured Screen files contained in the SD card can be copied to the PC.Select the Captured Screen folder or files on the SD card file list (right half of the screen) and clickbutton. Fig. 7 illustrates the Captured Image files copied to PC.Captured Screen files copied to the PC can be viewed in the “preview” window when selected.MSN:kathy-tool@hotmail.comSkype:kathy-tool79Email: sales@hkjinghang.comyahoo:hkjinghang@yahoo.com
80G-scan User Manualwww.hkjinghang.com[Fig. 7] Captured Screen copied from SD card to PCCaptured Screen files contained in the PC or the SD card can be removed when button isselected, followed by the confirmation dialog for deleting the files, then select “OK” to delete the files.[Fig. 8] Delete Captured Screen fileMSN:kathy-tool@hotmail.comSkype:kathy-toolEmail: sales@hkjinghang.comyahoo:hkjinghang@yahoo.com
81G-scan User Manualwww.hkjinghang.com4.5. Software UpdateG-scan PC Utility SoftwareAA-4-5. Software UpdateG-scan software contained in SD Card can be updated to the latest versions to include the newlyadded models, systems and functions as well as the recent patches and revisions.Select “Software Update” from the G-Scan PC Utility Software main menu as shown in Fig. 1 below.[Fig. 1] Software Update selectedHow to connect the SD card to the PC is illustrated on the PC screen as shown in Fig. 2.[Fig. 2] SD Card inserted to PCMSN:kathy-tool@hotmail.comSkype:kathy-toolEmail: sales@hkjinghang.comyahoo:hkjinghang@yahoo.com
82G-scan User Manualwww.hkjinghang.com1. Turn G-scan base unit power OFF and remove the SD Card2. Insert the SD Card to the provided Card Reader3. Insert the Card Reader to a USB port of the PC4. Click “Next” button to proceedCaution• Make sure to move the SD Card Write Protection Tab to the UNLOCK position beforeinserting to the PC as illustrated in Fig. 2.• PC Utility may not function properly if the write protection tab is at the LOCKED position[Fig. 3] SD Card Write Protection TabType in the G-scan base unit serial number correctly, and feed in the correct ID and password asregistered when purchased G-Scan as shown in Fig. 4. Click “Next” button when ready.[Fig. 4] Serial number, ID and Password input
83G-scan User Manualwww.hkjinghang.comSoftware Update begins automatically if serial number, ID and password information provided are allcorrect.[Fig. 5] Software Update in progressClick “Done” when the progress bar reaches 100% and the “Update <strong>Co</strong>mpleted” message appears inthe window,[Fig. 6] Software Update <strong>Co</strong>mpletedMSN:kathy-tool@hotmail.comSkype:kathy-toolEmail: sales@hkjinghang.comyahoo:hkjinghang@yahoo.com
84G-scan User Manualwww.hkjinghang.comCaution• DO NOT remove SD Card or Card Reader from the PC while updating• Removing SD Card or Card Reader while updating or before the process is completed mayseriously damage the SD Card and its contents.When the update is completed, make sure to remove the Card Reader safely by double clicking the“Safely Remove Hardware” icon in the Windows tray in the bottom as illustrated in Fig. 7.[Fig. 7] Safely-Remove-Hardware iconThe USB devices connected to the PC are listed for safe removal. Select “USB Mass StorageDevice” among the list, and click “Stop(S)” to stop the operation and get ready for safe removal.[Fig. 8] Stop use of USB Mass Storage DeviceMSN:kathy-tool@hotmail.comSkype:kathy-toolEmail: sales@hkjinghang.comyahoo:hkjinghang@yahoo.com
85G-scan User Manualwww.hkjinghang.comThe procedure is followed by the “Stop a hardware device” query for confirmation. Click “OK” toremove the Card Reader.[Fig. 9] Stop Hardware DeviceCheck if the device has been stopped and there is no “USB Mass Storage Device” in the “SafelyRemove Hardware” list as shown in Fig. 10, then remove the Card Reader from the USB port..[Fig. 10] Check “Remove Hardware Safely” listInsert the SD Card into the G-Scan base unit and check if the G-Scan operations normally afterupdate.MSN:kathy-tool@hotmail.comSkype:kathy-toolEmail: sales@hkjinghang.comyahoo:hkjinghang@yahoo.com
86G-scan User Manualwww.hkjinghang.com4.6. SD Card RecoveryG-scan PC Utility SoftwareAA-4-6. SD Card RecoveryIn case G-Scan software contained in the SD card gets corrupted or any memory card read failure isexperienced, SD card can be restored to the original condition.Select “SD Card Recovery” from the G-scan PC Utility Software main menu as shown in Fig. 1.[Fig. 1] SD Card Recovery selectedRead the SD Card recovery instruction carefully and click “Next” button to proceed.[Fig. 2] SD Card Recovery InstructionMSN:kathy-tool@hotmail.comSkype:kathy-toolEmail: sales@hkjinghang.comyahoo:hkjinghang@yahoo.com
87G-scan User Manualwww.hkjinghang.comCaution• Make sure that the following instructions are understood and carefully observed.1. G-scan Base Unit ResetPress the RESET button in the bottom of the G-Scan base unit using the stylus pen while theG-Scan is turned ON.When the base unit turns off, turn it ON and check if G-Scan operates normally.If the problem is solved by resetting, SD Card Recovery is not necessary.2. Base unit problemIf the base unit seems defective rather than the SD Card, DO NOT proceed with the SD Cardrecovery procedure and call the local distributor for support.How to connect the SD card to the PC is illustrated on the PC screen as shown in Fig. 3.[Fig. 3] SD Card inserted to PC1. Turn G-scan base unit power OFF and remove the SD Card2. Insert the SD Card to the provided Card Reader3. Insert the Card Reader to a USB port of the PC4. Click “Next” button to proceedMSN:kathy-tool@hotmail.comSkype:kathy-toolEmail: sales@hkjinghang.comyahoo:hkjinghang@yahoo.com
88G-scan User ManualCautionwww.hkjinghang.com• Make sure to move the SD Card Write Protection Tab to the UNLOCK position beforeinserting to the PC as illustrated in Fig. 2.• PC Utility may not function properly if the write protection tab is at the LOCKED position[Fig. 4] SD Card Write Protection TabAll information contained in the SD Card is lost after the recovery.If important Record Data and Captured Imagefiles are not copied to the PC, abort the procedure byclicking “Cancel” button. If possible, copy the files to the PC using the “Record Data Review” or“Captured ImageReview” functions of the PC Utility Software, and then resume recovery procedure.Click “OK” to being SD Card Recovery.[Fig. 5] Warning messageFile TypeFolder LocationImage DataRecoded DataSD Card\G-scanImageSD Card\G-scanRecordMSN:kathy-tool@hotmail.comSkype:kathy-toolEmail: sales@hkjinghang.comyahoo:hkjinghang@yahoo.com
89G-scan User Manualwww.hkjinghang.comThe warning message is followed by the window for SD Card Format setting. Select “FAT32” as the filesystem as shown in Fig. 6. Click “Start(S)” to format the card.SD Card may not be recognized by G-Scan if the file system other than FAT32 is selected forformatting.[Fig. 6] SD Card FAT32 FormatMSN:kathy-tool@hotmail.comSkype:kathy-toolEmail: sales@hkjinghang.comyahoo:hkjinghang@yahoo.com
90G-scan User Manualwww.hkjinghang.comThe recovery process initiates as shown in Fig. 7 when the SD card is formatted.[Fig. 7] SD Card being recoveredThe progress bar reaches 100% and “Recovery has been completed” message appears when the SDCard is successfully recovered. Click “Done” to end the recovery program.[Fig. 8] SD Card Recovery <strong>Co</strong>mpletedMSN:kathy-tool@hotmail.comSkype:kathy-toolEmail: sales@hkjinghang.comyahoo:hkjinghang@yahoo.com
91G-scan User Manualwww.hkjinghang.comCaution• Do not remove the SD Card from the card reader, or the card reader from the PC.• It may take a few more seconds for the internal process running in the background after thecompletion of the recovery process.• Do not remove the SD Card or the Card Reader immediately without going through “RemoveHardware Safely” procedure.When SD Card recovery is completed, double-click the “Safely Remove Hardware” icon on theWindows tray in the bottom right of the PC screen.[Fig. 9] Safely Remove Hardware IconSelect the “USB Massive Storage Device” among the USB device list as shown in Fig. 10, and click“Stop(S)”.[Fig. 10] Stop USB Massive Storage DeviceMSN:kathy-tool@hotmail.comSkype:kathy-toolEmail: sales@hkjinghang.comyahoo:hkjinghang@yahoo.com
92G-scan User Manualwww.hkjinghang.com“Hardware Device Stop” window shows the details of the selected USB Mass Storage Device. Checkthat the correct USB device has been selected in case multiple USB devices are connected to the PC.Then click “OK” to proceed.[Fig. 11] <strong>Co</strong>nfirm Hardware Device to be StoppedIf there is no “USB Massive Storage Device” in the “Remove Hardware Safely” list as shown in Fig. 12,close the window by clicking “Close (C)”, then the SD Card can be removed safely.[Fig. 12] Close “Safely Remove Hardware” windowCheck that the SD Card recovery has been completed without problem by inserting it to G-Scan andobserving normal operation of the base unit.If the main menu of G-Scan comes up normally, the SD Card is considered recovered properly.Note that the recovered SD Card contains outdated applications of the versions when it waspurchased. Make sure to update the recovered SD card using “Software Update” function of PC Utility.MSN:kathy-tool@hotmail.comSkype:kathy-toolEmail: sales@hkjinghang.comyahoo:hkjinghang@yahoo.com
93G-scan User Manualwww.hkjinghang.com4.7. PC Utility <strong>Co</strong>nfigurationG-scan PC Utility SoftwareAA-4-7. PC Utility <strong>Co</strong>nfigurationIn the configuration menu, software update alarm setting and user information (serial number)registration is supported. Run G-scan PC Utility Program and click “<strong>Co</strong>nfiguration” as shown in Fig. 1.[Fig. 1] Selected configurationSet Alarm[Fig. 2] Update Alarm SetupMSN:kathy-tool@hotmail.comSkype:kathy-toolEmail: sales@hkjinghang.comyahoo:hkjinghang@yahoo.com
94G-scan User Manualwww.hkjinghang.comAlarm refers to the function that informs the user when there is an update available for G-Scan.Automatic Update Alarm can be toggled On or Off by selecting “Yes” or “No” in the menu as shown inFig. 2.Setting Automatic Update Alarm ON by selecting “Yes” is followed by a further selection menu for theAlarm Frequency as illustrated in Fig. 3: “Once when booting”, “Every 1 hour”, “every 3 hours” and“every 6 hours”[Fig. 3] Update Notice Frequency SettingIconDescriptionClose the <strong>Co</strong>nfiguration menu after saving the changed settingClose the <strong>Co</strong>nfiguration menu without saving the changed settingSave the changed settings and the <strong>Co</strong>nfiguration menu remains openMSN:kathy-tool@hotmail.comSkype:kathy-toolEmail: sales@hkjinghang.comyahoo:hkjinghang@yahoo.com
95G-scan User Manualwww.hkjinghang.comUser informationUser information refers to the function that registers the G-Scan serial number for software update andsupport. Software update is not provided if the correct serial number is not registered.Type in the G-scan serial number correctly as shown in Fig.4, and click “Register” button.[Fig. 4] User info (serial number) registrationIconDescriptionRegisters the new serial numberDeletes the registered serial numberMSN:kathy-tool@hotmail.comSkype:kathy-toolEmail: sales@hkjinghang.comyahoo:hkjinghang@yahoo.com
96G-scan User Manualwww.hkjinghang.comThe registered serial numbers are listed in the box as shown in the Fig. 5.[Fig. 5] Registered one serial numberRegistering multiple serial numbers is also possible as shown in Fig. 6 which illustrates an examplewhen 3 serial numbers are registered[Fig. 6] Multiple Serial Numbers registeredMSN:kathy-tool@hotmail.comSkype:kathy-toolEmail: sales@hkjinghang.comyahoo:hkjinghang@yahoo.com
97G-scan User Manualwww.hkjinghang.comIn order to delete a registered serial number, select the serial number from the list and click “Delete”button. The selected serial number is deleted instantly as shown in Fig. 7.[Fig. 7] Delete serial numberIf the registered serial number is valid for software updates, the serial number and the expiry date ofthe software update subscription are indicated in the top of the main menu as illustrated in Fig. 8.[Fig. 8] Registered serial number and update expiry DateMSN:kathy-tool@hotmail.comSkype:kathy-toolEmail: sales@hkjinghang.comyahoo:hkjinghang@yahoo.com
98G-scan User Manualwww.hkjinghang.comIn case multiple G-Scan serial numbers are registered, the expiry date of the each serial number isindicated when a serial number is selected from the drop down list as shown in Fig. 9.[Fig. 9] Select Serial NumberMSN:kathy-tool@hotmail.comSkype:kathy-toolEmail: sales@hkjinghang.comyahoo:hkjinghang@yahoo.com
99G-scan User Manualwww.hkjinghang.comChapter 5 Appendix5.1. Lithium-ion battery replacement5.2. Cigarette Lighter Fuse Replacement5.3. G-Scan OS update5.4. G-Scan Limited Warranty5.5. Discard of used equipmentMSN:kathy-tool@hotmail.comSkype:kathy-toolEmail: sales@hkjinghang.comyahoo:hkjinghang@yahoo.com
100G-scan User Manualwww.hkjinghang.com5.1. Lithium Ion Battery ReplacementAppendixAA-5-1. Li-ion Battery Replacement1) Unscrew 4 bolts from the battery pack as shown in Fig.1 and remove the battery pack from thebase unit.[Fig. 1] Remove battery pack2) Open the flat cover from the battery pack as shown in the Fig. 2, and take out the battery cell.[Fig. 2] Open battery lidMSN:kathy-tool@hotmail.comSkype:kathy-toolEmail: sales@hkjinghang.comyahoo:hkjinghang@yahoo.com
101G-scan User Manualwww.hkjinghang.com3) Hold the battery and unplug the wire harness from the battery pack housing as illustrated in Fig. 3.[Fig. 3] Unplug the battery4) Observe the shape of the connecting part carefully and plug the wired harness of the replacementbattery into the housing.[Fig. 4] <strong>Co</strong>nnect the replacement battery5) Follow the procedure 1 and 2 in reversed sequencePlace the replacement battery into right position and put the battery pack flat lid back in place.Put the battery pack in to place in the rear of the base unit and tighten the 4 screws.MSN:kathy-tool@hotmail.comSkype:kathy-toolEmail: sales@hkjinghang.comyahoo:hkjinghang@yahoo.com
G-scan User Manualwww.hkjinghang.comCaution• Beware of the connecting direction of the wired harness when inserting into the battery pack.Do not apply excessive force to make connection wrong side up.• When closing the battery lid, be careful not to get the battery wire caught in and damaged.MSN:kathy-tool@hotmail.comSkype:kathy-tool102Email: sales@hkjinghang.comyahoo:hkjinghang@yahoo.com
103G-scan User Manualwww.hkjinghang.com5.2. Cigarette Lighter Fuse ReplacementAppendixAA-5-2. Cigarette Lighter Fuse Replacement1) Use the 10mm spanner to turn the metal stopper counterclockwise.Remove the stopper, the fuse cap and the metal contact, then the fuse is taken out of the case.2) Put the replacement fuse (250V 4A)into place and assemble the metal parts in reversedsequence.Fuse(250V 4A)[Fig. 1] Dismantling the cigarette lighterMSN:kathy-tool@hotmail.comSkype:kathy-toolEmail: sales@hkjinghang.comyahoo:hkjinghang@yahoo.com
104G-scan User Manualwww.hkjinghang.com5.3. G-scan O/S UpdateAppendixAA-5-3. G-Scan OS UpdateG-scan is built on Windows CE operating system, and this part of manual explains the details onconditions and procedure for the operating system update.OS update becomes possible when all of the following conditions are met.• Power shall be supplied through the provided AC/DC converter.• OS update data shall be loaded on the SD Card• The OS update loaded on the SD Card shall be of different version from the currentlyrunning G-Scan OS version.• All external devices connected to the Option Ports shall be removed.※ G-Scan automatically turns off in case update is attempted without inserting SD Card.Insert the SD Card into G-Scan base unit while turned Off.Turn On the base unit while pressing the and keys pressed together.On-screen instruction for OS update comes up as shown in Fig. 1, then press the ENTER keyto continue and the O/S update process initiates.Otherwise, press the ESC key to cancel OS update, then G-Scan gets turned off.[Fig. 1] O/S update instructionMSN:kathy-tool@hotmail.comSkype:kathy-toolEmail: sales@hkjinghang.comyahoo:hkjinghang@yahoo.com
105G-scan User Manualwww.hkjinghang.comThe message informing that the OS update has been completed appears as shown in Fig. 2.Press the ENTER key to acknowledge.[Fig. 2] O/S update completed messageOS update process is followed by the Touch Screen Calibration automatically. Touch thecenter of the crosshair mark in sequence as instructed on the screen as shown in Fig. 3.[Fig. 3] Touch Screen CalibrationMSN:kathy-tool@hotmail.comSkype:kathy-toolEmail: sales@hkjinghang.comyahoo:hkjinghang@yahoo.com
G-scan User Manualwww.hkjinghang.comWhen the touch signals for all 5 crosshair marks are recognized, the process is prompted bythe query for applying the new calibration data.Press the ENTER key to apply the new calibration, otherwise press the ESC key cancel.[Fig. 4] Touch screen calibration completedWhen the O/S update is completed, the system reinitiates.[Fig. 5] G-scan main menuMSN:kathy-tool@hotmail.comSkype:kathy-tool106Email: sales@hkjinghang.comyahoo:hkjinghang@yahoo.com
107G-scan User Manualwww.hkjinghang.comError Message for OS updatePower is not supplied from AC/DC converter1The base unit turns off when any key is pressed in case this error message appears.Supply power to the base unit using the AC/DC converter and retry.OS update file contained on the SD Card is defective / corrupted.2The base unit turns off when any key is pressed in case this error message appears.<strong>Co</strong>rrect the SD Card problem by going through the SD Card Recovery procedure usingthe PC Utility Software.Update software applications after recovering the SD Card, then retry OS updateprocedure.MSN:kathy-tool@hotmail.comSkype:kathy-toolEmail: sales@hkjinghang.comyahoo:hkjinghang@yahoo.com
108G-scan User Manualwww.hkjinghang.comOS update file contained in SD Card is the same as the current OS3The base unit turns off when any key is pressed in case this error message appears.The latest OS version is already installed. No update is necessary.External device is connected to the USB port4Unknown USB deviceRemove all external devices connected to USB ports and reboot G-scanRetry OS update procedure.MSN:kathy-tool@hotmail.comSkype:kathy-toolEmail: sales@hkjinghang.comyahoo:hkjinghang@yahoo.com
109G-scan User Manualwww.hkjinghang.com5.5. G-Scan Limited WarrantyAppendixAA-5-5. G-Scan Limited WarrantyProviding that this product has been installed and used as instructed in this operating manual, GIT willrepair G-Scan module (base unit other than software, which is subject to a different warranty program)with new or reconditioned parts, free of charge for two (2) years from the date of original purchase inthe event of defect in materials or workmanship. During the first 1 year of this 2-year period, GIT willcover the freight cost for return trip of the G-Scan module for repair service, and for the remainingsecond 1 year period, the customer shall pay the return trip freight cost while the labor and part costsare still covered by GIT.Functioning accessories including cables and connectors are warranted for 1 year from the data oforiginal purchase.Non-functioning parts and consumable accessories including but not limited to base unit plastic case,carry case and parts thereof, plastic bags, printed material and CD or DVD.Lithium-ion battery module is warranted for 6 months only by the manufacturer.The warranty is extended solely to the original purchaser. A purchase receipt or other proof ofevidencing the date of original purchase will be required to be presented before providing necessarywarranty service.YOU ARE REQUIRED TO REGISTER G-<strong>SCAN</strong> AND <strong>USER</strong> INFORMATION TO GIT WEBSITEIMMEDIATELY. GIT HOLDS THE RIGHT TO REFUSE PROVISION OF ANY SERVICE FOR THEPRODUCT THAT HAS NOT BEEN REGISTERED.This warranty only covers failures caused by defects in materials or workmanship, which may occurduring normal use. It does not cover damage occurs during shipment or failures which may becaused by products, non-genuine parts or accessories not supplied by GIT, or failures resulting fromact of god, alteration, accident, misuse, introduction of liquid material or any other foreign matter intothe product, abuse, neglect, improper installation, maladjustment of consumer controls, impropermaintenance, modification or service conducted by any one unauthorized by GIT.GIT SHALL NOT BE LIABLE FOR LOSS OF DATA OR OTHER INCIDENTAL OR CONSEQUENTIALDAMAGE RESULTING FROM THE USE OF THIS PRODUCT, OR ARISING OUT OF ANY BREACHMSN:kathy-tool@hotmail.comSkype:kathy-toolEmail: sales@hkjinghang.comyahoo:hkjinghang@yahoo.com
110G-scan User Manualwww.hkjinghang.comOF THIS WARRANTY. ALL EXPRESS AND IMPLIED WARRANTIES, INCLUDING THEWARRANTIES OF MERCHANTABILITY AND FITNESS FOR A PARTICULAR PURPOSE ARELIMITED TO THE APPLICABLE WARRANTY PERIOD SET FORTH ABOVE.GIT’s entire liability and your exclusive remedy under this warranty shall be limited to the replacement,or any defective parts or functions in the products, which is returned to GIT or its authorized localdistributor, together with a copy of the purchasing receipt, during the aforementioned warranty period.Anything in the foregoing to the contrary notwithstanding, GIT shall have no obligation for any defectsin the product resulting from your storage thereof, or for defects that have been caused by operation ofthe product other than on the operation manual or in environmental conditions other than thosespecified by GIT or by alteration, accident, misuse, abuse, neglect, mishandling, misapplication,installation, maladjustment of consumer controls, improper maintenance, modification or damage thatis attributed to acts of God.This limited warranty gives you specified legal rights, and you may also have other rights, which varyfrom country to country. The laws of Republic of Korea, without regard to its conflict-of-laws rules,will govern this Limited Warranty.To obtain help or technical Assistance, please contact your local distributor.MSN:kathy-tool@hotmail.comSkype:kathy-toolEmail: sales@hkjinghang.comyahoo:hkjinghang@yahoo.com
111G-scan User Manualwww.hkjinghang.com5.6. Discard of used equipmentAppendixAA-5-6. Discard of used equipmentWEEE (Waste Electrical and Electronic Equipment) symbol as shown in Fig. 1 is indicated on the backof G-Scan base unit. Please note that G-Scan is subject to this regulation for disposal of WasteElectrical and Electronic Equipment, therefore you are kindly requested to follow the suggested rules.WEEE is applied to EU member nations as well as Non-EU member European countries with separatewaste collection systems.This symbol on the product or on its packaging indicates that this product shall not be treated ashousehold waste. Instead it shall be handed over to the applicable collection point for the recycling ofelectrical and electronic equipment. By ensuring this product is disposed of correctly, you will helpprevent potential negative consequences for the environment and human health, which couldotherwise be caused by inappropriate waste handling of this product. The recycling of materials willhelp conserve natural resources. For more information on recycling of this product , please contactyour community authority, your household waste disposal service or your local distributor.MSN:kathy-tool@hotmail.comSkype:kathy-toolEmail: sales@hkjinghang.comyahoo:hkjinghang@yahoo.com