Quick Start Guide to VTS OnlineAVL Software
Quick Start Guide to VTS OnlineAVL Software
Quick Start Guide to VTS OnlineAVL Software
Create successful ePaper yourself
Turn your PDF publications into a flip-book with our unique Google optimized e-Paper software.
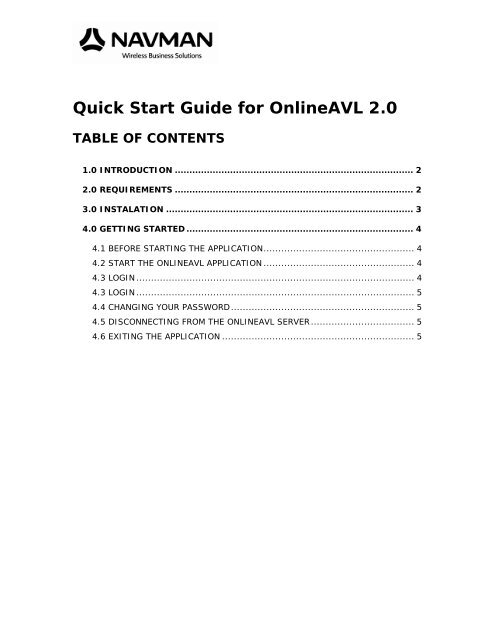
<strong>Quick</strong> <strong>Start</strong> <strong>Guide</strong> for <strong>OnlineAVL</strong> 2.0<br />
TABLE OF CONTENTS<br />
1.0 INTRODUCTION .................................................................................. 2<br />
2.0 REQUIREMENTS .................................................................................. 2<br />
3.0 INSTALATION ..................................................................................... 3<br />
4.0 GETTING STARTED .............................................................................. 4<br />
4.1 BEFORE STARTING THE APPLICATION................................................... 4<br />
4.2 START THE ONLINEAVL APPLICATION ................................................... 4<br />
4.3 LOGIN .............................................................................................. 4<br />
4.3 LOGIN .............................................................................................. 5<br />
4.4 CHANGING YOUR PASSWORD .............................................................. 5<br />
4.5 DISCONNECTING FROM THE ONLINEAVL SERVER ................................... 5<br />
4.6 EXITING THE APPLICATION ................................................................. 5
1.0 INTRODUCTION<br />
Congratulations on your purchase of the Navman Wireless Fleet Management<br />
Solution. This <strong>Quick</strong> <strong>Start</strong> <strong>Guide</strong> will help you install and become familiar with your<br />
<strong>OnlineAVL</strong> application.<br />
<strong>OnlineAVL</strong> (Au<strong>to</strong>matic Vehicle Location) is a PC desk<strong>to</strong>p or lap<strong>to</strong>p application which<br />
allows you <strong>to</strong> view and moni<strong>to</strong>r your vehicles on an interactive map display.<br />
<strong>OnlineAVL</strong> represents a key part of the overall Navman Fleet Management Solution.<br />
In order for you <strong>to</strong> be able <strong>to</strong> fully utilise <strong>OnlineAVL</strong> you must first ensure the<br />
following:<br />
1. Your vehicle(s) have been setup with the Navman Halo Qube or Dome GPS<br />
(Global Positioning System) tracking device. Contact your Navman<br />
representative <strong>to</strong> ensure that this has been completed.<br />
2. You have been setup with a user account for access <strong>to</strong> the Navman Fleet<br />
Management Server. <strong>OnlineAVL</strong> requires a ‘user name’ and ‘password’ for<br />
security purposes before you will be permitted <strong>to</strong> access the Navman Fleet<br />
Management Server and view your vehicles. Contact your Navman<br />
representative <strong>to</strong> ensure that this has been done.<br />
NOTE: The <strong>OnlineAVL</strong> licensing model allows you <strong>to</strong> install as many copies of this<br />
application as you require. <strong>OnlineAVL</strong> is ‘user name’ and ‘password’ protected<br />
allowing you <strong>to</strong> control access <strong>to</strong> your fleet's information.<br />
2.0 REQUIREMENTS<br />
HARDWARE:<br />
• 133 MHz or higher Pentium-compatible CPU<br />
• At least 64 megabytes (MB) of RAM; more memory generally improves<br />
responsiveness<br />
• 2GB of available hard disk space or more<br />
• A direct Internet connection at a minimum of 56kbs speed or higher (128kbs<br />
recommended)<br />
SOFTWARE<br />
• Microsoft Windows 98/2000/XP<br />
NOTE: <strong>OnlineAVL</strong> is not supported on a Apple Macin<strong>to</strong>sh computer.<br />
2
3.0 INSTALATION<br />
To install the <strong>OnlineAVL</strong> application on<strong>to</strong> your PC (please ensure your PC meets the<br />
minimum hardware and software requirements for installation first):<br />
1. Download the <strong>OnlineAVL</strong> ‘setup.exe’ file from the website<br />
2. Save the file in a folder where you can easily locate it. It is recommended<br />
using the default ‘Desk<strong>to</strong>p’ location<br />
3. On completion of the download, click on ‘OPEN’ in the windows box that pops<br />
up<br />
4. The <strong>OnlineAVL</strong> Install screen will then open in a new window. Click 'NEXT' <strong>to</strong><br />
continue. The 'Select Destination Direc<strong>to</strong>ry' screen will appear<br />
5. If you want <strong>to</strong> install the <strong>OnlineAVL</strong> application in the recommended default<br />
location, do not modify the settings displayed. The <strong>OnlineAVL</strong> application will<br />
be installed in the default location 'C:\Program Files\Navman\<strong>OnlineAVL</strong>20'.<br />
a. If you want <strong>to</strong> install the <strong>OnlineAVL</strong> application in a specific location,<br />
select your destination location by browsing through the drive and<br />
folder direc<strong>to</strong>ries. NOTE: by changing the default install direc<strong>to</strong>ry the<br />
instructions in this <strong>Quick</strong> <strong>Start</strong> <strong>Guide</strong> may become invalid<br />
6. Click 'NEXT'. A 'Select Components' screen will appear. Select the country<br />
where your fleet is located. Click 'NEXT' <strong>to</strong> continue<br />
7. The 'Select <strong>Start</strong> Menu Folder' screen will appear. Click ‘NEXT’ <strong>to</strong> continue<br />
8. Choose the Application Icon and Server location you wish <strong>to</strong> connect <strong>to</strong> and<br />
click ‘NEXT’ <strong>to</strong> continue<br />
9. The ‘Ready <strong>to</strong> Install’ screen will appear. Click ‘NEXT’ <strong>to</strong> continue<br />
10. Click ‘INSTALL’. <strong>OnlineAVL</strong> will begin installation<br />
11. The installation process should only take a few minutes. At the end of the<br />
installation process click ‘FINISH’<br />
12. <strong>OnlineAVL</strong> is now installed and ready<br />
3
4.0 GETTING STARTED<br />
4.1 BEFORE STARTING THE APPLICATION<br />
Check that an Internet connection is available:<br />
• If you are using a network connection, the Internet should be available<br />
through the network. Check with your system administra<strong>to</strong>r if you are having<br />
difficulty connecting <strong>to</strong> the Internet<br />
• If you are using a dial-up Internet connection, ensure you have connected<br />
prior <strong>to</strong> launching <strong>OnlineAVL</strong><br />
4.2 START THE ONLINEAVL APPLICATION<br />
To start the <strong>OnlineAVL</strong> application:<br />
1. Click on the <strong>OnlineAVL</strong> icon on the Windows <strong>Quick</strong> <strong>Start</strong> bar at the bot<strong>to</strong>m<br />
of your desk<strong>to</strong>p or access the application by following the menu items from<br />
the Windows ‘<strong>Start</strong>’ but<strong>to</strong>n: ‘<strong>Start</strong>’ > ‘Programs’ > ‘Navman <strong>OnlineAVL</strong>’ ><br />
‘<strong>OnlineAVL</strong>’<br />
2. Once the application is started, the <strong>OnlineAVL</strong> window will appear with the<br />
‘Remote Login’ screen open<br />
Menu Bar<br />
Vehicle Display Screen<br />
Login Screen<br />
Map Display Screen<br />
Control Bar<br />
Vehicle Activity Screen<br />
Map Toolbar<br />
Status Bar<br />
4
4.3 LOGIN<br />
To login <strong>to</strong> <strong>OnlineAVL</strong>:<br />
1. Enter your ‘user name’ and ‘password’ (case sensitive) as provided <strong>to</strong> you by<br />
your Navman representative or your <strong>OnlineAVL</strong> administra<strong>to</strong>r<br />
2. Click ‘OK’<br />
4.4 CHANGING YOUR PASSWORD<br />
To change your <strong>OnlineAVL</strong> Login password:<br />
1. Select: ‘File’ > ‘Password’ from the <strong>OnlineAVL</strong> Menu Bar<br />
2. Enter your existing password<br />
3. Enter your new password<br />
4. Confirm your new password entry again<br />
5. Click ‘OK’. Your new password will replace the old one<br />
NOTE: both your ‘user name’ and ‘password’ are case sensitive.<br />
4.5 DISCONNECTING FROM THE ONLINEAVL SERVER<br />
To terminate your <strong>OnlineAVL</strong> user session, select: ‘File’ > ‘Disconnect’ from the<br />
<strong>OnlineAVL</strong> Menu bar.<br />
4.6 EXITING THE APPLICATION<br />
To exit the <strong>OnlineAVL</strong> application, select: ‘File’ > ‘Exit’ from the <strong>OnlineAVL</strong> Menu bar.<br />
You can also exit the application by clicking on the Close icon on the <strong>to</strong>p right<br />
corner of your <strong>OnlineAVL</strong> window.<br />
This document contains confidential and proprietary information that belongs <strong>to</strong> Navman. Using any of the<br />
information contained herein, copying or imaging all or part of this document by any means, or disclosing<br />
any of its content <strong>to</strong> third parties is strictly forbidden without express written consent of NAVMAN.<br />
NAVMAN is a registered trademark. All rights reserved. Web Site www.navman.com<br />
5


