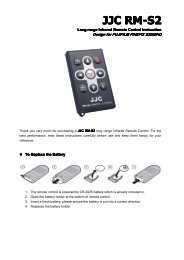
JJC RM-DSLR2
JJC RM-DSLR2
JJC RM-DSLR2

Create successful ePaper yourself
Turn your PDF publications into a flip-book with our unique Google optimized e-Paper software.
<strong>JJC</strong> <strong>RM</strong>-<strong>DSLR2</strong><br />
Long range Infrared Remote Control Instruction<br />
Design for SONY Alpha & NEX<br />
Cameras<br />
Thank you for purchasing <strong>JJC</strong> <strong>RM</strong>-<strong>DSLR2</strong><br />
long range Infrared Remote Control. For the best<br />
performance, please read this instruction carefully before use.<br />
Features:<br />
The <strong>RM</strong>-<strong>DSLR2</strong> is a remote control made especially for the SONY camera provided a remote<br />
sensor. You can operate the camera using the remote control.<br />
• By operating the remote control, you can shoot images and play them back on a TV.*<br />
Shooting the image<br />
Playing back images<br />
Enlarging or reducing the playback images<br />
• The (Slide show) button easily starts/stops a slide show on a TV.*<br />
• Once you connect the camera to a PictBridge printer, you can easily print images while viewing<br />
them on the TV by pressing the PRINT button on the remote control.**<br />
*These function only work when the camera is connected to a TV.<br />
**This function only works when the camera is connected to an HDTV with HDMI cable.<br />
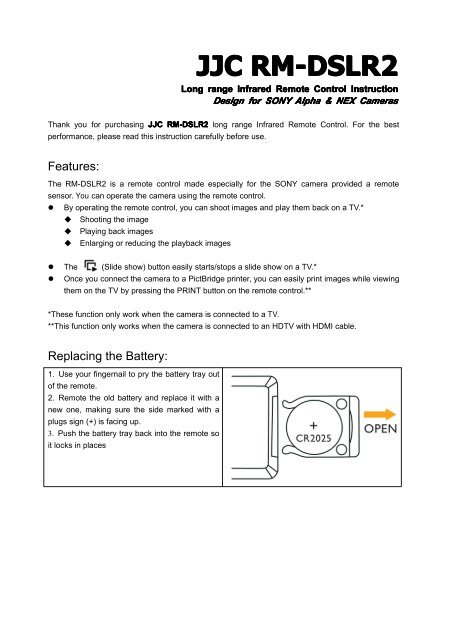
Replacing the Battery:<br />
1. Use your fingernail to pry the battery tray out<br />
of the remote.<br />
2. Remote the old battery and replace it with a<br />
new one, making sure the side marked with a<br />
plugs sign (+) is facing up.<br />
3. Push the battery tray back into the remote so<br />
it locks in places
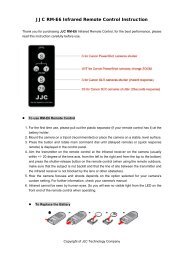
Identifying the parts:<br />
S<br />
●∕█<br />
2S<br />
Shutter button<br />
Start/Stop button<br />
Shutter release in 2<br />
seconds button<br />
Histogram button<br />
DISP<br />
Display button<br />
Index button<br />
Rotate button<br />
Playback button<br />
MENU<br />
PRINT<br />
Menu button<br />
Print button<br />
Slide show button<br />
+/- Scale up/down buttons<br />
Delete button<br />
Multi-selector<br />
Notes:<br />
Except for the 2S, S and ●∕█ buttons, the buttons only work when the camera is connected to a<br />
TV.<br />
Shooting<br />
Verify that the subject is visually in focus and press the S or 2S button.<br />
S button<br />
When the button is pressed, the shutter is released right away.<br />
2S button<br />
After you press the button, the shutter is released about two seconds later.
START/STOP button*<br />
Pressing the button once starts movie recording.<br />
Pressing the button again during movie recording stops recording.<br />
*Can only be used if the camera supports movie recording.<br />
Depending on the model of camera the supports movie recording, you can check the<br />
START/STOP operation with the camera's AF illuminator or self-timer lamp.<br />
Check whether your camera is compatible before use.<br />
• For details about settings, refer to the camera's operating instructions.<br />
• The other buttons are used when the camera is connected to a TV.<br />
Viewing operation with the remote control by connecting the camera to a<br />
TV<br />
Connecting the camera to a TV with a video cable or an HDMI cable and turning to the playback<br />
mode enable you to operate viewing using the remote control. Most of the buttons on the remote<br />
control have the same functions as the buttons on the camera.<br />
• For details, refer to the camera's Operating Instructions.<br />
• The S button, 2S button and PRINT button are used when shooting the image the camera is<br />
connected to a PictBridge printer.<br />
Slide show<br />
The slide show button on the remote control easily starts/stops a slide show. During a slide<br />
show, the following operations are available from the remote control.<br />
• Displaying the previous/next image with<br />
• Pausing/playing back the slide show with .<br />
Printing<br />
Once you connect the camera to an HDTV with an HDMI cable, you can easily print images while<br />
viewing them on the TV.<br />
1. Connect the camera to a TV.<br />
2. Connect the camera to a PictBridge compliant printer.<br />
3. Display the image you want to print.<br />
4. Press the PRINT button on the remote control.<br />
• For details about printing, refer to the camera's Operating Instructions.
Specification:<br />
• Battery Type: 1x 3V CR2025 lithium battery<br />
• Operating temperature: 0 °C to 40 °C (32 °F to 104 °F)<br />
• Storage temperature: -20°C to +60 °C (-4 °F to 140°F)<br />
• Operation distance: 1cm-15meters<br />
• Mass: 22g<br />
• Dimensions: Approx. 90.3 X 40.8 X 11.2 mm<br />
• <strong>RM</strong>-<strong>DSLR2</strong> replaces SONY <strong>RM</strong>T-DSLR1 and <strong>RM</strong>-<strong>DSLR2</strong> remote commander.<br />
Attention:<br />
• When the remote control is not in use over a long time, please remove the battery from the<br />
remote control.<br />
• Do not leave the remote control in places subject to extremely high temperatures.<br />
• The operable range of the wireless controller will shorten under the following circumstance.<br />
1. When strong light strikes the camera.<br />
2. When the battery is weak.<br />
Compatible with Sony Camera<br />
A230 A290 A330 A380<br />
A390 A450 A500 A550<br />
A560 A580 A700 A850<br />
Digital SLR<br />
A900 A33 A55 NEX5<br />
NEX 5N NEX 7 A35 A65<br />
A77 NEX 6 NEX 5R A99<br />
A77<br />
A57<br />
Printed in CHINA<br />
Date:2012-11-01<br />
NO.6950291503893<br />
Copyright of <strong>JJC</strong> Photography Equipment<br />
WWW.<strong>JJC</strong>.CC<br />
Co., Ltd