High Resolution Color Camera SDC-313B User Guide - DOMUSWIRE
High Resolution Color Camera SDC-313B User Guide - DOMUSWIRE
High Resolution Color Camera SDC-313B User Guide - DOMUSWIRE

Create successful ePaper yourself
Turn your PDF publications into a flip-book with our unique Google optimized e-Paper software.
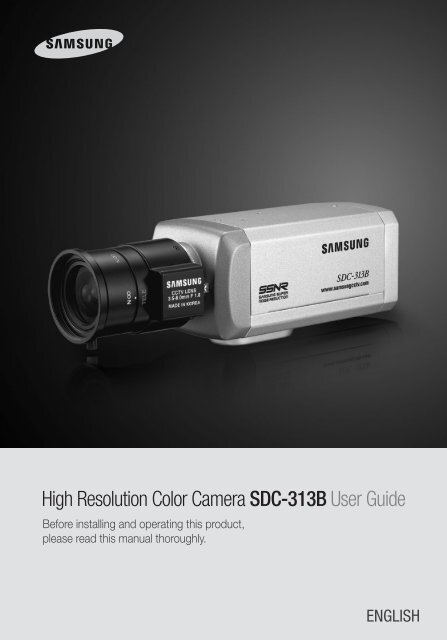
<strong>High</strong> <strong>Resolution</strong> <strong>Color</strong> <strong>Camera</strong> <strong>SDC</strong>-<strong>313B</strong> <strong>User</strong> <strong>Guide</strong><br />
Before installing and operating this product,<br />
please read this manual thoroughly.<br />
ENGLISH
Thank you for purchasing a SAMSUNG CCD CAMERA.<br />
Before operating the camera, confirm the camera model and proper input<br />
power voltage. In order to that you can understand this manual thoroughly,<br />
we'll introduce our model description.<br />
Samsung Techwin cares for the environment at all product manufacturing<br />
stages to preserve the environment, and is taking a number of steps to<br />
provide customers with more environment-friendly products.The Eco<br />
mark represents Samsung Techwin's will to create environment-friendly<br />
products, and indicates that the product satisfies the EU RoHS Directive.<br />
n <strong>SDC</strong>-<strong>313B</strong> SERIES<br />
• NTSC MODEL<br />
<strong>SDC</strong>-<strong>313B</strong>NA<br />
• PAL MODEL<br />
<strong>SDC</strong>-<strong>313B</strong>P<br />
<strong>SDC</strong>-<strong>313B</strong>PD<br />
<strong>SDC</strong>-<strong>313B</strong>PH<br />
n MODEL DESCRIPTION<br />
• <strong>SDC</strong>-<strong>313B</strong>XX ___<br />
• SIGNAL SYSTEM<br />
N --> NTSC MODEL<br />
P --> PAL MODEL<br />
• POWER SOURCE<br />
--> AC 24V / DC 12V<br />
D --> DC 12V<br />
A --> AC 24V<br />
H --> AC 230V<br />
POWER SOURCE<br />
SIGNAL SYSTEM<br />
SHARP CCD<br />
The lightning flash with an arrowhead symbol, within an equilateral triangle is<br />
intended to alert the user to the presence of uninsulated “dangerous voltage”<br />
within the product's enclosure that may be of sufficient magnitude to constitute a<br />
risk of electric shock to persons.<br />
The exclamation point within an equilateral triangle is intended to alert the user<br />
to the presence of important operating and maintenance (servicing) instructions in<br />
the literature accompanying the appliance.<br />
INFORMATION -This equipment has been tested and found to comply with limits for a Class A<br />
digital device, pursuant to part 15 of the FCC Rules. These limits are designed to provide<br />
reasonable protection against harmful interference when the equipment is operated in a<br />
commercial environment. This equipment generates, uses, and can radiate radio frequency<br />
energy and, if not installed and used in accordance with the instruction manual, may cause<br />
harmful interference to radio communications.<br />
Operation of this equipment in a residential area is likely to cause harmful interference in<br />
which case the user will be required to correct the interference at his own expense.<br />
WARNING - Changes or modifications not expressly approved by the manufacturer could void<br />
the user’s authority to operate the equipment.WARNING - To prevent electric shock<br />
and risk of fire hazards:<br />
◆ Do NOT use power sources other than that specified.<br />
◆ Do NOT expose this appliance to rain or moisture.<br />
This installation should be made by a qualified service person<br />
and should conform to all local codes.
Contents<br />
Features<br />
Warning<br />
Precautions<br />
Component<br />
6<br />
7<br />
8<br />
10<br />
<strong>Camera</strong> Operation<br />
■ Menu<br />
■ Settings<br />
• LENS (selection)<br />
• SHUTTER (condition and speed control)<br />
• WHITE BALANCE control<br />
• BACKLIGHT (Backlight Compensation)<br />
• AGC (Auto Gain Control)<br />
• SSNR (Samsung Super Noise Reduction )<br />
• SENS-UP (Low illuminance)<br />
• SPECIAL<br />
• EXIT<br />
20<br />
20<br />
21<br />
23<br />
24<br />
25<br />
26<br />
27<br />
28<br />
29<br />
30<br />
35<br />
Name and Function of Each Parts<br />
■ FRONT<br />
■ SIDE<br />
■ BOTTOM<br />
■ BACK<br />
11<br />
11<br />
12<br />
13<br />
14<br />
Troubleshooting<br />
Specification<br />
36<br />
38<br />
Installation<br />
15<br />
■ Lens<br />
■ Connecting to Monitor<br />
■ Connecting to Power<br />
15<br />
18<br />
19<br />
COLOR CCD CAMERA<br />
4 <strong>User</strong>’s Manual<br />
COLOR CCD CAMERA 5 <strong>User</strong>’s Manual
Features<br />
Warning<br />
Horizontal <strong>Resolution</strong> 530 TV Lines<br />
Clear image quality has been achieved by<br />
employing a CCD with 410,000 pixels(NTSC),<br />
470,000 pixels (PAL), which provides a<br />
horizontal resolution of 530 TV lines.<br />
Electronic DAY & NIGHT<br />
This camera has a function that electronically<br />
selects the mode that is appropriate for<br />
daytime or night-time conditions.<br />
The COLOR mode operates in daytime<br />
conditions to provide optimum colors, and BW<br />
mode operates in night-time conditions to<br />
enhance the definition of the image.<br />
Electronic IRIS<br />
The electronic IRIS function enables continuous<br />
automatic control of the shutter between<br />
1/60(1/50) ~ 1/120,000 seconds.<br />
PRIVACY Function<br />
The PRIVACY function conceals the areas you<br />
do not wish to appear on the screen.<br />
VIDEO/DC Drive Lens<br />
The video drive lens and the DC drive lens<br />
can be selected by the touch of a switch.<br />
<strong>High</strong> Sensitivity<br />
The built-in high sensitivity COLOR CCD enables<br />
a clear image even in 0.002 Lux(Sens-Up)<br />
illumination.<br />
SSNR<br />
(Samsung Super Noise Reduction)<br />
By using built-in SSNR function manufactured<br />
by SAMSUNG TECHWIN, the amount of low<br />
illuminance noise has been significantly<br />
reduced, and the signal-to-noise ratio(S/N) as<br />
well as horizontal resolution have been<br />
improved, resulting in a clear and sharp image<br />
display even in the dark.<br />
Controlled by OSD Menu<br />
The camera can be controlled by selecting<br />
text displayed on the monitor screen.<br />
- ENGLISH, PORTUGUESE<br />
Additional Functions<br />
SENS-UP, MOTION DETECTION, MIRROR,<br />
SHARPNESS and SYNC(INT/LL) functions are<br />
also available.<br />
The camera needs periodic inspection.<br />
Contact an authorized technician for inspection.<br />
Stop using your camera when you find a malfunction.<br />
If you use your camera around smoke or unusual heat for a long time, a fire<br />
may be caused.<br />
Do not Install the camera on a surface that can not support it.<br />
Unless the surface is suitable, it could cause falling or other hazards.<br />
Do not handle the camera with wet hands .<br />
It could cause an electric shock.<br />
Do not disassemble the camera.<br />
It may result in fire, electric shock or other hazards.<br />
Do not use the camera close to a gas or oil leak.<br />
It may result in fire or other hazards.<br />
COLOR CCD CAMERA<br />
6 <strong>User</strong>’s Manual<br />
COLOR CCD CAMERA 7 <strong>User</strong>’s Manual
Precautions<br />
Do not install under extreme<br />
temperatures.<br />
Do not install in high humidity<br />
environments.<br />
Do not drop the camera or<br />
subject it to physical shock.<br />
Never point the camera directly<br />
at a strong light.<br />
Use only under temperature conditions<br />
between -10°C and +50°C. Provide good<br />
ventilation when using in high temperature<br />
conditions.<br />
May lower image quality.<br />
May cause a product malfunction.<br />
Do not expose the camera to<br />
rain or other types of liquids.<br />
May damage the CCD.<br />
Do not expose the camera to<br />
radioactivity.<br />
Do not install under unstable<br />
lighting conditions.<br />
Avoid touching the camera lens.<br />
Wipe dry any liquids. Liquids may contain<br />
minerals that are corrosive to electronic<br />
components.<br />
Radioactivity exposure may damage the<br />
CCD.<br />
Notes<br />
Severe lighting changes or flickering may<br />
hinder normal camera operation.<br />
The lens is the most important component<br />
of the camera. Be careful not to smear it<br />
with fingerprints.<br />
• Exposure to a spotlight or an object emitting strong light may cause smear or<br />
blooming.<br />
• Ensure that the power source complies with normal specifications before connecting<br />
it to the camera.<br />
COLOR CCD CAMERA<br />
8 <strong>User</strong>’s Manual<br />
COLOR CCD CAMERA 9 <strong>User</strong>’s Manual
Component<br />
Names and Functions of Parts<br />
FRONT<br />
1. HIGH RESOLUTION COLOR CAMERA<br />
A 2 3 4<br />
2. Auto iris lens connection plug<br />
3. C-Mount adaptor<br />
4. Instruction manual<br />
A CCD protection cap<br />
Please cover the CCD SENSOR when not using it.<br />
2 C-Mount lens adaptor<br />
Please install this adapter when using a C-Mount Lens.<br />
3 CS-Mount lens adaptor<br />
Please remove the C-MOUNT lens adaptor and then attach it.<br />
4 Back Focus clamp screw<br />
Please loosen the clamp screw with a screwdriver before adjusting the Back Focal<br />
length.<br />
COLOR CCD CAMERA<br />
10 <strong>User</strong>’s Manual<br />
COLOR CCD CAMERA 11 <strong>User</strong>’s Manual
Names and Functions of Parts<br />
SIDE<br />
BOTTOM<br />
5<br />
6<br />
5 Auto iris lens connector<br />
This is the connection terminal for the auto iris lens.<br />
6 Tripod Mounting Plate screw hole<br />
Please use the screw hole when fixing the<br />
camera onto the Tripod Mounting Plate.<br />
※The Tripod Mounting Plate can be separated and<br />
attached to the top of the camera.<br />
In this instance please do not tighten the screw to a depth<br />
of more than 4mm, otherwise serious damage can occur<br />
to the inside of the camera.<br />
1/4"-20 UNC (20 THREAD)<br />
L:4.5mm±0.2mm (ISO standard),<br />
or 0.197" (ASA standard)<br />
Notes<br />
• This camera package does not include the Tripod Mounting Plate. Please refer to<br />
the user's manual for installation of the Tripod Mounting Plate.<br />
COLOR CCD CAMERA<br />
12 <strong>User</strong>’s Manual<br />
COLOR CCD CAMERA 13 <strong>User</strong>’s Manual
Names and Functions of Parts<br />
Installation<br />
BACK<br />
7<br />
8<br />
Lens<br />
Lenses are sold separately. Lenses such as an auto iris lens, CS-Mount lens and<br />
C-Mount lens can be used.<br />
Notes<br />
⓫<br />
❿<br />
9<br />
• Keep the lens surface clean, if it becomes contaminated with dirt or fingerprints<br />
the picture quality suffers.<br />
• Any foreign objects and fingermarks on the lens can cause inferior image quality<br />
in low light level conditions.<br />
*<strong>High</strong> Voltage Type(<strong>SDC</strong>-<strong>313B</strong>PH)<br />
When using an auto iris lens<br />
1. Please peel off about 8mm of the outer skin of the auto iris lens cable.<br />
7 Auto iris lens selection switch : Please change the mode to DC or<br />
VIDEO depending on the type of auto<br />
iris lens being used.<br />
8 Video output terminal : Sends video signal and connects to the video<br />
input terminal of the monitor.<br />
9 Power input terminal : Connects to the power appropriate to each model.<br />
❿ Setting button :<br />
• SETUP button<br />
: Used for the menu display. This button can be used to<br />
confirm<br />
settings after changing the value of the selected<br />
function or current conditions.<br />
• UP & DOWN buttons : Used for selecting items by moving the cursor up or<br />
down on the menu screen.<br />
• LEFT & RIGHT buttons : Used when changing item values, by moving the<br />
cursor to the left or right on the menu screen.<br />
⓫ Power lamp: Lights up when the correct power is supplied to the camera.<br />
approx. 8mm<br />
2. Please peel off about 2mm of the outer skin of the insulated conductor inside<br />
the lens cable.<br />
approx. 2mm<br />
COLOR CCD CAMERA<br />
14 <strong>User</strong>’s Manual<br />
COLOR CCD CAMERA 15 <strong>User</strong>’s Manual
Installation<br />
3. Please remove the cover of the auto iris lens connection plug and solder the<br />
lens cable to the connector pin in the plug.<br />
LENS<br />
Pin No. DC VIDEO<br />
No.1 Pin Damping- Red (power)<br />
No.2 Pin Damping+ NC<br />
No.3 Pin Drive+ White (video signal)<br />
No.4 Pin Drive- Black (GND)<br />
No.3 Pin<br />
No.1 Pin<br />
No.4 Pin<br />
No.2 Pin<br />
4. Please replace the auto iris lens connection plug cover and take off the CCD<br />
protection cap, and then attach the auto iris<br />
lens to the camera by screwing it in clockwise.<br />
5. Please insert the connection plug that is<br />
connected to the auto iris lens cable into the<br />
auto lens connector, which is located on the<br />
side of the camera.<br />
6. Please set the lens selection switch, located on<br />
the side of the camera, to DC or VIDEO<br />
depending on the type of auto iris lens which<br />
is being used.<br />
Connector<br />
Lens cable<br />
When using a C-Mount lens<br />
Please take off the CCD protection cap and<br />
attach the C-Mount lens to the camera by<br />
screwing it in clockwise.<br />
C-mount adaptor<br />
When using a CS-Mount lens<br />
1. Please take off the CCD protection cap and<br />
C-mount adaptor.<br />
C-mount adaptor<br />
2. Please attach the CS-Mount lens to the<br />
camera by screwing it in clockwise.<br />
Notes<br />
CCD protection cap<br />
C-mount adaptor<br />
• Please use the specified lens connection parts as shown in the picture below.<br />
The use of the wrong sized parts of the wrong size may cause<br />
damage to the inside of the camera or result in poor fitting.<br />
• Use of a lens which is too heavy affects the balance of the<br />
camera and may cause a malfunction. Please use a lens<br />
that weighs less than 450g.<br />
• Please select Av mode if possible when adjusting the<br />
automatic light control (ALC) of an auto lens. Use of PK mode<br />
may cause hunting.<br />
C-mount lens : 10 mm or less<br />
CS-mount lens : 5 mm or less<br />
COLOR CCD CAMERA<br />
16 <strong>User</strong>’s Manual<br />
COLOR CCD CAMERA 17 <strong>User</strong>’s Manual
Installation<br />
Connecting to Monitor<br />
Please connect the video output terminal located on the back of the camera to the<br />
monitor.<br />
Connecting to Power<br />
Since power specifications differ depending on the model, make sure you check your<br />
model name and specifications before connecting power.<br />
AC Power Type (AC 24V, 300mA)<br />
The recommended adaptor specification for<br />
<strong>SDC</strong>-<strong>313B</strong>NA is AC 24V / 300mA.<br />
DC Power Type (DC 12V, 500mA)<br />
The recommended adaptor specification<br />
for <strong>SDC</strong>-<strong>313B</strong>PD is DC 12V / 500mA.<br />
CCD <strong>Camera</strong><br />
• The connection method varies depending on the type of monitor and accessories.<br />
Please refer to the user's manual for each instrument.<br />
• Please turn off the power when connecting.<br />
• Please turn the 75Ω/Hi-Z switches of interim display devices to the Hi-Z position<br />
and switch the end-of-line devices to the 75Ω position.<br />
CCD <strong>Camera</strong><br />
Intermediate<br />
Monitor<br />
End monitor<br />
<strong>High</strong> Voltage Type (AC230V, 50Hz)<br />
Use AC230V, 50Hz power source<br />
for <strong>SDC</strong>-<strong>313B</strong>PH.<br />
Dual Power Type (AC 24V / DC 12V)<br />
The Recommended adaptor specification<br />
for <strong>SDC</strong>-<strong>313B</strong>P is AC 24V/300mA or DC<br />
12V/500mA.<br />
When the resistance value of copper wire is at [20℃(68℉)]<br />
Copper wire size(AWG) #24(0.22mm 2 ) #22(0.33mm 2 ) #20(0.52mm 2 ) #18(0.83mm 2 )<br />
Resistance value(Ω/m) 0.078 0.050 0.030 0.018<br />
Voltage drop(V/m) 0.028 0.018 0.011 0.006<br />
• As shown in the table above, voltage decreases as the wire gets longer.<br />
Therefore use of an excessively long adaptor output line for connection to the<br />
camera may affect the performance of the camera.<br />
※ Note that adaptor is not supplied with accessory<br />
※ Standard voltage for camera operation : DC 12V ±10%<br />
※ There may be some deviation in voltage drop depending on the type of wire and the manufacturer.<br />
COLOR CCD CAMERA<br />
18 <strong>User</strong>’s Manual<br />
COLOR CCD CAMERA 19 <strong>User</strong>’s Manual
<strong>Camera</strong> Operation<br />
Menu<br />
SETUP menu<br />
LENS (selection) • MANUAL • DC •VIDEO<br />
SHUTTER<br />
(condition and speed control)<br />
• ESC • MANUAL • FLK<br />
WHITE BALANCE control • ATW • AWC • MANUAL<br />
BACKLIGHT<br />
(Backlight compensation)<br />
AGC (Auto Gain control)<br />
SSNR<br />
(Samsung super noise<br />
reduction)<br />
• OFF • LOW • MIDDLE<br />
• HIGH<br />
• OFF • LOW • MIDDLE<br />
• HIGH<br />
• OFF • LOW • MIDDLE<br />
• HIGH<br />
SENS-UP (Low illuminance) • OFF • AUTO<br />
SPECIAL<br />
EXIT<br />
• CAMERA ID • COLOR • SYNC<br />
• MOTION DET • PRIVACY • MIRROR<br />
• SHARPNESS • RESET • RETURN<br />
Settings<br />
<strong>Camera</strong> Operation<br />
Settings can be made using the 5 buttons located on the back of the camera.<br />
UP button<br />
LEFT button<br />
SETUP button<br />
RIGHT button<br />
DOWN button<br />
1. Please press the SETUP button<br />
• Settings can now be made. The SETUP menu is displayed on the monitor.<br />
SETUP<br />
▶LENS<br />
DC<br />
SHUTTER - - -<br />
WHITE BAL. ATW<br />
BACKLIGHT OFF<br />
AGC<br />
MIDDLE<br />
SSNR<br />
LOW<br />
SENS-UP<br />
OFF<br />
SPECIAL <br />
EXIT<br />
2. Please select any function you wish to activate by using the UP and DOWN<br />
buttons.<br />
• The arrow can be moved up or down by using the UP and DOWN buttons.<br />
Please position the arrow to point to the function you wish to operate.<br />
COLOR CCD CAMERA<br />
20 <strong>User</strong>’s Manual<br />
COLOR CCD CAMERA 21 <strong>User</strong>’s Manual
<strong>Camera</strong> Operation<br />
Select any function you<br />
wish to operate by using<br />
the UP and DOWN<br />
buttons.<br />
SETUP<br />
▶LENS<br />
DC<br />
SHUTTER - - -<br />
WHITE BAL. ATW<br />
BACKLIGHT OFF<br />
AGC<br />
MIDDLE<br />
SSNR<br />
LOW<br />
SENS-UP<br />
OFF<br />
SPECIAL<br />
EXIT<br />
Modes can be changed<br />
using the LEFT and<br />
RIGHT buttons.<br />
3. Please press the LEFT or RIGHT button if you wish to change mode.<br />
• When the LEFT or RIGHT button is pressed, available values and modes are<br />
displayed in order. Please keep pressing the button until you get to the mode<br />
you wish to operate.<br />
4. Please select 'EXIT' and then press the SETUP button to finish the setting.<br />
LENS (selection)<br />
Using this function, you can control the screen brightness.<br />
1. When the SETUP menu is displayed on the screen, please position the arrow<br />
to point to 'LENS' by using the UP and DOWN buttons.<br />
2. Please select the type of the lens you wish to use by pressing the LEFT or<br />
RIGHT button.<br />
SETUP<br />
▶LENS<br />
DC<br />
SHUTTER - - -<br />
WHITE BAL. ATW<br />
BACKLIGHT OFF<br />
AGC<br />
LOW<br />
SSNR<br />
AUTO<br />
Notes<br />
• If appears at the mode you wish to operate, it means that there is a submenu<br />
which can be selected by pressing the SETUP button.<br />
• If --- appears at the mode item, it means that there is no mode available to be<br />
selected.<br />
DC/VIDEO : Auto iris lens selection<br />
Notes<br />
• When using an auto iris lens, the setting of the auto iris lens selection switch,<br />
located on the back of the camera, must be on DC or<br />
VIDEO depending on the type of the lens which is being<br />
used. (Please refer to the picture on page 15)<br />
• The brightness of the screen can be adjusted in DC<br />
mode. The brightness can be adjusted within the range<br />
of 1~70. The optimum level of brightness for the user<br />
can be achieved by adjustment.<br />
MANUAL : Manual lens selection<br />
3. Please press the SETUP button if you wish to return to the previous menu.<br />
COLOR CCD CAMERA<br />
22 <strong>User</strong>’s Manual<br />
COLOR CCD CAMERA 23 <strong>User</strong>’s Manual
<strong>Camera</strong> Operation<br />
SHUTTER (condition and speed control)<br />
1. When the SETUP menu is on the screen, please position the arrow to point<br />
to 'SHUTTER' by using the DOWN button.<br />
2. Please select the shutter mode by pressing the LEFT or RIGHT button.<br />
FLK : Please select 'FLK' mode when flickering occurs on the screen, due to<br />
an imbalance between illumination and frequency. NTSC<br />
Model:1/100, PAL MODEL: 1/120<br />
ESC : Auto control of the shutter speed can be achieved. When ESC mode is<br />
on, the speed is controlled automatically according to the brightness<br />
of the screen.<br />
MANUAL : The shutter speed can be controlled manually.<br />
3. Please select 'MANUAL' mode if you wish to adjust the shutter manually.<br />
• You can select speed from '1/60' to '1/120,000'sec (NTSC Models), '1/50'<br />
to '1/120,000'sec (PAL Models).<br />
4. Please press the SETUP button when all the settings are complete.<br />
Notes<br />
SETUP<br />
LENS<br />
MANUAL<br />
▶SHUTTER<br />
ESC<br />
WHITE BAL. ATW<br />
BACKLIGHT OFF<br />
AGC<br />
MIDDLE<br />
• When selecting DC/VIDEO lens, the shutter speed is fixed at 1/60 (1/50).<br />
• While using the internal synchronous system, if the shutter setting is on 'ESC'<br />
and the camera is directly facing a bright fluorescent light, the image on the<br />
screen can be adversely affected. Therefore please choose the installation<br />
location with care.<br />
• When 'MANUAL' mode is on, the SENS-UP function does not operate.<br />
WHITE BALANCE control<br />
The screen color can be adjusted by using the WHITE BALANCE function.<br />
1. Please position the arrow to point to 'WHITE BAL' on the SETUP menu by<br />
using the UP and DOWN buttons.<br />
2. Please select the mode you wish to operate by pressing the LEFT or RIGHT button.<br />
SETUP<br />
LENS<br />
DC<br />
SHUTTER - - -<br />
▶WHITE BAL. ATW<br />
*Please select one of the 3 modes below.<br />
ATW(Auto Tracking White Balance) :<br />
• NORMAL : This mode can be used within the color temperature range 1,800°K~<br />
8,000°K. (fluorescent light, outdoor, normal environment)<br />
• SPECIAL : This mode can be used within the color temperature range 1,800°K~<br />
10,500°K (strong sodium vapor lamp or metal lamp)<br />
AWC(Auto White Balance Control) : Please press the SETUP button while the<br />
camera is directed at a piece of white paper to obtain the optimum state under<br />
current illumination. If the environment including the light source is changed, you<br />
have to adjust the white balance again.<br />
MANUAL : The manual adjustment mode enables finer adjustment. Please select<br />
ATW or AWC first. Please change to manual adjustment mode and press the SETUP<br />
button. Please set the appropriate color temperature, and then increase or decrease<br />
the red and blue color values while monitoring the color changes on the object.<br />
Notes<br />
• Under the following conditions the WHITE BALANCE function may not operate<br />
properly. In such cases, please select the AWC mode.<br />
A When the color temperature of the environment surrounding the subject is out of the<br />
control range (e.g. clear sky or sunset).<br />
2 When the object's surroundings are dark<br />
3 If the camera directly faces a fluorescent light or is installed in a place where there<br />
are considerable changes in illumination, the WHITE BALANCE function may become<br />
unstable.<br />
COLOR CCD CAMERA<br />
24 <strong>User</strong>’s Manual<br />
COLOR CCD CAMERA 25 <strong>User</strong>’s Manual
<strong>Camera</strong> Operation<br />
BACKLIGHT (Backlight Compensation)<br />
When there is a strong backlight behind the object, clear images of the background<br />
as well as the object can still be obtained by using the BACKLIGHT function.<br />
1. Please position the arrow to point to 'BACKLIGHT' on the SETUP menu by<br />
using the UP and DOWN buttons.<br />
2. Please select the mode you wish to operate by pressing the LEFT or RIGHT button.<br />
SETUP<br />
LENS<br />
DC<br />
SHUTTER - - -<br />
WHITE BAL. ATW<br />
▶BACKLIGHT OFF<br />
HIGH/MIDDLE/LOW : You can adjust the sensitivity of Backlight Compensation.<br />
it will be able to adjust the size and location of BLC window.<br />
Regardless of location of the subject, BLC function is well<br />
accomplished.<br />
AGC (Auto Gain Control)<br />
1. Please position the arrow to point to 'AGC' on the SETUP menu by using the<br />
UP and DOWN buttons.<br />
2. Please select the mode you wish to operate by pressing the LEFT or RIGHT<br />
button. As the level of gain increases, the screen gets brighter and the level<br />
of noise also increases.<br />
HIGH : The gain increases or decreases within the range of 6dB ~ 26dB.<br />
MIDDLE : The gain increases or decreases within the range of 6dB ~ 22dB.<br />
LOW : The gain increases or decreases within the range of 6dB ~ 10dB.<br />
OFF : The gain is fixed at 6dB.<br />
SETUP<br />
LENS<br />
DC<br />
SHUTTER - - -<br />
WHITE BAL. ATW<br />
BACKLIGHT OFF<br />
▶AGC<br />
MIDDLE<br />
SSNR<br />
LOW<br />
SENS-UP<br />
OFF<br />
OFF : BACKLIGHT function does not operate.<br />
3. Please press the SETUP button. The BRIGHTNESS can be adjusted within the<br />
range of 1~70.<br />
BACKLIGHT ON<br />
BACKLIGHT OFF<br />
4. Please press the SETUP button when all the settings are complete.<br />
COLOR CCD CAMERA<br />
26 <strong>User</strong>’s Manual<br />
COLOR CCD CAMERA 27 <strong>User</strong>’s Manual
<strong>Camera</strong> Operation<br />
SSNR (Samsung Super Noise Reduction)<br />
The background noise in the low light level decreases automatically as the level<br />
of gain changes.<br />
1. Please position the arrow to point to 'SSNR' on the SETUP menu by using the<br />
UP and DOWN buttons.<br />
2. Please select the mode you wish to operate by pressing the LEFT or RIGHT button.<br />
OFF : There is no reduction in noise level.<br />
LOW : There is a small reduction in noise level with almost no ghost image.<br />
MIDDLE : The most effective mode. There is a sufficient reduction in noise levels<br />
without causing much ghost imaging.<br />
HIGH : The level of noise is reduced greatly, however there is an increase in<br />
ghost imaging.<br />
Notes<br />
SETUP<br />
LENS<br />
DC<br />
SHUTTER - - -<br />
WHITE BAL. ATW<br />
BACKLIGHT OFF<br />
AGC<br />
MIDDLE<br />
▶SSNR<br />
LOW<br />
SENS-UP<br />
OFF<br />
SPECIAL<br />
EXIT<br />
• When AGC is turned off, SSNR does not operate.<br />
SENS-UP (Low illuminance)<br />
SENS-UP helps maintain a bright, clear screen image by automatically detecting<br />
changes in the level of light in low light level conditions.<br />
1. Please position the arrow to point to 'SENS-UP' on the SETUP menu by using<br />
the UP and DOWN buttons.<br />
2. Please select the mode you wish to operate by pressing the LEFT or RIGHT button.<br />
AUTO : Low light level auto mode OFF : The function does not operate.<br />
Notes<br />
• When SHUTTER is in the manual mode, SENS-UP does not operate.<br />
3. Please press the SETUP button when all the settings are complete.<br />
Notes<br />
SETUP<br />
LENS<br />
DC<br />
SHUTTER - - -<br />
WHITE BAL. ATW<br />
BACKLIGHT OFF<br />
AGC<br />
MIDDLE<br />
SSNR<br />
LOW<br />
▶SENS-UP<br />
OFF<br />
SPECIAL<br />
•The maximum storage magnification in low light level can be adjusted by pressing<br />
the SETUP button in 'AUTO' mode.(x2 ~ x128)<br />
•As the magnification increases, the screen gets brighter; moving object gets more<br />
afterimage.<br />
• If storage magnification is increased while SENS-UP is operating, it may cause noise,<br />
and spots may appear; however this is normal.<br />
COLOR CCD CAMERA<br />
28 <strong>User</strong>’s Manual<br />
COLOR CCD CAMERA 29 <strong>User</strong>’s Manual
<strong>Camera</strong> Operation<br />
SPECIAL<br />
1. Please position the arrow to point to 'SPECIAL' on the SETUP menu by using<br />
the UP and DOWN buttons.<br />
2. Please select the mode you wish to operate by pressing the UP or DOWN button.<br />
▒MIRROR<br />
- ON : Sets a horizontal image inversion.<br />
- OFF : Cancels the inversion.<br />
SPECIAL<br />
▶IMAGE ADJ<br />
COLOR<br />
SYNC<br />
MOTION DET<br />
PRIVACY<br />
LANGUAGE<br />
RESET<br />
RETURN<br />
ON<br />
INT<br />
OFF<br />
OFF<br />
ENGLISH<br />
MIRROR ON<br />
▒SHARPNESS : The outline of the video image becomes cleaner and more<br />
distinctive as the level of SHARPNESS increases. If the level goes<br />
up excessively, however, it may affect the video image and<br />
generate noise.<br />
• Please press the SETUP button.<br />
MIRROR OFF<br />
IMAGE ADJ : <br />
1) When the SPECIAL menu screen is displayed, select ‘IMAGE ADJ’ by Using the Up<br />
and Down buttons so that the arrow indicates ‘IMAGE ADJ’<br />
2) Select a desired mode using the Up and Down buttons.<br />
• The available range of level is 0 ~ 31.<br />
IMAGE ADJ<br />
▶MIRROR<br />
SHARPNESS<br />
RETURN<br />
OFF<br />
ON<br />
CAMERA ID : If the ID is input, the camera ID appears on the monitor.<br />
1) Please position the arrow to point to 'CAMERA ID' by using the UP or DOWN<br />
button.<br />
2) Please select 'ON' by pressing the LEFT or RIGHT button.<br />
Notes<br />
• If 'OFF' is selected, the ID does not appear on the monitor even if it has been input.<br />
COLOR CCD CAMERA<br />
30 <strong>User</strong>’s Manual<br />
COLOR CCD CAMERA 31 <strong>User</strong>’s Manual
<strong>Camera</strong> Operation<br />
3) Please press the SETUP button.<br />
<br />
<br />
<strong>Camera</strong> ID<br />
ABCDEFGHIJKLM<br />
NOPQRSTUVWXYZ<br />
abcdefghijklm<br />
nopqrstuvwxyz<br />
-.0123456789<br />
←→ CLR POS END<br />
4) Up to 15 letters can be used for the ID.<br />
A Please move the cursor to the letter you wish to choose by using the UP and<br />
DOWN button.<br />
<strong>Camera</strong> ID<br />
ABCDEFGHIJKLM<br />
NOPQRSTUVWXYZ<br />
abcdefghijklm<br />
nopqrstuvwxyz<br />
-.0123456789<br />
←→ CLR POS END<br />
<br />
5) When a name has been chosen, please select a position for the name display.<br />
A Please move the cursor onto 'POS' and then press the SETUP button.<br />
<br />
<strong>Camera</strong> ID<br />
ABCDEFGHIJKLM<br />
NOPQRSTUVWXYZ<br />
abcdefghijklm<br />
nopqrstuvwxyz<br />
-.0123456789<br />
←→ CLR POS END<br />
A The name will appear at the top left hand<br />
corner.<br />
FRONT DOOR<br />
2 Select an ID from A, B~Y, Z, a, b~y, z, 0,1~8, 9 by using the UP, DOWN, LEFT and<br />
RIGHT buttons.<br />
3 Please lock in the letters by using the SETUP button.<br />
• When the letter is locked in, the cursor moves to the next space.<br />
4 Please repeat the above to input the ID.<br />
A Please find the position you wish to display<br />
the name by using the 4 directional buttons,<br />
and then press the SETUP button.<br />
FRONT DOOR<br />
Notes<br />
• If the wrong name has been input.....<br />
If you press the SETUP button after moving the cursor to CLR, all the letters will be<br />
erased. If you want to correct a letter, please move the cursor to the arrow at the<br />
bottom left of the screen and press 'SET'.Please position the cursor above the letter<br />
you wish to correct, and then move the cursor onto the letter you wish to choose and<br />
press the SETUP button.<br />
6) Please select 'END' and then press the SETUP button to complete ID input.<br />
➲ COLOR (Electronic DAY & NIGHT)<br />
- AUTO : This camera has a function which electronically changes to the appropriate<br />
mode for daytime or night-time. The COLOR mode is operated for daytime, and<br />
it converts to BW mode for night-time.<br />
- ON : The color mode is selected electronically.<br />
COLOR CCD CAMERA<br />
32 <strong>User</strong>’s Manual<br />
COLOR CCD CAMERA 33 <strong>User</strong>’s Manual
<strong>Camera</strong> Operation<br />
Notes<br />
• If AGC is OFF, you can´t select AUTO mode.<br />
• When an infrared light is used, there may be a problem with focusing and COLOR (DAY &<br />
NIGHT).<br />
SYNC : Two SYNCHRONIZATION modes are available INTERNAL and EXTERNAL<br />
LINE-LOCK. In LINE-LOCK mode, it synchronizes the video signal between<br />
cameras without a synchronous generator. The line-lock synchronization is only<br />
used in the areas of 60Hz(NTSC Model) / 50Hz(PAL Model)<br />
- INT : Internal synchronization - LL : External line-lock synchronization<br />
• If you choose 'LL', you can adjust the desired phase.<br />
Press the SET button.<br />
• You can adjust the desired phase from 0 to 359.<br />
Notes<br />
• When the power frequency is 50Hz, you can not use line-lock mode (NTSC MODEL).<br />
• When the power frequency is 60Hz, you can not use the line-lock mode (PAL MODEL).<br />
• 'Sync' mode is fixed to 'INT' in DC12V input power.<br />
- OFF : MOTION DETECTION mode is cancelled.<br />
- ON : Any motion in the selected areas is observed.<br />
• Please select the area you wish to observe from the<br />
4 areas in AREA SEL mode.<br />
• Please select ON mode for the chosen area.<br />
• Please adjust the size of the area to be observed by<br />
using the UP, DOWN, LEFT or RIGHT button.<br />
• Please press the SETUP button to save the changes<br />
and complete the setting.<br />
Notes<br />
• There is no 'MD' output signal. 'MD' is on screen display only words.<br />
PRIVACY : This modes conceals the areas you do not wish<br />
to appear on the screen.<br />
- OFF : Cancels the PRIVACY mode.<br />
- ON : Operates the PRIVACY mode.<br />
• Please press the SETUP button.<br />
• Please select the area you do not wish to appear from the 4<br />
areas in AREA SEL mode.<br />
• Please select ON mode for the chosen area.<br />
• Please adjust the size of the area to be concealed by<br />
using the UP, DOWN, LEFT or RIGHT button.<br />
MOTION DETECTION:<br />
This product has a feature that allows you to observe movements of objects in 4<br />
different areas on the screen, and the words 'MOTION DETECTED' appear on the<br />
screen when movement is detected; hence a single individual can conduct<br />
supervision efficiently. The camera detects an object's movement by sensing<br />
disparity of outline, and level of brightness and color.<br />
• Please press the SETUP button.<br />
RESET : Returns to the level which was set by the manufacturer for shipment.<br />
RETURN : Returns to the SETUP menu.<br />
EXIT<br />
Saves all the setting menus and then exits.<br />
COLOR CCD CAMERA<br />
34 <strong>User</strong>’s Manual<br />
COLOR CCD CAMERA 35 <strong>User</strong>’s Manual
Troubleshooting<br />
If you have trouble operating your camera, refer to the following table. If the<br />
guidelines do not enable you to solve the problem, contact an authorized<br />
technician.<br />
Problem<br />
Solution<br />
Problem<br />
Solution<br />
Nothing appears on<br />
the screen.<br />
The video image is<br />
not clear.<br />
• Please check the power connection.<br />
• Please check the video signal line connection.<br />
• Please check and make sure that the auto lens switch<br />
is set to DC (VIDEO) when using a DC (VIDEO) lens.<br />
• Please check the Brightness of Auto Iris lens.<br />
• Please check if the lens is clean.<br />
Please clean the lens with a clean cloth or brush.<br />
• Please adjust the contrast feature of the monitor.<br />
• Please make sure that the screen is not exposed<br />
directly to a bright light.<br />
Please move the camera if necessary.<br />
• Please readjust the back focus of the camera.<br />
The MOTION DETECTION<br />
function is not working.<br />
<strong>Color</strong>s are not quite right.<br />
The screen is flickering.<br />
• Please check if 'MOTION DETECTION' mode is turned<br />
on.<br />
• Please check if the MD LEVEL is too low.<br />
• Please check the setting of the MD AREA.<br />
• Please check the 'WHITE BAL' setting. (Please refer to<br />
page 25)<br />
• Please check if the camera is facing directly into<br />
sunlight or fluorescent light.<br />
• Please check if an auto iris lens is being used.<br />
• Please check the connection of the lens connector<br />
cable.<br />
The screen is dark.<br />
• Please adjust the contrast feature of the monitor.<br />
• If you have an intermediate device, set the 75Ω/ Hi-z<br />
properly, and check the terminals. (refer to page 18)<br />
• Please check if an auto iris lens is being used and<br />
adjust the brightness level.<br />
L/L mode isn't able to be<br />
selected.<br />
COLOR (DAY & NIGHT) mode<br />
is not working.<br />
• Have you connected your camera to DC power source?<br />
Connect it to AC power source.<br />
• Please check if the AGC menu is set to the OFF<br />
position.<br />
There is a problem with the<br />
camera operation. The<br />
camera surface is too hot and<br />
black stripes appear on the<br />
screen.<br />
• Please check if an appropriate power source to the<br />
camera complies with the manufacturer's standard<br />
requirement, or if the voltage keeps changing.<br />
SENS-UP function is not<br />
working.<br />
• Please check if the AGC menu is set to the OFF<br />
position.<br />
• Please check if the SHUTTER menu is set to MANUAL<br />
mode.<br />
• Please check the limit of Sens-UP AUTO mode.<br />
COLOR CCD CAMERA<br />
36 <strong>User</strong>’s Manual<br />
COLOR CCD CAMERA 37 <strong>User</strong>’s Manual
Specifications<br />
ITEM <strong>SDC</strong>-<strong>313B</strong>NA <strong>SDC</strong>-<strong>313B</strong>PH <strong>SDC</strong>-<strong>313B</strong>P <strong>SDC</strong>-<strong>313B</strong>PD<br />
POWER AC 24V / 3.5W AC 240V, 50Hz AC 24V / DC 12V DC 12V / 2.5W<br />
C<br />
C<br />
D<br />
Total Pixels 811(H) x 507(V) 795(H) x 595(V)<br />
Effective Pixels 768(H) x 494(V) 792(H) x 582(V)<br />
Sensor<br />
1/3" IT CCD<br />
S<br />
y<br />
n<br />
c<br />
Scanning System 2:1 Interlace<br />
Synchronization Internal / Line Lock 0~359° (Adjustable) Internal Only<br />
Frequency<br />
H : 15.734Khz<br />
V : 59.94Hz<br />
H : 15.625Khz<br />
V : 50.00Hz<br />
A<br />
L<br />
SENS-UP AUTO / OFF (Selectable limit x2 ~ x128)<br />
<strong>Resolution</strong> More than 530 TV Lines<br />
Video Output 1.0Vp-p / 75Ω 1.0Vp-p / 75Ω (Video 0.7Vp-p, Sync 0.3Vp-p)<br />
S/N (Y Signal)<br />
50dB (AGC OFF / Weight ON)<br />
Min. Illumination 0.3 Lux(F1.2), 0.002 Lux (SENS-UP x128)<br />
COLOR<br />
(DAY&NIGHT)<br />
ON/AUTO(Electronically)<br />
E<br />
L<br />
E<br />
Backlight<br />
Compensation<br />
LOW / MIDDLE / HIGH / OFF Selectable<br />
Gain Control<br />
LOW / MIDDLE / HIGH / OFF Selectable<br />
C White Balance ATW (Normal Mode : 1,800°K ~ 8,000°K, Special Mode : 1,800°K ~ 10,500°K) / AWC / MANUAL<br />
T<br />
R Electronic I AUTO : (1/60(PAL:1/50) ~ 1/120,000sec) / Maual / Flickerless<br />
C<br />
Shutter Speed<br />
O.S.D<br />
Motion Detection<br />
SSNR<br />
MIRROR<br />
Privacy Function<br />
Sharpness<br />
IRIS Control<br />
Dimension<br />
Operating<br />
Temperature / Humidity<br />
Built-in (English, Portuguese)<br />
ON / OFF (4 Programmable Zone)<br />
LOW / MIDDLE / HIGH / OFF Selectable (Noise Reduction)<br />
ON / OFF<br />
ON / OFF (4 Programmable Zone)<br />
ON / OFF (Level Adjustable)<br />
DC / VIDEO<br />
58(W) x 52(H) x 121(D)mm<br />
-10℃ ~ +50℃ / 30% ~ 80% RH<br />
Weight 340g 510g 310g 310g<br />
DECLARATION OF CONFORMITY<br />
Application of Council Directive(s) 89 / 336 / EEC<br />
Manufacturer's Name<br />
SAMSUNG TECHWIN CO., LTD<br />
Manufacturer's Address<br />
SAMSUNG TECHWIN CO., LTD<br />
42, SUNGJU-DONG CHANGWON-CITY,<br />
KYUNGNAM, KOREA, 641-716<br />
European Representative Name<br />
European Representative Address<br />
Equipment Type/Environment CCTV <strong>Camera</strong><br />
Model Name<br />
<strong>SDC</strong>-<strong>313B</strong>PD, <strong>SDC</strong>-<strong>313B</strong>PH, <strong>SDC</strong>-<strong>313B</strong>P<br />
Beginning Serial NO.<br />
S7020001<br />
Year of Manufacture 2009. 01. 02<br />
Conformance to EN 50081-1 : 1992<br />
EMC-Directive 89/336 EEC and 92/31/EEC<br />
EN 50130-4 : 1996<br />
We, the undersigned, hereby declare that the equipment specified above conforms<br />
to the above Directive(s).<br />
Manufacturer SAMSUNG TECHWIN CO., LTD Legal Representative in Europe<br />
Signature Signature<br />
Full Name BONJENG GU Full Name<br />
Position QUALITY CONTROL MANAGER Position<br />
Place CHANGWON, KOREA Place<br />
Date 2009. 01. 02 Date<br />
COLOR CCD CAMERA<br />
38 <strong>User</strong>’s Manual<br />
COLOR CCD CAMERA 39 <strong>User</strong>’s Manual
SALES NETWORK<br />
• SAMSUNG TECHWIN CO., LTD.<br />
145-3, Sangdaewon 1-dong, Jungwon-gu, Seongnam-si Gyeonggi-do, Korea, 462-703<br />
TEL : +82-31-740-8151~8 FAX : +82-31-740-8145<br />
• SAMSUNG TECHWIN AMERICA Inc.<br />
1480 Charles Willard St, Carson, CA 90746, UNITED STATES<br />
Tol Free : +1-877-213-1222 FAX : +1-310-632-2195<br />
www.samsungcctvusa.com<br />
www.samsungtechwin.com<br />
www.samsungcctv.com<br />
• SAMSUNG TECHWIN EUROPE CO., LTD.<br />
Samsung House, 1000 Hillswood Drive, Hillswood Business<br />
Park Chertsey, Surrey, UNITED KINGDOM KT16 OPS<br />
TEL : +44-1932-45-5300 FAX : +44-1932-45-5325<br />
P/No. : Z6806-0791-01E<br />
VAN 09. 10