Create successful ePaper yourself
Turn your PDF publications into a flip-book with our unique Google optimized e-Paper software.
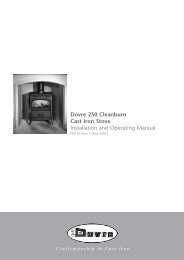
Operating & Installation Manual<br />
Camborne Deluxe<br />
All Wood / Multifuel Model Range<br />
Camborne Deluxe Small Multifuel<br />
PLEASE RETAIN THESE INSTRUCTIONS FOR FUTURE REFERENCE<br />
Rev 1<br />
SEPTEMBER 2006<br />
AFS1297
Congratulations on your choice of a Hamlet Stove.<br />
More than 20 years experience has been put into the<br />
development of our Camborne Deluxe range of stoves to<br />
ensure ultimate performance and years of trouble free<br />
enjoyment.<br />
Every detail on the fire has been carefully engineered and<br />
designed which is why we are so confident in the<br />
reliability of our product that we offer a<br />
Lifetime Guarantee*.<br />
Should you have any questions about our Camborne<br />
Deluxe stoves that are not covered in this manual, please<br />
contact the Hamlet dealer in your area, or call our<br />
Technical support department on 01308 427234.<br />
© COPYRIGHT 2006<br />
Arada <strong>Ltd</strong><br />
This booklet has copyright & may not be<br />
copied in whole or part or be used for any<br />
purpose other than that for which it is<br />
supplied without express written consent<br />
from Arada Limited.<br />
2 Hamlet Camborne Deluxe Wood & Multifuel Stoves
CONTENTS<br />
INTRODUCTION<br />
Page<br />
Warning Notice 4<br />
Safety Notices 5<br />
The Principle Of The Fire 5<br />
Check List 6 - 7<br />
Technical Data 8<br />
INSTALLATION<br />
General Precautions 9<br />
Handling 9<br />
Hearth 9<br />
Combustible Materials 9<br />
Air For Combustion 9<br />
Fitting the Flue Outlet & Hotplate 10<br />
Flues & Chimneys 10 - 13<br />
Wood Only Version 14<br />
Multifuel Version 15<br />
Firebox Liner Panels 16<br />
Optional Add In Boilers 17<br />
Water Connections 17 - 18<br />
Final Check List 19<br />
SERVICING & MAINTENANCE<br />
Cleaning - Internal Surfaces 20<br />
Cleaning - Outer Finish 20<br />
Door Glass 20<br />
Chimney Sweeping 20<br />
Annual Maintenance 21<br />
Summer Storage / Non Usage 21<br />
Door Adjustment 21<br />
Dissassemble Airwash 22<br />
Fuel Retaining Bars - Inspection 22<br />
Fire Door Glass 23<br />
Service Record 24<br />
OPERATING INSTRUCTIONS<br />
Fuel Types 25<br />
Lighting The Fire 25<br />
Solid Fuel Burning 26<br />
Burning Wood 26<br />
Mixed Fuels 26<br />
Anthracite 26<br />
Overnight Burning 26<br />
Air Inlet Controls - Primary Air 27<br />
Air Inlet Controls - Airwash 27<br />
Fuel Retainer Bars 27<br />
Multi-Purpose Operating Tool 28<br />
Setting The Grate 28<br />
De-Ashing (Riddle) 28<br />
Empty The Ashpan 28<br />
Ash Removal 28<br />
Adjusting Air Inlet Controls 28<br />
Main Fire Door Handle 29<br />
Over-Firing 29<br />
Extended Burning 29<br />
OPTIONAL EXTRA ACCESSORIES 30<br />
SPARE PARTS LIST 31 - 33<br />
GUARANTEE 34 - 35<br />
FINAL FACTORY CHECKLIST 36<br />
Hamlet Camborne Deluxe Wood & Multifuel Stoves 3
WARNING<br />
TO ALL MULTIFUEL USERS<br />
PETROLEUM COKE<br />
SOME OF WHOSE BRAND NAMES ARE<br />
"CALCO", "PETROCOKE" OR "WONDERCO"<br />
MUST NOT BE BURNED IN THIS APPLIANCE<br />
TO USE THESE FUELS WILL INVALIDATE THE<br />
APPLIANCE GUARANTEE<br />
IF IN DOUBT CONTACT THE SOLID FUEL ASSOCIATION<br />
TELEPHONE NUMBER 0800 600 000<br />
www.solidfuel.co.uk<br />
THE USE OF SPARE PARTS OTHER THAN THOSE SUPPLIED<br />
BY HAMLET STOVES WILL INVALIDATE THE<br />
APPLIANCE GUARANTEE.<br />
4 Hamlet Canborne Deluxe Wood & Multifuel Stoves
INTRODUCTION<br />
SAFETY<br />
A fireguard conforming to BS 8423: 2002 should<br />
be used in the presence of children and old/or<br />
infirm people. If the appliance is used with the fire<br />
door open, a spark guard conforming to BS 3248<br />
should be fitted.<br />
Caution -<br />
Do not use aerosol sprays or any other flammable<br />
materials near the appliance under fire.<br />
Do not fit an extractor fan in the same room as<br />
the appliance.<br />
Fire cement is caustic, hand and eye protection<br />
should always be worn, prolonged contact with<br />
the skin should be avoided.<br />
Hamlet stoves will not be responsible for any<br />
consequential or incidental loss or injury<br />
however caused.<br />
Before continuing any further with the installation<br />
of this appliance please read the following guide to<br />
manual handling.<br />
• Always obtain assistance when lifting the<br />
appliance.<br />
• When lifting always keep your back<br />
straight. Bend your legs not your back.<br />
• Avoid twisting at the waist. It is better to<br />
reposition your feet.<br />
• Avoid upper body/top heavy bending. Do not<br />
lean forwards or sideways when<br />
handling the fire.<br />
• Always grip with the palms of your hands.<br />
Do not use fingertips for support.<br />
• Always keep the stove as close to the body as<br />
possible. This will minimise the cantilever<br />
action.<br />
• Use gloves to provide additional grip.<br />
THE PRINCIPLE OF THE FIRE<br />
Your Hamlet stove is built to the highest standard<br />
of craftsmanship using the best materials and the<br />
most modern equipment available. It is a highly<br />
efficient and sophisticated piece of machinery and<br />
when properly installed and operated it should provide<br />
a lifetime of heating satisfaction.<br />
Safety is the most important consideration when<br />
installing your fire. If not properly installed and<br />
operated a house fire may result. installation must<br />
comply with the Building Regulations and conform<br />
to all relevant fire safety standards.<br />
Hamlet Stoves produce a variety of appliances<br />
ranging from units, which are traditional in style to<br />
stoves which are modern in appearance, all<br />
bristling with "High Tech" features.<br />
Model types include simple room heaters,<br />
convectors, integral boiler models and inset units.<br />
Your Hamlet stove is constructed from either single<br />
or twin wall steel strengthened where necessary.<br />
Cast iron is used where appropriate for decorative<br />
features.<br />
All fire doors are fitted with special high<br />
temperature ceramic glass panels through which<br />
the fire can be viewed.<br />
Multifuel stoves are fitted with a cast iron grate to<br />
give full multifuel facility and positive de-ashing.<br />
All models except integral boiler models are lined<br />
with firebricks or heat reflective panels which<br />
ensure complete combustion and provide a good<br />
heat store to even out fluctuations in burning.<br />
An internal throat plate produces turbulence to<br />
encourage secondary combustion and directs the<br />
flue gas around the whole upper firebox before<br />
allowing it to escape up the chimney.<br />
On multifuel appliances the primary air for burning<br />
enters the ash pit chamber beneath the grate,<br />
controlled by the air inlet mechanism.<br />
Hamlet Stoves are also fitted with an "air wash" so<br />
called because it provides a curtain of high speed<br />
preheated air behind the glass to help keep it clean<br />
and to provide secondary air/over draught.<br />
The provision of two inlets on all multifuel stoves<br />
gives a wide range of primary air/secondary air,<br />
under draught/over draught combinations. The<br />
optimum settings will only be established by<br />
experience in firing the appliance, and will depend<br />
on type of fuel, the position of the appliance in the<br />
house, condition of chimney etc.<br />
Hamlet Canborne Deluxe Wood & Multifuel Stoves 5
CHECK LIST<br />
Part Description<br />
& Visual Aid<br />
(not to scale)<br />
Camborne<br />
Deluxe<br />
Compact<br />
Wood<br />
Camborne<br />
Deluxe<br />
Compact<br />
Multifuel<br />
Camborne<br />
Deluxe<br />
Small<br />
Wood<br />
Camborne<br />
Deluxe<br />
Small<br />
Multifuel<br />
Camborne<br />
Deluxe<br />
Medium<br />
Wood<br />
Camborne<br />
Deluxe<br />
Medium<br />
Multifuel<br />
Camborne<br />
Deluxe<br />
Large<br />
Wood<br />
Camborne<br />
Deluxe<br />
Large<br />
Multifuel<br />
1. Grate bars<br />
N/A<br />
5<br />
N/A<br />
7<br />
2. Wood burning<br />
tray<br />
1<br />
N/A<br />
1<br />
N/A<br />
3. Throat plate<br />
1<br />
1<br />
1<br />
1<br />
4. Flue spigot<br />
1 (4”)<br />
1 (4”)<br />
1 (5”)<br />
1 (5”)<br />
5. Hotplate<br />
1 (4”)<br />
1(4”)<br />
1 (5”)<br />
1(5”)<br />
6. Rear liner (s)<br />
1<br />
1<br />
2<br />
2<br />
7. Side liners<br />
2<br />
2<br />
2<br />
2<br />
6 Hamlet Camborne Deluxe Wood & Multifuel Stoves
CHECK LIST<br />
Part Description<br />
& Visual Aid<br />
(not to scale)<br />
Camborne<br />
Deluxe<br />
Compact<br />
Wood<br />
Camborne<br />
Deluxe<br />
Compact<br />
Multifuel<br />
Camborne<br />
Deluxe<br />
Small<br />
Wood<br />
Camborne<br />
Deluxe<br />
Small<br />
Multifuel<br />
Camborne<br />
Deluxe<br />
Medium<br />
Wood<br />
Camborne<br />
Deluxe<br />
Medium<br />
Multifuel<br />
Camborne<br />
Deluxe<br />
Large<br />
Wood<br />
Camborne<br />
Deluxe<br />
Large<br />
Multifuel<br />
8. Rear grate bar<br />
support<br />
N/A<br />
1<br />
N/A<br />
1<br />
9. Comb<br />
assembly<br />
consisting<br />
of comb & comb<br />
extension<br />
bar<br />
N/A<br />
1<br />
N/A<br />
1<br />
10. Fuel retainers<br />
2<br />
2<br />
2<br />
2<br />
11. Stove Mitten<br />
1<br />
1<br />
1<br />
1<br />
12. Ashpan<br />
1<br />
1<br />
1<br />
1<br />
13. Operating tool<br />
1<br />
1<br />
1<br />
1<br />
14. Instruction<br />
Manual<br />
1 1<br />
1<br />
1<br />
Hamlet Camborne Deluxe Wood & Multifuel Stoves 7
TECHNICAL DATA<br />
TECHNICAL DATA<br />
Camborne<br />
Deluxe<br />
Compact<br />
Wood<br />
Camborne<br />
Deluxe<br />
Compact<br />
Multifuel<br />
Camborne<br />
Deluxe<br />
Small<br />
Wood<br />
Camborne<br />
Deluxe<br />
Small<br />
Multifuel<br />
Camborne<br />
Deluxe<br />
Medium<br />
Wood<br />
Camborne<br />
Deluxe<br />
Medium<br />
Multifuel<br />
Camborne<br />
Deluxe<br />
Large<br />
Wood<br />
Camborne<br />
Deluxe<br />
Large<br />
Multifuel<br />
Room Min/Max<br />
Room Heater Only<br />
Output (kW)<br />
1 - 5<br />
1 - 5<br />
1.5 - 6<br />
1.5 - 6<br />
Room Heater with Domestic Hot<br />
Water with add in boiler type<br />
0<br />
0<br />
8<br />
8<br />
Max Output to Room (kW)<br />
3<br />
3<br />
3.8<br />
3.8<br />
Max Output to Water (kW)<br />
2<br />
2<br />
2.2<br />
2.2<br />
Height (mm)<br />
495 495<br />
524 524<br />
Width (mm)**<br />
415 415<br />
490 490<br />
Depth (mm) **<br />
400 400<br />
400 400<br />
Height to Centre of Rear Flue<br />
401 401<br />
415 415<br />
Depth from Back to Centre<br />
of Flue (mm)<br />
102 102<br />
103 103<br />
Flue Diameter<br />
102mm<br />
(4”)<br />
102mm<br />
(4”)<br />
127mm<br />
(5”)<br />
127mm<br />
(5”)<br />
Weight Packed (Kg)<br />
56 58<br />
67 71<br />
Ideal Log Length (mm) 260 260 300 300<br />
**Footprint area of stove (tip to tip of stove feet)<br />
The model and Serial Number of your stove can be found stamped into the casing,<br />
centrally just below the bottom edge of the fire door aperture.<br />
8 Hamlet Camborne Deluxe Wood & Multifuel Stoves
INSTALLATION<br />
GENERAL PRECAUTIONS<br />
Note - All installations must conform to the<br />
appropriate building regulations.<br />
The Building Regulations for England and Wales<br />
2000 ref Approved Document J 2002 edition<br />
(issued by the DTLR).<br />
The Building Standards (Scotland) (Consolidation)<br />
Regulations.<br />
Detailed recommendations for installation of<br />
appliances, chimneys and flues are outlined in the<br />
current issue of the following British Standards:-<br />
BS6461, BS8303 and BS4543.<br />
Any Manufacturer's Instructions must not be<br />
taken as overriding statutory requirements.<br />
During installation ensure that adequate<br />
precautions are taken to avoid unnecessary risk to<br />
yourself or any householder. In particular the<br />
danger from the caustic nature of the fire cement<br />
should be avoided by using these accepted<br />
methods:<br />
• Wear gloves when handling fire cement.<br />
• Wear goggles when chiselling or looking up<br />
chimneys.<br />
Make sure that Building Regulations are adhered to<br />
during installation along with any local by-laws. In<br />
the case of heating systems make sure that the pipe<br />
work is correctly bonded to ensure electrical<br />
earthing.<br />
HANDLING<br />
By the time you read this you will appreciate the<br />
weight of the appliance. The Safety and handling<br />
guidelines as set out on page 5 of this manual<br />
should be followed.<br />
To make movement easier internal fittings, fuel<br />
retainers, grates, firebox liners, flue outlets, hot<br />
plate, throat plate, etc., can be removed.<br />
HEARTH<br />
The stove should be installed to stand on a<br />
constructional hearth of non-combustible materials<br />
not less than 125mm (5'') thick conforming to<br />
Building Regulations. Dimensions of the hearth<br />
should project at least 300mm (12'') forward of the<br />
front of the appliance and 150mm (6'') at the sides.<br />
The surface of the hearth should be free of<br />
combustible materials. In most buildings with solid<br />
concrete floors the requirement will be met by the<br />
floor itself, but mark the perimeter of the hearth to<br />
ensure floor coverings are kept well away or use<br />
different levels to mark the hearth perimeter.<br />
COMBUSTIBLE MATERIALS<br />
A gap of at least 450mm (18'') should be allowed<br />
between the appliance and any combustible<br />
materials including furnishings. Adjacent walls<br />
should be of suitable non-combustible<br />
construction, preferably brickwork. In large<br />
fireplaces take care that any supporting beam is<br />
protected by a 13mm (0.5'') sheet of<br />
Masterboard/Supalux spaced 13mm (0.5'') off the<br />
surface with strips of non-combustible material<br />
- not wood.<br />
Make sure that there is a gap between an<br />
uninsulated flue system and any combustible<br />
material. This gap must be at least 3 x the outside<br />
diameter of the flue pipe, or 1.5 x the flue diameter<br />
to non combustible surfaces. see illustration p13.<br />
AIR FOR COMBUSTION<br />
There must always be a permanent means of<br />
providing air for combustion into the room in<br />
which the fire is installed. A permanent vent with a<br />
total free area of at least 550mm 2<br />
for every kW<br />
rated output above 5kw should be connected<br />
directly to the outside air or to an adjacent room<br />
which itself has a permanent vent of the same size<br />
direct to the outside air. The fitting of an extractor<br />
fan to either of these rooms is not recommended.<br />
Care should be taken to make sure that the hinges<br />
are not damaged during installation.<br />
Hamlet Camborne Deluxe Wood & Multifuel Stoves 9
INSTALLATION<br />
FITTING THE FLUE OUTLET AND<br />
HOT PLATE<br />
The flue outlet spigot is found packed inside the<br />
appliance. The hot plate (blanking plate) is supplied<br />
fitted to the top opening and is removed by turning<br />
clockwise (as is the flue outlet).<br />
Smear a very thin layer of fire cement on the faces<br />
of the flue outlet and the blanking plate. Fit the outlet<br />
to the appliance in the desired position .<br />
Lock into place by rotating anti-clockwise and<br />
tighten by tapping with a block of wood and mallet<br />
from the inside of the appliance. Similarly, fit the<br />
blanking plate to the unused opening. Clean off any<br />
surplus fire cement.<br />
Place appliance on the hearth and make sure that it<br />
is level and does not rock.<br />
Connect the chimney ensuring all joints are sealed<br />
with fire cement.<br />
FLUES AND CHIMNEYS<br />
Please remember that chimney draught is<br />
dependent on four main factors:<br />
• Flue gas temperature.<br />
• Flue height.<br />
• Flue size.<br />
• Flue terminal.<br />
The stove must be connected to a suitable and<br />
efficient flue that provides a good up draught to<br />
safely take the products of combustion (fumes)<br />
from the stove outlet to the outside air. To ensure a<br />
good up draught it is important that the flue gases<br />
are kept warm and that the flue size suits the stove.<br />
The termination of the outlet at the top of the flue<br />
also needs to comply with the Building<br />
Regulations. The minimum effective height of the<br />
flue must be at least 4.5 metres from the top of the<br />
stove to the top of the flue outlet. When warm the<br />
flue draught should be between 0.1 and 0.2 mb.<br />
A chimney may comply with the regulations but<br />
still be subject to down draught and similar<br />
problems. A chimney terminating above the ridge<br />
level is generally less likely to suffer such<br />
problems.<br />
*NOTE<br />
THE FLUE PIPE MUST BE FITTED INSIDE THE OUTLET SPIGOT<br />
FAILURE TO DO SO COULD RESULT IN THE SPILLAGE OF<br />
CONDENSATION ECT. RUNNING DOWN THE FLUE.<br />
Fig. 1. Flue and Spigot Fitting<br />
If a new chimney is being provided it should fully<br />
comply with the relevant Building Regulations that<br />
specify the requirements for solid fuel burning<br />
installations. Suitable types of chimney include the<br />
following.<br />
Masonry chimney built with clay or concrete<br />
liners, or a chimney block system meeting Building<br />
Regulations. These types of chimney should be<br />
installed in accordance with the Building<br />
Regulations and BS 6461: Part 1.<br />
Factory made insulated chimney complying<br />
with BS 4543: Part 2 (often called "Class 1<br />
prefabricated metal chimney"). These types of<br />
chimney should be installed in accordance with the<br />
Building Regulations and BS 7566: Parts 1 to 4.<br />
10 Hamlet Camborne Deluxe Wood & Multifuel Stoves
INSTALLATION<br />
Due to the gradual introduction of European<br />
Chimney Standards chimneys will be specified<br />
according to their performance designation as<br />
defined in BS EN 1443 that covers the General<br />
Requirements for chimneys. The minimum<br />
performance designation required for use with solid<br />
fuel burning stoves is T450 N2 S D3.<br />
The flue and chimney installation must be carefully<br />
checked by a competent person before fitting the<br />
stove to ensure it is suitable and will work safely.<br />
If the chimney is old (i.e. built of brick or stone<br />
without a liner) or being opened up for reuse<br />
additional checks and smoke testing as described in<br />
Appendix E of the Approved Document J 2002<br />
Edition should also be carried out to ensure the flue<br />
and chimney are in good operating condition.<br />
Unless the existing flue is in good condition with<br />
suitable access for collection and removal of debris.<br />
If the flue size is more than 225mm (9 inches)<br />
diameter or 200 x 200mm square, a suitable lining of<br />
150mm (6 inches) diameter should be fitted, or if the<br />
flue length is over 5.5 metres one size larger than the<br />
appliance outlet should be fitted. This should be a<br />
double skin stainless steel flexible flue liner that is<br />
independently certified for use with solid fuel.<br />
Details of suitable linings for use with solid fuel are<br />
given in the Official HETAS guide that can be<br />
viewed on their website at www.hetas.co.uk<br />
It is also important that suitable flue pipe<br />
complying with the Building Regulations is used to<br />
connect the stove to the flue in the chimney and that<br />
suitable access is provided into the flue for regular<br />
inspection and sweeping of the flueways.<br />
The installer should comply with the Building<br />
Regulation requirements in respect of providing a<br />
Notice Plate giving details on the chimney, flue<br />
lining, hearth and fireplace installation. Approved<br />
Document J of the Building Regulations for<br />
England and Wales is available from The Stationery<br />
Book shops and can also be<br />
viewed at the ODPM website at<br />
www.safety.odpm.gov.uk/bregs/brads.htm<br />
Details on the relevant Building Regulations and<br />
BS British Standards are given in the "General<br />
Precautions" section page 9 of these instructions.<br />
A chimney may comply with the regulations but<br />
still be subject to down draught and similar<br />
problems. A chimney terminating above the ridge<br />
level is generally less likely to suffer such<br />
problems.<br />
Chimneys should be as straight as possible.<br />
Horizontal runs should be avoided except where<br />
the rear outlet of the appliance is used, in which<br />
case the horizontal section should not exceed<br />
150mm (6'') in length.<br />
If the fire appears to be working hard but produces<br />
very little output to the room it is likely that<br />
excessive draw is present in the chimney, and that<br />
heat is being sucked out of the appliance and up the<br />
chimney. If this is the case we recommend the<br />
fitting of a draught stabiliser in preference to a flue<br />
damper, in the interest of safety and efficiency.<br />
We do not recommend the use of a damper when<br />
burning solid fuel.<br />
FOR ALL APPLIANCES<br />
Access for cleaning the flue should be incorporated<br />
in the system other than through the appliance (e.g.<br />
a soot door or access through register plate).<br />
Purpose-made soot doors and inspection lengths<br />
are available from manufacturers of all systems.<br />
Ensure that the whole length of the flue can be<br />
reached from the soot door.<br />
Note: if the appliance is fitted with a draught<br />
stabiliser or if one is fitted to the flue pipe or<br />
chimney in the same room as the appliance, then<br />
the permanent air entry opening (or openings)<br />
should be increased by 300mm 2 for each kW of<br />
rated output.<br />
For advice on flues and chimneys contact;<br />
NACE (National Association of Chimney<br />
Engineer): telephone 0800 0924019<br />
www.nace.org.uk<br />
or<br />
NACS (National Association of Chimney<br />
Sweeps): telephone 01785 811732<br />
www.chimneyworks.co.uk<br />
Hamlet Camborne Deluxe Wood & Multifuel Stoves 11
INSTALLATION<br />
Fig. 2. A Typical Rear Flue Layout<br />
12 Hamlet Camborne Deluxe Wood & Multifuel Stoves
INSTALLATION<br />
TYPICAL METAL INSULATED CHIMNEY SYSTEM<br />
TO BE INSTALLED TO THE CHIMNEY MANUFACTURERS INSTRUCTIONS IN COMPLIANCE<br />
WITH BUILDING REGULATIONS AND BS7566 PTS 1-4<br />
PLAN VIEW OF REGISTER PLATE AND<br />
CLEARANCES FOR NON INSULATED<br />
FLUES<br />
A is minimum clearance for non-insulated flue =<br />
1.5 x D to a non-combustible surface/material<br />
or<br />
3 x D to combustible surface/material<br />
Fig. 3. A Typical Top Flue Layout<br />
Hamlet Camborne Deluxe Wood & Multifuel Stoves 13
INSTALLATION<br />
WOOD STOVE VERSION -<br />
WOOD TRAY<br />
The wood burning tray should come fitted in your<br />
stove, if not please follow these instructions -<br />
•Fully open the fire door, and remove the two round<br />
fuel retaining bars<br />
•Locate the front edge of the wood tray, this is the<br />
smooth end with no tabs protruding from each<br />
side, opposite to the rear end with the tabs protruding<br />
either side.(See Fig. 4.)<br />
•Holding the front edge of the wood tray, carefully<br />
insert the wood tray into the firebox, taking care not<br />
to damage the paint work and side / rear liner panels.<br />
•Engage the rear lugs into the slots athe the rear of<br />
the side landings. Then lower the front of the tray<br />
until this rests onto the front brace of the stove.<br />
(See Fig. 5.)<br />
Front<br />
Rear Lug<br />
Fig. 4. Wood tray identification<br />
Fig. 5. Wood Tray Installed<br />
14 Hamlet Camborne Deluxe Wood & Multifuel Stoves
INSTALLATION<br />
MULTIFUEL STOVE VERSION-<br />
MULTIFUEL GRATE<br />
GRATE<br />
The grates in the Hamlet Camborne Deluxe multifuel<br />
units comprise a series of reciprocating cast<br />
iron bars seated on a pivoted "comb". All bars in<br />
the grate are identical, but every other bar is turned<br />
through 180 degrees, with the ends of the bars<br />
marked "H" sitting on the high sections of the<br />
comb, and the ends marked "L" sitting on the low<br />
sections.<br />
ASSEMBLING THE GRATE<br />
Fig. 6. Fitting the grate bars<br />
To assemble the grate, fit bars to low sections of the<br />
comb first, inserting end marked "H" into rear<br />
channel with groove on underside of bar located on<br />
upstand tab, and then lowering end marked "L"<br />
onto the low section of the comb, see fig. 6. The<br />
upper bar is fitted in a similar manner, but with the<br />
end marked "L" inserted in the rear channel, and<br />
the end marked "H" seated on the high section of<br />
the comb. See fig. 7. for the assembled grate layout.<br />
GRATE BAR REPLACEMENT<br />
After extended use it may be necessary to replace<br />
some of the grate bars. Periodic inspection of the<br />
bars is recommended and the removal of any nails<br />
or wire that may be present after burning wood. All<br />
the grate bars in each appliance are identical and<br />
can easily be lifted out after removal of the fuel<br />
retainers. Remove damaged grate bars and replace<br />
with casting of the same type, fitting as per<br />
instruction above. When re-ordering replacement<br />
grate bars, see page 31, of these instructions for the<br />
correct spare part code.<br />
Fig. 7. Assembled grate<br />
Hamlet Camborne Deluxe Wood & Multifuel Stoves 15
INSTALLATION<br />
FIREBOX LINER PANELS<br />
The Hamlet Camborne Deluxe Wood and Multifuel<br />
stoves use firebox liner panels to the sides and back<br />
of the firebox. The throat plate sits on top of the<br />
side and rear panels. These should come fitted to<br />
your stove, if however they are not proceed as follows<br />
to fit them as follows -<br />
•<strong>Open</strong> the fire door.<br />
•Remove the two round front fuel retaining bars, by<br />
lifting one end free of the bracket and sliding the<br />
remaining end out from the bracket.<br />
Fig. 9. Liners inserted<br />
•Set the small liner(s) into the back of the fire.<br />
•Insert side liner panels. (See Fig. 9).<br />
•Fit the throat plate with the single bend and two<br />
cut outs to the front facing up. The projecting lugs<br />
sit on top of the side liners. The long centre tab on<br />
the back edge rests on the rear liners.The shorter<br />
turn-down tabs against the vertical face.(See Fig.<br />
10 & 11 ).<br />
Fig. 10. Inserting the throat plate<br />
•Replace the front fuel retainer bars.<br />
Note: Neither the rear firebox liners nor the side<br />
firebox liners are "handed", both faces are<br />
suitable for direct contact with the fire.<br />
Note: Cracking of lining panels does not effect<br />
efficiency.<br />
Fig. 11. Liners & throat plate<br />
correctly fitted<br />
Fig. 8. Overall View Of Liners & Throat<br />
Plate.<br />
16 Hamlet Camborne Deluxe Wood & Multifuel Stoves
INSTALLATION<br />
OPTIONAL ADD IN BOILERS<br />
All of the Hamlet Camborne Deluxe Wood and<br />
Multifuel stoves offer the option of a slab boiler,<br />
which occupies the position of the rear firebox liner<br />
panels.<br />
Fitting:<br />
•Remove the fuel retainering bars, rear firebox liner<br />
panels and throat plate.<br />
•Knock out the blanking discs in the back<br />
plate corresponding to the terminals on the<br />
boiler.<br />
•Introduce the boiler to the appliance<br />
through the main fire door and locate the<br />
terminal pipes through the back plate holes<br />
and seal around boiler terminals with fire<br />
cement.<br />
•Engage locking nuts to the thread of the<br />
terminals and tighten to secure the boiler in<br />
position, ready for connection to flow and<br />
return pipes.<br />
•Replace throat plate and the fuel retainering bars.<br />
Note: On boilers the terminal which is<br />
approximately flush with the edge of the boiler<br />
and marked "TOP" must be fitted uppermost, to<br />
prevent "Kettling".<br />
WATER CONNECTIONS<br />
<strong>Heating</strong> systems<br />
The size of the heating system which can be run,<br />
will depend on the output rating of the appliance. It<br />
will be necessary to work out heat loss calculations<br />
for the system proposed in order to establish the<br />
kW/hr rating. An appliance that will meet this<br />
figure can then be chosen; (for boiler outputs please<br />
refer to the brochure).<br />
by a qualified heating engineer. In many cases your<br />
supplier will be able to offer advice and assistance.<br />
Direct Systems<br />
Stainless steel boilers, either factory fitted or<br />
retro-fitted as add-in boilers enable connection to<br />
direct systems to be made without the need to<br />
change the cylinder or to fit an expansion tank. This<br />
applies to domestic water supply only and should<br />
not be done when in an area with soft water. If<br />
radiators are used then an indirect system must be<br />
utilised.<br />
To connect the cylinder use 28mm copper pipes.<br />
Ensure that the pipes rise continuously to the<br />
cylinder.<br />
Ensure that the runs are not too long, i.e. 20ft<br />
maximum each for flow and return. Install the<br />
cylinder above the level of the fire, and as close to<br />
it as possible. (the higher the cylinder the faster the<br />
circulation). Ensure that no valves are present in the<br />
circulating pipes.<br />
Indirect Systems- The Domestic Hot Water<br />
Circuit<br />
In addition to providing hot water the primary<br />
circuit is essential in providing a "heat leak" to<br />
absorb excessive heat produced in the event of the<br />
circulation pump shutting down.<br />
Heat is produced in varying quantities while the<br />
fire is alight and care must be taken to ensure that<br />
effective circulation can occur around the primary<br />
circuit to carry heat away and thus stop boiling. The<br />
output of any radiator installed as a "heat leak"<br />
should not be less than 10% of the rated output of<br />
the appliance. The radiator should not be fitted<br />
with a control valve.<br />
The cylinder must be of the indirect type with a<br />
minimum capacity of 110 litres, conforming to<br />
BS 1566 part 1.<br />
The constructional requirements of installing and<br />
connecting the appliance also need to be taken into<br />
account when selecting. Design and calculations<br />
for individual heating systems should be carried out<br />
Hamlet Camborne Deluxe Wood & Multifuel Stoves 17
INSTALLATION<br />
Primary flow and return pipes should be 28mm<br />
diameter. The cylinder should be installed at a<br />
higher level than the appliance, and as close to it as<br />
possible (the higher the cylinder the faster the<br />
circulation). The flow and return pipes should not<br />
be longer than 20ft each. Pipe runs should rise<br />
continually from the boiler to the cylinder.<br />
A radiator of approximately 25 sq.ft. should be<br />
connected into the primary circuit, if installed in the<br />
bathroom it provides a means of drying towels in<br />
the summer.<br />
Safety Vent Circuit<br />
This circuit consists of a cold feed pipe, expansion<br />
pipe, and expansion tank. The possibility that water<br />
may boil can never be completely ruled out, and it<br />
is therefore vital to ensure that cold water can be<br />
supplied to the boiler and steam vented from it at all<br />
times.<br />
The expansion tank should have a capacity of at<br />
least 7 % of the system's water capacity. The cold<br />
water feed pipe should be at least 22mm diameter.<br />
There must not be any shut off valves in the circuit.<br />
Pipes should be run to avoid air locks. A spring<br />
safety valve should be fitted to the expansion pipe<br />
close to the boiler.<br />
•Balance the radiators.<br />
•Re-vent and ensure no air locks.<br />
•Check the circulation round the primary<br />
system and the heat leak radiator,<br />
particularly when the pump is running, to<br />
ensure circulation is not reversed.<br />
•Be sure that the chimney is operating and<br />
that ALL smoke and fumes are vented to<br />
the atmosphere through the chimney<br />
terminal.<br />
•Check all joints and seals.<br />
•Clean the outside of the appliance to<br />
prevent any stains becoming burnt on.<br />
•Check the flue draught which should read<br />
1 - 2mm, or 0.1 - 0.2mbar.<br />
The following details must be checked and<br />
completed in full by the installer at the time of<br />
installation. Please answer all questions as fully as<br />
possible. Hamlet Stoves can not be held responsible<br />
for chimney or installation.<br />
It is often possible, and is good practice, to utilise<br />
the primary flow and return as part of the safety<br />
circuit. The ball valve should have a copper ball.<br />
The overflow pipe from the expansion tank should<br />
be 28mm diameter copper. Pipes in unheated<br />
spaces must be lagged.<br />
FINAL CHECK<br />
Before handing over the installation to the<br />
customer it is strongly recommended that the<br />
appliance is lit and the functioning of the chimney,<br />
hot water and heating system is checked.<br />
A checklist (Pre-lighting Checks) appears in the<br />
Operating Instructions, but in addition to this the<br />
installer should:<br />
•Operate the heating system and set the<br />
pump head.<br />
HOT WATER SYSTEMS<br />
Is the boiler cross-flowed?<br />
Are the pipes correctly sized?<br />
What is the calculated output<br />
required to heat the system?<br />
Is a heat leak fitted?<br />
What is the return water temperature?<br />
Is the pump thermostatically<br />
controlled by a pipe stat?<br />
What is the height and distance of the<br />
hot water tank above the stove?<br />
YES / NO<br />
YES / NO<br />
YES / NO<br />
YES / NO<br />
18 Hamlet Camborne Deluxe Wood & Multifuel Stoves
INSTALLATION<br />
CHECKLIST<br />
Hearths, Fireplaces, Flues and chimneys<br />
This checklist is to ensure hearths, fireplaces, flues and chimneys are satisfactory, and to show what you have done to comply with the<br />
requirements of The Building Regulations 2000 Approved Document J 2002.<br />
1. Building address, where work has been carried out.......................................................................................................................................<br />
.........................................................................................................................................................................................................................<br />
2. Identification of hearth, fireplace chimney or flue<br />
3. Firing capability: solid fuel/gas/.<br />
4. Intended type of appliance.<br />
State model and output.<br />
5. Ventilation provisions for the appliance:<br />
State type and area of permanently open vents.<br />
6. Chimney or flue construction<br />
a) State the type or make and whether new or existing.<br />
b) internal flue size (and equivalent height, where<br />
calculated - natural draught gas appliances only).<br />
c) If clay or concrete flue liners used confirm that they are<br />
correctly jointed with socket end uppermost and<br />
state jointing materials used.<br />
d) If an existing chimney has been refurbished with a<br />
new liner, type or make of liner fitted.<br />
e) Details of flue outlet terminal and diagram reference.<br />
Outlet Details:<br />
f) Number and angle of bends.<br />
g) Provision for cleaning and recommended frequency.<br />
7. Hearth. Form of construction. New or existing?<br />
Complies with:<br />
8. Inspection and testing after completion<br />
Tests carried out by:<br />
Tests and results<br />
Flue<br />
visual<br />
inspection<br />
sweeping<br />
coring ball<br />
smoke<br />
Appliance (where included) spillage<br />
I/we the undersigned confirm that the above details are correct. In my opinion, these works comply with the relevant requirements in<br />
Part J of Schedule 1 to the Building regulations.<br />
Print name and title....................................................................................................Profession..........................................................................<br />
Capacity......................................................................................................................Telephone..........................................................................<br />
Address............................................................................................................................................................Post code.......................................<br />
Signed........................................................................................................Date.................................<br />
Hamlet Camborne Deluxe Wood & Multifuel Stoves 19
SERVICING & MAINTENANCE<br />
CLEANING<br />
INTERNAL SURFACES<br />
IMPORTANT -<br />
Under some circumstances soot can quickly build<br />
up on the throat plate and adjacent areas. The throat<br />
plate should be removed and checked monthly, and<br />
any debris stripped off. Similarly, clean the upper<br />
surface of the firebox. Refer to page 16 for instructions<br />
on the throat plate removal / inspections.<br />
OUTER FINISH<br />
The outside finish of the appliance is a durable high<br />
temperature paint. It is best cleaned by brushing<br />
down with a clean shoe brush. Do not allow<br />
moisture to remain on the appliance whilst cold or<br />
surface rust may form.<br />
The high temperature paint should not require<br />
attention for some time, depending on use. The<br />
hotter the fire burns the sooner repainting will be<br />
necessary. Aerosol tins of paint are available for<br />
complete refurbishing. Before repainting make sure<br />
that the fire is out and is cold.<br />
•Remove the door glass.<br />
•Lightly wire brush, or rub with wire wool, the<br />
body of the appliance to remove any loose paint<br />
powder.<br />
•Mask or remove items such as brass work.<br />
•Any adjacent brickwork, mantelpiece, hearth,<br />
etc., should be carefully masked for quite a<br />
distance around the appliance. (this precaution is<br />
to prevent discolouration of the surrounding brick<br />
work, wallpaper etc).<br />
Re-spray in a well-ventilated area - avoid breathing<br />
the vapour. Refer to safety instructions on paint<br />
cans.<br />
•When the paint is dry refit door glass and any<br />
other parts previously removed.<br />
•Leave the appliance for eight hours before<br />
re-lighting.<br />
•Burn slowly for the first four hours, then build up<br />
heat gradually to cure the paint.<br />
Note: Use only genuine Hamlet Stoves touch-up<br />
spray as some paints interact. This could ruin the<br />
finish and invalidate the guarantee.<br />
DOOR GLASS<br />
The door glass should remain clear during normal<br />
daytime burning. However under certain conditions-such<br />
as burning at a low rate with damp wood, or overnight<br />
burning, the glass may become somewhat blackened. To<br />
remedy this, operate the appliance at a fast rate.<br />
Alternatively when the stove is cold open the door and<br />
clean the inside face of the glass with a damp cloth or<br />
with glass cleaner (available from fire stockists). A piece<br />
of cloth moistened with vinegar and dipped in wood ash<br />
- not coal ash - will provide a good soft scourer to<br />
remove the soot without scratching the glass.<br />
CHIMNEY SWEEPING<br />
Sweeping should be carried out with an appropriate<br />
sized bristle brush and rods to suit chimney size and<br />
type. As with all appliances regular sweeping of the flue<br />
is essential to avoid the danger of blockage and the<br />
escape of poisonous fumes. Access for cleaning should<br />
also be incorporated in the chimney (e.g. soot door or<br />
access through register plate).<br />
Any existing chimney should be swept prior to<br />
installation of the appliance, and swept again a<br />
second time within one month of regular use after<br />
installation to establish frequency of sweeping<br />
required. This should be done by a competent<br />
person such as a NACS chimney engineer who will<br />
provide a Certificate of Chimney Sweeping.<br />
Sweep the whole flue way, including the outlet, at<br />
least twice per burning season. It is important that<br />
the flue ways, flue pipe and chimney be cleaned<br />
prior to lighting the fire after a prolonged<br />
shut-down period.<br />
If any damage or doubt over the flue or chimney<br />
exists, DO NOT use the appliance until the chimney<br />
and connector have been inspected and any<br />
damaged parts repaired or replaced. This should be<br />
done by a competent person such as a HETAS registered<br />
engineer.<br />
20 Hamlet Camborne Deluxe Wood & Multifuel Stoves
SERVICING & MAINTENANCE<br />
ANNUAL MAINTENANCE<br />
It is important that your fire is regularly serviced in<br />
accordance with these instructions. This should be<br />
carried out at least annually by a qualified person<br />
and should consist of the following.<br />
Remove the fire lining(s), and throat plate, inspect<br />
all gasketing on doors, glass etc. and re-order any<br />
items that may need replacing, from your Hamlet<br />
dealer. With a wire brush clean inside the appliance<br />
paying particular attention to the small inlet holes<br />
of the air wash on the inside of the stove, above the<br />
fire door. Ensure the inside face of the fire door is<br />
free of debris around the area of the primary air<br />
inlet.<br />
Sweep the chimney and confirm that it is sound.<br />
Examine all joints in the flue pipe etc. and re-seal if<br />
necessary.<br />
SUMMER STORAGE/NON USAGE<br />
Please ensure that your stove is left clean and moving<br />
components are well lubricated for the summer<br />
months (during periods of prolonged non use). If<br />
possible store the throat plate outside of the stove,<br />
check all movable components, at regular intervals,<br />
to ensure they are moving freely.<br />
Allow air movement through the stove, by opening<br />
the airwash and prinmary air inlet(s) controls to<br />
about half way open or leave the door ajar. This will<br />
allow a free flow of air through the appliance thus<br />
preventing moisture and condensation forming<br />
inside the stove and chimney. This preventative<br />
maintenance will ensure your stove stays in the best<br />
condition for the coming winter months.<br />
DOOR ADJUSTMENT<br />
Once the appliance has been under fire for a period<br />
of time the fire door(s) may appear to have moved<br />
out of alignment with relation to the door aperture.<br />
This is quite normal and due to the settling of the<br />
casing.<br />
The fire door(s) can be re-aligned by the user as<br />
follows:<br />
•When the appliance is cold, open the fire door(s )<br />
so they are at a right angles to the front face of the<br />
stove.<br />
•Lift the fire door(s) up off the hinges..<br />
•Gently tap the two hinge pins in a direction to<br />
compensate for the misalignment.(Fig.12)<br />
•Refit the door(s) and check to ensure they now sit<br />
square to the body; if not repeat above steps.<br />
Raising the door(s) as follows:<br />
•When the appliance is cold, open the fire door(s)<br />
so that it is at a right angle to the front.<br />
•Lift the fire door(s) up off the hinges.<br />
•Drop one washer onto the top and bottom hinge<br />
pin.<br />
•Refit the door(s) and check.<br />
Please Note: There is no adjustment to the door<br />
lock/catch assembly.<br />
Fig. 12. Adjusting the door hinge<br />
Hamlet Camborne Deluxe Wood & Multifuel Stoves 21
SERVICING & MAINTENANCE<br />
DISASSEMBLE AIRWASH<br />
The Hamlet Camborne Deluxe air wash may be<br />
disassembled for cleaning or adjustment. To<br />
achieve this, the following procedure should be followed:<br />
Note - This should only be carried out when the fire<br />
is cold and unlit.<br />
•Unscrew (Anti-clockwise) the airwash control<br />
knob (Fig. 13).<br />
•Move outer cover up by tapping each end of the<br />
cover with a soft mallet.<br />
•Lift outer cover free from body, being careful not<br />
to damage the ends of each lug (Fig. 14).<br />
•Slide off the spacer tube from the centre stud and<br />
retain for re-assembly.<br />
•Unscrew the inner slider and clean/replace<br />
(Fig.15).<br />
Fig. 15. Inner slider removal<br />
FUEL RETAINER BARS -<br />
INSPECTION<br />
Fuel retainering bars are supplied with the stove.<br />
Periodically check for any bowing or heat warpage<br />
to the fuel retaining bars and replace as necessary.<br />
Note: This operation should only be carried out<br />
when the appliance is unlit and cold.<br />
•Refit using the reverse of this procedure.<br />
Fig. 13. Unscrew control knob<br />
Fig. 14. Lifting cover from body<br />
22 Hamlet Camborne Deluxe Wood & Multifuel Stoves
SERVICING & MAINTENANCE<br />
FIRE DOOR GLASS<br />
In the event of the door glass being broken it can<br />
easily be replaced.<br />
Note: This operation should only be carried out<br />
when the appliance is unlit and cold. Pictures<br />
depict a double door model, however, descriptions<br />
and wording relate to either single or double<br />
doored stoves.<br />
•The door(s) should be lifted off the hinges so that<br />
the operations can be carried out on a<br />
workbench or similar level surface.<br />
•Unscrew the four hex bolts, on the inside of the<br />
door securing the retaining clips.<br />
•Carefully remove any pieces of broken glass, and<br />
sealing gasket wearing suitable gloves.<br />
Fig. 17. Fitting the glass<br />
•Replace the four retaining clips and bolts. Do not<br />
over-tighten the bolts as damage may occur to the<br />
glass (Fig.18) Re-place the door(s) carefully over<br />
the hinges and slot in place.<br />
•Re-place the gaskets and line them up in<br />
relation to the door frame. (Fig. 16)<br />
Fig. 18. Tightening the glass clips<br />
Fig. 16. Lining up the gasket<br />
•Re-seat the new glass, ensuring the sealing gasket<br />
is flat and in contact with the glass. (Fig. 17)<br />
Hamlet Camborne Deluxe Wood & Multifuel Stoves 23
SERVICING & MAINTENANCE<br />
Date of Visit Company Work Carried Out Signature<br />
Should you have any questions about your Camborne Deluxe stove that is not covered in this manual please<br />
contact your Hamlet Stoves retailer.<br />
Please keep all repair receipts safely.<br />
Please ensure you have this manual available when an engineer visits as they will complete the service record<br />
chart.<br />
24 Hamlet Camborne Deluxe Wood & Multifuel Stoves
OPERATING INSTRUCTIONS<br />
FUEL TYPES<br />
Wood- Any type of wood is suitable provided it is<br />
well seasoned and has a moisture content below<br />
20%. This usually implies that the timber has been<br />
suitably stored to allow moisture to evaporate for at<br />
least nine months in the case of soft woods, and at<br />
least eighteen months in the case of hard wood. We<br />
recommend that for general burning, wood should<br />
be split into logs of no more than 130mm (5")<br />
diameter.<br />
Larger logs can be used for overnight burning.<br />
WARNING wet wood must not be used as this will<br />
greatly contribute to the creation of tar and creosote<br />
which may, in extreme cases, run down the<br />
chimney in liquid form. This will seriously damage<br />
both the chimney and the appliance, and increase<br />
the risk of chimney fire.<br />
Note: If you have sticky tar inside the appliance or<br />
chimney your wood is 'Green' or too wet.<br />
Recommended Reading:<br />
"Wood as Fuel" available from the Forestry<br />
Commission.<br />
Peat- Can be used in turf or briquette form, but<br />
again the moisture content must be low.<br />
Paper- paper will burn successfully. Burn dry<br />
paper only or chimney damage will occur.<br />
NEVER BURN PLASTICS OR WASTE IN<br />
YOUR STOVE.<br />
Coal - Household coal produces a large amount of<br />
ash and smoke. If used the appliance and chimney<br />
will require frequent cleaning. Therefore soft house<br />
coal is not recommended.<br />
Recommended fuels are as follows:<br />
The Hetas <strong>Ltd</strong>, "Three Tick" appliance approval<br />
only covers the use of the following fuels in this<br />
appliance; Phurnacite, Phurnacite Plus,<br />
Centurion, Maxibrite, Extracite, Pureheat,<br />
Blazebrite, Taybrite, Sunbrite (Doubles/Singles),<br />
Anthracite (Large Nuts), and Welsh Dry Steam<br />
Coal (Large/Small Nuts).<br />
Approval does not cover the use of other fuels<br />
either alone or mixed with the suitable fuels listed<br />
above, nor does it cover instructions for the use of<br />
other fuels.For latest details please refer to Hetas<br />
website www.hetas.co.uk.<br />
Do not use Homefire (six sided) and smaller sizes<br />
than Stovesse, e.g. Beans, Peas,Grains.<br />
Do not use petroleum based solid products such<br />
as Calco or Petrocoke.<br />
To do so will invalidate the appliance guarantee<br />
LIGHTING THE FIRE<br />
Prior to lighting the fire for the first time check<br />
with the installer that:<br />
•Installation and all building work is complete.<br />
•The chimney is sound and has been swept and is<br />
free from obstruction.<br />
•Adequate provision for combustion air has<br />
been made, i.e. a permanent vent of at least<br />
550mm² per kW of rated output above 5 kW,<br />
is fitted in the room in which the appliance<br />
is installed.<br />
•That Building Regulations and any local<br />
by-laws have been followed during installation<br />
(see installation instructions).<br />
•All firebox liner panels are in place.<br />
•Throat plate is in place.<br />
•Where add in boilers are fitted ensure that the<br />
system is full of water and vented, and<br />
precautions have been taken to prevent corrosion<br />
(see installation Instructions).<br />
•That the chimney draw has been checked and is<br />
within specification. With the chimney warm the<br />
draught should be between 1 - 2mm water gauge<br />
(0.1 - 0.2mbar).<br />
WARNING: An over drawing chimney can cause<br />
over-firing resulting in damage to the appliance.<br />
WARNING - ADD IN BOILERS: Do not light the<br />
fire if it is suspected that any part of the water<br />
system is frozen.<br />
Hamlet Camborne Deluxe Wood & Multifuel Stoves 25
OPERATING INSTRUCTIONS<br />
ENSURE THAT YOU HAVE READ &<br />
UNDERSTOOD THESE INSTRUCTIONS<br />
BEFORE LIGHTING THE FIRE.<br />
ALWAYS WEAR SUITABLE PROTECTIVE<br />
FIRE GLOVES WHEN REFUELLING YOUR<br />
STOVE.<br />
SOLID FUEL BURNING (Multifuel<br />
Version Only)<br />
•Set the grate to ‘coal’ position.<br />
•Ensure that the ash pan is in position and the fire<br />
doors are closed.<br />
•Set the air wash (secondary air) to one quarter<br />
open position.<br />
•Set the primary inlet to the fully open position<br />
•Light in the normal manner with paper and<br />
kindling, or use a fire lighters.<br />
•If using a gas poker be sure to remove it<br />
immediately when the fire is alight.<br />
•When the fire is well alight regulate the burning<br />
rate by adjusting the setting on the primary air<br />
inlet control.<br />
•The air wash can be opened sufficiently to keep<br />
the door glass clean.<br />
BURNING WOOD<br />
•When burning wood on multifuel version set to<br />
grate to wood burning position.<br />
•If wood burning only version no further settings<br />
are required.<br />
•Set the air wash to fully open position.<br />
•Proceed as for solid fuel but note the fire will burn<br />
up and become established more quickly.<br />
• Ensure primary air control is in the fully closed<br />
position. Note some familiarisation may be<br />
required due to fuel variation and some adjustment<br />
may be necessary.<br />
MIXED FUELS (Multifuel Version Only)<br />
•The grate can be set to either coal or wood<br />
position depending on the main percentage of<br />
the fuel to be burnt.<br />
•As per coal but allow additional secondary air.<br />
•The primary air inlet can be closed and burning<br />
regulated by means of the air wash above the door.<br />
ANTHRACITE (Multifuel Version Only)<br />
Anthracite is more difficult to keep in for long<br />
periods, consequently more care in setting the<br />
controls and some familiarisation is necessary<br />
when burning anthracite.<br />
Use the smallest size fuel (Stovesse or Small Nuts).<br />
Proceed as for manufactured smokeless fuel. Leave<br />
the air inlet control open about a quarter or less.<br />
Note: The high temperature paint acquires<br />
durability by being "cured" during the initial<br />
firings of the appliance. During this time fumes<br />
which are non-toxic, are emmitted, certain persons<br />
may find they have an unpleasant or irritant effect.<br />
Ensure that the area is well ventilated during this<br />
time.<br />
OVERNIGHT BURNING<br />
The appliance will burn overnight provided:<br />
•Sufficient fuel is placed in the firebox.<br />
•The controls are set correctly.<br />
•Excess draught is not present in the chimney.<br />
•Close the door.<br />
•If the fire goes out with unburnt fuel left in the<br />
firebox increase the air opening slightly, and vice<br />
versa.<br />
In the morning<br />
<strong>Open</strong> the air control fully until embers begin to<br />
glow brightly and place pieces of fuel on the fire<br />
until it is well established.<br />
WARNING: When wood is burnt slowly in a<br />
closed appliance it produces moisture and tar,<br />
which will create condensation and deposits in the<br />
chimney. This effect can be minimised by burning<br />
hard for a short period, about 20 minutes, twice a day.<br />
It is usually convenient to do this morning and night.<br />
Note: To avoid chimney problems your fire should<br />
not be burnt slowly for longer than 12 hours<br />
without a period of fast burning.<br />
WARNING: Properly installed, with a suitable<br />
flue and chimney and operated and maintained<br />
this appliance will not emit fumes into the<br />
dwelling. Occasional fumes from the de-ashing<br />
and re-fuelling may occur. However, persistent<br />
fume emission is potentially dangerous and must<br />
be investigated by a Hetas registered installer.<br />
Stop using the appliance if you smell fumes or<br />
see smoke escaping.<br />
26 Hamlet Camborne Deluxe Wood & Multifuel Stoves
OPERATING INSTRUCTIONS<br />
AIR INLET CONTROLS<br />
Both Hamlet Camborne Deluxe wood & multifuel<br />
stoves have two air inlets:<br />
•The primary air inlet providing under draught to<br />
the base of the fire chamber through the control<br />
slider located under the oval cover.<br />
•The air wash system (so called because its<br />
pre-heated high speed air washes across the inner<br />
face of the door glass, keeping it clear), which<br />
provides over draught.<br />
PRIMARY AIR<br />
Air enters the appliance through the control(s) on<br />
the bottom of the fire door for the compact models<br />
or all other models: either of the fire doors. Sliding<br />
the control knob(s) the plus symbol (+) as fas as it<br />
will go, achieves the fully open position, see fig.<br />
20. Sliding the knob(s) to the minus symbol (-) will<br />
shut off the air inlets slots as shown in Fig. 19<br />
AIRWASH SYSTEM<br />
The air wash has an internal sliding plate with slots,<br />
housed in a cover plate, and is located above the fire<br />
door. Sliding the control knob to the right as far as it<br />
will go achieves the fully open position. Sliding it to<br />
the left will shut off the air inlet slots As shown in fig.<br />
21 & 22.<br />
Fig. 21 Fully Closed<br />
Fig. 22 Fully <strong>Open</strong><br />
Fig. 19 Closed Position<br />
Please Note - refer to page 26 to the type of<br />
fuel being burnt, as the positioning of the air inlet<br />
controls are dependant upon the fuel varity being<br />
used. Incorrect setting could cause an inefficient<br />
heat output and poor fuel consumption from the<br />
appliance.<br />
FUEL RETAINER BARS<br />
Fig. 20 <strong>Open</strong> Position<br />
Fuel retainering bars are supplied with the stove.<br />
For wood burning, the top fuel retaining bar may be<br />
removed to afford a better view of the fire. Slide<br />
and lift the bar until it is clear of the guides at each<br />
side, and remove through the fire door opening.<br />
The bars are symmetrical and of even lengths<br />
making incorrect fitting impossible.<br />
Note: This operation should only be carried out<br />
when the appliance is unlit and cold.<br />
Hamlet Camborne Deluxe Wood & Multifuel Stoves 27
OPERATING INSTRUCTIONS<br />
MULTI-PURPOSE<br />
TOOL<br />
OPERATING<br />
Your Hamlet stove comes with a multi-purpose<br />
operating tool, which is used for riddling, setting<br />
the multifuel grate *, (fuel position) , adjusting the<br />
air wash control knob and for the removal of the<br />
ashpan.<br />
SETTING THE GRATE<br />
(*Multifuel Version Only)<br />
To use the operating tool for setting the grate in the<br />
coal burning position or the wood burning position,<br />
place the tool over the external round bar extension<br />
, found on the front right hand side of the stove,<br />
(see Fig. 23.), move the lever to the desired position<br />
as indicated upon the bracket fixed to the stove.<br />
This lever is also used for de-ashing and riddling<br />
Fig. 23 Setting The Grate<br />
DE-ASHING (RIDDLE)<br />
It is necessary to maintain an ash layer on the upper<br />
surface of the grate bars, in order to protect them so<br />
de-ashing should cease as soon as the first red<br />
embers drop into the ash pan. Further de-ashing<br />
will cause heat build-up under the grate, which will<br />
considerably shorten its life. This operation should<br />
be carried out with the doors closed to prevent dust<br />
escaping into the room.<br />
TO EMPTY THE ASH PAN<br />
<strong>Open</strong> the fire doors. Fit the fork end of the operating<br />
tool into the ash pan and remove from the ash<br />
pit chamber.<br />
Empty the ash into a suitable container and replace<br />
ashpan into the stove, withdraw the operating tool<br />
and close the fire doors.<br />
Fig. 24 Operating Tool & Ashpan<br />
Warning: The ash can be very hot. Empty only<br />
into a metal container. Even if the ash appears<br />
cold, red-hot pieces of ash may be concealed and<br />
could easily start a fire or cause an injury.<br />
ASH REMOVAL<br />
The ash pan should be emptied at least twice a day<br />
or when the level of ash reaches the top of the ash<br />
pan. On no account should the ash be allowed to<br />
build up to touch the underside of the grate bars as<br />
this will greatly shorten their life span.<br />
When the appliance is burning Wood only, it is<br />
acceptable to maintain an ash bed on top of the<br />
grate bars, of approximately 20mm (3/4'') without<br />
any un-due effect upon the grate bars.<br />
ADJUSTING AIR INLET CONTROLS<br />
The operating tool can also be used to adjust the air<br />
inlet control knobs relating to the airwash and the<br />
primary air inlets. Use the fork end of the tool,<br />
place side onto the knob and push in the desired<br />
direction as in Fig. 25.<br />
•Move up and down vigorously the riddling<br />
lever (ash will fall into the ash pan beneath<br />
the grate). See Fig. 23.<br />
•When de-ashing is complete re-set grate to<br />
previous position.<br />
• Empty the ash pan.<br />
Note: Do not force the riddling lever.<br />
Fig. 25 Adjusting Airwash Controls<br />
28 Hamlet Camborne Deluxe Wood & Multifuel Stoves
OPERATING INSTRUCTIONS<br />
MAIN FIRE DOOR HANDLE<br />
A stove mitten is supplied with your Hamlet<br />
Camborne Deluxe stove, this is provided for the<br />
operation of the fire door whilst the stove is in use.<br />
Care must be taken when opening and closing the<br />
fire door as any surrounding areas of the stove will<br />
be very hot.<br />
Warning : Never attempt to open the fire<br />
door(s) whilst the appliance is in use, without the<br />
use of the stove mitten or suitable gloves, serious<br />
injuries may occur.<br />
Caution must be given when re-fuelling the<br />
appliance, always keep the stove mitten away<br />
from naked flames and sparks.<br />
OVER-FIRING<br />
Do not over fire your appliance. Using flammable<br />
liquids or too much wood or firing the fire at<br />
maximum for prolonged periods may result in<br />
over-firing. If the chimney connector or casing<br />
glows red it is being over-fired. If this occurs<br />
immediately close all air inlets to the appliance to<br />
reduce the air supply to the fire. Should a chimney<br />
fire occur immediately close the appliance down.<br />
Get everyone out of the house and call the fire<br />
brigade. A chimney fire may cause structural<br />
damage of the chimney. Do not use the appliance<br />
until the chimney and connector have been<br />
inspected and any damaged parts repaired or<br />
replaced. This should be done by a competent person<br />
such as a HETAS registered engineer.<br />
CLINKER<br />
The formation of clinker suggests that the unit is<br />
being over-fired. Any clinker forming on the grate<br />
should be removed when cold.<br />
EXTENDED BURNING<br />
The appliance will burn for an extended period<br />
provided:<br />
•Sufficient fuel is placed in the firebox.<br />
•The controls are set correctly.<br />
•Excess draught is not present in the chimney.<br />
•Fire door(s) is/are closed.<br />
•If the fire goes out with unburnt fuel left in<br />
the firebox increase the air opening slightly,<br />
and vice versa.<br />
In the morning<br />
•<strong>Open</strong> the air control fully until embers begin<br />
to glow brightly and place pieces of fuel on<br />
the fire until it is well established.<br />
WARNING: When wood is burnt slowly in a<br />
closed appliance it produces moisture and tar,<br />
which will create condensation and deposits in the<br />
chimney. This effect can be minimised by burning<br />
hard for a short period, about 20 minutes, twice a<br />
day. It is usually convenient to do this morning and<br />
night.<br />
Note: To avoid chimney problems your fire should<br />
not be burnt slowly for longer than 12 hours<br />
without a period of fast burning.<br />
WARNING: Properly installed, with a suitable<br />
flue and chimney correctly operated and maintained<br />
this appliance will not emit fumes into the<br />
dwelling. Occasional fumes from the de-ashing<br />
and re-fuelling may occur. However, persistent<br />
fume emission is potentially dangerous and must<br />
be investigated by a Hetas registered installer.<br />
Stop using the appliance if you smell fumes or<br />
see smoke escaping.<br />
If fume emission does persist, the following<br />
immediate actions should be taken.<br />
•<strong>Open</strong> doors and windows to ventilate room.<br />
•Let the fire die or extinguish and safely<br />
dispose of fuel from the appliance.<br />
•Check the flue or chimney for a blockage, and<br />
clean if required.<br />
Seek expert advice from your HETAS registered<br />
installer. Do not attempt to re-light the fire until the<br />
cause of the fume emission has been identified and<br />
corrected<br />
Hamlet Camborne Deluxe Wood & Multifuel Stoves 29
OPTIONAL EXTRA / ACCESSORIES<br />
Optional Extra<br />
Description<br />
Camborne<br />
Deluxe<br />
Compact<br />
Wood<br />
Camborne<br />
Deluxe<br />
Compact<br />
Multifuel<br />
Camborne<br />
Deluxe<br />
Small<br />
Wood<br />
Camborne<br />
Deluxe<br />
Small<br />
Multifuel<br />
Camborne<br />
Deluxe<br />
Medium<br />
Wood<br />
Camborne<br />
Deluxe<br />
Medium<br />
Multifuel<br />
Camborne<br />
Deluxe<br />
Large<br />
Wood<br />
Camborne<br />
Deluxe<br />
Large<br />
Multifuel<br />
Aerosol Paint<br />
AFS<br />
101a<br />
AFS<br />
101a<br />
AFS<br />
101a<br />
AFS<br />
101a<br />
AFS<br />
101a<br />
AFS<br />
101a<br />
AFS<br />
101a<br />
AFS<br />
101a<br />
Add In Boiler**<br />
AIB 0 AIB 0 AIB 8 AIB 8 AIB 9 AIB 9<br />
AIB 10 AIB 10<br />
Stove Gloves<br />
AFS998 AFS998 AFS998 AFS998 AFS998 AFS998<br />
AFS998<br />
AFS998<br />
Add On<br />
CanopyLow<br />
AOCXSL AOCXSL AOCSL AOCSL AOCML AOCML AOCLL AOCLL<br />
Add On<br />
Canopy High<br />
N/A N/A AOCSH AOCSH AOCMH AOCMH AOCLH AOCLH<br />
Note<br />
** - See page 17 for instructions on how to fit the add in boilers.<br />
30 Hamlet Camborne Deluxe Wood & Multifuel Stoves
SPARE PARTS LIST<br />
Part Description<br />
& Visual Aid<br />
(not to scale)<br />
Camborne<br />
Deluxe<br />
Compact<br />
Wood<br />
Camborne<br />
Deluxe<br />
Compact<br />
Multifuel<br />
Camborne<br />
Deluxe<br />
Small<br />
Wood<br />
Camborne<br />
Deluxe<br />
Small<br />
Multifuel<br />
Camborne<br />
Deluxe<br />
Medium<br />
Wood<br />
Camborne<br />
Deluxe<br />
Medium<br />
Multifuel<br />
Camborne<br />
Deluxe<br />
Large<br />
Wood<br />
Camborne<br />
Deluxe<br />
Large<br />
Multifuel<br />
1. Grate bars<br />
N/A<br />
AFS001<br />
N/A<br />
AFS001<br />
2. Wood burning<br />
tray<br />
AFS<br />
1196<br />
N/A<br />
AFS<br />
1197<br />
N/A<br />
3. Throat plate<br />
AFS<br />
1018<br />
AFS<br />
1018<br />
AFS<br />
1019<br />
AFS<br />
1019<br />
4. Flue spigot<br />
AFS<br />
009a<br />
AFS<br />
009a<br />
AFS<br />
009<br />
AFS<br />
009<br />
5. Hotplate<br />
AFGS<br />
064<br />
AFGS<br />
064<br />
AFS<br />
010<br />
AFS<br />
010<br />
6. Rear liner(s)<br />
AFS<br />
1207<br />
AFS<br />
1207<br />
AFS<br />
1157<br />
AFS<br />
1157<br />
7. Side liners<br />
AFS<br />
1206<br />
AFS<br />
1206<br />
AFS<br />
1058<br />
AFS<br />
1058<br />
Hamlet Camborne Deluxe Wood & Multifuel Stoves 31
SPARE PARTS LIST<br />
Part Description<br />
& Visual Aid<br />
(not to scale)<br />
Camborne<br />
Deluxe<br />
Compact<br />
Wood<br />
Camborne<br />
Deluxe<br />
Compact<br />
Multifuel<br />
Camborne<br />
Deluxe<br />
Small<br />
Wood<br />
Camborne<br />
Deluxe<br />
Small<br />
Multifuel<br />
Camborne<br />
Deluxe<br />
Medium<br />
Wood<br />
Camborne<br />
Deluxe<br />
Medium<br />
Multifuel<br />
Camborne<br />
Deluxe<br />
Large<br />
Wood<br />
Camborne<br />
Deluxe<br />
Large<br />
Multifuel<br />
8. Liner Set<br />
AFS<br />
1205<br />
AFS<br />
1205<br />
AFS<br />
1156<br />
AFS<br />
1156<br />
9. Ashpan<br />
AFS<br />
058<br />
AFS<br />
058<br />
AFS<br />
058<br />
AFS<br />
058<br />
10. Fuel Retainer<br />
AFS<br />
1190<br />
AFS<br />
1190<br />
AFS<br />
1192<br />
AFS<br />
1192<br />
11. Operating<br />
Tool<br />
AFS<br />
008<br />
AFS<br />
008<br />
AFS<br />
008<br />
AFS<br />
008<br />
12. Replacement<br />
Glass & Gasket<br />
AFS<br />
1300<br />
AFS<br />
1300<br />
AFS<br />
1278<br />
AFS<br />
1278<br />
13. Glass Clips<br />
AFS<br />
1010<br />
AFS<br />
1010<br />
AFS<br />
1010<br />
AFS<br />
1010<br />
14. Hinge &<br />
Fixing Kit<br />
AFS<br />
1279<br />
AFS<br />
1279<br />
AFS<br />
1279<br />
AFS<br />
1279<br />
15. Air Wash<br />
Assembly<br />
AFS<br />
1280<br />
AFS<br />
1280<br />
AFS<br />
1280<br />
AFS<br />
1280<br />
32 Hamlet Camborne Deluxe Wood & Multifuel Stoves
SPARE PARTS LIST<br />
Part Description<br />
& Visual Aid<br />
(not to scale)<br />
Camborne<br />
Deluxe<br />
Compact<br />
Wood<br />
Camborne<br />
Deluxe<br />
Compact<br />
Multifuel<br />
Camborne<br />
Deluxe<br />
Small<br />
Wood<br />
Camborne<br />
Deluxe<br />
Small<br />
Multifuel<br />
Camborne<br />
Deluxe<br />
Medium<br />
Wood<br />
Camborne<br />
Deluxe<br />
Medium<br />
Multifuel<br />
Camborne<br />
Deluxe<br />
Large<br />
Wood<br />
Camborne<br />
Deluxe<br />
Large<br />
Multifuel<br />
16. Fire Door Rope Kit<br />
Complete With Glue<br />
AFS<br />
1021<br />
AFS<br />
1021<br />
AFS<br />
1021<br />
AFS<br />
1021<br />
17.Main Fire Door<br />
Assembly, Complete With<br />
Handle, Glass, Gaskets,<br />
Clips & Seal<br />
AFS<br />
1299<br />
AFS<br />
1299<br />
L/H<br />
AFS<br />
1281<br />
R/H<br />
AFS<br />
1303<br />
L/H<br />
AFS<br />
1281<br />
R/H<br />
AFS<br />
1303<br />
18. Door Handle<br />
Assembly<br />
AFS<br />
1298<br />
AFS<br />
1298<br />
AFS<br />
1304<br />
AFS<br />
1304<br />
19. Replacement<br />
Instructions<br />
AFS<br />
1297<br />
AFS<br />
1297<br />
AFS<br />
1297<br />
AFS<br />
1297<br />
20. Comb &<br />
Extension<br />
N/A<br />
AFS<br />
1274<br />
N/A<br />
AFS<br />
1276<br />
21. Grate Bar<br />
Support<br />
N/A<br />
AFS<br />
1275<br />
N/A<br />
AFS<br />
1277<br />
22. Stove Mitten<br />
AFS<br />
1285<br />
AFS<br />
1285<br />
AFS<br />
1285<br />
AFS<br />
1285<br />
Hamlet Camborne Deluxe Wood & Multifuel Stoves 33
GUARANTEE<br />
Guarantee<br />
Once again we would like to thank you for buying<br />
a Hamlet Camborne Deluxe stove.<br />
When you buy a Hamlet stove, you are not only<br />
buying a first class appliance - you are buying a<br />
commitment from us to look after you and your<br />
appliance for as long as you want.<br />
The Camborne Deluxe stoves come with a<br />
Lifetime Guarantee against splitting or<br />
cracking of the main body. The main body being<br />
defined as the steel outer casing and items fixed<br />
immovably to the casing. All other parts are covered<br />
by a one-year no-quibble parts Guarantee.<br />
This Guarantee shall not apply to any part that has<br />
been altered in any way, or which in our judgment<br />
has been subjected to misuse, neglect, accident,<br />
abuse and fair wear and tear.<br />
Items which would be subject to fair wear or tear,<br />
firebox liner panels, fuel retainers, throat plate,<br />
door rope, door glass and gaskets are not covered<br />
by the guarantee. However, should you have any<br />
problems with your appliance please contact your<br />
Hamlet stockist who will have the knowledge and<br />
facilities to help you.<br />
Claims are not valid where the installation does<br />
not conform to local Building Regulations and<br />
fire codes.<br />
The Guarantee is conditional upon the appliance<br />
being serviced and checked annually by a qualified<br />
heating engineer.<br />
The Manufacturers decision shall be final.<br />
USE OF SPARE PARTS OTHER THAN<br />
THOSE SUPPLIED BY HAMLET<br />
STOVES WILL INVALIDATE THE<br />
APPLIANCE WARRANTY.<br />
HAMLET STOVES WILL NOT BE<br />
RESPONSIBLE FOR ANY CONSEQUEN-<br />
TIAL OR INCIDENTAL LOSS, DAMAGE<br />
OR INJURY HOWEVER CAUSED.<br />
All Guarantee periods commence on the date of<br />
purchase and are non-transferable.<br />
Our Guarantee is offered as an addition to your<br />
statutory rights.<br />
If you think your fire is not working correctly or in<br />
the event of a breakdown, please call your local<br />
dealer.<br />
When you contact them, they will want to know:<br />
1.Your Name, Address/Post Code and Telephone<br />
Number<br />
2.Serial Number<br />
3.Clear and concise details of the fault<br />
This installation and operating manual gives sufficient<br />
details to enable the appliance to be installed<br />
and maintained. If further information is required,<br />
our technical helpline will be pleased to help.<br />
Please telephone 01308 427234 or email : technical<br />
@hamletstoves.co.uk.<br />
Please note -<br />
The appliance serial number can be found<br />
stamped into the casing of the main stove body,<br />
centrally just below the bottom edge of the fire<br />
box apperature.<br />
If your appliance proves to be defective as a<br />
result of faulty materials or workmanship<br />
during the guarantee period, we will repair or<br />
replace it FREE OF CHARGE as long as the fire<br />
has been installed according to the manuals<br />
instructions and the Final Installation Check<br />
List on page 19 has been completed and signed<br />
by a suitably qualified engineer.<br />
34 Hamlet Camborne Deluxe Wood & Multifuel Stoves
Lifetime Guarantee<br />
For your peace of mind<br />
Hamlet Stoves gives a Lifetime Guarantee against manufacturing defects of the main<br />
body* of its Camborne Deluxe range of stoves. Additionally, all other parts are covered<br />
by a one year no quibble replacement guarantee. This guarantee covers replacement<br />
of the item only and does not extend to any other costs, including labour,<br />
incurred in its replacement. Documentation must be retained and produced in the<br />
event of a warranty claim. This guarantee specifically does not cover accidental<br />
damage, misuse, wear & tear. The use of non Hamlet replacement parts will invalidate<br />
your warranty. For full details contact your local Hamlet retailer. All guarantees<br />
are in addition to your statutory rights. Please see page 34 for further information<br />
regarding the Lifetime guarantee.<br />
*The main body defined as the steel outer casing and items fixed immovably on to this casing.<br />
Hamlet Camborne Deluxe Wood & Multifuel Stoves 35
FINAL FACTORY CHECK LIST<br />
Model..................................<br />
Serial No.............................<br />
QUALITY<br />
FINISH<br />
PARTS<br />
FLUE OUTLET<br />
HOT PLATE<br />
FUEL RETAINERS x2<br />
GRATE BARS / WOODBURNING TRAY<br />
FIREBOX LININGS<br />
THROAT PLATE<br />
AIR WASH<br />
DOOR CATCH<br />
ASH PAN<br />
OPERATING TOOL<br />
OPERATING INSTRUCTIONS<br />
STOVE MITTEN<br />
I’ve checked it<br />
and it’s O.K.<br />
Assembled by.............................<br />
Checked by ................................<br />
Date of Purchase....................................<br />
Name and address of supplier.......................................................................<br />
.......................................................................................................................<br />
.......................................................................................................................<br />
* Please ensure installer completes INSTALLATION CHECK LIST details<br />
on page 19 of this manual.<br />
If an add in boiler is fitted please also ensure information on page 18 is<br />
completed.<br />
BK055