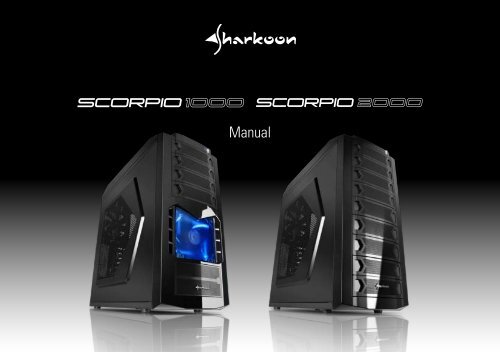
Manual - Sharkoon
Manual - Sharkoon
Manual - Sharkoon
You also want an ePaper? Increase the reach of your titles
YUMPU automatically turns print PDFs into web optimized ePapers that Google loves.
<strong>Manual</strong>
Content<br />
1. Features<br />
2. Package contents<br />
3. The case at a glance<br />
4. Installing a mainboard<br />
5. Installing a HDD<br />
5.1 Fast Swap bays<br />
5.2 3.5" HDD cage<br />
5.3 3.5" drive bay<br />
5.4 2.5" HDD cage<br />
6. Installing a PSU<br />
7. Installing an optical device<br />
8. Installing an add-on card<br />
9. The pre-installed fans<br />
Dear customer!<br />
Congratulations for purchasing one premium quality SHARKOON<br />
product.<br />
For a long life time and to take full advantage of this product we<br />
recommend that you read this manual completely.<br />
Have a good time with our product!<br />
SHARKOON Technologies<br />
10. Installing additional fans / optimized airflow<br />
10.1 Side panel<br />
10.2 Top panel<br />
scorpio 1000/2000
1. Features<br />
• Fan configuration Scorpio 2000:<br />
• ATX case<br />
• 4x 5.25“ drive bays (external)<br />
• 2x 3.5“ fast swap drive bays (external)<br />
• 3x 3.5“ drive bays (internal)<br />
• 4x 2.5“ drive bays (internal)<br />
• Top I/O with 2x USB2.0, 1x eSATA, 1x headphone and<br />
1x microphone connector, power and reset button<br />
• 7 slots for add-on cards<br />
• Plastic front panel with air inlet, drive bay covers in mesh design<br />
• Quick fasteners for optical drives, mainboard mounting with<br />
installation opening for CPU coolers<br />
• 2 openings for water cooling<br />
• Cable management system<br />
• Black interior painting<br />
• Dimensions: 508 x 210 x 503 mm (L x W x H)<br />
• Weight: ~7.25 kg<br />
Case front<br />
Side panel<br />
Back side of case<br />
Top panel<br />
1x 140 mm LED fan and 1x 80 mm fan<br />
(pre-installed)<br />
1x 200 mm fan or 2x 120 mm fans<br />
(optional)<br />
1x 120 mm fan<br />
(pre-installed)<br />
2x 120 mm or 2x 140mm fans<br />
(optional)<br />
• Fan configuration Scorpio 1000:<br />
Case front<br />
Side panel<br />
Back side of case<br />
Top panel<br />
1x 120 mm LED fan<br />
(blue/pre-installed)<br />
1x 200 mm fan or 2x 120 mm fans<br />
(optional)<br />
1x 120 mm fan<br />
(pre-installed)<br />
2x 120 mm or 2x 140mm fans<br />
(optional)<br />
scorpio 1000/2000
2. Package contents<br />
• ATX case “Scorpio 1000”<br />
(1x 120 mm fan in the case front and<br />
1x 120 mm fan in the case’s back side pre-installed)<br />
OR<br />
• ATX case Scorpio 2000“<br />
(1x 140 mm LED and 1x 80 mm fan in the case front as well as<br />
1x 120 mm fan in the case’s back side pre-installed)<br />
3. The case at a glance<br />
Front view Scorpio 1000<br />
A<br />
B<br />
• Accessory kit:<br />
10x stand-offs<br />
for mainboard<br />
10x screws<br />
for drive/<br />
mainboard<br />
mounting<br />
4x screws<br />
for HDD/PSU<br />
mounting<br />
10x screws<br />
with coarse<br />
thread for HDD<br />
mounting<br />
C<br />
D<br />
D<br />
12x screws<br />
with fine<br />
thread for HDD<br />
mounting<br />
4x fan screws<br />
4x mounting<br />
rails<br />
1x speaker<br />
A – LEDs<br />
B – 5.25" drive bays<br />
C – 120 mm LED fan (blue/pre-installed)<br />
D – Fast Swap drive bays<br />
Note:<br />
If you are missing any of the items listed above, please contact<br />
customer service via e-mail at support@sharkoon.com or call<br />
+ 49 (0) 6403 – 775 6100.<br />
scorpio 1000/2000
Front view Scorpio 2000<br />
A<br />
Top view<br />
B<br />
a<br />
b<br />
A<br />
B<br />
c<br />
d<br />
D<br />
C<br />
D<br />
c<br />
e<br />
A – LEDs<br />
B – 5.25" drive bays<br />
C – behind front bezel:<br />
120 mm LED fan (blue/pre-installed)<br />
D – Fast Swap drive bays (incl. pre-installed 80 mm fan)<br />
A – Ventilation openings<br />
B – Top I/O:<br />
a – On/off button<br />
b – Reset button<br />
c – 2x USB2.0 connectors<br />
d – 1x headphones and microphone plug<br />
e – 1x eSATA connector<br />
scorpio 1000/2000
Side view (closed/left)<br />
Side view (opened/left)<br />
A<br />
B<br />
C<br />
D<br />
E<br />
F<br />
G<br />
A<br />
H<br />
I<br />
A<br />
E<br />
F<br />
G<br />
A – Fan brackets (1x 200 mm or 2x 120 mm fan)<br />
a<br />
b<br />
d<br />
c<br />
J<br />
scorpio 1000/2000<br />
A – Drive bays for 5.25" devices<br />
B – Mainboard mounting panel<br />
C – Installation opening for CPU coolers<br />
D – Quick fasteners for optical drives<br />
E – Mounting cage for 2.5“ HDDs/SSDs<br />
F – Mounting cage for 3,5“ HDDs<br />
G – Fast Swap drive bays<br />
H – Cable openings<br />
I – Circuit board to connect the front fans (no fan control!):<br />
a – Circuit board’s 4-pin power connector<br />
b – SATA data connector HDD 1 (top)<br />
c – SATA data connector HDD 2 (bottom)<br />
d – Fan power connectors<br />
J – Mounting bay for a single 3.5" HDD
Back view<br />
Bottom view<br />
A<br />
B<br />
B<br />
C<br />
A<br />
A<br />
B<br />
A – Case feet<br />
B – Air intake (PSU)<br />
A<br />
A<br />
D<br />
The internal cables and connectors<br />
A<br />
B<br />
C<br />
D<br />
E<br />
A – Opening for I/O shield<br />
B – Cable openings (1x eSATA, 2x water cooling)<br />
C – 120 mm fan (pre-installed)<br />
D – Slot bezels<br />
E – PSU bracket<br />
A – Connectors for:<br />
Reset Switch<br />
HDD-LED<br />
Power LED +<br />
Power LED –<br />
Power Switch<br />
B – USB connector of the USB front hub<br />
C – Audio connectors (HD Audio and AC’97)<br />
D – eSATA connector<br />
Note:<br />
For more information on how to install the intended devices, refer<br />
to their respective documents.<br />
scorpio 1000/2000
4. Installing a mainboard<br />
1. Open the case by loosening the thumb screws on the case’s back<br />
side and removing the left side panel. Lay down the case sidewise<br />
on an even surface.<br />
2. The mainboard’s mounting panel inside the case provides various<br />
drillings to screw in the stand-offs (fig. 1).<br />
Place the mainboard to the mounting panel. A stand-off must be<br />
screwed into every drilling of the mounting panel visible through<br />
the mainboard’s screw openings.<br />
3. Remove the mainboard and screw the stand-offs into the respective<br />
drillings of the mounting panel (fig. 3).<br />
(Stand-offs)<br />
fig. 1<br />
The mainboard contains special screw openings (fig. 2).<br />
fig. 3<br />
4. Press the I/O shield (delivered with the mainboard) into the I/O<br />
shield opening in the case’s back side.<br />
fig. 2<br />
scorpio 1000/2000
5. Place the mainboard back onto the stand-offs and screw the<br />
mainboard to them (fig. 4).<br />
5. Installing a HDD<br />
5.1 Fast Swap bays<br />
1. Set up the case in front of you.<br />
(Screws for mainboard mounting)<br />
2. Open the bezel of the Fast Swap bays. Unlock one mounting<br />
frame’s detent lever, pull the mounting frame towards you and<br />
take it out of the case (fig. 5).<br />
fig. 4<br />
6. Plug the connectors of the case’s front bezel to the respective<br />
connectors of the mainboard (also refer to your mainboard’s<br />
manual for further information).<br />
Note:<br />
The eSATA cable connected to the front eSATA connection should<br />
not exceed 50 cm of length otherwise transmission errors may<br />
occur! With premium quality eSATA cables this maximum length<br />
may be exceeded.<br />
fig. 5<br />
3. Place a 3.5" SATA HDD into the mounting frame (connectors<br />
pointing backward/ fig. 6).<br />
fig. 6<br />
scorpio 1000/2000
4. Screw the HDD to the mounting frame from below (fig. 7).<br />
6. Connect the circuit board’s SATA data connector to a matching<br />
SATA data connector on the mainboard (fig. 8).<br />
(Screws with coarse thread for HDD mounting)<br />
fig. 8<br />
5.2 3.5" HDD cage<br />
1. Attach the mounting rails to the 3.5“ HDD from both sides (fig. 9).<br />
fig. 7<br />
5. Slide the mounting frame back into the Fast Swap bay until its<br />
detent lever locks and close the bezel.<br />
fig. 9<br />
scorpio 1000/2000
2. Slide the HDD with attached mounting rails into an available drive<br />
bay inside the 3.5" HDD cage (fig. 10).<br />
3. Screw the HDD to the drive bay from both sides (fig. 12).<br />
(Screws with coarse thread for HDD mounting)<br />
fig. 10<br />
3. Connect the built-in HDD to the mainboard.<br />
5.3 3.5" drive bay<br />
1. Remove the case’s left and right side panel.<br />
2. Insert a 3.5" HDD into the drive bay below the Fast Swap drive<br />
bays inside the case (fig. 11).<br />
fig. 12<br />
4. Connect the installed HDD to the mainboard.<br />
fig. 11<br />
scorpio 1000/2000
5.4 2.5" HDD cage<br />
1. Insert a 2.5“ HDD/SSD into a drive bay of the 2.5“ HDD cage until<br />
it locks inside the pre-installed plastic rail (fig. 13).<br />
Note:<br />
The PSU may be installed in two different directions: either the<br />
fan points upwards (towards the mainboard) or the fan points<br />
downwards (towards the floor).<br />
2. Screw the PSU to the case from the outside (fig. 15).<br />
(Screws for PSU mounting)<br />
fig. 13<br />
2. Connect the inserted HDD to the mainboard.<br />
6. Installing a PSU<br />
fig. 15<br />
3. Connect the circuit board’s 4-pin power connector to a matching<br />
power plug of the PSU (fig. 16).<br />
1. Put the PSU from the inside against the PSU bracket on the case’s<br />
back side (fig. 14).<br />
fig. 14<br />
fig. 16<br />
scorpio 1000/2000
7. Installing an optical device<br />
1. Reach into the case and push out the 5.25" front bezel from the<br />
mounting bay where you want to install the drive (fig. 17).<br />
2. Insert the optical drive into the case’s drive bay and attach it from<br />
both sides using the pre-installed quick fasteners (fig. 18).<br />
fig. 18<br />
fig. 17<br />
3. Connect the optical drive to the power supply and the mainboard.<br />
Note:<br />
If you intend to transport the case we recommend securing<br />
(additionally) the installed drives.<br />
scorpio 1000/2000
8. Installing an add-on card<br />
1. Remove the slot bezel from its attachment.<br />
2. Insert the add-on card into the mainboard’s respective slot and<br />
screw it to the case (fig. 19).<br />
9. The pre-installed fans<br />
1. The pre-installed case fans provide a 3-pin mainboard plug each.<br />
2. Connect the plugs to either the respective mainboard or fan<br />
connector of the circuit board (fig. 20).<br />
(Screws for drive/mainboard mounting)<br />
fig. 20<br />
10. Installing additional fans /<br />
optimized airflow<br />
fig. 19<br />
10.1 Side panel<br />
1. Place the fan (1x 200 mm or 2x 120 mm) against the respective<br />
fan bracket from the inside. Screw the fan to the side panel from<br />
the outside.<br />
2. Connect the fan’s power connector to the mainboard or the PSU.<br />
scorpio 1000/2000
10.2 Top panel<br />
1. Dismantle the plastic cover from the case’s top by unscrewing<br />
both attachment screws on the rear (fig. 21).<br />
Note:<br />
While installing fans make sure that (cool) air is taken in on the<br />
case’s front side/bottom and blown out on its back side/top. The<br />
PC components with the highest heat development should be<br />
placed directly within the airflow.<br />
fig. 21<br />
2. Slide the cover backwards and lift it from the case.<br />
3. Place the fan to the respective fan bracket from the inside. Screw<br />
the fan to the fan bracket from the outside (fig. 22).<br />
fig. 22<br />
4. Connect the fan’s power connector to the PSU or the mainboard.<br />
scorpio 1000/2000
Legal disclaimer:<br />
As a continuing policy of product improvement at SHARKOON, the<br />
design and specifications are subject to change without prior notice.<br />
National specifications may vary.<br />
All rights reserved especially (also in extracts) for translation,<br />
reprinting, reproduction by copying or other technical means.<br />
Infringements will lead to compensation.<br />
All rights reserved especially in case of assignation of patent or utility<br />
patent. Means of delivery and technical modifications reserved.<br />
Disposal of your old product<br />
Your product is designed and manufactured with high quality materials<br />
and components, which can be recycled and reused.<br />
When this crossed-out wheeled bin symbol is attached to a product, it<br />
means the product is covered by the European Directive 2002/96/EC.<br />
Please be informed about the local separate collection system for<br />
electrical and electronic products.<br />
Please act according to your local rules and do not dispose of your<br />
old products with your normal household waste. The correct disposal<br />
of your old product will help prevent potential negative consequences<br />
to the environment and human health.<br />
© SHARKOON Technologies 2010<br />
www.sharkoon.com<br />
scorpio 1000/2000


