INSTRUCTION MANUAL ENGLISH GB - Orion
INSTRUCTION MANUAL ENGLISH GB - Orion
INSTRUCTION MANUAL ENGLISH GB - Orion

You also want an ePaper? Increase the reach of your titles
YUMPU automatically turns print PDFs into web optimized ePapers that Google loves.
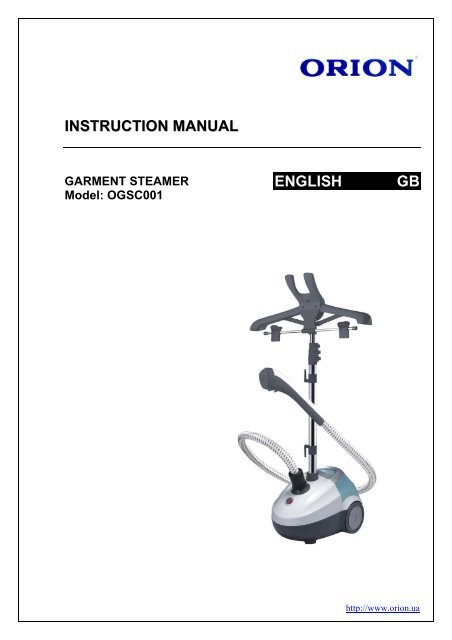
<strong>INSTRUCTION</strong> <strong>MANUAL</strong><br />
GARMENT STEAMER<br />
Model: OGSC001<br />
<strong>ENGLISH</strong><br />
<strong>GB</strong><br />
http://www.orion.ua
Dear Customers, Thank you for buying ORION products!<br />
Welcome to use!<br />
Read the instructions for use carefully before using the appliance and save them for<br />
future reference.<br />
IMPORTANT SAFETY <strong>INSTRUCTION</strong>S<br />
1. When using your appliance, basic precautions should always be followed, including the<br />
following:<br />
2. Read all instructions before use.<br />
3. Use appliance for its intended use only.<br />
4. This product has been designed for domestic use only.<br />
5. Any commercial use, inappropriate use or failure to comply with the instructions, the<br />
manufacturer accepts no responsibility and the guarantee will not apply.<br />
6. This appliance is not designed to be used by people (including children) with a physical,<br />
sensory or mental impairment, or people without knowledge or experience, unless they are<br />
supervised or given prior instructions concerning the use of the appliance by someone<br />
responsible for their safety.<br />
7. Children must be supervised to ensure that they do not play with the appliance.<br />
8. Do not leave appliance unattended while plugged in or while it is still hot.<br />
9. Do not operate any appliance with a damaged cord, plug or steam hose or after the<br />
appliance malfunctions, or is dropped or damaged in any manner.<br />
10. To reduce the risk of electric shock, do not disassemble or attempt to repair the appliance.<br />
Return appliance to nearest authorized service center for examination, repair or adjustment.<br />
11. To reduce the risk of contact with hot water emitting from steam vents, check appliance<br />
before each use by holding it away from your body and operating.<br />
12. Steam only in an up and down vertical motion. Never use steam head in a horizontal<br />
position or tilt into a backward position, this may result in water discharge.<br />
13. To reduce the risk of electric shock, do not immerse the appliance in water or other liquids.<br />
14. Appliance should always be turned off before plugging or unplugging.<br />
15. Never pull on the cord to unplug from outlet, instead grasp plug and pull to unplug.<br />
16. Do not allow cord to touch hot surfaces.<br />
17. Let appliance cool completely before putting away. Loop cord loosely under the appliance<br />
when storing.<br />
18. Do not let power cord contact sharp edges or hot surfaces.<br />
19. Do not try to fasten the hose adapter during operation.Scalding may occur if the hose<br />
adapter is removed while using the appliance.<br />
20. Always unplug appliance from an electrical outlet when filling with water, emptying or when<br />
not in use.<br />
21. Do not attempt to hang up the unit using the hose.<br />
22. The use of foreign accessory attachments that are not supplied is not recommended and<br />
may result in fire, electric shock or personal injury.<br />
23. Burns could occur from touching hot parts, hot water or steam. Use care when you empty a<br />
steam appliance. There may be hot water in the reservoir.<br />
24. Do not direct steam at people, animals or steam clothes while they are being worn.<br />
25. Your appliance is intended for household use only.<br />
26. This is a floor appliance never carry it while in use.<br />
2<br />
http://www.orion.ua
DETAILS<br />
1.1 Steam tube fixation<br />
1.2. Switch<br />
1.3 Upper housing<br />
1.4 Lower housing<br />
1.5 Rubber foot<br />
1.6 Wheel<br />
2.1 Tank handle<br />
2.2 Tank<br />
2.3 Tank knob<br />
3.1 Steam tube head<br />
3.2 Steam tube<br />
3.3 Handle<br />
4.1 Brcaket pole set<br />
4.2 Up and dowm pole<br />
5. Bracket head<br />
6. Steam press board<br />
7. Brush accessories<br />
CHARACTERISTICS<br />
• Garment steamer<br />
• Rated voltage: 230V<br />
• Rated frequency: 50/60Hz<br />
• Output power: 1600W<br />
• Continue and big steam rate<br />
• Steam flow: 40g/min<br />
• Continued steam time:60min<br />
• Output steam temperature: 98°C<br />
• Capacity: 1.5L<br />
• Max length of lever: 130 cm<br />
• Min length of lever: 50 cm<br />
• Pressure supported by the vertical lever: 1Kg<br />
• Steam pipe length: 1.7 m<br />
• Removable wheels<br />
• Power light indicator and steam light indicator<br />
• Self-clean function<br />
• Accessories: fabric brush, for brush, crease attachment, Clothes hanger<br />
• Protection against electric shock: Class I<br />
• Net/Gross weight: 4.1/5.2kg<br />
• Product size: 320*242*223mm<br />
• Gift Box Size: 466*305*303mm<br />
• Color: white and blue<br />
INSTALLATION<br />
• Pls read the instruction carefully.<br />
• Remove all the package.<br />
3<br />
http://www.orion.ua
• Do not power on or open before finish the install.<br />
• Appliance knock down assembly picture,Fig. 1<br />
• Put the telescopic pole insert the base.Fig. 2<br />
• Make sure the knob tight after insert the body.Fig. 3.<br />
• Open the telescopic buckle, pull the Aluminum pole. Fig .4<br />
• Keep the buckle tight. Fig .5<br />
• Put the steam tube tie-in insert the hole. Fig.6<br />
• Put the steam brush on the brush fix base.Fig.7<br />
HOW TO USE<br />
• Fill the water from the water filled cover,opne the cover of water tank, fill the water<br />
into water tank.Fig.8,Fig.8.<br />
• Do not fill hot water.<br />
• Close the water tank cover, put the water tank on the body. Fig. 10,Fig .11.<br />
• Pull the power cord, socket on, open the power switch. Fig .12,Fig.13.<br />
• After around one minute ,steam indicate lamp on,(please notice the indicator)<br />
• Hold steam brush and made the steam pole out of body, use steam brush touch the<br />
cloth vertically gently start ironing, Fig .14, from upside to downside.<br />
• During operate, steam tube will be some sound of water flow,this is normal. When<br />
heard this sound,pull the tube upside,made the bead back to boiler.<br />
• In order to extend the appliance life,after operating, dump the water inside the water<br />
tank,make the appliance dry working 5 minutes, make the boiler dry, power off<br />
when without steam. – Fig.22<br />
ACCESSORIES <strong>INSTRUCTION</strong><br />
Remind: When use the accessories, only can use at vertical direction, please don’t iron<br />
at horizon direction.<br />
Before using the accessories, please read the instruction manual, first use, suggest test<br />
with some old or waste cloth.<br />
Brush:<br />
• Use brush can make the steam infiltrate cloth, make good iron effect.- Fig.15<br />
• Remind: install brush make the steam brush cool.<br />
• When install brush, make steam brush panel upside, push brush accessories<br />
gently, make the buckle tightly.<br />
• When ironing, should be from top to end.<br />
• Before remove the brush, please power off the power control swich, when there is<br />
no steam from the steam brush, remove the bursh, please note do not touch the<br />
stainless steal panel, avoid scald hand.<br />
Iron splint:<br />
• Splint can help iron hem and cockle easyly.<br />
• Install the splint on the steam brush, push it tightly to its position.- Fig. 16<br />
• Hold the steam brush, open the splint. – Fig.17<br />
• Put the cloth between splint and steam brsuh. – Fig.18<br />
• Release handle, made it clamp cloth, ironing from upside to downside. – Fig.19<br />
Before remove splint, please power off the power control swich, when there is no steam<br />
from the steam brush, remove the bursh, please note do not touch the stainless steal<br />
panel, avoid scald hand.<br />
4<br />
http://www.orion.ua
STORAGE<br />
• After using, remove the water tank from the body, dump the water in the water tank.<br />
• Make the appliance dry working 5 minutes. Make the boiler dry.<br />
• Power off the power switch,(power indicate lame will be off),remove the power<br />
cord,press the cord rewind button, rewind the power cord into the body.<br />
• Warning:pls do not touch the steam bursh before it cooling, make the boiler dry<br />
before storage.<br />
CLEANING<br />
Please use a wet rag clean the body. Inorder to make your product always have a good<br />
capability,clean the scale untiming, the period depend on the using period.Water tank at<br />
least once per year, or once per 100 hours. The process for clean the scale is as below:<br />
• Remove the water tank, wash the scale at water base with clean water.<br />
5<br />
http://www.orion.ua
• Open the water tank base knob,dump mixture in the water tank, wash with clean<br />
water.<br />
• After clean the scale,if you think there is still scale,please repeat the above procees.<br />
Please use a coin or the similar tool to switch on the waterspout.Then turn on the switch<br />
and heating for three minutes.Next put the water tank on the appliance,and the water<br />
will flow into the heating soleplate.The scale will flow out with the water.Pls be careful of<br />
the water. After clean the scale, if you think there is still scale,please repeat the above<br />
procees. – Fig.20, Fig.21<br />
TROUBLE SHOOTING<br />
Problem Cause Solution<br />
One of the circuits has fault, Check and maintain by<br />
the plug is loose, the fuse specialized technician<br />
burned, the LED of supply<br />
source is extinguished.<br />
The security device<br />
does not work.<br />
A noise originates pipe<br />
of steam but the<br />
produced steam is<br />
weak.<br />
Spray head is leaked<br />
Hooking connection of<br />
steam pipe is leaked.<br />
Water spilled out water<br />
tank<br />
Steam is weak<br />
Water tank is in<br />
distortion<br />
No steam but the<br />
indicator is lighted<br />
The pipe is twisted below<br />
level to iron.<br />
The head is broken, or the<br />
ironing is vertical.<br />
The cushion can be<br />
damaged itself with the<br />
aging, the junction interface<br />
loosen itself.<br />
Water tank is broken or has<br />
a hole<br />
The power source is lower or<br />
deposits can obstruct the<br />
arrival pipe.<br />
Over heated water is put. Or<br />
other chemical element is<br />
put<br />
The steam creator is broken.<br />
The internal electric<br />
component is broken.<br />
Raise the steam pipe<br />
(residual water in top<br />
returns into the device).<br />
Replace the spray head.<br />
Move from top down to<br />
operate.<br />
Replace the cushion.<br />
Rotate the junction of<br />
steam pipe tightly.<br />
Replace the water tank<br />
Add a stabilizer of power<br />
source. Use a cleaning<br />
respecting the<br />
environment.<br />
Continue to use.<br />
Replace the water tank<br />
Call a specialized<br />
technician to do an<br />
examination<br />
Subject to change without notice<br />
Extra information on ORION company web-site www.orion.ua<br />
We take your opinion and offers by E-mail support@orion.ua<br />
6<br />
http://www.orion.ua