

The Heat Zone Wax Tool Heater - Whip Mix
The Heat Zone Wax Tool Heater - Whip Mix
The Heat Zone Wax Tool Heater - Whip Mix

Create successful ePaper yourself
Turn your PDF publications into a flip-book with our unique Google optimized e-Paper software.
<strong>The</strong> <strong>Heat</strong> <strong>Zone</strong><br />
<strong>Wax</strong> <strong>Tool</strong> <strong>Heat</strong>er<br />
OPERATION MANUAL<br />
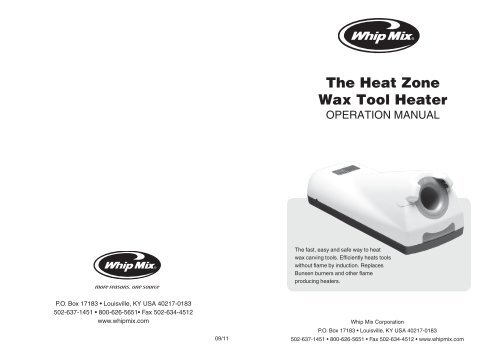
<strong>The</strong> fast, easy and safe way to heat<br />
wax carving tools. Efficiently heats tools<br />
without flame by induction. Replaces<br />
Bunsen burners and other flame<br />
producing heaters.<br />
P.O. Box 17183 • Louisville, KY USA 40217-0183<br />
502-637-1451 • 800-626-5651• Fax 502-634-4512<br />
www.whipmix.com<br />
09/11<br />
<strong>Whip</strong> <strong>Mix</strong> Corporation<br />
P.O. Box 17183 • Louisville, KY USA 40217-0183<br />
502-637-1451 • 800-626-5651 • Fax 502-634-4512 • www.whipmix.com
Important Safeguards<br />
Caution: Failure to follow these safeguards<br />
may result in fire or electric shock.<br />
1. Do not touch with wet hand.<br />
2. Avoid heavy impact or dropping of unit, may cause mechanical damage.<br />
3. Do not use if power cord is damaged or frayed.<br />
4. Do not set any objects on or bend power cord.<br />
5. To avoid electrical shock plug in to a grounded outlet only.<br />
6. Avoid setting unit on soft surface like cloth towels which may block cooling fan on<br />
bottom of unit. Fan will run more frequently with increased use of the <strong>Heat</strong> <strong>Zone</strong>.<br />
7. Unplug unit in the event of a lightning storm.<br />
8. Do not unplug unit by pulling cord.<br />
9. Avoid humidity, dust and water.<br />
10. Keep unit away from hot equipment.<br />
11. Unplug unit before cleaning. Clean outside of unit with a soft damp cloth,<br />
do not immerse in water or use cleaning chemicals.<br />
12. Unplug immediately if you smell smoke, or if unit is making noise.<br />
13. Do not disassemble or attempt to repair unit yourself.<br />
14. Do not insert any metallic ringed finger in hole to avoid burn.<br />
15. Do not insert fingers in hole after long use to avoid burn.<br />
16. Do not touch optical sensor with wax carving tool and melted wax,<br />
it may prevent proper sensing.<br />
Please contact <strong>Whip</strong> <strong>Mix</strong> with any questions or for troubleshooting advice.<br />
Use of the equipment in any way not intended by the manufacturer<br />
compromises the safety of the equipment.<br />
Environmental Conditions<br />
• Indoor use only<br />
• Temperature 5°C to 40°C (41°F – 104°F)<br />
• Humidity 50% Min. 80% Max<br />
• Voltage Fluctuations up to ± 10% of normal<br />
• Pollution Degree ll<br />
Functions & features<br />
• <strong>Heat</strong>s wax tools fast without flame<br />
• Reduces carbon deposits on instruments<br />
• Energy efficient<br />
• Indicator light glows GREEN for standby and blinks GREEN to RED alternately for operation<br />
• Safety light blinks when instrument is left in too long<br />
• Reusable inserts keep unit clean of wax residue<br />
Operating Instructions<br />
1. Plug unit into grounded outlet and switch to ON position.<br />
2. Confirm that the LED light is GREEN. If LED is RED, please adjust the sensitivity<br />
level with a small Phillips head screwdriver. Sensitivity level is located on left hand<br />
side of unit. Turn left for more sensitive and right for less sensitive. Turn slowly until<br />
LED light turns to GREEN.<br />
3. Insert wax tool into center hole, being careful not to touch the inside edge of the<br />
hole. It’s important to keep tool as centered in the hole as possible.<br />
4. While heating the tool the LED should blink alternately from GREEN to RED.<br />
5. Adjust sensitivity of <strong>Heat</strong> <strong>Zone</strong> to your tool. Insert tool into <strong>Heat</strong> <strong>Zone</strong>. Light should<br />
blink alternately from GREEN to RED. If it does not, increase sensitivity.<br />
6. <strong>Heat</strong> <strong>Zone</strong> will “time out” after 15 seconds of continuous heating. This is indicated<br />
by a rapidly blinking RED light. To re-set; switch unit off then back on.<br />
Note: To gain better sensitivity, please put carver<br />
in the center of the hole.<br />
If the machine overheats the indicator lights will blink<br />
back and forth rapidly from green to red. Check to ensure<br />
cooling fan is not blocked and allow unit to cool.<br />
Technical Specifications<br />
Voltage: Power: Amperage:<br />
AC 115V 50/60Hz 100W 2A<br />
AC 230V 50/60Hz 100W 2A<br />
Dimensions: 3.5 W x 8.2 D x 3.5 H<br />
91 mm x 209 mm x 89 mm<br />
Temperature:<br />
Optimum Indoor Temperature: 5°C – 40°C (41°F – 104°F)<br />
Optimum Indoor Humidity: 50% – 80%<br />
Weight: 1.168 lbs. (0.53 kg)<br />
Note: Main voltage supply should not<br />
exceed ± 10% of the nominal value<br />
Packing list<br />
1. <strong>The</strong> <strong>Heat</strong> <strong>Zone</strong> <strong>Wax</strong> <strong>Tool</strong> <strong>Heat</strong>er<br />
2. AC Cord<br />
3. Two (2) Reusable Inserts<br />
Description / Item #<br />
<strong>The</strong> <strong>Heat</strong> <strong>Zone</strong> 115V 50/60Hz 10147<br />
<strong>The</strong> <strong>Heat</strong> <strong>Zone</strong> 230V 50/60Hz 10247


