

Denar® Combi Instructions - Whip Mix
Denar® Combi Instructions - Whip Mix
Denar® Combi Instructions - Whip Mix

Create successful ePaper yourself
Turn your PDF publications into a flip-book with our unique Google optimized e-Paper software.
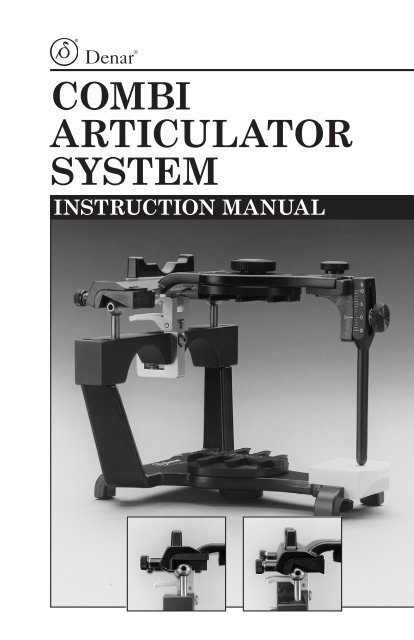
Denar ®<br />
<strong>Combi</strong><br />
Articulator<br />
System<br />
instruction manual
table of contents<br />
I. Rationale for Development............................... 2<br />
II. Benefits and Features......................................... 3<br />
III. Set Path Condylar Insert................................... 5<br />
IV.<br />
Adjustable Path Condylar<br />
Insert...................................................................... 5<br />
V. How to Use the Adjustable<br />
Path Condylar Insert.......................................... 7<br />
VI. <strong>Combi</strong> Recording Procedure............................ 7<br />
VII. Transferring the Intraoral<br />
Condylar Recording to the<br />
<strong>Combi</strong> Articulator............................................. 12<br />
VIII. Adjustment Capabilities...................................15<br />
IX.<br />
<strong>Combi</strong> Accessories.............................................15<br />
X, Reordering...........................................................15<br />
XI.<br />
Care and Maintenance......................................16<br />
XII. Bibliography........................................................16<br />
XIII. Warranty..............................................................16
I. Rationale for Development<br />
The Denar ® <strong>Combi</strong> Articulator<br />
The <strong>Combi</strong> Articulator was developed to provide the simplicity of a<br />
set path instrument while having the capacity for additional adjustment<br />
when needed. This practical combination can be found in this<br />
precisely machined instrument that fulfills both requirements. The<br />
<strong>Combi</strong> provides the option of either set path or additional adjustment<br />
through the use of machined inserts for condylar guidance,<br />
and a simplified method for intraoral recording of condylar paths<br />
when needed. The <strong>Combi</strong> Articulator is a valuable instrument during<br />
orthodontic finishing treatment and postitioner fabrication.<br />
Because of its interchangeability, the <strong>Combi</strong> can be used with set<br />
path condylar inserts as a standard for most restorative needs. But<br />
when changes in condylar paths are necessary, the condylar path<br />
inserts can be changed to accept an actual border path recording.<br />
(Or, the casts can also be transferred to a Denar ® Mark II<br />
Articulator.)<br />
Intraoral condylar recording techniques have an advantage in the<br />
use of three dimensional recordings. The border pathways can be<br />
programmed into the condylar guidance, including both protrusive,<br />
lateral and all pathways in between. The instrument can also<br />
accept customized anterior guidance procedures.<br />
The intraoral condylar recording technique is excellent for denture<br />
fabrication as the bases can be stabilized against the ridges by the<br />
central bearing point. All recordings are made intraorally within<br />
the central area of the bases. By following this procedure, the width<br />
of the external appendages will not tilt the denture base.<br />
2
II. Benefits and features<br />
An instrument system that reproduces the TMJ for restorative and<br />
orthodontic treatment.<br />
Benefits<br />
ü Extremely accurate.<br />
ü Superior results in the analysis and restoration of occlusion.<br />
ü Superior orthodontic finishing treatment.<br />
ü Simple to use.<br />
ü Economical.<br />
ü Requires minimum chair time.<br />
ü Minimizes orthodontic positioner frabrication time.<br />
ü Permanent patient records: helpful for medical/legal purposes.<br />
ü Simulates true anatomical structure.<br />
ü Allows quick and easy mounting of the mandibular cast.<br />
ü Allows easy viewing and access to casts from the rear of the<br />
articulator.<br />
ü Provides years of trouble free use. Easy to handle. Low maintenance,<br />
easy to clean.<br />
ü Permits transferability of casts due to three dimensional<br />
calibration.<br />
ü Upper and lower bows can be separated or positivelay locked<br />
together in centric relation in both open and closed positions.<br />
Features<br />
ü Intraoral recordings of the TMJ are transferred directly to the<br />
articulator.<br />
ü Anatomic joint is accurately reproduced through an intraoral<br />
condylar recording.<br />
ü Condylar path inserts duplicate patient’s anatomic joint.<br />
ü All recordings are made directly in patient’s mouth eliminating<br />
interpolation and averaging.<br />
ü Low cost system and patient procedure.<br />
ü Custom acrylic tracing is done in one simple intraoral procedure.<br />
ü Patient’s custom fossae are mounted on articulator for convenient<br />
positioner construction.<br />
ü Low cost custom condylar fossae inserts.<br />
ü Arcon construction.<br />
ü Stable and level in the inverted position.<br />
ü Excellent linual visibility.<br />
ü Rigid, sturdy and lightweight design.<br />
ü Field inspection gage aligns articulator.<br />
ü Positive centric latch.<br />
3
The <strong>Combi</strong> Articulator<br />
20 Degree Set Path<br />
Condylar Insert<br />
Upper Clutch<br />
Lower Clutch<br />
Retention<br />
Circle<br />
Recording<br />
Studs<br />
Dimple<br />
Pin<br />
Center Bearing Point<br />
0 Degree Adjustable<br />
Path Condylar Insert<br />
Figure 1<br />
4
III. Set Path Condylar Insert<br />
The set path insert has a horizontal inclination of 20 degrees which<br />
makes it flatter than the minimal angulation found in healthy<br />
articulations. The lateral path is curved to a more medially directed<br />
path than the most severe progressive side shift. Use of this<br />
insert permits direct fabrication of posterior restorations that will<br />
automatically be discluded by all but the most abnormally contoured<br />
condylar pathways as long as the correct anterior guidance<br />
is recorded.<br />
For restoration procedures, there are no contraindications for using<br />
the 20 degree set path inserts if the following is determined:<br />
A. 1. If the patient’s anterior teeth maintain contact in protrusive<br />
and lateral excursions, and<br />
2. The anterior teeth on the casts maintain contact in protrusive<br />
and lateral excursions when the set path 20 degree inserts are<br />
in place.<br />
B. If the posterior teeth are to be restored, and the posterior disclusion<br />
can be achieved with minimal adjustment, the 20 degree set<br />
path is acceptable.<br />
C. If the posterior disclusion can be achieved with the set path<br />
inserts by correcting an unacceptable occlusal plane that requires<br />
restoration anyway, the 20 degree set path can be used.<br />
In short, the set path insert can be used on almost any mounting<br />
which permits anterior guidance without unnecessary reduction<br />
of posterior teeth.<br />
IV. Adjustable Path<br />
Condylar Insert<br />
The 0 degree condylar insert is to be used whenever precise duplication<br />
of condylar paths is needed for occlusal analysis. When the<br />
anterior teeth are discluded by the posterior teeth either on the<br />
patient or on the articulator, it may be necessary to record the path<br />
and duplicate it on the articulator. The following conditions indicate<br />
the need for non-arbitrary path analysis:<br />
1. Protrusive disclusion of anterior teeth when posterior teeth do<br />
not require restoration.<br />
A major purpose of occlusal analysis is to determine the best<br />
way to achieve posterior disclusion. To accomplish that with a<br />
minimum amount of tooth reduction, it is important to take full<br />
advantage of the disclusive effect of the condyles. The steeper the<br />
condyles move downward, the more they can help to separate the<br />
posterior teeth when the jaw protrudes. Therefore, the less reduc-<br />
5
tion of tooth structure will be needed. To know the actual condylar<br />
paths is the best way to pre-determine the amount of occlusal<br />
alteration required to achieve posterior disclusion.<br />
When posterior disclusion is lacking, it can be achieved by flattening<br />
fossae walls, by lowering the occlusal plane at the posterior<br />
teeth or by steepening the anterior guidance, or a combination<br />
of the above. If disclusion is achieved by steepening the<br />
anterior guidance, it is possible to create a damaging restriction<br />
of functional pathways. The determination of how much change<br />
is needed for the anterior guidance is dependent on how much<br />
disclusive help is possible for the condylar path, and how much<br />
reduction is permitted for the posterior teeth without destroying<br />
too much enamel.<br />
The condylar path should be recorded and transferred to the 0<br />
degree condylar insert on the <strong>Combi</strong> whenever formulation of a<br />
conservative treatment plan depends on a pre-treatment determination<br />
of the precise amount of posterior tooth reduction<br />
required to achieve posterior disclusion.<br />
2. Restorative cases which would require severe change to establish<br />
an ‘ideal’ arbitrary occlusal plane.<br />
Some occlusal plane problems are too severe to be corrected to an<br />
ideal curve without excessive reduction of the teeth. Even if the<br />
posterior teeth are to be restored, the condylar path should be recorded<br />
and transferred to the 0 degree condylar insert whenever<br />
it appears that an ideal arbitrary curve will require excessive<br />
tooth reduction.<br />
3. Severely worn dentitions, particularly when the upper lingual<br />
cusps have been worn flat.<br />
When there is severe wear of the upper lingual cusps, there is a<br />
probability that both the condyles and the eminentiae have been<br />
worn flat also. In these cases, the condylar path may actually<br />
be flatter than the 20 degree set path insert. This is also found<br />
with a flat anterior guidance and may require special attention<br />
to both the anterior guidance and condylar guidance. In the<br />
restoration of severely worn dentitions, the 0 degree adjustable<br />
path condylar insert should be used on the <strong>Combi</strong> Articulator in<br />
combination with an intraoral condylar recording so the condylar<br />
paths can be reproduced with accuracy.<br />
6
V. How to use the adjustable<br />
Path condylar insert<br />
Recording and transferring the precise condylar guidance does not<br />
need to be done until after the diagnostic casts are mounted on the<br />
<strong>Combi</strong> Articulator. The mounting is usually completed with the 20<br />
degree set path inserts in place as the standard, but since changing<br />
the inserts does not alter the centric relation position, either insert<br />
may be used for mounting. The 0 dgree insert should be used whenever<br />
a customized condylar path is to be fabricated.<br />
Fabricating the customized condylar path is accomplished in two<br />
stages. First, the clinical stage requires making an intraoral condylar<br />
recording (a recording of all border movements in three dimensions)<br />
utilizing a set of intraoral clutches. Secondly, the laboratory<br />
stage requires the generation of condylar pathways in acrylic as<br />
programmed from the intraoral recording. The clinical and laboratory<br />
stages may be completed at any point during diagnosis or<br />
treatment including at the time of tooth preparation.<br />
Vi. combi recording procedure<br />
For a successful intraoral condylar recording, three things are<br />
required:<br />
1. Stable Clutches. There must be no dislacement of either<br />
clutch during the recording, so clutches must be adapted accurately<br />
with a material that is hard enough to resist any shifting<br />
or rocking during jaw movements.<br />
2. Non-interference with centric relation. The<br />
intraoral condylar recording must start at centric relation and<br />
should encounter no interference through protrusive and lateral<br />
pathways that are continuous from centric relation. If the intraoral<br />
condylar recording does not include unimpeded access to<br />
centric relation, it will not be possible to transfer the recording to<br />
centrically mounted casts.<br />
3. Clutch placement at the most closed vertical<br />
possible. If the clutches are too thick or require too much jaw<br />
opening to position them, condyles can be forced into a protrusive<br />
translation which prohibits access to centric relation. The <strong>Combi</strong><br />
clutches are designed for recording at the closest possible jaw to<br />
jaw relationship consistent with separation of all tooth contact.<br />
The central bearing point holds the clutches firmly against the<br />
teeth while it separates all contact except the gothic arch pathways<br />
it makes against the plastic plate.<br />
7
Adapting the clutches<br />
There are two ways to adapt the<br />
clutches for an intraoral condylar<br />
recording: 1) from mounted diagnostic<br />
casts, or 2) directly in the<br />
mouth. Adaption on the casts is<br />
easily accomplished. It is the recommended<br />
method of choice. Using<br />
the cast method, the clutches can<br />
be aligned at centric relation and<br />
can be ready for the recording. The<br />
casts must provide adequate lingual<br />
clearance so the centric latch<br />
can be closed with the clutches<br />
in place. The intraoral condylar<br />
recording can then be completed<br />
in approximately 4 to 5 minutes of<br />
chair time.<br />
A facebow (Slidematic) must be<br />
taken for the proper mounting of<br />
the casts. (Figure 3).<br />
indirect method for<br />
adapting clutches<br />
Mount the casts on the <strong>Combi</strong><br />
Articulator with a Slidematic<br />
Facebow tranfer jig (upper cast)<br />
and centric bite record (lower cast).<br />
(Figure 4A and B) The incisal pin<br />
sits on the moveable piece in the<br />
center of the index. See Slidematic<br />
instruction manual for mounting<br />
detail. The mounting is completed<br />
with the 20 degree set path insert.<br />
The Denar ® <strong>Combi</strong> clutches can be<br />
adapted to the casts by applying<br />
Denar’s self-curing acrylic (Figure<br />
5). Before the acrylic comes in<br />
contact with the casts, paint the<br />
casts with a tin foil substitute so<br />
the acrylic does not stick. Also,<br />
wax out all undercuts to assure<br />
that the casts will remain intact.<br />
Impress the clutches between the<br />
two casts while the articulator is<br />
locked in centric.<br />
Figure 3<br />
Figure 4A<br />
Figure 4B<br />
Figure 5<br />
8
Figure 6<br />
Figure 7<br />
Figure 8<br />
Figure 9<br />
The clutches should be flat against<br />
each other when the articulator<br />
is closed as far as possible into<br />
the acrylic. (Figure 6) The central<br />
bearing pin is then raised enough<br />
to separate all contact except for<br />
the central bearing point itself.<br />
(Figure 7)<br />
During imprintation of the acrylic,<br />
the back edges of the clutches<br />
should be aligned so the recording<br />
studs are positioned directly<br />
under the retention circles in the<br />
upper clutch. (Figure 8)<br />
The clutches are removed from<br />
the casts and the excess acrylic<br />
is trimmed away. They are then<br />
ready for the intraoral condylar<br />
recording.<br />
Direct method of<br />
adapting clutches<br />
1. Using red utility was (rope<br />
wax), form a handle in the<br />
upper clutch. (Figure 9) This<br />
handle allows easy insertion<br />
and removal of the clutch<br />
assembly from the patient’s<br />
mouth.<br />
2. The self-curing acrylic is applied<br />
to each clutch. (Figure 10)<br />
3. Note the following points prior<br />
to inserting clutches into the<br />
patient’s mouth.<br />
ü The posterior margin of<br />
the upper clutch should be<br />
pressed as close as possible to<br />
the occlusal surfaces especially<br />
at the back. Indentations<br />
into the acrylic should<br />
be deep enough to stabilize<br />
the clutches against lateral<br />
displacement.<br />
9
ü Make sure the central bearing<br />
screw on the lower clutch<br />
is screwed down so it does not<br />
prevent the clutch from being<br />
placed flat against the upper<br />
clutch surface.<br />
ü The two pins on the wings<br />
of the lower clutch must be<br />
matched with the dimples on<br />
the wings of the upper clutch<br />
to help anchor and orientate<br />
one clutch to the other.<br />
4. Insert the clutch assembly with<br />
acrylic into the mouth using the<br />
wax handle. (Figure 11) Guide<br />
the jaw into centric relation at<br />
the opened position. Have the<br />
patient close gently into the<br />
acrylic. Closure should be as<br />
close to centric relation as<br />
possible.<br />
5. The patient must indent the<br />
acrylic to the most closed<br />
position possible. Remove the<br />
clutches from the patient’s<br />
mouth. Take off the wax handle.<br />
6. Trim off the excess acrylic.<br />
7. Raise the central bearing screw<br />
so the clutches are separated at<br />
least 1mm. (Figure 12)<br />
8. Replace the clutches in the<br />
mouth to confirm that excursions<br />
can be made in all directions<br />
with complete separation<br />
of all clutch contact escept the<br />
central bearing point. If clutch<br />
contact occurs in any jaw position,<br />
raise the central bearing<br />
point until it is separated.<br />
9. Clutches are ready for the intraoral<br />
recording.<br />
Figure 10<br />
Figure 11<br />
Figure 12<br />
10
Figure 13<br />
Figure 14<br />
Figure 15<br />
Making the intraoral<br />
condylar recording<br />
1. Seat the clutches and test to<br />
see if the jaw can move freely to<br />
centric relation. Test jaw movements<br />
for all excursions to and<br />
from centric relation. Remove<br />
the clutches from the patient’s<br />
mouth.<br />
2. <strong>Mix</strong> self-curing acrylic and flow<br />
a small amount into each round<br />
retention area on the upper<br />
arch. Add more acrylic to form<br />
a mound that extends slightly<br />
past the height of the clutch<br />
offset. (Figure 13) Be sure each<br />
mound is wide enough to record<br />
the excursions of the recorder<br />
studs. Wait until the acrylic<br />
reaches a non-sticky, doughy<br />
stage and insert the upper<br />
clutch.<br />
3. While an assistant holds the<br />
upper clutch in place from behind<br />
the patient, seat the lower<br />
clutch (which has been lubricated<br />
with petroleum jelly on<br />
the recording studs for ease of<br />
movement through the acrylic)<br />
into position against the opened<br />
lower arch, and stabilize it<br />
while the patient closes to contact<br />
the central bearing point.<br />
(Figure 14)<br />
4. Using the bilateral manipulation<br />
to verify complete seating<br />
of the condyles, maintain firm<br />
upward pressure through the<br />
condyles as the patient moves<br />
the jaw forward and back, left<br />
and right. (Figure 15)<br />
5. Continue moving the jaw<br />
through all excursions until a<br />
test sample of the acrylic indicates<br />
it has hardened enough to<br />
be removed without distortion.<br />
11
6. Remove the clutches and check<br />
to see if all excursions have<br />
been recorded in the acrylic.<br />
(Figure 16)<br />
7. Note: the following points regarding<br />
the gothic arch tracing.<br />
ü Verification of a complete<br />
border path recording can<br />
be made using an indicator<br />
spray (Occlude) in the central<br />
area of the upper clutch and<br />
observing the gothic arch<br />
scribed by the central bearing<br />
point. A definite point<br />
indicates the centric relation<br />
is included in the pathways<br />
recorded. (Figure 17)<br />
ü Inserting the clutches in<br />
the patient’s mouth for two<br />
or three minutes before the<br />
intraoral condylar recording<br />
is an excellent muscle deprogrammer.<br />
Figure 16<br />
Figure 17<br />
VII. transferring the intraoral<br />
Condylar recording to the<br />
combi Articulator<br />
1. Casts should be mounted with<br />
a Slidematic transfer jig (upper<br />
cast) and centric bite record<br />
(lower cast) on the <strong>Combi</strong>.<br />
(Figure 18A & B) The mounting<br />
is completed with the 20 degree<br />
set path insert.<br />
2. If the 20 degree inserts were<br />
used for mounting, remove them<br />
and insert the 0 degree adjustable<br />
path inserts. Note: Before Figure 18A<br />
tightening, slide fossa inserts<br />
into upper bow. Attach upper bow and close (lock) latch. Tighten<br />
insert screws.<br />
3. With the casts in place, position the clutches between the casts<br />
and match the impressions. (Figure 19)<br />
12
Figure 18B<br />
Figure 19<br />
Figure 20<br />
Figure 21<br />
4. Close the casts with the clutches<br />
in place and make sure there<br />
are no interferences to centric<br />
relation. It MUST be possible<br />
to lock the centric latch without<br />
displacing the clutches. (Figure<br />
20) Note: It is necessary to<br />
grind off the excess on the posterior<br />
border of each intraoral<br />
condylar record so the studs<br />
can arc into the record without<br />
deviation.<br />
5. Unlock centric latch and move<br />
the casts through all border<br />
movements. Maintain continuous<br />
simultaneous contact of<br />
the central bearing pin and all<br />
three recording studs against<br />
the upper pathways. Note:<br />
Test the pathways to make<br />
sure there are no obstructions.<br />
Relieve the medial wall of the<br />
condylar path plastic insert if it<br />
interferes with any path.<br />
6. Lift off the upper bow and place<br />
a mix of self-curing acrylic into<br />
the 0 degree fossae. Do not<br />
overfill. (Figure 21)<br />
7. After the acrylic reaches a<br />
non-sticky, doughy stage, run<br />
cold water on it and place the<br />
upper bow back on the condyle<br />
balls which have been lubricated<br />
with petroleum jelly. Test<br />
for complete seating by locking<br />
the centric latch. If it seats<br />
completely, unlock the latch<br />
and immediately proceed with<br />
moving the upper bow through<br />
all the border movements. It is<br />
essential to maintain simultaneous<br />
contact of all three<br />
points on the intraoral condylar<br />
clutches while moving<br />
the upper bow forward and<br />
backward, left and right. Keep<br />
firm downward pressure on the<br />
13
upper bow. (Figure 22) Do not<br />
rock. Continue to check access<br />
to centric relation. Repeat the<br />
pathways until the acrylic is<br />
firm enough to be certain of<br />
no distortion. Grind off excess<br />
acrylic on the outside edge<br />
of the fossae if necessary for<br />
complete seating of the condyle<br />
balls.<br />
The condylar ball should<br />
penetrate the acrylic at three<br />
points in centric relation: at<br />
the top of the ball, medial and<br />
posterior wall. (Figure 23) If<br />
the acrylic is wiped away for an<br />
extended flat surface on the top<br />
wall, this indicates an error in<br />
recording. (Figure 24) Figure<br />
25 shows the upper bow with<br />
condylar paths in acrylic and<br />
the intraoral condylar recording<br />
in place.<br />
The intraoral condylar recording<br />
is made in the mouth by<br />
the paths of the condyles. The<br />
procedure on the articulator is<br />
simply reversed so the paths of<br />
the recording dictate the mechanical<br />
equivalent of condyle<br />
movement by generating the<br />
condylar paths in acrylic on the<br />
articulator.<br />
NOTE: When the <strong>Combi</strong><br />
Articulator is calibrated with<br />
the Denar ® Field Inspection<br />
Gage, the fossae inserts are interchangeable.<br />
Therefore, when<br />
both the doctor and laboratory<br />
have instruments that are calibrated,<br />
the doctor can send the<br />
fossae inserts to the laboratory<br />
so the instrument is free for the<br />
next case.<br />
Figure 22<br />
Figure 23<br />
Figure 24<br />
Figure 25<br />
14
VIII. Adjustment capabilities<br />
Uses disposable fossae inserts:<br />
Set path (20 degree top wall)<br />
15 degree medial wall<br />
Adjustable path (0 degree top wall)<br />
15 degree plus concave medial wall<br />
Intercondylar distance:<br />
Fixed at 110mm (55mm from mid-sagittal plane)<br />
IX. <strong>Combi</strong> Accessories<br />
The <strong>Combi</strong> may be used with most <strong>Whip</strong> <strong>Mix</strong> mounting plates<br />
(magnetic, plastic, or standard metal). In addition, it may be used<br />
with any Denar ® incisal pins and tables (mechanical or custom).<br />
To further enhance its adaptability, the <strong>Combi</strong> is compatible with<br />
the Denar ® Slidematic and the D31AB Facebow/Earbow.<br />
When used with a Denar ® Field Inspection Gage to insure accuracy,<br />
the <strong>Combi</strong> is interchangeable with other Denar ® Articulators.<br />
X. Reordering<br />
<strong>Combi</strong> 0 Degree Fossae Inserts<br />
Part No. 112008-10 10 Pair<br />
<strong>Combi</strong> Clutches<br />
Part No. 112041-10<br />
10 Pair<br />
15
XI. Care and Maintenance<br />
Your <strong>Whip</strong> <strong>Mix</strong> articulator is a precision instrument and requires<br />
care and maintenance. Periodic cleaning and lubricating as<br />
described below will assure prolonged life and dependable service<br />
from the instrument. Failure to follow these instructions will void<br />
your warranty.<br />
CLEANING<br />
Use a mild soap and water solution with the aid of a brush to<br />
dissolve accumulations of wax and to wash away carborundum grit.<br />
Then air dry and lubricate. DO NOT use strong detergents,<br />
alkalies, gasoline or naphtha as cleaning agents.<br />
LUBRICATION<br />
Lubricate the working and bearing components with a thin film of<br />
sewing machine or high speed hand-piece type oil. Wipe off excess<br />
oil to prevent accumulation of dust or grit. A thin coating of<br />
petroleum jelly must be applied to all articulator surfaces that will<br />
be contacted by the gypsum mounting material.<br />
STORAGE<br />
Store the articulator in a clean, dry atmosphere free of plaster and<br />
carborundum dust; away from acids, alkalies or corrosive medicaments.<br />
Wait a full day after mounting casts before storing the<br />
articulator in a carrying case or corrugated carton. Moisture<br />
dissipation from the stone in an enclosed area causes alkalinity of<br />
the stone mixture which can damage the articulator surface.<br />
XII. Bibliography<br />
Dawson, P.E.: Evaluation, Diagnosis and Treatment of Occlusal<br />
Problems, St. Louis, 1988, The C.V. Mosby Company.<br />
XIII. Warranty<br />
<strong>Whip</strong> <strong>Mix</strong> Corporation warrants the articulator system to be free<br />
from defects in material and/or workmanship for a period of one<br />
year. In the event of a defect, please notify the factory in writing of<br />
the defect prior to returning the instrument. <strong>Whip</strong> <strong>Mix</strong> will, at its<br />
option, either repair, replace, or issue credit for such defects.<br />
Because <strong>Whip</strong> <strong>Mix</strong> is continually advancing the design of its products<br />
and manufacturing methods, it reserves the right to improve,<br />
modify or discontinue products at any time, or to change specifications<br />
or prices without notice and without incurring obligations.<br />
16
<strong>Whip</strong> <strong>Mix</strong> Corporation - West<br />
1730 East Prospect Rd., Suite 101<br />
Fort Collins, CO 80525<br />
Toll-Free: 800-201-7286<br />
Fax: 970-472-1793<br />
www.whipmix.com<br />
<strong>Whip</strong> <strong>Mix</strong> ® , Denar ® and logos are registered<br />
trademarks of <strong>Whip</strong> <strong>Mix</strong> Corporation.<br />
©2008 <strong>Whip</strong> <strong>Mix</strong> Corporation<br />
PN 8181-1<br />
FN 81811-F AD R0708


