WARRANTY INFORMATION Owner's Guide - GE :: Housewares
WARRANTY INFORMATION Owner's Guide - GE :: Housewares
WARRANTY INFORMATION Owner's Guide - GE :: Housewares

Create successful ePaper yourself
Turn your PDF publications into a flip-book with our unique Google optimized e-Paper software.
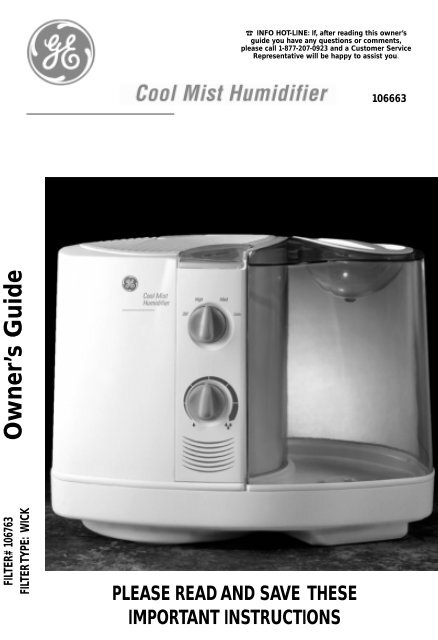
Owner’s <strong>Guide</strong><br />
☎ INFO HOT-LINE: If, after reading this owner’s<br />
guide you have any questions or comments,<br />
please call 1-877-207-0923 and a Customer Service<br />
Representative will be happy to assist you.<br />
106663<br />
FILTER# 106763<br />
FILTER TYPE: WICK<br />
PLEASE READ AND SAVE THESE<br />
IMPORTANT INSTRUCTIONS
PLEASE READ AND SAVE THESE<br />
IMPORTANT SAFETY INSTRUCTIONS<br />
When using electrical appliances, basic safety precautions<br />
should always be followed to reduce the<br />
risk of fire, electric shock, and injury to persons,<br />
including the following:<br />
1. Read all instructions before using the appliance.<br />
2. To avoid fire or shock hazard, plug the appliance<br />
directly into a 120 V AC electrical outlet.<br />
3. Keep the cord out of heavy traffic areas. To avoid<br />
fire hazard, NEVER put the cord under rugs, near<br />
heat<br />
registers, radiator, stoves, or heaters.<br />
4. DO NOT place humidifier near heat sources such<br />
as stoves, radiators, and heaters. Do locate your<br />
humidifier on an inside wall near an electrical outlet.<br />
The humidifier should be at least 4" away<br />
from the wall for best results.<br />
5. NEVER place humidifier in an area where it is<br />
accessible to children. NEVER use humidifier in a<br />
closed room,<br />
particularly where a child may be sleeping, resting,<br />
or playing (a closed room may result in excessive<br />
humidity).<br />
6. WARNING: Do not attempt to refill humidifier<br />
without first unplugging the unit from it’s electrical<br />
outlet. Failure to heed this warning may cause<br />
personal injury. Be sure to pull the plug and not<br />
the cord.<br />
7. Never place anything over moisture outlet when<br />
the unit is running.<br />
8. NEVER drop or insert any object into any openings.<br />
9. DO NOT operate any appliance with a damaged<br />
cord or plug, after the appliance malfunctions, or<br />
if it has been dropped or damaged in any manner.<br />
Return appliance to manufacturer for examination,<br />
electrical or mechanical adjustment, or<br />
repair.<br />
10. Use appliance only for intended household use as<br />
described in this manual. Any other use not recommended<br />
by the manufacturer may cause fire,<br />
electric shock, or injury to persons. The use of<br />
attachments not recommended may cause hazards.<br />
11. DO NOT use outdoors.<br />
12. Always place humidifier on a firm, flat, level surface.<br />
A waterproof mat or pad is recommended for<br />
under the humidifier. NEVER place it on a rug or<br />
carpet, or on a<br />
finished floor that may be damaged by exposure to<br />
water or moisture.<br />
13. DO NOT allow the Moisture Outlet to directly face<br />
the wall. Moisture could cause damage, particularly<br />
to wallpaper.<br />
14. Humidifier should be unplugged when not in use.<br />
THIS PRODUCT IS EQUIPPED WITH A POLARIZED AC<br />
(Alternating Current)PLUG (a plug having one blade<br />
wider than the other). This plug will fit into the power<br />
outlet only one way. If the plug does not fit fully into<br />
the outlet, reverse the plug. If it still does not fit, contact<br />
qualified personnel to install the proper outlet.<br />
DO NOT DEFEAT THE SAFETY PURPOSE OF THIS<br />
POLARIZED PLUG IN ANY WAY.<br />
15. NEVER tilt, move, or attempt to empty unit while<br />
it is operating. Shut off and unplug before removing<br />
the water tank and moving the unit.<br />
16. This humidifier requires daily and weekly maintenance<br />
to operate appropriately. Refer to daily and<br />
weekly cleaning procedures.<br />
17. NEVER use detergents, gasoline, glass cleaner, furniture<br />
polish, paint thinner, or other household<br />
solvents to clean any part of the humidifier.<br />
18. Excessive humidity in a room can cause water condensation<br />
on windows and some furniture. If this<br />
happens, turn the humidifier OFF.<br />
19. DO NOT use humidifier in an area where humidity<br />
level is in excess of 50%. Use a hygrometer,<br />
available at your local hardware store, to measure<br />
the humidity.<br />
20. DO NOT attempt to repair or adjust any electrical<br />
or mechanical functions on this unit. Doing so<br />
will void your warranty. The inside of the unit contains<br />
no user serviceable parts. All servicing<br />
should be performed by qualified personnel only.<br />
21. Never place housing under water flow or immerse<br />
in<br />
liquids.<br />
22. DO NOT plug in the cord with wet hands: electric<br />
shock could result.<br />
22. DO NOT pour water in any openings other than<br />
the water tank.<br />
PLEASE READ AND<br />
SAVE THESE<br />
IMPORTANT SAFETY<br />
INSTRUCTIONS<br />
Consumer Safety Information<br />
Note: This is an electrical appliance and requires<br />
attention when in use.<br />
Note: If moisture forms on the walls or windows of<br />
the room, turn off the humidifier. The room<br />
already has plenty of humidity and additional<br />
moisture may cause damage.<br />
Note: DO NOT block air grills.<br />
Cord and Plug Installation Safety Instructions<br />
The length of cord used on this appliance was<br />
selected to reduce the hazards of becoming tangled<br />
in, or tripping over a longer cord. If a longer<br />
cord is necessary an approved extension cord may<br />
be used. The electrical rating of the extension<br />
cord must be equal to or greater than the rating of<br />
the humidifier. Care must be taken to arrange the<br />
extension cord so that it will not drape over the<br />
countertop or tabletop where it can be pulled on<br />
by children or accidentally tripped over.
FEATURES - OPERATION<br />
How COOL Mist works<br />
Your <strong>GE</strong> Brand Cool Mist humidifier draws dry air<br />
through the rear air intake grill area. This air is then<br />
passed through a moisture–laden Wick Filter, which<br />
retains the minerals and deposits in the water. The<br />
resulting moist air is directed back into the room from<br />
the top air grill.<br />
NOTE: This humidification system provides a cool,<br />
invisible moisture output. It is normal not to see the<br />
mist.<br />
NOTE: The recommended humidity level is between<br />
40%-50%.<br />
PRE-OPERATING INSTRUCTIONS<br />
1. Select a location for your humidifier, on a flat surface,<br />
about 4" away from the wall. Do not place your humidifier<br />
on furniture; a floor location that will not be damaged<br />
by moisture is best.<br />
2. Be sure the Power Knob is in the OFF position and the<br />
humidifier is disconnected from the electrical outlet.<br />
3. Remove the Water Tank by holding the Carry Handle<br />
and lifting straight upward (see figure 1).<br />
4. Remove the Humidifier Housing by lifting straight<br />
upward. Check to see that the Wick Filter is properly in<br />
place. Replace the Humidifier Housing.<br />
FILLING THE WATER TANK<br />
NOTE: This humidifier holds about 2.6 gallons of<br />
water in the Water Tank and Humidifier Base. The<br />
humidifier will produce up to 4 gallons of moisture<br />
over a 24-Hour period, depending on the<br />
room humidity and temperature.<br />
1. Be sure the humidifier Power Knob is turned off and<br />
disconnected from the electrical outlet.<br />
2. Remove the Water Tank from the Humidifier Base by<br />
holding the Carry Handle and lifting straight up (see<br />
figure 1).<br />
3. Twist off the Tank Cap located on the bottom of the<br />
Water Tank by turning counter clockwise and fill the<br />
Water Tank with cool, fresh water.<br />
Do not fill with warm water as this may cause leaking.<br />
4. After filling the Water Tank, replace the tank cap by<br />
firmly turning clockwise and then replace the Water<br />
Tank on the base. The Water Tank will immediately<br />
begin to empty into the Humidifier Base.<br />
5. Plug the power cord into a 120V AC electrical outlet.<br />
OPERATING INSTRUCTIONS<br />
1. Turn the Power Knob to the desired setting (HIGH,<br />
MED or LOW).<br />
2. Turn the Humidistat Knob to the highest setting.<br />
3. When the desired humidity level is reached the<br />
Humidistat Knob can be set to a lower setting to<br />
reduce the humidification rate.<br />
NOTE: Allow up to 30 minutes for the Wick Filter to<br />
fully absorb water and the unit to produce the maximum<br />
moisture output.<br />
4. When the Water Tank is empty and the water in the<br />
Humidifier Base is almost empty, you need to refill the<br />
Water Tank. The fan will continue to run to help dry<br />
the humidifier. Switch off and unplug the unit. Please<br />
follow the Daily Cleaning instructions before refilling<br />
the Water Tank.<br />
5. Refill the Water Tank as directed in the Pre-Operating<br />
Instructions.<br />
IMPORTANT: If you do not plan to use the humidifier<br />
for two or more days, make sure any residual<br />
water is drained from the Water Tank, Humidifier<br />
Base and the Wick Filter to prevent algae or bacteria<br />
growth.<br />
FILTER MONITOR<br />
(Located on the top of the Humidifier Housing) will<br />
let you know when the Wick Filter needs replacing (see<br />
Figure 1).<br />
You will be able to monitor the condition of the Wick<br />
Filter in your humidifier by checking the Filter Monitor<br />
Indicator. When the unit is off or empty of water the<br />
Filter Monitor will read in the OFF/FILL position.<br />
Within 60 minutes of use the Filter Monitor will move<br />
from the OFF position and indicate your Wick Filter<br />
condition. A brand new Wick Filter will register in the<br />
green section reading GOOD filter. After frequent use<br />
of your humidifier, the Filter Monitor indicator will let<br />
you know when the Wick Filter should be changed.<br />
When the needle is in the purple CHAN<strong>GE</strong> section this<br />
means the proper amount of moisture is not getting<br />
into your air due to the large amount of minerals and<br />
sediment that have become trapped in your Wick Filter.<br />
At this point you should replace your Wick Filter. It is<br />
important to change your Wick Filter to get the best<br />
performance from your humidifier.<br />
Figure 1<br />
D<br />
H<br />
C<br />
F<br />
G<br />
B<br />
A<br />
I<br />
E<br />
A.Water Tank<br />
B.Carry Handle<br />
C.Humidifier<br />
Housing<br />
D.Power Knob<br />
E. Humidifier Base<br />
F. Filter Support<br />
G. Filter Monitor<br />
H. Humidistat<br />
Knob<br />
I. Tank Cap
REPLACING THE FILTER CLEANING<br />
INSTRUCTIONS - STORA<strong>GE</strong><br />
REPLACING THE WICK FILTER<br />
Through normal use, waterborne minerals and sediment<br />
become trapped in the Wick Filter. The harder<br />
your water, the greater the amount of minerals in the<br />
water, and the more often you will need to change your<br />
Wick Filter. In general, a brown Wick Filter indicates a<br />
need to replace the Wick Filter.<br />
To replace the Wick Filter, follow the below steps.<br />
1. Turn the Power Knob off and unplug the humidifier<br />
from the<br />
electrical outlet.<br />
2. Remove the Water Tank and Humidifier Housing to<br />
access the Humidifier Base.<br />
3. Discard the old Wick Filter and follow weekly cleaning<br />
instructions.<br />
4. Insert a new Wick Filter into the filter Support in the<br />
Humidifier Base.<br />
5. Replace the Humidifier Housing and then the Water<br />
Tank.<br />
6. Repeat Operating Instruction steps.<br />
It will take about 30 minutes for the humidifier to<br />
reach maximum output.<br />
You can obtain a new Wick Filter by calling 1-877-207-<br />
0923 in the USA or by visiting your nearest retailer or<br />
authorized service center. This humidifier takes model<br />
106763 replacement Wick Filter.<br />
STORA<strong>GE</strong> INSTRUCTIONS<br />
If your humidifier will not be in use for two<br />
days or more, or at the end of the season<br />
follow these instructions.<br />
1. Clean and dry the humidifier thoroughly as per the<br />
Weekly Maintenance instructions.<br />
2. Let the humidifier dry completely before storing.<br />
Do not store with water inside the Humidifier Base.<br />
3. Do not store with the Tank cap in place.<br />
4. Throw away the Wick Filter. Do not store with Wick<br />
Filter in place.<br />
5. Store in a cool dry location.<br />
Figure 2<br />
B<br />
A<br />
A. Wick Filter<br />
Supports<br />
B. Wick Filter<br />
C. Humidifier<br />
Base<br />
CLEANING AND MAINTENANCE<br />
INSTRUCTIONS<br />
Humidifiers provide comfort by adding<br />
moisture to dry indoor air. To get the most<br />
benefit from the humidifier and avoid product<br />
failure, follow all maintenance instructions<br />
carefully. If the recommended care and<br />
maintenance guidelines are not followed,<br />
micro-organisms may be able to grow in the<br />
water within the humidifier.<br />
Daily Maintenance<br />
1. Before cleaning, set the Power Knob to OFF position<br />
and unplug the unit from the electrical outlet.<br />
2. Lift off the Water Tank and Humidifier Housing.<br />
Remove Wick Filter and place in sink or tub as the<br />
Wick Filter will release water when not in the humidifier.<br />
3. Carry the Humidifier Base and the Water Tank to the<br />
sink, then drain and rinse the Humidifier Base and<br />
Water Tank thoroughly to remove any sediment and<br />
dirt. Wipe clean and dry with a clean soft cloth or<br />
paper towel. (DO NOT use metal cleaning utensils or<br />
abrasive cleaners)<br />
4. Put the Wick Filter back in the Filter Support, replace<br />
the Humidifier Housing, then refill the Water Tank<br />
with cool tap water as instructed in filling the Water<br />
Tank instructions.<br />
Weekly Maintenance<br />
Remove scale:<br />
1. Repeat steps 1-3 above.<br />
2. Clean the Humidifier Base by partially filling the<br />
Humidifier Base with one 8-oz cup of undiluted white<br />
vinegar. Let solution stand 20 minutes, clean all interior<br />
surfaces with a soft brush.<br />
3. Dampen a cloth with undiluted white vinegar and wipe<br />
out entire Humidifier Base to remove scale.<br />
4. Rinse with clean warm water to remove scale and the<br />
white vinegar solution before beginning to disinfect the<br />
Water Tank.<br />
Disinfect Water Tank:<br />
1. Fill Water Tank with 1/2 teaspoon of chlorine bleach<br />
and 1/2 gallon of water.<br />
2. Let the solution stand for 20 minutes, swishing every<br />
few minutes. Wet all surfaces.<br />
3. Empty the Water Tank after 20 minutes, and rinse well<br />
with water until the bleach smell is gone. Dry with a<br />
clean cloth or paper towel.<br />
4. Refill the Water Tank with cool water; replace the housing<br />
and the Water Tank. Repeat ALL Operating<br />
Instructions.<br />
C
TROUBLESHOOTING<br />
Trouble Probable Cause Solution<br />
Mist output minimal to none. Wick Filter has not absorbed water. Wait 15 minutes before<br />
Mineral buildup in Humidifier Base. starting humidifier.<br />
Regular cleaning of tray<br />
after each use will help<br />
keep the unit functioning<br />
properly.<br />
Humidistat is set too low.<br />
Turn the Humidistat Knob<br />
up.<br />
Wick Filter needs to be replaced. Replace your Wick Filter<br />
(106763)<br />
by calling 1-877-207-0923,<br />
Normal<br />
Depending on the humidity<br />
setting this may be normal.<br />
Water leaks from Water Tank. Rubber Tank Cap Ring is missing Remove Tank Cap then<br />
or improperly placed.<br />
replace or reposition ring.<br />
Tank Cap not tight enough.<br />
Tighten Tank Cap.<br />
Wick Filter turns brown. Your Wick Filter needs to be changed. Replace your Wick Filter<br />
(106763) by calling 1-877-<br />
207-0923,<br />
Short Wick Filter life<br />
In areas with particular<br />
hard water your Wick Filter<br />
will need to be changed<br />
more frequently.<br />
Film on Water Tank. Mineral deposits cause film on Clean/disinfect Water Tank<br />
Water Tank to buildup.<br />
as instructed in weekly<br />
cleaning instructions.<br />
Water cloudy. Wick Filter needs to be replaced. Replace your Wick Filter<br />
(106763) by calling 1-877-<br />
207-0923<br />
Using warm water to refill Water Tank.<br />
Only use suggested care<br />
products and cool water to<br />
refill tank.<br />
Humidistat cycles on/off. Humidifier is reacting to room humidity Set the Humidistat Knob to<br />
level.<br />
a higher, or lower setting.<br />
Very tight Tank Cap. Over tightened. Add liquid soap to Tank<br />
Cap Ring to ease opening.<br />
REPLACEMENT ACCESSORY<br />
To order call 1-877-207-0923<br />
• 106763 Replacement Filter ..................$12.99
1. Do NOT attempt to repair or adjust any electrical or mechanical functions on this unit. Doing so will void the warranty.<br />
2. If you have any questions regarding this units operation or believe any repair is necessary, please call 1-877-207-0923<br />
to speak with a Customer Service Representative.<br />
3. If you need to exchange the unit, please return it in its original carton, with a sales receipt, to the store you purchased it. If<br />
you are returning the unit more than 30 days after the date of purchase, please see the enclosed warranty.<br />
4. If you have any other questions or comments, feel free to write us:<br />
Customer Service Department<br />
P.O. Box 769, Milford, MA 01757-0769<br />
For your own records, staple or attach your sales receipt to this manual. Also, please take a moment to write the store<br />
name/location and date purchased below.<br />
STORE NAME<br />
LOCATION:<br />
DATE PURCHASED:<br />
<strong>WARRANTY</strong> <strong>INFORMATION</strong><br />
SERVICE INSTRUCTIONS<br />
(STAPLE RECEIPT HERE)<br />
FIVE (5) YEAR LIMITED <strong>WARRANTY</strong><br />
SAVE THIS <strong>WARRANTY</strong> <strong>INFORMATION</strong><br />
A. The quality controls used in the manufacture of this product are to ensure your satisfaction.<br />
B. This Warranty applies only to the original purchaser of this product.<br />
C. This Warranty applies ONLY to repair or replacement of any supplied or manufactured parts of this product that, upon inspection by<br />
authorized personnel, proves to have failed in normal use due to defects in material or workmanship. We will determine whether to<br />
repair or replace the unit. This Warranty does not apply to installation expenses.<br />
D. Operating this unit under conditions other than those recommended or at voltages other than the voltage indicated on the unit, or<br />
attempting to service or modify the unit, will render this <strong>WARRANTY</strong> VOID.<br />
E. Unless otherwise prescribed by law, we shall not be liable for any personal injury, property or any incidental or consequential damages<br />
of any kind (including water damage) resulting from malfunctions, defects, misuse, improper installation or alteration of this product.<br />
F. All parts of this product are guaranteed for a period of 5 years as follows:<br />
1. Return the product to nearest store or follow instructions as stated in paragraph H below.<br />
2. Within the first sixty months from date of purchase, subject to the conditions in paragraph H, we will repair or replace the product<br />
if it is defective in material or workmanship providing it is returned , freight prepaid, with PROOF OF PURCHASE date, together<br />
with $7.00 for handling and return packing/shipping charges.<br />
G. If you have any problem with this product, please write our Customer Service Dept., or call, 1-877-207-0923.<br />
H. IMPORTANT Return INSTRUCTIONS Your warranty depends on your following these instructions if you are returning the unit more<br />
than 30 days after the date of purchase:<br />
1. Carefully pack the item in its original carton or other suitable box to avoid damage in shipping.<br />
2. Before packing your unit for return; be sure to enclose:<br />
a) Your name, full address with zip code and telephone number,<br />
b) A dated sales receipt or PROOF OF PURCHASE,<br />
c) Your $7.00 check for return packaging, and<br />
d) The model number of the unit and the problem you are having. (Enclose in an envelope and tape directly to the unit before<br />
the box is sealed.)<br />
3. We recommend you insure the package (as damage in shipment is not covered by your warranty).<br />
4. All shipping charges must be prepaid by you (as noted in paragraph F).<br />
5. Mark the outside of your package:<br />
CUSTOMER SERVICE DEPARTMENT<br />
233 FORTUNE BOULEVARD<br />
MILFORD, MA 01757<br />
SHIPPING AND HANDLING CHAR<strong>GE</strong>S: $7.00<br />
For products purchased outside the United States and Canada, see dealer for warranty. Stores, Inc. Bentonville, Ak 72716.<br />
This warranty gives you specific legal rights, and you may have other rights which vary from state to state. The provisions of this warranty<br />
are in addition to, and not a modification of, or subtraction from, the statutory warranties and other rights and remedies contained<br />
in any applicable legislation. To the extent that any provision of this warranty is inconsistent with any applicable law, such provision<br />
shall be deemed voided or amended, as necessary, to comply with such law.<br />
*Please note: If you have any questions or problems with the use of this product while in use outside of the USA or Canada, please use<br />
the address listed above for warranty claims.*<br />
7/10/00 last update<br />
<strong>GE</strong>10666300UM1<br />
Printed in CHINA