nov dec issue FINAL.indd - Custom Home Furnishings Academy
nov dec issue FINAL.indd - Custom Home Furnishings Academy
nov dec issue FINAL.indd - Custom Home Furnishings Academy

You also want an ePaper? Increase the reach of your titles
YUMPU automatically turns print PDFs into web optimized ePapers that Google loves.
Cover Story<br />
O Christmas Tree,<br />
O Christmas Tree!<br />
Step-By-Step<br />
Flat Roman Shades<br />
Kicked Up A Notch<br />
CHF Success Story<br />
Lorie Albitz—Above The Fray<br />
www.CHFmagazine.com November/December 2006 1
2 The <strong>Custom</strong> <strong>Home</strong> <strong>Furnishings</strong> Magazine November/December 2006
Contents November/December 2006<br />
Instructors’ Corner<br />
5 Holiday Cut Off<br />
Industry News<br />
14 D&WC Presents CHF Conference & Trade Show<br />
Cover Story<br />
8 O Christmas Tree, O Christmas Tree!<br />
A Sneak Peek Into a Workroom<br />
10 Working By Design—Meg Lilja<br />
Upholstery<br />
12 The Arte and the ‘Misterie’<br />
Design Ideas<br />
27 Pull Out Section of Design Ideas<br />
Industry Association Group<br />
17 WCAA—Central Florida Chapter<br />
14 D&WC Presents<br />
Down to Business<br />
34 Time Management in the 21st Century<br />
16 Advertising—–Ensure That Your Ad Gets Results<br />
45 Mass Mailings To Prospective Clients<br />
Product Profile<br />
33 Ultra-Pro Seam Ripper<br />
Special Features<br />
7 Tablecloth Magic<br />
15 One Year Later—Cheryl Strickland<br />
47 Great Use For Those Leftovers<br />
Book Review<br />
40 Eat That Frog!<br />
Step-by-Step<br />
42 Mitered Flange Pillow Sham<br />
8<br />
15<br />
Step-by-Step Window<br />
48 Flat Roman Shades—Kicked Up A Notch<br />
Form of the Month<br />
52 Calculating Yardage<br />
The CHF <strong>Academy</strong><br />
37 Above The Fray—<strong>Academy</strong> Success Story<br />
54 The Latest Career Professional Graduates<br />
55 The CHF <strong>Academy</strong> Schedule<br />
the custom home furnishings magazine<br />
13900-F South Lakes Drive • Charlotte, NC 28273<br />
Margie Nance, Publisher<br />
Mary Zellers, Editor<br />
Connie Sikora, Associate Editor<br />
Ross Terry, Graphics Artist<br />
SUBSCRIPTIONS<br />
800-222-1415 • 704-333-4636 • 704-333-4639 FAX<br />
www.CHFmagazine.com<br />
$36 per year, including the CHF Forum<br />
editor@chfmagazine.com<br />
The CHF Magazine Advisory Board<br />
Jill Stanbro, Chairperson<br />
Karen Barnes • Carlette Cormier • Amanda Endress<br />
Dean Fountain • Kelly Geraghty • Suzanne Cox-Hudson<br />
Susan Kindel • Rebecca Mack • Linda Noakes<br />
Mary Ann Quinn • Marilee Smock • Judy Soccio<br />
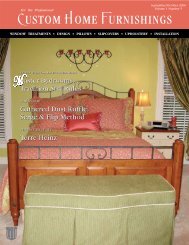
ON THE COVER…<br />
Happy Holidays from everyone at CHF Magazine.<br />
Photo provided by Connie Sikora from the home of<br />
Paula Lempart-Stanfa, Chapel Hill, North Carolina.<br />
28<br />
www.CHFmagazine.com November/December 2006 3
Editors’ Journal November/December 2006<br />
from the associate editor<br />
Happy Holidays<br />
It’s hard to believe, but the holiday season is already<br />
upon us. It’s time for food, family and possibly even<br />
traveling. But before we can enjoy these things, we<br />
have deadlines to meet.<br />
The Instructors’ Corner in this <strong>issue</strong> relates to holiday<br />
deadlines. I hope that this will help others to set<br />
realistic deadlines and then not waiver. After all, it is<br />
your business and you should run it the way that you<br />
want to, not the way someone else thinks it should be<br />
run.<br />
I would like to welcome Mary Zellers back to the CHF<br />
Magazine. We are very lucky to have her and I truly<br />
appreciate her hard work. I look forward to spending a<br />
lot of time with her, even if it is through cyber-space!<br />
In my Window Treatment 100 class I tell my students<br />
that there is one very important rule to follow in your<br />
workroom. “Do what you say you will do.” If you<br />
tell someone that they will have their treatments in a<br />
certain amount of time, then you should do whatever<br />
it takes to make it happen. I personally was thrilled to<br />
see Zona Tiller’s book report this month. Believe me, it<br />
already holds a prominent place on my wall!<br />
We at CHF Magazine cannot thank you enough for<br />
your patience while we worked out the kinks this year<br />
and we promise you that we will do everything within<br />
our power to stay on schedule next year. This remains<br />
the premier publication for workroom professionals<br />
and you can look forward to more fantastic columns<br />
and articles in coming <strong>issue</strong>s.<br />
A special holiday wish for all of the wonderful people<br />
involved in the <strong>Custom</strong> <strong>Home</strong> <strong>Furnishings</strong> Family. May<br />
you all be blessed as much as you have blessed others.<br />
Enjoy this <strong>issue</strong> and I’ll see you on the forum.<br />
Connie Sikora<br />
I'm Back<br />
from the editor<br />
Some of you may remember me.<br />
I was the Managing Editor of the<br />
SewWhat Magazine three years ago.<br />
It is great to be back.<br />
I was only back a few days when I was reminded of<br />
how great it is to work with everyone in this industry.<br />
From my experience, it seems that a requirement for<br />
working in the <strong>Custom</strong> <strong>Home</strong> <strong>Furnishings</strong> industry is<br />
that you are nice and that you go out of your way to<br />
help everyone achieve their goals (sometimes at the<br />
sacrifice of your own goals). Thank you to everyone<br />
who has helped me put this <strong>issue</strong> together. I really<br />
could not have done it without you.<br />
Be sure and check out the letter from Cheryl<br />
Strickland on page 15 to see what she has been up<br />
to since retiring from the business. It looks like she is<br />
having more fun than we are!<br />
It is always a pleasure to listen when someone has<br />
an inspiring and exciting success story. That was<br />
definitely the case when I was talking with Lori Albitz<br />
(page 35) about what she has been doing with her<br />
business and how the <strong>Custom</strong> <strong>Home</strong> <strong>Furnishings</strong><br />
<strong>Academy</strong> has helped her achieve her goals. Lori<br />
believes that her amazing success is a combination<br />
of hard work and blessings handed down from God,<br />
allowing her to be in the right place at the right<br />
time to seize the opportunities that are given to her.<br />
Lori’s high energy level and optimism has inspired<br />
me to continue to accomplish all the things I would<br />
like to accomplish in my own life. I, too, have been<br />
especially blessed by God and I am aware of all that<br />
has happened in my life that are His special gifts to<br />
me.<br />
I hope that all of you have a wonderful Christmas<br />
and a Happy New Year. I look forward to working<br />
with Connie and all of you this year to produce the<br />
best magazine in the industry.<br />
Mary Zellers<br />
4 The <strong>Custom</strong> <strong>Home</strong> <strong>Furnishings</strong> Magazine November/December 2006
Instructors’ Corner November/December 2006<br />
For this <strong>issue</strong> we asked the <strong>Academy</strong> Instructors<br />
to tell us about their workroom’s cut-off date for<br />
projects to be done for the holidays. Here they<br />
are, complete with nightmare stories and other<br />
events that might have contributed to making<br />
them believers of insisting on a cut-off date.<br />
Mary Zellers<br />
Jill Stanbro — Swags, Top Treatments, and Embellishments<br />
Instructor: My deadlines have changed over<br />
the years. When I was new to this business<br />
and trying to please everyone, I worked<br />
90 hour weeks in October, November, and<br />
December. As I became more experienced<br />
and had employees to count on, my deadlines<br />
were early October for Thanksgiving and<br />
early November for Christmas. I haven't seen nearly the rush<br />
for Christmas orders the last few years as in the past. I am<br />
a better judge now of what I can accomplish in a given time<br />
span, so I plan accordingly to what I know is coming in.<br />
I do still occasionally have <strong>dec</strong>orators who try to push the<br />
envelope and show up in early December with something<br />
they have promised their customer for Christmas. Now my<br />
answer is, “You really shouldn't have done that.” The worst<br />
thing you can say is “maybe.” That is always interpreted as<br />
“yes”.<br />
I think everyone has a story of an order that just “has” to be<br />
done for an upcoming party and when the installer arrives,<br />
the homeowner has put their tree up right in front of the<br />
window.<br />
Susan Schurz — High-End Fabrication Methods Instructor:<br />
I can't think of any nightmares, thank<br />
goodness. I am sure there have been<br />
Christmas deadline nightmares in 18 years of<br />
business but I have forgotten them.<br />
My holiday cut-off is October 1st. This<br />
means all fabrics and a completed purchase<br />
order must be in house by October 1st - not<br />
just “asked for” by October 1st. I will still take work but<br />
will not promise Christmas delivery. I usually can fit in small<br />
projects such as pillows after the cut-off date. But it is better<br />
Holiday Cut-Off<br />
to say it is not possible and surprise the customer with an<br />
early delivery than to not be able to finish the work on time.<br />
(This is true all year, not just at Christmas.)<br />
One funny story. My wedding date was purposely set to be<br />
after Christmas (December 28th) so that all my work would<br />
be done and I could enjoy it!<br />
Terri Booser — Advanced top treatments and<br />
Embellishments: My holiday cut off date<br />
seems to vary year to year depending on the<br />
workload. I tell my customers that I will not<br />
guarantee anything for Thanksgiving after<br />
October 1st and I will not guarantee anything<br />
for Christmas after November 1st. But if I do<br />
run ahead of schedule, they may get it.<br />
The holiday nightmare that comes to mind is when I was<br />
given 80 yds of voile sheer to do not only 6x fullness for top<br />
and bottom rod pockets for 12 doors, but also pinch pleated<br />
draperies for 2 windows. It was not a terribly difficult job,<br />
just monotonous. Well . . . we finally go to install everything<br />
before Christmas and when I went to hang the pinch pleated<br />
draperies I had them 10" too short!!!! The customer was<br />
having a New Year’s Eve party so I had to order new fabric<br />
and re-make them before then. Needless to say, that year I<br />
found myself working between Christmas and New Year’s to<br />
accommodate her, since it was totally my error.<br />
Mary Dwan - Workroom Shortcuts, Draperies, and Shades<br />
Instructor: The story that I have to tell about<br />
a “nightmare” holiday installation is the one<br />
that I did a few years ago on Thanksgiving<br />
Eve. I arrived at the home with gorgeous silk<br />
draperies for a living room and dining room.<br />
The out-of-town family had started to arrive,<br />
and their entertainment for the evening was<br />
apparently to drink wine and watch me install the window<br />
treatments. They really got toasted! There was a brother or<br />
brother-in-law that talked to me the whole time: “So, you<br />
got your own tools…” “How did you learn to do this”<br />
“How do you know where to hang the things” “Are you<br />
www.CHFmagazine.com November/December 2006 5
Instructors’ Corner November/December 2006<br />
Holiday Cut Off<br />
(cont'd from page 5)<br />
sure that one is level with the other ones” Blah, blah, blah.<br />
I tried to remain calm, and it all turned out okay. But it<br />
was very nerve wracking and my stomach was all tied up in<br />
knots when I got out of there.<br />
From that day forward I have never scheduled an<br />
installation the day before a holiday or the day before a<br />
client’s party. It’s much better to have at least one buffer day.<br />
Jeanelle Dech — Slipcovers and Business<br />
Plan Start To Finish Instructor: Back when I<br />
managed the workroom at Crab Apple Farm<br />
Interiors, the most joyous holiday season<br />
occurred when we created a cut-off date of<br />
November 10th, and gave firm installation<br />
dates at the time of order. December 20-23<br />
was always a busy install week. We also<br />
informed our customers that the workroom and showroom<br />
would be closed from December 24th thru January 7th<br />
- giving everyone a much needed break. That first week of<br />
January was a wonderful time to settle the books from the<br />
previous year and begin planning for the new.<br />
Donna Skufus — Basic Cornices, Cornices and Headboards,<br />
and Advanced Top Treatments and Embellishments<br />
Instructor: My workroom is strictly wholesale.<br />
I don't really have cut-off deadlines. I<br />
assign dates to my designers. For example<br />
if a designer says they have a living room<br />
to do before Christmas. They need 4 pairs<br />
of panels, 3 large swags, and 6 cascades.<br />
From experience I know how many days that will take to<br />
complete. So I go to my calendar and see if I have that many<br />
days empty to work on the project. Then I put that person's<br />
job on the calendar and assign them those days. Everybody's<br />
work is done on the days assigned to them. If their project<br />
changes and requires more time, they only get that time if it<br />
is open. If not, they must tell their customer they will have<br />
to wait for the rest until after Christmas.<br />
I have also learned from experience to take care of myself<br />
and take time for the things that are most important to me.<br />
I always take the month of January off and visit my family.<br />
I plan for this and I stick to the plan. I don't allow anything<br />
to stop me. When I come back I am ready to go again.<br />
Connie Sikora — Starting and Operating a Workroom &<br />
Workroom Shortcuts, Draperies and Shades: When I first<br />
started in the industry, I would do whatever my customers<br />
wanted me to do. I worked 24 hours a day right up until<br />
the holiday, even doing installations on Christmas Eve day<br />
or Thanksgiving morning. I thought that I had to do these<br />
things in order to stay in business and keep jobs coming in.<br />
About 6 years ago I was doing a project for a wellknown<br />
newscaster in Chicago. He called two days<br />
before Thanksgiving and asked if there was any chance<br />
that he could have his cornices before the holiday. I had<br />
not planned on it, as a matter of fact I thought that I<br />
was done working until a few days after Thanksgiving.<br />
Instead of standing firm, I agreed to install the project on<br />
Thanksgiving morning. I worked long hours for the next<br />
two days in order to finish the project. I was at the client’s<br />
home at 8:30 am and just wanted to get it done and get<br />
home to my family.<br />
I installed the brackets above the patio door, perched the<br />
cornice on them, turned to pick up my drill and when I<br />
turned back to look at the cornice, it slipped off of the<br />
brackets and landed square on the bridge of my nose. I fell<br />
to the floor with my face in my hands. There was blood<br />
everywhere. To my horror, I had broken my nose. After a<br />
second or two of shocked silence, the customer gave me an<br />
ice pack and a wash cloth. What happened next solidified<br />
my <strong>dec</strong>ision to NEVER kill myself for another job. The<br />
customer asked if I was going to be able to finish the job<br />
because he didn’t want me to leave the brackets up if I<br />
wasn’t going to put up the treatment. I installed the cornice<br />
and cried the whole hour drive home.<br />
I have learned to set deadlines for holiday jobs and stick to<br />
them. I try to get all Thanksgiving jobs installed two days<br />
before the holiday and an entire week before Christmas.<br />
I also do not commit to any deliveries between Christmas<br />
and New Years. I take this time to clean my workroom and<br />
tune up and clean my sewing machines.<br />
6 The <strong>Custom</strong> <strong>Home</strong> <strong>Furnishings</strong> Magazine November/December 2006
Tablecloth Magic<br />
Lorie Leslie<br />
Tablecloth Magic<br />
This colorful and dramatic window treatment was designed using two tablecloths that the customer had purchased<br />
for the purpose of having the window treatment made.<br />
To achieve balance, each<br />
triangular panel is centered over<br />
a window break accentuating the natural<br />
breaks in the window. Wide bands of red<br />
antique satin on the valance under-curtain<br />
and the leading edge of the side panels create<br />
harmony with the vertical and horizontal<br />
bands of the window trim. The valance is<br />
board mounted with a curved return to<br />
soften the angular lines of the treatment and<br />
smoothly transition it to the wall. Banded<br />
trim with tassels accent the under-curtain,<br />
connecting the printed edge of the triangular<br />
panels to one another horizontally. A gold<br />
cord suspending two color-coordinated “puff<br />
balls” hangs at the point of each panel. This<br />
hanging cord visually extends the triangular<br />
panel even deeper into the window.<br />
The window treatment is the focal point of the living room<br />
creating a beautiful frame for the outside view.<br />
Lorie Leslie is the owner of Sew by Design. With a degree in Clothing Design she has owned and operated<br />
her alterations and custom sewing business for many years. Expanding her business to include window<br />
treatments has been a welcome opportunity to use her design knowledge and creativity. Currently, both<br />
parts of her business thrive and bring the satisfaction of constant variety.<br />
www.CHFmagazine.com November/December 2006 7
Cover Story<br />
Mary Zellers<br />
O Christmas Tree,<br />
O Christmas Tree!<br />
Christmas Trees. Almost every one <strong>dec</strong>orates one.<br />
Nothing is more beautiful and the possibilities<br />
for <strong>dec</strong>orating are endless. Some people like<br />
to <strong>dec</strong>orate with a theme. Others prefer a<br />
hodgepodge of <strong>dec</strong>orations, collected over the years, that<br />
have sentimental value as well as beauty. No matter what the<br />
choice, everywhere you go at this time of year you hear “Did<br />
you get your house <strong>dec</strong>orated” or “Have you <strong>dec</strong>orated<br />
your tree yet”<br />
Since we are the <strong>Custom</strong> <strong>Home</strong> <strong>Furnishings</strong> industry I<br />
expected nothing less than interesting, one-of-a-kind,<br />
in<strong>nov</strong>ative Christmas <strong>dec</strong>orations from our talented work<br />
rooms and designers. I was not disappointed.<br />
Zona Tiller, owner of Zona’s Drapery & Upholstery<br />
House, Johnston, LA, has been in the window coverings<br />
business for 25 years. She has four sons ranging in age from<br />
14 to 33. She always <strong>dec</strong>orates her Christmas tree for “little”<br />
eyes. She uses bright colored lights and shiny ornaments.<br />
Her <strong>dec</strong>orations are prized possessions with tremendous<br />
sentimental value.<br />
A friend made an antique Santa from Zona's drapery and<br />
upholstery fabric scraps. Before Zona’s Mom passed away,<br />
she gave each of the grandchildren an ornament from their<br />
first Christmas tree. When Zona’s first two children grew<br />
up and started their own home, she gave them their special<br />
ornament to <strong>dec</strong>orate the tree in their home. Two of the<br />
special ornaments that <strong>dec</strong>orate Zona’s tree belong to her<br />
two children who still live at home.<br />
Karen Barnes, owner<br />
of Elegant Windows<br />
in Gilbert, AZ, has a<br />
tradition in her family to<br />
give the children a new<br />
ornament every year on<br />
Christmas Eve. When<br />
they get married and<br />
leave home, they take<br />
their ornaments with<br />
them. Two of Karen’s<br />
four children are married<br />
now and were able<br />
to take more than 20<br />
ornaments with them to<br />
<strong>dec</strong>orate their Christmas tree. Karen and her husband started<br />
the tradition 26 years ago when they found a cute toy soldier<br />
ornament while on their honeymoon.<br />
Kathie Faletra, owner of HD Interior Design,<br />
Hopkinton, MA, made this sentimental theme<br />
Christmas tree just for her husband. He is an executive in a<br />
publishing company and doesn’t have a lot of time for extracurricular<br />
activities. But he loves fly fishing.<br />
While on vacation, Kathie came across her first fly fishing<br />
tree <strong>dec</strong>oration and thought it would be fun to surprise her<br />
husband with his own Christmas tree. She<br />
bought a small artificial tree with a trunklooking<br />
stand and<br />
began her search for<br />
ornaments. She found<br />
many of them in small<br />
boutiques and shops<br />
in Maine and over the<br />
next several months,<br />
put it all together. Each year, she finds an<br />
ornament or two and puts them in her<br />
husband's stocking.<br />
8 The <strong>Custom</strong> <strong>Home</strong> <strong>Furnishings</strong> Magazine November/December 2006
Cover Story<br />
Mary Zellers<br />
He really enjoys the tree, and they keep it up all year in<br />
their vacation home in Maine. It has actually set the theme<br />
for the house and Kathie thinks it is much more pleasant<br />
than moose and bear.<br />
Turn to page 45 for<br />
details about these<br />
great ornaments.<br />
Susan Kindel, owner of SK Fabric<br />
Interiors, Gainesville, VA, went<br />
with a “Citrus Christmas” theme<br />
this year. Her “new” Christmas<br />
colors are copper and lime-green.<br />
It all started when she fell in<br />
love with the entire Citrus-Lime-<br />
Melon book from Greenhouse Fabrics. She grew up in<br />
Florida and the fresh, trendy (and slightly shocking) color<br />
scheme from the book fell right in line with her energy level<br />
and casual “Florida Girl” personality.<br />
With just a few days to spare in early December and prior<br />
to hosting a party, she pulled together a complete new<br />
look using a little new fabric and a can of copper spray<br />
paint. She created four lime-green stockings with ticking<br />
cuffs, one tree skirt with mitered banding, purchased new<br />
copper and green ball ornaments and found some remnant<br />
tangerine colored ticking for the garland.<br />
Susan stumbled upon a great client gift when she created<br />
a mock-up stocking using leftover napped sateen lining<br />
The “fuzzy” side made a great face fabric for the base of<br />
the stocking and the cuff needed only an 8" x 14" scrap of<br />
leftover material. The resourceful use of leftover lining paired<br />
with such a small scrap of any client’s leftover material<br />
helped her clear out the workroom and create an adorable<br />
gift to be filled with <strong>dec</strong>orating magazines, CDs, chocolates,<br />
wine bottles, kitchen towels, or gingerbread mix and cookie<br />
cutters.<br />
I think we will all agree that Susan has created an<br />
updated, casual, and fun new “Citrus Christmas” look.<br />
My friend, Nancy Matthews’ mom was a <strong>Home</strong><br />
Economics teacher for 37 years. Nancy got<br />
her first sewing machine when she was nine years old.<br />
She has been sewing literally all her life. She makes<br />
unbelievable award winning quilts with amazing detail<br />
and all sorts of other wonderful “crafty” works of art.<br />
Nancy has been collecting flamingos since her college<br />
days. She says its’s just “something about pink and long<br />
legs.” She found several stores in Charlotte, NC (where<br />
we both live) that offered flamingo ornaments. But she<br />
got most of<br />
them at a<br />
Christmas<br />
shop in<br />
Myrtle Beach,<br />
SC.<br />
Nancy is a<br />
self-proclaimed<br />
“free spirit” who<br />
doesn't always<br />
like to conform<br />
to the rules. She applied<br />
this trait when she<br />
<strong>dec</strong>orated her flamingo<br />
tree and made the 4-ft<br />
stocking and the tree<br />
skirt.<br />
am sure that we can all<br />
I relate to these stories<br />
and have stories of our<br />
own.<br />
The next time you see a<br />
particularly interesting Christmas tree, ask the owner. She<br />
will be happy to tell you what inspired her and you will be as<br />
pleasantly surprised as I was to learn the details.<br />
www.CHFmagazine.com November/December 2006 9
A Sneak Peak Into A Workroom<br />
Working By Design<br />
Meg Lilja, Owner<br />
For just under two years, Meg Lilja has owned<br />
and operated her home based wholesale/retail<br />
workroom, Working By Design, in Hudson, Ohio.<br />
Meg says, “If ‘Necessity’ is the mother of invention,<br />
then ‘Budget’ just may be the father.” She loves to go into<br />
a store, a garage sale, or even her own attic looking to<br />
repurpose items for use in her workroom. “Once you start<br />
seeing things through the lens of how it can serve you in<br />
your business, it’s hard to stop.” An over-the-door towel<br />
rack accommodates some of her rolled goods, an ice tray<br />
holds her presser feet, and nothing beats a 99¢ shower<br />
caddie to hold board mounts. “I especially<br />
like to use things that are meaningful to me.<br />
Years ago, a friend made us a<br />
beautiful spice rack for our kitchen.<br />
It now holds my thread.”<br />
Meg’s workroom. She blew out the back of a bedroom<br />
closet and made two rooms into one.<br />
Meg admits that it can easily get out<br />
of hand. “Unfortunately for my son,<br />
I looked at his room and thought of<br />
a wonderful way to repurpose that<br />
too! We blew out the back of his<br />
closet and my workroom grew from<br />
150 square feet to over 500 square<br />
feet in an afternoon. It took me a<br />
Meg especially likes the strip fluorescent lighting.<br />
while to stop walking around the long way through the<br />
hall.”<br />
Workroom machines include: Juki Straight stitch DDL-8700,<br />
US BlindStitch 718-9, Industrial 5-thread serger,<br />
Bernina serger and Husqvarna/Viking Designer 2.<br />
This repurposing doesn't always work, however.<br />
Meg tried to make a home-made iron track. She tried<br />
everything...cables then curtain rods, etc. The plastic<br />
carriers just weren’t up to the task of carrying the<br />
weight. After the whole iron system crashed down a<br />
couple times, she gave in, called döfix and ordered<br />
their track. She is all for saving a few bucks when<br />
possible but this is one area she wasted a lot of money<br />
and time monkeying around.<br />
The tool Meg couldn’t live without A small digital<br />
voice recorder. “It’s with me at all times. I used to<br />
10 The <strong>Custom</strong> <strong>Home</strong> <strong>Furnishings</strong> Magazine November/December 2006
A Sneak Peak Into A Workroom<br />
is more), the cheery color (inspiring and noninstitutional),<br />
and her extra high work table. “I’m<br />
almost 5’11” and I love my 43.5" tall worktable.<br />
No more stooping.” She also adds, “I try to put<br />
everything on wheels, so as needs arise I can move<br />
machines around and<br />
reconfigure my room<br />
easily.”<br />
Storage for books, manuals,<br />
videos, and files.<br />
keep it in my apron, but now I wear<br />
it around my neck on a breakaway<br />
lanyard. No more sticky notes and<br />
little scraps of paper. I don’t have to<br />
interrupt myself in the middle of a<br />
seam anymore to write something<br />
down that just popped in my head.”<br />
When asked what are her favorite<br />
things about her workroom, Meg<br />
is quick to say the lighting (more<br />
Cheapo cord holder.<br />
Digital Voice Recorder<br />
The thing she loves<br />
most about her job<br />
“When I’ve finished<br />
making something<br />
it’s DONE. I can<br />
“. . . a beautiful spice rack<br />
for our kitchen . . . now<br />
holds my thread.”<br />
actually see it, touch it, and take a picture of it.”<br />
Everything else she does – like laundry, dishes, and cleaning – she has to do<br />
again. It’s nice to look at something and say “Here it is...voila...fini.”<br />
Meg’s favorite treatments to fabricate are panels. She especially loves using her<br />
blind hemmer (U.S. Blind Stitch 718-9) when making them. It is difficult, though,<br />
to find a way to make enough money producing panels.<br />
Meg’s most challenging but rewarding project was a long distance one with a<br />
client in London. Despite the distance and different time zones, they were able<br />
to pull it off using email and digital photos. Freight to London is very expensive.<br />
So Meg shipped the drapes to her client when she was stateside. Then when she<br />
flew home to London she carried them with her.<br />
Meg loved the fabrics, silks and tapestries that<br />
her client chose. She<br />
fabricated stripes for<br />
the living room panels<br />
by alternating chocolate<br />
brown and dotted<br />
robin-egg blue silks. The<br />
project made her “feel so<br />
very inter-continental!”<br />
Over-the-door towel rack =<br />
rolled goods holder.<br />
Panels alternating<br />
chocolate brown<br />
and dotted<br />
robin-egg blue<br />
silks.<br />
Meg started sewing<br />
Meg in her workroom.<br />
when she was in the<br />
sixth grade. She has been<br />
married to her husband, George, for 25 years and<br />
enjoys raising their four fabulous kids.<br />
You can view more pictures of Working By Design at<br />
www.picturetrail.com/workingbydesign.<br />
www.CHFmagazine.com November/December 2006 11
Upholstery<br />
Craig Wienand<br />
The Arte and the ‘Misterie’<br />
The term upholstery in its basic context evokes<br />
something comfortable and attractive to sit on.<br />
The application of various skilled techniques,<br />
myriad support stuffings, paddings, and fabric<br />
secured to a frame, can result in a piece of upholstered<br />
furniture of functional<br />
utility. Or through the<br />
creativity of a craftsman<br />
and some embellishment it<br />
can become a very lavish<br />
and ornate work of art.<br />
Queen Mary's Chair, 1554.<br />
With original upholstery.*<br />
The trade of the<br />
upholsterer can be traced<br />
to England back in the late<br />
13th Century. Trades were<br />
then known as misteries<br />
due to their initiations<br />
and secrecy of rites to<br />
outsiders. Upholstery was<br />
known as the Company of<br />
Upholders, governed by<br />
the Misterie of Upholders.<br />
The company served as a sort of labor union to<br />
the upholsterer, maintaining standards within<br />
the misterie and <strong>dec</strong>iding by whom it could be<br />
practiced. Apprenticeship programs had been<br />
established. A typical term for an apprentice<br />
upholsterer assigned to a master was at least seven<br />
years, often extending to ten. Parents paid the<br />
upholsterer a substantial yearly fee to teach their<br />
child the craft. In turn, the child worked, ate, slept<br />
and breathed with the master craftsman who acted<br />
‘in loco parentis’.<br />
The Upholsterer’s Guild (misterie) was granted a royal<br />
charter by King Charles I in 1626, incorporating it as a<br />
proper guild. The records of this company were destroyed in<br />
the Great Fire of London in 1666. Whatever remained was<br />
destroyed in another fire in 1812. Hence very little is known<br />
about the early days and few pieces of original upholstered<br />
furniture exist from before the 17th Century. The common<br />
thought however is that the work, with some exceptions,<br />
was rudimentary and relatively crude. Before 1600, to make<br />
a chair more comfortable, one would simply put a pillow<br />
on it. Some chairs with fixed padding were made during the<br />
1500’s but these were for grand and ceremonial purposes.<br />
The 17th Century showed much progress in the craft.<br />
When King James I was on the throne, from 1603-1625,<br />
he slept on a bed made of canvas stuffed with straw.<br />
However, by the time King George II (1727-1760) came<br />
along he had a bed made of white leather stuffed with<br />
horsehair. The use of horsehair as a stuffing became<br />
commonplace from 1660 and by 1700 the true craft of<br />
upholstery was in place. Techniques for stitched edge<br />
horsehair seating were refined and did not change much<br />
for the next 150 years. This was a flourishing time for the<br />
upholsterer in Europe.<br />
Meanwhile, across the<br />
Atlantic in the ‘Colony of<br />
America’, there were already<br />
at least forty individuals<br />
practising upholstery in<br />
Boston alone! A famous<br />
American we are all familiar<br />
with, Betsy Ross (with her<br />
husband John), opened<br />
their upholstery shop in<br />
Philadelphia in 1775. Betsy<br />
had apprenticed in sewing<br />
at another upholsterer’s<br />
when she was younger. It is<br />
English Armchair, 1750.<br />
interesting to note that in<br />
Upholstered in wool<br />
regards to sewing, the iron<br />
‘gros-point’ needlework.*<br />
needle was invented in the<br />
14th Century, a needle with an eye in it was invented in the<br />
15th Century and prior to 1851 everything was sewn by<br />
hand (including flags).<br />
Opulence would define the 18th and 19th Centuries with<br />
the aristocracy clambering to outdo one another with their<br />
interior décor. The upholsterer was truly in his (or her)<br />
element during this period, creating incredibly lavish and<br />
ornate furnishings. These would include bedding, draperies<br />
*Photos used by permission: Upholsterers & Interior <strong>Furnishings</strong> in England 1530-1840. By Geoffrey Beard. Yale University Press, New Haven and London 1997.<br />
12 The <strong>Custom</strong> <strong>Home</strong> <strong>Furnishings</strong> Magazine November/December 2006
Upholstery<br />
Craig Wienand<br />
and flooring – even coffins. In those days it was the custom<br />
for the upholsterer to be responsible for everything involved<br />
in the interior <strong>dec</strong>oration of a home or palace or funeral.<br />
The upholsterer was in effect the interior designer of the<br />
day!<br />
During this period the upholstery trade was considered the<br />
most lucrative and prestigious of the craft guilds. In 1747<br />
Robert Campbell, author of “The London Tradesman”<br />
ranked the upholsterer, “above all other furniture making<br />
artisans.” Their shops were teeming with velvets and silks<br />
from Italy and France and they employed many crafts<br />
people, from curtain-makers to woodcarvers.<br />
In 1828, Mr. Samuel Pratt of New Bond Street, London,<br />
obtained a patent for a coiled spring. The introduction<br />
of the coiled spring to upholstery had quite an impact on<br />
the furniture making industry. Springs had been in use in<br />
furniture to some degree during the late 18th century but<br />
with their increased availability their use became much<br />
more widespread in the 1830’s. A much higher degree of<br />
comfort was attained through their use in the arms, seats<br />
and backs of chairs and sofas. Seats became much deeper<br />
allowing furniture legs to be shorter. Styles and techniques<br />
of upholstery began to change. These developments were<br />
instrumental for the upholsterer to neatly segue into the<br />
mass production, industrial age from the 1850’s onward.<br />
The craft of upholstery is at the beginning of a renaissance.<br />
A quick survey of upholstery workrooms across America<br />
might produce a mixed reaction as to the validity or merits<br />
of this statement, but for the seasoned artisan of this craft,<br />
the times they are a-changing. Although ‘official statistics’<br />
may point to a <strong>dec</strong>line in the need for upholsterers, this<br />
refers to factory production positions which are being<br />
usurped by the flood of inexpensive foreign imports.<br />
However, this is precisely one of the reasons why the<br />
future is so bright for upholstery workshops and the ‘lone’<br />
artisan. A quick perusal of just a few websites shows many<br />
workshops across the country looking to employ even basic<br />
or trainee upholsterers.<br />
There exists a certain mass production fatigue, with people<br />
wanting to put their own stamp on their interior décor.<br />
Individuality and customization are the new battle-cry.<br />
This has opened up the floodgates for an increased demand<br />
for quality upholstery and quality upholsterers to meet<br />
this demand. There had been a gradual thinning-out of<br />
upholstery shops during the last twenty years, mostly due<br />
to older craftsmen retiring and having no-one to pass their<br />
skills on to. This leaves the upholstery workshops which<br />
have survived, weathering many storms and financial ups<br />
and downs, to take advantage of the resurgence in the<br />
marketplace. The days are quietly passing when a person will<br />
buy ten yards of $100 a yard fabric and shop around for the<br />
least expensive tradesperson to do the work, because their<br />
options are becoming more limited. The catchword now is<br />
‘quality’.<br />
It is refreshing to see people who may have dabbled in<br />
upholstery in the past, as a hobby or professionally, realizing<br />
what is happening in this field and wanting to learn more<br />
about it. Whether they want to upholster their own furniture,<br />
start a business, or improve their existing skills perhaps to<br />
target niche markets, the sky is the limit once armed with the<br />
necessary skills.<br />
Through the conduit of information at the <strong>Academy</strong>, one<br />
has access to advice and support from experts around the<br />
country, relating to any aspect of the soft furnishing industry.<br />
As any upholsterer will tell you, there are many aspects to<br />
upholstery, a lot of work and quite a lot to learn. If you<br />
want to learn, you have to start somewhere and I personally<br />
can think of no better place to start than the <strong>Academy</strong>.<br />
In the coming months, more classes will be added to the<br />
curriculum to increase the selection for students wanting<br />
to learn more about the various aspects of upholstery. We<br />
will be addressing deep-buttoned tufting and “old world”<br />
upholstering techniques, in general.<br />
Re-upholstering a wonderful old chair from the frame up,<br />
creating shapes and contours with your hands and finally<br />
admiring your craftsmanship in the finished piece, can be<br />
almost therapeutic. The skills necessary to do this need not<br />
be a “misterie”.<br />
See you at the <strong>Academy</strong>!<br />
Craig Wienand is the upholstery instructor at<br />
the <strong>Custom</strong> <strong>Home</strong> <strong>Furnishings</strong> <strong>Academy</strong>. He<br />
began his career working a family business in<br />
Pittsburgh, PA, with his father. He has just<br />
returned to the US from England, where he<br />
spent 13 years developing skills in traditional<br />
British upholstery techniques. He currently resides in<br />
Connecticut.<br />
www.CHFmagazine.com November/December 2006 13
Industry News<br />
D&WC<br />
D&WC PRESENTS<br />
CHF CONFERENCE & TRADE SHOW<br />
FEBRUARY 2007<br />
Charlotte Convention Center,<br />
Charlotte, NC<br />
Draperies & Window Coverings<br />
magazine presents the 15th <strong>Custom</strong><br />
<strong>Home</strong> <strong>Furnishings</strong> Conference &<br />
Trade Show February 15 to 18, 2007,<br />
at the Charlotte Convention Center,<br />
Charlotte, NC. D&WC purchased the<br />
<strong>Custom</strong> <strong>Home</strong> <strong>Furnishings</strong> Educational<br />
event in October. An official<br />
announcement was made at the CHF<br />
conference in Valley Forge, PA.<br />
The 2007 event will continue and<br />
build upon the solid foundation Cheryl<br />
Strickland created in her former<br />
workroom show and bring to life<br />
new seminars and events to attract<br />
additional retailers and designers,<br />
making this show an even more<br />
comprehensive and valuable experience.<br />
Cheryl’s foresight in bringing<br />
workrooms together as the primary<br />
focus of this event will remain the same.<br />
The 15th CHF Conference & Trade<br />
Show will feature a faculty of the<br />
industry’s most knowledgeable<br />
speakers, presenting 48 sessions<br />
on fabrication, design, installation,<br />
upholstery and slipcovers, and general<br />
business knowledge. More than 60<br />
leading suppliers will preview products<br />
and services at their exhibit booths and<br />
present live demonstrations throughout<br />
the show.<br />
KEYNOTE AND SPECIAL<br />
EVENTS<br />
The event’s keynote speaker will<br />
be Wolfgang H. Schaber, host of<br />
the Food TV Network’s “Kitchen<br />
Accomplished!” Schaber will present<br />
his keynote address during lunch on<br />
Thursday, February 15th. He shares<br />
his passion for design through his<br />
design studio, Wolfgang Interiors,<br />
which provides designer furniture<br />
and accessories and custom draperies<br />
(with an in-house drapery workroom<br />
to fabricate his custom draperies<br />
and bedding). He won “Designer’s<br />
Challenge” as a featured designer<br />
on HGTV and has aired on HGTV’s<br />
design trends show “I Want That . . .<br />
Baths.” He is host of numerous design<br />
seminars and speaking engagements<br />
across the country!<br />
Besides the exhibit hall, unlimited<br />
networking opportunities and handson<br />
classes, the CHF Conference &<br />
Trade Show will feature the Working<br />
Workroom, a functioning drapery<br />
workroom inside the exhibit all set<br />
up by the <strong>Custom</strong> <strong>Home</strong> <strong>Furnishings</strong><br />
<strong>Academy</strong>. Attendees will have the ideal<br />
opportunity to learn the layout and<br />
details of an efficient workroom and<br />
to work with exhibitors’ supplies and<br />
equipment before purchasing.<br />
Other feature events include The Great<br />
American Slipcover Race, a dinner<br />
gala hosted by the Window Coverings<br />
Association of American (WCAA) and<br />
D&WC, and a tour of the <strong>Custom</strong><br />
For more information on the 15th <strong>Custom</strong> <strong>Home</strong> Furnishing Conference<br />
& Trade show, visit www.chfconference.com.<br />
<strong>Home</strong> <strong>Furnishings</strong> <strong>Academy</strong>. Each fourday<br />
conference attendee will receive<br />
exhibitor coupons valued at more than<br />
$2,000 and one lucky winner will<br />
receive a free five-day course at the<br />
CHF <strong>Academy</strong>, valued at $995.<br />
ABOUT D&WC<br />
Draperies & Window Coverings<br />
magazine is the premier monthly<br />
business-to-business multi-media<br />
publication dedicated to interior<br />
fashions professionals specializing<br />
in window treatments and to the<br />
continued growth and success of<br />
their businesses. For more than 25<br />
years we have presented design ideas,<br />
new product information, advice,<br />
industry news, and management ideas<br />
to all aspects of the custom window<br />
coverings industry—fabricators,<br />
workrooms, <strong>dec</strong>orators, dealers,<br />
installers and suppliers.<br />
Since 1995, Draperies & Window<br />
Coverings has been accessible on the<br />
Web. With the most comprehensible<br />
site for the window coverings trade,<br />
www.DWConline.com presents<br />
current articles, a year-by-year and<br />
month-by-month archive of articles<br />
and a searchable Directory & Buyer’s<br />
Guide. Each month, the magazine also<br />
circulates an e-mail Newsletter with<br />
latest news and timely features.<br />
Since the very first industry trade show<br />
and conference, The World of Window<br />
Coverings in 1983, Draperies &<br />
Window Coverings has produced<br />
more than 70 events, both large and<br />
small, accumulating the knowledge and<br />
experience in designing, organizing and<br />
operating successful shows.<br />
14 The <strong>Custom</strong> <strong>Home</strong> <strong>Furnishings</strong> Magazine November/December 2006
One Year Later<br />
Cheryl Strickland<br />
Cheryl Strickland—One Year Later<br />
Hello Everyone!<br />
Wow! I am really honored that Margie<br />
asked for an update on my activities a<br />
year after selling the school. It’s nice to<br />
be remembered. I do miss you all!<br />
This past October I sold the rest of<br />
the company to the D&WC Magazine<br />
and completely<br />
retired. Before that I was still busy<br />
getting a show ready in South<br />
Carolina in January, Phoenix<br />
in March, and Philadelphia in<br />
October. I loved every minute I had<br />
the business, but have been really<br />
enjoying semi-retirement and now<br />
full retirement for the past eight<br />
weeks.<br />
Life certainly is different from when<br />
I still had the company. I now have<br />
time to enjoy my grandchildren.<br />
My daughter used to call and say,<br />
“Mom, your granddaughters would<br />
like to see you.” They practically had<br />
to make an appointment! Now those<br />
two granddaughters get off the bus<br />
Panning for gold. I'll let you know<br />
every day at my house and the other<br />
if we strike it rich!<br />
three grandchildren live just four<br />
doors down from me in the same<br />
development. I used to live on the side of the mountain, but<br />
now I’m in a terrific area with great neighbors and a flat<br />
yard where the kids and I can play!<br />
This past spring there was enough time to watch three<br />
of the kids play T-ball and little league. On and off over<br />
the summer we all spent time at my camper on a river,<br />
swimming, panning for gold, riding bikes, playing games,<br />
and building campfires. We also went horse-back riding.<br />
(I know I look as big as the horse in the photo!) All of my<br />
brothers and sisters, and many other family members and<br />
friends, came to the camper for my 55th birthday in May.<br />
My daughter and I now attend water<br />
aerobics three times a week and I’ve<br />
lost 15 pounds.<br />
All five grandchildren (ages 4 through<br />
11) are learning to sew and we<br />
have been busy making Christmas<br />
projects and <strong>dec</strong>orative pillows for<br />
my new house. There are no window<br />
treatments yet, except for blinds,<br />
and I’m looking forward to creating<br />
them. I really miss the sergers (all of<br />
them went to the school) so I just<br />
ordered myself one from Bill’s Sewing<br />
Machines. Hey, what can I say, once<br />
it’s in your blood… I love sewing for<br />
fun again and not under deadlines.<br />
I received great satisfaction from<br />
my work, but when you get to a<br />
place where you can<br />
retire, I recommend<br />
it highly!<br />
Meanwhile, I wish<br />
you all a very<br />
successful new year<br />
and happy sewing!<br />
Lots of Love,<br />
Cheryl<br />
Celebrating my 55th!<br />
Horseback riding with my<br />
wonderful grandkids.<br />
www.CHFmagazine.com November/December 2006 15
Down To Business<br />
Judy May<br />
Advertising<br />
Ensure That Your Ad Gets Results!<br />
If you’re like many design professionals, you feel<br />
compelled to advertise. I mean, everyone else is doing<br />
it, right In fact, here is a question my clients pose<br />
regularly: “I’ve been in business for several months and<br />
things are moving in the right direction. However, I want<br />
more business. I’ve thought about advertising but it seems<br />
so expensive. Do you have any advice on where to advertise<br />
and how much to spend”<br />
Many design professionals<br />
equate advertising with<br />
marketing. This is not, in fact,<br />
the case. While advertising may<br />
be a component of an effective<br />
marketing strategy, the terms “advertising” and “marketing”<br />
are NOT synonymous.<br />
Advertising is, in most cases, expensive and without repeated<br />
ad appearances, fails to provide the new business you<br />
hoped for. But if your budget is large enough to support an<br />
advertising campaign (not a haphazard occasional placement<br />
of “an ad here and another ad there,” which is NOT at all<br />
effective) I have a few things you should keep in mind.<br />
Advertising budget. The Small Business Administration<br />
suggests that 5% of your gross sales should be budgeted for<br />
advertising. For example, if your business produces $50,000<br />
in gross revenue, the SBA recommends an annual advertising<br />
budget of $2,500, or just over $200 per month. While you<br />
can use this as a rule of thumb, don’t fret if your available<br />
funds do not support this kind of expenditure. Instead<br />
spend your time and efforts seeking to “get in front of” your<br />
target market as much as possible by speaking, writing or<br />
networking.<br />
Before placing an ad, do your homework. Contact the<br />
publication to ascertain demographics related to their<br />
subscribers and readers. Indeed, you need to confirm<br />
that your target market reads the publication you seek to<br />
advertise in.<br />
There is no correlation between the amount of money spent<br />
and business gained. This conclusion was confirmed in a<br />
recent study at the Wharton School of Business, University<br />
of Pennsylvania. So if the money spent does not necessarily<br />
indicate the success of an ad, what does<br />
Instead of saying,<br />
“Specializing in One Day Room Makeovers,”<br />
try, “Come home to a beautiful like-new space . . .<br />
completed in just one day.”<br />
The message is the most important aspect of an ad. Often<br />
the message is in the headline, the first (and sometimes<br />
the only) part of the ad readers see. The headline needs to<br />
be simple, compelling and should appeal to the reader’s<br />
emotions. If the headline delivers, the reader will likely be<br />
drawn in to read the rest of the ad.<br />
Think out-of-the-box when creating your ad. If you want<br />
the ad to be read, strive to make it unique. Ensure that it<br />
“stands out” from the rest. Use your local Yellow Pages as<br />
an example. Peruse your Yellow Pages and I’m confident<br />
you will see that most of the<br />
ads are of the same format. An<br />
“institutional” ad where the<br />
logo and/or company name are<br />
“front and center,” along with<br />
their contact information. Rather than leaping off the page<br />
with an attention-grabbing headline, many ads look like all<br />
the rest. This often results in a less-than-expected return on<br />
investment. Instead of creating a “cookie cutter” ad, take<br />
the time to focus on your target market. Choose a problem<br />
they struggle with (e.g., putting a space together to look<br />
cohesive and attractive) and try to come up with a headline<br />
that promises a solution to that problem. Instead of saying,<br />
“Specializing in One Day Room Makeovers,” try “Come<br />
home to a beautiful like-new space . . . completed in just one<br />
day.” Do you see the difference<br />
Repetition is key. You cannot expect to get results from one<br />
ad, placed one time, in one publication. Likewise, placing an<br />
ad in one publication one month, then placing that same ad<br />
in another publication the following month, will not get you<br />
the response you seek. To the contrary, the key to success in<br />
advertising is multiple appearances in the same publication<br />
so that readers begin to recognize you, get to know you,<br />
and trust you. The average reader will NOT contact you<br />
after seeing your ad once. In fact, most people will contact a<br />
business only after seeing the ad eight or more times. Before<br />
investing in advertising, realize that your investment will pay<br />
for itself only if you engage in a true advertising campaign.<br />
Judy May is the President of Show House<br />
Marketing, a business development and<br />
marketing firm catering exclusively to design<br />
industry professionals. For free resources, visit<br />
them online at www.ShowHouseMarketing.com.<br />
Or you may contact Judy at 610.324.5240.<br />
16 The <strong>Custom</strong> <strong>Home</strong> <strong>Furnishings</strong> Magazine November/December 2006
WCAA Central Florida Chapter<br />
Patty Indrunas<br />
WCAA<br />
Central Florida Chapter<br />
In the spring of 2005, I opened my own window<br />
treatment design firm, sewing and selling window<br />
treatments. There are many risks involved when<br />
starting your own business. You need the help of an<br />
experienced partner who knows the industry, can provide<br />
training and education, and can support you in your sales<br />
and marketing efforts. I chose WCAA as my industry<br />
partner. With the help of two other women, Sharon<br />
Baughman and Angela Whiteman, we started the WCAA<br />
Central Florida chapter.<br />
WCAA is a national organization with leadership and<br />
support from other individuals and chapters all over the<br />
country. I had doubts that I could actually get the chapter<br />
off the ground and have<br />
a viable, thriving, and<br />
cohesive group with<br />
interesting and compelling<br />
topics each month. But all I<br />
had to do was send an email<br />
or make a phone call to<br />
WCAA leaders.<br />
WCAA is the only national<br />
trade association dedicated<br />
to the retail window<br />
coverings industry. Members<br />
include dealers, designers,<br />
<strong>dec</strong>orators, workrooms and<br />
installers. WCAA Local<br />
Chapter members meet<br />
regularly to network and share industry information with<br />
each other in a non-competitive atmosphere. As WCAA<br />
members we receive industry discounts, affordable health,<br />
life and disability insurance, merchant credit services, and<br />
group buying power. Continuing education is available to<br />
members through two certification programs, bimonthly<br />
newsletters and monthly networking through local chapters.<br />
All members are listed free of charge in the Member<br />
Directory section of the WCAA website.<br />
In the Central Florida area, the first thing we did was solicit<br />
membership from over 150 workrooms and designers.<br />
Rowley Company provided the names and addresses of<br />
these businesses using zip codes in our area. Thirty-five<br />
people attended the first meeting and five people became<br />
Front Row: L-R. Lucy Medford, Mary Beth Damon, Patty<br />
Indrunas (president). Back Row: L-R. Pat Johnson, Jan<br />
Bennett, Angela Whiteman (Secretary), Sharon Baughman<br />
(Treasurer), Teresa Grysikiewicz (President, Jacksonville<br />
WCAA), and Susan Schurz (Member of WCAA in VA. Guest<br />
presenter invited by the Jacksonville chapter). Not pictured:<br />
Tammy Hall, Gail Vannier-Coton (Membership Chair), and<br />
Dale Veazey.<br />
members. We now have ten members: Sharon Baughman,<br />
Jan Bennett, Gail Vannier-Coton, Mary Beth Damon,<br />
Tammy Hall, Pat Johnson, Lucy Medford, Dale Veazey,<br />
Angela Whiteman, and me. We have a strong commitment to<br />
the growth of our own business through industry knowledge.<br />
We meet monthly, on the 2 nd Tuesday, at 10:00 a.m.<br />
Meetings usually last until noon. We plan meeting agendas<br />
around three basic topics: workroom construction<br />
techniques, business information, and window treatment<br />
design. 20% of our members specialize in design services,<br />
40% own wholesale workrooms, and 50% own retail<br />
workrooms. Our most requested meeting topic is pricing,<br />
which we share openly with each other. (Only WCAA<br />
members are allowed to attend this meeting.)<br />
We enjoyed attending the Jacksonville WCAA meeting last<br />
month to hear Susan Schurz, owner of Tavern Hill, and CHF<br />
<strong>Academy</strong> instructor. Susan<br />
presented “Extraordinary<br />
Panels” and “High-end<br />
Workroom Details.” Other<br />
meeting topics included<br />
Window Illusions by Gulf<br />
Coast American Fabricators;<br />
Dream Draper Quickbooks<br />
Solutions presented by<br />
Teresa Grysikiewicz,<br />
WCAA Jacksonville chapter<br />
president; construction tips<br />
offered by members; website<br />
design for the window<br />
treatment business by Bill<br />
Reese, WCAA Website<br />
Administrator; and a WCAA<br />
presentation by Mark Nortman, WCAA Executive Director.<br />
Our biggest challenge is to grow our group. We opened some<br />
of our meetings this year to the group of 35 who attended<br />
the first meeting in October 2004. We are working on details<br />
for another direct mail campaign in early 2007 using the<br />
customer list from a local fabric and workroom supplier.<br />
Also, Greenhouse Designs has agreed to share their regional<br />
customer list with us. We will have more meetings next year<br />
in the evening hours to provide opportunities to business<br />
owners who cannot leave their jobs during the day.<br />
We are hopeful that events such as the Weekend <strong>Academy</strong><br />
sponsored by <strong>Custom</strong> <strong>Home</strong> <strong>Furnishings</strong> <strong>Academy</strong> and<br />
WCAA in the Orlando area will allow us opportunities to<br />
market our group in 2007.<br />
www.CHFmagazine.com November/December 2006 17
18 The <strong>Custom</strong> <strong>Home</strong> <strong>Furnishings</strong> Magazine November/December 2006
www.CHFmagazine.com November/December 2006 19
CHF Tips & Tricks<br />
Leslie Fehling<br />
Leslie Fehling Designs<br />
Prosperity, PA<br />
As posted on the CHF Forum.<br />
When making an unlined tablecloth with<br />
welt on the lower edge, draw the circle (on<br />
the right side of the face fabric) the finished<br />
diameter +1" seam allowance.<br />
Sew on the welt, then trim away excess<br />
fabric. Now here comes the hint...<br />
Serge the edges of the welt and face fabric<br />
together the whole way around the lower<br />
edge. Press the welt to the back side, then<br />
blind hem the serged edge to the inside of the<br />
tablecloth. It gives such a nice finish without<br />
any glue, tape, or top stitching. And it’s<br />
really fast.<br />
20 The <strong>Custom</strong> <strong>Home</strong> <strong>Furnishings</strong> Magazine November/December 2006
CHF Tips & Tricks<br />
Deb's Drapery Designs<br />
Foothill, Ontario, Canada<br />
As posted on the CHF Forum.<br />
Before making custom place mats, go to a department store and buy<br />
cheap place mats, one of each shape (oval, rectangular and with<br />
angled corners). Show them to the customer and ask them to pick<br />
which shape they like best. Use their choice as the template for making<br />
their place mats.<br />
Another trick when making place mats is to buy the stiffest interfacing<br />
you can find. It usually comes as an iron on but I sew it in. If you<br />
iron it in, it will pucker the first time the place mats are washed or<br />
sponged. The interfacing gives the place mats a nice, crisp/stiff look.<br />
My customers have all been happy and I even saw some recently that I<br />
made five years ago. They still looked great!<br />
www.CHFmagazine.com November/December 2006 21
22 The <strong>Custom</strong> <strong>Home</strong> <strong>Furnishings</strong> Magazine November/December 2006
What would you do<br />
A designer sends you a picture and asks you<br />
to quote a free form scarf swag, lined and<br />
interlined, with bead trim on the leading<br />
edge. You quote, she sells. She calls a week<br />
later. Says she wants it to be two widths<br />
wide instead of one. You agree. You make<br />
the treatment. BUT you never requoted it<br />
with two widths! It was YOUR lining and<br />
interlining. Would you:<br />
A) drop it and let it go,<br />
B) send her a revised estimate with<br />
explanation (even though the job<br />
is gone now),<br />
C) bill her for additional materials only.<br />
Submit your answer to Connie@chfmagazine.<br />
com. We will print the results in the next <strong>issue</strong>!<br />
www.CHFmagazine.com November/December 2006 23
Help Others While Helping Yourself<br />
Lynn Haddad (LynnMA) posted the following information on the forum. This is a great way to<br />
help others and clean out your workroom at the same time.<br />
The Caleb Group is a non-profit organization that provides service coordination to<br />
low income residents in the New England area who live in communities of affordable<br />
rental housing provided by The Caleb Foundation and other non-profit partners. Each<br />
community has a community center, including a kitchen, computer learning center and<br />
comfortable space to gather for classes, games and recreation. At the elderly and family<br />
sites many residents gather to share meals and craft ideas and to learn skills.<br />
Donated materials are made available to families, the elderly, and people with special<br />
needs. At some sites quilts are especially exciting for youth who gain a skill as well as<br />
a great deal of pride in their work. Residents make all kinds of crafts—some of which<br />
are sold at the Caleb Craft Shoppe on consignment. This gives the crafter a little extra<br />
spending money and a tremendous amount of pride and satisfaction. Some active elderly<br />
residents gather to knit. They use donated yarn to make sweaters, hats and blankets that<br />
are then given to hospitals for premature babies.<br />
Please let us know if you have materials that you could donate or if would be willing to<br />
volunteer teaching a skill.<br />
The Caleb Group – Swampscott, MA 01907 – www.thecalebfoundation.org<br />
Heidi Sawyer, Director of Development – 781.595.4665<br />
Email: hsawyer@thecalebfoundation.org<br />
24 The <strong>Custom</strong> <strong>Home</strong> <strong>Furnishings</strong> Magazine November/December 2006
CHF Tips & Tricks<br />
Susan Kindel<br />
SK Fabric Interiors<br />
Gainesville, VA<br />
Instead of<br />
store bought<br />
gift bags,<br />
wrap gifts in<br />
serged fabric<br />
remnants<br />
and tie them<br />
with nice<br />
gift tags.<br />
www.CHFmagazine.com November/December 2006 25
26 The <strong>Custom</strong> <strong>Home</strong> <strong>Furnishings</strong> Magazine November/December 2006
Design Ideas November/December 2006<br />
www.CHFmagazine.com November/December 2006 27
Design Ideas November/December 2006<br />
28 The <strong>Custom</strong> <strong>Home</strong> <strong>Furnishings</strong> Magazine November/December 2006
Design Ideas November/December 2006<br />
By Susan Schurz<br />
www.CHFmagazine.com November/December 2006 29
Design Ideas November/December 2006<br />
30 The <strong>Custom</strong> <strong>Home</strong> <strong>Furnishings</strong> Magazine November/December 2006
www.CHFmagazine.com November/December 2006 31
CHF Magazine<br />
Oops!<br />
The following errors were made in the May/June <strong>issue</strong><br />
of our magazine:<br />
Nancy Ketchum was our 2nd Place Window Treatment<br />
Workmanship Contest winner (page 48). Her company<br />
name was inadvertently listed as Southern Charms. Her<br />
company name is Southern <strong>Custom</strong>s, LLC. Also,<br />
on page 7, her treatment was listed as an example for<br />
a use of Sealah Shaper. Sealah Shaper was not used in<br />
the construction of Nancy’s award winning treatment.<br />
She did say, however, that it could be used as another<br />
method of achieving the desired effect.<br />
In the instructions for the Versatile Shawl Valance, page<br />
43, step 2. - the cut length should be 19" and not 10".<br />
We apologize for these errors and any inconvenience<br />
they might have caused.<br />
Also, we would like to take this opportunity to formally<br />
thank Lisabeth Martin for generously sharing all of the<br />
wonderful tips from her Decorate Now Patterns website<br />
that we published in our July/Aug and Sept/Oct <strong>issue</strong>s.<br />
32 The <strong>Custom</strong> <strong>Home</strong> <strong>Furnishings</strong> Magazine November/December 2006
CHF Classifieds<br />
For Sale: Singer 20U. Great machine, runs perfectly! Asking $900. Contact: Connie Sikora, 219.961.6905.<br />
For Sale: One current D’Kei trim book. Contact Sissy on the forum, SD0045A. $10. Buyer pay shipping/postage.<br />
For Sale: Partial roll of Rowley WC60/S 5/32" welt cording. I have not used much of it but I cannot say for sure how<br />
much I did use. Maybe 20 yards. Asking $12 plus shipping. If you are interested, I can send you a photo so you can see<br />
how full the roll is. Contact: Julie E. Jones, JJones1120@aol.com.<br />
For Sale: Partial roll of Conso #3 10/32" cord. I have used approximately half. Make me an offer. I am trying to clean<br />
out my workroom. I like to use a stiffer cording than this. Contact: Julie Jones, JJones1120@aol.com.<br />
For Sale: 6 current D’Kei trim sample books. Asking $5 less per book than D’Kei charges, and I’ll pay shipping. You can<br />
buy one book, several or the whole lot. Contact me for pricing. All books are still listed on D’Kei’s website. Contact:<br />
Amanda Endress on the forum.<br />
Job Opportunity in Florida: Robb and Stucky Interiors in Boca Raton, Florida is currently looking for a special person<br />
to fill the position in their Cut Goods Department. We need an individual who is drapery and bedding savvy and<br />
understands trade terminology in this particular industry. Must be computer literate and have a pleasant personality to<br />
deal with our customers and workrooms. Hourly wage and great benefits, 40 hours a week, Monday through Friday.<br />
Contact: Shelley Story at (561)-347-1717, ext 2076, e-mail Shelley.Story@RobbStucky.net, or fax (561)-347-6030.<br />
Position needed to be filled ASAP!!<br />
Job Opportunity: High-end drapery workroom seeking Workroom Manager. Experience in all aspects of drapery and<br />
top treatment fabrication required, including yardage calculations. Must have 5 years previous workroom management<br />
experience and know industrial equipment. Must be able to communicate well with others. Workroom is approximately<br />
10,000 square feet, with 28 employees. Salary and benefits. San Francisco Bay Area. Please fax cover letter and resume<br />
to (415) 865 8122).<br />
Business For Sale: Carolina Upholstery Shop and Showroom.Well established in Charlotte/Concord/Harrisburg, NC area<br />
-18 years. Providing fine furniture, restaurant, marine, auto, recreational vehicle, hospital, athletic equipment and misc.<br />
upholstering needs - both residential and commercial. Serious inquires only please. Contact owner Lynn Davis<br />
704-455-2004.<br />
Product Profile<br />
Ultra-Pro Seam Ripper<br />
This is the prefect seam ripper for serged seams.<br />
It has easy to replace blades in a specially<br />
designed handle. Curved blade ends won’t poke<br />
through or tear fabric. Comes complete with five<br />
replacement blades and a safety cover.<br />
Order yours today by calling<br />
800-222-1415 (704-644-7730)<br />
or by visiting the website at<br />
www.CHFschool.com.<br />
Item No. S-320<br />
$9.95<br />
Surgically sharp<br />
blades<br />
glide through<br />
stitches!<br />
www.CHFmagazine.com November/December 2006 33
Time Management<br />
Wilmoed Sisson<br />
Time Management<br />
In The 21st Century<br />
It’s a familiar dilemma: you have so much to do that<br />
it’s hard to keep up with everything. You don’t know<br />
what you should work on next, or how much time it’s<br />
going to take. You feel overwhelmed, and to top it off<br />
you’re sure there’s something important you’ve forgotten.<br />
How can you make time for everything<br />
Outlook<br />
The programs in Outlook are vital to staying organized. I use<br />
the calendar to keep track of my appointments, my husband’s<br />
work schedule, the kids’ activities and more. Everything is<br />
color-coded so I can tell at a glance what category an activity<br />
falls into. It serves as the central information station for<br />
my day. Everything I need to know is in one place. Another<br />
The simple answer is, you can’t. It’s impossible to<br />
make time! Every one of us is allotted the same 24<br />
hours in the day. The hours will go equally fast no<br />
matter what you are doing, and the universe does not<br />
care that you have too much to do. The real question<br />
is, how can I make the best use of my time<br />
It really doesn’t matter why you have problems with<br />
time management. What helps is letting go of your<br />
past time management methods—after all, they<br />
haven’t worked for you, have they—and being open<br />
to change.<br />
A quick disclaimer here. I am not an organizing<br />
expert. It continually amazes me when people tell me<br />
“You’re so organized!” and privately I feel like I am<br />
just one step ahead of chaos! But I am learning to<br />
take a “big picture” approach to a lot of life. It really won’t<br />
matter in ten years if I got this paperwork done, but it will<br />
matter if I chose instead to do something fun with my kids.<br />
It’s all a matter of choices.<br />
I’m also an avowed technophile. If it uses batteries or a<br />
cord, I’m all for it. My technology keeps me going in the<br />
right direction and helps me make the best use of the 24<br />
hours I have every day. So I apologize in advance for those<br />
of you who aren’t comfortable with technology and also to<br />
those of you with Macs. I’m a Windows gal. (Hey, it’s my<br />
line of work, right)<br />
There are several programs I rely on to keep me on track,<br />
both for work and for my personal life. They are:<br />
1) Outlook (Microsoft), which includes calendar, task<br />
list, contacts and email<br />
2) Taskline (ResultsWare)<br />
3) Post-It Pro (3M)<br />
4) ListPro (Ilium)<br />
advantage, if you have more than one computer in the house<br />
running Outlook and they are networked, you can send<br />
appointments to the other users so they can keep up with<br />
your activities as well. (My husband and I do this so I know<br />
when he has work appointments and isn’t available to take<br />
the kids to an activity.)<br />
The Tasks list helps me keep a running list of everything<br />
going on in my life that requires time. Entering it on the<br />
computer helps me unclutter my head. It really helps that<br />
I don’t have to remember everything. It’s on the computer.<br />
The contacts list has every phone number I’ve ever needed<br />
(no more slips of paper). I can also scan a contact’s business<br />
card and save the image with their information. And I use<br />
Outlook to manage my email.<br />
Taskline<br />
This program is a plug-in for Outlook. It has become a<br />
crucial element to helping me make good choices for using<br />
my time. It is very simple. For every task in your Outlook<br />
34 The <strong>Custom</strong> <strong>Home</strong> <strong>Furnishings</strong> Magazine November/December 2006
Time Management<br />
Wilmoed Sisson<br />
writing it on a scrap of losable paper. You can program a<br />
note to pop up at a certain time as a reminder.<br />
ListPro<br />
I’m an inveterate list maker. Shopping lists, project lists,<br />
errand lists, gift lists, whatever. ListPro helps me keep<br />
them organized.<br />
You Can Take It With You<br />
All this is great if you always stay within reach of your<br />
desktop computer. What do you do if that’s not the case<br />
For me, I take my technology with me. My constant<br />
companion is my Pocket PC, a Hewlett-Packard iPaq<br />
2215. It’s now about two years old so it’s considered<br />
a quaintly obsolete model. I synchronize it with my<br />
desktop PC every day. So I have my calendar, contacts<br />
and task list from Outlook, and my ListPro lists with me<br />
at all times. Having “my life at my fingertips” has helped<br />
me be more effective in the most surprising ways.<br />
Tasks list, you can set multiple parameters: deadline,<br />
duration, priority, etc. Then you run the program. It sorts<br />
the tasks according to those parameters and inserts the tasks<br />
into your calendar as appointments, fitting them in among<br />
your scheduled appointments and pre-defined break times.<br />
You can quickly see exactly how much time is required to<br />
complete all the tasks on your list.<br />
What always surprises me is that<br />
getting it all done will take a lot less<br />
time than I imagine it will, even if the<br />
task list is long and I am generous<br />
with my time estimates. I print out my<br />
calendar listing for the day and know<br />
that if I follow the plan, I am making<br />
good choices for using my time and<br />
will get everything done when it needs<br />
to be done.<br />
Post-It Pro<br />
These are Post-It Notes for your<br />
computer. I use this program when I<br />
want to have a temporary reminder<br />
about something but don’t want to risk<br />
For example, I can use “waiting time”—waiting in line<br />
at the bank or grocery store, or at the doctor’s office—to<br />
go over schedules or project lists. Since I have all my<br />
contacts with me, I can call clients or vendors without taking<br />
up office time.<br />
Can You Hear Me Now<br />
This brings up another technology item that has gone from<br />
luxury to necessity in just a few years,<br />
the cell phone. Being able to place<br />
or receive calls no matter where you<br />
are can make out-of-office time just<br />
as productive as in-office-time. For<br />
example, I was driving to a conference<br />
with another local workroom owner<br />
and she used the travel time to call a<br />
designer to discuss a job, plus call two<br />
vendors to place orders. She knew she<br />
was going to have “wait time” while<br />
in the car and rather than make the<br />
calls while she was in her workroom,<br />
she planned to make the calls while<br />
traveling.<br />
Many of today’s cell phones also have<br />
built-in cameras, which can be very<br />
www.CHFmagazine.com November/December 2006 35
Time Management<br />
Wilmoed Sisson<br />
useful for taking pictures of interesting window treatments<br />
you run across in your travels, or to photograph fabric<br />
samples. Find out how much your carrier charges to send<br />
the pictures though. Depending on your calling plan, it<br />
could be up to 25 cents per<br />
photo.<br />
One word of caution, cell<br />
phones can keep you too much<br />
in touch. Make a point of<br />
turning off your phone when<br />
meeting with clients. You will<br />
be letting them know that they<br />
are what is important.<br />
Where am I<br />
The last gadget that travels<br />
with me is my Global<br />
Positioning System (GPS)<br />
receiver. This device, along with proper mapping software,<br />
has saved me immense amounts of time and stress. I no<br />
longer worry about getting lost. I also like knowing exactly<br />
when I will arrive at my destination. I know whether I<br />
have to call the client to tell them I will be late. The type<br />
of receiver I use plugs into my PocketPC and cost less than<br />
$100. The mapping software I use (Mapopolis) costs $99<br />
for the annual map license and covers all of North America.<br />
Send/Receive<br />
Email can be either a blessing or a curse and is often<br />
both. Becoming an efficient email reader takes a bit of<br />
preparation but pays off in the long run.<br />
First, you need to analyze the categories of email you<br />
get and set up folders for each category. I like to have a<br />
separate folder for each email list I am on. Plus I have other<br />
folders for specific community groups I am a part of, or for<br />
special projects. I have programmed Outlook to sort the<br />
incoming mail into the proper folders. I can see at a glance<br />
what kinds of messages I have received. This lets me focus<br />
on one category at a time without constantly having to<br />
“change hats.”<br />
Of course, take advantage of spam-filtering software. The<br />
newest versions of Outlook have junk mail filtering built in<br />
so you don’t need to buy additional software.<br />
One last time-saver. Invest in a good virus protection<br />
program and make regular backups of your data. This may<br />
not save time immediately but if you ever get socked with a<br />
nasty computer virus or lose your computer to a hard drive<br />
failure, you’re going to be spending a LOT of time trying to<br />
restore your information. The last hard drive<br />
failure we had took more than a month to fully<br />
recover from.<br />
When all is said and done, the whole concept<br />
of “time management” really is an illusion.<br />
You cannot really manage time, you can only<br />
make choices about what to do with the time<br />
you have. Making good choices takes practice,<br />
determination, and sometimes courage, but the<br />
payoff is knowing that you have made the right<br />
choices for you, your family and your business.<br />
Sources and Web Sites<br />
Taskline:<br />
www.resultsware.com.<br />
Special offer for CHF Forum Members:<br />
Get a 15% discount by entering<br />
Code TLCHF at checkout.<br />
(Offer expires April 2007.)<br />
ListPro:<br />
www.iliumsoft.com.<br />
PostIt Pro:<br />
www.3m.com/us/office/postit/digital/digital_notes.html.<br />
Mapopolis:<br />
www.mapopolis.com.<br />
Welmoed Sisson, CWP, CWTC, is the owner of<br />
Sewing Seams Easy, a retail window treatment<br />
workroom. She is Secretary of the Maryland<br />
Chapter of the WCAA, and has created<br />
“Trend Vignettes” for the past two IWCE<br />
conferences. Her work has been published in<br />
Window Fashions magazine, she is a regular<br />
columnist for the popular sewing website, PatternReview.<br />
com, and she publishes a monthly e-newsletter, The Couture<br />
<strong>Home</strong>. Welmoed lives in Boyds, Maryland with her husband<br />
Bob and their two children.<br />
36 The <strong>Custom</strong> <strong>Home</strong> <strong>Furnishings</strong> Magazine November/December 2006
CHF <strong>Academy</strong> Success Story<br />
Lorie Albitz<br />
Above The Fray, Inc.<br />
Lorie Albitz, hasn't always been the proud owner<br />
of Above The Fray, Inc., a home based design<br />
and fabrication studio. She dedicated more than<br />
20 years to a large corporation as a successful<br />
Marketing and Sales Account Manager. What a pleasant<br />
experience it was for me to sit and talk to Lorie about her<br />
transformation.<br />
CHF Editor: How did you get started in the business<br />
Lorie: My mother taught me to sew at a very early age. I<br />
continued to sew and make clothing through my college<br />
years. After spending 20 years<br />
in sales, I had become a heavy<br />
smoker. Just shortly before my<br />
50th birthday, I was walking in<br />
my backyard and I remembered<br />
my aunt and the last time I<br />
spoke to her before she died<br />
from emphysema. I remembered<br />
that it was very difficult for her<br />
to speak and she gasped for<br />
breath with every word. I knew<br />
that if I did not quit smoking<br />
I might not be around long<br />
enough to enjoy my husband,<br />
our friends, and all the things I<br />
loved to do.<br />
Quitting smoking was quite the<br />
battle. To help me with this, I<br />
needed something to do with my<br />
hands. I <strong>dec</strong>ided that sewing would do the trick and started<br />
making pillows, throws, and table toppers for my home.<br />
It soon became apparent to both my husband and me that<br />
I had been blessed with the ability to design and fabricate.<br />
One Saturday night, we had some very dear friends over for<br />
dinner. My husband, Bob, was so proud of all the things I<br />
had made, he wanted to show them off to our friends. My<br />
friend, too, loved my work. He asked if he could make a few<br />
introductions for me at the Michigan Design Center. I was<br />
speechless, to say the least. The following week I had several<br />
names of Designers who had offices at the Design Center.<br />
I called the first Designer and was told to bring in every<br />
sample I had. She offered me the opportunity to display my<br />
work in her showroom window.<br />
CHF Editor: How long have you been in business<br />
Lorie: I have been in business 3 years now. I thoroughly<br />
enjoyed being in sales and marketing with my former<br />
employer. And I loved the excitement of Election business,<br />
selling voting systems to county and local government.<br />
However, I also felt that with my rekindled love of sewing<br />
I could make a living designing and fabricating soft home<br />
furnishings. My very next step was to sit down and write a<br />
business plan. I had been in the business world long enough<br />
to know that I had to have a good, sound business plan. I<br />
also knew that my husband would not be in favor of me<br />
quitting my job in sales unless<br />
I could prove to him that I<br />
had thought out everything.<br />
The afternoon of my very first<br />
meeting with the Designer at<br />
the Michigan Design Center,<br />
I went home on cloud nine. I<br />
was ready to take the plunge.<br />
Some friends wondered if I<br />
shouldn’t keep the good job I<br />
had while getting this business<br />
off the ground but I believed<br />
that taking a leap of faith<br />
Lorie Albitz, Owner. Above The Fray, Inc.<br />
She offers design services, space planning, a full line<br />
of window treatments, bedding, table linens and fine<br />
furnishings for the home.<br />
and going at it full time was<br />
best for me. I was so at peace<br />
when I gave my notice to my<br />
employer. I knew it was the<br />
right thing to do.<br />
CHF Editor: How did your husband feel about this <strong>dec</strong>ision<br />
Lorie: The evening I told my husband about my opportunity<br />
to showcase my work at the Designer’s showroom, I also<br />
told him I felt that I needed to take that leap. Bob said,<br />
“I think so too. I’ll support you in whatever <strong>dec</strong>ision you<br />
make.” When it came to purchasing major equipment, we<br />
treated it just as if I were going to the bank for a loan. I<br />
listed all the reasons (in writing) for the capital expenditure<br />
for each of the major purchases so that we could assess<br />
the practicality and chances for success for the business.<br />
Everything was so clear. Each purchase had a sound basis<br />
in writing. From then on, equipment purchases were never<br />
questioned by either of us.<br />
www.CHFmagazine.com November/December 2006 37
CHF <strong>Academy</strong> Success Story<br />
Lorie Albitz<br />
CHF Editor: How did you get started<br />
Lorie: My very first customer was the designer who allowed<br />
me to display my work in her showroom window. Another<br />
designer saw the display and asked if I would do work for<br />
her. Initially, I did wholesale work. I started my retail work<br />
with neighbors, which led to referrals. I also had some<br />
unusual opportunities. A neighbor who had seen some of my<br />
work asked if she could give my name to a fellow business<br />
woman who was organizing an Art Show. I brought pillows,<br />
window treatments, table toppers and my portfolio (on<br />
my laptop) to this show. My retail<br />
business grew immediately from<br />
the show. The following spring, an<br />
educator at a private middle school<br />
was organizing a fund raiser for her<br />
school and she remembered seeing<br />
my work at the art show. She asked<br />
if I would display some work. For<br />
this show I brought my portfolio,<br />
several pillows and a wide variety<br />
of window treatments, most of<br />
which were fabricated at the CHF<br />
<strong>Academy</strong> Certification programs.<br />
Once again, I was very fortunate<br />
and my retail business grew.<br />
CHF Editor: Tell us about your workroom<br />
Lorie: I converted the lower level living and recreation<br />
areas of our home into a functional studio. The living areas<br />
serve as a place for clients to peruse fabric and trim books,<br />
and view sample window treatments. A former guest room<br />
adjacent to the studio functions as an office and a cutting<br />
room. Linings, interlinings, supplies and client fabrics are<br />
also stored in this room.<br />
CHF Editor: What is your favorite or most helpful<br />
equipment<br />
Lorie: I would have to say that my most helpful piece of<br />
equipment is the Creative Equipment Corporation J.R.<br />
cutting machine. With the exception of swags, all my fabric<br />
is inspected and cut on this machine. The cutting machine is<br />
great for cutting long lengths. For Swags, I use the Parkhill.<br />
It is invaluable for its ease of use and it is a time saver. I<br />
used to be intimidated by swags, but not any more. And<br />
of course it would be very difficult to function without the<br />
industrial sewing machines.<br />
Client Area. Pillows and window treatments<br />
designed and fabricated by Lorie.<br />
CHF Editor: How did you learn about The <strong>Custom</strong> <strong>Home</strong><br />
<strong>Furnishings</strong> <strong>Academy</strong> (formerly The CHF School)<br />
Lorie: I had worked a year in this field before finding out<br />
about the CHF Conferences and <strong>Academy</strong>. An Interior<br />
Designer friend of mine gave me a brochure for the<br />
CHF Conferences. I attended my first conference, met<br />
wonderful people, made great friends and found out about<br />
the <strong>Academy</strong>. After spending 20 years in sales I knew the<br />
importance of an education in this field. I <strong>dec</strong>ided as soon as<br />
I could afford it I would attend.<br />
CHF Editor: What made you <strong>dec</strong>ide<br />
to attend the <strong>Academy</strong><br />
Lorie: I wanted the credentials.<br />
I wanted to raise the bar for<br />
myself. I already had an education<br />
in marketing and sales which I<br />
still use in my business. I knew<br />
that completing my certifications<br />
was one of the most important<br />
expenditures that I would make for<br />
my business, equally as important<br />
as any equipment I had purchased.<br />
I wanted something more than a<br />
seminar, something equivalent to a<br />
college education in this field with<br />
the degree and certification to prove it. I had the skill and<br />
the confidence but I needed independent confirmation of my<br />
ability and skill level.<br />
CHF Editor: Tell us<br />
about your experience<br />
at the <strong>Academy</strong><br />
Lorie: I have three<br />
certifications from the<br />
<strong>Academy</strong>: Window<br />
Treatments Career<br />
Professional Program,<br />
Advanced Window<br />
Treatment Career<br />
Professional Program,<br />
Arched and Unusual<br />
Swags, and The<br />
Cornice Professional<br />
Program. One of my<br />
favorite classes was<br />
Design services and fine<br />
furnishings<br />
for the home.<br />
38 The <strong>Custom</strong> <strong>Home</strong> <strong>Furnishings</strong> Magazine November/December 2006
CHF <strong>Academy</strong> Success Story<br />
Lorie Albitz<br />
Arched and Unusual Swags where we learned to manipulate<br />
fabric into swags of all shapes and sizes without a pattern. I<br />
learned something important from each of the classes and an<br />
invaluable education from each of the <strong>Academy</strong> Instructors.<br />
Sometimes it was just a matter of confirmation that I was<br />
doing something correctly. Other times it was some small<br />
adjustment to something making it more professional or less<br />
time consuming. It might have taken me years to figure these<br />
things out on my own.<br />
Studio and<br />
fabrication<br />
area.<br />
CHF Editor: What are your goals for your business now<br />
Lorie: To continue to grow my business by offering<br />
excellence in customer service and design along with the<br />
highest quality in the fabrication of all types of soft home<br />
furnishings.<br />
CHF Editor: What other things have you done to help<br />
achieve your goals<br />
Lorie: I have had two opportunities to do Designer Show<br />
houses. One with a Designer as a teamed joint business<br />
venture and the other fabrication for a designers’ show<br />
vignette. I am a member of The Window Coverings<br />
Association of America and the Greater Detroit Workroom<br />
Association.<br />
CHF Editor: What advice would you give to fellow <strong>Custom</strong><br />
<strong>Home</strong> <strong>Furnishings</strong> professionals<br />
Lorie: Continually strive for excellence in all areas of your<br />
business. Build sound relationships with your clients.<br />
Educate them to the type of quality you can provide. Update<br />
your business plan with new goals periodically. It’s much<br />
easier to achieve goals if they are in writing. Photograph all<br />
your work. You will have ideas to show your new customers<br />
and a reminder of your achievements. Be yourself and love<br />
what you do. Always remember and be thankful for those<br />
people who have helped you advance in your business. I<br />
will always be grateful for the Designer who gave me my<br />
first chance and to those women in the Greater Detroit<br />
Workroom Association who have taught and helped me. And<br />
thanks to my Instructors at the CHF <strong>Academy</strong>. All of you<br />
made my work life easier.<br />
Office and<br />
cutting room.<br />
Pictured here is<br />
the JR Cutting<br />
Machine.<br />
Window<br />
treatment<br />
in progress.<br />
Designing<br />
unusual<br />
cascades.<br />
Arched Soft<br />
cornice<br />
with bump<br />
interlined<br />
goblet<br />
pleated<br />
drapery<br />
panels and<br />
upholstered<br />
chairs.<br />
www.CHFmagazine.com November/December 2006 39
Book Review<br />
Zona Tiller<br />
Eat That Frog!<br />
By Brian Tracy<br />
If in the morning you have to “eat a live frog,”<br />
you know that when you have accomplished<br />
that task it is probably the worst thing you<br />
will have to do all day. Why just sit and look<br />
at it Get it done!<br />
I have just finished reading Eat that Frog,<br />
by Brian Tracy. It is a very good book about<br />
organizing yourself to keep from being a<br />
procrastinator. While reading the forum for years,<br />
I have noticed that some time after Christmas,<br />
in the dead of winter, some people have trouble<br />
getting back into gear. And we also think of goals<br />
we need to set for the New Year. This book will<br />
help you accomplish just that.<br />
Highly productive people take the time to think,<br />
plan, and set priorities. They move quickly and<br />
strongly toward their goals and objectives. They<br />
work steadily, smoothly and continuously and<br />
seem to get through enormous amounts of work<br />
in the same time period that the average person<br />
spends socializing, wasting time, and working<br />
on low-value activities. How can we be that<br />
productive person<br />
Brian Tracy starts with seven methods for<br />
overcoming procrastination.<br />
1. Decide exactly what you want.<br />
Know what your goals for your business are–for a<br />
week or even a day. Know what projects need to<br />
be done and prioritize them.<br />
2. Write it down.<br />
If it isn’t written down it’s just a wish or a<br />
fantasy. Become a list writer. By writing down<br />
goals you could accomplish 5 to 10 more goals<br />
than someone who doesn’t write them down.<br />
3. Set a deadline.<br />
You need a beginning and an end. Without the<br />
deadline you could procrastinate forever.<br />
4. Make a list.<br />
A list of everything you need to accomplish your<br />
goal will give you a visual picture. Do you have<br />
all the supplies on hand to complete the project<br />
Have everything there before you begin.<br />
5. Organize your list into a plan.<br />
Organize by priority and sequence. Know in your<br />
mind how to complete the project. Look and study<br />
your pattern if you are using one. Or know what<br />
steps and sequence you need to follow to complete<br />
the treatment. Plan it all out before you begin.<br />
6. Take action immediately.<br />
Do something. Do anything.<br />
7. Do something every day toward the goal.<br />
Keep moving forward. Once you start moving,<br />
don’t stop. This <strong>dec</strong>ision alone can make you<br />
productive and successful.<br />
Clear written goals have a wonderful effect on<br />
your thinking. They stimulate your creativity,<br />
release your energy, and help you overcome<br />
procrastination.<br />
Plan each day in the order of importance. This<br />
is the ABCDE method. Think about each task<br />
and start with the one thing that must get done.<br />
Choose something that will bring negative<br />
consequences if it’s not done. This is your “A”<br />
task.<br />
In our business, an “A” task might be a project<br />
that needs to be installed by the end of the week.<br />
If you have several treatments to do, in different<br />
sizes or different ranges of difficulties, start with<br />
the largest or most difficult item. The job will<br />
move along so much easier knowing the worst<br />
one is out of the way. When the “A” task is done,<br />
continue on to the “B” task.<br />
40 The <strong>Custom</strong> <strong>Home</strong> <strong>Furnishings</strong> Magazine November/December 2006
Book Review<br />
Zona Tiller<br />
A “B” task is something you should do. This<br />
would be something that has only mild negative<br />
consequences. This could be a phone call or a<br />
measurement that doesn’t have an immediate<br />
deadline.<br />
A “C” task is something that would be nice to<br />
have done. This task has no negative consequences<br />
at all. For example, having lunch with a<br />
friend. This task would have no adverse effect on<br />
your business, but it would be enjoyable if you<br />
had the time.<br />
A “D” task is something you could delegate to<br />
someone else. If someone else can do it, let it go<br />
and let them do it.<br />
An “E” task is something you can eliminate<br />
totally. This would be something that really has<br />
no relevance to your business at all. Maybe it is<br />
something you do out of habit or just because you<br />
enjoy it. Think about it though, is it really helping<br />
my business<br />
Discipline yourself each day to start immediately<br />
with your “A” task. Start that project and don’t<br />
stop until it’s done. Set goals for the day that can<br />
realistically be done in a day. To get through all<br />
the tasks for the day or the week, plan in advance.<br />
Be sure you have all the tools and supplies you<br />
need to get the job done. If you have to lay the<br />
project aside because you don’t have all the<br />
supplies, that’s your excuse to procrastinate.<br />
Are you really proficient in several treatments<br />
but have one or two that you are very slow at<br />
or maybe just don’t do as well That weakness<br />
can cause you to slow down or procrastinate.<br />
The feeling of inadequacy or lack of confidence<br />
can cause you to delay a project. Here’s a plug<br />
for the CHF <strong>Academy</strong>. Spend a weekend there<br />
or a week with the professional instructors and<br />
become proficient in that treatment. By becoming<br />
proficient in that treatment you eliminate one<br />
more reason to procrastinate.<br />
Always look for ways to upgrade your skills.<br />
Pat Riley a basketball coach said, “If you’re not<br />
getting better, you’re getting worse.” Remember,<br />
continuous learning is the minimum requirement<br />
for success in any field. There are many ways for<br />
you to continue your education in our industry.<br />
Educate yourself with books of all topics, attend<br />
the conferences, read this magazine from cover-tocover,<br />
read the forum, find a local WCAA.<br />
Being healthy is another way to be proficient. With<br />
proper rest, food, and water, you will generate<br />
enough energy to use throughout the day. Most<br />
people are at their best early in the morning. But<br />
whenever your peak time is, identify it, and work<br />
at that project you’ve been dreading when you are<br />
at your peak performance. There’s nothing worse<br />
than to start a project that is difficult or you’re not<br />
really fond of doing when you’re tired or hungry.<br />
The more tired or hungry you get, the worse your<br />
work gets and the more mistakes you make. By<br />
eating healthy, exercising regularly, and getting<br />
enough rest you’ll get more and better work done<br />
easier and with greater satisfaction.<br />
Another key to staying motivated not to<br />
procrastinate is what you tell yourself. Are you<br />
your own personal cheerleader Ninety-five<br />
percent of your emotions, positive or negative,<br />
are determined by how you talk to yourself on a<br />
minute-by-minute basis. Become an optimist. Your<br />
level of self-esteem is central to your levels of<br />
motivation and persistence. Visualize your goals<br />
and talk to yourself positively to boost your selfesteem.<br />
You will feel focused and energized.<br />
To conclude, TAKE ACTION! Once you start,<br />
persevere without any distractions until you are<br />
100% done. Just do it! EAT THAT FROG!<br />
Zona Tiller has been in the window coverings business<br />
for 25 years and has one employee. She has a home-based<br />
workroom, serving designers and retail clients. Zona<br />
specializes in designing and fabricating window coverings<br />
along with upholstery and slipcovers. She has also taught at<br />
the CHF Conferences.<br />
Editor's Note: You can get a copy of this book at<br />
your favorite bookstore or online at amazon.com.<br />
www.CHFmagazine.com November/December 2006 41
Mitered Flange Pillow Sham<br />
Donna Ayesh<br />
Mitered Flange Pillow Sham<br />
This pillow has a contrast mitered flange on both<br />
the front and back. The flange is inserted in the<br />
seam, much like a trim. You can use this technique<br />
on any size pillow–square or rectangular.<br />
1. For a 26" Euro sham, cut a 27" square each of face<br />
fabric, interlining, and lining, as well as the back fabric,<br />
interlining and lining. (It is easiest to cut all three layers<br />
together if possible.) See Illustration 1.<br />
2. Serge all 4 sides of back layers together. (I use a threethread<br />
serge.) Pin layers of front together.<br />
See Illustration 2.<br />
3. For a 2½" wide finished flange, cut 4 strips 6" wide<br />
(flange width x 2 + 1") by 33" long (pillow size + 2x<br />
flange width + 2). Press in half lengthwise, right side<br />
out. (For a different flange fabric on the back, seam two<br />
strips together to form one 6" wide strip for this step.)<br />
See Illustration 3.<br />
4. From center point of first strip, measure 13" out (half<br />
of finished size of pillow), on each side, and draw a line,<br />
(Line A).<br />
5. Chalk mark ½" seam allowances, (Line B) perpendicular<br />
to each Line A.<br />
6. From the center of each Line A, measure and mark 2 ½"<br />
towards outside edge with a pin (Mark C).<br />
See Illustration 4.<br />
11. Turn corners, and make a crisp point. (I gently use a<br />
shish-kabob skewer.) Be careful to keep seam allowances<br />
pressed open. Press on fold and form a square.<br />
See Illustration 9 and 10.<br />
12. Attach flange to front section, as you would a trim or<br />
welt cord. Use a long, loose stitch a little less than the<br />
½" seam line to hold in place. See Illustration 11.<br />
13. At the corners, be sure not to stitch into the flange.<br />
Leaving the seam allowance free allows you to open the<br />
corner appropriately. Stitch from corner to corner, back<br />
stitching at beginning and end. Do this for all four sides.<br />
See Illustration 12 and 13.<br />
14. Serge all four sides of front. See Illustration 14.<br />
7. Draw a line from Mark C to each point where Lines A<br />
and B meet. This will be the stitching line.<br />
See Illustration 5.<br />
8. Join this marked strip with an unmarked strip on each<br />
end, right sides together. Stitch together only on the lines<br />
you drew in Step 7, leaving the seam allowances free. Be<br />
sure to back stitch or tie off at the beginning and end so<br />
that stitches do not come loose. See Illustration 6.<br />
Illustration 1 Illustration 2<br />
9. On each of the two strips you just attached, measure,<br />
then mark 26" from Line A (the base of the triangle just<br />
stitched). Draw a line and repeat steps 4, 5, 6 and 7.<br />
Attach the fourth strip and stitch all four corners in the<br />
same way. Pre-match stripes or plaids prior to cutting.<br />
10. Clip ¼" from stitching. Press seam open. (I have found<br />
that my mother’s well-used point press works great for<br />
this.) See Illustration 7 and 8.<br />
Illustration 3<br />
42 The <strong>Custom</strong> <strong>Home</strong> <strong>Furnishings</strong> Magazine November/December 2006
Mitered Flange Pillow Sham<br />
Donna Ayesh<br />
A<br />
C<br />
A<br />
15. For zipper in the seam, cut zipper 3" less than finished<br />
pillow size. For this 26" pillow, cut a 23" zipper. Lay<br />
centered, face down on bottom edge of front with zipper<br />
foot on your left. Begin and end stitching 2½" from<br />
each edge. Stitch fairly close to teeth, with ½" seam. See<br />
Illustration 15.<br />
B<br />
C<br />
B<br />
16. Press under ½" on bottom back of pillow. Attach back to<br />
front on outside 2½" on each side of the zipper, pulling<br />
zipper back so as not to stitch it into the seam. See<br />
Illustration 16.<br />
Illustration 4<br />
Illustration 5<br />
17. Turn right sides out, front down, zipper on<br />
bottom edge. See Illustration 17.<br />
18. Roll the pillow back towards you, and pin<br />
½" fold line to bottom seam line.<br />
See Illustration 18.<br />
Illustration 6 Illustration 7<br />
19. Open pillow flat, with front of pillow on<br />
your left, back of pillow on your right,<br />
seam open on bottom edge with flange<br />
folded to the left. Top stitch the zipper,<br />
½" from folded edge, starting with a<br />
single stitch, then back stitch, then right<br />
angle turn to stitch down to seam, back<br />
stitch, right angle turn back and continue<br />
stitching a ½" seam. See Illustration 19,<br />
20, and 21.<br />
Illustration 8<br />
Illustration 9<br />
20. Open zipper once you have stitched about<br />
2". Continue stitching ½" from folded<br />
edge, using it as your guide. At the other<br />
end, turn and stitch down ½" to the seam,<br />
back tack, and the zipper is done! See<br />
Illustration 22 and 23.<br />
21. Attach back to front on three remaining<br />
sides, being careful to pin corners out of<br />
the way of stitching. See Illustration 24.<br />
22. Trim corners if too much bulk. Turn right<br />
sides out and insert pillow form.<br />
Illustration 10<br />
Illustration 11 Illustration 12<br />
www.CHFmagazine.com November/December 2006 43
Mitered Flange Pillow Sham<br />
Donna Ayesh<br />
Illustration 13<br />
Illustration 14<br />
Illustration 15<br />
Illustration 16<br />
Illustration 17<br />
Illustration 18<br />
Illustration 19 Illustration 20<br />
Illustration 21<br />
Illustration 22 Illustration 23<br />
Illustration 24<br />
Donna P. Ayesh is the owner of Creative Elegance, a one-person custom drapery workroom with strong<br />
attention to detail located in Hendersonville, NC. In addition to collaborating with designers, her work has<br />
been routinely featured in Calico Corners catalogs and regional store displays. She has been a CHF <strong>Academy</strong><br />
instructor since 2002 and teaches “All About Pillows” and “Fabricating Bed Treatments”.<br />
44 The <strong>Custom</strong> <strong>Home</strong> <strong>Furnishings</strong> Magazine November/December 2006
Mass Mailings<br />
Patty Indrunas<br />
Mass Mailings To Prospective <strong>Custom</strong>ers<br />
Sending postcards in the mail is a great way to<br />
advertise and generate new clients. It is easy to send<br />
from 300 to over a 1,000 postcards in just a few<br />
hours. All without spending arduous hours thinking<br />
of people to send the postcards to and looking up addresses.<br />
The following method allows you to target the market you<br />
believe is most profitable for your business. The secret is<br />
at your fingertips on the internet and on your computer,<br />
assuming you have word processor and spreadsheet<br />
software. I use Microsoft ® Word ® and Excel ® so my<br />
instructions describe how to use these programs.<br />
Recently, I had 1,000 postcards printed (color, front and<br />
back, glossy card stock) for only $121.00, including<br />
shipping. They were delivered to me within a few days of<br />
the order. The cost of postage for<br />
postcards is 24¢, labels for 1,000<br />
postcards is approximately $30,<br />
resulting in a total cost of $391.<br />
Steve Winslow, from Exciting<br />
Windows, reported in a seminar I attended at the Window<br />
Fashions EXPO in Tampa, FL, that you can expect to<br />
receive 2 to 5 responses from 1,000 mailings.<br />
This may seem disappointing at first. But consider this. At<br />
the very least, if you only close one sale from the mailing<br />
and make a profit of $1,000, then your profit of $1,000<br />
divided by $391 is a 255% return on your investment. In<br />
other words, you made more than twice what you spent to<br />
advertise. And it’s likely that your profit will be even higher<br />
if you close more than one sale. If making 255% return<br />
on investment and increasing your business with very little<br />
effort intrigues you, then follow these steps to create your<br />
own mass mailing.<br />
255% return on investment . . . increasing<br />
your business with very little effort.<br />
address from your property appraiser website into Excel ® ,<br />
mail merge this data into label files in Word ® , and print<br />
the labels. Then simply peel the self adhesive labels, stick<br />
them on the postcards, stick on a stamp, and mail. The<br />
property appraiser information is public information and is<br />
available in print at your county archival office. However,<br />
the internet makes it easier to retrieve and easier to use. In<br />
addition, newspapers print new home purchase information.<br />
This information is also easier to retrieve and use from the<br />
internet.<br />
Search the internet for your County’s Property Appraiser<br />
website. For example, www.scpafl.org/scpaweb05/index.<br />
jsp, for Seminole County, Florida. Once on the County<br />
Property Appraiser website select Record Search. Enter<br />
the appropriate selection criteria.<br />
I’ve noticed that some website and<br />
record searches are slightly different.<br />
I like the searches that include a<br />
subdivision name. You might be able<br />
to determine by the home values of a particular subdivision<br />
if it would likely be a good market for custom window<br />
treatments. Some sites allow you to enter a street name.<br />
In this case your search may take more time if you have<br />
to enter many different street names. Other sites select by<br />
Neighborhood Codes. You may be able to call the county<br />
Property Appraiser’s office and get the neighborhood codes<br />
for the selected market. In my case, I selected a subdivision<br />
name and then made a selection for what “section” of the<br />
subdivision. Some subdivisions have thousands of homes.<br />
I <strong>dec</strong>ided to market the most recently built homes in the<br />
subdivision, not because they were newer homes, but<br />
because they were the most expensive.<br />
Property Appraiser Website<br />
Find the County Property Appraiser website on the internet<br />
and look for record search capability. Hopefully, the county<br />
you are wanting to mail has this capability. I researched<br />
several in the state of Florida and all did have record search<br />
capability. I also researched a few counties in Georgia and<br />
Tennessee. Some had record search capability and some<br />
did not. The idea is to export the homeowner’s name and<br />
Excel ® File<br />
Once the selected list of homeowners is displayed, right<br />
click on a blank spot on the screen and choose “Export<br />
to Microsoft ® Excel ® ”. It may take several seconds for<br />
an Excel ® window to open and load all the data from the<br />
website.<br />
This Excel® file will be your Recipient Source document for<br />
Word ® (discussed later). Save the file. It is very important<br />
www.CHFmagazine.com November/December 2006 45
Mass Mailings<br />
Patty Indrunas<br />
that you take time to study the data in the file. Determine<br />
what Excel® columns you want to print on your label.<br />
Review the homeowner’s name. Are the names in first name,<br />
last name order If you want to address the label to the<br />
homeowner’s name, you will need to edit<br />
the Excel ® file. The easiest way to do this<br />
is insert a column next to the homeowner’s<br />
name column and just start retyping in the<br />
new column. It actually goes pretty quickly,<br />
since you can view the homeowner’s name<br />
in the column to your left and just retype<br />
the name as you want it to appear. If you<br />
do not want to address the label with the<br />
homeowner’s name, you can always send it to “Resident”<br />
and only use the street address from the Excel ® file.<br />
The city, state, and zip code are not usually on the property<br />
appraiser site. Be sure that the selections from the property<br />
appraiser site are from the same city, state, and zip. I can’t<br />
imagine anything different but it bears mentioning.<br />
You must have a blank line as the first row<br />
of data. Every preceding row should contain<br />
the homeowner information. If this is not the<br />
case, perform the necessary steps in Excel ® to<br />
accomplish this.<br />
Save the Excel® file.<br />
Word ® File<br />
Open Word ® . Select a new document. Select<br />
Tools, Letters and Mailings, Mail Merge Wizard. A new<br />
window will open to the right of the document. Select<br />
Labels. Notice at the bottom of the Mail Merge Wizard<br />
window the steps you can follow to complete the mail<br />
merge task. Step 1 is completed when you select Labels.<br />
Now select Next, Starting document. Select Label Options.<br />
A new window will appear. Select the appropriate label<br />
that you want to use. Select OK. I used office supply store<br />
brand labels because they were slightly<br />
cheaper than brand name labels. Office<br />
supply store brand labels usually indicate<br />
the corresponding brand label number on<br />
the box. After you select the label number,<br />
Word ® will format the document to look<br />
like the label layout. This is SO cool.<br />
«F2»<br />
«F3»<br />
Oviedo, FL 32765<br />
«F2»<br />
«F3»<br />
Oviedo, FL 32765<br />
«Next Record»«F2»<br />
«F3»<br />
Oviedo, FL 32765<br />
My <strong>Custom</strong>er #1<br />
123 Their Street<br />
Oviedo, FL 32765<br />
My <strong>Custom</strong>er #4<br />
1011 Their Street<br />
Oviedo, FL 32765<br />
Save this document as the label layout document. You have<br />
completed Step 2.<br />
Before going any further in the Mail Merge Wizard, insert<br />
the fields from the Excel® file that you want to print on<br />
Illustration 1.<br />
the labels. You only need to do this for the 1 st label. Select<br />
Insert:Field:Category Mail Merge:MergeField, and enter<br />
the field name as F1, F2, or F3, etc. It is very important to<br />
enter the correct column from the Excel ® spreadsheet. Since<br />
the first line of the Excel ® spreadsheet is blank, Word ® will<br />
automatically assign the column with field names beginning<br />
with F1, F2, F3, etc., corresponding to Excel ® columns A,<br />
B, C, respectively. For example, if the homeowner’s name is<br />
«Next Record»«F2»<br />
«F3»<br />
Oviedo, FL 32765<br />
«Next Record»«F2»<br />
«F3»<br />
Oviedo, FL 32765<br />
Illustration 2.<br />
«Next Record»«F2»<br />
«F3»<br />
Oviedo, FL 32765<br />
«Next Record»«F2»<br />
«F3»<br />
Oviedo, FL 32765<br />
in column B, then enter F2 in the document where you want<br />
the homeowner’s name to appear. Insert all fields for the 1 st<br />
label ONLY. Enter the city, state and zip. At this point, the<br />
label document may look like the one in Illustration 1. Save<br />
this file, again, as your label layout document.<br />
Proceed to the next step of Mail Merge Wizard by selecting<br />
Next: Select Recipients: Browse. Use the window buttons<br />
to search for the location of the Excel® file and select. The<br />
My <strong>Custom</strong>er #2<br />
456 Their Street<br />
Oviedo, FL 32765<br />
My <strong>Custom</strong>er #5<br />
1213 Their Street<br />
Oviedo, FL 32765<br />
Illustration 3.<br />
My <strong>Custom</strong>er #3<br />
789 Their Street<br />
Oviedo, FL 32765<br />
My <strong>Custom</strong>er #6<br />
1415 Their Street<br />
Oviedo, FL 32765<br />
46 The <strong>Custom</strong> <strong>Home</strong> <strong>Furnishings</strong> Magazine November/December 2006
Mass Mailings Patty Indrunas<br />
Select Table window will appear. Select the data sheet that<br />
contains the Generated External Data. Select the box that<br />
indicates the first row of data is the heading. Since your<br />
first row of data is blank, Word ® will default to naming the<br />
column headings as F1, F2, F3, etc., as previously explained.<br />
Select OK. The Mail Merge Recipients window will appear.<br />
Select, Select All, assuming you want to insert all the names<br />
and addresses into the label file. You can also sort the data if<br />
you wish. Select OK. At this point the merge is NOT done.<br />
You will notice that commands have been<br />
entered for each label.<br />
Select Arrange Your Labels. Select Update All Labels. This<br />
option will copy the inserted fields and any typed data from<br />
the first label to all label areas. See Illustration 2. Save this<br />
file again, as your label layout document.<br />
Select Next: Preview the labels. Word ® will now merge the<br />
Excel ® data into the Word ® file. Only one page of labels<br />
are merged at this point. To complete the merge, select Edit<br />
individual labels. Select all. A new document is created with<br />
all the labels. See Illustration 3. Save this document with a<br />
different name. This is the document you will use to actually<br />
print the labels. You should have two Word ® documents:<br />
1) the label layout document, which can be used to print<br />
multiple labels using different recipient source files, and 2)<br />
Microsoft, Word, and Excel are either registered trademarks or trademarks of<br />
Microsoft Corporation in the United States and/or other countries.<br />
Great Use For Those Leftovers<br />
What do you do with the extra 10"<br />
of the client’s tassel trim Make<br />
angel ornaments or gift tags out of them.<br />
The angel ornament pictured on the right<br />
is made from one tassel of Malibu Trim,<br />
beads and buttons. The angel’s hair is<br />
made from the collection of silky threads<br />
used to attach it to the gimp. You can<br />
easily make a handful of ornaments from<br />
just a few inches of leftover tassel trim.<br />
Key tassels, which are a little larger, also make adorable<br />
angel ornaments. The singing angel tassel, pictured in the<br />
center, uses 3" of ribbon for the wings, and 1 bead and one<br />
button for the halo. A fine permanent marker quickly creates<br />
the face.<br />
the actual label file with the merged names and addresses.<br />
I saved each label file containing the name and addresses<br />
for each subdivision so I can easily produce labels for this<br />
market in the future.<br />
I realize that these steps may seem complicated because<br />
of the detailed information, but don’t be deterred. Spend<br />
an hour one evening researching your property appraiser<br />
website and exploring the possibilities.<br />
Automatic Mass Mailing<br />
Another method of mass mailing I’ve discovered is to use<br />
a service like Quantum Mail, at www.quantummail.com.<br />
Quantum Mail allows you to upload the postcard design to<br />
their website and for a small fee they mail the postcard to<br />
selected homes using a street name or a neighborhood. You<br />
can print as little as 30 postcards. I recently used their service<br />
to mail 50 jumbo cards (8½" x 5½") to 50 addresses, for<br />
only $30.<br />
Good luck.<br />
Patty Indrunas is the owner of Sew Divine, a<br />
retail workroom in Oviedo, FL. She opened<br />
her business in the Fall of 2006, and is<br />
currently serving as president of the WCAA<br />
Central Florida chapter. She can be reached<br />
at sewdivine@cfl.rr.com and her website is<br />
www.sewdivine.net.<br />
Don’t discard your empty thread<br />
spools in the upcoming year. Save<br />
them. I purchased the “empty spool”<br />
snowman, pictured on the left, but<br />
you could easily make your own.<br />
Glue the spools together and wrap<br />
them with a few coordinated scraps<br />
from your client’s room. They’ll be<br />
reminded of you every Christmas.<br />
Susan Kindel<br />
SK Fabric Interiors<br />
Gainesville, VA<br />
Editor's Note: Susan’s Christmas Tree is featured on page 9.<br />
www.CHFmagazine.com November/December 2006 47
Step-by-Step<br />
Chris Watt<br />
Flat Roman Shades<br />
Kicked Up A Notch!<br />
Figure 1: Side Wall Before<br />
Thoughtful planning and vision can<br />
take a “simple” flat Roman shade<br />
and “kick it up a notch” resulting in<br />
an extraordinarily custom shade that<br />
can place your workroom reputation well above<br />
others. Our designers and clients often do not<br />
understand that there is a difference. It is within<br />
our abilities to educate them. But be careful, once<br />
they learn what the possibilities can be, their<br />
expectations (and yours) will never be the same!<br />
I recently completed a job, for Interior Designer, Jo Ann<br />
James, that is a perfect example of such a situation.<br />
The design of the shades—flat Roman shades made out of<br />
paisley fabric with plain contrast 3" bottom banding, the<br />
band exposed 2" when pulled up—was nothing unusual.<br />
However, this job had a number of special circumstances and<br />
illustrates why there are no “standards” for Roman shade<br />
construction in my workroom.<br />
The Project<br />
Window covering for side-by-side windows, Figures 1 and 2.<br />
8 flat Roman shades with contrast hems,<br />
3" exposed when lowered,<br />
2" skirt exposed when raised.<br />
4 shades, 34" x 70" (inside mount).<br />
4 shades, 34" x 92" (outside mount).<br />
The fabric is from Lee Jofa and has a 19.5" repeat.<br />
The Challenge<br />
1. All shades must have consistent fabric repeat placement,<br />
starting at the top.<br />
2. Each fold must have the same pattern placement.<br />
3. The shades must look identical when raised.<br />
4. No face fabric should be visible from the outside of the<br />
home.<br />
5. The clutch lift system must be concealed so it will not be<br />
seen from the outside or inside of the home.<br />
Figure 2: Back Wall Before<br />
The Planning Process<br />
1. Determine the ring spacing overall.<br />
Since the fabric has a 19.5" pattern repeat, I divided<br />
this number by 2 and established the primary spacing at<br />
9.75". This spacing results in every other fold showing<br />
the same pattern at the bottom. (For a 24" or 27" repeat,<br />
consider dividing into thirds, resulting in every third fold<br />
showing the same pattern at the bottom edge. This will<br />
still create a consistent and pleasing pattern of folds when<br />
the shades are raised.)<br />
2. Find a way to get side-by-side shades of different lengths<br />
to look identical when raised.<br />
I had already <strong>dec</strong>ided to start the first row of rings from<br />
the top of the board at 11.75", then space all other rows<br />
every 9.75" (1/2 of 19.5" pattern repeat). The last row<br />
of rings needed to be appropriately placed to reveal 2"<br />
of bottom skirt (the contrast). In a mock-up, I folded the<br />
shade and noted that the flap between the rings is about<br />
half the space between the rings (4 7/8"). I rounded this<br />
up to 5" and determined that to expose 2" of skirt, the<br />
48 The <strong>Custom</strong> <strong>Home</strong> <strong>Furnishings</strong> Magazine November/December 2006
Step-by-Step<br />
Chris Watt<br />
bottom row of rings needed to start 7" up<br />
from the bottom of the shade (5 + 2 = 7).<br />
This seemed straight-forward enough,<br />
BUT I was working with a pattern repeat,<br />
and consequently, the next row of rings<br />
(up from the bottom) for the 70"L shade<br />
was 2" from the first row, and for the<br />
92"L shade, it was 5". See Figure 3.<br />
Note: There MUST be at least 2" in that<br />
first space to give the fabric between the<br />
rings enough weight to lay down. If less<br />
than 2", the fold will end up pushing the<br />
other folds forward. To avoid this, you<br />
can manipulate that top row of rings. But<br />
remember, the other rows of rings between<br />
must remain at 9.75" (for a 19.5" repeat)<br />
to work with the repeat.<br />
The exterior of the home is white and soft<br />
gray. To keep the reveal of the face fabrics<br />
to a minimum:<br />
3. Plan the lining to cover all but ½" on the 2 sides and<br />
bottom; and<br />
4. Plan cuts as follows<br />
a) Cut face fabric width at FW + 3" (1.5" single side<br />
hems).<br />
b) Cut face fabric length at FL + 2. The shades have a 2"<br />
allowance for the top of the board. Since there will be<br />
a 3" band sewn at the bottom (with a 2" reveal), no<br />
fabric has been allowed for a hem in the face fabric. Be<br />
sure to note the pattern placement at the top before the<br />
cut! Work with the repeat.<br />
c) Cut lining width at FW + 1" (1" single side hem will<br />
finish ½" less than FW of shade).<br />
d) Cut lining length at FL + 8".<br />
e) For the 4 inside mount shades, cut lining for aprons on<br />
the back of the head rail to conceal the clutches. I save<br />
8" strips of lining with the selvage on the edge for this<br />
application. Cut the apron width the finished width of<br />
the shade + 1.5".<br />
f) Cut the bottom band fabric @ FW + 2" and 7.25"<br />
Long (for 3" finished band + Seam allowance)<br />
g) For the 4 outside mount shades, cut 8 “returns”<br />
from the face fabric. The returns need to finish at the<br />
depth of the head rail (1.5" in this case) + 2" to tuck<br />
in behind the shade x approximately 5" long. Cut<br />
Figure 3: 92" shade ring spacing on left.<br />
70" shade ring spacing on right.<br />
rectangles from the face fabric 4.5 (1.5 + 2 + 1"<br />
seam allowance) x 14" (5" x 2 + 4 to staple on top<br />
of the board). Pattern match returns with shades.<br />
Construction<br />
NOTE: These instructions do not describe how to put a<br />
clutch system together. They are instructions for making<br />
shades only.<br />
1. Prepare the face fabric, pressing in 1.5" single side<br />
hems (taking into account turn of the cloth factors to<br />
achieve an accurate finished width).<br />
2. Prepare the lining the same, but with only 1" single<br />
side hems pressed in and press in a double 3" hem.<br />
Bortenfix the hem in place. (The width of the lining<br />
will be a total of 1" less than the face fabric or ¹⁄₂"<br />
on each side.)<br />
3. Prepare the band by steaming ³/₈" Bortenfix on<br />
both long sides on the right side of the fabric. Press<br />
under using the paper tape to keep the edge straight<br />
and crisp.<br />
5. Carefully, remove the paper and place the band on<br />
the face of the shade using the tacky tape to position<br />
perfectly. Steam to the face of the shade only, leaving<br />
1" on each side to finish later.<br />
4. Take shade to the sewing machine. Flip up the band<br />
and stitch in the crease.<br />
6. Back on the table, place the shade face down and<br />
remove the paper on the hem of the banding,<br />
www.CHFmagazine.com November/December 2006 49
Step-by-Step<br />
Chris Watt<br />
carefully placing it edge on top of the bobbin thread,<br />
just a “smidgen” above that line of stitching.<br />
7. For this step, be sure that the bobbin thread matches<br />
the band. Stitch the band from the front, stitching in the<br />
ditch (see Figure 4), between the shade and the band.<br />
Because I döfix’ed the back band up that smidgen, the<br />
stitching caught the back layer perfectly.<br />
Figure 4: Stitching in the ditch to attach banding<br />
from the front of the shade.<br />
8. Turn and finish the 1" on each side, inserting the weight<br />
bar. Poof, the band is on, weight bar is in place, and the<br />
hem is done!<br />
9. Lay the shade back on the table face down. Press and<br />
square.<br />
10. Lay the lining on top (wrong sides together) and<br />
position so the face is exposed ½" on both sides and<br />
the bottom. See Figure 5.<br />
11. Make the ring placement “template”. On the blank<br />
side of a long ruler, adhere a strip of masking or blue<br />
painter’s tape along the edge. Start at the top (noting<br />
the top) and mark where each row of rings gets sewn<br />
on. (If you need a longer template, add another ruler/<br />
yardstick, or anything to achieve the length needed.)<br />
12. Using the template, mark the ring placement with<br />
disappearing ink. See Figure 6. Sew on rings with<br />
4 strands of thread, doubled. Tie and dot knots with<br />
glue. The rings will hold the lining and face fabric<br />
together.<br />
13. Staple the top of the shades for the inside mount to<br />
the board, keeping<br />
everything square and<br />
being mindful of the<br />
finished length. It is<br />
important to keep the<br />
fabric on the top of the<br />
board as flat as possible.<br />
14. For the inside mount<br />
shades, to conceal the<br />
clutch system, add the<br />
apron to the backside of<br />
the board, using those<br />
four 8" lining strips with<br />
the selvage edge.<br />
15. Turn under 1" on each Figure 6: The ring placement.<br />
side to have an apron<br />
about ½" less than the board width.<br />
16. Press ³⁄₈" Bortenfix on the selvage edge.<br />
17. Press the 8" strip at 4.5" and 3.5" (not really in half,<br />
because you want to keep the Bortenfix exposed).<br />
18. Staple the raw edge of the apron on top of the board,<br />
covering the staples that have been used to attach the<br />
shade.<br />
19. Now the Bortenfix on the selvage edge can be<br />
steamed to the top of the board and it will cover all<br />
staples. See Figure 7.<br />
20. For the outside mount shades, it is not necessary to<br />
add an apron to conceal the back of the clutch. But it is<br />
Figure 5: Placing the lining over the back<br />
of the face fabric.<br />
Figure 7: Concealing the clutch with an apron<br />
for inside mount shades.<br />
50 The <strong>Custom</strong> <strong>Home</strong> <strong>Furnishings</strong> Magazine November/December 2006
Step-by-Step<br />
Chris Watt<br />
necessary to conceal visibility from the ends, because<br />
these will protrude into the room. This is accomplished<br />
by using a return, and the return is added before<br />
stapling the shade to the board. Use the eight rectangles<br />
of face fabric you cut for the returns. Remember to<br />
pattern match those returns with the face of the shade.<br />
21. Fold in half lengthwise and sew the side seams.<br />
22. Turn. The returns should now be 3.5" x 7". Press the<br />
fold so it maintains the crease, or use Sealah wire to<br />
maintain the fold.<br />
23. Staple these to the ends of the board, with 2" to the top<br />
and 2" around the corner to the front of the board.<br />
24. Now staple the shade on the board, keeping everything<br />
square. See Figure 8.<br />
25. Now it is time to pre-drill holes in the mount boards for<br />
installation. Be careful. Avoid catching a thread as you<br />
drill through the fabric.<br />
Figure 8: Outside mount shades with returns.<br />
Note pattern matching.<br />
Conclusion<br />
Planning this job was a challenge but provided spectacular<br />
results. See the completed shades in Figures 9 and 10.<br />
Note the consistent pattern placement both at the top and<br />
with each fold. You do not notice that the bottom fold of<br />
the 70" shade is different from the 92" shades.<br />
There were many more shades in this home, but the other<br />
rooms had solid or striped fabrics. I used the same templates<br />
for the other shades, keeping the ring spacing and skirts<br />
exposed to keep consistency throughout the home. (And<br />
also to not have to make any more <strong>dec</strong>isions!)<br />
Figure 9: Side Wall After<br />
As a side bar, I did all this figuring the day after<br />
I had carpal tunnel surgery on my left hand and<br />
then constructed these 8 shades from start to finish<br />
(including installation) in only 4 normal workdays<br />
– with a cast on my left hand. Proof-positive that a<br />
well-planned shade is a fast shade!<br />
Figure 10: Back Wall After<br />
Chris Watt owns a full service drapery<br />
workroom in the San Francisco bay area. Open<br />
since 1976, she has a reputation for being able<br />
to do what others say cannot be done. She<br />
specializes in custom home furnishings and<br />
modifies workroom standards for individual<br />
projects as needed to achieve spectacular<br />
results. Chris is better known within the<br />
industry as The Pillow Lady.<br />
www.CHFmagazine.com November/December 2006 51
Form of the Month<br />
Terri Booser<br />
Calculating Yardage<br />
The key to calculating yardage is allowing for all the necessary allowances — allowances for hems, headers,<br />
returns, overlaps and pattern repeat. This form groups and calculates the allowances and overlaps for you and<br />
walks you through calculating for the pattern repeat. The form also color codes the critical calculations that you<br />
will need to use more than once.<br />
Top line of the form:<br />
Fill in the “given” specifications along the top of the form. FW is the finished width. This is the measurement of the face<br />
of the rod. FL is the finished length of the drapery. VR is the vertical repeat of the fabric you are using. The vertical repeat<br />
should either be submitted to you by the designer or can be found on the back of the fabric sample you are selecting from.<br />
Circle on the form whether you are making a pair of draperies or OWD (One Way Draw). Fill in the return size and the<br />
fabric width.<br />
Length calculation:<br />
The first calculation on this form is the cut length. First, <strong>dec</strong>ide what method of fabrication you will be doing. For top-down<br />
low-bulk, as we do at the CHF <strong>Academy</strong>, the cut allowance will be 12". For a traditional bottom-up method of fabrication,<br />
the cut allowance will be 18". Add the appropriate allowance to the finished length for the cut length before pattern match.<br />
If you are using a solid fabric, skip to the width calculation. If you are using a print, calculate the adjusted cut length.<br />
Adjusted cut length:<br />
The trickiest part of this section is to remember to always round up the number of repeats needed. Divide the cut length just<br />
calculated by the pattern repeats to get a <strong>dec</strong>imal number of how many repeats it takes to obtain that cut length. Round this<br />
number up to the nearest whole number and then multiply it by the repeat size to equal the adjusted cut length.<br />
Width calculation:<br />
Use this calculation to figure out how many widths of material (WOM) are necessary. Multiply the finished width by the<br />
desired fullness. (2½ or 2.5 is generally standard. But you may want 3 times fullness in some cases, such as for sheer fabric.)<br />
Using the chart to the right, add the required allowances for side hems, returns, and overlap, based first on whether you are<br />
making a pair or a one way drawn drapery, then by the size of the return. Only add the one respective number that is in bold<br />
type. The numbers in parenthesis represent how that number was derived. Add the correct allowance, then divide by the<br />
width of the material to obtain a <strong>dec</strong>imal number representing the number of widths of material you need. Since we know<br />
we can not purchase a fraction of a width of material, round this number to a whole number.<br />
Final yardage calculation:<br />
Transfer all the critical numbers to their respective color coded box. Multiply the WOM by the Adjusted Cut length, add<br />
one vertical repeat, and divide by 36 to get the yards needed for that particular drapery. Now add one more vertical repeat.<br />
If the fabric turns out to be a drop match, this extra vertical repeat will allow enough yardage as long as you plan the cuts<br />
accordingly, and it also allows for a specific placement of the pattern. For example, if you want the design of the fabric to<br />
fall in a specific place you must allow one extra repeat so that you have the ability to place the first cut exactly where you<br />
want it. All other cuts will fall within the match planned prior.<br />
Form supplied by Terri Booser, owner of An Interior Stitch.<br />
52 The <strong>Custom</strong> <strong>Home</strong> <strong>Furnishings</strong> Magazine November/December 2006
Form of the Month<br />
Terri Booser<br />
www.CHFmagazine.com November/December 2006 53
Career Professional Graduates<br />
The CHF <strong>Academy</strong><br />
Congratulations to the Latest<br />
Career Professional Graduates!<br />
Window Coverings:<br />
Lorie Albitz, Lake Orion, MI<br />
Janice Buseick, Fernandina Beach, FL<br />
Ana Harsanyi, Southhampton, NY<br />
Karla Herman, Liberty Township, OH<br />
Linda Lennard, Laurel Hill, FL<br />
Sherri Mcginnis, Hildebran, NC<br />
Jeannette Mougalian, Buxton, ME<br />
Sharon Neufville, Bryn Mawr, PA<br />
Dorian Nicolosi, Waxhaw, NC<br />
Martha O'Brien, Athens, GA<br />
Lisa O’Connor, Sharpsburg, GA<br />
Pauline Sagoe, New Hope, MN<br />
Ellen Shobe, Naples, FL<br />
Rita Neal Shreve, Stokesdale, NC<br />
Karen Smith, Lake Wylie, SC<br />
Kristi Wurtz, Chesterfield, MO<br />
Advanced Window Coverings<br />
Karin Conn, Moultonboro, NH<br />
Katie Fisher, Norcross, GA<br />
Sandra L. Garrett, Manassas, VA<br />
Marlene Graham, Tallahassee, FL<br />
Belinda Perry, Idaho Falls, ID<br />
Stephanie F. Stevens, Coldwater, MS<br />
What can the Career Professional Program at The<br />
<strong>Custom</strong> <strong>Home</strong> <strong>Furnishings</strong> <strong>Academy</strong> do for you<br />
The benefits of the program include recognition as<br />
an industry professional, an engraved wall plaque with your<br />
name and program designation, and a camera-ready Career<br />
Professional logo, which can be used on business cards,<br />
letterhead, etc.<br />
All graduates choosing to do so will be announced in The<br />
<strong>Custom</strong> <strong>Home</strong> <strong>Furnishings</strong> Magazine. Your name will also<br />
be listed on the CHF <strong>Academy</strong>’s website, along with a link to<br />
your website. There are seven Career Professional Programs to<br />
choose from: Window Coverings, Advanced Window Coverings,<br />
Professional Slipcovers, Cornice/Headboards, Installation,<br />
Pillows/Bedding, and The Art of Upholstery.<br />
Would you like to be a Career Professional Give the <strong>Academy</strong><br />
a call today at 800-222-1415 (704-333-4636), or visit their<br />
website at www.CHFschool.com.<br />
If your name has not appeared in the list of Career Professional Graduates<br />
and you would like to have it listed, please send an email with your name,<br />
city, and state to editor@chfschool.com.<br />
Installation:<br />
Anthony Bucciarelli, Nokomis, FL<br />
Dennis Bucciarelli, Nokomis, FL<br />
Dow Kirkland, Jonesboro, GA<br />
Mark Leger, Orange, TX<br />
Belinda Perry, Idaho Falls, ID<br />
Fred D. Stanley<br />
Scott Turner, Warwick, Bermuda<br />
Tony Worthington, Stoneville, NC<br />
Lori Yoder, Fleetwood, PA<br />
Pillows:<br />
Kelly Geraghty, Denver, NC<br />
Slipcovers:<br />
Carol Collord, Medway, MA<br />
Jannese Gerkin, Oak Ridge, NC<br />
Belinda Perry, Idaho Falls, ID<br />
Sherree Salmon, Ontario, Canada<br />
Upholstery:<br />
Harriet Rice, Sterling Heights, MI<br />
54 The <strong>Custom</strong> <strong>Home</strong> <strong>Furnishings</strong> Magazine November/December 2006
2007 <strong>Custom</strong> <strong>Home</strong> <strong>Furnishings</strong> <strong>Academy</strong> Schedule<br />
800-222-1415 (704) 333-4636 ~ www.CHFschool.com<br />
January 2007<br />
3-4 Starting and Operating a Workroom (WT100)<br />
5-9 Workroom Shortcuts, Draperies, and Shades (WT 101)<br />
5-9 Installation 101<br />
10-11 Installation 102<br />
11-14 Swags, Top Treatments, and Embellishments (WT 102)<br />
14-15 Slipcover 101 - Parsons Chairs<br />
16-19 Slipcovers 102 - Fit-Like-A-Glove Slipcovers<br />
16-20 Advanced Top Treatments and Shades (WT 103)<br />
20-21 Slipcovers 103 - Slipcover Details<br />
21-24 High-end Fabrication Methods (WT 104)<br />
24-30 The Art of Upholstery<br />
25-27 Pillows<br />
28-31 Bed Covering Fabrication<br />
February 2007<br />
1-4 Headboards and Ottomans<br />
3-4 Starting and Operating a Workroom (WT100)<br />
5-7 Corona's, Bed Canopies, and Awnings<br />
5-9 Workroom Shortcuts, Draperies, and Shades (WT 101)<br />
11-12 Basic Cornices<br />
11-14 Swags, Top Treatments, and Embellishments (WT 102)<br />
13-14 Advanced Cornices<br />
13-14 Knock Your Socks Off Presentations<br />
19-20 Window Treatments for Designers<br />
19-21 Outdoor Living<br />
19-23 Advanced Top Treatments and Shades (WT 103)<br />
22-23 Business Plan from Start to Finish<br />
24-27 High-end Fabrication Methods (WT 104)<br />
28-3/1 Starting and Operating a Workroom (WT100)<br />
March 2007<br />
3-4 Lifestyle Marketing<br />
2-6 Workroom Shortcuts, Draperies, and Shades (WT 101)<br />
8-11 Swags, Top Treatments, and Embellishments (WT 102)<br />
10-14 Installation 101<br />
13-17 Advanced Top Treatments and Shades (WT 103)<br />
15-16 Installation 102<br />
18-21 High-end Fabrication Methods (WT 104)<br />
23-25 The Challenge (WT 105)<br />
24-25 Starting and Operating a Workroom (WT100)<br />
26-30 Workroom Shortcuts, Draperies, and Shades (WT 101)<br />
April 2007<br />
1-4 Swags, Top Treatments, and Embellishments (WT 102)<br />
10-16 Art of Upholstery<br />
16-18 Draping and Drafting Window Treatment Patterns<br />
17-18 Slipcover 101 - Parsons Chairs<br />
11-14 Swags, Top Treatments, and Embellishments (WT 102)<br />
14-15 Slipcover 101 - Parsons Chairs<br />
19-21 The Challenge (WT 105)<br />
19-22 Slipcovers 102 - Fit-Like-A-Glove Slipcovers<br />
23-24 Slipcovers 103 - Slipcover Details<br />
23-25 All About Pillows<br />
25-27 Outdoor Living<br />
26-29 Bed Treatment Fabrication<br />
28-29 Business Plan from Start to Finish<br />
28-29 Starting and Operating a Workroom (WT100)<br />
30-5/4 Workroom Shortcuts, Draperies, and Shades (WT 101)<br />
May 2007<br />
5-9 Installation 101<br />
6-9 Swags, Top Treatments, and Embellishments (WT 102)<br />
10-11 Installation 102<br />
11-15 Advanced Top Treatments and Shades (WT 103)<br />
16-19 High-end Fabrication Methods (WT 104)<br />
17-18 Basic Cornices<br />
19-20 Advanced Cornices<br />
21-23 Corona's, Bed Canopies, and Awnings<br />
30-31 Starting and Operating a Workroom (WT100)<br />
June 2007<br />
1-5 Workroom Shortcuts, Draperies, and Shades (WT 101)<br />
7-10 Swags, Top Treatments, and Embellishments (WT 102)<br />
12-14 Outdoor Living<br />
12-14 Installation For The Workroom<br />
15-16 Slipcover 101 - Parsons Chairs<br />
17-20 Slipcovers 102 - Fit-Like-A-Glove Slipcovers<br />
18-19 Starting and Operating a Workroom (WT100)<br />
20-24 Workroom Shortcuts, Draperies, and Shades (WT 101)<br />
21-22 Slipcovers 103 - Slipcover Details<br />
23-24 Business Plan from Start to Finish<br />
26-29 Swags, Top Treatments, and Embellishments (WT 102)<br />
July 2007<br />
6-7 Starting and Operating a Workroom (WT100)<br />
6-10 Installation 101 - Professional Installation Techniques<br />
8-12 Workroom Shortcuts, Draperies, and Shades (WT 101)<br />
11-12 Installation 102 - Advanced Installation Technique<br />
14-17 Swags, Top Treatments, and Embellishments (WT 102)<br />
14-20 Art of Upholstery<br />
19-23 Advanced Top Treatments and Shades (WT 103)<br />
22-25 Ottomans and Headboards<br />
24-27 High-end Fabrication Methods (WT 104)<br />
29-31 Draping and Drafting Window Treatment Patterns<br />
8/1-8/3 The Challenge (WT 105)<br />
www.CHFmagazine.com November/December 2006 55
56 The <strong>Custom</strong> <strong>Home</strong> <strong>Furnishings</strong> Magazine November/December 2006