AMD ENT scope light source - LSUHSC Medical Communications ...
AMD ENT scope light source - LSUHSC Medical Communications ...
AMD ENT scope light source - LSUHSC Medical Communications ...

You also want an ePaper? Increase the reach of your titles
YUMPU automatically turns print PDFs into web optimized ePapers that Google loves.
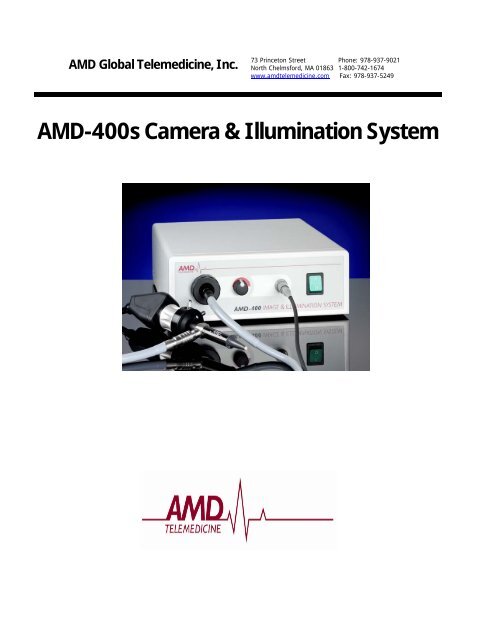
<strong>AMD</strong> Global Telemedicine, Inc.<br />
73 Princeton Street Phone: 978-937-9021<br />
North Chelmsford, MA 01863 1-800-742-1674<br />
www.amdtelemedicine.com Fax: 978-937-5249<br />
<strong>AMD</strong>-400s Camera & Illumination System
Table of Contents<br />
<strong>AMD</strong>-400s Image & Illumination Source Overview................................3<br />
System Components ................................................................................................................................... 3<br />
Platform Box Front Panel ............................................................................................................................ 3<br />
Platform Box Rear Panel............................................................................................................................. 4<br />
Light Guide Connections……………………………………………………………………………………..5<br />
Camera Cable.............................................................................................................................................. 6<br />
Intended Use and Operation…………………………………………………………………………………7<br />
Installation.....................................................................................………..8<br />
Using the Camera........................................................................................................................................ 8<br />
Getting an Image ....................................................................................................................................... 11<br />
Important Hints and Safety Notes…………………………………………………………………….…….11<br />
<strong>AMD</strong>-400s Trouble Shooting..................................................................13<br />
No Video..................................................................................................................................................... 13<br />
No Illumination: .......................................................................................................................................... 13<br />
If <strong>light</strong> is not bright enough:........................................................................................................................ 13<br />
Poor video quality ...................................................................................................................................... 14<br />
Servicing the <strong>AMD</strong>-400s .........................................................................15<br />
Cleaning/Sterilization ................................................................................................................................. 16<br />
Warranty, Service and Repair………………………………………………………………………………17<br />
Spare Parts…………………………………………………………………………………………………..18<br />
Changing the camera’s <strong>light</strong> bulb.............................................................................................................. 19<br />
Replacing the Camera’s Fuses................................................................................................................. 22<br />
Amd-400s Product Specifications.........................................................25<br />
Power Supply Safety Ratings.................................................................................................................... 25<br />
CONFID<strong>ENT</strong>IAL 2<br />
VERSION 1
<strong>AMD</strong>-400s Image & Illumination Source Overview<br />
The <strong>AMD</strong>-400s Image and Illumination Source is a combination of a <strong>light</strong> <strong>source</strong> and a compact<br />
camera. It consists of the base unit with exchangeable <strong>light</strong> guide connections and a camera<br />
head. It drives a wide variety of diagnostic <strong>scope</strong>s and produces the superior quality images you<br />
need for accurate diagnosis. Examination <strong>scope</strong>s supported by the <strong>AMD</strong>-400s unit include:<br />
<strong>ENT</strong>/oto<strong>scope</strong>, direct ophthalmo<strong>scope</strong>, derma<strong>scope</strong>, nasopharyngo<strong>scope</strong> and laparo<strong>scope</strong>s.<br />
System Components<br />
Figure 1 shows the four components of the <strong>AMD</strong>-400s system<br />
Platform Box Front Panel<br />
2<br />
1<br />
3<br />
4<br />
1. Light Guide: Sets the White Balance for the viewing scene. It is very important to reset the<br />
White Balance anytime there is a change in the Imaging and Illumination System<br />
set up, especially after a lamp change and/or <strong>scope</strong> change.<br />
2. Diaphragm: This controls the brightness of the image and it can be adjusted by turning the<br />
control.<br />
3. Camera Cable: Video signals are transmitted by the camera cable. The video signal then is<br />
available at the camera outputs for monitor, video recorder, video printer or<br />
PC connection<br />
4. Power Switch: Controls Power to the Platform Box and integrated <strong>light</strong> <strong>source</strong> as well as the<br />
camera head. When the switch is in the ON position, the metal halide lamp will<br />
ignite. (See Trouble Shooting Guide for further information).<br />
CONFID<strong>ENT</strong>IAL 3<br />
VERSION 1
Platform Box Rear Panel<br />
1 2 3 4<br />
5 6 7<br />
1. Label: Schoelly label and CE mark<br />
2. Remote: Connector for remote to control video printer<br />
3. S-Video: Plug for video out (Y/C)<br />
4. Bonding Connector: Equipment ground<br />
5. Mains Connection: Power cord plug<br />
6. USB 2.0: Digital Output<br />
7. Connection Video Out: FBAS<br />
.<br />
CONFID<strong>ENT</strong>IAL 4<br />
VERSION 1
Light Guide Connections<br />
1 Locking for Scope ocular 2 Focusing Ring<br />
3 White Balance 4 Remote Function<br />
Light guide connection for Storz-compatible <strong>light</strong> guide is part of the base equipment<br />
1. Locking for Scope Ocular- Locks Scope securely into place<br />
2. Focusing Ring- Used in focusing the <strong>scope</strong> for clarity of the image<br />
3. White Balance/Window Function- Press the white balance function to whiten image<br />
4. Remote Function- Controls an image on a video printer.<br />
CONFID<strong>ENT</strong>IAL 5<br />
VERSION 1
Camera Cable<br />
1<br />
3 2<br />
1. Camera Head: Its plastic construction is designed to be <strong>light</strong>weight and durable to<br />
meet the broad spectrum of endoscopic applications, from general<br />
surgery to <strong>ENT</strong> to orthopedic to office diagnostics.<br />
2. Cable: The cable assembly consists of illumination fibers and electronic wires<br />
housed within a stainless steel monocoil and covered with a durable<br />
neoprene outer sheathing to resist crushing.<br />
3. Camera Connector: Simply align the connector with the port, and insert the connector<br />
firmly into the <strong>AMD</strong>-400s. To uncouple, grasp the knurled ring on the<br />
connector, pull it back away from the platform box and withdraw the<br />
cable from the port.<br />
CONFID<strong>ENT</strong>IAL 6<br />
VERSION 1
Intended Use and Operation<br />
The <strong>light</strong> <strong>source</strong> and camera unit provides illumination and visualization for<br />
medical and industrial applications such as endoscopy, laboratory diagnosis,<br />
non destructive material testing. Preferably to be used with rigid or flexible<br />
endo<strong>scope</strong>s.<br />
The <strong>AMD</strong>-400s is a combination of a <strong>light</strong> <strong>source</strong> and a compact camera. The<br />
<strong>light</strong> <strong>source</strong> and compact camera are turned on by the power switch. The<br />
brightness of the <strong>light</strong> can be adjusted by using the diaphragm.<br />
The image of operation field is optically realized by the endo<strong>scope</strong> and<br />
projected to the CCD sensor through the endo objective and then is turned<br />
into electrical signals and amplified. The image brightness is adjusted<br />
automatically depending on the <strong>light</strong> intensity.<br />
The video signals are transmitted by camera cable. The video signal is<br />
available at the camera outputs for monitor, video recorder, video printer or<br />
PC connection.<br />
Accessories<br />
The <strong>light</strong> <strong>source</strong> is able to be used with <strong>light</strong> guides of different manufacturers<br />
respectively with <strong>light</strong> guides which are compatible to other brands.<br />
• Storz-compatible <strong>AMD</strong>-408<br />
• Wolf-compatible <strong>AMD</strong>-410<br />
• ACMI-compatible <strong>AMD</strong>-309<br />
Endo<strong>scope</strong>s<br />
All endo<strong>scope</strong>s with ACMI-compatible eyepieces can be adapted to the<br />
camera head. Depending on the type of your compact camera it is especially<br />
applicable with image bundle endo<strong>scope</strong>s by the use of an anti-moiree-filter.<br />
Video Accessories<br />
Peripherals (monitor, printer, recorder, PC, video still storage) which<br />
corresponds to the video standards PAL or NTSC (depending on the camera<br />
module) and which can analyze the signals video (FBAS) or s-video (Y/C)<br />
can be connected.<br />
CONFID<strong>ENT</strong>IAL 7<br />
VERSION 1
Installation<br />
The Installation of the <strong>AMD</strong>-400s consists of 7 simple steps shown<br />
Using the Camera<br />
Step 1 – Plug in power cable to the <strong>AMD</strong>-400s<br />
Connect the power cable to the <strong>AMD</strong>-400s but do NOT connect it to the<br />
power <strong>source</strong> yet.<br />
Step 2 – Plug in video cable to the <strong>AMD</strong>-400s<br />
Use the video output socket on the back of the <strong>AMD</strong>-400s to connect your<br />
video cable. The S-Video USB 2.0 connector can be used as well. You<br />
may connect a video device to the video output.<br />
CONFID<strong>ENT</strong>IAL 8<br />
VERSION 1
Step 3 – Plug in video cable to your video system<br />
Connect the video cable coming from the <strong>AMD</strong>-400s to your video input<br />
socket in your system. Make sure you select the right video input <strong>source</strong><br />
in your video system or video monitor.<br />
Step 4 – Connect camera cable to <strong>AMD</strong>-400s<br />
Simply connect the camera cable into the Platform Box firmly.<br />
To uncouple, grasp the connector; pull back and withdraw the cable from<br />
the port.<br />
CONFID<strong>ENT</strong>IAL 9<br />
VERSION 1
Step 5 – Connect Light cable to <strong>AMD</strong>-400s<br />
The fiber optic bundles are specifically designed to maximize the <strong>light</strong><br />
provided by the <strong>AMD</strong>-400s Imaging and Illumination System. They<br />
feature a precisely fitted ACMI termination on the Platform Box end, and<br />
a Universal <strong>light</strong> post on the <strong>scope</strong> end which can be coupled with<br />
various adapters to fit a wide variety of <strong>scope</strong>s. Do no kink or crush this<br />
cable. Uniform <strong>light</strong> quality will be diminished.<br />
Step 6 – Plug power cable to 115-230, 50-60Hz outlet<br />
Step 7- Connect camera cable and <strong>light</strong> cable to the desired Video<br />
For instructions on how to connect camera cable and <strong>light</strong> cable to a<br />
specific video <strong>scope</strong> refer to the <strong>scope</strong> instruction manual.<br />
Step 8 – Turn the <strong>AMD</strong>-400s on. (Refer to “Getting an Image,” p.11)<br />
CONFID<strong>ENT</strong>IAL 10<br />
VERSION 1
Getting an Image<br />
Before getting any image from the <strong>AMD</strong>-400s you should connect the<br />
desired <strong>scope</strong> to it. For <strong>ENT</strong> images use the <strong>AMD</strong>-2015-<strong>ENT</strong> Scope. For<br />
dermatology images use the <strong>AMD</strong>-2030 Dermo<strong>scope</strong>. For Ophthalmology<br />
images use the <strong>AMD</strong>-2020 Ophthalmo<strong>scope</strong>. Refer to the Scope<br />
Operation manual for its own specific operation and connection to the<br />
<strong>AMD</strong>-400s. Other <strong>scope</strong>s can be connected to the <strong>AMD</strong>-400s camera for<br />
more medical applications. Call <strong>AMD</strong> for further assistance on other<br />
medical applications at 1-800-742-1674 or 1-978-937-9021.<br />
Once the appropriate <strong>scope</strong> is connected follow the Start-Up and<br />
operation procedures.<br />
Important Hints<br />
Set-up the unit in such a way that sufficient air flow is guaranteed. All<br />
ventilation slits on the back side of the <strong>AMD</strong>-400s have to be free. Be sure<br />
to take care that a minimum space of 30 cm is given between the back<br />
panel and other objects. The average ambient temperature should not<br />
exceed 40 °C. Never use the unit with dismantled housing and only<br />
operate the unit in a horizontal position. The operating performance of the<br />
unit is dependent on electromagnetic harmonization of the peripheral units<br />
such as monitor, printer and recorder. If electromagnetic disharmony<br />
occurs it could cause stripes or color changes on the monitor.<br />
Make sure that all devices operated in the vicinity comply with the relevant<br />
EMC requirements. Radio systems, cellular telephones, etc. are possible<br />
<strong>source</strong>s of interference as they may emit higher levels of electromagnetic<br />
radiation. All additional and/or peripheral systems or units which are<br />
connected to the camera system units have to correspond to EN<br />
specifications (e.g. EN 60950 or EN 60601; The International Electro<br />
technical Commission (IEC) Standards. Furthermore they have to cover<br />
the EN 60601-1-1 norming.<br />
Safety Notes<br />
It is in no case allowed that the <strong>AMD</strong>-400s is used in explosive<br />
environment. Please make sure that the unit is only used in water proofed<br />
areas. Never dip the <strong>AMD</strong>-400s in liquids. Routinely inspect all electrical<br />
connections, defects like loose plugs, defective cables or others are<br />
interfering safety and image quality and have to be eliminated<br />
immediately. The unit is not allowed to be used in technical<br />
unobjectionable condition for the defined purpose according to this<br />
instruction manual.<br />
CONFID<strong>ENT</strong>IAL 11<br />
VERSION 1
Start-up Procedure<br />
a) Turn POWER switch to “ON”<br />
b) Turn the diaphragm control and the brightness can be adjusted.<br />
c) Focus the image by turning the optical focusing ring on the camera<br />
head. To white balance the camera system aim the <strong>scope</strong> at a white<br />
object<br />
d) White Balance<br />
Operation Procedure<br />
a) Press the white balance button and focus on white image for a few<br />
seconds. The image will change to an accurate white.<br />
b) Press the White Balance/Window Function button to toggle between<br />
enhanced and standard image. Select as desired.<br />
c) During the exam, adjust the illumination by turning the Intensity Ring<br />
until best results.<br />
CONFID<strong>ENT</strong>IAL 12<br />
VERSION 1
<strong>AMD</strong>-400s Trouble Shooting<br />
No Video<br />
a) Check that unit is connected to power supply and mains.<br />
b) Check that camera is connected correctly with monitor.<br />
c) Check that camera head is connected to the <strong>AMD</strong>-400s.<br />
d) Check that <strong>light</strong> guide is connected to the <strong>light</strong> <strong>source</strong>.<br />
No Illumination:<br />
A few seconds after the camera is turned “ON” you should be able to see<br />
the glow of the <strong>light</strong>.<br />
a) Turn the <strong>AMD</strong>-400s power switch off.<br />
b) Wait for 25 seconds.<br />
c) Turn the <strong>AMD</strong>-400s power switch on.<br />
d) Make sure fan is running – listen to it.<br />
e) Without the <strong>light</strong> cable plugged into the <strong>AMD</strong>-400s, check that the<br />
<strong>light</strong> bulb is on.<br />
f) If <strong>light</strong> and fan are not on, replace fuse.<br />
g) If <strong>light</strong> bulb is not on, replace bulb.<br />
h) If <strong>light</strong> bulb is on plug the <strong>light</strong> cable (see installation in this same<br />
manual) in.<br />
i) If <strong>light</strong> is not coming out the other end of the <strong>light</strong> cable, replace<br />
<strong>light</strong> cable.<br />
If <strong>light</strong> is not bright enough:<br />
a) Check <strong>light</strong> <strong>source</strong> and repeat white balance if necessary.<br />
b) Check window function.<br />
CONFID<strong>ENT</strong>IAL 13<br />
VERSION 1
Poor video quality<br />
a) Turn the focusing of the camera head until the image is brought into<br />
focus.<br />
b) Try cleaning the endo<strong>scope</strong> tip. The front window of the camera head<br />
should also be kept free of debris and can be cleaned with 70%<br />
isopropyl alcohol if necessary.<br />
CONFID<strong>ENT</strong>IAL 14<br />
VERSION 1
Servicing the <strong>AMD</strong>-400s<br />
Carefully review the instructions for cleaning and sterilization found in this<br />
manual. The first section high<strong>light</strong>s compatibility of the <strong>AMD</strong>-400s with<br />
various cleaning methods, and the next section high<strong>light</strong>s instructions for<br />
cleaning of each of the components of the <strong>AMD</strong>-400s.<br />
Compatible Cleaning Methods<br />
BE SURE TO FOLLOW YOUR INSTRUCTIONS SPECIFIC CLEANING<br />
AND STERILIZATION PROCEDURES IN CONSULTATION WITH THIS<br />
OPERATING MANUAL. Disinfection or Sterilization is always<br />
recommended for devices coming in contact with the patient; always<br />
sterilize rigid and flexible <strong>scope</strong>s before use.<br />
1. Platform Box (Illustrated in Figure 1)<br />
The Platform Box should not be sterilized. To clean, turn power OFF, and<br />
disconnect the power cord from the Platform Box. The surfaces may be<br />
cleaned by wiping with a damp cloth.<br />
2. Camera Head and Camera Cable need to be unplugged and can not<br />
be steeped in liquids.<br />
The Camera Head and Camera Cable are compatible<br />
using the following cleaning methods:<br />
• Moisten with water and soft suds, rinse with tap water<br />
WARNING:<br />
The Camera Head and Camera Cable should never be autoclaved.<br />
The Camera Head Assembly and Fiber Optic Assembly may also be<br />
draped.<br />
CONFID<strong>ENT</strong>IAL 15<br />
VERSION 1
Instructions for Cleaning<br />
System Disassembly<br />
a) Turn Platform Box OFF.<br />
b) Disconnect Fiber Optic Bundle from the Platform Box. Pull fiber<br />
bundle straight out.<br />
c) Disconnect the Camera Head Cable from the Platform Box. Release<br />
the fuse connector. Continue pulling the connector straight back so it<br />
disconnects from the Platform Box.<br />
Cleaning/Sterilization<br />
a) Rinse the Camera Head and Cable, Optical Coupler, Fiber Optic<br />
Bundle, and Scope Adapters in tap water. Use mild soap suds to<br />
remove any resistant debris.<br />
b) Follow your institutions specific cleaning procedures at all<br />
times. Specific sterilization instructions for the <strong>AMD</strong>-400s<br />
appear below. To ensure compatibility and prevent damage<br />
to the <strong>AMD</strong>-400s, consult the previous section on Compatible<br />
Cleaning Methods<br />
ETO Sterilization (for Camera Head and coupler Assembly and<br />
Fiber Optic Bundle)<br />
The camera head is not allowed to be sterilized by ETO (Ethylene Oxide).<br />
Steam auto clavation will destroy the camera head.<br />
c) The Camera Head, Camera Cable, and Fiber Optic Bundle should<br />
be dried with a lint-free, sterile cloth. The glass window on the<br />
Camera Head and Optical coupler should not be allowed to air dry<br />
as this may lead to fogging or smeared image.<br />
CONFID<strong>ENT</strong>IAL 16<br />
VERSION 1
Warranty, Service and Repair<br />
<strong>AMD</strong> commits a 12 month guarantee on the functioning of the <strong>light</strong><br />
<strong>source</strong>/camera unit. This guarantee is restricted to claims presented<br />
within the guarantee period starting from the date of the purchase of<br />
the <strong>light</strong> <strong>source</strong>/camera unit giving details about repairs along with the<br />
invoice number.<br />
This guarantee is only applicable to defects that cannot be attributed<br />
to normal wear and tear, misuse or wrong handling, and lack of proper<br />
care.<br />
For maintenance and repairs, please contact <strong>AMD</strong> Telemedicine:<br />
<strong>AMD</strong> Telemedicine<br />
73 Princeton Street<br />
North Chelmsford, MA 01863<br />
1-800-742-1674<br />
1-978-937-9021<br />
service@amdtelemedicine.com<br />
For a fast processing of your service requests, please return the<br />
product indicating the following dates:<br />
• Return Material Authorization (RMA)<br />
• Serial number (SN)<br />
• Detailed description of defects<br />
Guarantee and warranty claims will not be accepted if the user or non<br />
authorized repair center effects maintenance or repair on its own.<br />
CONFID<strong>ENT</strong>IAL 17<br />
VERSION 1
Spare Parts:<br />
Spare Lamp:<br />
Camera Cable:<br />
Light Cable:<br />
<strong>AMD</strong>-407<br />
<strong>AMD</strong>-406<br />
<strong>AMD</strong>-404<br />
CONFID<strong>ENT</strong>IAL 18<br />
VERSION 1
System Reassembly<br />
Be sure to follow your institution’s sterility procedures while reassembling<br />
the <strong>AMD</strong>-400s.<br />
a) Ensure Platform Box is turned OFF<br />
b) Connect power cord to the Platform box. Connect the appropriate<br />
<strong>scope</strong> adapter to the universal <strong>light</strong> post at the end of the Fiber Optic<br />
Bundle.<br />
c) If applicable, connect and secure the Optical Coupler and endo<strong>scope</strong><br />
to the Camera Head. Connect Fiber Optic Bundle to the endo<strong>scope</strong>.<br />
d) Turn Platform Box ON and verify that the <strong>AMD</strong>-400s functions<br />
properly. If picture does not appear, turn OFF power and verify<br />
that camera cable is plugged in. If problems persist, see section<br />
on Troubleshooting.<br />
Changing the camera’s <strong>light</strong> bulb<br />
The camera <strong>light</strong> bulb can be replaced following a simple 8 step<br />
procedure. Make sure the camera is turned off and disconnected, wear<br />
appropriate eye protection and gloves while changing lamps before<br />
staring the bulb replacement procedure described as follows:<br />
Caution: Be sure the bulb has cooled down for at least 10 minutes<br />
before handling.<br />
Step 1 – Locating the <strong>light</strong> bulb<br />
The <strong>light</strong> bulb (<strong>AMD</strong>-407) is located under the housing cover right behind<br />
the Light Guide Connection.<br />
CONFID<strong>ENT</strong>IAL 19<br />
VERSION 1
Step 2 – Open the <strong>light</strong> bulb compartment<br />
With a flat screwdriver unscrew the safety screw and detach the<br />
grounding cable.<br />
Step 3 – Removing the lamp<br />
Turn lamp to the left approximately 20 degrees until the stop position.<br />
Step 4 – Remove the <strong>light</strong> bulb<br />
Pull the lamp forward carefully to remove.<br />
CONFID<strong>ENT</strong>IAL 20<br />
VERSION 1
Step 5 – Reinsert new <strong>light</strong> bulb<br />
Insert the new <strong>light</strong> bulb in between the bulb base and the holding clips.<br />
Step – 6 Reinsert new <strong>light</strong> bulb<br />
Turn lamp to the right approximately 20 degrees until the stop position.<br />
Step 7 – Reconnect the grounding cable.<br />
Plug grounding cable back into place<br />
Step 8 – Close the Housing cover and screw it on.<br />
CONFID<strong>ENT</strong>IAL 21<br />
VERSION 1
Replacing the Camera’s Fuses<br />
The camera’s fuses can easily be replaced following a simple 5-step<br />
procedure. Make sure the camera is turned off and the power cable<br />
disconnected before starting the fuse replacement procedure described<br />
as follows:<br />
Step 1 – Locate the fuses’ compartment<br />
The fuses are located right below the power cable connector.<br />
Step 2 – Open the fuses’ compartment<br />
Using two fingers open the compartment as illustrated.<br />
CONFID<strong>ENT</strong>IAL 22<br />
VERSION 1
Step 3 – Take out the fuses’ holding box<br />
Using your fingers remove the fuses’ box out as illustrated.<br />
Step 4- Replace fuses<br />
Replace both fuses with same size same power (3.15A, 230V) fuses.<br />
CONFID<strong>ENT</strong>IAL 23<br />
VERSION 1
Step 5- Reinsert fuses’ holding box<br />
Using your fingers reinsert the fuses’ box back in as illustrated and push<br />
until it clicks in.<br />
CONFID<strong>ENT</strong>IAL 24<br />
VERSION 1
Amd-400s Product Specifications<br />
There are no user serviceable or repairable parts inside the unit. The unit must be returned to<br />
<strong>AMD</strong> for repair. The unit does not have to be maintained regularly. The only wear part at the <strong>light</strong><br />
<strong>source</strong> is the lamp which can be easily replaced by the user.<br />
Power Supply: Worldwide Automatic Switching 115/230 VAC<br />
Main fuse: 115V-T 6.3A or 230V- T 3.15A<br />
Dimensions: 10.35” (263mm) W x 3.93” (100mm) D x 12.40” (315mm) H<br />
Weight:<br />
8.818 lbs. (4kg)<br />
Video Outputs: Video/S-Video, USB 2.0<br />
TV System: PAL or NTSC Sensor; size- 1/3” CCD Detection 2:1 line interlacing<br />
Signal/Noise Ratio: 44 db<br />
Average lamp life: 2,500 hours<br />
Ambient Temp: +10° C up to + 40° C<br />
Approx. air humidity: up to 70%<br />
Horizontal Resolution: 525 lines (NTSC), 625 lines (PAL), Brightness-automatically<br />
Approvals:<br />
The CE-label certifies that the product corresponds to the EMC regulations<br />
89/336/EEC respectively EMC law and the directive 73/23/EEC. With<br />
regard to medical devices the CE-label certifies, that the product<br />
corresponds to the <strong>Medical</strong> Device Directive 93/42/EEC respectively to the<br />
<strong>Medical</strong> Device Law.<br />
* Local rules may require that these contaminated tip covers be treated as hazardous waste.<br />
Power Supply Safety Ratings<br />
Type BF equipment (according EN 60601-1)<br />
CE-mark guideline 93/42/EWG<br />
Warning/ Caution: indicating a potential<br />
hazard/actual hazard. If not avoided, this may<br />
result in personal or serious injury and product<br />
or property damage.<br />
High Voltage<br />
Equipotential bonding connector<br />
Please observe instruction for use<br />
High Temperature<br />
CONFID<strong>ENT</strong>IAL 25<br />
VERSION 1