EMCO WinNC GE Series Fanuc 21 MB Software description ...
EMCO WinNC GE Series Fanuc 21 MB Software description ...
EMCO WinNC GE Series Fanuc 21 MB Software description ...

Create successful ePaper yourself
Turn your PDF publications into a flip-book with our unique Google optimized e-Paper software.
SYSTEM<br />
MESSA<strong>GE</strong><br />
ALTER<br />
INSERT<br />
DELETE<br />
OFFSET<br />
SETTING CUSTOM<br />
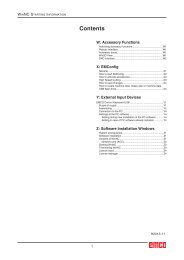
<strong>EMCO</strong> <strong>WinNC</strong> <strong>GE</strong> <strong>Series</strong> <strong>Fanuc</strong> <strong>21</strong> <strong>MB</strong><br />
<strong>Software</strong> <strong>description</strong>/ <strong>Software</strong> version from 13.76<br />
<strong>GE</strong> <strong>Fanuc</strong> <strong>Series</strong> <strong>21</strong><br />
RESET<br />
O N G P<br />
( ) E C<br />
7 8 9<br />
X Y Z Q<br />
U V W <br />
4<br />
5 6<br />
HELP I<br />
,<br />
J K R<br />
A @<br />
1<br />
2<br />
3<br />
M S T L<br />
# = * +<br />
] D H B<br />
SHIFT [ & SP<br />
- .<br />
0<br />
/ EOB CAN<br />
INPUT<br />
PA<strong>GE</strong><br />
PA<strong>GE</strong><br />
POS PROG<br />
MMC<br />
GRAPH<br />
CNC<br />
<strong>GE</strong> <strong>Fanuc</strong> <strong>Series</strong> <strong>21</strong><br />
USB<br />
RS232<br />
SKIP<br />
1 x<br />
DRY<br />
RUN<br />
OPT.<br />
STOP<br />
SBL<br />
-4<br />
-X<br />
-Y<br />
+Z<br />
-Z<br />
+Y<br />
+X<br />
+4<br />
100%<br />
EDIT<br />
1<br />
10<br />
100<br />
1000<br />
10000<br />
40<br />
20<br />
10<br />
6<br />
2<br />
0<br />
60 70 80 90<br />
100<br />
110<br />
120<br />
AUX<br />
AUX<br />
0<br />
1<br />
0<br />
1<br />
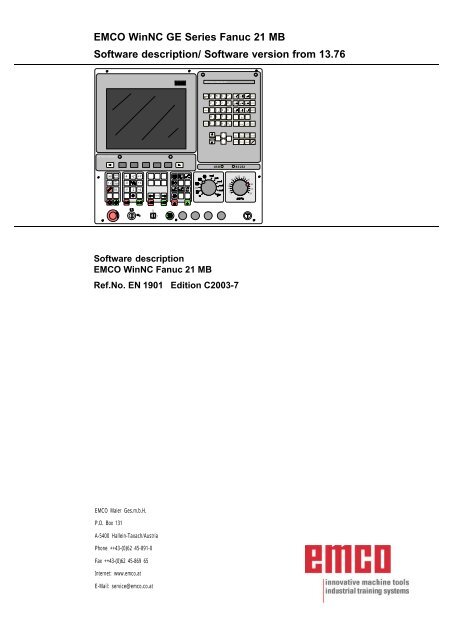
<strong>Software</strong> <strong>description</strong><br />
<strong>EMCO</strong> <strong>WinNC</strong> <strong>Fanuc</strong> <strong>21</strong> <strong>MB</strong><br />
Ref.No. EN 1901 Edition C2003-7<br />
<strong>EMCO</strong> Maier Ges.m.b.H.<br />
P.O. Box 131<br />
A-5400 Hallein-Taxach/Austria<br />
Phone ++43-(0)62 45-891-0<br />
Fax ++43-(0)62 45-869 65<br />
Internet: www.emco.at<br />
E-Mail: service@emco.co.at
<strong>EMCO</strong> WINNC <strong>GE</strong> SERIES FANUC <strong>21</strong><strong>MB</strong><br />
PREFACE<br />
Preface<br />
The <strong>EMCO</strong> <strong>WinNC</strong> <strong>GE</strong> SERIES FANUC <strong>21</strong><strong>MB</strong> Milling <strong>Software</strong> is part of the<br />
<strong>EMCO</strong> training concept on PC-basis.<br />
This concept aims at learning the operation and programming of a certain<br />
machine control on the PC.<br />
The milling machines of the <strong>EMCO</strong> PC MILL und CONCEPT MILL series can<br />
be directly controlled via PC by means of the <strong>EMCO</strong> <strong>WinNC</strong> for the <strong>EMCO</strong> MILL.<br />
The operation is rendered very easy by the use of a digitizer or the control<br />
keyboard with TFT flat panel display (optional accessory), and it is didactically<br />
especially valuable since it remains very close to the original control.<br />
This manual does not include the whole functionality of the control software <strong>GE</strong><br />
SERIES FANUC <strong>21</strong><strong>MB</strong> Milling, however emphasis was laid on the simple and<br />
clear illustration of the most important functions so as to achieve a most<br />
comprehensive learning success.<br />
In case any questions or proposals for improving this manual should arise,<br />
please contact us directly:<br />
<strong>EMCO</strong> MAIER Gesellschaft m. b. H.<br />
Department for technical documentation<br />
A-5400 Hallein, Austria<br />
All rights reserved, reproduction only by authorization of Messrs. <strong>EMCO</strong> MAIER<br />
© <strong>EMCO</strong> MAIER Gesellschaft m.b.H., Hallein 2003<br />
2
<strong>EMCO</strong> WINNC <strong>GE</strong> SERIES FANUC <strong>21</strong><strong>MB</strong><br />
CONTENTS<br />
Contents<br />
A: Key Description<br />
Control Keyboard, Digitizer Overlay .....................................A1<br />
Key Functions ....................................................................A1<br />
Data Input Keys .................................................................A2<br />
Function Keys ....................................................................A2<br />
Machine Control Keys ........................................................A4<br />
PC Keyboard .....................................................................A6<br />
B: Basics<br />
Reference Points of the <strong>EMCO</strong> Milling Machines .................B1<br />
Zero offset .........................................................................B2<br />
Coordinate System.............................................................B2<br />
Coordinate System with Absolute Programming .............B2<br />
Coordinate System with Incremental Programming ........B2<br />
Input of the Zero Offset .......................................................B3<br />
Tool Data Measuring ..........................................................B4<br />
Tool Data Measuring by Scraping ........................................B5<br />
C: Operating Sequences<br />
Survey Operating Modes ................................................... C1<br />
Approach the Reference Point ........................................... C2<br />
Setting of Language and Workpiece Directory .................... C3<br />
Program Input ................................................................... C4<br />
Call Up a Program....................................................... C4<br />
Input of a block ........................................................... C4<br />
Search a Word ............................................................ C4<br />
Insert a Word .............................................................. C4<br />
Alter a Word................................................................ C4<br />
Delete a Word ............................................................. C4<br />
Insert a Block .............................................................. C4<br />
Delete a Block............................................................. C4<br />
Data Input - Output ............................................................ C5<br />
Adjusting the Serial Interface ....................................... C5<br />
Delete a Program .............................................................. C5<br />
Delete All Programs .......................................................... C5<br />
Program Output .......................................................... C6<br />
Program Input ............................................................. C6<br />
Tool Offset Output ....................................................... C6<br />
Tool Offset Input .......................................................... C6<br />
Print Programs ............................................................ C6<br />
Program Run .................................................................... C7<br />
Start of a Part Program ................................................ C7<br />
Displays while Program Run ........................................ C7<br />
Block Search .............................................................. C7<br />
Program Influence ....................................................... C7<br />
Program interruption ................................................... C7<br />
Display of the <strong>Software</strong> Versions .................................. C7<br />
Part Counter and Piece Time ............................................. C8<br />
Graphic Simulation ............................................................ C9<br />
D: Programming<br />
Program Structure ............................................................. D1<br />
Used Addresses ................................................................ D1<br />
Survey of G Commands ................................................... D2<br />
Survey of M Commands .................................................... D3<br />
Description of G Commands .............................................. D4<br />
G00 Positioning (Rapid Traverse) ...................................... D4<br />
G01 Linear Interpolation ................................................... D4<br />
G02 Circular Interpolation Clockwise .................................. D6<br />
G03 Circular Interpolation Counterclockwise ....................... D6<br />
G04 Dwell ......................................................................... D7<br />
G7.1 Cylindrical Interpolation ............................................. D8<br />
G09 Exact Stop ............................................................... D10<br />
G10 Data Setting ............................................................ D10<br />
G15 End Polar Coordinate Interpolation ............................D11<br />
G16 Begin Polar Coordinate Interpolation ..........................D11<br />
G17-G19 Plane Selection ............................................... D12<br />
G20 Measuring in Inches ................................................. D12<br />
G<strong>21</strong> Measuring in Millimeter ............................................ D12<br />
G28 Approach Reference Point ........................................ D13<br />
Cutter Radius Compensation ........................................... D14<br />
G40 Cancel Cutter Radius Compensation ........................ D14<br />
G41 Cutter Radius Compensation left .............................. D14<br />
G42 Cutter Radius Compensation right ............................ D14<br />
G43 Tool Length Compensation positive ........................... D16<br />
G44 Tool Length Compensation negative ......................... D16<br />
G49 Cancel Tool Length Compensation............................ D16<br />
G50 Cancel Scale Factor, Mirror ...................................... D16<br />
G51 Scale Factor, Mirror .................................................. D16<br />
Mirroring a Contour ......................................................... D17<br />
G52 Local Coordinate System ......................................... D18<br />
G53 Machine Coordinate System..................................... D18<br />
G54 - G59 Zero Offset 1 - 6 ............................................. D18<br />
G63 Thread Cutting Mode On ......................................... D19<br />
G64 Cutting mode ........................................................... D19<br />
G61 Exact Stop Mode...................................................... D19<br />
G68 / G69 Coordinate System Rotation ............................ D20<br />
Drilling Cycles G73 - G89 ................................................ D<strong>21</strong><br />
G73 Chip Break Drilling Cycle .......................................... D22<br />
G74 Left Tapping Cycle ................................................... D22<br />
G76 Fine Drilling Cycle .................................................... D23<br />
G80 Cancel Drilling Cycles .............................................. D23<br />
G81 Drilling Cycle ........................................................... D23<br />
G82 Drilling Cycle with Dwell ........................................... D24<br />
G83 Withdrawal Drilling Cycle .......................................... D24<br />
G84 Tapping Cycle .......................................................... D25<br />
G85 Reaming Cycle ........................................................ D26<br />
G86 Drilling Cycle with Spindle Stop ................................. D26<br />
G87 Back Pocket Drilling Cycle ........................................ D27<br />
G88 Drilling Cycle with Program Stop ............................... D27<br />
G89 Reaming Cycle with Dwell ........................................ D28<br />
G90 Absolute Programming ............................................. D28<br />
G91 Incremental Programming ........................................ D28<br />
G92 Coordinate System Setting ....................................... D28<br />
G94 Feed per Minute ...................................................... D28<br />
G95 Feed per Revolution................................................. D28<br />
G97 Revolutions per Minute ............................................ D28<br />
G98 Retraction to the Start Plane ..................................... D28<br />
G99 Retraction to the Withdrawal Plane ........................... D28<br />
3
<strong>EMCO</strong> WINNC <strong>GE</strong> SERIES FANUC <strong>21</strong><strong>MB</strong><br />
CONTENTS<br />
Description of M Commands .............................................D29<br />
M00 Programmed Stop ....................................................D29<br />
M01 Programmed Stop, Conditional ..................................D29<br />
M02 Main Program End ....................................................D29<br />
M03 Milling Spindle ON Clockwise ....................................D29<br />
M04 Milling Spindle ON Counterclockwise .........................D29<br />
M05 Milling Spindle OFF ..................................................D29<br />
M06 Tool Change .............................................................D29<br />
M08 Coolant ON ..............................................................D29<br />
M09 Coolant OFF ............................................................D29<br />
M27 Swivel Dividing Head ................................................D29<br />
M30 Main Program End ....................................................D29<br />
M71 Puff blowing ON .......................................................D29<br />
M72 Puff blowing OFF ......................................................D29<br />
M98 Subprogram Call ......................................................D30<br />
M99 Subprogram End, Jump Instruction ............................D30<br />
Starting Information<br />
see attachment<br />
G: Flexible NC programming<br />
Variables and arithmetic parameters .................................. G1<br />
Calculating with variables .................................................. G1<br />
Control structures .............................................................. G2<br />
Relational operators .......................................................... G2<br />
H: Alarms and Messages<br />
Input Device Alarms 3000 - 3999 ....................................... H2<br />
Machine Alarms 6000 - 7999 ............................................. H3<br />
Axis Controller Alarms 8000 - 9999 ................................... H11<br />
I: Control Alarms<br />
Control Alarms .................................................................... I1<br />
4
<strong>EMCO</strong> WINNC <strong>GE</strong> SERIES FANUC <strong>21</strong><strong>MB</strong><br />
KEY DESCRIPTION<br />
A: Key Description<br />
Control Keyboard, Digitizer Overlay<br />
*(Ã)DQXFÃ6HULHVÃ<br />
5(6(7<br />
2 1 * 3<br />
( &<br />
<br />
$/7(5<br />
; < =<br />
8 9 : 4 "<br />
<br />
<br />
<br />
,16(57<br />
+(/3<br />
, - . 5<br />
$ #<br />
<br />
<br />
<br />
'(/(7(<br />
0 6 7 /<br />
Æ <br />
<br />
<br />
<br />
6+,)7<br />
) ><br />
' @<br />
+ % É 63<br />
<br />
(2%<br />
&$1<br />
,1387<br />
3$*(<br />
326<br />
352*<br />
2))6(7<br />
6(77,1*<br />
&86720<br />
3$*(<br />
6
<strong>EMCO</strong> WINNC <strong>GE</strong> SERIES FANUC <strong>21</strong><strong>MB</strong><br />
KEY DESCRIPTION<br />
Data Input Keys<br />
2 1 * 3<br />
( &<br />
<br />
; < =<br />
4<br />
8 9 : "<br />
<br />
<br />
<br />
, - . 5<br />
$ #<br />
<br />
<br />
<br />
0 6 7<br />
/<br />
Æ <br />
<br />
<br />
<br />
6+,)7<br />
Data input keys<br />
) ><br />
' @<br />
+ %<br />
É 63<br />
<br />
Note for the Data Input Keys<br />
Each data input key runs several functions (numbers,<br />
address character(s)). Repeated pressing of the key<br />
switches to the next function automatically.<br />
Function Keys<br />
326<br />
352*<br />
2))6(7<br />
6(77,1*<br />
Function keys<br />
6
<strong>EMCO</strong> WINNC <strong>GE</strong> SERIES FANUC <strong>21</strong><strong>MB</strong><br />
KEY DESCRIPTION<br />
A 3
<strong>EMCO</strong> WINNC <strong>GE</strong> SERIES FANUC <strong>21</strong><strong>MB</strong><br />
KEY DESCRIPTION<br />
Machine Control Keys<br />
The machine control keys are in the lower block of the<br />
control keyboard resp. the digitizer overlay.<br />
Depending on the used machine and the used<br />
accessories not all functions may be active.<br />
<br />
Ã;<br />
4<br />
<br />
<br />
=<br />
=<br />
(',7<br />
<br />
<br />
4<br />
;<br />
<br />
<br />
<br />
<br />
<br />
<br />
<br />
<br />
<br />
<br />
Machine control keyboard<br />
6.,3 '5<<br />
581<br />
237<br />
Ã[ 6723<br />
<br />
;<br />
=<br />
<<br />
;<br />
<br />
<br />
<br />
<br />
<br />
<br />
<br />
<br />
<br />
6%/<br />
<<br />
=<br />
<br />
(',7<br />
<br />
<br />
<br />
<br />
<br />
<br />
<br />
<br />
È<br />
$8;<br />
$8;<br />
<br />
<br />
<br />
<br />
Machine control keyboard of the <strong>EMCO</strong> PC- Mill Serie<br />
SKIP (skip blocks will not be executed)<br />
DRY RUN (test run of programs)<br />
OPT STOP (program stop at M01)<br />
RESET<br />
Single block machining<br />
Program stop / program start<br />
Ã<br />
=<br />
<<br />
;<br />
Ã;<br />
manual axis movement<br />
Ã<<br />
=<br />
<br />
Approaching the reference point in all axes<br />
Feed stop / feed start<br />
Spindle override lower / 100% / higher<br />
A 4
<strong>EMCO</strong> WINNC <strong>GE</strong> SERIES FANUC <strong>21</strong><strong>MB</strong><br />
KEY DESCRIPTION<br />
Spindel stop / spindle start; spindle start in JOG and INC1...INC10000 mode:<br />
Clockwise: perss key short, Counterclockwise: press min. 1 sec.<br />
Open / close door<br />
Swivel dividing head<br />
Open / close clamping device<br />
Swivel tool turret<br />
Coolant on/off<br />
AUX OFF / AUX ON (auxiliary drives off / on)<br />
<br />
<br />
<br />
<br />
<br />
<br />
<br />
<br />
<br />
<br />
Vorschub- / Eilgangkorrekturschalter<br />
<br />
<br />
<br />
<br />
<br />
<br />
<br />
<br />
<br />
<br />
Feed / rapid feed override switch<br />
EMER<strong>GE</strong>NCY OFF (Unlock: pull out button)<br />
<br />
<br />
Key switch for special operations (siehe Maschinenbeschreibung)<br />
Additional NC start key<br />
Additional key clamping device<br />
Consent key<br />
<br />
<br />
No function<br />
A 5
<strong>EMCO</strong> WINNC <strong>GE</strong> SERIES FANUC <strong>21</strong><strong>MB</strong><br />
KEY DESCRIPTION<br />
Q<br />
OH<br />
R<br />
5<br />
W<br />
V<br />
H<br />
)<br />
P<br />
X<br />
1<br />
<br />
7<br />
3<br />
2<br />
<<br />
5<br />
'<br />
P<br />
X<br />
1<br />
3<br />
2 /<br />
7 %<br />
6 6<br />
1<br />
8 ,3<br />
5 .<br />
6<br />
+Z<br />
!<br />
<br />
;<br />
<br />
<br />
-X +X<br />
)<br />
(<br />
5<br />
=<br />
<br />
<br />
=<br />
/<br />
/<br />
$<br />
1&<br />
- Z<br />
<br />
<br />
7<br />
5<br />
$<br />
7<br />
6<br />
<br />
;<br />
<br />
3<br />
& 2<br />
7<br />
16<br />
7<br />
(<br />
6<br />
(<br />
5<br />
The machine functions in<br />
the numeric key block are<br />
active only with active NUM<br />
lock.<br />
PC Keyboard<br />
H<br />
V<br />
X<br />
D<br />
3<br />
Q<br />
OH<br />
R<br />
5<br />
N<br />
F<br />
UX<br />
'<br />
!<br />
<br />
<br />
)<br />
0 > ) <br />
!<br />
)<br />
(<br />
5<br />
6<br />
2<br />
3<br />
(<br />
5<br />
2<br />
7<br />
8<br />
$<br />
$<br />
'<br />
0<br />
*<br />
2<br />
-<br />
<br />
)<br />
<br />
)<br />
<br />
)<br />
<br />
)<br />
<br />
)<br />
<br />
)<br />
<br />
)<br />
<br />
)<br />
<br />
&<br />
,1<br />
<br />
<br />
<br />
&<br />
,1<br />
<br />
<br />
<br />
&<br />
,1<br />
<br />
<br />
&<br />
,1<br />
<br />
<br />
&<br />
,1<br />
C<br />
"<br />
‰<br />
<br />
ƒ A<br />
<br />
@<br />
(<br />
'<br />
1<br />
(<br />
(<br />
7<br />
(<br />
/<br />
(<br />
'<br />
a<br />
<br />
h<br />
3<br />
2<br />
,<br />
8<br />
=<br />
7<br />
5<br />
(<br />
:<br />
#<br />
4<br />
<br />
b<br />
g<br />
/<br />
.<br />
-<br />
+<br />
*<br />
)<br />
'<br />
6<br />
$<br />
B<br />
<br />
<br />
<br />
<br />
0<br />
1<br />
%<br />
9<br />
&<br />
;<br />
<<br />
! <br />
WUJ<br />
6<br />
U U<br />
OW*<br />
OW*<br />
$ $<br />
OW<br />
$<br />
WUJ<br />
6<br />
<br />
<br />
<br />
&<br />
,1<br />
<br />
<br />
OW<br />
$<br />
<br />
<br />
WUJ<br />
6<br />
<br />
<br />
<br />
<br />
<br />
<br />
* With F12 the function keys POS, PROG,<br />
OFFSET SAETTING, SYSTEM,<br />
MESSA<strong>GE</strong>S and GRAPH will be displayed<br />
in the softkey line.<br />
Some alarms will be acknowledged with the key ESC.<br />
By pressing the key F1 the modes (MEM, EDIT, MDI,...) will be<br />
displayed in the softkey line.<br />
The assignement of the accessory functions is described int the chapter<br />
"Accessory Functions".<br />
The meaning of the key combination ctrl 2 depends on the machine:<br />
<strong>EMCO</strong> PC MILL 50/55: Puff blowing ON/OFF<br />
<strong>EMCO</strong> PC MILL 100/125/155: coolant ON/OFF<br />
A 6
<strong>EMCO</strong> WINNC <strong>GE</strong> SERIES FANUC <strong>21</strong><strong>MB</strong><br />
BASICS<br />
B: Basics<br />
Reference Points of the <strong>EMCO</strong><br />
Milling Machines<br />
M = Machine zero point<br />
An unchangeable reference point established by the<br />
machine manufacturer.<br />
Proceeding from this point the entire machine is<br />
measured.<br />
At the same time "M" is the origin of the coordinate<br />
system.<br />
1<br />
R = Reference point<br />
A position in the machine working area which is<br />
determined exactly by limit switches. The slide positions<br />
are reported to the control by the slides<br />
approaching the "R".<br />
Required after every power failure.<br />
0<br />
:<br />
5<br />
N = Tool mount reference point<br />
Starting point for the measurement of the tools. "N"<br />
lies at a suitable point on the tool holder system and<br />
is established by the machine manufacturer.<br />
Reference points in the working area<br />
W = Workpiece zero point<br />
Starting point for the dimensions in the part program.<br />
Can be freely established by the programmer and<br />
moved as desired within the part program.<br />
B 1
<strong>EMCO</strong> WINNC <strong>GE</strong> SERIES FANUC <strong>21</strong><strong>MB</strong><br />
BASICS<br />
0<br />
:<br />
Zero offset<br />
With <strong>EMCO</strong> milling machines the machine zero point<br />
"M" lies on the left front edge of the machine table.<br />
This position is unsuitable as a starting point for<br />
dimensioning. With the so-called zero offset the<br />
coordinate system can be moved to a suitable point<br />
in the working area of the machine.<br />
In the Operating Area Parameter - Zero Offsets are<br />
four adjustable zero offsets available.<br />
When you define a value in the offset register, this<br />
value will be considered with call up in program (G54<br />
- G57) and the coordinate zero point will be shifted<br />
from the machine zero M to the workpiece zero W.<br />
The workpiece zero point can be shifted within a<br />
program in any number.<br />
More informations see in the command <strong>description</strong>.<br />
Zero offset from machine zero point M to workpiece<br />
zero point W<br />
Coordinate System<br />
=<br />
Incremental<br />
<<br />
;<br />
=<br />
;<br />
The X coordinate lies parallel to the front edge of the<br />
machine table, the Y coordinate lies parallel to the<br />
side edge of the machine table, the Z coordinate is<br />
vertical to the machine table.<br />
Z coordinate values in minus direction describe<br />
movements of the tool system towards the workpiece,<br />
values in plus direction away from the work piece.<br />
;<br />
<<br />
Absolute<br />
Absolute coordinates refer to a fixed point, incremental<br />
coordinates to the tool position<br />
=<br />
=<br />
<<br />
<<br />
;<br />
Coordinate System with<br />
Absolute Programming<br />
The origin of the coordinate systemlies in the machine<br />
zero point "M" or after a zero offset in the work piece<br />
zero point "W".<br />
All target points are described from the origin of the<br />
coordinate system by indication of the respective X,<br />
Y and Z distances.<br />
Coordinate System with<br />
Incremental Programming<br />
The origin of the coordinate system lies at the tool<br />
mount reference point "N" or at the tool tip after a tool<br />
call-up.<br />
With incremental programming the actual pathes of<br />
the tool (from point to point) are described.<br />
B 2
<strong>EMCO</strong> WINNC <strong>GE</strong> SERIES FANUC <strong>21</strong><strong>MB</strong><br />
BASICS<br />
:LQ1&Ã*(Ã)DQXFÃ6HULHVÃÃ0ÃFÃ(0&2 [<br />
:25.Ã&225',1$7(6<br />
12ÃÃÃÃÃÃÃÃÃÃÃÃÃÃÃ'$7$<br />
ÃÃÃÃÃÃÃÃ;ÃÃÃÃÃÃÃÃÃÃ<br />
(;7ÃÃ
<strong>EMCO</strong> WINNC <strong>GE</strong> SERIES FANUC <strong>21</strong><strong>MB</strong><br />
BASICS<br />
Length correction<br />
1<br />
=<br />
Tool Data Measuring<br />
Aim of the tool data measuring:<br />
The CNC should use the tool tip resp. the tool centre<br />
at the face end for positioning, not the tool mount<br />
reference point.<br />
Every tool which is used for machining has to be<br />
measured. The distance "N" between tool tip and tool<br />
mount reference point is to be measured.<br />
To every of this distances a H-parameter in the offset<br />
register (<strong>GE</strong>OMT) is related to (Tool 1 - H1).<br />
The correction number can be any register number<br />
(max.32), but has to be considered with tool call in<br />
program.<br />
The length corrections can be measured halfautomatically,<br />
the cutter radius has to be inserted<br />
manually as H-parameter.<br />
Inserting the cutter radius is only necessary for using<br />
cutter radius compensation with this tool.<br />
Cutter radius R<br />
5 5<br />
For G17 (XY plane active):<br />
Tool data measuring (<strong>GE</strong>OMETRIE) occurs for<br />
Z absolute from point "N"<br />
R radius of the cutter<br />
For all other active planes always the vertical axis to<br />
the plane is computed. In the following the normal<br />
case G17 is described.<br />
B 4
<strong>EMCO</strong> WINNC <strong>GE</strong> SERIES FANUC <strong>21</strong><strong>MB</strong><br />
BASICS<br />
Tool Data Measuring by Scraping<br />
Procedure<br />
• Clamp a workpiece in the working area. The<br />
measuring point has to be reachable with the tool<br />
mount reference point and with all tools to be<br />
measured.<br />
The tool mount reference point of the <strong>EMCO</strong> PC<br />
MILL 100/125/155 is on the reference tool<br />
(clamp before).<br />
• Select the JOG mode<br />
• Place a thin sheet of paper between work piece<br />
and milling spindle.<br />
• Traverse with the tool mount reference point on<br />
the workpiece (standing spindle)<br />
Reduce feed to 1%<br />
Traverse with the spindle (tool mount reference<br />
point) down to the workpiece, so far that the paper<br />
still can be moved.<br />
• Press the key 326 and the softkey REL to show<br />
the relative position at the screen.<br />
• Press the key = :<br />
.- the Z display flashes<br />
• Reset Z value with Z0 and softkey PRESET to 0<br />
• Clamp the tool to be measured.<br />
• Change to MDI mode<br />
• Switch on the spindle (e.g. S1000 M3 NC-Start)<br />
• Change to JOG mode.<br />
• Press the key<br />
• Clamp tool to be measured and scrap on the<br />
workpiece<br />
• Now the screen shows the length difference between<br />
tool mount reference point and the tool tip (Z<br />
value relative)<br />
• Select the corresponding H- parameter<br />
with the keys<br />
• Key in the displayed Z value as H-parameter and<br />
take it over with the ,1387 key.<br />
• Clamp next tool and scrap onto the workpiece<br />
surface etc.<br />
B 5
<strong>EMCO</strong> WINNC <strong>GE</strong> SERIES FANUC <strong>21</strong><strong>MB</strong><br />
BASICS<br />
B 6
<strong>EMCO</strong> WINNC <strong>GE</strong> SERIES FANUC <strong>21</strong><strong>MB</strong><br />
OPERATING SEQUENCES<br />
C: Operating Sequences<br />
Survey Operating Modes<br />
REF<br />
In this operating mode the reference point will be<br />
approached.<br />
With reaching the reference point the actual position<br />
display is set to the value of the reference point<br />
coordinates. By that the control acknowledges the<br />
position of the slides in the working area.<br />
With the following situations the reference point has<br />
to be approached::<br />
• After switching on the machine<br />
• After mains interruption<br />
• After alarm "Approach reference point" or "Ref.<br />
point not reached"<br />
• After collisions or if the slides stucked because of<br />
overload<br />
MEM<br />
For working off a part program the control calls up<br />
block after block and interprets them.<br />
The interpretation considers all correction which are<br />
called up by the program.<br />
The so-handled blocks will be worked off one by one.<br />
EDIT<br />
In the EDIT mode you can enter part programs and<br />
transmit data.<br />
JOG<br />
With the JOG keys the slides can be traversed<br />
manually.<br />
I1 ... I1000 <br />
In this operation mode the slides can be traversed for<br />
the desired increment (1...1000 in µm/10 -4 inch) by<br />
means of the JOG keys<br />
; ; < < = =<br />
The selected increment (1, 10, 100, ...) must be<br />
larger than the machine resolution (lowest possible<br />
traverse movement), otherwise no movement occurs.<br />
REPOS<br />
Repositioning, approach back to the contour in JOG<br />
mode.<br />
Teach In<br />
MDI<br />
In the MDI mode you can switch on the spindle and<br />
swivel the tool holder.<br />
The control works off the entered block and deletes<br />
the intermediate store for new inputs..<br />
Making programs in dialogue with the machine in<br />
MDA mode.<br />
C 1
<strong>EMCO</strong> WINNC <strong>GE</strong> SERIES FANUC <strong>21</strong><strong>MB</strong><br />
OPERATING SEQUENCES<br />
Approach the Reference Point<br />
By approaching the reference point the control will be<br />
synchronized to the machine.<br />
• Change into REF mode<br />
• Press as first the direction keys = or = , then<br />
; or ; and < or < to approach the<br />
reference point in the respective direction.<br />
• With the key 5()<br />
$// all axes will be approached<br />
automatically in the correct sequence (PC<br />
keyboard).<br />
Danger of Collisions<br />
Mind for obstacles in the working area (Clamping<br />
devices, clamped work pieces, etc.)<br />
After reaching the reference point its position will be<br />
displayed as actual position. Now the machine is<br />
synchronized to the control.<br />
C 2
<strong>EMCO</strong> WINNC <strong>GE</strong> SERIES FANUC <strong>21</strong><strong>MB</strong><br />
OPERATING SEQUENCES<br />
:LQ1&Ã*(Ã)DQXFÃ6HULHVÃÃ0ÃFÃ(0&2 [<br />
2)ÃÈ<br />
3$5$0(7(5ÃÃÃÃÃÃÃÃ*(1(5$/<br />
2ÃÃÃ1<br />
Setting of Language and<br />
Workpiece Directory<br />
*($5<br />
352*5$0Ã3$7+<br />
/$1*8$*(<br />
Ã<br />
Ã<br />
Ã'7<br />
• Press the key 6Ã3$5$0ÃÃ@ >Ã',$*1ÃÃ@ >ÃÃÃÃ30&ÃÃÃ@ >6ÃÃ2357ÃÃ@<br />
Parameter General<br />
Workpiece Directory<br />
In the workpiece directory the CNC programs created<br />
by the operator will be stored.<br />
The workpiece directory is a subdirectory of the<br />
program directory which was determined with<br />
installation.<br />
Enter in the input field PROGRAM PATH the name of<br />
the workpiece directory with the PC keyboard, max.<br />
8 characters, no drives or pathes. Not existing<br />
directories will be created.<br />
Active Language<br />
Selection from installed languages, the selected<br />
language will be activated with restart of the<br />
software.<br />
Enter the language sign in the input field<br />
LANGUA<strong>GE</strong><br />
• DT for German<br />
• EN for English<br />
• FR for French<br />
• SP for Spanish<br />
C 3
<strong>EMCO</strong> WINNC <strong>GE</strong> SERIES FANUC <strong>21</strong><strong>MB</strong><br />
OPERATING SEQUENCES<br />
Program Input<br />
Part programs and subprograms can be entered in<br />
the EDIT mode.<br />
Call Up a Program<br />
• Change into EDIT mode<br />
• Press the key<br />
• With the softkey DIR the existing programs will be<br />
displayed.<br />
• Enter program number O...<br />
• New program: Press the key<br />
• Existing program: Press the softkey O SRH.<br />
Input of a block<br />
Example:<br />
Block number (not necessary)<br />
1. word<br />
2. word<br />
<br />
EOB - End of block (on PC keyboard also )<br />
or<br />
Note:<br />
With the parameter SEQUENCE NO (PARAMETER<br />
MANUELL) you can determine whether block<br />
numbering should occur automatically (1 = yes, 0 =<br />
no).<br />
Search a Word<br />
Enter the address of the word to be searched (e.g.:<br />
X) and press the softkey SRH .<br />
Insert a Word<br />
Move the cursor before the word, that should be<br />
before the inserted word, enter the new word (address<br />
and value) and press the key .<br />
Insert a Block<br />
Move the cursor before the EOB sign ";" in that block<br />
which should be before the inserted block and enter<br />
the block to be inserted.<br />
Delete a Block<br />
Enter block number (if no block number exists: N0)<br />
and press the key<br />
Alter a Word<br />
Move the cursor before the word that should be<br />
altered, enter the word and press the key .<br />
Delete a Word<br />
Move the cursor before the word, that should be<br />
deleted and press the key .<br />
C 4
<strong>EMCO</strong> WINNC <strong>GE</strong> SERIES FANUC <strong>21</strong><strong>MB</strong><br />
OPERATING SEQUENCES<br />
Delete a Program<br />
EDIT mode<br />
Enter the program number (e.g.: O22) and press the<br />
key .<br />
Delete All Programs<br />
EDIT mode<br />
Enter the program number O 0-9999 and press the<br />
key .<br />
:LQ1&Ã*(Ã)DQXFÃ6HULHVÃÃ0ÃFÃ(0&2 [<br />
3$5$0(7(5Ã0$18$/<br />
!ÃÃB<br />
-2*ÃÃÃÃÃÃÃÃÃÃÃÃÃÃÃÃÃÃÃÃÃÃÃÃÃÃÃÃÃÃÃÃÃÃÃÃÃÃÃÃÃÃÃÃÃÃÃÃÃÃÃÃÃÃÃÃÃÃÃÃÃÃÃÃÃÃÃÃÃÃÃÃÃÃÃÃ<br />
ÃÃÃÃÃÃ<br />
Selection of the input/output interface<br />
Adjusting the serial interface<br />
NOTE<br />
3$5$0(7(5Ã:5,7(ÃÃÃÃÃÃÃÃÃÃÃÃÃÃÃ ÃÃÃ',6$%/(Ã(1$%/(<br />
79Ã&+(&.ÃÃÃÃÃÃÃÃÃÃÃÃÃÃÃÃÃÃÃÃÃÃÃÃ ÃÃÃ2))ÃÃÃ<strong>21</strong><br />
381&+Ã&2'(ÃÃÃÃÃÃÃÃÃÃÃÃÃÃÃÃÃÃÃ ÃÃÃ(,$ÃÃÃ,62<br />
,1387Ã81,7ÃÃÃÃÃÃÃÃÃÃÃÃÃÃÃÃ ÃÃÃ00ÃÃÃÃ,1&+<br />
,2Ã&+$11(/ÃÃÃÃÃÃÃÃÃÃÃÃÃÃÃÃÃÃÃÃÃÃÃÃÃÃÃÃ ÃÃÃ&20Ã$&',6&Ã3357<br />
6(48(1&(Ã12ÃÃÃÃÃÃÃÃÃÃÃÃÃÃÃÃÃÃÃÃ ÃÃÃ2))Ã<strong>21</strong><br />
7$3(Ã)2500$7ÃÃÃÃÃÃÃÃÃÃÃÃÃÃÃÃÃÃ ÃÃÃ.1Ã.<strong>21</strong>9Ã)<br />
>ÃÃÃÃÃÃÃÃÃÃÃÃÃÃÃÃ@<br />
6(48(1&(Ã6723ÃÃÃÃÃÃÃÃÃÃÃÃÃÃÃÃÃÃÃÃÃÃÃÃ352*5$012<br />
6(48(1&(Ã6723ÃÃÃÃÃÃÃÃÃÃÃÃÃÃÃÃÃÃÃÃÃÃÃÃ6(48(1&(Ã12Ã<br />
2)ÃÈ<br />
2ÃÃÃ1<br />
26ÃÈÃÃ7<br />
) ) ) ) )<br />
>ÃÃ3$5$0ÃÃ@ >Ã',$*1Ã@ >ÃÃÃ30&ÃÃÃ@ >Ã6ÃÃ2357ÃÃ@<br />
:LQ1&Ã*(Ã)DQXFÃ6HULHVÃÃ0ÃFÃ(0&2 [<br />
3$5$0(7(5Ã56&Ã,17(5)$&(<br />
,17(5)$&(<br />
%$8'5$7(<br />
6723%,76<br />
'$7$%,76<br />
&<strong>21</strong>752/Ã3$5$0(7(5<br />
!ÃÃB<br />
&20ÃÃÃÃÃÃÃ&20ÃÃÃÃÃÃÃ'1&<br />
ÃÃÃÃÃÃÃÃÃÃÃÃÃÃÃÃÃÃÃÃ<br />
Ã<br />
ÃÃÃÃÃ(ÃÃÃÃÃÃÃÃÃÃÃÃÃÃÃ(ÃÃÃÃÃÃÃÃÃÃÃÃÃÃÃ(<br />
ÃÃÃÃÃÃÃÃÃÃÃÃÃÃÃÃÃÃÃÃÃÃÃÃÃÃÃÃÃÃÃÃÃÃÃÃ<br />
ÃÃÃÃÃÃÃÃÃÃÃÃÃÃÃÃÃÃÃÃÃÃÃÃÃÃÃÃÃÃÃÃÃÃÃÃ<br />
ÃÃÃÃÃÃÃÃÃÃÃ<br />
ÃÃÃÃÃÃÃÃÃÃÃÃÃÃ<br />
2)ÃÈ<br />
2ÃÃÃ1<br />
26ÃÈÃÃ7<br />
-2*ÃÃÃÃÃÃÃÃÃÃÃÃÃÃÃÃÃÃÃÃÃÃÃÃÃÃÃÃÃÃÃÃÃÃÃÃÃÃÃÃÃÃÃÃÃÃÃÃÃÃÃÃÃÃÃÃÃÃÃÃÃÃÃÃÃÃÃÃÃÃÃÃÃÃÃÃÃ<br />
ÃÃÃÃÃÃ<br />
) ) ) ) )<br />
>Ã3$5$0Ã@ >Ã',$*1Ã@ >ÃÃÃÃ30&ÃÃÃÃ@ >ÃÃ6ÃÃ2357Ã@<br />
When you use an interface expansion card (e.g. for<br />
COM 3 and COM 4), take care that for every interface<br />
a separate interrupt is used (e.g.: COM1 - IRQ4,<br />
COM2 - IRQ3, COM3 - IRQ11, COM4 - IRQ10).<br />
Data Input - Output<br />
• Press the key .<br />
6
<strong>EMCO</strong> WINNC <strong>GE</strong> SERIES FANUC <strong>21</strong><strong>MB</strong><br />
OPERATING SEQUENCES<br />
Program Output<br />
• EDIT mode<br />
• Enter the receiver in (PARAMETER MANUAL)<br />
below "I/O".<br />
• Press the key 352* .<br />
• Press the softkey OPRT.<br />
• Press the key F11.<br />
• Press the soktkey PUNCH<br />
• Enter the program number to be send (e.g. O22).<br />
• When you enter e.g. O5-15, all programs with the<br />
numbers 5 to inclusive 15 will be printed.<br />
When you enter the program numbers 0-9999 all<br />
programs will be put out.<br />
• Press softkey EXEC<br />
Program Input<br />
• EDIT mode<br />
• Enter the receiver in (PARAMETER MANUAL)<br />
below "I/O".<br />
• Press the key 352* .<br />
• Press the softkey OPRT<br />
• Press key F11.<br />
• Press softkey READ<br />
• With input from disk or hard disk you have to enter<br />
a program number.<br />
Enter the program number when you want to read<br />
in one program (e.g.: O22).<br />
When you enter e.g. O5-15, all programs with the<br />
numbers 5 to inclusive 15 will be transmitted.<br />
When you enter O-9999 as program number, all<br />
programs will be transmitted.<br />
• Press the softkey EXEC.<br />
Tool Offset Output<br />
• EDIT mode<br />
• Enter the receiver in (PARAMETER MANUAL)<br />
below "I/O".<br />
• Press the key 2))6(7<br />
6(77,1*<br />
• Press the softkey OPRT.<br />
• Press the key F11<br />
• Pres the soktkey PUNCH<br />
• Press the softkey EXEC<br />
Tool Offset Input<br />
• EDIT mode<br />
• Enter the receiver in (PARAMETER MANUAL)<br />
below "I/O".<br />
• Press the key 2))6(7<br />
6(77,1* .<br />
• Press the softkey OPRT.<br />
• Press the key F11<br />
• Press the softkey READ<br />
• Press the softkey EXEC<br />
Print Programs<br />
• The printer (standard printer in Windows) must be<br />
connected and must be in ON LINE status.<br />
• EDIT mode<br />
• Enter P (Printer) as receiver in (PARAMETER<br />
MANUAL) below "I/O".<br />
• Press the key 352* .<br />
• Press the softkey OPRT.<br />
• Press the key F11.<br />
• Press the softkey PUNCH.<br />
• Enter the program to be printed (e.g. O22) when<br />
you want to print one program.<br />
When you enter e.g. O5-15, all programs with the<br />
numbers 5 to inclusive 15 will be printed.<br />
When you enter the program number O-9999 all<br />
programs will be printed.<br />
• Press the softkey EXEC.<br />
C 6
<strong>EMCO</strong> WINNC <strong>GE</strong> SERIES FANUC <strong>21</strong><strong>MB</strong><br />
OPERATING SEQUENCES<br />
Program Run<br />
Start of a Part Program<br />
Before starting a program the control and the machine<br />
must be ready for running the program.<br />
• Select the EDIT mode.<br />
• Press the key 352*<br />
• Enter the desired part program number (e.g.:<br />
O79).<br />
• Press the key .<br />
• Change to MEM mode.<br />
• Press the key .<br />
Displays while Program Run<br />
While program run different values can be shown.<br />
• Press the softkey PRGRM (basic status). While<br />
program run the actual program block will be<br />
displayed.<br />
• Press the softkey CHECK . While program run the<br />
actual program block, the actual positions, active<br />
G and M commands and speed, feed and tool will<br />
be displayed.<br />
• Press the softkey CURRNT. While the program<br />
run the aktiv G commands will be displayed.<br />
• Press the key . The positions will be shown<br />
enlarged at the screen.<br />
Block Search<br />
With this function you can start a program at any<br />
block.<br />
While block search the same calculations will be<br />
proceeded as with normal program run but the slides<br />
do not move.<br />
• EDIT mode<br />
• Select the program to be machined.<br />
• Move the cursor with the keys and on<br />
that block, with which machining should start.<br />
• Change to MEM mode.<br />
• Start the program with the key .<br />
Program Influence<br />
DRY RUN<br />
DRY RUN is used for testing programs. The main<br />
spindle will not be switched on and all movements<br />
occur in rapid feed.<br />
If DRY RUN is active, DRY will be displayed in the first<br />
line on the screen.<br />
SKIP<br />
With SKIP all program blocks which are marked with<br />
a "/" (e.g.: /N0120 G00 X... ) will not be proceeded<br />
and the program will be continued with the next block<br />
without a "/" sign.<br />
If SKIP is active, SKP will be displayed in the first line<br />
on the screen.<br />
Program interruption<br />
Single block mode<br />
After every program block the program will be stopped.<br />
Continue the program with the key .<br />
If the program block is aktivated SBL will be displayed<br />
in the first line on the screen.<br />
M00<br />
After M00 (programmed stop) in the program the<br />
program will be stopped. Continue the program with<br />
the key .<br />
M01<br />
If OPT. STOP is active, (display OPT in the first line<br />
of the screen) M01 works like M00, otherwise M01<br />
has no effect.<br />
Display of the <strong>Software</strong> Versions<br />
• Press the key<br />
• Select softkey SYSTEM<br />
The software version of the control system and the<br />
eventually connected axcontroller, PLC, working<br />
status,... will be displayed.<br />
C 7
<strong>EMCO</strong> WINNC <strong>GE</strong> SERIES FANUC <strong>21</strong><strong>MB</strong><br />
OPERATING SEQUENCES<br />
:LQ1&Ã*(Ã)DQXFÃ6HULHVÃÃ0ÃFÃ(0&2 [<br />
3$5$0(7(5ÃÃÃ7,0(5<br />
3$576Ã727$/<br />
3$576Ã5(48,5('<br />
3$57Ã&2817<br />
32:(5Ã<strong>21</strong><br />
23(5$7,1*Ã7,0(<br />
&877,1*Ã7,0(<br />
)5((Ã385326(<br />
&ÃÃÃÃ30&ÃÃÃ@ >6ÃÃ%(75Ã@<br />
Display of part counter and piece time<br />
2)ÃÈ<br />
2ÃÃÃ1<br />
Part Counter and Piece Time<br />
Below the position display the part counter and the<br />
piece time are displayed.<br />
The part counter shows the number of program runs.<br />
Each M30 (or M02) increases the part counter for 1.<br />
RUN TIME shows the complete running time of all<br />
program runs.<br />
CYCLE TIME shows the running time of the actual<br />
program and will be reset to 0 with every program<br />
start.<br />
Part Counter Reset<br />
• Press softkey POS.<br />
• Press softkey OPRT<br />
• Select between PTSPRE (reset part counter to 0)<br />
or RUNPRE (reset run time to 0).<br />
Preset of the Part Counter<br />
The part counter can be preset in (PARAMETER<br />
TIMER).<br />
Therefore move the curor on the desired value and<br />
enter the new value.<br />
PARTS TOTAL:<br />
Each M30 increases this number by 1. Every program<br />
run of every program will be counted (= number<br />
of all program runs).<br />
PARTS REQUIRED:<br />
Preset part number. When this number is reached<br />
the program will be stopped and message 7043<br />
PIECE COUNT REACHED will be displayed.<br />
After that the program can be started only after<br />
resetting the part counter or increasing the preset<br />
part number.<br />
C 8
<strong>EMCO</strong> WINNC <strong>GE</strong> SERIES FANUC <strong>21</strong><strong>MB</strong><br />
OPERATING SEQUENCES<br />
Graphic Simulation<br />
NC-programs can be simulated graphically.<br />
:LQ1&*()DQXF6HULHV0F(0&2 [<br />
*5$3+,&3$7+3$5$0(7(5<br />
$;,6<br />
3<br />
;< ;=
<strong>EMCO</strong> WINNC <strong>GE</strong> SERIES FANUC <strong>21</strong><strong>MB</strong><br />
OPERATING SEQUENCES<br />
C 10
<strong>EMCO</strong> WINNC <strong>GE</strong> SERIES FANUC <strong>21</strong><strong>MB</strong><br />
PROGRAMMING<br />
D: Programming<br />
Program Structure<br />
CNC programming for machine tools according to<br />
DIN 66025 is used.<br />
The CNC program is a sequence of program blocks<br />
which are stored in the control.<br />
With machining of workpieces these blocks will be<br />
read and checked by the computer in the programmed<br />
order.<br />
The corresponding control signals will be sent to the<br />
machine.<br />
The CNC program consists of:<br />
• Program number<br />
• CNC blocks<br />
• Words<br />
• Addresses<br />
• number combinations (for axis addresses partly<br />
with sign)<br />
Used Addresses<br />
C........... chamfer<br />
F ........... feed rate, thread pitch<br />
G .......... path function<br />
H........... number of the correction value address in<br />
the offset register (OFFSET)<br />
I, J, K .... circle parameter, scale factor, K also<br />
number of repetitions of a cycle,<br />
mirror axes<br />
M .......... miscellaneous function<br />
N........... block number 1 to 9999<br />
O .......... Program number 1 to 9499<br />
P ........... dwell, subprogram call<br />
Q .......... cutting depth or shift value in cycle<br />
R........... radius, retraction height with cycle<br />
S ........... spindle speed<br />
T ........... tool call<br />
X, Y, Z .. position data (X also dwell)<br />
; ............ block end<br />
D 1
<strong>EMCO</strong> WINNC <strong>GE</strong> SERIES FANUC <strong>21</strong><strong>MB</strong><br />
PROGRAMMING<br />
Survey of G Commands<br />
G00 1 ....................... Positioning (Rapid Traverse)<br />
G01 .............. Linear Interpolation<br />
G02 .............. Circular Interpolation Clockwise<br />
G03.............. Circular Interpolation Counterclockwise<br />
G04² ............. Dwell<br />
G09² ............. Exact Stop<br />
G10 .............. Data Setting<br />
G11 .............. Data Setting Off<br />
G15 1 ....................... End Polar Coordinate Interpolation<br />
G16 .............. Begin Polar Coordinate Interpolation<br />
G17 1 ....................... Plane Selection XY<br />
G18 .............. Plane Selection ZX<br />
G19 .............. Plane Selection YZ<br />
G20 .............. Measuring in Inches<br />
G<strong>21</strong> .............. Measuring in Millimeter<br />
G28² ............. Approach Reference Point<br />
G40 1 ....................... Cancel Cutter Radius Compensation<br />
G41 .............. Cutter Radius Compensation left<br />
G42 .............. Cutter Radius Compensation right<br />
G43.............. Tool Length Compensation positive<br />
G44 .............. Tool Length Compensation negative<br />
G49 1 ....................... Cancel Tool Length Compensation<br />
G50 1 ....................... Cancel Scale Factor<br />
G51 .............. Scale Factor<br />
G52² ............. Local Coordinate System<br />
G53² ............. Machine Coordinate System<br />
G54 1 ....................... Zero Offset 1<br />
G55 .............. Zero Offset 2<br />
G56 .............. Zero Offset 3<br />
G57 .............. Zero Offset 4<br />
G58 .............. Zero Offset 5<br />
G59 .............. Zero Offset 6<br />
G61 .............. Exact Stop Mode<br />
G62 .............. Automatic Corner Override<br />
G63.............. Thread Cuting Mode On<br />
G64 1 ....................... Cutting mode<br />
G68 .............. Coordinate System Rotation ON<br />
G69 .............. Coordinate System Rotation OFF<br />
G73.............. Chip Break Drilling Cycle<br />
G74 .............. Left Tapping Cycle<br />
G76 .............. Fine Drilling Cycle<br />
G80 1 ....................... Cancel Drilling Cycles (G83 bis G85)<br />
G81 .............. Drilling Cycle<br />
G82 .............. Drilling Cycle with Dwell<br />
G83.............. Withdrawal Drilling Cycle<br />
G84 .............. Tapping Cycle<br />
G85 .............. Reaming Cycle<br />
G86 .............. Drilling Cycle with Spindle Stop<br />
G87 .............. Back Pocket Drilling Cycle<br />
G88 .............. Drilling Cycle with Program Stop<br />
G89 .............. Reaming Cycle with Dwell<br />
G90 1 ....................... Absolute Programming<br />
G91 .............. Incremental Programming<br />
G92² ............. Coordinate System Setting<br />
G94 1 ....................... Feed per Minute<br />
G95 .............. Feed per Revolution<br />
G97 1 ....................... Revolutions per Minute<br />
G98 1 ....................... Retraction to Starting Plane (Drilling Cycles)<br />
G99 .............. Retraction to Withdrawal Plane<br />
*URXS &RPPDQG<br />
)XQFWLRQ<br />
* 'ZHOO<br />
* ([DFWÃVWRS<br />
* 'DWDÃ6HWWLQJÃ<br />
<br />
* 'DWDÃ6HWWLQJÃ2II<br />
* $SSURDFKÃ5HIHUHQFHÃ3RLQW<br />
* /RFDOÃ&RRUGLQDWHÃ6\VWHP<br />
* 0DFKLQHÃ&RRUGLQDWÃ6\VWHP<br />
* &RRUGLQDWHÃ6\WHPÃ6HWWLQJ<br />
* 3RVLWLRQLQJÃ5DSLGÃ7UDYHUVH<br />
<br />
* /LQHDUÃ,QWHUSRODWLRQ<br />
* &LUFXODUÃ,QWHUSRODWLRQÃ&ORFNZLVH<br />
* &LUFXODUÃ,QWHUSRODWLRQÃ&RXQWHUFORFNZLVH<br />
* 3ODQHÃ6HOHFWLRQÃ;<<br />
* 3ODQHÃ6HOHFWLRQÃ=;<br />
* 3ODQHÃ6HOHFWLRQÃ
<strong>EMCO</strong> WINNC <strong>GE</strong> SERIES FANUC <strong>21</strong><strong>MB</strong><br />
PROGRAMMING<br />
Survey of M Commands<br />
M00 ...... Programmed Stop<br />
M01 ...... Programmed Stop, Conditional<br />
M02 ...... Program End<br />
M03 ...... Main Spindle ON Clockwise<br />
M04 ...... Main Spindle ON Counterclockwise<br />
M05 1 .......... Main Spindle OFF<br />
M06 ...... Tool Change<br />
M08 ...... Coolant ON<br />
M09 1 .......... Coolant OFF<br />
M10 ...... Lock dividing head<br />
M11 ...... Unlock dividing head<br />
M19 ...... Oriented Spindle Stop<br />
M25 ...... Release Clamping Device<br />
M26 ...... Close Clamping Device<br />
M30 ...... Program End<br />
M71 ...... Puff blowing ON<br />
M72 1 .......... Puff blowing OFF<br />
M98 ...... Subprogram Call<br />
M99 ...... Subprogram End<br />
1 ............................... Initial status<br />
D 3
<strong>EMCO</strong> WINNC <strong>GE</strong> SERIES FANUC <strong>21</strong><strong>MB</strong><br />
PROGRAMMING<br />
Description of G Commands<br />
G00 Positioning (Rapid Traverse)<br />
Format<br />
N.... G00 X... Y... Z...<br />
<<br />
<br />
<br />
<br />
The slides are traversed at maximum speed to the<br />
programmed target point (tool change position, start<br />
point for a following machining routine)<br />
Notes<br />
• A programmed feed F will be suppressed while<br />
G00<br />
• The maximum speed is defined by the producer of<br />
the machine<br />
• The feed override switch is active<br />
<br />
Example<br />
;<br />
<<br />
;<br />
absolute G90<br />
N50 G00 X40 Y56<br />
incremental G91<br />
N50 G00 X-30 Y-30.5<br />
Absolute and incremental measures<br />
<<br />
G01 Linear Interpolation<br />
<br />
<br />
6<br />
<br />
Format<br />
N... G01 X... Y... Z.... F....<br />
Straight movements at the programmed feed rate.<br />
;<br />
<<br />
(<br />
S ...... Start point<br />
E ...... End point<br />
Absolute and incremental measures<br />
<br />
;<br />
Example<br />
absolute G90<br />
N.. G94<br />
.....<br />
N20 G01 X40 Y20.1 F500<br />
incremental G91<br />
N.. G94 F500<br />
.....<br />
N20 G01 X20 Y-25.9<br />
D 4
<strong>EMCO</strong> WINNC <strong>GE</strong> SERIES FANUC <strong>21</strong><strong>MB</strong><br />
PROGRAMMING<br />
Chamfers and Radius<br />
<<br />
<br />
<br />
&<br />
By programming the parameter C or R a chamfer or<br />
a radius can be inserted between two G00 or G01<br />
movements.<br />
Format:<br />
N.. G00/G01 X.. Y.. C/R<br />
N.. G00/G01 X.. Y..<br />
<br />
G<br />
E<br />
5<br />
F<br />
<br />
;<br />
Programming of chamfers and radii is possible for<br />
the active plane only. Following the programming in<br />
the XY plane (G17) is described.<br />
The movement which is programmed has to start at<br />
point b of the drawing.<br />
With incremental programming the distance from<br />
point b must be programmed.<br />
Chamfer and radius in a drawing<br />
With single block mode the tool starts first at point c<br />
and then at point d.<br />
The following situations cause an error message:<br />
• If the traverse path in one of the two G00/G01<br />
blocks is so short, that with inserting a chamfer or<br />
a radius no intersection point would be existing,<br />
error message no. 055 will appear.<br />
• If in the second block no G00/G01 command is<br />
programmed, error message no. 51, 52 will appear.<br />
D 5
<strong>EMCO</strong> WINNC <strong>GE</strong> SERIES FANUC <strong>21</strong><strong>MB</strong><br />
PROGRAMMING<br />
G02 Circular Interpolation<br />
Clockwise<br />
G03 Circular Interpolation<br />
Counterclockwise<br />
=<br />
*<br />
*<br />
*<br />
*<br />
*<br />
*<br />
*<br />
*<br />
*<br />
; <<br />
Format<br />
N... G02/G03 X... Y... Z... I... J... K... F...<br />
or<br />
N... G02/G03 X... Y... Z... R... F...<br />
X, Y, Z .. End point of the arc (abs. or incr.)<br />
I, J, K .... Incremental circle parameter<br />
(distance from start point to the centre<br />
point, I is related to X, J to Y, K to Z)<br />
R........... Radius of the arc (arc < semicircle with +R,<br />
> semicircle with -R), can be programmed<br />
instead of the circle parameter I, J, K<br />
The tool will be traversed along the defined arc with<br />
the programmed feed F.<br />
(<br />
6<br />
5<br />
Notes<br />
The circular interpolation can be proceeded in the<br />
active plane only.<br />
Programming the value 0 for I, J or K can be omitted.<br />
The observation of G02, G03 occurs always vertical<br />
to the active plane.<br />
-<br />
0<br />
Rotational directions of G02 and G03<br />
Helix curve<br />
=<br />
; <<br />
f<br />
Helix Interpolation<br />
Normally only two axes will be programmed for a<br />
circle. These axes determine also the active plane.<br />
If a third vertical axis will be programmed, the<br />
movements of the slides will be coupled in a way that<br />
a screw line results.<br />
The programmed feed rate will not be hold at the real<br />
path, but on the circle path (projected). The third,<br />
linear traversed axis will be controlled in a way, that<br />
it reaches the end point at the same time as the<br />
circular traversed axes.<br />
Limitations<br />
• A helix interpolation is possible with G17 (XY<br />
plane) only.<br />
• The gradient angle φ must be less than 45°.<br />
• If the spatial tangents differ more than 2° with<br />
block transititions, an exact stop will be proceeded<br />
in every case before/after the helix.<br />
D 6
<strong>EMCO</strong> WINNC <strong>GE</strong> SERIES FANUC <strong>21</strong><strong>MB</strong><br />
PROGRAMMING<br />
G04 Dwell<br />
Format<br />
N... G04 X...<br />
or<br />
N... G04 P...<br />
[sec]<br />
[msec]<br />
The tool movement will be stopped for a time defined<br />
by X or P in the last reached position - sharp edges<br />
- transititions, cleaning drilling ground, exact stop<br />
Notes<br />
• With address P no decimal point can be used<br />
• The dwell starts at the moment when the tool<br />
movement speed from the last movement becomes<br />
zero.<br />
• t max. = 2000 sec<br />
• Input resolution 100 msec (0.1 sec)<br />
Examples<br />
N75 G04 X2.5<br />
N95 G04 P1000<br />
(Dwell = 2.5 sec)<br />
(Dwell = 1sec = 1000 msec)<br />
D 7
<strong>EMCO</strong> WINNC <strong>GE</strong> SERIES FANUC <strong>21</strong><strong>MB</strong><br />
PROGRAMMING<br />
G7.1 Cylindrical Interpolation<br />
4<br />
Format:<br />
N... G7.1 Q...<br />
N... G7.1 Q0<br />
G7.1 Q... Starts the cylinder interpolation.<br />
The Q- value describes the radius of<br />
the the blank part.<br />
G7.1 Q0 End of cylinder interpolation<br />
The tool tip position 0 must be programmed for all<br />
tools that will be used for the cylindrical interpolation.<br />
This function enables the development of a cylinder<br />
surface in programming.<br />
In this way e.g. programs for cyclindrical cam<br />
machining on lathes can be created.<br />
The traverse amount of the rotary axis Q programmed<br />
by indication of the angle is converted in the control<br />
into the distance of a fictitious linear axis along the<br />
external surface of the cylinder.<br />
Thus, it is possible that linear and circular<br />
interpolations on this area can be carried out with<br />
another axis.<br />
With G19 the level is determined in which the rotary<br />
axis Q is preset in parallel to the Y-axis.<br />
Notes:<br />
· The reference point of the cylinder must be entered<br />
incrementally, since otherwise it would be<br />
approached by the tool!<br />
· In the offset data cutter position 0 must be allocated<br />
to the tool. However, the miller radius must be<br />
entered.<br />
· In mode G7.1 the coordinate system must not be<br />
changed.<br />
· G7.1 Q.. and/or G13.1 Q0 must be programmed in<br />
the mode "cutter radius compensation off" (G40)<br />
and cannot be started or terminated within "cutter<br />
radius compensation on" (G41 or G42).<br />
· G7.1 Q.. and G7.1 Q0 must be programmed in<br />
separate blocks.<br />
· In a block between G7.1 Q.. and G7.1 Q0 an<br />
interrupted program cannot be restarted.<br />
· The arc radius with circular interpolation (G2 or G3)<br />
must be programmed via an R-command and must<br />
not be programmed in degree and/or via K and J-<br />
coordinates.<br />
· In the geometry program between G7.1 Q.. and<br />
G7.1 Q0 no rapid motion (G0) and/or positioning<br />
procedures causing rapid motion movements (G28)<br />
or drilling cycles (G83 to G89) must be programmed.<br />
· The feed entered in the mode cylindric interpolation<br />
is to be considered as traverse speed on the<br />
unrolled cylinder area.<br />
D 8
<strong>EMCO</strong> WINNC <strong>GE</strong> SERIES FANUC <strong>21</strong><strong>MB</strong><br />
PROGRAMMING<br />
4<br />
;<br />
Example - Cylindrical Interpolation<br />
X axis with diametrical programming and Q axis with<br />
angular programming.<br />
=<br />
ƒ ¡[π <br />
5<br />
<br />
4<br />
=<br />
Milled with end mill cutter ø5mm<br />
O0002 (Cylindrical Interpol.)<br />
N15 T0505<br />
N25 M13<br />
Sense of rotation for driven tools<br />
(be equivalent to M3)<br />
N30 G97 S2000<br />
N32 M52 Positioning of the spindle<br />
N35 G7.1 Q19.1 Start of the interpolation /<br />
blank part radius<br />
N37 G94 F200<br />
N40 G0 X45 Z-5<br />
N45 G1 X35 Q0 Z-5<br />
N50 G1 Z-15 Q22.5<br />
N55 Z-5 Q45<br />
N60 Z-15 Q67.5<br />
N65 Z-5 Q90<br />
N70 Z-15 Q112.5<br />
N75 Z-5 Q135<br />
N80 Z-15 Q157.5<br />
N85 Z-5 Q180<br />
N90 Z-15 Q202.5<br />
N95 Z-5 Q225<br />
N100 Z-15 Q247.5<br />
N105 Z-5 Q270<br />
N110 Z-15 Q292.5<br />
N115 Z-5 Q315<br />
N120 Z-15 Q337.5<br />
N125 Z-5 Q360<br />
N130 X45<br />
N135 G7.1 Q0<br />
N140 M53<br />
N145 G0 X80 Z100 M15<br />
N150 M30<br />
End of interpolation<br />
End of roundaxis<br />
operation<br />
D 9
<strong>EMCO</strong> WINNC <strong>GE</strong> SERIES FANUC <strong>21</strong><strong>MB</strong><br />
PROGRAMMING<br />
G09<br />
Exact Stop<br />
Exact Stop active<br />
Exact Stop not active<br />
Format<br />
N... G09<br />
A block will then be proceeded, when the slides are<br />
braked to 0 before. Therefore the edges will not be<br />
rounded and precise transititions will result.<br />
G09 is effective blockwise.<br />
G10 Data Setting<br />
The command G10 allows to overwrite control data,<br />
programming parameters, writing tool data etc...<br />
G10 is frequently used to program the workpiece<br />
zero point.<br />
Zero point offset<br />
Format<br />
N... G10 L2 Pp IP...;<br />
p=0 External workpiece zero point offset<br />
p=1-6 Normal workpiece zero point offset<br />
corrresponding to the coordinatesystem<br />
1 - 6<br />
IP Workpiece zero point offset for the<br />
several axis.<br />
At the programming IP become<br />
replaced by the axsletters (X,X,Z).<br />
Tool Compensation<br />
Note: By the reason of compatibility with older NCprogramms<br />
the system allow the input of L1 instead<br />
of L11<br />
Format<br />
N... G10 L11 P...R...;<br />
P<br />
R<br />
Number of the toll compensation<br />
Tool compensation value in the im absolute<br />
command- Mode (G90).<br />
At the inkremental value programming (G91) the<br />
tool compensation value get add up to the existing<br />
value.<br />
D 10
<strong>EMCO</strong> WINNC <strong>GE</strong> SERIES FANUC <strong>21</strong><strong>MB</strong><br />
PROGRAMMING<br />
; <br />
G15 End Polar Coordinate<br />
Interpolation<br />
G16 Begin Polar Coordinate<br />
Interpolation<br />
< ƒ<br />
A point determided by polar coordinates<br />
Format<br />
N... G15/G16<br />
Between G16 and G15 points can be defined by polar<br />
coordinates.<br />
The selection of the plane in which polar coordinates<br />
can be programmed occurs with G17 - G19.<br />
With the address of the first axis the radius will be<br />
programmed, with the address of the second axis the<br />
angle will be programmed, both related to the<br />
workpiece zero point.<br />
Example<br />
N75 G17 G16<br />
N80 G01 X50 Z30<br />
first axis: radius X=50<br />
second axis: angle Y=30<br />
D 11
<strong>EMCO</strong> WINNC <strong>GE</strong> SERIES FANUC <strong>21</strong><strong>MB</strong><br />
PROGRAMMING<br />
;<br />
<<br />
<<br />
=<br />
=<br />
;<br />
<<br />
*<br />
*<br />
;<br />
G17-G19 Plane Selection<br />
Format<br />
N... G17/G18/G19<br />
With G17 to G19 the plane will be defined, in which<br />
circular interpolation and polar coordinate interpolation<br />
can be proceeded and in which the cutter radius<br />
compensation will be calculated.<br />
In the vertical axis to the active plane the tool length<br />
compensation will be proceeded.<br />
=<br />
;<br />
<<br />
=<br />
G17<br />
G18<br />
G19<br />
XY-Plane<br />
ZX-Plane<br />
YZ-Plane<br />
=<br />
*<br />
<<br />
;<br />
;<br />
=<br />
<<br />
Definition of the main planes<br />
G20 Measuring in Inches<br />
Format<br />
N... G20<br />
By programming G20 the following values will be<br />
converted to the inch system:<br />
• Feed F [mm/min, inch/min, mm/rev, inch/rev]<br />
• Offset values (WORK, geometry and wear)<br />
[mm, inch]<br />
• Traverse pathes [mm, inch]<br />
• Display of the actual position [mm, inch]<br />
• Cutting speed [m/min, feet/min]<br />
Notes<br />
• For clearness G20 should be programmed in the<br />
first block<br />
• The last active measuring system will be hold -<br />
even with main switch off/on.<br />
• To get back to the origin measuring system it is the<br />
best to use the MDI mode (e.g. MDI-G20-Cycle<br />
Start)<br />
G<strong>21</strong>Measuring in Millimeter<br />
Format<br />
N... G<strong>21</strong><br />
Comments and notes analogous to G20!<br />
D 12
<strong>EMCO</strong> WINNC <strong>GE</strong> SERIES FANUC <strong>21</strong><strong>MB</strong><br />
PROGRAMMING<br />
G28 Approach Reference Point<br />
Format<br />
N... G28 X... Y... Z...<br />
X, Y, Z Coordinates of the intermediate point.<br />
With G28 the reference point will be approached via<br />
an intermediate position (X, Y, Z).<br />
First is the movement to X, Y and Z, then the<br />
reference point will be approached. Both movements<br />
occur with G00!<br />
The shift G92 will be deleted.<br />
D 13
<strong>EMCO</strong> WINNC <strong>GE</strong> SERIES FANUC <strong>21</strong><strong>MB</strong><br />
PROGRAMMING<br />
Cutter Radius Compensation<br />
With the cutter radius compensation the control<br />
calculates automatically a path parallel to the programmed<br />
contour and compensates so the cutter<br />
radius.<br />
Radius compensated tool path<br />
G40 Cancel Cutter Radius<br />
Compensation<br />
The cutter radius compensation will be cancelled by<br />
G40.<br />
Cancellation is only permitted in combination with a<br />
linear traversing movement (G00, G01).<br />
G40 can be programmed in the same block like G00<br />
or G01 or in the previous block.<br />
Usually G40 will be programmed with the retraction to<br />
the tool change point.<br />
G41Cutter Radius<br />
Compensation left<br />
If the tool is (viewed in feed direction) at the left side<br />
of the contour to be worked, G41 has to be programmed.<br />
For calculating a radius, an H parameter in the offset<br />
register (OFFSET) which represents the cutter radius<br />
must be programmed and called up with G41<br />
e.g.:<br />
N... G41 H..<br />
Definition ofG41 cutter radius compensation left<br />
Notes<br />
• Direct change between G41 and G42 is not allowed<br />
- previous cancellation with G40.<br />
• Selection in combination with G00 or G01 necessary<br />
• Programming an H parameter is necessary<br />
unconditionally, the H parameter is effective<br />
modally.<br />
G42 Cutter Radius<br />
Compensation right<br />
If the tool is (viewed in feed direction) at the right side<br />
of the contour to be worked, G42 has to be<br />
programmed.<br />
Definition ofG42 cutter radius compensation right<br />
Notes see G41!<br />
D 14
<strong>EMCO</strong> WINNC <strong>GE</strong> SERIES FANUC <strong>21</strong><strong>MB</strong><br />
PROGRAMMING<br />
Tool pathes with selection / cancellation of the cutter radius compensation<br />
5<br />
*<br />
5<br />
Frontal approach or leaving of an edge point<br />
*<br />
5<br />
*<br />
5<br />
*<br />
*<br />
5<br />
Approach or leaving an edge point behind<br />
*<br />
Approach or leaving an edge point at side behind<br />
programmed tool path<br />
real traversed tool path<br />
With arcs always the tangent of the end or start point<br />
of the arc will be approached.<br />
The approaching path to the contour and the leaving<br />
path from the contour must be larger than the tool<br />
radius R, otherwise program interruption with alarm.<br />
If contour elements are smaller than the tool radius R,<br />
contour violations could happen. The software<br />
computes three blocks forward to recognize this<br />
contour violations and interrupt the program with an<br />
alarm.<br />
Tool pathes with program run with active cutter radius compensation<br />
5<br />
5<br />
*<br />
*<br />
*<br />
Tool path at an inner edge Tool path at an outer edge > 90°<br />
5<br />
*<br />
5<br />
*<br />
5<br />
5<br />
5<br />
*<br />
Tool path at an outer edge < 90°<br />
programmed tool path<br />
real traversed tool path<br />
With arcs always the tangent of the end or start point<br />
of the arc will be approached.<br />
If contour elements are smaller than the cutter radius<br />
R, contour violations could happen. The software<br />
computes three blocks forward to recognize this<br />
contour violations and interrupt the program with an<br />
alarm.<br />
D 15
<strong>EMCO</strong> WINNC <strong>GE</strong> SERIES FANUC <strong>21</strong><strong>MB</strong><br />
PROGRAMMING<br />
G43 Tool Length Compensation<br />
positive<br />
G44 Tool Length Compensation<br />
negative<br />
Format:<br />
N... G43/G44 H..<br />
With G43 and G44 a value from the offset register<br />
(OFFSET) can be called up and added to or subtracted<br />
from as tool length. To all following Z movements<br />
(with active XY plane - G17) in the program<br />
this value will be added to or subtracted from.<br />
Example:<br />
N... G43 H05<br />
The value, which is written into the register under<br />
H05, will be added to all following Z movements as<br />
tool length.<br />
G49 Cancel Tool Length<br />
Compensation<br />
The positive (G43) or negative (G44) shift will be<br />
cancelled.<br />
=<br />
;<br />
= 3 % <<br />
*;
<strong>EMCO</strong> WINNC <strong>GE</strong> SERIES FANUC <strong>21</strong><strong>MB</strong><br />
PROGRAMMING<br />
<<br />
*;
<strong>EMCO</strong> WINNC <strong>GE</strong> SERIES FANUC <strong>21</strong><strong>MB</strong><br />
PROGRAMMING<br />
G52 Local Coordinate System<br />
Format:<br />
N... G52 X... Y... Z...<br />
With G52 the actual coordinate zero point can be<br />
shifted for the values X, Y, Z.<br />
With this function a sub coordinate system to the<br />
existing coordinate system can be created.<br />
G52 is effective blockwise, the resulting shift will be<br />
holded, until another shift will be activated.<br />
G53 Machine Coordinate System<br />
Format:<br />
N... G53<br />
The machine zero point is determined by the machine<br />
manufacturer (<strong>EMCO</strong> milling machines: at the<br />
left front machine table corner).<br />
Certain working sequences (tool change, measuring<br />
position...) always will be done at the same position<br />
in the working area.<br />
With G53 the zero offset will be cancelled for one<br />
program block and the machine coordinate system is<br />
active for this block.<br />
G54 - G59 Zero Offset 1 - 6<br />
Six positions in the working area can be predetermined<br />
as zero points (e.g. points on fix mounted<br />
clamping devices). These zero points can be called<br />
up with G54 - G59.<br />
D 18
<strong>EMCO</strong> WINNC <strong>GE</strong> SERIES FANUC <strong>21</strong><strong>MB</strong><br />
PROGRAMMING<br />
Exact stop active<br />
Exact stop not active<br />
G61Exact Stop Mode<br />
Format<br />
N... G61<br />
A block will then be proceeded, when the slides are<br />
braked to 0 before. Therefore the edges will not be<br />
rounded and precise transititions will result.<br />
G61 is active, until it will be deselected with G62 or<br />
G64.<br />
G63 Thread Cutting Mode On<br />
G63 only with AC95 possible.<br />
With AC88 is G63 allowed, but without function.<br />
By thread cutting always work with a tap holder with<br />
lenght compensation.<br />
Only for PC Mill 100/125/155<br />
Format<br />
N... G63 Z... F...<br />
Z<br />
F<br />
Thread depht<br />
Thread pitch<br />
• Feed and spindle override switch are not active<br />
while G33 (100%).<br />
• G63 works only with the <strong>EMCO</strong> PC Mill 100/125/<br />
155, because the <strong>EMCO</strong> PC Mill 50/55 has no<br />
encoder on the milling spindle.<br />
G64 Cutting mode<br />
Velocity<br />
X axis<br />
3 3<br />
<br />
<br />
Y axis<br />
3 3<br />
<br />
<br />
3 3<br />
<br />
<br />
Contour<br />
transitition<br />
Format<br />
N... G62/64<br />
G62 and G64 have the same effect.<br />
Before reaching the target point in X direction the Y<br />
slide will already be accelerated. This causes a<br />
steady movement with contour transititions. The<br />
contour transitition is not exactly sharp-edged (parabola,<br />
hyperbola).<br />
The size of the contour transititions is normally within<br />
the tolerance of the drawings.<br />
Speed reaction of the slides with G62 and G64<br />
D 19
<strong>EMCO</strong> WINNC <strong>GE</strong> SERIES FANUC <strong>21</strong><strong>MB</strong><br />
PROGRAMMING<br />
G68 / G69 Coordinate System Rotation<br />
<<br />
Format:<br />
N... G68 a... b... R...<br />
.<br />
.<br />
N... G69<br />
α, β<br />
Coordinate System Rotation G68/ G69<br />
;<br />
G68 ....... Coordinate System Rotation ON<br />
G69 ....... Coordinate System Rotation OFF<br />
α / β ........ Indicates the coordinates of the rotational<br />
center in the respective plane.<br />
R............ Angel of rotation<br />
For example, this function can be used to alter<br />
programs by using a rotational command.<br />
The rotation occurs in the actual valid plane<br />
(G17, G18 or G19).<br />
;<br />
Example:<br />
<br />
<br />
ƒ<br />
ƒ<br />
N5 G54<br />
N10 G43 T10 H10 M6<br />
N15 S2000 M3 F300<br />
N20 M98 P030100 ;Subprogram call<br />
N25 G0 Z50<br />
N30 M30<br />
ƒ<br />
Ã<br />
5<br />
Example Coordinate System Rotation<br />
=<br />
O0100 (Subprogram 0100)<br />
N10 G91 G68 X10 Y10 R22.5<br />
N15 G90 X30 Y10 Z5<br />
N20 G1 Z-2<br />
N25 X45<br />
N30 G0 Z5<br />
N35 M99<br />
D 20
<strong>EMCO</strong> WINNC <strong>GE</strong> SERIES FANUC <strong>21</strong><strong>MB</strong><br />
PROGRAMMING<br />
Drilling Cycles G73 - G89<br />
G98<br />
Start plane<br />
Movements with G98 and G99<br />
G99<br />
Withdrawal<br />
plane<br />
Systematic G98/G99<br />
G98 .... After reaching the drilling depth the tool<br />
retracts to the start plane<br />
G99 .... After reaching the drilling depth the tool<br />
retracts to the withdrawal plane- defined by<br />
the R parameter<br />
Is no G98 or G99 active, the tool retracts to the start<br />
plane. If G99 (Withdrawal to the withdrawal plane) is<br />
programmed the address R must be programmed.<br />
With G98 R need not to be programmed.<br />
The compution of the R parameter is different with<br />
incremental and absolute programming:<br />
Absolute programming (G90):<br />
R defines the height of the withdrawal plane over the<br />
actual workpiece zero point.<br />
Incremental programming (G91):<br />
R defines the height of the withdrawal plane related<br />
to the last Z position (start position of the drilling<br />
cycle). With a negative value for R the withdrawal<br />
plane will be below the start position, with a positive<br />
value the withdrawal plane will be over the start<br />
position<br />
6<br />
5<br />
(<br />
<br />
<br />
D<br />
E<br />
Sequence of movements<br />
1: The tool traverses with rapid speed from the start<br />
position (S) to the plane defined by R (R).<br />
2: Cycle-specific drill machining down to end<br />
deptht (E).<br />
3: The withdrawal occurs a: with G98 to the start<br />
plane (S) and b: with G99 to the withdrawal plane.<br />
Sequence of movements G98, G99<br />
< < <<br />
; ; ;<br />
Cycle repetition for a row of holes<br />
Number of repetitions<br />
The K parameter defines the number of repetitions of<br />
the cycle.<br />
With absolute programming (G90) it would make no<br />
sense to drill several times in the same hole.<br />
With incremental programming (G91) the tool moves<br />
on each time for the distances X and Y. This is a<br />
simple way of programming rows of borings.<br />
G98 must be aktivated!<br />
D <strong>21</strong>
<strong>EMCO</strong> WINNC <strong>GE</strong> SERIES FANUC <strong>21</strong><strong>MB</strong><br />
PROGRAMMING<br />
G73<br />
(G98)<br />
G73 Chip Break Drilling Cycle<br />
Format<br />
N... G98(G99) G73/G83 X... Y... Z... (R...) P... Q...<br />
F... K...<br />
4<br />
R<br />
Start<br />
plane<br />
The tool dips into the work piece for the infeed Q,<br />
drives back 1 mm to break the chips, dips in again<br />
etc. until end depth is reached and retracts with rapid<br />
feed.<br />
Applications<br />
4<br />
deep borings, material with bad cutting property<br />
4<br />
Dwell P<br />
Movements of G73 with active G98<br />
G73<br />
(G99)<br />
G98(G99) .. Return to starting plane (withdrawal plane)<br />
X, Y ........... Hole position<br />
Z ................ Absolute (incremental) drilling depth<br />
R [mm] ...... Absolute (with G91 incremental) value<br />
of the withdrawal plane<br />
P [msec] .... Dwell at the hole bottom<br />
P1000 = 1 sec<br />
F ................ Feed rate<br />
Q [mm] ...... Cutting division - infeed per cut<br />
K ................ Number of repetitions<br />
4 4 4 5<br />
Withdrawal<br />
plane<br />
Dwell P<br />
Movements of G73 with active G99<br />
G74 Left Tapping Cycle<br />
Only for PC Mill 100/125/155.<br />
With this cycle left threads can be produced. The<br />
cycle G74 works like G84 but with reversed turning<br />
directions.<br />
See Tapping Cycle G84.<br />
D 22
<strong>EMCO</strong> WINNC <strong>GE</strong> SERIES FANUC <strong>21</strong><strong>MB</strong><br />
PROGRAMMING<br />
G76 Fine Drilling Cycle<br />
4<br />
Start<br />
plane<br />
Movements of G76 - fine drilling cycle<br />
Withdrawal<br />
plane<br />
Only for machines with oriented spindle stop.<br />
Format<br />
N...G98(G99) G76 X... Y... Z... (R...) F... Q... K...<br />
This cycle is for enlarging borings with boring and<br />
facing heads.<br />
The tool traverses with rapid feed to the withdrawal<br />
plane, with the programmed feed to the end depth,<br />
the milling spindle will be stopped oriented, the tool<br />
traverses with rapid speed horizontally (Q) off the<br />
surface (against stop direction) and traverses with<br />
rapid speed to the withdrawal plane (G99) or start<br />
plane (G98) and traverses back for the value Q to the<br />
original position.<br />
G98(G99) .. Retraction to start plane (withdrawal<br />
plane)<br />
X, Y ........... Hole position<br />
Z ................ Absolute (incremental) drilling depth<br />
R [mm] ...... Absolute (with G91 incremental) value<br />
of the withdrawal plane<br />
F ................ Feed<br />
Q ............... Horizontal traverse-off value<br />
K ................ Number of repetitions<br />
G80 Cancel Drilling Cycles<br />
Format<br />
N... G80<br />
The drilling cycles are modal. They have to be<br />
cancelled by G80 or another group 1 command (G00,<br />
G01, ...).<br />
G81Drilling Cycle<br />
Start<br />
plane<br />
R<br />
G98<br />
G99<br />
Movements of G81 - drilling cycle<br />
Withdrawal<br />
plane<br />
Format<br />
N...G98(G99) G81 X... Y... Z... (R...) F... K...<br />
The tool traverses down to end depth with feed speed<br />
and retracts with rapid feed.<br />
Application:<br />
Short drillings, material with good cutting properties<br />
G98(G99) .. Retraction to start plane (withdrawal<br />
plane)<br />
X, Y ........... Hole position<br />
Z ................ Absolute (incremental) drilling depth<br />
R [mm] ...... Absolute (with G91 incremental) value<br />
of the withdrawal plane<br />
F ................ Feed<br />
K ................ Number of repetitions<br />
D 23
<strong>EMCO</strong> WINNC <strong>GE</strong> SERIES FANUC <strong>21</strong><strong>MB</strong><br />
PROGRAMMING<br />
G82<br />
(G98)<br />
Start<br />
plane<br />
G82 Drilling Cycle with Dwell<br />
Format<br />
N... G98(G99) G82 X... Y... Z... (R...) P... F... K...<br />
The tool traverses down to end depth with feed<br />
speed, dwells turning to clean the hole ground and<br />
retracts with rapid feed.<br />
Dwell P<br />
Drilling cycle with dwell and retraction to the start<br />
plane<br />
G82<br />
(G99)<br />
Withdrawal<br />
plane R<br />
Applications<br />
Short borings, material with good cutting property<br />
G98(G99) .. Return to starting plane (withdrawal plane)<br />
X, Y ........... Hole position<br />
Z ................ Absolute (incremental) drilling depth<br />
R [mm] ...... Absolute (with G91 incremental) value<br />
of the withdrawal plane<br />
P [msec] .... Dwell at the hole bottom<br />
P1000 = 1 sec<br />
F ................ Feed rate<br />
K ................ Number of repetitions<br />
Dwell P<br />
Drilling cycle with dwell and retraction to the withdrawal<br />
plane<br />
G83<br />
4 4<br />
R4<br />
(G98)<br />
Withdrawal<br />
plane<br />
Dwell P<br />
G83 Withdrawal Drilling Cycle<br />
Format<br />
N... G98(G99) G73/G83 X... Y... Z... (R...) P... Q...<br />
F... K...<br />
The tool dips into the work piece for the infeed Q,<br />
drives back to the start plane (G98) or to the withdrawal<br />
plane (G99), to break the chips and remove it<br />
from the hole, traverses with rapid speed until 1 mm<br />
over the previous drilling depth, dips in again for the<br />
infeed Q etc. until end depth is reached and retracts<br />
with rapid feed.<br />
Applications<br />
deep borings, (soft) material with long chips<br />
Movements of G83 with active G98<br />
D 24
<strong>EMCO</strong> WINNC <strong>GE</strong> SERIES FANUC <strong>21</strong><strong>MB</strong><br />
PROGRAMMING<br />
G73<br />
4<br />
(G99)<br />
Withdrawal<br />
plane<br />
G98(G99) .. Return to starting plane (withdrawal plane)<br />
X, Y ........... Hole position<br />
Z ................ Absolute (incremental) drilling depth<br />
R [mm] ...... Absolute (with G91 incremental) value<br />
of the withdrawal plane<br />
P [msec] .... Dwell at the hole bottom<br />
P1000 = 1 sec<br />
F ................ Feed rate<br />
Q [mm] ...... Cutting division - infeed per cut<br />
K ................ Number of repetitions<br />
4<br />
4<br />
Dwell P<br />
Movements of G83 with active G99<br />
G84 Tapping Cycle<br />
R<br />
)<br />
Tapping cycle (with G99)<br />
3<br />
Only for PC Mill 100/125/155.<br />
Format<br />
N...G98(G99) G84 X... Y... Z... (R...) F... P... K...<br />
A tapping chuck with length compensation must<br />
be used.<br />
Spindle override and feed override will be set fix to<br />
100 % while machining.<br />
The tool moves turning clockwise with programmed<br />
feed into the workpiece down to drilling depth Z,<br />
dwells (P), switches to counterclockwise turning and<br />
retracts with feed.<br />
G98(G99) .. Retraction to start plane (withdrawal<br />
plane)<br />
X, Y ........... Hole position<br />
Z ................ Absolute (incremental) tapping depth<br />
R [mm] ...... Absolute (with G91 incremental) value<br />
of the withdrawal plane<br />
F ................ Thread pitch (feed per revolution)<br />
P ................ Dwell at thread ground<br />
K ................ Number of repetitions<br />
D 25
<strong>EMCO</strong> WINNC <strong>GE</strong> SERIES FANUC <strong>21</strong><strong>MB</strong><br />
PROGRAMMING<br />
G85<br />
(G98)<br />
Startplane<br />
Startplane<br />
G85 Reaming Cycle<br />
Format<br />
N... G98 (G99) G85 X... Y... Z... (R...) F... K...<br />
The tool traverses down to end depth with feed speed<br />
and retracts to the withdrawal plane with feed.<br />
Retraction to withdrawal plane with rapid feed depending<br />
on G98.<br />
Reaming cycle with withdrawal to the start plane<br />
R<br />
G98(G99) .. Return to starting plane (withdrawal plane)<br />
X, Y ........... Hole position<br />
Z ................ Absolute (incremental) drilling depth<br />
R [mm] ...... Absolute (with G91 incremental) value<br />
of the withdrawal plane<br />
F ................ Feed rate<br />
K ................ Number of repetitions<br />
G86<br />
(G98)<br />
G86 Drilling Cycle with Spindle<br />
Stop<br />
Format<br />
N... G98(G99) G86 X... Y... Z... (R...) F...<br />
R<br />
Spindle<br />
Stop<br />
Drilling cycle with spindle stop and withdrawal to the<br />
start plane<br />
The tool traverses down to end depth with feed<br />
speed. At the hole ground the spindle stops and the<br />
tool retracts with rapid feed.<br />
G98(G99) .. Return to starting plane (withdrawal plane)<br />
X, Y ........... Hole position<br />
Z ................ Absolute (incremental) drilling depth<br />
R [mm] ...... Absolute (with G91 incremental) value<br />
of the withdrawal plane<br />
F ................ Feed rate<br />
K ................ Number of repetitions<br />
D 26
<strong>EMCO</strong> WINNC <strong>GE</strong> SERIES FANUC <strong>21</strong><strong>MB</strong><br />
PROGRAMMING<br />
4<br />
Back pocket drilling cycle<br />
=<br />
5<br />
G87 Back Pocket Drilling Cycle<br />
Only for machines with oriented spindle stop<br />
Format<br />
N... G87 X... Y... Z... R... Q... F...<br />
Existing drillings can be enlarged in one direction with<br />
a boring or facing head.<br />
• The tool will be positioned in X and Y and stopped<br />
oriented.<br />
• It will be traversed horizontally for the distance Q<br />
against the stop direction of the oriented stop. The<br />
value Q must be larger than the tool diameter to<br />
avoid collisions.<br />
• The tool traverses to the depth R (no machining).<br />
• The tool traverses back horizontally for the distance<br />
Q on the position X, Y (machining).<br />
• The tool traverses vertical to the height Z<br />
(machining).<br />
• At height Z the spindle stops oriented, traverses<br />
horizontally for the distance Q against the stop<br />
direction of the oriented stop (into the existing<br />
drilling) and with rapid feed out of the drilling.<br />
• The tool traverses horizontally for the value Q back<br />
to the position X,Y.<br />
G99 can not be programmed, the tool always retracts<br />
to the start plane.<br />
X, Y ........... Hole position<br />
Z ................ Absolute (incremental) drilling depth<br />
R [mm] ...... Back drilling depth<br />
F ................ Feed rate<br />
G88<br />
G88 Drilling Cycle with Program<br />
Stop<br />
Format<br />
N... G88 X... Y... Z... (R...) P... F... M...<br />
R<br />
Drilling cycle with program stop<br />
Start<br />
plane<br />
Program<br />
stop<br />
The tool traverses with feed rate to the programmed<br />
end depth. At the end depth the program will be<br />
stopped after the programmed dwell, retraction occurs<br />
manually.<br />
X, Y ........... Hole position<br />
Z ................ Absolute (incremental) drilling depth<br />
R [mm] ...... Absolute (with G91 incremental) value<br />
of the withdrawal plane<br />
P [msec] .... Dwell at end depth:<br />
P1000 = 1 sec<br />
F ................ Feed rate<br />
D 27
<strong>EMCO</strong> WINNC <strong>GE</strong> SERIES FANUC <strong>21</strong><strong>MB</strong><br />
PROGRAMMING<br />
G89 Reaming Cycle with Dwell<br />
See G85<br />
The tool traverses with the programmed feed rate to<br />
the end depth and dwells (P). Retraction to the<br />
withdrawal plane occurs with feed rate, depending on<br />
G98 traverses the tool with rapid speed to the start<br />
plane.<br />
G90 Absolute Programming<br />
Format<br />
N... G90<br />
G94 Feed per Minute<br />
With G94 all F (feed) values are in mm/min.<br />
Format<br />
N... G94 F...<br />
G95 Feed per Revolution<br />
Only PC MILL 100/125/155<br />
With G95 all F (feed) values are in mm/rev.<br />
Format<br />
N... G95 F...<br />
G97 Revolutions per Minute<br />
With G97 all S values are in rev/min.<br />
Format<br />
N... G97 S...<br />
Notes<br />
• A direct change between G90 and G91 is allowed<br />
also blockwise<br />
• G90 (G91) can be programmed in combination<br />
with other G functions.<br />
(N... G90 G00 X... Y... Z...).<br />
G91Incremental Programming<br />
Format<br />
N... G91<br />
Notes see G90.<br />
G92 Coordinate System Setting<br />
Format<br />
N... G92 X... Z... (Coordinate System Setting)<br />
Sometimes it is necessary to shift the zero point<br />
within a part program. This occurs with G92.<br />
This zero offset is effective modally and will not be<br />
cancelled by M30 or RESET. Therefore it is necessary<br />
to activate the previous zero point before program<br />
end.<br />
G98 Retraction to the Start Plane<br />
G99 Retraction to the Withdrawal<br />
Plane<br />
see "Drilling Cycles G73 - G89".<br />
D 28
<strong>EMCO</strong> WINNC <strong>GE</strong> SERIES FANUC <strong>21</strong><strong>MB</strong><br />
PROGRAMMING<br />
Description of M Commands<br />
M00 Programmed Stop<br />
This command effects a machining stop within a part<br />
program.<br />
The milling spindle, feeds and coolant will be switched<br />
off.<br />
The machine door can be opened without releasing<br />
an alarm.<br />
With "NC START" the program run can be<br />
continued. After that the main drive will be switched<br />
on with all values which were valid before.<br />
M01Programmed Stop,<br />
Conditional<br />
M01 works like M00, when OPT. STOP is active<br />
(display OPT in the first line at the screen). If OPT.<br />
STOP is not active, M01 has no effect.<br />
With "NC START" the program run can be<br />
continued. After that the main drive will be switched<br />
on with all values which were valid before.<br />
M02 Main Program End<br />
M02 works like M30.<br />
M06 Tool Change<br />
Only for machines with tool turret.<br />
The previously with the T word selected tool will be<br />
swivelled in.<br />
The T word describes the tool turret station number.<br />
Example:<br />
N100 T04 M06<br />
N110 G43 H4<br />
In the block 100 the tool will be selected by T04 and<br />
swivelled in with M06. In the block 110 the length of<br />
the tool (entered in H4) will be considered for all<br />
following traverse movements (tool length compensation).<br />
After that the main drive will be switched on with all<br />
values which were valid before.<br />
M08 Coolant ON<br />
Only for <strong>EMCO</strong> PC Mill 100/125/155.<br />
The coolant will be switched on.<br />
M09 Coolant OFF<br />
Only for <strong>EMCO</strong> PC Mill 100/125/155.<br />
The coolant will be switched off.<br />
M03 Milling Spindle ON<br />
Clockwise<br />
The spindle will be switched on provided that a cutting<br />
speed has been programmed, the machine doors<br />
are closed and a workpiece is correctly clamped.<br />
M03 must be used for all right hand cutting tools.<br />
M04 Milling Spindle ON<br />
Counterclockwise<br />
The same conditions as described under M03 apply<br />
here.<br />
M04 must be used for all left hand cutting tools.<br />
M05 Milling Spindle OFF<br />
The main drive is braked electrically.<br />
At the program end the milling spindle is automatically<br />
switched off.<br />
M27 Swivel Dividing Head<br />
Only for accessory dividing head.<br />
The dividing head will be swivelled for one step (step<br />
angle mechanically adjusted).<br />
M30 Main Program End<br />
With M30 all drives will be switched off and the control<br />
will be reset to program start.<br />
M71Puff blowing ON<br />
Only for accessory puff blowing device.<br />
The puff blowing device will be switched on.<br />
M72 Puff blowing OFF<br />
Only for accessory puff blowing device.<br />
The puff blowing device will be switched off.<br />
D 29
<strong>EMCO</strong> WINNC <strong>GE</strong> SERIES FANUC <strong>21</strong><strong>MB</strong><br />
PROGRAMMING<br />
M98 Subprogram Call<br />
Format<br />
N... M98 P...<br />
P ......... The first four digits from the right determine<br />
the subprogram number, the other digits the<br />
number of repetitions.<br />
Notes<br />
• M98 can be designated in the same block as the<br />
movement command (e.g. G01 X25 M98<br />
P1235001)<br />
• When the count of repetitions is not specified, the<br />
subprogram is called once (M98 P5001)<br />
• When the programmed subroutine does not exist<br />
an alarm occurs.<br />
• A two loop subprogram call can be executed.<br />
Main program<br />
Subprogram<br />
<br />
<br />
<br />
103<br />
<br />
<br />
103<br />
<br />
Sequence of program run<br />
2<br />
<br />
<br />
<br />
<br />
1[[[[0<br />
2<br />
<br />
<br />
<br />
<br />
1[[[[0<br />
M99 Subprogram End,<br />
Jump Instruction<br />
Format<br />
N... M99 P...<br />
M99 in the main program<br />
Without jumping address:<br />
Jump to the program start.<br />
With jumping address Pxxxx:<br />
Jump on block no. xxxx<br />
M99 in the subprogram<br />
Without jumping address:<br />
Jump to the calling up program, on the next block<br />
after the calling up block (see drawing).<br />
With jumping address Pxxxx:<br />
Jump to the calling up program on block no. xxxx<br />
Note<br />
M99 must be the last command in the subprogram.<br />
D 30
<strong>EMCO</strong> WINNC <strong>GE</strong> SERIES FANUC <strong>21</strong><strong>MB</strong><br />
FLEXIBLE NC- PROGRAMMING<br />
G: Flexible NC programming<br />
9DULDEOH<br />
QXPEHU<br />
<br />
<br />
<br />
<br />
9DULDEOHW\SH<br />
$OZD\V]HUR<br />
V\VWHP<br />
YDULDEOH<br />
/RFDOYDULDEOH<br />
*OREDO<br />
YDULDEOHV<br />
6\VWHP<br />
YDULDEOH<br />
)XQFWLRQ<br />
7KLVYDULDEOHKDVDOZD\V<br />
WKHYDOXH]HUR1RW<br />
FKDQJHDEOH<br />
$WGLVSRVDOIRU<br />
FDOFXODWLRQVLQWKH<br />
SURJUDP<br />
$WGLVSRVDOIRU<br />
FDOFXODWLRQVLQWKH<br />
SURJUDP<br />
$WGLVSRVDOIRU<br />
FDOFXODWLRQVLQWKH<br />
SURJUDP<br />
Variables and arithmetic parameters<br />
By using variables instead of fixed values, a program<br />
can be configured more flexibly. Thus, you can react<br />
to signals, such as e.g. measuring values, or the<br />
same program can be used for different geometries<br />
by using variables as nominal value.<br />
Together with variable calculation and program jumps<br />
you get the possibility to create a highly-flexible<br />
program archive and thus save programming time.<br />
Local and global variables can be read and written.<br />
All other variables can only be read.<br />
<br />
<br />
6\VWHP<br />
YDULDEOH<br />
6\VWHP<br />
YDULDEOH<br />
/RDGLQJPDJD]LQHEDU<br />
HQGUHDFKHG<br />
/RDGLQJPDJD]LQHORDGHU<br />
KDVDGYDQFHG<br />
Local variables can only be used in that macro in<br />
which they are defined.<br />
Global variables can be used in every macro<br />
irrespective of the macro in which they were defined.<br />
<br />
6\VWHP<br />
YDULDEOH<br />
/RDGLQJPDJD]LQHILUVW<br />
SDUWDIWHUEDUFKDQJH<br />
<br />
6\VWHP<br />
YDULDEOH<br />
1RPLQDOSLHFHQXPEHU<br />
<br />
6\VWHP<br />
YDULDEOH<br />
$FWXDOSLHFHQXPEHU<br />
Calculating with variables<br />
)XQFWLRQ<br />
<br />
<br />
<br />
<br />
([DPSOH<br />
<br />
<br />
<br />
<br />
<br />
With the four basic arithmetic operations the usual<br />
mathematic notation is valid.<br />
The term at the operator's right can contain constants<br />
and/or variables combined by functions.<br />
Each variable can be replaced again by an arithemetic<br />
term in square brackets or by a constant.<br />
Example<br />
#1=#[#2]<br />
During the calculation the limitation is valid that the<br />
execution of the calculation is carried out from left to<br />
right without observance of the calculation rule point<br />
before line.<br />
Example<br />
#1=#2*3+#5/2<br />
G 1
<strong>EMCO</strong> WINNC <strong>GE</strong> SERIES FANUC <strong>21</strong><strong>MB</strong><br />
FLEXIBLE NC- PROGRAMMING<br />
Control structures<br />
In programs the control sequence can be changed by<br />
IF and GOTO instructions. Three types of branchings<br />
are possible:<br />
- IF[] THEN<br />
- IF[] GOTO <br />
- GOTO <br />
IF[] THEN<br />
After IF a provisory term must be indicated. If the<br />
provisory term applies, a determined macro<br />
instruction is carried out. Only one macro<br />
instruction can be carried out.<br />
Example<br />
With equal values of #1 and #2 the value 5 is<br />
allocated to #3.<br />
IF [#1 EQ #2] THEN#3=5<br />
IF[] GOTO <br />
After IF a provisory term must be indicated. If the<br />
provisory term applies, the branching is carried<br />
out to block number n. Otherwise the subsequent<br />
block is carried out.<br />
Example<br />
If the value of the variable #1 is greater than 10,<br />
the branching is carried out to block number N4.<br />
Otherwise the subsequent block is carried out.<br />
IF [#1 GT 10] GOTO 4<br />
Relational operators<br />
Relational operators consist of two letters and are<br />
used to determine, in comparison with two values, if<br />
these are equal or if one value is greater and/or less<br />
than the other.<br />
2SHUDWRU<br />
0HDQLQJ<br />
(4 (TXDO <br />
1( 8QHTXDOž)<br />
*7 *UHDWHUWKDQ!<br />
*( *UHDWHUWKDQRUHTXDO <br />
/7 /HVVWKDQ<br />
/( /HVVWKDQRUHTXDO <br />
The expressions to be compared can be variable n or<br />
constants. A variable can be replaced again by a<br />
calculation term in square brackets.<br />
Example<br />
IF[#12 EQ 1] GOTO10<br />
Comprising macro programming examples:<br />
IF[#1000 EQ 1] GOTO10<br />
IF[#[10]] NE #0] GOTO#[#1]<br />
IF[1 EQ 1] THEN#2 =5<br />
IF[#[#4+#[#2/2]] GT #20] THEN#[#10]] =#1*5+#7<br />
GOTO <br />
The jump command GOTO can also be<br />
programmed without condition. A variable or<br />
constant can be used as a branch destination.<br />
With a variable the number can be replaced again<br />
by a calculation term in square brackets.<br />
Example<br />
Jump to block number 3<br />
GOTO 3<br />
Example<br />
Jump to variable #6<br />
GOTO#6<br />
G 2
ALARMS AND MESSA<strong>GE</strong>S<br />
H: Alarms and Messages<br />
Machine Alarms 6000 - 7999<br />
These alarms will be triggered by the machines.<br />
There are different alarms for the different machines.<br />
The alarms 6000 - 6999 normally must be<br />
confirmed with RESET. The alarms 7000 - 7999<br />
are messages which normally will disappear when<br />
the releasing situation is finished.<br />
PC MILL 50 / 55 / 100 / 105 / 125 / 155<br />
Concept MILL 55 / 105 / 155<br />
6000: EMER<strong>GE</strong>NCY OFF<br />
The EMER<strong>GE</strong>NCY OFF key was pressed.<br />
Remove the endangering situation and restart<br />
machine and software.<br />
6001: PLC-CYCLE TIME EXCEEDING<br />
Contact <strong>EMCO</strong> Service.<br />
6002: PLC - NO PROGRAM CHAR<strong>GE</strong>D<br />
Contact <strong>EMCO</strong> Service.<br />
6003: PLC - NO DATA UNIT<br />
Contact <strong>EMCO</strong> Service.<br />
6004: PLC - RAM MEMORY FAILURE<br />
Contact <strong>EMCO</strong> Service.<br />
6005: OVERHEAT BRAKEMODUL<br />
Main drive was braked too often, large changes<br />
of speed within a short time. E4.2 active<br />
6006: OVERLOAD BRAKE RESISTOR<br />
see 6005<br />
6007: SAFETY CIRCUIT FAULT<br />
Axis and main drive contactor with machine<br />
switched off not disabled. Contactor got stuck or<br />
contact error. E4.7 was not active during switchon.<br />
6009: SAFETY CIRCUIT FAULT<br />
Defective step motor system.<br />
A running CNC program will be interrupted, the<br />
auxiliary drives will be stopped, the reference position<br />
will be lost.<br />
Contact <strong>EMCO</strong> Service.<br />
6010: DRIVE X-AXIS NOT READY<br />
The step motor board is defective or too hot, a<br />
fuse or cabling is defective.<br />
A running program will be stopped, the auxiliary<br />
drives will be switched off, the reference position<br />
will be lost.<br />
Check fuses or contact <strong>EMCO</strong> service.<br />
6011: DRIVE Y-AXIS NOT READY<br />
see alarm 6010.<br />
6012: DRIVE Z-AXIS NOT READY<br />
see alarm 6010.<br />
6013: MAIN DRIVE NOT READY<br />
Main drive power supply defective, main drive too<br />
hot, fuse defective.<br />
A running program will be stopped, the auxilliary<br />
drives will be switched off.<br />
Check fuses or contact <strong>EMCO</strong> Service.<br />
6014: NO MAIN SPINDLE SPEED<br />
This will be released, when the spindle speed is<br />
lower than 20 rpm because of overload.<br />
Alter cutting data (feed, infeed, spindle speed).<br />
The CNC program will be aborted, the auxilliary<br />
drives will be stopped.<br />
6019: VICE TIME EXCEED<br />
The electric vice has not reached a stop position<br />
within 30 seconds.<br />
The control or the clamping device board are<br />
defective, the vice is stuck. Adjust the proximity<br />
switches of the stop position.<br />
6020: VICE FAILURE<br />
When the electric vice is closed, the signal<br />
"clamping device clamped" of the clamping device<br />
board has failed.<br />
The control, the clamping device board or the<br />
wiring are defective.<br />
A 2007-05<br />
H 1
ALARMS AND MESSA<strong>GE</strong>S<br />
6022: CLAMPING DEVICE BOARD<br />
DEFECTIVE<br />
The signal "clamping device clamped" is<br />
constantly released, although no command has<br />
been given.<br />
Replace the board.<br />
6024: MACHINE DOOR OPEN<br />
The door was opened while a machine movement.<br />
The program will be aborted.<br />
6027: DOOR LIMIT SWITCH DEFECTIVE<br />
The limit switch of the automatic door is displaced,<br />
defective, wrong cabled.<br />
Contact <strong>EMCO</strong> service.<br />
6028: DOOR TIMEOUT<br />
The automatic door stucks, the pressured air<br />
supply is insufficient, the limit switch is displaced.<br />
Check door, pressured air supply, limit switch or<br />
contact <strong>EMCO</strong> service.<br />
6030: NO PART CLAMPED<br />
No workpiece inserted, vice cheek displaced, control<br />
cam displaced, hardware defective.<br />
Adjust or contact <strong>EMCO</strong> service.<br />
6040: TOOL TURRET INDEX FAILURE<br />
After WZW procedure drum pressed down by Z-<br />
axis. Spindle position wrong or mechanical<br />
defect. E4.3=0 in lower state<br />
6041: TOOL CHAN<strong>GE</strong> TIMEOUT<br />
Tool drum stucks (collision), main drive not<br />
ready, fuse defective, hardware defective.<br />
A running CNC program will be stopped.<br />
Check for collisions, check fuses or contact<br />
<strong>EMCO</strong> service.<br />
6043-6046: TOOL DISK POSITION FAULT<br />
Position error of main drive, error of position<br />
supervising (inductive proximity switch defective<br />
or disadjusted, drum allowance), fuse defective,<br />
hardware defective.<br />
The Z axis could have been slipped out of the<br />
toothing while the machine was switched off.<br />
A running CNC program will be stopped.<br />
Contact <strong>EMCO</strong> service.<br />
6047: TOOL DISK UNLOCKED<br />
Tool drum turned out of locked position, inductive<br />
proximity switch defective or disadjusted, fuse defective,<br />
hardware defective.<br />
A running CNC program will be interrupted.<br />
Contact <strong>EMCO</strong> service.<br />
When the tool drum is turned out of locked position<br />
(no defect), act as following:<br />
Turn the drum into locking position manually<br />
Change into MANUAL (JOG) mode.<br />
Turn the key switch. Traverse the Z slide upwards,<br />
until the alarm disappears.<br />
6048: DIVIDING TIME EXCEEDED<br />
Dividing head stucks, insufficient pressured air<br />
supply, hardware defective.<br />
Check for collision, check pressured air supply or<br />
contact <strong>EMCO</strong> service.<br />
6049: INTERLOCKING TIME EXCEEDED<br />
see alarm 6048<br />
6050: M25 AT RUNNING MAIN SPINDLE<br />
Cause: Programming mistake in NC program.<br />
A running program will be aborted.<br />
The auxilliary drives will be switched off.<br />
Remedy: Correct NC program<br />
6064: DOOR AUTOMATIC NOT READY<br />
Cause: pressure failure automatic door<br />
automatic door stucks mechanically<br />
limit switch for open end position defective<br />
security print circuits defect<br />
cabling defective<br />
fuses defective<br />
A running program will be aborted.<br />
The auxilliary drives will be switched off.<br />
Remedy: service automatic door<br />
6069: CLAMPING FOR TANI NOT OPEN<br />
When opening the clamping pressure switch does<br />
not fall within 400ms. Pressure switch defective<br />
or mechanical problem. E22.3<br />
6070: PRESSURE SWITCH FOR TANI MIS-<br />
SING<br />
When closing the clamping pressure switch does<br />
not respond. No compressed air or mechanical<br />
problem. E22.3<br />
6071: DIVIDING DEVICE NOT READY<br />
Servo Ready Signal from frequency converter<br />
missing. Excess temperature drive TANI or<br />
frequency converter not ready for operation.<br />
H 2
ALARMS AND MESSA<strong>GE</strong>S<br />
6072: VICE NOT READY<br />
Attempt to start the spindle with an open vice or<br />
without clamped workpiece.<br />
Vice stucks mechanically, insufficient compressed<br />
air supply, compressed air switch defective, fuse<br />
defective, hardware defective.<br />
Check the fuses or contact <strong>EMCO</strong> service.<br />
6073: DIVIDING DEVICE NOT READY<br />
Cause: locking switch defective<br />
cabling defective<br />
fuses defective<br />
A running program will be aborted.<br />
The auxilliary drives will be switched off.<br />
Remedy: service automatic dividing device<br />
lock the dividing device<br />
6074: DIVIDING TIME EXCEEDED<br />
Cause: dividing device stucks mechanically<br />
locking switch defective<br />
cabling defective<br />
fuses defective<br />
insufficient compressed-air supply.<br />
A running program will be aborted.<br />
The auxilliary drives will be switched off.<br />
Remedy: Check for collision, check the compressedair<br />
supply or contact the <strong>EMCO</strong> service.<br />
6075: M27 AT RUNNING MAIN SPINDLE<br />
Cause: Programming mistake in NC program.<br />
A running program will be aborted.<br />
The auxilliary drives will be switched off.<br />
Remedy: Correct NC program<br />
7000: INVALID TOOL NU<strong>MB</strong>ER PRO-<br />
GRAMMED<br />
The tool position was programmed larger than<br />
10.<br />
The CNC program will be stopped.<br />
Interrupt program with RESET and correct the<br />
program.<br />
7001: NO M6 PROGRAMMED<br />
For an automatic tool change you also have to<br />
program a M6 after the T word.<br />
7007: FEED STOP!<br />
The axes have been stopped by the robotics<br />
interface (robotics entry FEEDHOLD).<br />
7016: SWITCH ON AUXILIARY DRIVES<br />
The auxiliary drives are off. Press the AUX ON<br />
key for at least 0.5 sec. (to avoid accidentally<br />
switching on) to switch on the auxiliary drives.<br />
7017: REFERENCE MACHINE<br />
Approach the reference point.<br />
When the reference point is not active, manual<br />
movements are possible only with key switch at<br />
position "setting operation".<br />
7018: TURN KEY SWITCH<br />
With NC-Start the key switch was in position<br />
"setting operation".<br />
NC-Start is locked.<br />
Turn the key switch in the position "automatic" to<br />
run a program.<br />
7020: SPECIAL OPERATION MODE ACTIVE<br />
Special operation mode: The machine door is<br />
opened, the auxiliary drives are switched on, the<br />
key switch is in position "setting operation" and<br />
the consent key is pressed.<br />
Manual traversing the axes is possible with open<br />
door. Swivelling the tool turret is not possible with<br />
open door. Running a CNC program is possible<br />
only with standing spindle (DRYRUN) and SIN-<br />
GLE block operation.<br />
For safety: If the consent key is pressed for more<br />
than 40 sec. the function of this key is interrupted,<br />
the consent key must be released and pressed<br />
again.<br />
70<strong>21</strong>: INITIALIZE TOOL TURRET<br />
The tool turret operating was interrupted.<br />
No traversing operation is possible.<br />
Press tool turret key in JOG operation. Message<br />
occurs after alarm 6040.<br />
7022: INITIALIZE TOOL TURRET !<br />
see 70<strong>21</strong><br />
7023: WAITING TIME MAIN DRIVE!<br />
The LENZE frequency converter has to be<br />
separated from the mains supply for at least 20<br />
seconds before you are allowed to switch it on<br />
again. This message will appear when the door<br />
is quickly openend/ closed (under 20 seconds).<br />
7038: LUBRICATION SYSTEM FAULT<br />
The pressure switch is defective or gagged.<br />
NC-Start is locked. This can be reset only by<br />
switching off and on the machine.<br />
Contact <strong>EMCO</strong> service.<br />
7039: LUBRICATION SYSTEM FAULT<br />
Not enough lubricant, the pressure switch is defective.<br />
NC-Start is locked.<br />
Check the lubricant and lubricate manually or contact<br />
<strong>EMCO</strong> service.<br />
H 3
ALARMS AND MESSA<strong>GE</strong>S<br />
7040: MACHINE DOOR OPEN<br />
The main drive can not be switched on and NC-<br />
Start can not be activated (except special<br />
operation mode)<br />
Close the machine to run a program.<br />
7042: INITIALIZE MACHINE DOOR<br />
Every movement and NC-Start are locked.<br />
Open and close the machine door to initialize the<br />
safety circuits.<br />
7043: PIECE COUNT REACHED<br />
A predetermined number of program runs was<br />
reached. NC-Start is locked. Reset the counter to<br />
continue.<br />
7050: NO PART CLAMPED<br />
After switching on or after an the vice is neither at<br />
the open position nor at the closed position.<br />
NC-Start is locked.<br />
Traverse the vice manually on a valid end position.<br />
7051: DIVIDING HEAD NOT LOCKED!<br />
Either the dividing head is in an undefined position<br />
after the machine has been switched on, or the<br />
locking signal after a dividing process is missing.<br />
Initiate the dividing process, check, respectively<br />
adjust the proximity switch for locking.<br />
7058: RETRACTING THE AXES<br />
The position of the tool turret arm cannot be<br />
clearly defined during the tool change.<br />
Open the machine door, push the tool turret<br />
magazine backwards to the stop. Move the milling<br />
head in the JOG mode upwards to the Z reference<br />
switch and then traverse the reference point.<br />
7270: OFFSET COMPENSATION ACTIVE !<br />
Only with PC-MILL 105<br />
Offset compensation activated by the following<br />
operation sequence.<br />
- Reference point not active<br />
- Machine in reference mode<br />
- Key switch in manual operation<br />
- Press STRG (or CTRL) and simultaneously 4<br />
This must be carried out if prior to the tool change<br />
procedure spindle positioning is not completed<br />
(tolerance window too large)<br />
7271: COMPENSATION FINISHED,DATA<br />
SAVED !<br />
see 7270<br />
7054: VICE OPEN<br />
Cause: the workpiece is not clamped<br />
When switching on the main spindle with M3/M4<br />
alarm 6072 (vice not ready) will be released.<br />
Remedy: Clamp<br />
7055: OPEN TOOL CLAMPING SYSTEM<br />
A tool is clamped in the main spindle and the<br />
control does not recognize the corresponding T<br />
number.<br />
Eject the tool from the main spindle when the<br />
door is open by means of the PC keys "Strg" and<br />
" 1 ".<br />
7056: SETTING DATA INCORRECT<br />
An invalid tool number is stored in the setting<br />
data.<br />
Delete the setting data in the machine directory<br />
xxxxx.pls.<br />
7057: TOOLHOLDER OCCUPIED<br />
The clamped tool cannot be positioned in the tool<br />
turret since the position is occupied.<br />
Eject the tool from the main spindle when the<br />
door is open by means of the PC keys "Strg" and<br />
" 1 ".<br />
H 4
H 5<br />
ALARMS AND MESSA<strong>GE</strong>S
ALARMS AND MESSA<strong>GE</strong>S<br />
PC TURN 50 / 55 / 105 / 120 / 125 / 155<br />
Concept TURN 55 / 105 / 155<br />
6000: EMER<strong>GE</strong>NCY OFF<br />
The EMER<strong>GE</strong>NCY OFF key was pressed.<br />
The reference position will be lost, the auxiliary<br />
drives will be switched off.<br />
Remove the endangering situation and restart machine<br />
and software.<br />
6001: PLC-CYCLE TIME EXCEEDING<br />
The auxiliary drives will be switched off.<br />
Contact <strong>EMCO</strong> Service.<br />
6002: PLC - NO PROGRAM CHAR<strong>GE</strong>D<br />
The auxiliary drives will be switched off.<br />
Contact <strong>EMCO</strong> Service.<br />
6003: PLC - NO DATA UNIT<br />
The auxiliary drives will be switched off.<br />
Contact <strong>EMCO</strong> Service.<br />
6004: PLC - RAM MEMORY FAILURE<br />
The auxiliary drives will be switched off.<br />
Contact <strong>EMCO</strong> Service.<br />
6008: MISSING CAN SUBSCRIBER<br />
The SPS-CAN board is not identified by the<br />
control.<br />
Check the interface cable and the power supply<br />
of the CAN board.<br />
6009: SAFETY CIRCUIT FAULT<br />
Defective step motor system.<br />
A running CNC program will be interrupted, the<br />
auxiliary drives will be stopped, the reference position<br />
will be lost.<br />
Contact <strong>EMCO</strong> Service.<br />
6010: DRIVE X-AXIS NOT READY<br />
The step motor board is defective or too hot, a<br />
fuse is defective, over- or undervoltage from<br />
mains.<br />
A running program will be stopped, the auxiliary<br />
drives will be switched off, the reference position<br />
will be lost.<br />
Check fuses or contact <strong>EMCO</strong> service.<br />
6012: DRIVE Z-AXIS NOT READY<br />
see 6010.<br />
6013: MAIN DRIVE NOT READY<br />
Main drive power supply defective or main drive<br />
too hot, fuse defective, over- or undervoltage from<br />
mains.<br />
A running program will be stopped, the auxilliary<br />
drives will be switched off.<br />
Check fuses or contact <strong>EMCO</strong> Service.<br />
6014: NO MAIN SPINDLE SPEED<br />
This alarm will be released, when the spindle<br />
speed is lower than 20 rpm because of overload.<br />
Alter cutting data (feed, infeed, spindle speed).<br />
The CNC program will be aborted, the auxiliary<br />
drives will be switched off.<br />
6015: NO DRIVEN TOOL SPINDLE SPEED<br />
see 6014.<br />
6016: AUTOMATIC TOOL TURRET SIGNAL<br />
COUPLED MISSING<br />
6017: AUTOMATIC TOOL TURRET SIGNAL<br />
UNCOUPLED MISSING<br />
In the tool turret that can be coupled, the position<br />
of the coupling and uncoupling magnet is<br />
monitored by means of two proximity switches. It<br />
has to be made sure that the coupling is in the<br />
rear stop position so that the tool turret can get to<br />
the next tool position. Equally, during operation<br />
with driven tools the coupling has to be safe in<br />
the front stop position.<br />
Check and adjust the cables, the magnet and the<br />
stop position proximity switches.<br />
60<strong>21</strong>: COLLET TIME OUT<br />
During closing of the clamping device the pressure<br />
switch has not reacted within one second.<br />
6022: CLAMPING DEVICE BOARD<br />
DEFECTIVE<br />
The signal "clamping device clamped" is<br />
constantly released, even though no command<br />
has been given. Replace the board.<br />
6023: COLLET PRESSURE MONITORING<br />
The pressure switch turns off when the clamping<br />
device is closed (compressed air failure for more<br />
than 500ms).<br />
H 6
ALARMS AND MESSA<strong>GE</strong>S<br />
6024: MACHINE DOOR OPEN<br />
The door was opened while a machine movement.<br />
The program will be aborted.<br />
6025: <strong>GE</strong>ARBOX COVER NOT CLOSED<br />
The gearbox cover was opened while a machine<br />
movement. A running CNC program will be<br />
aborted.<br />
Close the cover to continue.<br />
6027: DOOR LIMIT SWITCH DEFECTIVE<br />
The limit switch of the automatic door is displaced,<br />
defective, wrong cabled.<br />
Contact <strong>EMCO</strong> service.<br />
6028: DOOR TIMEOUT<br />
The automatic door stucks, the pressured air<br />
supply is insufficient, the limit switch is displaced.<br />
Check door, pressured air supply, limit switch or<br />
contact <strong>EMCO</strong> service.<br />
6029: TAILSTOCK QUILL TIME EXCEED<br />
The tailstock quill does not reach a final position<br />
within 10 seconds.<br />
Adjust the control and the stop position proximity<br />
switches, or the tailstock quill is stuck.<br />
6030: NO PART CLAMPED<br />
No workpiece inserted, vice cheek displaced, control<br />
cam displaced, hardware defective.<br />
Adjust or contact <strong>EMCO</strong> service.<br />
6031: QUILL FAILURE<br />
6032: TOOL CHAN<strong>GE</strong> TIMEOUT<br />
see alarm 6041.<br />
6033: TOOL TURRET SYNC ERROR<br />
Hardware defective.<br />
Contact <strong>EMCO</strong> service.<br />
6037: CHUCK TIMEOUT<br />
The pressure switch does not react within one<br />
second when the clamping device is closed.<br />
6039: CHUCK PRESSURE FAILURE<br />
The pressure switch turns off when the clamping<br />
device is closed (compressed air failure for more<br />
than 500ms).<br />
6040: TOOL TURRET INDEX FAILURE<br />
The tool turret is in no locked position, tool turret<br />
sensor board defective, cabling defective, fuse<br />
defective.<br />
A running CNC program will be stopped.<br />
Swivel the tool turret with the tool turret key, check<br />
fuses or contact <strong>EMCO</strong> service.<br />
6041: TOOL CHAN<strong>GE</strong> TIMEOUT<br />
Tool drum stucks (collision), fuse defective, hardware<br />
defective.<br />
A running CNC program will be stopped.<br />
Check for collisions, check fuses or contact<br />
<strong>EMCO</strong> service.<br />
6042: TOOL TURRET OVERHEAT<br />
Tool turret motor too hot.<br />
With the tool turret a max. of 14 swivel procedures<br />
a minute may be carried out.<br />
6043: TOOL CHAN<strong>GE</strong> TIMEOUT<br />
Tool drum stucks (collision), fuse defective, hardware<br />
defective.<br />
A running CNC program will be stopped.<br />
Check for collisions, check fuses or contact<br />
<strong>EMCO</strong> service.<br />
6045: TOOL TURRET SYNC MISSING<br />
Hardware defective.<br />
Contact <strong>EMCO</strong> service.<br />
6046: TOOL TURRET ENCODER FAULT<br />
Fuse defective, hardware defective.<br />
Check fuses or contact <strong>EMCO</strong> service.<br />
6048: CHUCK NOT READY<br />
Attempt to start the spindle with open chuck or<br />
without clamped workpiece.<br />
Chuck stucks mechanically, insufficient pressured<br />
air supply, fuse defective, hardware defective.<br />
Check fuses or contact <strong>EMCO</strong> service.<br />
6049: COLLET NOT READY<br />
see 6048<br />
6050: M25 DURING SPINDLE ROTATION<br />
With M25 the main spindle must stand still (consider<br />
run-out time, evtl. program a dwell)<br />
6055: NO PART CLAMPED<br />
This alarm occurs when with rotating spindle the<br />
clamping device or the tailstock reach the end position.<br />
The workpiece has been pushed out of the chuck or<br />
has been pushed into the chuck by the tailstock.<br />
Check clamping device settings, clamping forces,<br />
alter cutting data.<br />
6056: QUILL NOT READY<br />
Attempt to start the spindle or to move an axis or<br />
to swivel the tool turret with undefined tailstock<br />
position.<br />
Tailstock is locked mechanically (collision), insufficient<br />
pressured air supply, fuse defective,<br />
magnetic switch defective.<br />
Check for collisions, check fuses or contact<br />
<strong>EMCO</strong> service.<br />
H 7
ALARMS AND MESSA<strong>GE</strong>S<br />
6057: M20/M<strong>21</strong> DURING SPINDLE ROTATION<br />
With M20/M<strong>21</strong> the main spindle must stand still<br />
(consider run-out time, evtl. program a dwell)<br />
6058: M25/M26 DURING QUILL FORWARD<br />
To actuate the clamping device in an NC program with<br />
M25 or M26 the tailstock must be in back end position.<br />
6059: C-AXIS SWING IN TIMEOUT<br />
C-axis does not swivel in within 4 seconds.<br />
Reason: not sufficient air pressure, and/or mechanics<br />
stuck.<br />
6060: C-AXIS INDEX FAILURE<br />
When swivelling in the C-axis the limit switch does<br />
not respond.<br />
Check pneumatics, mechanics and limit switch.<br />
6064: AUTOMATIC DOOR NOT READY<br />
Door stucks mechanically (collision), insufficient<br />
pressured air supply, limit switch defective, fuse<br />
defective.<br />
Check for collisions, check fuses or contact<br />
<strong>EMCO</strong> service.<br />
6065: LOADER MAGAZINE FAILURE<br />
Loader not ready.<br />
Check if the loader is switched on, correctly connected<br />
and ready for operation and/or disable<br />
loader (WinConfig).<br />
6066: CLAMPING DEVICE FAILURE<br />
No compressed air at the clamping device<br />
Check pneumatics and position of the clamping<br />
device proximity detectors.<br />
6067: NO COMPRESSED AIR<br />
Turn the compressed air on, check the setting of<br />
the pressure switch.<br />
7000: INVALID TOOL NU<strong>MB</strong>ER<br />
PROGRAMMED<br />
The tool position was programmed larger than 8.<br />
The CNC program will be stopped.<br />
Interrupt program with RESET and correct the<br />
program.<br />
7007: FEED HOLD<br />
In the robotic mode a HIGH signal is at input E3.7.<br />
Feed Stop is active until a low signal is at E3.7.<br />
7016: SWITCH ON AUXILIARY DRIVES<br />
The auxiliary drives are off. Press the AUX ON<br />
key for at least 0.5 sec. (to avoid accidentally<br />
switching on) to switch on the auxiliary drives (also<br />
a lubricating pulse will be released).<br />
7017: REFERENCE MACHINE<br />
Approach the reference point.<br />
When the reference point is not active, manual<br />
movements are possible only with key switch at<br />
position "setting operation".<br />
7018: TURN KEY SWITCH<br />
With NC-Start the key switch was in position<br />
"setting operation".<br />
NC-Start is locked.<br />
Turn the key switch in the position "automatic" to<br />
run a program.<br />
7019: PNEUMATIC LUBRICATION MONITOR-<br />
ING!<br />
Refill pneumatic oil<br />
7020: SPECIAL OPERATION MODE ACTIVE<br />
Special operation mode: The machine door is<br />
opened, the auxiliary drives are switched on, the<br />
key switch is in position "setting operation" and<br />
the consent key is pressed.<br />
Manual traversing the axes is possible with open<br />
door. Swivelling the tool turret is possible with<br />
open door. Running a CNC program is possible<br />
only with standing spindle (DRYRUN) and SIN-<br />
GLE block operation.<br />
For safety: If the consent key is pressed for more<br />
than 40 sec. the function of this key is interrupted,<br />
the consent key must be released and pressed<br />
again.<br />
70<strong>21</strong>: TOOL TURRET NOT LOCKED<br />
The tool turret operating was interrupted.<br />
NC start and spindle start are locked. Press the<br />
tool turret key in the RESET status of the control.<br />
7022: COLLECTION DEVICE MONITORING<br />
Time exceed of the swivelling movement.<br />
Check the pneumatics, respectively whether the<br />
mechanical system is jammed (possibly a<br />
workpiece is jammed).<br />
7023: ADJUST PRESSURE SWITCH !<br />
During opening and closing of the clamping device<br />
the pressure switch has to turn off and on once.<br />
Adjust the pressure switch. This alarm does not<br />
exist any more for versions starting with PLC 3.10.<br />
7024: ADJUST CLAMPING DEVICE<br />
PROXIMITY SWITCH !<br />
When the clamping device is open and the<br />
position stop control is active, the respective<br />
proximity switch has to feed back that the<br />
clamping device is "Open".<br />
Check and adjust the clamping device proximity<br />
switch, check the cables.<br />
H 8
ALARMS AND MESSA<strong>GE</strong>S<br />
7025 WAITING TIME MAIN DRIVE !<br />
The LENZE frequency converter has to be<br />
separated from the mains supply for at least 20<br />
seconds before you are allowed to switch it on<br />
again. This message will appear when the door<br />
is quickly openend/ closed (under 20 seconds).<br />
7038: LUBRICATION SYSTEM FAULT<br />
The pressure switch is defective or gagged.<br />
NC-Start is locked. This alarm can be reset only<br />
by switching off and on the machine.<br />
Contact <strong>EMCO</strong> service.<br />
7039: LUBRICATION SYSTEM FAULT<br />
Not enough lubricant, the pressure switch is defective.<br />
NC-Start is locked.<br />
Check the lubricant and lubricate manually or contact<br />
<strong>EMCO</strong> service.<br />
7040: MACHINE DOOR OPEN<br />
The main drive can not be switched on and NC-<br />
Start can not be activated (except special<br />
operation mode)<br />
Close the machine to run a program.<br />
7052: QUILL IN UNDEFINED POSITION<br />
The tailstock is in no defined position.<br />
All axis movements, the spindle and the tool turret<br />
are locked.<br />
Drive the tailstock in back end position or clamp a<br />
workpiece with the tailstock.<br />
7053: QUILL - NO PART CLAMPED<br />
The tailstock reached the front end position. Traverse<br />
the tailstock back to the back end position<br />
to continue.<br />
7054: NO PART CLAMPED<br />
No part clamped, switch-on of the spindle is<br />
locked.<br />
7055: CLAMPING DEVICE OPEN<br />
This message indicates that the clamping device<br />
is not in clamping state. It disappears as soon as<br />
a part is clamped.<br />
7041: <strong>GE</strong>ARBOX COVER OPEN<br />
The main spindle cannot be switched on and NC<br />
start cannot be activated.<br />
Close the gearbox cover in order to start a CNC<br />
program.<br />
7042: INITIALIZE MACHINE DOOR<br />
Every movement and NC-Start are locked.<br />
Open and close the machine door to initialize the<br />
safety circuits.<br />
7043: PIECE COUNT REACHED<br />
A predetermined number of program runs was<br />
reached. NC-Start is locked. Reset the counter to<br />
continue.<br />
7048: CHUCK OPEN<br />
This message shows that the chuck is open. It<br />
will disappear if a workpiece will be clamped.<br />
7049: CHUCK - NO PART CLAMPED<br />
No part is clamped, the spindle can not be<br />
switched on.<br />
7050: COLLET OPEN<br />
This message shows that the collet is open. It will<br />
disappear if a workpiece will be clamped.<br />
7051: COLLET - NO PART CLAMPED<br />
No part is clamped, the spindle can not be<br />
switched on.<br />
H 9
H 10<br />
ALARMS AND MESSA<strong>GE</strong>S
ALARMS AND MESSA<strong>GE</strong>S<br />
Axis Controller Alarms<br />
AC95 / ACC ALARMS<br />
8000 Fatal Error AC<br />
8100 Fatal init error AC<br />
Cause: Internal error<br />
Remedy: Restart software or reinstall when necessary,<br />
report to <strong>EMCO</strong>, if repeatable.<br />
8101 Fatal init error AC<br />
see 8101.<br />
8102 Fatal init error AC<br />
see 8101.<br />
8103 Fatal init error AC<br />
see 8101.<br />
8104 Fatal system error AC<br />
see 8101.<br />
8105 Fatal init error AC<br />
see 8101.<br />
8106 No PC-COM card found<br />
Cause: PC-COM board can not be accessed (ev.<br />
not mounted).<br />
Remedy: Mount board, adjust other address with<br />
jumper<br />
8107 PC-COM card not working<br />
see 8106.<br />
8108 Fatal error on PC-COM card<br />
see 8106.<br />
8109 Fatal error on PC-COM card<br />
see 8106.<br />
8110 PC-COM init message missing<br />
Cause: Internal error<br />
Remedy: Restart software or reinstall when necessary,<br />
report to <strong>EMCO</strong>, if repeatable.<br />
8111 Wrong configuration of PC-COM<br />
see 8110.<br />
8113 Invalid data (pccom.hex)<br />
see 8110.<br />
8114 Programming error on PC-COM<br />
see 8110.<br />
8115 PC-COM packet acknowledge missing<br />
see 8110.<br />
8116 PC-COM startup error<br />
see 8110.<br />
8117 Fatal init data error (pccom.hex)<br />
see 8110.<br />
8118 Fatal init error AC<br />
see 8110, ev. insufficient RAM memory<br />
8119 PC interrupt no. not valid<br />
Cause: The PC interrupt number can not be used.<br />
Remedy: Find out free interrupt number in the Windows95<br />
system control (allowed: 5,7,10,<br />
11, 12, 3, 4 und 5) and enter this number in<br />
WinConfig.<br />
8120 PC interrupt no. unmaskable<br />
see 8119<br />
81<strong>21</strong> Invalid command to PC-COM<br />
Cause: Internal error or defective cable<br />
Remedy: Check cables (screw it); Restart software<br />
or reinstall when necessary, report to<br />
<strong>EMCO</strong>, if repeatable.<br />
8122 Internal AC mailbox overrun<br />
Cause: Internal error<br />
Remedy: Restart software or reinstall when necessary,<br />
report to <strong>EMCO</strong>, if repeatable.<br />
8123 Open error on record file<br />
Cause: Internal error<br />
Remedy: Restart software or reinstall when necessary,<br />
report to <strong>EMCO</strong>, if repeatable.<br />
8124 Write error on record file<br />
Cause: Internal error<br />
Remedy: Restart software or reinstall when necessary,<br />
report to <strong>EMCO</strong>, if repeatable.<br />
8125 Invalid memory for record buffer<br />
Cause: Insufficient RAM, record time exceeding.<br />
Remedy: Restart software, ev. remove drivers etc. to<br />
gain more RAM, reduce record time.<br />
8126 AC Interpolation overrun<br />
Cause: Ev. insufficient computer performance.<br />
Remedy: Set a longer interrupt time in WinConfig.<br />
This may result in poorer path accuracy.<br />
8127 Insufficient memory<br />
Cause: Insufficient RAM<br />
Remedy: Close other programs, restart software,<br />
ev. remove drivers etc. to gain more RAM.<br />
8128 Invalid message to AC<br />
Cause: Internal error<br />
Remedy: Restart software or reinstall when necessary,<br />
report to <strong>EMCO</strong>, if repeatable.<br />
8129 Invalid MSD data - axisconfig.<br />
see 8128.<br />
8130 Internal init error AC<br />
see 8128.<br />
8130 Internal init error AC<br />
see 8128.<br />
8132 Axis accessed by multiple channels<br />
see 8128.<br />
H 11
ALARMS AND MESSA<strong>GE</strong>S<br />
8133 Insufficient NC block memory AC<br />
see 8128.<br />
8134 Too much center points programmed<br />
see 8128.<br />
8135 No centerpoint programmed<br />
see 8128.<br />
8136 Circle radius too small<br />
see 8128.<br />
8137 Invalid for Helix specified<br />
Cause: Wrong axis for helix. The combination of<br />
linear and circular axes does not match.<br />
Remedy: Program correction.<br />
8140 Maschine (ACIF) not responding<br />
Cause: Machine off or not connected.<br />
Remedy: Switch on machine or connect.<br />
8141 Internal PC-COM error<br />
Cause: Internal error<br />
Remedy: Restart software or reinstall when necessary,<br />
report to <strong>EMCO</strong>, if repeatable.<br />
8142 ACIF Program error<br />
Cause: Internal error<br />
Remedy: Restart software or reinstall when necessary,<br />
report to <strong>EMCO</strong>, if repeatable.<br />
8143 ACIF packet acknowledge missing<br />
see 8142.<br />
8144 ACIF startup error<br />
see 8142.<br />
8145 Fatal init data error (acif.hex)<br />
see 8142.<br />
8146 Multiple request for axis<br />
see 8142.<br />
8147 Invalid PC-COM state (DPRAM)<br />
see 8142.<br />
8148 Invalid PC-COM command (CNo)<br />
see 8142.<br />
8149 Invalid PC-COM command (Len)<br />
see 8142.<br />
8150 Fatal ACIF error<br />
see 8142.<br />
8151 AC Init Error (missing RPG file)<br />
see 8142.<br />
8152 AC Init Error (RPG file format)<br />
see 8142.<br />
8153 FPGA program timeout on ACIF<br />
see 8142.<br />
8154 Invalid Command to PC-COM<br />
see 8142.<br />
8155 Invalid FPGA packet acknowledge<br />
see 8142 or hardware error on ACIF board (contact<br />
<strong>EMCO</strong> Service).<br />
8156 Sync within 1.5 revol. not found<br />
see 8142 or Bero hardware error (contact <strong>EMCO</strong><br />
Service).<br />
8157 Data record done<br />
see 8142.<br />
8158 Bero width too large (referencing)<br />
see 8142 or Bero hardware error (contact <strong>EMCO</strong><br />
Service).<br />
8159 Function not implemented<br />
Bedeutung: In normal operation this function can not<br />
be executed<br />
8160 Axis synchronization lost axis 3..7<br />
Cause: Axis spins or slide is locked, axis synchronisation<br />
was lost<br />
Remedy: Approach reference point<br />
8161 X-Axis synchronization lost<br />
Step loss of the step motor. Causes:<br />
- Axis mechanically blocked<br />
- Axis belt defective<br />
- Distance of proximity detector too large<br />
(>0,3mm)<br />
or proximity detector defective<br />
- Step motor defective<br />
8162 Y-Axis synchronization lost<br />
see 8161<br />
8163 Z-Axis synchronization lost<br />
see 8161<br />
8164 <strong>Software</strong> limit switch max axis 3..7<br />
Cause: Axis is at traverse area end<br />
Remedy: Retract axis<br />
8168 <strong>Software</strong> limit overtravel axis 3..7<br />
Cause: Axis is at traverse area end<br />
Remedy: Retract axis<br />
8172 Communication error to machine<br />
Cause: Internal error<br />
Remedy: Restart software or reinstall when necessary,<br />
report to <strong>EMCO</strong>, if repeatable.<br />
Check connection PC - machine, eventually<br />
eliminate distortion sources.<br />
8173 INC while NC program is running<br />
Remedy: Stop the program with NC stop or with<br />
Reset. Traverse the axis.<br />
8174 INC not allowed<br />
Cause: At the moment the axis is in motion.<br />
Remedy: Wait until the axis stops and then traverse<br />
the axis.<br />
8175 MSD file could not be opened<br />
Cause: Internal error<br />
Remedy: Restart software oder bei Bedarf neu installieren,<br />
report to <strong>EMCO</strong>, if repeatable.<br />
8176 PLS file could not be opened<br />
see 8175.<br />
8177 PLS file could not be accessed<br />
see 8175.<br />
8178 PLS file could not be written<br />
see 8175.<br />
H 12
ALARMS AND MESSA<strong>GE</strong>S<br />
8179 ACS file could not be opened<br />
see 8175.<br />
8180 ACS file could not be accessed<br />
see 8175.<br />
8181 ACS file could not be written<br />
see 8175.<br />
8183 Gear too high<br />
Cause: The selected gear step is not allowed at the<br />
machine.<br />
8184 Invalid interpolaton command<br />
8185 Forbidden MSD data change<br />
see 8175.<br />
8186 MSD file could not be opened<br />
see 8175.<br />
8187 PLC program error<br />
see 8175.<br />
8188 Gear command invalid<br />
see 8175.<br />
8189 Invalid channel assignement<br />
see 8175.<br />
8190 Invalid channel within message<br />
see 8175.<br />
8191 Invalid jog feed unit<br />
Cause: The machine does not support the rotation<br />
feed in the JOG operating mode.<br />
Remedy: Order a software update from <strong>EMCO</strong>.<br />
8192 Invalid axis in command<br />
see 8175.<br />
8193 Fatal PLC error<br />
see 8175.<br />
8194 Thread without length<br />
Cause: The programmed target coordinates are<br />
identical to the starting coordinates.<br />
Remedy: Correct the target coordinates.<br />
8195 No thread slope in leading axis<br />
Remedy: Program thread pitch<br />
8196 Too manny axis for thread<br />
Remedy: Program max. 2 axes for thread.<br />
8197 Thread not long enough<br />
Cause: Thread length too short.<br />
With transition from one thread to the other<br />
the length of the second thread must be<br />
sufficient to produce a correct thread.<br />
Remedy: Longer second thread or replace it by a<br />
linear interpolation (G1).<br />
8198 Internal error (to manny threads)<br />
see 8175.<br />
8199 Internal error (thread state)<br />
Cause: Internal error<br />
Remedy: Restart software or reinstall when necessary,<br />
report to <strong>EMCO</strong>, if repeatable.<br />
8200 Thread without spindle on<br />
Remedy: Switch on spindle<br />
8201 Internal thread error (IPO)<br />
see 8199.<br />
8201 Internal thread error (IPO)<br />
see 8199.<br />
8203 Fatal AC error (0-ptr IPO)<br />
see 8199.<br />
8204 Fatal init error: PLC/IPO running<br />
see 8199.<br />
8205 PLC Runtime exceeded<br />
Cause: Insufficient computer performance<br />
8206 Invalid PLC M-group initialisation<br />
see 8199.<br />
8207 Invalid PLC machine data<br />
see 8199.<br />
8208 Invalid application message<br />
see 8199.<br />
8<strong>21</strong>2 Rotation axis not allowed<br />
see 8199.<br />
8<strong>21</strong>3 Circle and rotation axis can't be<br />
interpolated<br />
8<strong>21</strong>4 Thread and rotation axis cant't be<br />
interpolated<br />
8<strong>21</strong>5 Invalid state<br />
see 8199.<br />
8<strong>21</strong>6 No rotation axis for rotation axis switch<br />
see 8199.<br />
8<strong>21</strong>7 Axis type not valid!<br />
Cause:<br />
Switching during the rotary axis operating<br />
mode when the spindle is running.<br />
Remedy: Stop the spindle and switch over to the<br />
rotary axis operating mode.<br />
8<strong>21</strong>8 Referencing round axis without<br />
selected round axis!<br />
see 8199.<br />
8<strong>21</strong>9 Thread not allowed without spindle<br />
encoder!<br />
Cause: Thread cutting, respectively tapping is only<br />
possible with spindles with encoders.<br />
8220 Buffer length exceeded in PC send<br />
message!<br />
see 8199.<br />
82<strong>21</strong> Spindle release although axis is no<br />
spindle!<br />
see 8199.<br />
8222 New master spindle is not valid<br />
Cause: The indicated master spindle is not valid<br />
when switching over to the master spindle.<br />
Remedy: Correct the spindle number.<br />
8224 Invalid stop mode<br />
see 8199.<br />
H 13
ALARMS AND MESSA<strong>GE</strong>S<br />
8225 Invalid parameter for BC_MOVE_TO_IO!<br />
Cause: The machine is not configurated for touch<br />
probes. A traversing movement with rotary<br />
axis is not allowed during touch probe<br />
operating mode.<br />
Remedy: Remove the rotary axis movement from<br />
the traversing movement.<br />
8226 Rotary axis switch not valid (MSD data)!<br />
Cause: The indicated spindle does not have a<br />
rotary axis.<br />
8228 Rotary axis switch not allowed while<br />
axis move!<br />
Cause: The rotary axis has moved during switching<br />
over to the spindle operating mode.<br />
Remedy: Stop the rotary axis before switching.<br />
8229 Spindle on not allowed while rotary axis<br />
is active!<br />
8230 Program start not allowed due to active<br />
spindle rotation axis!<br />
8231 Axis configuration (MSD) for TRANSMIT<br />
not valid!<br />
Cause: Transmit is not possible at this machine.<br />
8232 Axis configuration (MSD) for TRACYL<br />
not valid!<br />
Cause: Tracyl is not possible at this machine.<br />
8233 Axis not available while TRANSMIT/<br />
TRACYL is active!<br />
Cause: Programming of the rotary axis is not<br />
allowed during Transmit/ Tracyl.<br />
8234 Axis control grant removed by PLC<br />
while axis interpolates!<br />
Cause: Internal error<br />
Remedy: Delete error with reset and inform <strong>EMCO</strong>.<br />
8235 Interpolation invalid while axis control<br />
grant is off by PLC!<br />
see 8234.<br />
8236 TRANSMIT/TRACYL activated while axis<br />
or spindle moves!<br />
see 8234.<br />
8237 Motion through pole in TRANSMIT!<br />
Cause: It is not allowed to move through the<br />
coordinates X0 Y0 inTransmit.<br />
Remedy: Alter the traversing movement.<br />
8238 Speed limit in TRANSMIT exceeded!<br />
Cause: The traversing movement gets too close to<br />
the coordinates X0 Y0. In order to observe<br />
the programmed feed rate, the maximum<br />
speed of the rotary axis would have to be<br />
exceeded.<br />
Remedy: Reduce the feed rate. Set the value of the<br />
C-axis feed limitation in WinConfig,<br />
machine data settings / general machine<br />
data/ to 0.2. Thus, the feed rate will be<br />
automatically reduced near the coordinates<br />
X0 Y0.<br />
8239 DAU exceeded 10V limit!<br />
Cause: Internal error<br />
Remedy: Start the software again or install it anew.<br />
Report the error to <strong>EMCO</strong>.<br />
8240 Function not valid during active transformation<br />
(TRANSMIT/TRACYL)!<br />
Cause: The Jog and INC operating mode are not<br />
possible during Transmit in X/C and during<br />
Tracyl in the rotary axis.<br />
8241 TRANSMIT not enabled (MSD)!<br />
Cause: Transmit is not possible at this machine.<br />
8242 TRACYL not enabled (MSD)!<br />
Cause: Tracyl is not possible at this machine.<br />
8243 Round axis invalid during active<br />
transformation!<br />
Cause: It is not allowed to program the rotary axis<br />
during Transmit/Tracyl.<br />
8245 TRACYL radius = 0!<br />
Cause: When selecting Tracyl, a radius of 0 was<br />
used.<br />
Remedy: Correct the radius.<br />
8246 Offset alignment not valid for this state!<br />
see 8239.<br />
8247 Offset alignment: MSD file write<br />
protected!<br />
8248 Cyclic supervision failed!<br />
Cause: The communication with the machine<br />
keyboard is interrupted.<br />
Remedy: Start the software again or install it anew.<br />
Report the error to <strong>EMCO</strong>.<br />
8249 Axis motion check alarm!<br />
see 8239<br />
8250 Spindle must be rotation axis !<br />
see 8239<br />
8251 Lead for G331/G332 missing !<br />
Cause:<br />
The threading pitch is missing or the starting<br />
coordinates are identical to the target<br />
coordinates.<br />
Remedy: Program the threading pitch.<br />
Correct the target coordinates.<br />
8252 Multiple or no linear axis programmed<br />
for G331/G332 !<br />
Remedy: Program exactly one linear axis.<br />
8253 Speed value for G331/G332 and G96<br />
missing !<br />
Cause: No cutting speed has been programmed.<br />
Remedy: Program the cutting speed.<br />
8254 Value for thread starting point offset<br />
not valid!<br />
Cause:<br />
The thread starting point offset is not within<br />
the range of 0 to 360°.<br />
Remedy: Correct the thread starting point offset.<br />
H 14
ALARMS AND MESSA<strong>GE</strong>S<br />
8255 Reference point not in valid software<br />
limits!<br />
Cause: The reference point has been defined<br />
outside the software limit switches.<br />
Remedy: Correct the reference points in WinConfig.<br />
8256 Spindle speed too low while executing<br />
G331/G332!<br />
Cause:<br />
During tapping the spindle speed has<br />
decreased. Perhaps the incorrect threading<br />
pitch was used or the core drilling is not<br />
correct.<br />
Remedy: Correct the threading pitch. Adapt the<br />
diameter to the core drilling.<br />
8257 Real Time Module not active or PCI card<br />
not found!<br />
Cause: ACC could not be started correctly or the<br />
PCI card in the ACC was not recognized.<br />
Remedy: Report the error to <strong>EMCO</strong>.<br />
8258 Error allocating Linux data!<br />
see 8239.<br />
8259 Current thread in sequence not valid!<br />
Cause: One block of a thread in sequence has<br />
been programmed without thread G33.<br />
Remedy: Correct the program.<br />
8261 Missing thread in sequence !<br />
Cause: A successive thread has not been<br />
programmed for a thread in sequence, the<br />
number has to be in accordance with the<br />
SETTHREADCOUNT () that has been<br />
defined before.<br />
Remedy: Correct the number of threads in the thread<br />
in sequence and add a thread.<br />
8262 Reference marks are not close enough !<br />
Cause: The settings of the linear scale have been<br />
changed or the linear scale is defective.<br />
Remedy: Correct the settings. Contact <strong>EMCO</strong>.<br />
8263 Reference marks are too close together!<br />
see 8262.<br />
22000 Gear change not allowed<br />
Cause: Gear step change when the spindle is<br />
active.<br />
Remedy: Stop the spindle and carry out a gear step<br />
change.<br />
22270 Feed too high (thread)<br />
Cause:<br />
Thread pitch too large / missing, Feed for<br />
thread reaches 80% of rapid feed<br />
Remedy: Program correction, lower pitch or lower<br />
spindle speed for thread<br />
H 15
H 16<br />
ALARMS AND MESSA<strong>GE</strong>S
<strong>EMCO</strong> WINNC <strong>GE</strong> SERIES FANUC <strong>21</strong><strong>MB</strong><br />
ALARMS AND MESSA<strong>GE</strong>S<br />
I: Control Alarms<br />
Control Alarms<br />
These alarm s can occur only with operating and<br />
programming the control functions or with running<br />
CNC programs.<br />
1 RS232 parity error !<br />
Cause:<br />
Data transmission error parity error, wrong<br />
RS 232 setting in external device<br />
Remedy: Check data cables, set serial interface of<br />
the external device<br />
2 RS232 transmission error !<br />
Cause:<br />
Data transmission error character overflow<br />
Data transmission error invalid data frame<br />
Remedy: Check data cables, set serial interface of<br />
the external device<br />
10 Nxxxx Invalid G-code<br />
Remedy: Program correction<br />
11 ORDxx Feed wrong/missing<br />
Cause: Attempt to start with feed = 0, also with<br />
G95/96, if S = 0 or M5<br />
Remedy: Program correction<br />
<strong>21</strong> Nxxxx Circle: Wrong plane selected<br />
Cause: The wrong plane (G17, 18, 19) is active for<br />
a circle<br />
Remedy: Program correction<br />
30 Nxxxx Invalid tool offset number<br />
Cause: The lower 2 digits of the T number are to<br />
great<br />
Remedy: Program correction<br />
33 Nxxxx CRC can’t be determined<br />
Cause: Too much blocks without new position<br />
programmed, invalid contour element,<br />
programmed circle radius smaller than<br />
cutter radius, contour element to short.<br />
Remedy: Program correction<br />
34 Nxxxx Error on deactivating CRC<br />
Remedy: Program correction<br />
37 Nxxxx Plane change while CRC act.<br />
Cause: Change of plane not permitted with active<br />
cutter radius compensation<br />
Remedy: Program correction<br />
41 Nxxxx Contour violation CRC<br />
Cause: Invalid contour element, programmed circle<br />
radius smaller than cutter radius, contour<br />
element to short, contour violation with full<br />
circle.<br />
Remedy: Program correction<br />
51 Nxxxx Wrong chamfer/radius value<br />
Cause: The contour elements between a chamfer<br />
/ radius should be inserted are too short.<br />
Remedy: Program correction<br />
52 Nxxxx Invalid contour draft<br />
Cause: From the programmed parameters no valid<br />
contour draft would result<br />
Remedy: Program correction<br />
53 Nxxxx Wrong parameter structure<br />
Cause: From the programmed parameters no valid<br />
contour draft would result, wrong parameter<br />
programmed<br />
Remedy: Program correction<br />
56 Nxxxx Wrong angle value<br />
Cause: With the programmed angle no intersection<br />
point would result<br />
Remedy: Program correction<br />
57 Nxxxx Error in contour draft<br />
Cause: Invalid parameters programmed.<br />
Remedy: Program correction<br />
58 Nxxxx Contour draft not determinable<br />
Cause: Too much blocks without new position<br />
programmed, program end while contour<br />
draft<br />
Remedy: Program correction<br />
60 Nxxxx Block number not found<br />
Cause: Jump target not found<br />
Remedy: Program correction<br />
62 Nxxxx General cycle error<br />
Cause: Call-up counter of subprogram call invalid,<br />
feed
<strong>EMCO</strong> WINNC <strong>GE</strong> SERIES FANUC <strong>21</strong><strong>MB</strong><br />
ALARMS AND MESSA<strong>GE</strong>S<br />
71 Program not found<br />
Cause:<br />
NC program not found<br />
With program start no program was<br />
selected<br />
Remedy: Correct call-up or create program, select<br />
program<br />
73 File already exists !<br />
Remedy: Select other file name.<br />
77 Insufficient RAM for subroutine<br />
Cause: Subprograms interlocked too deep<br />
Remedy: Program correction<br />
83 Nxxxx Circle not in active plane<br />
Cause: Circle is not in active plane for CRC<br />
Remedy: Program correction<br />
142 Wrong simulation area<br />
Cause: Wrong scale factor (e.g. 0) programmed<br />
Remedy: Program correction<br />
142 Invalid scale factor<br />
Cause: No or an invalid simulation area was entered<br />
Remedy: Enter correct simulation area<br />
315 ORDxx Rotatory checking X<br />
Cause: The step motor has fallen out of pace<br />
Remedy: Reduce infeed and feed, check slides for<br />
smooth running, approach reference point<br />
325 ORDxx Rotatory checking Y<br />
see alarm 315<br />
335 ORDxx Rotatory checking Z<br />
see alarm 315<br />
500 ORDxx Target point exceeds work.area<br />
Cause: Target point, circle target point or circle out<br />
of working area limitation<br />
Remedy: Program correction<br />
501 ORDxx Target point exceeds SW limit<br />
Cause: Target point, circle target point or circle out<br />
of working area limitation<br />
Remedy: Program correction<br />
510 ORDxx <strong>Software</strong>-limit switch X<br />
Cause: <strong>Software</strong> limit switch in X exceeded (JOG)<br />
Remedy: Traverse back manually<br />
520 ORDxx <strong>Software</strong>-limit switch Y<br />
see 510<br />
530 ORDxx <strong>Software</strong>-limit switch Z<br />
see 510<br />
2501 ORDxx Synchronisation-error AC<br />
Remedy: RESET, report to <strong>EMCO</strong> if reproducible<br />
2502 ORDxx Synchronisation-error AC<br />
see 2501<br />
2503 ORDxx Synchronisation-error AC<br />
see 2501<br />
2504 ORDxx No memory for interpreter<br />
Cause: Too less RAM memory, continueing the<br />
program is not possible<br />
Remedy: Close all Windows application, close<br />
<strong>WinNC</strong>,remove resident programs from<br />
AUTOEXEC.BAT and CONFIG.SYS,<br />
restart the PC<br />
2505 ORDxx No memory for interpreter<br />
see 2504<br />
2506 ORDxx Too less RAM<br />
see 2504<br />
2507 ORDxx Reference point not active<br />
Remedy: Approach reference point<br />
2508 ORDxx Internal error NC core<br />
Remedy: RESET, report to <strong>EMCO</strong> if reproducible<br />
2520 ORDxx RS485 device absent<br />
Cause: With program start a RS485 device did not<br />
report, while program run a device got<br />
defective<br />
AC Axis controller<br />
SPS PLC<br />
MT control keyboard<br />
Remedy: Switch on RS485 device (machine, control<br />
keyboard), check cables and plugs, check<br />
terminator plug, report to <strong>EMCO</strong> if<br />
reproductible<br />
25<strong>21</strong> ORDxx RS485 communication error<br />
Remedy: PC restart, report to <strong>EMCO</strong> if reproducible<br />
2522 ORDxx RS485 communication error<br />
Remedy: PC restart, report to <strong>EMCO</strong> if reproducible<br />
2523 ORDxx INIT error on RS485 PC-board<br />
See "<strong>Software</strong> Installation" , Mistakes with installation<br />
of the software<br />
2524 ORDxx Gen.-Failure RS485 PC-board<br />
Remedy: PC restart, report to <strong>EMCO</strong> if reproducible<br />
2525 ORDxx Transmit error RS485<br />
Cause: Transmission error by poor plug<br />
connections, missing terminator, external<br />
sources of electromagnetic interference<br />
Remedy: Check the error sources above<br />
2526 ORDxx Transmit error RS485<br />
see 2525<br />
2527 ORDxx Internal error AC<br />
Remedy: Switch machine off/on, report to <strong>EMCO</strong> if<br />
reproducible<br />
2528 ORDxx Operating system error PLC<br />
Remedy: Switch machine off/on, report to <strong>EMCO</strong> if<br />
reproducible<br />
2529 ORDxx External keyboard error<br />
Remedy: The external keyboard always must be<br />
switched on after the PC. Restart the<br />
software, report to <strong>EMCO</strong> if reproducible<br />
I 2
<strong>EMCO</strong> WINNC <strong>GE</strong> SERIES FANUC <strong>21</strong><strong>MB</strong><br />
ALARMS AND MESSA<strong>GE</strong>S<br />
2540 ORDxx Error saving setting-data<br />
Cause:<br />
Hard disk full, wrong path setting, no writing<br />
access<br />
Remedy: Check hard disk space, check writing<br />
access, reinstallation of the software if<br />
reproducible<br />
2545 ORDxx Drive / Device not ready<br />
Remedy: Insert disk, lock drive, check disk drive, ...<br />
2546 ORDxx Checksum error machine-data<br />
Remedy: Restart, report to <strong>EMCO</strong> if reproductible<br />
2550 ORDxx PLC simulation error<br />
Remedy: Restart, report to <strong>EMCO</strong> if reproducible<br />
2551 ORDxx PLC simulation error<br />
Remedy: Restart, report to <strong>EMCO</strong> if reproducible<br />
2562 Read error on CNC program<br />
Cause:<br />
Defective program file, DOS read error<br />
(disk, hard disk)<br />
Remedy: Solve problem on DOS level, eventually<br />
reinstallation of the software<br />
2614 ORDxx Internal error MSD<br />
Remedy: Report to <strong>EMCO</strong> if reproducible<br />
2650 ORDxx Internal error cycle call up<br />
Cause: Invalid cycle call when a cycle was called<br />
with a G command<br />
Remedy: Program correction<br />
2849 Internal error CRC<br />
Remedy: Report to <strong>EMCO</strong> if reproducible<br />
2904 Helix Z value too large<br />
Cause: The pitch of the helix must not be larger<br />
than 45°<br />
Remedy: Program correction<br />
I 3
<strong>EMCO</strong> WINNC <strong>GE</strong> SERIES FANUC <strong>21</strong><strong>MB</strong><br />
ALARMS AND MESSA<strong>GE</strong>S<br />
I 4