Outlook 2007 - Academic Health Center Training
Outlook 2007 - Academic Health Center Training
Outlook 2007 - Academic Health Center Training

Create successful ePaper yourself
Turn your PDF publications into a flip-book with our unique Google optimized e-Paper software.
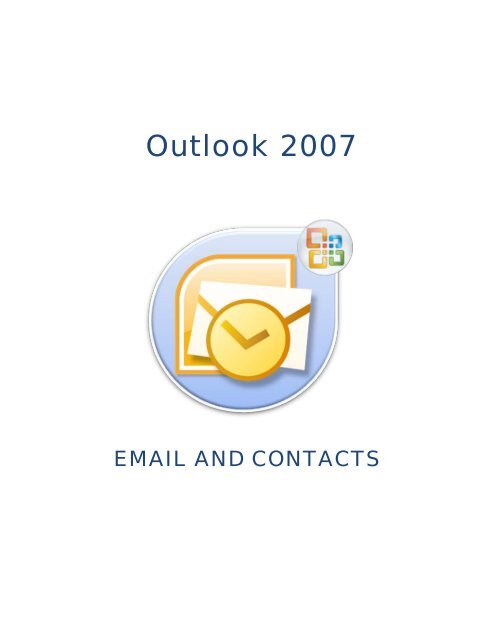
<strong>Outlook</strong> <strong>2007</strong><br />
EMAIL AND CONTACTS
Microsoft <strong>Outlook</strong> <strong>2007</strong> with Exchange<br />
Email and Contacts<br />
<strong>Outlook</strong> Interface ....................................................................................................... 4<br />
Menu Bar<br />
Tool Bar<br />
Navigation Pane<br />
Buttons to other areas<br />
Folders ....................................................................................................... 6<br />
Create New<br />
Move items from folder to folder<br />
Division Lines ....................................................................................................... 6<br />
Categorize<br />
Flag<br />
Reading Pane ....................................................................................................... 6<br />
To-Do Bar ....................................................................................................... 6<br />
Sending Email ....................................................................................................... 7<br />
Ribbon<br />
Tabs<br />
Quick Access Toolbar<br />
BCC ....................................................................................................... 8<br />
Attachments ....................................................................................................... 8<br />
Auto Signatures ....................................................................................................... 9<br />
Out of Office Manager ....................................................................................................... 9<br />
Rules ..................................................................................................... 10<br />
Email Template ..................................................................................................... 12<br />
Contacts/Address Book ..................................................................................................... 13<br />
Global vs. Contacts<br />
Create<br />
Search<br />
Distribution List ..................................................................................................... 14<br />
Diane Millican<br />
<strong>Training</strong> Specialist<br />
<strong>Health</strong> Science <strong>Center</strong> <strong>Training</strong><br />
<strong>Health</strong> Science <strong>Center</strong> 352-273-5051<br />
PO Box 100152<br />
dmillic@ufl.edu<br />
Gainesville, FL 32610-0152 http://training.health.ufl.edu<br />
3
Menu Bar and<br />
Tool Bar<br />
Minimize/Maximize<br />
Navigation<br />
Pane<br />
To-Do<br />
Bar<br />
Reading Pane<br />
<strong>Outlook</strong> Interface<br />
At the top of the page there is a Menu Bar and a contextual Tool Bar. That means the Tool Bar will<br />
change depending on what area of <strong>Outlook</strong> you are using.<br />
On the left side there is a Navigation Pane which includes a folder list as well as buttons to jump from<br />
one area of the <strong>Outlook</strong> Application to another. For example you can easily go from the Email area to<br />
the Calendar area with one click on the Calendar button. The buttons can be large as the Mail and<br />
Calendar buttons are in the view above. Or by clicking and dragging on the dots in between the folder<br />
area and the button area you can drag down to make the buttons smaller or drag up to make the<br />
buttons larger. The buttons to other areas are Mail, Calendar, Contacts, Tasks, Notes, Folder List and<br />
Shortcuts.<br />
The Navigation Pane and the To-Do Bar can be collapsed (minimized) by clicking on the double arrows<br />
in the top right corner of each pane. The To-Do Bar is a snap shot of your calendar and Task list. The<br />
visibility of these items is controlled in the View Menu.<br />
5
The Folders in the Navigation Pane allow you to<br />
organize your emails. You can create new<br />
folders by right clicking and choosing New Folder<br />
in the menu.<br />
Click and drag emails from the list of emails in<br />
the main pane into those folders. Or you can<br />
create Rules which will move your emails<br />
automatically. See the Rules section to learn<br />
how to create a rule.<br />
In the main section of the Email Application, there is a title row with items such as From, Subject,<br />
Received, Categories, and Flag Status. From the View Menu you can open the Reading Pane. The<br />
Reading Pane allows us to read an email message without double clicking to open it. The Reading Pane<br />
can be on the Right, the Bottom or turned off totally if you want to just see a list of your emails.<br />
The sections in the title row can be moved or resized by clicking and dragging. If you point to an item<br />
and click hold and drag you can move the item. If you want to resize hover your cursor over the gray<br />
dividing line until you see a line with a double headed arrow. Then click and drag to the desired size.<br />
The list of Emails can be sorted using title row items by<br />
clicking on the item in the title row. Or if the Reading<br />
Pane is open on the Right, click on the area that says<br />
Arrange by and choose from the drop down menu.<br />
Emails can be Flagged for follow-up or Categorized by a<br />
Category you create. If the email is flagged for followup,<br />
it can have a reminder attached to it so it will<br />
automatically remind you when the item is due. If the<br />
email is Categorized, you can sort by Category.<br />
Categories can be accessed from the Action menu. To<br />
Create or rename categories choose All Categories .<br />
6
Sending Emails<br />
To Send a New E-mail<br />
1. Click on the New button on the Standard toolbar.<br />
2. Type in the address of the recipient in the To… box.<br />
3. Enter an address in the CC… box if you want someone to receive a copy<br />
4. Type in a Subject in the Subject box. Subjects should be short and descriptive.<br />
5. Click in the Body text box and type your message<br />
6. Click on the Send button.<br />
When creating a new Email, you will see a different look in <strong>Outlook</strong> <strong>2007</strong>. The New Message window is<br />
based on Word <strong>2007</strong> and uses the Ribbon and Tab interface.<br />
The first thing we see in this new Email<br />
message window is the Office Button.<br />
The Office Button gives us access to Create<br />
New <strong>Outlook</strong> Items and Editor Options as<br />
well as File Options such as Save or Print.<br />
Quick Access Toolbar<br />
Editor Options affect how the <strong>Outlook</strong> program<br />
functions. It includes Auto Correct items and Proofing<br />
options.<br />
In the new message area there is also a Quick Access Toolbar. This area is customizable. Any command<br />
can be added to this area to make the program easier and more efficient for you to use.<br />
7
This new interface has Tabs across the top of the Ribbon which holds the commands to choose from<br />
when creating your email. Each tab holds different commands. The most frequently used commands<br />
will be found on the Message tab. Click on each tab to see the other commands that are available. The<br />
commands are context sensitive. If the command is not available for what you are working with it will be<br />
grayed out.<br />
Tabs<br />
Ribbon<br />
BCC – Blind Carbon Copy<br />
When sending email you can choose who to send the email to and you can add recipients to the Carbon<br />
Copy field as well. Putting addresses in the To: area or the CC: area show the address to all who are<br />
receiving the email. If you want to send a copy to someone but not show their email address to<br />
everyone else that has received the email you can place them in the BCC: area.<br />
If you don’t see the BCC: area, choose the Options tab (from a new message) and click on the Show BCC<br />
button. This will allow you to see the area for the BCC. It does not show the addresses included in the<br />
BCC area to those receiving the email.<br />
Attachments<br />
If you want to add an attachment to an email, click on the paperclip icon in the Message Ribbon. An<br />
Explorer window will open to allow you to search your computer for the item you want to attach. Click<br />
on the item and then click on the insert button on the bottom of the dialog box.<br />
Certain type of attachments will not be sent by <strong>Outlook</strong>. For example .exe files will be stripped by<br />
<strong>Outlook</strong>. If you need to send a type of attachment that outlook will not send you can rename it or zip<br />
the file or folder. Then attach the zipped file.<br />
To open an attachment, click once on the file name to get a preview. Double click to open the file in its<br />
originating program.<br />
8
Auto Signatures<br />
Emails can be set up to have a signature automatically applied to all new messages and/or Replies and<br />
Forwards.<br />
From the Tools menu, choose Options. Click on the Mail Format tab and click on the Signature button.<br />
Click on the New button. Multiple signatures can be created. Each signature must have a unique name<br />
such as work, reply, or department.<br />
Once you choose a name for your<br />
signature, the Edit Signature area<br />
will become available for you to<br />
add text and if you are using HTML<br />
formatting, images.<br />
Out of Office Manager<br />
If you are going to be out of the office for a period of<br />
time and want an automatic reply to all incoming<br />
emails, set up an Out of Office Message.<br />
From the Tools menu, choose Out of Office Assistant.<br />
Select the send Out of Office auto-replies radio<br />
button. Create your message in the text box.<br />
You can choose to set a start and stop time by clicking<br />
in the box to Only send during this time range.<br />
9
Email Rules<br />
You can organize emails automatically by setting up Rules.<br />
From the Tools menu choose Rules and Alerts…<br />
Click on NEW RULE…<br />
Start from a blank rule<br />
Choose CHECK MESSAGES AS THEY ARRIVE<br />
Click NEXT<br />
Choose the conditions you want.<br />
In this case I chose:<br />
FROM PEOPLE OR DISTRIBUTION LIST<br />
and<br />
WITH SPECIFIC WORDS IN THE SUBJECT OR BODY<br />
In the bottom half click on the blue words to set<br />
the values.<br />
10
FROM PEOPLE OR DISTRIBUTION LIST<br />
This option will open the Global Address Book. If you are<br />
setting this for a UF person, you can look them up in the<br />
top half.<br />
If the address is from outside UF (or not found in the top<br />
half)<br />
type in the address in the FROM<br />
box<br />
Choose the action you would like to perform. Here I chose<br />
FORWARD IT TO PEOPLE OR DISTRIBUTION LIST<br />
Another option would be to chose move it to the Specified<br />
folder.<br />
Again, click on the blue words to set the values. Then click<br />
NEXT<br />
Choose any exceptions that you might want. Adjust<br />
values if needed and click NEXT<br />
Give the rule a<br />
good name<br />
and click Finish.<br />
If you would like to test the rule, you can turn on the RUN THIS<br />
RULE NOW… option before you finish.<br />
11
Email Template<br />
Repetitive/Routine email messages do not have to be created every time you need to provide routine<br />
information to someone. You can find many templates online. Or, you can create a template yourself.<br />
For example, you could use a template for a weekly<br />
agenda or routinely sent information.<br />
To Create an Email Template:<br />
1. Open <strong>Outlook</strong> Mail<br />
2. Click New Mail Message<br />
3. Create Email with message, subject<br />
and recipients or distribution<br />
list<br />
4. Click Office Button<br />
5. Choose Save As<br />
6. Click Save As Type down arrow<br />
7. Click <strong>Outlook</strong> Template (.oft)<br />
8. Click Save Button<br />
To Create a New Email from the Template:<br />
1. Click Tools Menu<br />
2. Select Forms<br />
3. Click Choose Form<br />
4. Click Look In - Down Arrow<br />
5. Click User Templates in File System<br />
6. Click User Templates<br />
7. Dbl Click Template<br />
12
Address Book / Contacts<br />
The Global Address book with UF Exchange provides current information on all college personnel in the<br />
UFAD (UF Active Directory). You can find email addresses by typing in the person’s name in the search<br />
box. From a new message, click on the Address Book icon or the To: Button. Start typing the last name<br />
and the list should jump to that area.<br />
Click on the To -> button to add that<br />
persons email to your message. You<br />
can also add people to the Cc or the<br />
Bcc areas. Then click OK.<br />
You can select multiples using the<br />
CRTL + click method. Select the<br />
people you want and then click the<br />
proper To or Cc or Bcc button.<br />
Another option is to use the Contacts area. In<br />
the drop down that says Global Address List,<br />
choose Contacts. (you may have to scroll up or<br />
down to find this option).<br />
Contacts are people that you add to <strong>Outlook</strong>. To<br />
add people it can be as easy as right clicking on<br />
the From name in a received email.<br />
13
You can also go to the New button and choose New Contact and<br />
enter the information manually. A benefit to using Contacts is that<br />
you can store a lot of information about your contacts in this area.<br />
In the Notes area you can add whatever notes you want.<br />
*Any item in outlook can be opened<br />
from the New Drop Down.<br />
Distribution Lists<br />
If you send emails to the same group of people many times a Distribution list would be very helpful and<br />
time saving. From the New drop down choose Distribution List to get the Distribution List dialog box.<br />
Each Distribution List must have a unique name such as Department, book club, or friends.<br />
Then choose the Select Members icon to choose people from your Global Address book or your<br />
Contacts. If you want to add someone not in your Address book you choose the Add New icon and type<br />
in the information. Any time you want to send to the group, you select the Distribution list and it will<br />
have everyone included.<br />
14