duropal - Hpl- tecHno- loGY
duropal - Hpl- tecHno- loGY
duropal - Hpl- tecHno- loGY

Create successful ePaper yourself
Turn your PDF publications into a flip-book with our unique Google optimized e-Paper software.
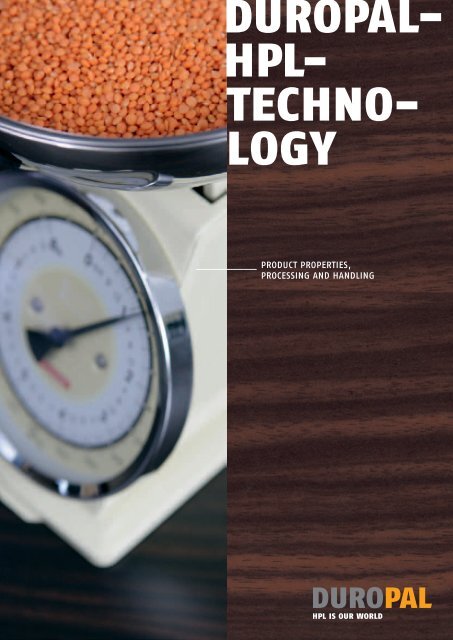
<strong>duropal</strong> -<br />
HPL-<br />
technO-<br />
LOGY<br />
PRODUCT PROPERTIES,<br />
PROCESSING and HANDLING
CONTENTS<br />
03 _ Product characteristics of Duropal-HPL and Duropal-HPL-Solid<br />
12 _ Recommendations for processing Duropal-HPL, Duropal-HPL-Solid<br />
and Duropal-HPL-elements<br />
41 _ Cleaning and care of Duropal-HPL<br />
_ 2
PRODUCT CHARACTERISTICS<br />
Duropal-HPL<br />
Duropal-HPL-solid
ERSATILE CHARACTER:<br />
HE PRODUCT CHARACTERISTICS<br />
Duropal high pressure laminates (HPL) are hard-wearing, versatile, and available in many<br />
attractive designs. In order to get the best use from the product and ensure that its attractive<br />
appearance is retained, please observe the chemical, mechanical and physical properties of<br />
our Duropal high pressure laminates (HPL).<br />
In terms of reaction to fire, protection against formaldehyde emission and surface processing<br />
are concerned, there are some minor differences between Duropal-HPL and Duropal-HPL-Solid.<br />
All other points apply to both high pressure laminates.<br />
1. CHEMICAL CHARACTERISTICS<br />
The surfaces of Duropal-HPL and Duropal-HPL-Solid are resistant to contact with most normal<br />
chemicals and substances. Cleaning products such as acetone and substances such as<br />
vinegar, coffee and blood will not stain the surface.<br />
Nor will spillages of any of the following (listed here as examples) affect the surface<br />
provided they are wiped up promptly (e.g. within 10-15 minutes). This means the tops must<br />
be wiped with a wet cloth and rubbed dry within 10-15 minutes.<br />
Substance Chemical Formula Substance Chemical Formula<br />
Antacid (more than 10%) HCOOH Lacquers/paints and adhesives (chemically hardening)<br />
Aminosulphonic acid (to 10%) NH 2<br />
SO 3<br />
H Methylene blue C 16<br />
H 18<br />
N 3<br />
CIS<br />
Aniline dyes Millon´s reagent OHg 2<br />
NH 2<br />
CI<br />
Inorganic acids (to 10%) Sodium hydrosulphate NaHSO 4<br />
Arsenic acid (to 10%) H 3<br />
AsO 4<br />
Sodium hypochlorite NaOCI<br />
Boric acid H 3<br />
BO 3<br />
Sodium thiosulphate Na 2<br />
S 2<br />
O 3<br />
Iron (II) chloride solution FeCI 2<br />
Sodium hydroxide (more than 10%) NaOH<br />
Iron (III) chloride solution FeCI 3<br />
Nylanders reagent<br />
Esbachs reagent Oxalic acid COOH x COOH<br />
Fuchsin solution C 19<br />
H 19<br />
N 3<br />
O Phosphoric acid (to 10%) H 3<br />
PO 4<br />
Hair dyes and bleaches Picric acid C 6<br />
H 2<br />
OH(NO 2<br />
) 3<br />
Iodine solution J Mercury dichromate HgCr 2<br />
O 7<br />
Limescale remover Nitric acid (to 10%) HNO 3<br />
Potassium hydroxide (more than 10%) KOH Hydrochloric acid (to 10%) HCI<br />
Potassium chromate K 2<br />
CrO 4<br />
Sulphuric acid (to 10%) H 2<br />
SO 4<br />
Potassium dichromate K 2<br />
Cr 2<br />
O 7<br />
Sulphurous acid (to 10%) H 2<br />
SO 3<br />
Potassium hydrogen sulphate KHSO 4<br />
Silver nitrate AgNO 3<br />
Potassium iodide KJ Mercury bichloride solution HgCI 2<br />
Potassium permanganate KMnO 4<br />
Hydrochloric peroxide (3-30% perhydrol) H 2<br />
O 2<br />
Methyl violet<br />
C 24<br />
H 28<br />
N 3<br />
CI<br />
_ 4
The following chemicals are examples of substances that will destroy a Duropal-HPL surface<br />
and must be removed immediately. The surface will very quickly become dull and rough.<br />
Chemical; each in concentration<br />
over approx. 10%<br />
Chemical Formula<br />
Chemical; each in concentration<br />
over approx. 10%<br />
Chemical Formula<br />
Aminosulphic acid NH 2<br />
SO 3<br />
H Phosphoric acid H 3<br />
PO 4<br />
Arsenic acid H 3<br />
AsO 4<br />
Hydrochloric acid HCI<br />
Chromic sulphuric acid K 2<br />
Cr 2<br />
O 7<br />
+ H 2<br />
SO 4<br />
Sulphuric acid H 2<br />
SO 4<br />
Hydrofluoric acid HF Hydrogen bromide HBr<br />
Nitrohydrochloric acid HNO 3<br />
+ HCI = 1 : 3<br />
Frequent exposure to the following aggressive gases will cause changes to the Duropal-HPL<br />
surface.<br />
Chemical Chemical Formula Chemical Chemical Formula<br />
Bromine Br 2<br />
Sulphur dioxide SO 2<br />
Chlorine CI 2<br />
Acid vapours<br />
Nitrous gases<br />
N x<br />
O y<br />
_ 5
2.1 mechanical and physical<br />
Properties of <strong>duropal</strong>-hpl<br />
DIN EN 438-3: 2005<br />
Requirements for Application Classification<br />
Quality criterion<br />
Resistance to surface abrasion<br />
PROCESS<br />
DIN EN 438-2<br />
or test<br />
standard<br />
HPL CLASSIFICATION TO<br />
DIN EN 438-3: 2005<br />
Thickness
FIGURES ACHIEVED BY DUROPAL-HPL<br />
TYPICAL APPLICATIONS AND CLASSIFICATION SYSTEM FOR DUROPAL-HPL<br />
Examples of typical<br />
APPLICATIONS<br />
STRESS<br />
FigurEs of numerical<br />
Classification<br />
EQUIVALENT<br />
alphabetical<br />
CLASSIFICATION<br />
Print designs<br />
conventional<br />
Plain designs Print designs<br />
special effects<br />
375–500 500–700 approx. 50–70<br />
3 3 ** (see footnote)<br />
Thickness 1.2 mm<br />
25<br />
Thickness 0.8 mm<br />
20<br />
Thickness 0.5 mm<br />
15<br />
4 3 2<br />
Texture deep<br />
4<br />
Texture medium<br />
3<br />
Non-textured<br />
2<br />
4 3 2<br />
Thickness 1.2 mm Thickness 0.8 mm Thickness 0.5 mm<br />
0.45 0.55 0.75<br />
0.90 1.05 1.25<br />
Min. level 3<br />
Depending on surface texture 4–5<br />
Min. level 3<br />
Depending on surface texture 4–5<br />
Min. level 3<br />
Depending on surface texture 4–5<br />
Level 5<br />
Cash desks, municipal<br />
facilities (military<br />
estab lishments,<br />
correctional facilities etc.)<br />
Kitchen and office worktops,<br />
hotel and restaurant<br />
tables, wall panelling<br />
and doors in public areas,<br />
interior walls of public<br />
transport<br />
Front elements on kitchen,<br />
bathroom and office<br />
furniture, wall and ceiling<br />
panels, shelving<br />
and furniture elements<br />
Very high resistance to<br />
surface abrasion, very<br />
high impact and scratch<br />
resistance<br />
High resistance to surface<br />
abrasion, high impact and<br />
scratch resistance<br />
Average resistance to<br />
surface abrasion, average<br />
impact and scratch<br />
resistance<br />
Wear<br />
RESISTANCE<br />
Impact<br />
resistance<br />
Scratch<br />
resistance<br />
4 4 4 HDS (horizontal heavyduty<br />
standard)<br />
HDF (horizontal heavyduty<br />
flame retardant)<br />
HDP (horizontal heavyduty<br />
postforming)<br />
3 3 3 HGS (horizontal generalpurpose<br />
standard)<br />
HGF (horizontal generalpurpose<br />
flame-retardant)<br />
HGP (horizontal generalpurpose<br />
postforming)<br />
2 2 2 VGS (vertical generalpurpose<br />
standard)<br />
VGF (vertical generalpurpose<br />
flame retardant)<br />
VGP (vertical generalpurpose<br />
postforming)<br />
Other combinations of the figures for abrasion, impact and scratch resistance than those contained in the table<br />
are possible.<br />
Min. level 4<br />
Depending on design or colour 4–5<br />
Min. level 3<br />
Depending on design or colour 4–5<br />
Min. level 3<br />
Min. level 4<br />
Requirement fulfilled<br />
Requirement fulfilled<br />
Reqirement fulfilled<br />
ACHIEVABLE RADIUS AT BENDING TEMPERATURE<br />
OF APPROX. 190 °C<br />
Thickness 1.2 mm<br />
R: approx. 10 mm<br />
Thickness 0.8 mm<br />
R: approx. 6 mm<br />
Thickness 0.5 mm<br />
R: approx. 3 mm<br />
Not given Not given Not given<br />
Thickness 1.2 mm Thickness 0.8 mm Thickness 0.5 mm<br />
20 sec 15 sec 10 sec<br />
* Information on alphabetical classification:<br />
1 st letter 2 nd letter 3 rd letter<br />
H (horizontal application) or<br />
V (vertical application)<br />
G (general purpose) or<br />
D (heavy duty)<br />
S (standard quality) or<br />
P (postforming) or<br />
F (fire retardant)<br />
** Print designs with optical special effects: approx. 50-75 rev. Only suitable for vertical applications<br />
_ 7
2.2 mechanical And physical<br />
CHARACTERISTICS OF <strong>duropal</strong>-hpl-solid<br />
DIN EN 438-4: 2005<br />
GENERAL REQUIREMENTS<br />
QUALITY CRITERION Process DIN EN 438-2<br />
or Test standard<br />
Property<br />
Unit<br />
Resistance to surface abrasion<br />
Resistance to shock loading<br />
(large ball)<br />
10 Abrasion resistance Rev. (min.) (IP + FP)/2<br />
21 Drop height mm (min.) HPL thickness: 2 mm to
Classification for HPL-Solid<br />
to DIN EN 438-4: 2005<br />
FIGURES ACHIEVED<br />
by Duropal-HPL-Solid<br />
CGS* CGF* CGS*<br />
Standard<br />
CGF*<br />
Fire retardant<br />
Print designs**<br />
Plain designs<br />
350 350 375–500 500–700<br />
1.400 1.400 1,400 1,400<br />
1.800 1.800 1,800 1,800<br />
2 2 2 2<br />
3 3 3–4 3–4<br />
3 3 3 3<br />
4 4 4 4<br />
3 3 3 3<br />
4 4 4 4<br />
5.0 7.0 5.0 7.0<br />
2.0 3.0 2.0 3.0<br />
6.0 9.0 6.0 9.0<br />
2.0 6.0 2.0 6.0<br />
3 3 3 3<br />
4 4 4 4<br />
0.4 0.4 0.4 0.4<br />
0.8 0.8 0.8 0.8<br />
0.3 0.3 0.3 0.3<br />
0.6 0.6 0.6 0.6<br />
5 5 5 5<br />
4 4 4–5 4–5<br />
4–5 4–5 4–5 4–5<br />
3 3 3 3<br />
4 4 4 4<br />
3 3 3 3<br />
4 4 4 4<br />
9,000 9,000 Requirement fulfilled<br />
80 80 Requirement fulfilled<br />
60 60 Requirement fulfilled<br />
Maximum deviation ±0.20<br />
Maximum deviation ±0.30<br />
Maximum deviation ±0.40<br />
Maximum deviation ±0.50<br />
Requirement fulfilled<br />
Maximum deviation ±0.60<br />
Maximum deviation ±0.70<br />
Maximum deviation ±0.80<br />
To be agreed<br />
Maximum deviation 8<br />
Maximum deviation 5<br />
Maximum deviation 3<br />
+10 /-0<br />
Maximum deviation 1.5<br />
Maximum deviation 1.5<br />
Permitted fault size/-length<br />
Max. 1<br />
Max. 10<br />
Requirement fulfilled<br />
Requirement fulfilled<br />
* Information on alphabetical classification:<br />
1 st letter 2 nd letter 3 rd letter<br />
C (compact laminates) G (general purpose) S (standard quality) or<br />
F (fire retardant)<br />
<br />
** Print designs with optical special effects: approx. 50-75 r.<br />
Only suitable for vertical applications<br />
_ 9
3. DUROPAL REAL METAL LAMINATES MATERIAL PROPERTIES<br />
Since sensitivity to scratches is greater than that of ordinary Duropal-HPL, Duropal Real<br />
Metal laminates are used solely for vertical applications. In the event that they are to be<br />
used horizontally, we recommend covering them e.g. with a thin glass sheet. Mild surface<br />
unevenness may occur during the production of Duropal Real Metal laminates. Slight<br />
impressions may also become visible, although these are regarded as normal by today‘s<br />
technical standards. There may also be slight deviations in colouring, although these will<br />
not affect the general overall appearance. The variations in texture and colour are not<br />
quality flaws, but proof that the item in question is a real metal surface and not an imitation.<br />
We therefore advise using products from the same batch for a particular application.<br />
4. REACTION TO FIRE<br />
Duropal-HPL and Duropal-HPL-Solid are suitable for fire protection and the highly flameresistant<br />
version is approved for use in the production of construction elements to<br />
DIN 4102/B 1. The following applies for Duropal-HPL: non-dripping, non-softening.<br />
- Construction classes to DIN 4102-1 - postforming quality: B2 (normal fire resistance)<br />
- Highly flame resistant quality: B 1<br />
- Use in maritime applications IMO Res. A 653 (16) B, US Coast Guard ASTM E 84 / NFPA 255 (A+C)<br />
5. PHYSIOLOGICAL PROPERTIES<br />
Duropal-HPL and Duropal-HPL-Solid are physiologically safe and suitable for use in rooms<br />
where food is stored, handled and consumed. This property is confirmed by a safety declaration<br />
from research and testing company ISEGA-Forschungs- und Untersuchungs-GmbH (tested to<br />
DIN EN 1186 / DIN EN 13130).<br />
6. PROTECTION AGAINST THE EMISSION OF FORMALDEHYDE FROM CORE MATERIALS<br />
When Duropal-HPL and the core material are bonded, Duropal-HPL offers highly effective<br />
protection against the possible diffusion of formaldehyde from the core material even in the<br />
lowest thickness.<br />
7. ANTISTATIC BEHAVIOUR<br />
The specific surface resistance of Duropal-HPL under ordinary ambient conditions is between<br />
1 x 10 9 and 1 x 10 12 Ohm (tested in accordance with DIN EN 61349). There is therefore little<br />
likelihood of an electro-static charge building up, and they do not attract dust.<br />
8. QUALITY MONITORING<br />
Duropal guarantees that the following standards are fulfilled e.g. with regard to the<br />
product properties:<br />
EN 438: 2005, ISO 4586 part 1: 2004, DIN EN ISO 9001: 2000<br />
and with regard to its reaction to fire:<br />
DIN 4102, AFNOR NFP 92.501, B/S 476 – parts 6.7, Önorm B 3800-1<br />
_ 10
COLOURS AND SURFACES<br />
Thanks to the extensive variety of colours and surface textures in which our Duropal high<br />
pressure laminates are available, they are ideal for the widest range of applications. We will<br />
be pleased to advise you in choosing the perfect solution for your requirements. You will find<br />
all the relevant details in our brochures.<br />
Duropal-HPL is sanded lengthwise ready for bonding for further processing. The same information<br />
applies to the reverse of Duropal-HPL-Solid as for the fronts.<br />
PRODUCT AND COLOUR MATCH<br />
One design – lots of possibilities: You can combine wodego melamine faced decorative panels<br />
(DP), Duropal high-pressure laminate (HPL) and edges in the same designs in the wodego<br />
colour match collection – just as you require.<br />
OVER- AND UNDER-DELIVERIES<br />
Minor flaws due to the production process and/or raw materials that do not impair the<br />
quality and are acceptable for 1 st quality goods are assessed in accordance with the Duropal<br />
selection regulations (based on EN 438, part 3, and the international ISO standard). We also<br />
reserve the right to minor under- or over-deliveries if necessary for technical/production<br />
reasons and in accordance with Duropal‘s terms and conditions.<br />
STORAGE<br />
The optimum storage conditions are in closed rooms under normal inner room conditions<br />
(temperature 18-25 °C, relative humidity 50-65%). Items are to be stored horizontally with<br />
the whole surface supported, including the edges, on a level base and wrapped in plastic<br />
film. The whole surface of the top sheet is to be covered by a cover board.<br />
DISPOSAL<br />
Incineration: Duropal-HPL and Duropal-HPL-Solid are perfectly safe to incinerate, and may<br />
be disposed of in officially approved industrial incineration facilities.<br />
_ 11
RECOMMENDATIONS FOR PROCESSING<br />
<strong>duropal</strong>-hpl,<br />
<strong>duropal</strong>-hpl-solid And<br />
<strong>duropal</strong>-hpl-elementS
RANSPORTATION AND STORAGE<br />
1. Transportation<br />
Ensure that any loose sheets are handled correctly during loading and<br />
unloading. The décor side should be face up when removed from the<br />
vehicle. Individual small sheets are to be carried with the decorative<br />
side held against the body. Avoid bending larger sizes by carrying them<br />
arched lengthwise or with the decorative side rolled up to the inside.<br />
Avoid any type of movement which might cause abrasion. When transporting<br />
a large quantity, we recommend stacking the sheets on a pallet,<br />
always with adequate protection of the decor side.<br />
2. STORING hpl<br />
Duropal-HPL must be well protected against moisture and should be<br />
stored in rooms with normal climatic conditions. Stacks of sheets are to<br />
be stored horizontally with the whole area supported or angled at 80°; in<br />
the latter case, again ensure that the surface of the board is supported<br />
and that there is protection on the floor to prevent them from slipping.<br />
Always stack with the decorative sides of two sheets facing each other.<br />
Please observe the climatisation instructions before processing; see<br />
chapter 7.3 “Pre-treatment“. Duropal-HPL is available with a heatresistant<br />
(to 80 °C or 180 °C) protective film on request. This film is to be<br />
removed after six months at the most, otherwise it may be extremely<br />
difficult to remove the film or adhesive residues.<br />
2.1 STORAGE OF DUROPAL REAL METAL LAMINATES<br />
The optimum storage conditions are provided by closed rooms under<br />
normal indoor room conditions (temperature 18-25 °C, relative humidity<br />
50-65%). Items are to be stored horizontally with the whole surface<br />
supported, including the edges, on a level base and wrapped in plastic<br />
film. Where this is not possible, then store the items angled at 80° with<br />
the whole area of the board supported and suitable protection on the floor<br />
to prevent the boards from slipping. The entire surface of the top board is<br />
to be covered by a cover panel. Duropal Real Metal laminates are delivered<br />
with a heat-resistant (to 180 °C) protective film. This film is to be re moved<br />
after six months at the most, otherwise the metal surface may be<br />
damaged.<br />
2.2 STORAGE OF Duropal-HPL-ELEMENTS<br />
Store on a level surface, dry, at normal climate if possible, i.e. in a<br />
warehouse, so that the Duropal-HPL-elements are not exposed to direct<br />
water or moisture. Avoid direct sunlight. Duropal-HPL is available with<br />
a heat-resistant (to 80 °C) protective film on request. This film is to be<br />
removed after six months at the most, as otherwise the surface may be<br />
damaged.<br />
_ 13
ocessing<br />
uropal-hpl<br />
uropal-hpl-elements<br />
1. TIP: „PLEASE NOTE“<br />
The strain on tools when processing Duropal-HPL is relatively high, due to the hardness<br />
of the surface, which is coated with melamine resin. Use tools with carbide-tipped<br />
blades, and diamond-tipped blades for certain processes. Please observe the following<br />
to ensure the best results with unbonded panels:<br />
– Make sure you always work on a level, firm base<br />
– The boards must not vibrate or wobble under any circumstances<br />
– Ensure that you cut sharply and that your tools run smoothly. Should the decorative side<br />
break out, splinter or arch upwards, this will almost always be due to inapprop riate<br />
handling or the use of unsuitable tools. Warning: any notches or nicks will crack or tear<br />
when subjected to fluctuations in temperature or humidity.<br />
– If the decorative surface is pushed over the supporting base, please ensure that a guide<br />
or support is used to protect the Duropal-HPL. When processing with machine tools,<br />
surfaces may also be grooved to ensure that the contact area is kept to a minimum.<br />
_ 14
2. CUTTING<br />
2.1 Duropal-HPL WITHOUT CORE<br />
Many tools are suitable for cutting Duropal-HPL, but they must all possess<br />
a number of specific features.<br />
Hand saw<br />
Fine-toothed saws with slightly straight-set saw blades are recommended<br />
for single cuts. Always saw from the top surface of the board<br />
and at a steep angle.<br />
Electric nibbling tool<br />
Ideal for rounded cuts; can also be used for stationary fitting on benchtops.<br />
Handheld circular saw<br />
Always turn the decor side down when processing. Please always use a<br />
fence to achieve straight, clean cuts.<br />
Electric jigsaw<br />
Always turn the decor side down when processing. Ensure you have a<br />
clean base to work on, ideally with a felt cover.<br />
Table (bench) saw<br />
The decor side must always be face up. A good amount of pressure is required<br />
around the cutting blade, i.e. place a batten on top or, ideally,<br />
height-adjustable pressure rollers. Ensure that the saw runs tightly in the<br />
correct blade position. You can also cut stacks of sheets with a table saw.<br />
Although they are extremely durable, carbide-tipped circular saw blades<br />
must be handled carefully because they are highly sensitive to impacts<br />
and blows.<br />
Tooth spacing:<br />
Rotations:<br />
Cutting speed:<br />
Feed speed:<br />
10–15 mm<br />
3,000–4,000 rpm<br />
50–100 m/s<br />
10–30 m/min<br />
The best cutting results are achieved with carbide-tipped saw blades that<br />
cut on both sides and with a hollow tooth front. Blades of less than 2 mm<br />
are usually too soft, and will result in rough edges.<br />
_ 15
STANDARD TOOTH SHAPES<br />
Flat tooth<br />
Alternating tooth<br />
Duplovit tooth<br />
(high tooth front)<br />
Duplovit tooth,<br />
chamfered on<br />
both sides<br />
Roof Duplovit<br />
Trapezoid flat tooth<br />
The flat tooth, the most basic variant, is easy and cheap to sharpen.<br />
The alternating tooth is the universal tooth shape for counter direction sizing and splitting<br />
cuts. The cutting width division and tip feed are advantageous.<br />
The Duplovit tooth is hollow cut for minimum tip feed and double-sided angle of the<br />
axis. Another advantage is that the teeth grab from both sides, although this version<br />
does not have the cutting width division. Maintenance is more time-consuming and<br />
complex.<br />
The Duplovit tooth with chamfers on both sides is the special version, and usually the<br />
only option for achieving a clean top and bottom cutting edge without use of a scoring<br />
blade and in a counter direction. Maintenance is even more time-consuming.<br />
The roof Duplovit is the combination of a roof and a Duplovit tooth. The roof tooth is<br />
responsible for the pre-cutting and holds the saw blade very firmly at the sides.<br />
The tip feed of the Duplovit tooth with the double-sided angle of the axis provides clean<br />
edge work with a long tool life.<br />
Advantages:<br />
– four-fold cutting division for optimum edges<br />
– universal circular saw blade for professional use<br />
The trapezoid flat tooth: as well as the individual tooth shapes, there are several others<br />
that are grouped together and are known accordingly as grouped teeth. The trapezoid<br />
flat tooth has a slightly higher flat tooth with chamfers on both sides, followed by a<br />
slightly lower flat tooth without chamfer. The very good cutting edge that is achieved by<br />
the fivefold cutting width separation is advantageous, although that is offset by the more<br />
time-consuming maintenance required.<br />
_ 16
2.2 Duropal-HPL-ELEMENTS ON ONE OR BOTH SIDES OF A CORE MATERIAL<br />
Cutting with circular saws<br />
The quality of the cutting edge is determined by the height at which the saw blade is set. If<br />
the top cut edge on a core panel that is covered on both sides is unclean, then we advise<br />
setting the saw blade higher; if the bottom edge is unclean then set the blade lower.<br />
The best stop position must be determined in advance in each case. You will achieve the best<br />
results with a pre-cutting saw. The combination of various other factors will also influence<br />
the quality of the cut edges:<br />
– tooth shape<br />
– number of teeth<br />
– cutting speed<br />
– feed speed<br />
– entry and exit angle<br />
2.3 CUTTING DUROPAL WINDOWBOARDS<br />
Use vibration-free, carbide-tipped circular saws or finely toothed, slightly straight-set hand<br />
saws.<br />
2.4 PLASTIC END CAPS FOR DUROPAL WINDOWBOARDS<br />
The ABS plastic caps make it easier to seal the top edges, and are available in all profile<br />
variants and the matching colours white, grey and beige. The end caps are to be adapted to<br />
the size of the windowboard. Cover the whole surface of the end caps and top edges with a<br />
single-component polyurethane sealant such as Sikaflex-221 (from: www.sika-industry.de),<br />
leave for approx. 2 minutes, and then firmly press the cover caps into place. The bond will<br />
have hardened after approx. one hour, and you will have an attractive professional seal to<br />
the top edges.<br />
2.5 CUTTING AND FEED SPEEDS<br />
Chapter 6, “Technical information“, explains how the cutting and feed speed determine the<br />
quality of the cut.<br />
_ 17
3. PROCESSING CUT EDGES AND PROFILING DUROPAL-HPL-ELEMENTS<br />
Always saw from the top surface of the board (decor side).<br />
3.1 MANUAL EDGE PROCESSING<br />
a) File, sandpaper, scraper<br />
These materials are suitable for smoothing edges. When processing an<br />
edge, please always file from the decor towards the core material.<br />
Edges should be smoothed with fine files, sandpaper (100-150) or scrapers.<br />
Milled edges should be lightly milled with sandpaper, then scraped with<br />
the scraper and smoothed again using fine sandpaper. Please ensure that<br />
all traces of sanding particles are removed.<br />
b) Plane<br />
For manual planing, we recommend the use of metal planes with HSS<br />
blades, working at a cutting angle of approx. 15°.<br />
c) Hand router<br />
Protruding Duropal-HPL panel edges can be milled flush with this tool.<br />
In order to protect the surface when working, cover the surface of the<br />
router with non-abrasive material. Remove all off-cuts before every<br />
new application of the tool.<br />
Router diameter:<br />
Speed:<br />
Cutting speed:<br />
10–25 mm<br />
20,000 rpm<br />
10–25 m/s<br />
Carbide-tipped router cutters are ideal, and especially ones with reversible<br />
carbide tips for larger diameters.<br />
You will be able to make better use of your tools with height adjustment<br />
and parallel-axis cutting. To protect your tool, make sure that the board<br />
overhangs by no more than 2-3 mm.<br />
_ 18
3.2 EDGE PROCESSING WITH STATIONARY MACHINES<br />
Spindle moulder<br />
Routing and blade heads with replaceable carbide-tipped blades and reversible carbide<br />
tips are ideal for this tool.<br />
Cylindrical tools need to be differentiated according to use:<br />
– parallel axis cutting for boards that are coated on one or both sides<br />
– one-sided angled upright cutting for boards that are coated on one side<br />
– herringbone-tooth cutters for boards that are coated on both sides.<br />
If only the Duropal high pressure laminate is to be milled, then choose 12,000 rpm for a<br />
thickness of up to approx. 5 mm and a tool diameter of e.g. 100 mm. (Please also observe<br />
your tool‘s maximum output in this instance.)<br />
If the boards are bonded, then we recommend a lower rpm of 3,000-6,000. The tool travel<br />
per height setting will vary, often considerably, according to the type of tool and its shape,<br />
as well as the material in question and the core material. The use of carbide-tipped tools<br />
is advisable for large production runs.<br />
Tabletop router (Routers used as spindle moulders)<br />
Tabletop routers require single- or double-bladed carbide tipped tools with a cutting speed<br />
of 10-15 m/s. This tool should also be used for internal recesses (see chapter 5).<br />
Core boards that are coated on one side can be guided for vertical milling on a template;<br />
boards that are coated on both sides and loose Duropal high pressure laminates are best<br />
milled all round with a single clamping device. 2 mm cutting allowance is usually sufficient<br />
in most cases. If the edges are rounded, the milling work can be minimised if you pre-cut<br />
the approximate shape with a band saw first.<br />
Surface planer<br />
Feed speed:<br />
5–15 m/min<br />
Cutting speed:<br />
12–15 m/s<br />
Rotations:<br />
3,000 rpm<br />
Use carbide tipped blades for large production runs, as the standard blades have only a<br />
very short tool life.<br />
Double-end profiler/tenoner<br />
Economical processing, especially for large runs, is a key feature of this process. It is also<br />
appropriate to fit the spindle moulder with tip material (see above) in this instance.<br />
3.3 EDGE FINISHING OF DUROPAL WINDOWBOARDS<br />
It is advisable to sand the edges in order to avoid stress cracking under temperature and/<br />
or moisture.<br />
3.4 PROFILING THE EDGES OF ELEMENTS<br />
Profiling elements edges, e.g. for the postforming or softforming process, requires tools<br />
such as a hand router, spindle moulder or double-end profiler.<br />
_ 19
4. DRILLING Duropal-HPL AND Duropal-HPL-ELEMENTS<br />
4.1 GENERAL<br />
Please note: drill holes in Duropal-HPL must always be made 0.5 mm<br />
bigger than the screw diameter. The screws need this clearance on all<br />
sides in order to prevent cracks around the drill holes resulting from<br />
variations in temperature and humidity. Raised countersunk head<br />
screws require a rosette washer. Please use plastic washers for our<br />
Duropal windowboards.<br />
4.2 DRILL TOOLS<br />
Twist bits<br />
Twist bits specially designed for plastics have a steep angle (twist) and<br />
broad chip space (groove). Acute angles of 60°-80° are ideal for drilling<br />
Duropal-HPL.<br />
Combi-bits<br />
Combi-bits - also known as carbide disc drills - are suitable for drilling<br />
larger diameters.<br />
Step bits<br />
Step bits are ideal for all kinds of drill holes; this technique avoids the<br />
need for double drilling.<br />
Hole cutter<br />
For larger drill hole diameters please use a hole cutter with guide pins.<br />
If you use adjustable hole cutters with guide pins, the hole will have to<br />
be drilled from both sides.<br />
4.3 DRILLING TECHNIQUE<br />
With regard to the drilling rate, please ensure that the melamine surface<br />
of the Duropal-HPL is not damaged.<br />
The cutting speed of high-speed steel (HSS) drills is approx. 0.8 m/s,<br />
and of carbide-tipped drills up to 1.6 m/s. The advisable feed rate is<br />
0.02-0.05 mm/rev, which at 1000 rpm equates to a drilling depth/min of<br />
20-50 mm.<br />
Prevent the material from accumulating at the drill outlet by using a<br />
hard wood or laminate base. For large production runs, the results will<br />
be even better if you use drilling rigs with drill bushes on both sides so<br />
they can be firmly clamped into position. When countersinking, the<br />
guideline speeds should be halved.<br />
_ 20
5. INTERNAL RECESSES AND CUT-OUTS OF Duropal-HPL-ELEMENTS<br />
5.1 GENERAL<br />
The corners of cut-outs must never have sharp angles as they will quickly<br />
crack or tear. Sharp edges can only be achieved by combining different<br />
cut-outs.<br />
The internal cut corners must always be rounded; remember the minimum<br />
radius should be 5 mm. For internal recesses and cut-outs with a side<br />
length of more than 250 mm, the radius must be increased increment ally<br />
according to the side length. Internal recesses can be made directly with<br />
a router, but for precise results pre-drill the corresponding radius.<br />
Please ensure that the edges are all free of notches. If you are planning<br />
to install heat sources, e.g. halogen lamps, the cut-out must be planed<br />
with sufficient clearance or should be insulated. The temperature of the<br />
Duropal-HPL surface must not exceed a constant 70 °C. Furthermore, if<br />
combining various different materials, remember to consider the varying<br />
coefficients of expansion.<br />
5.2 PROCESSING Duropal-HPL-ELEMENTS<br />
The high quality surface of the top and reverse reliably protects the<br />
Duropal-HPL-elements against penetration by water and steam.<br />
Unprotected edges and butt joints etc. may however occur during processing,<br />
and these must always be sealed during the final installation of the<br />
Duropal-HPL-elements. In all other respects the general information in<br />
item 5.1 applies.<br />
5.3 Tools<br />
Please refer to chapters 2, 3 and 4. The tools and uses described here<br />
also apply for the production of internal recesses and cut-outs.<br />
_ 21
6. TECHNICAL INFORMATION<br />
6.1 TOOL INFORMATION<br />
Material PRODUCTION STEP TOOL CUTTING SPEED in m/s RpM feed in m/min<br />
HPL Panel cutting Circular saw bench 40–60 approx. 3,000–4,000 10–30<br />
HPL on raw chipboard Format cutting Circular saw bench 40–60 approx. 3,000–4,000 manually approx. 10<br />
HPL on raw chipboard Format cutting Double-end profiler<br />
(pre-grooving, cutting)<br />
HPL on raw chipboard Milling edges Spindle moulder or edge<br />
processing machine<br />
HPL on raw chipboard Milling edges Double-end profiler<br />
(postmilling)<br />
40–60 approx. 6,000 manually<br />
approx. 6–20<br />
40–60 approx. 6,000–9,000 approx. 6–15<br />
40–60 approx. 6,000 approx. 6–20<br />
HPL on raw chipboard Grooving Circular saw bench 40–60 approx. 3,000–4,000 approx. 3–8<br />
HPL on raw chipboard Grooving Spindle moulder 40–60 approx. 6,000 approx. 3–8<br />
HPL on raw chipboard Grooving Double-end profiler 40–60 approx. 6,000–9,000 approx. 6–20<br />
HPL on raw chipboard Grooving Router<br />
approx. 12,000–<br />
18,000<br />
approx. 3–8<br />
HPL on raw chipboard Grooving Drill, dowelling machine approx. 3,000–6,000<br />
6.2 FEED SPEED<br />
Feed speed in m/min based on the processing length and time<br />
Time for<br />
travel in s<br />
FEED SPEED IN M/MIN AND PROCESSING LENGTH IN M<br />
1 2 3 4 5 6 7 8 9<br />
1 60 120 180 240 300 360 420 480 540<br />
2 30 60 90 120 150 180 210 240 270<br />
3 20 40 60 80 100 120 140 160 180<br />
4 15 30 45 60 75 90 105 120 135<br />
5 12 24 36 48 60 72 84 96 108<br />
6 10 20 30 40 50 60 70 80 90<br />
7 9 17 26 34 43 52 60 69 77<br />
8 7.5 15 22.5 30 37.5 45 52.5 60 67.5<br />
9 6.7 13 20 27 34 40 47 54 60<br />
10 6 12 18 24 30 36 42 48 54<br />
Example: processing length 5 m, feed speed 50 m/min – travel time needed: 6 s<br />
_ 22
6.3 CUTTING SPEED<br />
Cutting speed v in m/s based on tool diameter and rotational speed<br />
Tool diameter<br />
in mm<br />
Cutting speed v in m/s<br />
400 20 40 60 80 100 120 140<br />
380 19 38 57 76 95 114 133<br />
360 18 36 54 72 90 108 126<br />
340 17 34 51 68 85 102 119<br />
320 16 32 48 64 80 96 112<br />
300 1) 15 30 45 60 75 90 105<br />
280 14 28 42 56 70 84 98<br />
260 13 26 39 52 65 78 91 104<br />
240 12 24 36 48 60 72 84 96 108<br />
220 11 22 33 44 55 66 77 88 99 110<br />
200 10 20 30 40 50 60 70 80 90 100 120<br />
180 2) 9 18 27 36 45 54 63 72 81 90 108 135<br />
160 8 16 24 32 40 48 56 64 72 80 96 120 144<br />
140 7 14 21 28 35 42 49 56 63 70 84 105 126<br />
120 6 12 18 24 30 36 42 48 54 60 72 90 108 126<br />
100 5 10 15 20 25 30 35 40 45 50 60 75 90 105<br />
80 4 8 12 16 20 24 28 32 36 40 48 60 72 84<br />
60 3 6 9 12 15 18 21 24 27 30 36 45 54 63<br />
40 2 4 6 8 10 12 14 16 18 20 24 30 36 42<br />
20 1 2 3 4 5 6 7 8 9 10 12 15 18 21<br />
10 0.5 1 1.5 2 2.5 3 3.5 4 4.5 5 6 7.5 9 10.5<br />
Tool shaft rpm 1,000 2,000 3,000 4,000 5,000 6,000 7,000 8,000 9,000 10,000 12,000 15,000 18,000 20,000<br />
Examples:<br />
1)<br />
Carbide-tipped circular saw blade<br />
2)<br />
Synchronously adjustable router head with clamped herringbone-shaped reversible carbide tips<br />
_ 23
7. PROCESSING Duropal-HPL AND Duropal-HPL-ELEMENTS<br />
7.1 GENERAL<br />
Duropal-HPL in thicknesses less than 2 mm needs a level, tension-free core material with<br />
minimum flex. A smooth surface is one of the main prerequisites for permanently good<br />
results; the right adhesive, quantity applied, forming pressure and press temperature are<br />
equally important.<br />
Please take into account when processing Duropal-HPL that temperature and humidity may<br />
cause some slight dimensional changes in it.<br />
7.2 CORE MATERIAL<br />
The following table illustrates the suitability of various materials as cores and their application<br />
possibilities. In all instances, please remember that the properties of a core material consisting<br />
of various components (e.g. honeycomb with frame) may have different effects on the<br />
surface of Duropal-HPL. This should be checked first, and must be taken into account.<br />
MATERIAL/CONSISTENCY AND SUITABILITY AS A CORE<br />
Chipboard<br />
The necessary thickness is to be taken into account on self-supporting constructions. The<br />
fixing of the flat bonded elements is determined by the thickness and size of the panel. The<br />
surface quality of the Duropal-HPL-element is determined largely by the structure of the<br />
chipboard panel, i.e. the shape of the chips, amount of resin, density and - above all - the<br />
sanding quality of the surface. Multiply chipboard is suitable as the core. The boards should<br />
be evenly sanded on both sides in order to prevent bowing and visual surface defects.<br />
In order to facilitate a short bonding and pressing time, ensure that the surface has good<br />
absorption properties if you are going to use a water-based bonding system. The top layer<br />
must have a minimum resistance to delamination of 1.2 N/mm in order to prevent the laminate<br />
from delaminating (DIN 52366).<br />
Should you have any questions concerning these special chipboard panels, please contact us.<br />
_ 24
MDF boards<br />
Particularly suitable for profiling, but lower thicknesses will not be self-supporting.<br />
High density fibreboard<br />
Not self-supporting. Surfaces that contain paraffin need to be sanded before bonding, but<br />
are usually processed before delivery. Density 850 kg/m 3 ; all other properties as per EN 622.<br />
Panels plywood<br />
Self-supporting. In order to guarantee a smooth surface, ideally use laminboard with<br />
narrow strips and a softwood top layer.<br />
Veneered panels<br />
Thin boards are not self-supporting; the fixing construction depends on the thickness and<br />
size. Softwoods such as poplar and abachi are suitable for bonding.<br />
Solid timber<br />
Should only be used for small areas. Risk of deformation.<br />
Honeycomb panels<br />
Suitable as a component in composite cores or in combination with a framework construction.<br />
Foam materials<br />
Self-supporting on vertical surfaces; also suitable as a component of composite boards.<br />
Excellent heat insulation. Use a hard foam made from artificial resin for bonding, e.g. polystyrene,<br />
PVC, phenol, polyurethane. Please consult the manufacturer before bonding.<br />
7.3 PRE-TREATMENT<br />
The Duropal-HPL and core materials must be conditioned together before use in order to<br />
balance the moisture content in the components. Materials that are too damp will tend to<br />
contract after a drying period. This can result in cracks and distortion. Materials that are<br />
too dry are difficult to process and may expand later, which could also result in distortion.<br />
The right climatisation is achieved at a room temperature of approx. 18-25 °C and 50-65%<br />
humidity. Please also ensure that the following requirements are met:<br />
- Sufficient air circulation around the Duropal-HPL for at least ten days.<br />
- Alternatively, the core boards and laminates may be stacked and stored for at least three<br />
days in the same order in which they will later be bonded together. In this case, ensure<br />
that the air humidity is similar to that of the proposed size of installation.<br />
- Duropal-HPL which is intended for use as a Duropal-HPL element is to be stacked for at<br />
least three days with the reverse sides together. Climatisation together with the core<br />
material is not necessary if it has been stored for long enough under these circumstances.<br />
If the Duropal-HPL element is to be exposed to a constant low relative humidity, it is<br />
advisable to carry out the conditioning accordingly, e.g. 20 hours at 40 °C or ten hours at<br />
50 °C.<br />
The adhesives are to be pre-stored at room temperature. The bonding process is to be carried<br />
out immediately after conditioning.<br />
PLEASE NOTE: This information applies only for processing in temperate climates. Please<br />
contact us if extreme conditions are likely to be experienced.<br />
_ 25
7.4 STRESS EQUALISATION<br />
If two different materials are to be bonded together, tension will occur. That is why cores<br />
need to be laminated on both sides with materials that undergo the same dimensional<br />
changes under the influence of heat and moisture. This applies in particular if the finished<br />
composite board is to be self-supporting and not held by a rigid construction. As the<br />
size of the surface increases, the more attention you must pay to the type of balancers<br />
and the density, the symmetry of the structure and the rigidity of the core.<br />
You will achieve the best results if you use the same type of Duropal-HPL in the same<br />
thickness on both sides. If using HPL with a film (for surface protection), make sure that<br />
the construction is symmetrical. Cut-outs in Duropal-HPL must always be made in the<br />
same direction of grain. Duropal-HPL must be bonded to both sides of the core in the<br />
same sanding direction. Our balancer boards of the same thickness are ideal.<br />
7.5 PROCESSING DUROPAL REAL METAL ELEMENTS<br />
Processing different types of materials to make composite elements always causes tension<br />
between the various materials. Both sides of the core material should be laminated with<br />
the same material that has the same dimensional changes under the influence of moisture<br />
and heat. Pay particular care to achieving a symmetrical construction if the composite<br />
element is to be self-supporting in use. Observe the direction of the decor pattern when<br />
processing Duropal real metal laminates. The protective film is marked with arrows in<br />
the direction of the decor to make this easier.<br />
_ 26
7.6 BONDING<br />
Please note: When gluing and bonding Duropal-HPL, always use adhesives with a good<br />
adhesive strength and which will be resistant to the subsequent influences of temperature<br />
and moisture.<br />
7.6.1 ADHESIVES, OVERVIEW<br />
- Dispersion adhesives (e.g. PVAC glue)<br />
- Condensation resin adhesives (urea, resorcin and phenolic resin adhesives)<br />
- Contact adhesives (e.g. polychloroprene adhesives PCB)<br />
- Mixed adhesives (e.g. epoxy, unsaturated polyester and polyurethane adhesives)<br />
- Hot melt adhesives (only for special applications)<br />
PLEASE CONSULT THE FOLLOWING TABLE TO FIND THE APPROPRIATE ADHESIVE:<br />
Dispersion adhesives<br />
(e.g. PVAc glue)<br />
condensation resin<br />
adhesives (e.g. urea<br />
resorcin and Phenolic<br />
resin adhesives)<br />
Contact adhesives<br />
(e.g. Polychloroprene<br />
adhesives)<br />
MIXED ADHESIVES<br />
(e.g. Epoxy, Polyurethane<br />
Adhesives)<br />
Hot melt adhesives<br />
Core wood-based<br />
(boards or honeycomb)<br />
■ ■ ■ ■ ■<br />
Paper honeycomb ■ ■ ■ ■ ■<br />
Foams and honeycomb in:<br />
– polystyrene ■ 1) ■ 1)<br />
– PVC ■ 2) ■ 2) ■<br />
– phenol ■ ■ ■ ■ ■<br />
– polyurethane ■ 2) ■ ■ ■ ■<br />
1)<br />
Contains no components that attack polystyrene<br />
2)<br />
PVC/polyurethane adhesives need to be suited to each other.<br />
_ 27
7.6.2 GUIDELINE FIGURES FOR THE LOAD CAPACITY OF ADHESIVES (EMPIRICAL)<br />
TYPE OF ADHESIVE<br />
Dispersion adhesives:<br />
Temperature resistance<br />
(approx.) 1)<br />
LOAD CAPACITY ACCORDING TO<br />
DIN EN 204 2)<br />
PVAC adhesives -20 to +70 °C D 1/D 2<br />
Two-component adhesives -20 to +100 °C D 3<br />
Condensation resin adhesives:<br />
Urea resin with a high content of thinner -20 to +120 °C D 2<br />
Melamine/urea resin -20 to +120 °C D 3/D 4<br />
Phenolic, resorcin resin -20 to +140 °C D 3/D 4<br />
Contact adhesives:<br />
Contact adhesives without hardener -10 to +50 °C D 1<br />
Contact adhesives with hardeners -10 to +100 °C D 2<br />
Contact adhesives with built-in resin hardeners contact manufacturer contact manufacturer<br />
Reaction adhesives:<br />
Epoxy, unsaturated polyester and polyurethane adhesives -20 to +100 °C D 3/D 4<br />
Hot melt adhesives -10 to +60 °C D 1<br />
Special hot melt adhesives -10 to +90 °C D 1<br />
The figures quoted here refer solely to the bonded joint.<br />
1)<br />
The plus figures are based on a short-term load (up to 30 mins.) up to these maximum temperatures.<br />
2)<br />
Core material and edge protection must correspond to the respective stresses.<br />
The information concerning temperature resistance applies only for short-term stress to<br />
the bonded joint. The long-term load-bearing ability depends on a number of factors,<br />
including e.g. the type and class of Duropal-HPL, humidity, temperature influences and<br />
the core material. Since the adhesives listed in the various groups all have various properties<br />
and are constantly undergoing further development, please always contact the manufacturer<br />
when dealing with special applications.<br />
_ 28
7.6.3 BONDING PROCESS<br />
Preparation: please clean both sides of the core material and the Duropal-<br />
HPL thoroughly. Dust, grease, oil and/or perspiration stains may leave<br />
marks on the surface after bonding, but can easily be removed using<br />
organic solvents (e.g. acetone, white spirit and benzine).<br />
For further information on cleaning and caring for Duropal-HPL please<br />
refer to the chapter “Duropal-HPL“.<br />
Ensure that the temperature for bonding is approx. 18-25 °C with a relative<br />
air humidity of 50-65%.<br />
We recommend testing first under the same conditions as for the bonding<br />
process. With all kinds of solvents and hardeners, please observe the<br />
safety regulations issued by the professional trade organisations.<br />
7.6.4 EDGING OF DUROPAL WINDOWBOARDS<br />
Duropal windowboard is a wood-based material. Wood-based materials<br />
are always likely to swell under the effects of moisture. We therefore<br />
recommend that all open edges be sealed professionally before installation.<br />
This may be done using high quality Duropal-HPL edging strips<br />
or end caps, but also with simpler edging materials. Current experience<br />
tells us that in some cases it is sufficient to seal the item with waterand<br />
temperature-resistant adhesives or a single-component polyurethane<br />
sealant such as Sikaflex ® -221 (source: www.sika-industry.de) to<br />
prevent moisture penetration (please also observe the corresponding<br />
information and instructions for the adhesive or sealant). Every pack<br />
comes with the appropriate Duropal-HPL edging strip to seal open<br />
edges. However, if the front profile edge is to be plastered, or if there is<br />
a risk of it coming into direct contact with water, the front edge in the<br />
profile area must always be sealed professionally. This also applies if<br />
the dimensions of the original width are to be reduced. In this case, the<br />
rear long edge must be sealed for all types.<br />
_ 29
Please follow the guidline values in the following table for good results.<br />
Remember to take into account that the figures depend on the processing and climate<br />
conditions as well as on the type of core material and the quality of the adhesive.<br />
GUIDE FIGURES FOR BONDING<br />
TYPE OF ADHESIVE<br />
Dispersion adhesives:<br />
– PVAc adhesives<br />
– Two-component<br />
PVAc adhesives<br />
Condensation resin adhesives:<br />
– urea resin, melamine urea resin<br />
– Phenolic resin,<br />
resorcine resin<br />
Contact adhesiv:<br />
– with and without hardener<br />
Application of<br />
adhesive in g/m 2 Waiting time (open) 1)<br />
in min<br />
90–150 on HPL<br />
or core<br />
90–150 on HPL<br />
or core<br />
90–150 on HPL<br />
or core<br />
100–180 on HPL<br />
or core<br />
150–200 each on<br />
HPL and hardener<br />
1–30<br />
1–30<br />
depending on the composition<br />
of the component<br />
2–20 3–5 15–180<br />
mins<br />
Ca. 2–15 3–5 approx.<br />
8 h<br />
depending on ambient<br />
temperature + type of adhesive<br />
(finger test)<br />
– with built-in resin hardeners These are special adhesive settings for which no general guidance figures can be given.<br />
Mixed adhesives:<br />
– epoxy, unsaturated polyester<br />
and polyurethane adhesives<br />
Hot melt adhesive<br />
100–250 on HPL<br />
or core<br />
180–300 on HPL<br />
or core<br />
depending on type<br />
extremely short<br />
Pressure 2) 3) Pressure temp./time 4) process<br />
20 °C 40 °C 60 °C<br />
approx. 3 8–60<br />
mins<br />
4–12<br />
mins<br />
45–160<br />
s<br />
a)<br />
approx. 3 as per the manufacturer‘s instruction a)<br />
5–30<br />
mins<br />
1–12<br />
mins<br />
depending on the hardener system<br />
pressing time depends<br />
on the hardener system<br />
min. 5 min. 1 min pressed c)<br />
stack pressure,<br />
store flat!<br />
pressure roller<br />
depends on the type and<br />
hardener system<br />
195–220 °C<br />
(adhesive application temperature range)<br />
1)<br />
1) Waiting time (open) = time from the application of the adhesive until the glued surfaces are placed together. Then there is also the waiting time<br />
(closed)<br />
= time from the placing together of the glued surfaces until the full forming pressure or the measures that bring about the bond (hardening, curing),<br />
such as the hardening temperature, are achieved. When gluing in a heating press, the full pressure needs to be applied as soon as the press has been<br />
charged to prevent the composite element from distorting and/or the adhesive layer drying too soon.<br />
2)<br />
1 bar ≈ 1 kp/cm 2 = 0.1 N/mm 2 ≈ 100 k Pa<br />
3)<br />
To calculate the forming pressure on hydraulic presses cf. appendix (figure 8)<br />
4)<br />
The pressing time is not always the same as the time to reach final strength. Depending on the particular procedure, a certain amount of time needs<br />
to be left after pressing before continuing with further processing.<br />
b)<br />
b)<br />
d)<br />
e)<br />
_ 30
the Press temperature<br />
A press temperature of approx. 20 °C is recommended for the production of tension-free<br />
Duropal-HPL elements. The setting times can be reduced at higher temperatures. As a<br />
general rule, 60 °C should not be exceeded when pressing, as it could result in bowing<br />
and changes to the surface.<br />
For special bonding at higher press temperatures, please observe the following guideline<br />
values to prevent damage to the material. For gluing systems that require a higher<br />
temperature, please contact us.<br />
Temperature Time<br />
70 °C 10 mins.<br />
80 °C 5 mins.<br />
90 °C 3 mins.<br />
100 °C 2 mins.<br />
APPLYING THE ADHESIVE AND THE PRESSING PROCESS<br />
Apply the adhesive evenly and sparingly over the entire surface. Both sides of Duropal-HPL<br />
elements need to be covered with the same amount of adhesive in order to prevent bowing.<br />
This applies in particular for water-based adhesive systems.<br />
GENERAL CALCULATION OF THE PRESSURE FOR HYDRAULIC PRESSES<br />
In order to set the correct pressure for various board diameters it is important to calculate<br />
the piston pressure and the corresponding manometer pressure.<br />
Please use the following formula for general calculations:<br />
required pressure in bar panel area in cm 2<br />
x = manometer pressure in bar<br />
number of pistons piston area in cm 2<br />
piston area = r2<br />
THE APPLICATION OF VAROUS ADHESIVES IS EXPLAINED BELOW:<br />
a) Dispersion ADHESIVES<br />
These include PVAc glues and two-component PVAc dispersion glues. You can apply the<br />
adhesive with a small stopping knife or hand roller, or if you want to work mechanically<br />
with a glue application or four-roller machine. Cold-pressing is undertaken on screw<br />
presses, spindle presses or single/multi-daylight presses; hot pressing with single or<br />
multi-daylight presses, short-cycle presses, roller presses or double band presses. Please<br />
observe the press times/temperatures with minimal and even application of the adhesive.<br />
b) CONDENSATION RESIN ADHESIVES<br />
These include e.g. urea resin, melamine urea resin, phenolic resin and resorcinol resin.<br />
Phenolic and resorcinol resin are used primarily on Duropal-HPL elements that must have<br />
a high resistance to flames. Condensation resins need the appropriate additives to make<br />
the adhesive joint elastic. The guideline values may vary depending on the hardness type.<br />
Contamination from leftover adhesive or hardener cannot be removed from the Duropal-HPL<br />
surface after gluing without damaging the material. Please make sure that all traces are<br />
removed. In cold and hot pressing, the same tooling requirements apply as for dispersion<br />
adhesives.<br />
_ 31
c) CONTACT ADHESIVES<br />
Without hardener: When applying with a stopping knife, the direction of application on<br />
the core material and laminate should be at right angles to each other. A brush or spraying<br />
or casting system may also be used for application. Whatever your choice, do take the<br />
greatest care when processing and ensure that there is adequate ventilation. Contact<br />
adhesives require short, firm pressure. The open time can be reduced by accelerating the<br />
drying of the adhesive films, but do make sure not to over-dry. Dried-on adhesive can be<br />
removed by heat, e.g. infrared rays. The pressure process is as follows.<br />
With hardener: This adhesive makes the joint suitable for greater stresses and more<br />
resistance to temperatures. For further information please consult the manufacturer.<br />
d) MIXED ADHESIVES<br />
We are unable to provide general recommendation for processing since this category is<br />
divided into various types, and is only used for special bonding applications.<br />
e) HOT MELT ADHESIVES<br />
Used mainly on edging.<br />
7.6.5 Postforming<br />
THE CORE MATERIAL<br />
It is important to choose a material in which the chips have the same thickness or size<br />
throughout, such as chipboard or MDF. Coarse chips in the middle layer of the chipboard may<br />
cause the HPL to crack or tear, depending on the quality of the milling<br />
PROFILE MILLING<br />
Ensure that the transitions between round and flat areas on the profile are even and that all<br />
cuts are smooth and clean. The radius of a postformed product is defined as the radius of the<br />
profiled core material.<br />
CONDITIONING<br />
Please observe the recommendations for storage and pre-treating. The postforming results<br />
may be adversely affected if not, especially if the environment is too dry.<br />
BONDING METHODS FOR POSTFORMING AND COATING<br />
In order to prevent tears and cracks, all traces of adhesive must be removed. This is particulary<br />
essential at the transition between rounded and flat areas. The same special adhesive, e.g.<br />
PVAc glue or contact adhesive, is to be used for Duropal-HPL and the balancer.<br />
PROCESS BASED ON THE SYSTEM CONFIGURATION (EXAMPLE)<br />
The continuous process consists of the following steps:<br />
- Cut and profile mill the core material<br />
- Compress the Duropal-HPL (standard type P = postformable) and balancer<br />
- Router the edges of the balancer<br />
– Apply adhesive to the underside and edge of the Duropal-HPL (approx. 120–180 g/m 2 )<br />
- Postform at 160-210°C. It is advisable to test first. If postforming continuously, the feed<br />
speed should be 11-17 m/min.<br />
- Use a coarse cutter to remove any projecting Duropal-HPL, then finish with a fine cutter<br />
at an angle of approx. 30°.<br />
_ 32
HEAT TRANSFER<br />
Basically, two different methods can be used.<br />
- Infrared heat: stationary or continuous.<br />
- Directly applied heat: stationary.<br />
With both systems, care must be taken to ensure that enough heat is available to facilitate<br />
postforming. Thin Duropal high pressure laminates heat up very quickly, and so must be<br />
processed quickly. With continuous postforming, bending should commence at the end of<br />
the heating zone.<br />
All machine systems should be set to their ideal dosage before the actual postforming process<br />
because every material responds to a different speed and temperature. It is important that<br />
Duropal-HPL is exposed to uniform heat throughout before you commence the bending<br />
process. The temperature depends on the thickness of the laminate, the surface structure<br />
and the bending profile.<br />
With continual processing machines, the maximum heat output needs to be set at the<br />
corresponding variable speed. Continuous postforming should, if at all possible, be done<br />
using a fixed bending block.<br />
On stationary machines, perform a trial run first in order to establish the optimum heat<br />
effect on the bending speed. Ideally, start at a high temperature and adjust the speed<br />
accordingly. Use a heating rail to keep the initial stage low and continuous for postforming.<br />
Avoid having the temperature too low in order to prevent cracks/tears. Discoloration may<br />
result from too high temperatures, along with cracks/tears, distortion or blistering.<br />
Postforming PROPERTIES OF DUROPAL REAL METAL LAMINATES<br />
All Duropal real metal laminates are made in postforming quality. With a thickness of<br />
0.8 mm, radius of 8 mm or greater can be produced for brushed surfaces, and on smooth<br />
surfaces a radius of 10 mm or more is possible.<br />
_ 33
8. INSTALLATION OF DUROPAL WINDOWBOARDS<br />
Please observe the following recommendations when installing our Duropal windowboards.<br />
8.1 INSTALLATION / ATTACHMENT<br />
Duropal windowboards are high quality composite elements made of Duropal high pressure<br />
laminate (HPL) and wood-based chipboard E1, and are easy to process. They are glued to a<br />
dowelled substructure (chipboard strips V100 or equivalent laminate strips) around the<br />
parapet. They can also be bonded using a PU adhesive on an appropriately prepared core<br />
board. If using ventilation bricks, they can be laid with underscrewed anchor bolts in the<br />
bedding compound (plaster). If, for structural reasons, the Duropal windowboard has to go<br />
on a closed, large bed of mortar, then a moisture barrier will be required between the<br />
Duropal windowboard and the mortar (e.g. roofing felt, aluminium foil). Where no continuous<br />
base is planned, e.g. on brackets, the Duropal windowboard must be attached in at last<br />
three places in order to prevent bending/buckling or distortion. We advise against two-point<br />
fastenings. The distance between the supports is determined mainly by the expected load,<br />
but should not exceed 80-100 cm.<br />
8.2 CONNECTING AND SEALING TO BRICKWORK<br />
Plastic sealants, available in tubes, are the ideal solution here. They provide a perfect seal<br />
between the plaster and Duropal windowboard and prevent moisture from penetrating.<br />
Particularly good seals are achieved if the Duropal windowboards are degreased before<br />
applying the sealant, e.g. silicone, and pre-treating with a primer.<br />
8.3 DISTANCE FROM RADIATORS<br />
The distance between the radiator and the Duropal windowboard should not be less than<br />
50 mm. It is advisable to insulate the underside of the windowboard with insulant, and is<br />
essential in the case of heat sources with high temperatures.<br />
_ 34
Bonding on wood subconstruction<br />
Installation on brackets<br />
Installation with anchor screws<br />
on bedding compound<br />
Installation with cable duct<br />
_ 35
RECOMMENDATIONS for<br />
rocessing<br />
uropal-hpl-solid<br />
Duropal-HPL-Solid has a high net weight. The value of the material is considerable so<br />
please observe the following recommendations for handling and processing.<br />
RECOMMENDATIONS FOR THE HANDLING AND PROCESSING OF Duropal-HPL-Solid<br />
TRANSPORTATION AND STORAGE<br />
TRANSPORTATION<br />
– Please ensure that, if transporting on pallets, they are sufficiently large, flat and strong.<br />
– The pallets and stacks of boards must be secured against slipping and sliding.<br />
– Foreign bodies and abrasive impurities on the stack of boards should be avoided as they<br />
may cause indentations and damage.<br />
– When loading and unloading the stacks by hand or with suction lifter, lift each one<br />
individually; do not push or pull them against each other.<br />
STORAGE<br />
– You will achieve the optimum storage conditions in closed rooms under normal indoor<br />
room conditions (temperature 18-25 °C, relative humidity 50-65%).<br />
– Items are to be stored horizontally on a flat surface, with the edges flush, and the whole<br />
stack wrapped in plastic film. The whole surface of the top board must be covered by a<br />
cover panel.<br />
– Stacks of boards must be wrapped in plastic film.<br />
2. CONDITIONING<br />
– Before processing, Duropal-HPL-Solid and the core material must be stored together for<br />
at least eight days at 20 °C and 50% relative humidity.<br />
– Please ensure that the materials do not get too damp.<br />
_ 36
3. PROCESSING<br />
Cutting<br />
– We recommend carbide or diamond tipped saw blades for cutting, as for the processing<br />
of Duropal-HPL.<br />
- Work with a lower feed rate on Duropal-HPL-Solid than on Duropal-HPL-elements.<br />
- If using compact laminate with decor on both sides, you can avoid tearing the lower<br />
layer by changing the exit angle. You can achieve this by adjusting the height of the<br />
saw blade - good results can also be achieved by placing chipboard, MDF or Duropal-<br />
HPL underneath.<br />
- You will achieve the optimum cutting quality of the lower edge if you use a pre-scoring<br />
device.<br />
ROUTING AND DRILLING<br />
– We recommend carbide or diamond tipped routers with a high rotational accuracy in<br />
order to minimise chatter marks. The use of special router heads has proved worthwhile<br />
for high volumes.<br />
- Secure tool guides and fences are essential due to the high cutting pressure.<br />
- Cutting marks on the milled surface are unavoidable. If guided mechanically, they can be<br />
reduced by milling at an even speed. Any remaining marks can be removed by sanding<br />
and polishing.<br />
- The appearance of the edges can also be improved by treating them with silicone-free<br />
furniture oils.<br />
- Freestanding corners and edges must be chamfered to avoid the risk of injury.<br />
- Drills for plastics are the most suitable.<br />
- Working on a firm base and constant reduction of the feed speed will prevent the<br />
Duropal-HPL-Solid from splintering on the exit side.<br />
- Ideally, use drills with a tip angle of 50-60° for through-holes.<br />
- When centre-drilling, please remember to retain the minimum board material. For blind<br />
hole drills, you will need to leave at least 1.5 mm, and for drills parallel to the board<br />
level at least 3 mm.<br />
- Threads can easily be cut and self-tapping screws can be used in any Duropal-HPL-Solid<br />
variety.<br />
INTERNAL RECESSES AND CUT-OUTS<br />
– The corners of internal recesses and cut-outs must be rounded with particular care and<br />
generosity.<br />
- The inner radius must be at least 5 mm.<br />
BONDING SHEET MATERIAL<br />
– The bonded joints are to be made so that they do not prevent any dimensional changes<br />
in the Duropal-HPL-Solid. Furthermore, ensure that the boards are all bonded in the<br />
same direction of pattern.<br />
_ 37
Postforming<br />
– Mill one side of the area for forming to approx. 1 mm, depending on the desired radius.<br />
– Avoid overheating during the milling process and ensure that the tool and work piece<br />
are guided correctly so as not to jeopardise the postforming properties.<br />
– Duropal-HPL-Solid is shaped under heat in a stationary postforming press.<br />
– Once the moulded Duropal-HPL-Solid has cooled, the remaining cavity is filled out with<br />
hardening synthetic resin or secured using adaptor pieces.<br />
Fixings<br />
– When attaching rigid objects (e.g. profiles, strips, fittings), make the drill holes in the<br />
Duropal-HPL-Solid a little larger for continuous screw attachments. With non-continuous<br />
screw attachments (e.g. splay dowels) make the drill holes for the objects being attached<br />
a little larger as well. Here, too, we advise the use of a lubricant film between the object<br />
and the Duropal-HPL-Solid.<br />
– Self-tapping screws with a slight angle offer good screw-holding values. However, predrilling<br />
is always required. The drill hole diameter must be one thread depth less than<br />
the outer diameter of the screw. When inserting screws, the drill hole must be at least<br />
1 mm deeper than the penetration depth of the screw. Screws should be lubricated before<br />
insertion.<br />
– The highest screw-holding value is achieved with splay dowels, although they should not<br />
have any cutting burrs. The residual thickness of the Duropal-HPL-Solid must be at least<br />
1.5 mm. The use of expansion plugs parallel to the panel plane is not recommended.<br />
– For a thorough attachment, the drill holes should be at least 2-3 mm larger than the<br />
diameter of the fixing material. The required freedom of movement can be achieved by<br />
using elastic sleeves (e.g. polyamide).<br />
Doors<br />
– Small doors (e.g. for furniture) in Duropal-HPL-Solid can be fitted with two hinges.<br />
– Large doors for toilet cubicles and changing rooms should be attached by more than two<br />
hinges in order to guarantee the necessary stability.<br />
– When choosing hinges, take account of the necessary expansion play for Duropal-HPL-<br />
Solid. In order to keep it small, the door panel should be cut lengthwise out of the board.<br />
The frame construction must be stable, level and stress-free; the door latch, locks and<br />
any rubber seals must not create constant tension in the door panel.<br />
– A constant increase in humidity and/or temperature on one side of the door may distort<br />
the panel. You should therefore ensure that there is an adequate circulation of air.<br />
_ 38
INSTALLATION<br />
– The subconstruction and Duropal-HPL-Solid will change under the influence of relative<br />
humidity and different temperatures. You must therefore ensure during installation<br />
that there is sufficient play around the attachment so that the subconstruction and<br />
panelling can move accordingly.<br />
– With panelling, you must also note the following:<br />
– The stability of panelling is determined by the subconstruction and the thickness of the<br />
panelling material.<br />
- The subconstruction must be protected against corrosion and rotting.<br />
- Ensure that there is adequate back ventilation. If there is inadequate ventilation, then<br />
varying climatic conditions may cause distortion on the front and reverse side. If no<br />
adequate back ventilation is provided for reasons concerning planning laws, then our<br />
Duropal-HPL-Solid quality Duropal DPHPL Solid FR with moisture barrier must be used<br />
to counteract the distortion.<br />
- The Duropal-HPL-Solid must have sufficient freedom of movement (expansion and retraction).<br />
- One particular advantage of Duropal-HPL-Solid is that joints or partitions in the boards<br />
can be arranged so that the installations will also be accessible at a later date.<br />
_ 39
Joints<br />
– If two Duropal-HPL-Solid panels are to be connected with tongueand-groove,<br />
then the following guidance figures will apply:<br />
groove width a approx. d/3<br />
groove cheek thickness b approx. d/3<br />
tongue length c<br />
≥ 10 mm<br />
board thickness d<br />
≥ 10 mm<br />
– Due to possible dimensional changes, the Duropal-HPL-Solid must be<br />
installed with sufficient play between the tongue and groove.<br />
– Duropal-HPL-Solid of less than 10 mm thickness should not be connected<br />
to tongue-and-groove.<br />
– Connection with a “false tongue“ is also advantageous, as it facilitates<br />
full use of the panel size and makes processing easier.<br />
– Corner connections should only be carried out using brackets or corner<br />
rails, according to the expected load.<br />
d<br />
b<br />
a<br />
b<br />
c<br />
4. Cleaning<br />
– Like Duropal-HPL and Duropal-HPL-elements, Duropal-HPL-Solid is<br />
highly resilient and requires nothing in the way of special care.<br />
–Remove light dirt with a soft, damp cloth.<br />
– Heavier dirt can be removed with soap suds or normal household<br />
cleaning products, and although detergents with mildly abrasive<br />
components may be used, we advise against them.<br />
Remove stubborn dirt with an organic solvent (white spirit, acetone<br />
etc.).<br />
Detailed information on cleaning and caring for Duropal-HPL-Solid<br />
is to be found in the next chapter.<br />
_ 40
LEANING AND CARING<br />
for <strong>duropal</strong>-hpl<br />
PLEASE OBSERVE OUR ADVICE ON CLEANING AND CARING FOR Duropal-HPL<br />
The following information applies for the surfaces of decorative Duropal-HPL to EN 438<br />
and any elements made therefrom. The cleaning information applies both for the dirt that<br />
occurs in normal use and for more severe dirt that can occur during the processing and<br />
installation of Duropal-HPL-elements.<br />
Duropal Real Metal laminates are cleaned with a soft cloth and mild detergents with<br />
no abrasive components. Stubborn stains can be removed with benzine. Acetone is not<br />
recommended.<br />
GENERAL INFORMATION<br />
Thanks to its highly resistant, hygienic closed surface, Duropal-HPL needs nothing particular<br />
in the way of care. It is easy to clean.<br />
Special cleaning products are not needed. Furniture polish and cleaning products containing<br />
wax must not be used. Use the mildest cleaning products possible. In particular, do not<br />
use any products with abrasive components.<br />
It may occasionally be necessary to use special cleaning products that are caustic, contain<br />
solvents or are flammable. In these cases the relevant accident prevention regulations<br />
must be observed and the rooms ventilated adequately. The identification stamp applied<br />
at our factory is in water-soluble dye, and so should only be removed with water.<br />
CLEANING RECOMMENDATIONS<br />
Please find below cleaning information and some sample descriptions of specific problems.<br />
Needless to say, always start with the mildest method.<br />
Light, fresh dirt<br />
Normal dirt, longer effect<br />
Severe, stubborn dirt, old marks/stains<br />
_ 41
DUST, DIRT, A MIXTURE OF DUST AND GREASE, PENCIL, CHALK<br />
Paper towels; soft, clean cloths (dry or damp); sponge or similar. Dry with absorbent cloth after<br />
wet cleaning.<br />
Clean hot water, clean cloth or towels, soft sponge or brush. Microfibre cloths dipped in hot water<br />
are ideal. Allow a standard cleaning product with no abrasive components, soap powder, soft or<br />
hand soap to work according to the level of dirt, and afterwards rinse to remove all traces and<br />
prevent smears. Wipe dry with clean, absorbent cloths (preferably paper towels), changing the<br />
cloth frequently.<br />
GREASE, OIL, FINGERPRINTS, FELT AND HIGHLIGHTER PEN, INK, NICOTINE, RUBBER MARKS<br />
Clean as for dust, dirt, pencil and chalk.<br />
Clean as for dust, dirt, pencil and chalk. Organic solvents such as acetone, white spirit, benzine,<br />
nail varnish remover.<br />
Leave a solution with soap powder or detergent and water to work overnight; liquid cleaner with<br />
the finest polishing chalk. Not to be used on high gloss surfaces! Mild bleaches (with care). Only<br />
to be used occasionally. Remove all traces of bleach after a short time (10-15 minutes).<br />
LIMESCALE, CHALKY DEPOSITS (WATERMARKS), RUST<br />
Clean as for dust, dirt, pencil and chalk.<br />
Clean as for dust, dirt, pencil and chalk.<br />
Leave a solution with soap powder or detergent and water to work overnight; liquid cleaner with<br />
the finest polishing chalk. Not to be used on high gloss surfaces! Mild bleaches (with reservation).<br />
Only to be used occasionally. Remove all traces of bleach after a short time (10-15 minutes).<br />
Particularly stubborn chalk marks may be removed with an acidic detergent (10% acetic or citric<br />
acid).<br />
COFFEE, TEA, FRUIT JUICE, SUGAR SOLUTIONS<br />
Clean as for dust, dirt, pencil and chalk.<br />
Clean as for dust, dirt, pencil and chalk.<br />
Leave a solution with soap powder or detergent and water to work overnight; liquid cleaner with<br />
the finest polishing chalk. Not to be used on high gloss surfaces! Mild bleaches (with reservation).<br />
Only to be used occasionally. Remove all traces of bleach after a short time (10-15 minutes).<br />
_ 42
WAX MARKS, WAX CRAYONS<br />
Clean as for dust, dirt, pencil and chalk.<br />
Clean as for dust, dirt, pencil and chalk. Organic solvents such as acetone, white spirit, benzine,<br />
nail varnish remover. Remove paraffin and wax residues by mechanical means. Avoid scratching;<br />
use a plastic or wooden scraper. Iron off residue over blotting paper.<br />
Leave a solution with soap powder or detergent and water to work overnight; liquid cleaner with<br />
the finest polishing chalk. Not to be used on high gloss surfaces! Mild bleaches (with reservation).<br />
Only to be used occasionally. Remove all traces of bleach after a short time (10-15 minutes).<br />
LIPSTICK, SHOE POLISH, FLOOR POLISH, WAX POLISH<br />
Clean as for dust, dirt, pencil and chalk.<br />
Clean as for dust, dirt, pencil and chalk. Organic solvents such as acetone, white spirit, benzine,<br />
nail varnish remover.<br />
Leave a solution with soap powder or detergent and water to work overnight; liquid cleaner with<br />
the finest polishing chalk. Not to be used on high gloss surfaces! Mild bleaches (with reservation).<br />
Only to be used occasionally. Remove all traces of bleach after a short time (10-15 minutes).<br />
BACTERIOLOGICAL CONTAMINATION (SOAP RESIDUE, SKIN CELLS, PATHOGENS, BLOOD, URINE,<br />
FAECES)<br />
Clean as for dust, dirt, pencil and chalk.<br />
Clean as for dust, dirt, pencil and chalk.<br />
Additional treatment with disinfectant in accordance with the relevant regulations. May be steam<br />
cleaned.<br />
Leave a solution with soap powder or detergent and water to work overnight; liquid cleaner with<br />
the finest polishing chalk. Not to be used on high gloss surfaces! Mild bleaches (with reservation).<br />
Only to be used occasionally. Remove all traces of bleach after a short time (10-15 minutes).<br />
_ 43
SHADING AFTER TREATMENT WITH SOLVENTS (SMEARS)<br />
Clean as for dust, dirt, pencil and chalk.<br />
Clean as for dust, dirt, pencil and chalk.<br />
WATER-SOLUBLE DYES, STAINS, EMULSION PAINTS, ADHESIVES, EMULSIONS (PVAC)<br />
Clean as for dust, dirt, pencil and chalk.<br />
Clean as for dust, dirt, pencil and chalk.<br />
Water or organic solvents.<br />
Soften with water or organic solvents, then peel or pull off.<br />
SOLVENT-BASED LACQUERS, PAINTS AND ADHESIVES (PAINT RESIDUE, SPLASHES, SPRAY AND<br />
STAMP DYE)<br />
Organic solvents.<br />
Organic solvents such as acetone, white spirit, benzine.<br />
In production processes using adhesives and lacquers, it is advisable to consult with the manufacturer<br />
regarding the most suitable cleaner for removing any dirt or marks left over from the<br />
manufacturing process.<br />
Soften with water or organic solvents, then peel or pull off.<br />
Dye residues can sometimes be removed mechanically once dry.<br />
TWO-COMPONENT LACQUERS AND ADHESIVES AND ARTIFICIAL RESINS E.G. UREA RESIN<br />
Remove immediately! Water or organic solvents.<br />
Can only be removed before hardening.<br />
Remove directly after contact with water or organic solvents.<br />
In production processes using adhesives and lacquers, it is advisable to consult with the manufacturer<br />
regarding the most suitable cleaner for removing any dirt or marks left over from the<br />
manufacturing process.<br />
Cannot be cleaned! It is not usually possible to remove residues of condensation and reaction<br />
resin adhesives once they have hardened.<br />
SILICONES, SEALANTS, FURNITURE CARE PRODUCTS<br />
Rub dry; silicone remover.<br />
Silicone remover.<br />
_ 44
IMPORTANT INFORMATION<br />
Please clean your Duropal-HPL surfaces regularly during use. Special cleaning products are<br />
not generally required. Smears may occur when cleaning with organic, oil-based solvents<br />
(e.g. benzine), with cold water and cloths or chamois leathers that have been used repeatedly.<br />
In order to clean without shading or smears, we recommend rinsing the items with hot<br />
water and then drying them with paper towels.<br />
Furniture polish and wax-based detergents may fill the structure in Duropal-HPL surfaces and<br />
build up to form a layer that attracts dirt. Do not use abrasive or scouring products for regular<br />
cleaning, and avoid furniture polish, furniture cleaners and products with bleach. Detergents<br />
with strong acids or saline will damage the surface (limescale remover with antacid and<br />
aminosulphonic acid, drain cleaner, hydrochloric acid, silver cleaner and oven cleaner).<br />
PLEASE OBSERVE THE FOLLOWING WHEN CLEANING WITH SOLVENTS:<br />
– Accident prevention regulations<br />
– Open windows<br />
– No open flames<br />
Should you have any questions, we will be pleased to be of assistance.<br />
CLOSING STATEMENT:<br />
The information contained here is based on the latest findings from science and technology. It does not<br />
represent a guarantee. It is the personal responsibility of the individual user to observe the products<br />
described in this data sheet, the current laws and regulations.<br />
_ 45
DUROPAL GmbH<br />
Westring 19–21<br />
59759 Arnsberg<br />
Germany<br />
Tel.: +49 (0) 2932/302-0<br />
Fax: +49 (0) 2932/302-341<br />
info@<strong>duropal</strong>.com<br />
www.<strong>duropal</strong>.com<br />
A Pfleiderer company<br />
As at 10/2010<br />
Errors and omissions excepted.<br />
If you would like to see a larger A4 sample of your preferred decor, this can be obtained<br />
from a distributor in your area or via www.<strong>duropal</strong>.com