Guidelines for the Engineer & Designer - FRP Grating
Guidelines for the Engineer & Designer - FRP Grating
Guidelines for the Engineer & Designer - FRP Grating
Create successful ePaper yourself
Turn your PDF publications into a flip-book with our unique Google optimized e-Paper software.
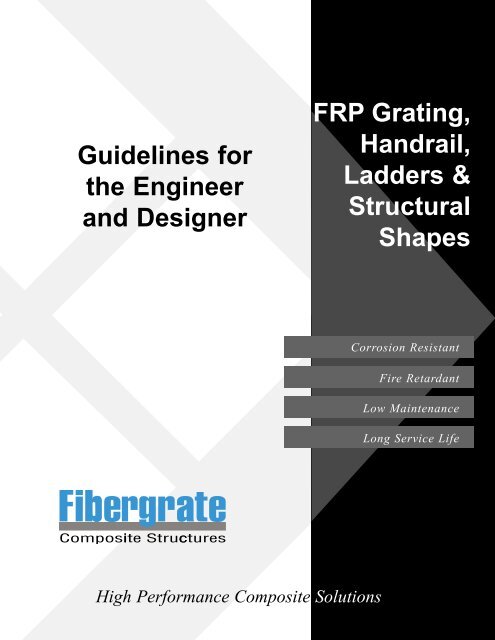
<strong>Guidelines</strong> <strong>for</strong><br />
<strong>the</strong> <strong>Engineer</strong><br />
and <strong>Designer</strong><br />
<strong>FRP</strong> <strong>Grating</strong>,<br />
Handrail,<br />
Ladders &<br />
Structural<br />
Shapes<br />
Corrosion Resistant<br />
Fire Retardant<br />
Low Maintenance<br />
Long Service Life<br />
High Per<strong>for</strong>mance Composite Solutions
1.0 GENERAL<br />
1.1 The purpose of this guideline is to assist <strong>the</strong> engineer/designer in designing <strong>FRP</strong> (Fiber -<br />
Rein<strong>for</strong>ced Plastic) pedestrian walkways utilizing molded and pultruded gratings, handrail<br />
systems, ladder systems, and structural members. The guideline includes recommended<br />
sizes and configurations, recommended design criteria, and referenced standards, where<br />
applicable.<br />
1.2 Drawing details of <strong>the</strong> <strong>FRP</strong> systems described in this guideline are also available in<br />
electronic <strong>for</strong>m (AutoCAD V14) on diskette.<br />
2.0 <strong>FRP</strong> GRATINGS AS PEDESTRIAN WALKWAYS<br />
2.1 <strong>Grating</strong>s<br />
2.1.1 Fibergrate Composite Structures, Inc. <strong>FRP</strong> gratings are manufactured by open molding or<br />
pultrusion processes. Molded gratings are available in a variety of stock panel sizes (i.e.<br />
3’ x 10’, 4’ x 8’, 5’ x 10’, and 4’ x 12’ <strong>for</strong> 1-1/2” deep, 1-1/2” square mesh gratings). The<br />
designer should consider <strong>the</strong>se sizes at <strong>the</strong> early stages of structure layout to efficiently<br />
utilize <strong>the</strong> material and minimize installation costs.<br />
Molded gratings are available in a variety of resin systems and colors to meet specific<br />
project requirements. Detailed descriptions of <strong>the</strong> resin systems available are included in <strong>the</strong><br />
Fibergrate Molded Product brochures.<br />
RIGIDEX ® Moltruded ® gratings are manufactured with <strong>the</strong> molding process but have<br />
improved stiffness characteristics similar to pultruded gratings. RIGIDEX Moltruded grating<br />
is available in one general purpose resin system and several configurations and panel sizes.<br />
See <strong>the</strong> RIGIDEX ® Moltruded ® <strong>Grating</strong> brochure <strong>for</strong> detailed in<strong>for</strong>mation.<br />
Pultruded gratings are available in two resin systems and two colors. Detailed descriptions<br />
of <strong>the</strong>se are given in <strong>the</strong> Safe-T-Span ® Fiberglass Pultruded <strong>Grating</strong> brochure.<br />
2
<strong>Guidelines</strong> <strong>for</strong> <strong>the</strong> <strong>Engineer</strong> and <strong>Designer</strong><br />
2.2 Minimum <strong>Grating</strong> Design Criteria<br />
PEDESTRIAN LOADS*<br />
Uni<strong>for</strong>m Live Load 50 lb/ft 2 - 65 lb/ft 2<br />
Concentrated Load<br />
250 lb<br />
Dead Load 3.75 lb/ft 2<br />
Maximum Deflection SPAN L/120 or 3/8” (whichever is less)<br />
* Note that <strong>the</strong>se design criteria are minimums, but exceed general building code requirements<br />
<strong>for</strong> office space. O<strong>the</strong>r criteria are commonly used in specifications. For pedestrian walkways in<br />
industrial applications, <strong>the</strong> above are sufficient and are recommended to prevent excessive cost.<br />
2.3 Application Notes: Molded <strong>FRP</strong> <strong>Grating</strong>s<br />
2.3.1 Molded grating spans should be kept to 36” or 48” from center to center of supporting<br />
members to most efficiently utilize grating panels. Typically, 1” deep molded gratings have<br />
acceptable deflections at spans up to 3’-0”. 1-1/2” deep molded gratings are acceptable <strong>for</strong><br />
spans from 3’-0” to 3’-6”, and 2” deep molded gratings are acceptable <strong>for</strong> spans from 4’-0”<br />
to 4’-6”.<br />
2.3.2 <strong>Grating</strong> panels installed over multiple spans will fur<strong>the</strong>r reduce deflections. The deflection<br />
of <strong>the</strong> grating can be determined using standard AISC beam <strong>for</strong>mulas and grating properties<br />
provided in <strong>the</strong> Fibergrate Molded Product brochures.<br />
2.3.3 Molded gratings may be cantilevered as required to a maximum distance of 6” (<strong>for</strong> 1” deep<br />
gratings) and up to 12” (<strong>for</strong> 2”deep gratings) from <strong>the</strong> centerline of <strong>the</strong> last supporting<br />
member. <strong>Grating</strong>s used in this way must be held down to a minimum of two supports and<br />
have a minimum of three hold downs clips at each interior support to prevent overturning of<br />
<strong>the</strong> grating panel.<br />
2.3.4 Hold Down Clips: <strong>Grating</strong>s must be mechanically fastened in place to prevent sliding. Each<br />
grating panel should be fastened to each supporting structure using a minimum of four “M”<br />
style hold down clips. For larger panels, 6 to 8 hold down clips are recommended. <strong>Grating</strong>s<br />
installed in trenches where <strong>the</strong>y are captive in an embedment angle do not require hold down<br />
clips unless bearing surfaces are uneven and <strong>the</strong> grating panels would tend to rock.<br />
3
<strong>Guidelines</strong> <strong>for</strong> <strong>the</strong> <strong>Engineer</strong> and <strong>Designer</strong><br />
2.3.5 Covered <strong>Grating</strong>s: Due to <strong>the</strong> nature of <strong>the</strong> manufacturing process, covered gratings are often<br />
slightly warped. As a result of this, covered gratings will rock and pose a trip hazard if <strong>the</strong>y<br />
are not secured with <strong>the</strong> appropriate hold down clips. It is Fibergrate policy to recommend<br />
hold down clips <strong>for</strong> all covered grating applications. In fact, Fibergrate includes “W” type<br />
hold down clips with each covered grating stock panel order.<br />
2.3.6 Abutting edges of molded grating panels should be supported by structural members or<br />
fastened toge<strong>the</strong>r using “F” style clips at a maximum spacing of 24” on center. This will<br />
prevent differential deflection when one of <strong>the</strong> abutting gratings is loaded.<br />
2.3.7 Due to <strong>the</strong> bi-directional nature of square mesh molded gratings, unsupported holes of<br />
limited size may be cut into <strong>the</strong> edges or interior of <strong>the</strong> panels without <strong>the</strong> use of additional<br />
supports. This is very useful <strong>for</strong> applications which involve pipe penetrations. As a rule of<br />
thumb, as long as no more than 1/3 of <strong>the</strong> individual grating panel width is removed by such<br />
a hole, no additional support will be required.<br />
2.3.8 Edge Banding: Unlike steel and aluminum gratings it is not necessary to edge band molded<br />
gratings <strong>for</strong> structural reasons. As <strong>FRP</strong> cannot be welded, edge banding will not transmit<br />
load to <strong>the</strong> grating. Fibergrate only recommends edge banding where personnel may be<br />
passing through <strong>the</strong> grating to prevent injury from stub bars.<br />
2.3.9 Molded <strong>Grating</strong> Details: The attached drawings (A and B) give details of <strong>the</strong> “M” style hold<br />
down clip and <strong>the</strong> “F” style abutment clip.<br />
2.4 Application Notes: Pultruded and Rigidex ® <strong>Grating</strong>s<br />
2.4.1 Since pultruded and Rigidex ® gratings are available in large panel sizes, <strong>the</strong> support spacing<br />
is not as critical to <strong>the</strong> utilization of <strong>the</strong> panels. Typically, it is most economical to design<br />
<strong>the</strong>se installations based on maximum allowable span. Due to <strong>the</strong> wide range of span<br />
capabilities of <strong>the</strong>se gratings, it is recommended that <strong>the</strong> designer refer to <strong>the</strong> appropriate<br />
design tables <strong>for</strong> determining support member spacing.<br />
4
<strong>Guidelines</strong> <strong>for</strong> <strong>the</strong> <strong>Engineer</strong> and <strong>Designer</strong><br />
Two types of hold down clips are available <strong>for</strong> pultruded gratings. The “M” style clip is<br />
configured in <strong>the</strong> same way as <strong>the</strong> similar clip <strong>for</strong> molded gratings. The “RI” type clip<br />
is a plate-style clip which grips <strong>the</strong> lower flange of <strong>the</strong> load bars. Typically, <strong>the</strong> clip type<br />
specified is based on customer preferences or application requirements. Rigidex ® gratings<br />
also utilize an “M” style hold down clip.<br />
2.4.2 As with molded gratings, pultruded gratings may also be used on multiple spans to reduce<br />
deflections. AISC beam <strong>for</strong>mulas and grating design procedures apply.<br />
2.4.3 The use of cantilever conditions <strong>for</strong> pultruded and Rigidex ® gratings is typically not<br />
recommended. Due to <strong>the</strong> uni-directional span capability of <strong>the</strong>se panels, cantilevers of<br />
<strong>the</strong> tie bars are dangerous and could lead to failure. For cantilevers of <strong>the</strong> load bars, it is<br />
possible to apply load to only a few of <strong>the</strong> load bars, potentially overloading <strong>the</strong> panel<br />
locally. <strong>Grating</strong>s used in this way must be held down to a minimum of two supports and<br />
have a minimum of three hold downs clips at each interior support to prevent overturning of<br />
<strong>the</strong> grating panel.<br />
2.4.4 Abutting edges of pultruded and Rigidex ® do not normally require additional support<br />
or abutment clips. Due to <strong>the</strong> high rigidity of <strong>the</strong>se gratings, <strong>the</strong> differential deflection<br />
produced by locally applied loads are minimal.<br />
2.4.5 Openings in pultruded and Rigidex ® gratings must have additional support. In cutting <strong>the</strong><br />
opening, <strong>the</strong> load bars are made discontinuous and unable to support load. Support attached<br />
to <strong>the</strong> bottom of <strong>the</strong> grating which ‘bridge’ <strong>the</strong> opening back to continuous load bars is<br />
commonly used.<br />
2.4.6 Like molded gratings, edge banding is not required <strong>for</strong> pultruded gratings. Due to <strong>the</strong><br />
construction of this type of grating it is very difficult to install banding.<br />
2.4.7 Pultruded <strong>Grating</strong> Details: The attached drawings (G and H) give details of <strong>the</strong> “RI” and<br />
“M” style hold down clip.<br />
5
<strong>Guidelines</strong> <strong>for</strong> <strong>the</strong> <strong>Engineer</strong> and <strong>Designer</strong><br />
3.0 DYNARAIL ® <strong>FRP</strong> HANDRAIL SYSTEM<br />
3.1 Handrail Arrangement & Dimensions<br />
3.1.1 The Fibergrate Composite Structures’ Dynarail ® handrail system consists of a 2-1/8” x 3/16”<br />
thick square tube post with two 1-3/4” x 1/8” thick square tube rails. The midrail passes<br />
through <strong>the</strong> post at a routed square hole and is riveted and bonded in place. The top rail is<br />
fitted into a u-shaped routed slot in <strong>the</strong> top of <strong>the</strong> post and is riveted and bonded in place.<br />
The system includes a 4” <strong>FRP</strong> toe-plate mounted at each post using a self-tapping screw. The<br />
height of <strong>the</strong> top rail is 42” above <strong>the</strong> walking surface. Handrail is available in vinyl ester<br />
and polyester fire-retardant resin <strong>for</strong>mulations in a safety yellow color.<br />
3.2 Design Criteria<br />
3.2.1 This handrail system is designed to meet <strong>the</strong> loading requirements of OSHA 1910.23, a 200<br />
lb <strong>for</strong>ce applied to <strong>the</strong> top rail in any direction at any point. The system also meets <strong>the</strong> o<strong>the</strong>r<br />
design criteria of this standard. In addition to OSHA, this system also meets <strong>the</strong> structural<br />
guidelines of UBC, SBC, and BOCA.<br />
3.3 UV Protective Coatings<br />
3.3.1 For applications where <strong>the</strong> handrail is to be used outdoors, a polyurethane based UV<br />
protective coating of 1 mil thickness is recommended to preserve <strong>the</strong> long-term appearance<br />
of <strong>the</strong> handrail.<br />
3.4 Layout <strong>Guidelines</strong><br />
3.4.1 The following guidelines should be used in handrail layout to most economically utilize this<br />
system and to maximize per<strong>for</strong>mance.<br />
3.4.2 Posting Spacing: Post spacing <strong>for</strong> this system must not exceed 6’-0” to meet <strong>the</strong> OSHA<br />
loading requirements.<br />
3.4.3 Inside or Outside Corners: Posts cannot be placed at corners. At interior or exterior corners,<br />
two posts should be placed within 12” of <strong>the</strong> corner, on both sides.<br />
6
<strong>Guidelines</strong> <strong>for</strong> <strong>the</strong> <strong>Engineer</strong> and <strong>Designer</strong><br />
3.4.4 Post Location With Respect to Structure: For side-mounted posts attaching to fiberglass<br />
structures, <strong>the</strong> post should be placed within 6” of an element which torsionally fixes <strong>the</strong><br />
element to which <strong>the</strong> post is attached. This will prevent excessive rotation of <strong>the</strong> structural<br />
element when <strong>the</strong> posts are under load.<br />
3.4.5 Number of Posts Per Section: A minimum of two posts per straight handrail section are<br />
recommended to improve durability in shipping and erection.<br />
3.5 Handrail System Details<br />
3.5.1 Refer to <strong>the</strong> attached drawings <strong>for</strong> details of handrail system assembly, splicing, and post<br />
base mountings.<br />
4.0 DYNARAIL ® <strong>FRP</strong> LADDER SYSTEM<br />
4.1 Ladder Arrangement & Dimensions<br />
4.1.1 The Fibergrate Composite Structures Dynarail ® ladder system consists of 1-3/4” x 1/4” thick<br />
square tube rails and 1-1/4” diameter x 1/4” thick fluted rungs. There is a clear horizontal<br />
distance of 18” between <strong>the</strong> inside of <strong>the</strong> rails and a center to center distance between rungs<br />
of 12”. Ladders are available in vinyl ester and polyester fire-retardant resin <strong>for</strong>mulations in<br />
a safety yellow color. The designer is referred to <strong>the</strong> brochure Dynarail ® Fiberglass Safety<br />
Ladders <strong>for</strong> fur<strong>the</strong>r description of this system.<br />
4.2 Loading Requirements<br />
4.2.1 This ladder system is designed to meet <strong>the</strong> loading requirements of OSHA 1910.27, “Fixed<br />
Ladders.” The ladders are designed to meet <strong>the</strong> OSHA minimum live load requirement of a<br />
200 lb concentrated load at <strong>the</strong> mid-point of <strong>the</strong> rung with a safety factor of 4.0.<br />
7
<strong>Guidelines</strong> <strong>for</strong> <strong>the</strong> <strong>Engineer</strong> and <strong>Designer</strong><br />
4.3 Support Requirements<br />
4.3.1 Ladders will require support back to a wall or solid structure at intervals not to exceed 6’-<br />
0”. Exceeding this spacing will result in a ladder installation that is too flexible <strong>for</strong> com<strong>for</strong>t<br />
or safety. Ladders are required to be base supported to structure or back to a wall or solid<br />
structure. All ladders are to include a minimum of one base support. The standard ladder<br />
wall mount bracket is not capable of supporting a vertical load. Ladders that cannot be base<br />
supported should include one pair of bottom wall brackets engineered to support design<br />
loads.<br />
4.4 Cages and Rest Plat<strong>for</strong>ms<br />
4.4.1 The designer is referred to OSHA 1910.27, “Fixed Ladders” <strong>for</strong> ladders requiring cages<br />
and rest plat<strong>for</strong>ms. These units are available in <strong>FRP</strong> as part of <strong>the</strong> ladder system. Generally,<br />
cages are required <strong>for</strong> ladders of more than 20’ in length to a maximum unbroken length<br />
of 30’. Ladders with a length of more than 20’ will require a cage and an intermediate rest<br />
plat<strong>for</strong>m at 30’ and <strong>for</strong> every 30’ <strong>the</strong>reafter. Cages are required to start at a minimum of 7’<br />
and a maximum of 8’ above <strong>the</strong> plat<strong>for</strong>m. They are required to extend 42” above <strong>the</strong> landing<br />
at <strong>the</strong> top of <strong>the</strong> ladder.<br />
4.5 Ladder System Details<br />
4.5.1 Refer to <strong>the</strong> attached drawings <strong>for</strong> ladder system splicing, and mounting details.<br />
5.0 DYNAFORM ® <strong>FRP</strong> STRUCTURAL MEMBERS<br />
5.1 Availability<br />
5.1.1 Dyna<strong>for</strong>m ® structural shapes are available in <strong>FRP</strong> in <strong>the</strong> common structural shapes: angle,<br />
channel, square and round tubes, I-sections and W-sections. These are available in fire<br />
retardant vinyl ester (beige), fire retardant polyester (slate gray) and non-fire retardant<br />
polyester (green).<br />
8
<strong>Guidelines</strong> <strong>for</strong> <strong>the</strong> <strong>Engineer</strong> and <strong>Designer</strong><br />
5.2 Design Criteria<br />
5.2.1 The following design criteria are recommended <strong>for</strong> use in <strong>FRP</strong> structural members used as<br />
beams <strong>for</strong> supporting live loads plus <strong>the</strong> dead load of <strong>the</strong> <strong>FRP</strong> structure. Higher safety factors<br />
and deflection ratios may be needed <strong>for</strong> o<strong>the</strong>r conditions.<br />
<strong>FRP</strong> STRUCTURAL SHAPES*<br />
Maximum Deflection L/180<br />
Allowable Bending Stress *10,000 psi (F.S. = 3)<br />
Allowable Shear Stress 1,500 psi (F.S. = 3)<br />
Allowable Bearing Stress 10,000 psi (F.S. = 3)<br />
*Assumes adequate lateral bracing of compression flange, see 5.6 and a b/t [ 12 (flange with-to-flange<br />
thickness ration). Using a column failure analogy, we refer you to <strong>the</strong> Dyna<strong>for</strong>m ® Fiberglass Structural<br />
Shapes Design Guide.<br />
5.3 Preferred Sizes<br />
5.3.1 The table below gives a list of preferred sizes <strong>for</strong> <strong>FRP</strong> structural members. These sizes are<br />
available from stock without <strong>the</strong> added cost and delay of a mill run. Members are stocked in<br />
20’-0” lengths.<br />
<strong>FRP</strong> STRUCTURAL SHAPES<br />
SHAPE NAME<br />
SHAPE SIZE<br />
EQUAL LEG ANGLES 2” x 1/4”, 3” x 1/4”, 3” x 3/8”, 4” x 1/2”, 6” x 1/2”<br />
CHANNELS 6” x1-5/8” x 1/4”, 8” x 2-3/16” x 3/8”, 10” x 2-3/4”x 1/2”<br />
I - SECTIONS 4” x 2” x 1/4”, 8” x 4”x 1/8”<br />
WIDE FLANGE SECTIONS 4” x 4” x 1/4”, 6” x 6” x 1/4”, 6” x 6” x 3/8”, 8” x 8” x 3/8”<br />
5.4 Beam and Column Selection Tables<br />
5.4.1 The Dyna<strong>for</strong>m ® Fiberglass Structural Shapes Design Guide provides tables <strong>for</strong> selecting <strong>the</strong><br />
common sizes of <strong>FRP</strong> structural members used as columns and beams. Note that <strong>the</strong>se tables<br />
are based on adequate lateral support of <strong>the</strong> compression flange of bending members (see<br />
Section 5.6, Lateral Support Requirements). The Design Guide also provides in<strong>for</strong>mation on<br />
corrosion resistance, section dimensions and properties, mechanical and physical properties,<br />
and <strong>the</strong>rmal effects.<br />
9
<strong>Guidelines</strong> <strong>for</strong> <strong>the</strong> <strong>Engineer</strong> and <strong>Designer</strong><br />
5.5 Availability of O<strong>the</strong>r Shapes and Mill Run Quantities<br />
5.5.1 Non-stock shapes can be obtained in mill run quantities. Consult Customer Service <strong>for</strong><br />
availability. These members may be used economically if <strong>the</strong>y are ordered in <strong>the</strong>se quantities.<br />
5.6 Lateral Support Requirements<br />
5.6.1 The table below gives <strong>the</strong> maximum lateral support spacing required to produce <strong>the</strong> full<br />
bending capacity of <strong>the</strong>se members.<br />
LATERAL SUPPORT REQUIREMENTS - <strong>FRP</strong> STRUCTURAL SHAPES<br />
MEMBER LATERAL SUPPORT SPACING MEMBER LATERAL SUPPORT SPACING<br />
C6” x 1/4” 48” W4” x 1/4” 60”<br />
C8 x 3/8” 60” W6 x 1/4” 84”<br />
C10” x 1/2” 60” W6” x 3/8” 96”<br />
I4” x 1/4” 24” W8” x 3/8” 108”<br />
I6” x 1/4” 36” W10” x 3/8” 156”<br />
I8” x 3/8” 48” W12” x 1/2” 168”<br />
I10” x 3/8” 60”<br />
I12” x 1/2” 84”<br />
5.7 Connection Details<br />
5.7.1 The attached drawings include example connection details <strong>for</strong> use with fiberglass structural<br />
shapes used as beams and columns. Note that <strong>the</strong>se details are examples only and that<br />
Fibergrate Composite Structures will per<strong>for</strong>m <strong>the</strong> detailed design needed to meet <strong>the</strong> loading<br />
requirements. Fibergrate Composite Structures can provide standard connection details<br />
designed to exceed <strong>the</strong> ultimate capacity of all standard <strong>FRP</strong> beams available.<br />
5.72 The following tables outline allowables and requirements that should be considered when<br />
designing and detailing connections.<br />
10
<strong>Guidelines</strong> <strong>for</strong> <strong>the</strong> <strong>Engineer</strong> and <strong>Designer</strong><br />
STRUCTURAL CONNECTIONS<br />
BEARING ON <strong>FRP</strong><br />
Bolt Allowable <strong>for</strong> Given <strong>FRP</strong> Plate Thickness (1)<br />
MATERIAL<br />
BOLT DIAMETER<br />
THICKNESS 3/8” 1/2” 5/8” 3/4” 1”<br />
1/8” 469 625 781 938 1250<br />
1/4” 938 1250 1563 1875 2500<br />
3/8” 1406 1875 2344 2813 3750<br />
1/2” 1875 2500 3125 3750 5000<br />
3/4” 2813 3750 4688 5625 7500<br />
1” 3750 5000 6250 7500 10000<br />
(1) BEARING on <strong>FRP</strong> plate or web controls (Factor of Safety = 3.0; Fp=10,000 psi)<br />
The designer must confirm that no o<strong>the</strong>r component of connection controls.<br />
BOLT SHEAR<br />
Bolt Allowable <strong>for</strong> Given Bolt Diameter (2)<br />
BOLT TYPE<br />
BOLT DIAMETER<br />
& APPLICATION 3/8” 1/2” 5/8” 3/4” 1”<br />
316SS- single shear (3) 1408 2503 3912 5633 10014<br />
316SS- double shear 2816 5007 7823 11265 20027<br />
<strong>FRP</strong> threaded rod (4)<br />
single shear<br />
300 600 900 1000 2050<br />
<strong>FRP</strong> threaded rod -<br />
double shear<br />
600 1200 1800 2000 4100<br />
(2) The designer must confirm that no o<strong>the</strong>r component of connection controls.<br />
(3) SHEAR of bolt controls. Fv=0.17*FU = 0.17*75,000 psi = 12,750 psi<br />
(4) SHEAR of <strong>FRP</strong> threaded rod controls (Factor of Safety = 4.0).<br />
Ultimate values from Dyna<strong>for</strong>m ® Fiberglass Structural Shapes Design Guide<br />
RATIO OF EDGE DISTANCE TO FASTENER DIAMETER<br />
RANGE<br />
RECOMMENDED<br />
Edge Distance - cl* bolt to END 2.0-4.0 3.0<br />
Edge Distance - cl* bolt to SIDE 1.5-3.5 2.5<br />
Bolt Pitch - cl* to cl* 4.0-5.0 5.0<br />
* - “cl” is centerline<br />
11
<strong>Guidelines</strong> <strong>for</strong> <strong>the</strong> <strong>Engineer</strong> and <strong>Designer</strong><br />
6.0 <strong>FRP</strong> STAIR SYSTEMS<br />
6.1 Stair System Components<br />
6.1.1 <strong>FRP</strong> structural shapes and special <strong>FRP</strong> gratings can be used in combination to create <strong>FRP</strong><br />
stairs. The stair treads are typically made using a 1-1/2” deep, 1-1/2” x 6” mesh molded<br />
Fibertred ® grating panels with an integral rein<strong>for</strong>ced, gritted nosing. These stair treads<br />
are available in <strong>the</strong> same resin systems and colors as molded grating. Fibertred ® panels<br />
are manufactured in a 22-1/2” wide x 120” long panel with solid nosings along both 120”<br />
sides. These panels can be best utilized if stair tread widths are kept to 24”, 30” 36” or 42”<br />
with depths of 11-1/4” or less. Pultruded grating stair treads are also available in <strong>the</strong> Safe-<br />
T-Span ® product line. These are manufactured using standard pultruded gratings with a<br />
stiffened nosing. The nosing bars are painted a contrasting color.<br />
6.2 Design Criteria<br />
6.2.1 The designer is referred to OSHA 1910.24, “Fixed Industrial Stairs” <strong>for</strong> guidelines in <strong>the</strong><br />
design of stair systems in general. The stair should be designed <strong>for</strong> a moving live load of<br />
1,000 lb (500 lb/stair stringer).<br />
6.3 Tread Deflections<br />
6.3.1 Tread deflections are typically limited to L/150 or less. The table below gives <strong>the</strong> loaddeflection<br />
per<strong>for</strong>mance of Fibertred ® <strong>for</strong> spans up to 42”. Spans greater than 42” will require<br />
a stiffened nosing or intermediate support to reduce deflections. The deflections are based<br />
on 250 lb and 500 lb point loads over a 4” wide x 6” deep at <strong>the</strong> nosing to stimulate <strong>the</strong><br />
landing of a foot.<br />
LOAD / DEFLECTION TABLE: 1-1/2” DEEP FIBERTRED ®<br />
SPAN (IN)<br />
LOAD (LB) 18 24 30 36 42<br />
250 0.03” 0.05” 0.09” 0.16” 0.25”<br />
500 0.06” 0.10” 0.19” 0.32” 0.50”<br />
*Load deflection tables <strong>for</strong> pultruded stair treads are available in <strong>the</strong> Safe-T-Span ® Fiberglass<br />
Pultruded <strong>Grating</strong> brochure.
<strong>Guidelines</strong> <strong>for</strong> <strong>the</strong> <strong>Engineer</strong> and <strong>Designer</strong><br />
6.4 <strong>FRP</strong> Stair Design Notes<br />
6.4.1 Most stairs can be satisfactorily designed using up to 8” or 10” channels as stringers with <strong>the</strong><br />
flanges outward. The stringer must be designed to meet <strong>the</strong> loading requirements given in<br />
section 6.3.1. The individual stair treads are supported by 2” x 2” x 1/4” angles bolted to <strong>the</strong><br />
stringers with two 3/8” diameter bolts.<br />
6.4.2 The stair railings are manufactured using a system identical to <strong>the</strong> one described in section<br />
3.0 <strong>for</strong> <strong>FRP</strong> Handrails. These are typically side-mounted to <strong>the</strong> channel stringers using <strong>the</strong><br />
detail given in that section. Note that <strong>the</strong> height of handrails at stairs is 2’ - 6 1/2 “ to 2’ - 8”<br />
above <strong>the</strong> nosing, depending on <strong>the</strong> slope of <strong>the</strong> stairs. (Per OSHA)<br />
6.4.3 Long stair runs may require intermediate support using columns and may require bracing to<br />
prevent excessive sidesway. (See Charts)<br />
Stringer Design Table - OSHA Design Criteria Notes: 1. Slope range is 30 to 50 degrees<br />
2. OSHA does not limit <strong>the</strong> maximum rise<br />
3. Design is <strong>for</strong> a 1000 lb point load, L/D ≥ 180<br />
4. C8 = C 8” x 2-3/16” x 3/8”; C10 = C10” x 2-3/4” x 1/2”<br />
Vertical Rise in Feet<br />
1 C8<br />
Horizontal Run in Feet<br />
1 2 3 4 5 6 7 8 9 10 11 12 13 14 15 16 17 18 19 20 21<br />
2 C8 C8<br />
3 C8 C8 C8<br />
4 C8 C8 C8<br />
5 C8 C8 C8 C8<br />
6 C8 C8 C8 C8 C8<br />
7 C8 C8 C8 C8 C8 C8 C8<br />
8 C8 C8 C8 C8 C8 C8 C8<br />
Stringers below double<br />
line require lateral<br />
bracing, see detail.<br />
9 C8 C8 C8 C8 C8 C8 C8 C8<br />
10 Rise/Run combinations<br />
C8 C8 C8 C8 C8 C8 C8 C8<br />
without stringer size fall<br />
11 outside of 30 - 50 degree<br />
C8 C8 C8 C8 C8 C8 C8 C8 C8 C8<br />
12 limits set by OSHA.<br />
C8 C8 C8 C8 C8 C8 C8 C8 C8 C8<br />
13 C8 C8 C8 C8 C8 C8 C8 C8 C10 C10 C10<br />
14 C8 C8 C8 C8 C10 C10 C10 C10 C10 C10<br />
15<br />
Stringers below heavy<br />
C10 C10 C10 C10 C10 C10 C10 C10 C10<br />
16 black line are longer than<br />
C10 C10 C10 C10 C10 C10 C10 C10<br />
17 20’-0”. These require a<br />
C10 C10 C10 C10 C10 C10 C10<br />
splice or pull to length.<br />
18 C10 C10 C10 C10 C10 C10
<strong>Guidelines</strong> <strong>for</strong> <strong>the</strong> <strong>Engineer</strong> and <strong>Designer</strong><br />
Stringer Design Table - UBC Design Criteria Notes: 1. Slope range is 19.5 to 41.6 degrees<br />
3’-0” Wide Stair Only 2. Landings are required every 12’ of rise<br />
3. Design is <strong>for</strong> a 100 psf point load, L/D ≥ 180<br />
4. C8 = C 8” x 2-3/16” x 3/8”; C10 = C10” x 2-3/4” x 1/2”<br />
Vertical Rise in Feet<br />
Horizontal Run in Feet<br />
1 2 3 4 5 6 7 8 9 10 11 12 13 14 15 16 17 18 19<br />
1 C8<br />
2 C8 C8 C8<br />
3 C8 C8 C8 C8 C8<br />
Stringers below double<br />
4 C8 C8 C8 C8 C8 C8 C8<br />
line require lateral<br />
5 C8 C8 C8 C8 C8 C8 C10 C10<br />
bracing, see detail.<br />
Rise/Run combinations<br />
6 without stringer size fall<br />
C8 C8 C8 C8 C8 C10 C10 C10 C10 C10<br />
7 outside of slope limits set<br />
C8 C8 C8 C8 C10 C10 C10 C10 C10 C8* C8* C8*<br />
8<br />
by UBC.<br />
C8 C8 C10 C10 C10 C10 C10 C8* C8* C8* C8*<br />
9 C10 C10 C10 C10 C10 C8* C8* C8* C8*<br />
10<br />
Stringers below heavy<br />
C10 C10 C8* C8* C8* C8* C8* C8*<br />
11 black line are longer than C10 C8* C8* C8* C8* C8* C8*<br />
12 20’-0”.<br />
C10 C8* C8* C8* C8* C8*<br />
*Indicates that C8 stringers can be used if columns are installed at midspan of stringer. C10 will not work.<br />
Stringer Design Table - UBC Design Criteria Notes: 1. Slope range is 19.5 to 41.6 degrees<br />
4’-0” Wide Stair Only 2. Landings are required every 12’ of rise<br />
3. Design is <strong>for</strong> a 100 psf point load, L/D ≥ 180<br />
4. C8 = C 8” x 2-3/16” x 3/8”; C10 = C10” x 2-3/4” x 1/2”<br />
Vertical Rise in Feet<br />
Horizontal Run in Feet<br />
1 2 3 4 5 6 7 8 9 10 11 12 13 14 15 16 17 18 19<br />
1 C8<br />
2 C8 C8 C8<br />
3 C8 C8 C8 C8 C8<br />
Stringers below double<br />
4 C8 C8 C8 C8 C8 C8 C10<br />
line require lateral<br />
bracing, see detail.<br />
5 Rise/Run combinations C8 C8 C8 C8 C8 C10 C10 C10<br />
6 without stringer size fall<br />
C8 C8 C8 C8 C10 C10 C10 C10 C8* C8*<br />
outside of slope limits set<br />
7<br />
by UBC.<br />
C8 C8 C8 C8 C10 C10 C10 C8* C8* C8* C8* C8*<br />
8 C8 C8 C10 C10 C10 C10 C8* C8* C8* C8* C8*<br />
9 C10 C10 C10 C8* C8* C8* C8* C8* C8*<br />
10 Stringers below heavy C10 C10 C8* C8* C8* C8* C8* C8*<br />
11 black line are longer than C10 C8* C8* C8* C8* C8* C8*<br />
20’-0”.<br />
12 C8* C8* C8* C8* C8* C8*<br />
*Indicates that C8 stringers can be used if columns are installed at midspan of stringer. C10 will not work.<br />
6.5 <strong>FRP</strong> Stair Details<br />
6.5.1 The attached drawings provide typical details of stair systems using channel stringers.
<strong>Guidelines</strong> <strong>for</strong> <strong>the</strong> <strong>Engineer</strong> and <strong>Designer</strong><br />
DRAWING A - F CLIP ASSEMBLY<br />
1-1/2” x 1-1/2” Square Mesh <strong>Grating</strong><br />
1/4” x 1-3/4” Bolt<br />
F-2 Clip<br />
<strong>Grating</strong> Abutment<br />
Nut Attached to Clip<br />
DRAWING B - M CLIP ASSEMBLY<br />
1/4” x 2-1/4” Bolt<br />
1-1/2” Thick <strong>Grating</strong><br />
M-2 Hold Down Clip<br />
Field Drill 5/16” Hole<br />
1/4” Washer<br />
1/4” Nut<br />
15
Approx. 12” Centers<br />
<strong>Guidelines</strong> <strong>for</strong> <strong>the</strong> <strong>Engineer</strong> and <strong>Designer</strong><br />
DRAWING C -<br />
<strong>FRP</strong> EDGEBANDING<br />
Straight Opening<br />
DRAWING D -<br />
<strong>FRP</strong> EDGEBANDING<br />
Radius Opening<br />
Approx. 8”<br />
Centers<br />
<strong>FRP</strong> Plate Banding<br />
1/8” Thick<br />
Shop Attached<br />
Plan View<br />
<strong>FRP</strong> Plate Banding<br />
1/8” Thick<br />
Shop Attached<br />
Plan View<br />
3/16”ø x 3” Lg.<br />
Hex Head Screw<br />
Self Tapping<br />
Section View<br />
3/16”ø x 3” Lg.<br />
Hex Head Screw<br />
Self Tapping<br />
Section View<br />
DRAWING E -<br />
<strong>FRP</strong> KICKPLATE<br />
Straight Opening<br />
DRAWING F -<br />
<strong>FRP</strong> KICKPLATE<br />
Radius Opening<br />
<strong>FRP</strong> Kickplate<br />
1/4” Thick<br />
Approx. 12” Centers<br />
Plan View<br />
<strong>FRP</strong> Kickplate<br />
1/4” Thick<br />
Approx. 8”<br />
Centers<br />
Plan View<br />
3/16”ø x 3” Lg.<br />
Hex Head Screw<br />
Self Tapping<br />
Section View<br />
16<br />
3/16”ø x 3” Lg.<br />
Hex Head Screw<br />
Self Tapping<br />
Section View
<strong>Guidelines</strong> <strong>for</strong> <strong>the</strong> <strong>Engineer</strong> and <strong>Designer</strong><br />
DRAWING G - MI-60 CLIP ASSEMBLY<br />
MI-60 Hold Down Clip<br />
1/4” x 2-1/4” Bolt<br />
Pultruded <strong>Grating</strong><br />
Field Drill 5/16” Hole<br />
1/4” Washer<br />
1/4” Nut<br />
DRAWING H - RI-60 CLIP ASSEMBLY<br />
Load Bar<br />
1/4” Nut<br />
1/4” Washer<br />
Pultruded <strong>Grating</strong><br />
With 1-1/2” Load<br />
Bar Spacing<br />
RI Retainer Clip<br />
RI <strong>Grating</strong> Hold Down Clip<br />
Drill Hole Through Wide Flange<br />
1/4” x 1-1/2” SC-HD Bolt<br />
17
<strong>Guidelines</strong> <strong>for</strong> <strong>the</strong> <strong>Engineer</strong> and <strong>Designer</strong><br />
DRAWING I - <strong>FRP</strong> HANDRAIL<br />
3/16”ø Hole<br />
(Typ 2 Sides)<br />
1/8”ø x 3/4” Lg.<br />
S.S. Rivet<br />
(Typ 2 Sides)<br />
3/16”ø Hole<br />
(Typ 2 Sides)<br />
1/8”ø x 3/4” Lg.<br />
S.S. Rivet<br />
(Typ 2 Sides)<br />
Routed to Allow Top & Midrail<br />
To Continue Through Post<br />
Shop Bonded<br />
& Riveted<br />
3/16”ø Hole<br />
1/4”ø x 1” Lg.<br />
Self Tapping Screw<br />
3/16”ø x 3” Lg.<br />
Hex Head Screw<br />
Self Tapping<br />
DRAWING J - TOE PLATE SPLICE CONDITIONS<br />
90° Angle Clip at<br />
Outside Turn<br />
Mount to Back<br />
of Toe Plate<br />
Straight Line Splice<br />
Shipped Attached<br />
to Right End of<br />
Handrail Assembly<br />
90° Angle Clip<br />
as Inside Turn<br />
Mount to Inside<br />
of Toe Plate<br />
Outside Turn Straight Line Inside Turn<br />
18
6 -/2”<br />
3-1/4”<br />
<strong>Guidelines</strong> <strong>for</strong> <strong>the</strong> <strong>Engineer</strong> and <strong>Designer</strong><br />
DRAWING K - HANDRAIL TO <strong>FRP</strong> STRUCTURE CONNECTION<br />
Handrail Post<br />
Toe Plate<br />
<strong>Grating</strong><br />
5/8”ø Bolt Assembly<br />
Square Tube Spacer<br />
<strong>FRP</strong> Structure<br />
DRAWING L - REMOVEABLE HANDRAIL CONNECTION<br />
2” Square<br />
Tube Handrail<br />
Toeplate<br />
1-7/8” 1-3/8”<br />
3-7/8”<br />
<strong>Grating</strong><br />
1/2” ø<br />
S.S. Bolt<br />
Assembly<br />
6” x 1/2”<br />
Angle<br />
<strong>FRP</strong><br />
Structure<br />
2-1/2”<br />
2-1/2”<br />
3/8”ø<br />
S.S. Bolt<br />
Assembly<br />
1” x 1/8” Round<br />
Tube Spacer<br />
19
<strong>Guidelines</strong> <strong>for</strong> <strong>the</strong> <strong>Engineer</strong> and <strong>Designer</strong><br />
DRAWING M - STANCHION BASE<br />
2-1/8” Square<br />
Handrail Post<br />
Stainless Steel<br />
Stanchion Base<br />
1/2”ø Bolt<br />
Assembly<br />
1/2”ø Anchor<br />
Bolt By O<strong>the</strong>rs<br />
DRAWING N - LADDER FLOOR MOUNT KIT<br />
3/8”ø x 3” Long Hex.<br />
Head Bolt Assembly<br />
9/16”ø Hole <strong>for</strong> 1/<br />
2”ø Anchor Bolt (All<br />
Anchors by O<strong>the</strong>rs)<br />
4” x 4” x 1/2” Angle<br />
2-3/4” Long<br />
20
<strong>Guidelines</strong> <strong>for</strong> <strong>the</strong> <strong>Engineer</strong> and <strong>Designer</strong><br />
DRAWING O - LADDER WALL MOUNT KIT<br />
3” x 7-7/8” x 3/8”<br />
Angle 6” Long<br />
9/16”ø Hole <strong>for</strong><br />
1/2”ø Anchor Bolt<br />
(All Anchors by O<strong>the</strong>rs)<br />
3/8”ø x 3” Long<br />
Bolt Assembly<br />
DRAWING P - LADDER SPLICE KIT<br />
1-3/4” x 1/4” Square<br />
Tube Ladder Rail<br />
Ladder Rail<br />
Splice Bar<br />
Bond<br />
1-1/4”ø Rung<br />
21
<strong>Guidelines</strong> <strong>for</strong> <strong>the</strong> <strong>Engineer</strong> and <strong>Designer</strong><br />
DRAWING Q - WIDE FLANGE COLUMN TOP<br />
Wide Flange<br />
Bolt Assembly<br />
Angle Clip<br />
<strong>FRP</strong> Plate<br />
Wide Flange<br />
DRAWING R - WIDE FLANGE TO CHANNEL CONNECTION<br />
<strong>FRP</strong> Channel<br />
<strong>FRP</strong> Wide Flange<br />
PLAN VIEW<br />
FRONT VIEW<br />
SIDE VIEW<br />
Bolt Assemblies<br />
<strong>FRP</strong> Angle Clip<br />
22
DRAWING S - WIDE FLANGE COLUMN BASE<br />
Wide Flange Column<br />
Angle Clip<br />
Bolt Assembly<br />
Anchor Bolt<br />
(By O<strong>the</strong>rs)<br />
DRAWING T - BOTTOM STAIR STRINGER MOUNT<br />
8” x 2-3/16” x 3/8”<br />
Channel<br />
1-1/2” Fibertred ®<br />
5/8”ø x 6” Long<br />
Bolt Assembly<br />
2-1/8” Square Tube Spacer<br />
9/16”ø Hole <strong>for</strong><br />
1/2” Anchor Bolt<br />
(By O<strong>the</strong>rs)<br />
23
<strong>Guidelines</strong> <strong>for</strong> <strong>the</strong> <strong>Engineer</strong> and <strong>Designer</strong><br />
DRAWING U - TOP STAIR STRINGER MOUNT<br />
1-1/2” <strong>Grating</strong><br />
8” x 2-3/16” x 3/8”<br />
Channel<br />
3/8”ø x 1-3/4” Long<br />
Bolt Assembly<br />
1-1/2” Fibertred ®<br />
Complementary Products<br />
Fibergrate, Plasite, Carboline and Stonhard comprise <strong>the</strong> StonCor Group. The products offered<br />
by <strong>the</strong>se companies protect your plant’s most corrosive environments.<br />
► Stonhard<br />
Stonhard offers a complete line of engineered secondary containment systems and flooring <strong>for</strong> concrete.<br />
These systems range from rein<strong>for</strong>ced coatings and linings to heavy-duty floors. For more in<strong>for</strong>mation on<br />
Stonhard’s engineered systems, call Stonhard at 800/257-7953.<br />
► Plasite<br />
Plasite offers a complete line of high-quality corrosion resistant immersion and maintenance coatings <strong>for</strong><br />
industrial applications. Plasite products include epoxies, epoxy phenolics, baked phenolics, vinyl esters,<br />
polyurethanes and acrylics. For more in<strong>for</strong>mation on Plasite products, call 877/PLASITE.<br />
► Carboline<br />
The Carboline Company is a world-wide manufacturer of protective coatings, high-per<strong>for</strong>mance paints and<br />
fireproofing materials <strong>for</strong> industrial, commercial and OEM accounts. For more in<strong>for</strong>mation on Carboline<br />
products, call 888/227-2654.<br />
Fibergrate Composite Structures Inc. 2001<br />
PN 884305-07/02-2.5<br />
Produced in <strong>the</strong> USA<br />
Fibergrate Composite Structures Inc. believes <strong>the</strong> in<strong>for</strong>mation contained here to be<br />
true and accurate. Fibergrate makes no warranty, expressed or implied based on this<br />
literature and assumes no responsibility <strong>for</strong> consequential or incidental damages in<br />
<strong>the</strong> use of <strong>the</strong>se products and systems described, including any warranty of<br />
merchantability or fitness. In<strong>for</strong>mation contained here is <strong>for</strong> evaluation only.<br />
24<br />
Fibergrate Composite Structures Inc.<br />
5151 Beltline Rd, Suite 700, Dallas, TX 75254<br />
Phone: 972-250-1633 • Fax: 972-250-1530<br />
800/527-4043 • www.fibergrate.com


