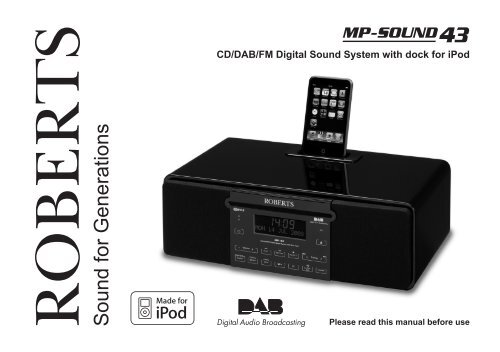
CD/DAB/FM Digital Sound System with dock - Roberts Radio
CD/DAB/FM Digital Sound System with dock - Roberts Radio
CD/DAB/FM Digital Sound System with dock - Roberts Radio

Create successful ePaper yourself
Turn your PDF publications into a flip-book with our unique Google optimized e-Paper software.
ROBERTS<br />
<strong>Sound</strong> for Generations<br />
<strong>CD</strong>/<strong>DAB</strong>/<strong>FM</strong> <strong>Digital</strong> <strong>Sound</strong> <strong>System</strong> <strong>with</strong> <strong>dock</strong> for iPod<br />
Please read this manual before use
iPod is a trademark of Apple Inc., registered in the U.S. and other countries.<br />
"Made for iPod" means that an electrical accessory has been designed to connect specifically to<br />
iPod and has been certified by the developer to meet Apple performance standards.<br />
Apple is not responsible for the operation of the device or its<br />
compliance <strong>with</strong> safety and regulatory standards.
Contents<br />
About this instruction manual .....................................................2<br />
Introduction ...................................................................................3<br />
MP-43 <strong>Sound</strong> <strong>System</strong> features ..................................................3<br />
Controls and connections ........................................................4-5<br />
Remote control ........................................................................6-7<br />
Using the touch panel .................................................................8<br />
Remote control functions ............................................................8<br />
Display icons ..............................................................................8<br />
Using the sound system for the first time ...................................9<br />
<strong>DAB</strong> radio ....................................................................................10<br />
Operating your sound system - <strong>DAB</strong> ........................................10<br />
Selecting a station - <strong>DAB</strong> ......................................................... 11<br />
Secondary services - <strong>DAB</strong> ....................................................... 11<br />
Display modes - <strong>DAB</strong> ..........................................................12-13<br />
Finding new stations - <strong>DAB</strong> ......................................................13<br />
Manual tuning - <strong>DAB</strong> ................................................................14<br />
Station order setup - <strong>DAB</strong> ...................................................15-16<br />
Software version - <strong>DAB</strong> ............................................................17<br />
Dynamic range control - <strong>DAB</strong> ...................................................18<br />
<strong>FM</strong> radio .......................................................................................19<br />
Operating your radio - search tuning <strong>FM</strong> ..................................19<br />
Manual tuning - <strong>FM</strong> ..................................................................20<br />
<strong>FM</strong> stereo / mono .....................................................................20<br />
Display modes - <strong>FM</strong>..................................................................21<br />
Presetting stations ....................................................................22<br />
<strong>CD</strong> / MP3 / WMA ..........................................................................23<br />
Compact discs ..........................................................................23<br />
Playing a <strong>CD</strong> .......................................................................24-25<br />
<strong>CD</strong> search and repeat ..............................................................26<br />
If you need any further advice, please call our Technical Helpline on :-<br />
020 8758 0338 (Mon-Fri)<br />
<strong>CD</strong> track programming .............................................................27<br />
MP3 / WMA <strong>CD</strong> mode ..............................................................28<br />
MP3 / WMA file and folder selection ....................................29-30<br />
iPod Docking ...............................................................................31<br />
Navigating your iPod ................................................................32<br />
Playing a file on your iPod ...................................................32-33<br />
Clock and Alarms .......................................................................34<br />
Alarms .................................................................................34-35<br />
Cancelling alarms .....................................................................36<br />
Snooze .....................................................................................36<br />
Sleep function ...........................................................................36<br />
Setting the clock manually ...................................................37-38<br />
Standby brightness control .......................................................39<br />
Audio and Setup .........................................................................40<br />
Equaliser function .....................................................................40<br />
Bass and treble settings ......................................................40-41<br />
Mute function ............................................................................41<br />
Auxiliary input socket ................................................................42<br />
Line output socket ....................................................................42<br />
Headphone socket ...................................................................43<br />
Aerial removal ...........................................................................43<br />
Touch panel sensitivity control ..................................................44<br />
<strong>System</strong> reset ............................................................................45<br />
Information ..................................................................................46<br />
Cautions ...................................................................................46<br />
Specifications ...........................................................................46<br />
Mains supply ............................................................................47<br />
Guarantee ................................................................................49<br />
1
About this instruction manual<br />
This instruction manual is split into sections for each of the different operating<br />
modes of your <strong>Roberts</strong> MP-43 <strong>Digital</strong> <strong>Sound</strong> <strong>System</strong>. The introduction<br />
describes the features and controls of the product.<br />
There are six sections covering the main features in detail - <strong>DAB</strong> radio,<br />
<strong>FM</strong> radio, <strong>CD</strong> / MP3 / WMA playback, iPod <strong>dock</strong>ing, Clock and Alarm, and<br />
Audio and Setup. Each section is clearly identified by the shaded heading<br />
in the top right hand corner of each pair of pages.<br />
The two sections for <strong>DAB</strong> <strong>Radio</strong> and <strong>FM</strong> <strong>Radio</strong> describe how to use the<br />
sound system to listen to radio broadcasts.<br />
The section for <strong>CD</strong> / MP3 / WMA player describes how to play digital<br />
audio <strong>CD</strong>s or MP3 / WMA files which have previously been recorded to<br />
<strong>CD</strong>-R or <strong>CD</strong>-RW.<br />
The section for iPod <strong>dock</strong>ing describes how to use your MP-43 to play<br />
audio files or video soundtracks directly from your iPod.<br />
The section titled Clock and Alarms describes setting the clock, as well<br />
as explaining the use of the alarms, snooze and sleep timer features.<br />
The Audio and Setup section describes how to use the audio equaliser<br />
and tone controls, how to connect other audio equipment, how to adjust<br />
the sensitivity of the touch panel and how to reset the sound system.<br />
Lastly, the Information section includes safety, specifications and warranty<br />
information.<br />
2<br />
Introduction<br />
<strong>DAB</strong> <strong>Radio</strong><br />
<strong>FM</strong> <strong>Radio</strong><br />
<strong>CD</strong> / MP3 / WMA<br />
iPod Docking<br />
Clock and Alarms<br />
Audio and Setup<br />
(page 3)<br />
(page 10)<br />
(page 19)<br />
(page 23)<br />
(page 31)<br />
(page 34)<br />
(page 40)<br />
Information (page 46)
MP-43 <strong>Sound</strong> <strong>System</strong> features<br />
The <strong>Roberts</strong> MP-43 <strong>Digital</strong> <strong>Sound</strong> <strong>System</strong> provides the following range<br />
of features in an attractive compact unit:-<br />
● <strong>Radio</strong> for <strong>DAB</strong> and <strong>FM</strong> (<strong>with</strong> RDS) broadcasts.<br />
● Audio <strong>CD</strong> player <strong>with</strong> track search and programming facility (can also<br />
play <strong>CD</strong>-R, <strong>CD</strong>-RW discs).<br />
● Playback of MP3 and WMA files which have been recorded to <strong>CD</strong>-R<br />
or <strong>CD</strong>-RW.<br />
● 20 radio station presets (10 for <strong>DAB</strong> and 10 for <strong>FM</strong>).<br />
● iPod <strong>dock</strong>ing connector to play your music collection or video<br />
soundtracks from your iPod.<br />
● Easy to use, wipe clean, touch sensitive control panel.<br />
● Clock display <strong>with</strong> time and date when in standby.<br />
● Two alarm timers <strong>with</strong> snooze feature to wake you to either buzzer,<br />
radio, <strong>CD</strong> or iPod (<strong>with</strong> humane wake system on buzzer alarm).<br />
● Adjustable sleep timer which can be set to turn the sound system off<br />
after between 15 and 120 minutes.<br />
If you need any further advice, please call our Technical Helpline on :-<br />
020 8758 0338 (Mon-Fri)<br />
● Easy-to-read 2 line text display <strong>with</strong> large clock display.<br />
● A 3.5mm stereo Auxiliary Input socket for playing audio from MP3<br />
players, iPod devices which cannot use the <strong>dock</strong> connector, or other<br />
audio equipment.<br />
● A standard 3.5mm Line Output socket for connecting the audio signal<br />
to an external amplifier or recorder.<br />
● A standard 3.5mm headphone socket for private listening.<br />
● High quality, full range, stereo speakers (2 x 7W).<br />
● An acoustically tuned, hand finished cabinet that includes bass ports<br />
and internal bracing for optimal sound reproduction.<br />
● Low power consumption when in standby mode.<br />
Introduction<br />
3
Controls and connections<br />
4<br />
(Front)<br />
1<br />
2<br />
1. Infra-red sensor<br />
2. On / Standby button<br />
3. <strong>Radio</strong> button<br />
4. Volume Up and Down buttons<br />
5. Media button<br />
6. Info / Menu button<br />
7. Folder button<br />
3 4<br />
19<br />
5<br />
18<br />
6<br />
17<br />
8. Equaliser button<br />
9. Sleep / Clock set button<br />
10. Alarm button<br />
11. Tuning Up / Fast-forward button<br />
12. <strong>CD</strong> eject button<br />
13. <strong>CD</strong> in indicator<br />
14. <strong>CD</strong> slot<br />
7<br />
16<br />
8<br />
15<br />
9<br />
14<br />
10<br />
15. Tuning down / Rewind button<br />
16. Select / Stop button<br />
17. Repeat button<br />
18. Play / Pause button<br />
19. L<strong>CD</strong> display<br />
13<br />
12<br />
11
Controls and connections<br />
(Rear)<br />
If you need any further advice, please call our Technical Helpline on :-<br />
020 8758 0338 (Mon-Fri)<br />
20. Telescopic aerial<br />
21. Headphone socket<br />
22. Line output socket<br />
20<br />
21<br />
22 23<br />
23. Auxiliary input socket<br />
24. Mains input socket<br />
Introduction<br />
24<br />
5
Remote control<br />
1. On / Standby button<br />
2. Mute button<br />
3. Key pad buttons 1-10/0<br />
4. Folder Up button<br />
5. Tuning Down / Rewind button<br />
6. Menu button<br />
7. Repeat button<br />
8. Media button<br />
9. Sleep / Clock set button<br />
10. Equaliser button<br />
11. Alarm button<br />
12. <strong>Radio</strong> button<br />
13. Auto-tune button<br />
14. Random button<br />
15. Play / Pause button<br />
16. Folder down button<br />
17. Tuning / Fast-forward button<br />
18. Select / Stop button<br />
19. Info button<br />
20. Volume Up / Down buttons<br />
21. <strong>CD</strong> eject button<br />
Note:<br />
The button marked Record is not used <strong>with</strong> the MP-43. It is intended for<br />
use <strong>with</strong> another <strong>Roberts</strong> product.<br />
Button 8, marked <strong>CD</strong>/iPod/SD/USB, only provides access to <strong>CD</strong> and iPod<br />
functionality. The SD/USB markings are for another <strong>Roberts</strong> product.<br />
6<br />
1<br />
2<br />
3<br />
4<br />
5<br />
6<br />
7<br />
8<br />
9<br />
10<br />
<strong>CD</strong>/iPod/<br />
SD/USB<br />
Record<br />
21<br />
20<br />
19<br />
18<br />
17<br />
16<br />
15<br />
14<br />
13<br />
12<br />
11
Remote control battery replacement<br />
1. Remove the battery cover on the rear of your remote control by<br />
applying pressure to the catch in the direction shown by the arrow in<br />
the diagram, and then lifting the cover.<br />
2. Insert 2 x AAA size batteries into the compartment. Make sure the (+)<br />
and the (-) ends of the batteries are positioned as shown inside the<br />
compartment.<br />
3. Close the battery cover by inserting the retaining lugs first, then<br />
apply pressure to the free end such that the catch latches the cover<br />
securely.<br />
4. If the remote is not to be used for an extended period of time it is<br />
recommended that the batteries are removed.<br />
IMPORTANT: The batteries should not be exposed to excessive heat<br />
such as sunshine, fire or the like. After use, disposable batteries should<br />
if possible be taken to a suitable recycling centre. On no account<br />
should batteries be disposed of by incineration.<br />
1. Battery compartment<br />
2. Latch<br />
3. Retaining lugs (inside)<br />
If you need any further advice, please call our Technical Helpline on :-<br />
020 8758 0338 (Mon-Fri)<br />
1<br />
Introduction<br />
2<br />
3<br />
7
Using the touch panel<br />
The MP-43 sound system has a stylish touch panel instead of conventional<br />
buttons.<br />
To operate the buttons simply touch the button area <strong>with</strong> the tip of a finger<br />
for about half a second. The clock set and system menu functions marked<br />
<strong>with</strong> a dot (�) are accessed by means of a long touch (2-3 seconds) on<br />
the appropriate button until the display on the sound system shows that<br />
the command has been accepted.<br />
You may find that at first, the sound system does not always detect that you<br />
have touched a button. If so, try touching <strong>with</strong> a little more pressure, or for<br />
slightly longer. You will soon find the optimum touch needed to control your<br />
sound system. (See also Touch Panel Sensitivity Control on page 44.)<br />
The panel may be cleaned using a dry cloth. Do not use abrasives,<br />
cleaning fluids or solvents.<br />
Remote control functions<br />
Most of the functions of the MP-43 sound system can be controlled using<br />
either the touch panel or the remote control. However, there are a few<br />
functions which are only accessible using the remote control. These<br />
are:<br />
<strong>DAB</strong> / <strong>FM</strong> radio station presets <strong>DAB</strong> / <strong>FM</strong> auto-tune<br />
<strong>DAB</strong> menu function <strong>CD</strong> track access by numbers<br />
<strong>CD</strong> / iPod random track control Audio mute<br />
As <strong>with</strong> the front panel, some operations require a longer operation of the<br />
button (explained in the relevant sections). In this case simply keep your<br />
finger held on the remote control button for 2-3 seconds until the display<br />
on the sound system shows that the command has been accepted.<br />
8<br />
Display icons<br />
C<br />
B<br />
D E F G H I<br />
A<br />
A. Sleep indicator<br />
B. Alarm 1 and 2 indicators<br />
C. Snooze indicator<br />
D. Speaker indicator<br />
E. Clock digits<br />
F. <strong>FM</strong> indicator<br />
G. <strong>DAB</strong> indicator<br />
H. Stereo indicator<br />
P<br />
O N<br />
M<br />
J<br />
K<br />
I. <strong>CD</strong> indicator<br />
J. WMA indicator<br />
K. MP3 indicator<br />
L. Repeat all files indicator<br />
M. Repeat folder indicator<br />
N. Repeat single file indicator<br />
O. Aux input indicator<br />
P. Two line text display<br />
L
Using the sound system for the first time<br />
1. Place your sound system on a flat surface.<br />
2. Fully extend the telescopic aerial. The aerial should be fully extended<br />
and positioned vertically for optimum reception.<br />
3. Plug the mains lead into the mains socket located on the back of your<br />
sound system ensuring that the plug is pushed fully into the socket.<br />
4. Plug the other end of the mains lead into the wall socket and switch<br />
on the wall socket.<br />
IMPORTANT: The mains plug is used as the means of connecting<br />
the sound system to the mains supply. The mains socket used for the<br />
sound system must remain accessible during normal use. In order to<br />
disconnect the sound system from the mains completely, the mains<br />
plug should be removed from the mains socket outlet completely.<br />
5. When your sound system is first switched on the clock display will<br />
show 12:00 and the unit will enter standby mode. It will then scan for<br />
<strong>DAB</strong> radio stations and when stations have been found the clock and<br />
date should be set automatically. Note that the display will not show<br />
any scanning message for this first scan.<br />
6. If no stations have been found then the clock will not set. You may need<br />
to relocate your sound system to a position giving better reception.<br />
You should then carry out an auto-tune to find <strong>DAB</strong> stations. See <strong>DAB</strong><br />
Operation on page 10 and also Finding New Stations on page 13. The<br />
clock will then be set from a <strong>DAB</strong> broadcast.<br />
If you need any further advice, please call our Technical Helpline on :-<br />
020 8758 0338 (Mon-Fri)<br />
Introduction<br />
9
Operating your sound system - <strong>DAB</strong><br />
1. Fully extend the telescopic aerial.<br />
2. If your sound system is in standby mode, press the On / Standby<br />
button to switch it on.<br />
3. Press and release the <strong>Radio</strong> button to select <strong>DAB</strong> mode. The display<br />
will show "<strong>DAB</strong>" for a few seconds.<br />
4. If this is the first time the sound system is used a quick scan of UK<br />
Band III <strong>DAB</strong> channels may be carried out (depending on whether<br />
scanning was already completed in standby mode). If the radio has<br />
been used before, the last used station will be selected.<br />
5. When first switched on, the first station in the list of stations found will<br />
be played. The display will show the station name on the upper line<br />
of the text display and broadcast information on the lower line.<br />
6. If the station list is still empty after the scan operation or if the<br />
selected station cannot be received your radio will display "Station<br />
not available".<br />
7. If no signals are found it may be necessary to relocate your sound<br />
system to a position giving better reception, and then repeat the scan<br />
using the Auto-tune facility (see Finding New Stations on page 13).<br />
Note that radio station name and frequency displays shown in this user<br />
guide may differ from those that you see on your radio. Broadcasters may<br />
change radio station names that are transmitted, and the frequencies<br />
used for <strong>DAB</strong> and <strong>FM</strong> radio stations may not be the same in all parts of<br />
the country.<br />
10<br />
3<br />
2<br />
<strong>DAB</strong><br />
<strong>DAB</strong><br />
<strong>DAB</strong><br />
<strong>DAB</strong>
Selecting a station - <strong>DAB</strong><br />
1. When the unit is in <strong>DAB</strong> mode the upper line of the text display normally<br />
shows the name of the station currently tuned.<br />
2. Repeatedly press the Tuning Up or Down buttons to scroll through<br />
the list of available stations on the lower line of the text display. Stop<br />
pressing the Tuning buttons when you find the station that you wish<br />
to hear. If you keep pressing one of the tuning buttons then the unit<br />
will rapidly scroll through the list of available stations.<br />
3. Press and release the Select button to cause the radio to tune to the<br />
chosen station. The display may show "Now tuning" while your radio<br />
finds the new station.<br />
The use of memory presets is described on page 22.<br />
4. Adjust the Volume to the required setting.<br />
If after selecting a station the display shows "Station not available" it may<br />
be necessary to relocate your radio to a position giving better reception.<br />
Secondary services - <strong>DAB</strong><br />
1. Certain radio stations have one or more secondary services associated<br />
<strong>with</strong> them. If a station has a secondary service associated <strong>with</strong> it the<br />
display will show ">>" next to the station name on the station list. The<br />
secondary service will then appear immediately after the primary<br />
service as you press the Tuning Up button.<br />
2. Press and release the Select button to select the station.<br />
If you need any further advice, please call our Technical Helpline on :-<br />
020 8758 0338 (Mon-Fri)<br />
2 2<br />
1<br />
3<br />
2<br />
<strong>DAB</strong> <strong>Radio</strong><br />
4 4<br />
<strong>DAB</strong><br />
<strong>DAB</strong><br />
11
Display modes - <strong>DAB</strong><br />
When in <strong>DAB</strong> mode your radio has seven display options.<br />
1. Press the Info button to cycle through the various modes.<br />
12<br />
a. Scrolling text Displays scrolling text messages such<br />
as artist/track name, phone in number,<br />
etc.<br />
b. Programme type Displays the type of station being<br />
listened to e.g. Pop, Classic, News, etc.<br />
c. Multiplex Name Displays the name of the multiplex to<br />
which the current station belongs.<br />
d. Time and date Displays the current time and date.<br />
e. Channel & frequency Displays the channel number and<br />
frequency for the current <strong>DAB</strong> radio<br />
station.<br />
1<br />
<strong>DAB</strong><br />
<strong>DAB</strong><br />
<strong>DAB</strong><br />
<strong>DAB</strong><br />
<strong>DAB</strong>
Display modes - <strong>DAB</strong> cont.<br />
f. Bit rate/audio type Displays the digital bit rate and audio<br />
type for the current <strong>DAB</strong> radio station.<br />
g. Signal strength Displays signal strength for the station<br />
being listened to. The clear rectangle<br />
shows the minimum required signal<br />
strength for clear <strong>DAB</strong> reception.<br />
Finding new stations - <strong>DAB</strong><br />
As time passes new stations may become available. To find new stations<br />
proceed as follows:-<br />
1. With the unit in <strong>DAB</strong> mode (see page 10) press and release the<br />
Auto-tune button. The display will then show "Fast scanning". The<br />
radio will perform a scan of the UK <strong>DAB</strong> frequencies. As new stations<br />
are found the station counter on the right-hand side of the display will<br />
increase and stations will be added to the list.<br />
2. To carry out a full scan of the entire <strong>DAB</strong> Band III frequencies press<br />
and hold the Auto-tune button for more than 2 seconds and then<br />
release. The display will show "Full scanning". As new stations are<br />
found the station counter on the right-hand side of the display will<br />
increase and stations will be added to the list.<br />
If you need any further advice, please call our Technical Helpline on :-<br />
020 8758 0338 (Mon-Fri)<br />
1<br />
2<br />
<strong>DAB</strong> <strong>Radio</strong><br />
<strong>DAB</strong><br />
<strong>DAB</strong><br />
13
Manual Tuning - <strong>DAB</strong><br />
Manual tuning allows you to tune directly to the various <strong>DAB</strong> Band III<br />
channels. UK <strong>DAB</strong> stations are located in the range 11B to 12D.<br />
1. Press and release the Menu button so that the display shows "Station<br />
order".<br />
2. Press the Tuning Up or Down buttons until "Manual tune" appears<br />
on the display. Press and release the Select button.<br />
3. Press the Tuning Up or Down buttons to select the required <strong>DAB</strong><br />
channel.<br />
4. Press and release the Select button to select the channel. A signal<br />
strength display will appear. The clear rectangle shows the minimum<br />
required signal strength for clear <strong>DAB</strong> reception.<br />
5. Any new stations that are found are automatically added to the stored<br />
list of stations.<br />
6. Press and release the Select button to return to normal tuning<br />
mode.<br />
14<br />
1<br />
2,3 2,3<br />
2,4,6<br />
<strong>DAB</strong><br />
<strong>DAB</strong><br />
<strong>DAB</strong><br />
<strong>DAB</strong>
Station order setup - <strong>DAB</strong><br />
Your radio has 3 station order settings from which you can choose. The<br />
station order settings are, favourite station, alphanumeric and active<br />
station.<br />
Note: The default station order setting is alphanumeric.<br />
1. Press and release the Menu button so that "Station order" appears<br />
on the display. Press the Select button to enter the station order<br />
selection menu.<br />
2. Press the Tuning Up or Down buttons to choose between favourite<br />
station, alphanumeric and active station.<br />
Favourite stations<br />
When this setting is selected, after a period of time the most listened to<br />
<strong>DAB</strong> stations will move to the top of the station list and will be marked<br />
<strong>with</strong> the heart symbol .<br />
Alphanumeric<br />
Press the Tuning Up or Down buttons until "Alphanumeric" appears on<br />
the display. This option will cause <strong>DAB</strong> stations to be listed in alphanumeric<br />
order 0....9 A....Z.<br />
continued on the next page...<br />
If you need any further advice, please call our Technical Helpline on :-<br />
020 8758 0338 (Mon-Fri)<br />
1<br />
1<br />
2 2<br />
<strong>DAB</strong> <strong>Radio</strong><br />
<strong>DAB</strong><br />
15
Station order setup - <strong>DAB</strong> - cont.<br />
Active station<br />
Press the Tuning Up or Down buttons until "Active station" appears on<br />
the display. The display will show only those <strong>DAB</strong> stations for which a<br />
signal can be found.<br />
3. Press and release the Select button to select the station order<br />
setting required.<br />
Prune stations - <strong>DAB</strong> only<br />
Over time, some <strong>DAB</strong> services may stop broadcasting, or you may change<br />
location and then not be able to receive a station. In order to remove such<br />
stations from the <strong>DAB</strong> station list, the Prune stations function will delete<br />
the <strong>DAB</strong> stations from your station list that can no longer be received.<br />
1. Press and release the Menu button so that "Station order" appears<br />
on the display. Press and release the Select button.<br />
2. Press the Tuning Up or Down buttons until "Prune stations" appears<br />
on the display.<br />
3. Press and release the Select button to cause the stations list to be<br />
pruned, eliminating unavailable stations.<br />
16<br />
1<br />
3<br />
2 2<br />
3<br />
<strong>DAB</strong><br />
<strong>DAB</strong>
Software version - <strong>DAB</strong> only<br />
The software version display cannot be altered and is provided for<br />
reference only.<br />
1. To view the <strong>DAB</strong> software version installed in your sound system,<br />
press and release the Menu button so that "Station order" appears<br />
on display.<br />
2. Press the Tuning Up or Down buttons until "Software version" appears<br />
on the display. The software version will appear on the display.<br />
If you need any further advice, please call our Technical Helpline on :-<br />
020 8758 0338 (Mon-Fri)<br />
1<br />
2 2<br />
<strong>DAB</strong> <strong>Radio</strong><br />
<strong>DAB</strong><br />
17
Dynamic Range Control (DRC) settings - <strong>DAB</strong> only<br />
DRC can make quieter sounds easier to hear when your radio is used in<br />
a noisy environment. This function is only for the <strong>DAB</strong> waveband.<br />
1. Press the On / Standby button to switch on your sound system.<br />
2. Press and release the Menu button so that "Station order" appears<br />
on the display.<br />
3. Press and release the Tuning Up or Down buttons until the display<br />
shows "DRC value".<br />
4. Press and release the Select button to enter the DRC adjustment<br />
mode.<br />
5. Press and release the Tuning Up or Down buttons to select the<br />
required DRC setting (the default is 0) .<br />
18<br />
DRC 0 DRC is switched off, Broadcast DRC will be ignored.<br />
DRC 1/2 DRC level is set to 1/2 that sent by broadcaster.<br />
DRC 1 DRC is set as sent by broadcaster.<br />
6. Press and release the Select button to confirm the setting. The display<br />
will then return to the previous radio display mode.<br />
Note: Not all <strong>DAB</strong> broadcasts are able to use the DRC function. If the<br />
broadcast does not support DRC, then the DRC setting in the radio will<br />
have no effect.<br />
1<br />
2<br />
3,5 3,5<br />
4,6<br />
<strong>DAB</strong><br />
<strong>DAB</strong><br />
<strong>DAB</strong><br />
<strong>DAB</strong>
Operating your radio - Search tuning <strong>FM</strong><br />
1. Fully extend the telescopic aerial.<br />
2. Press the On / Standby button to switch on your sound system.<br />
3. Press and release the <strong>Radio</strong> button until the <strong>FM</strong> band is selected.<br />
4. Press and release the Auto-tune button to cause your radio to scan<br />
in the direction previously scanned and stop automatically when it<br />
finds a station of sufficient strength.<br />
5. After a few seconds the display will update. The display will show the<br />
frequency of the signal found. If the signal is strong enough and there<br />
is RDS data present then the radio will display the station name.<br />
6. To find additional stations press and release the Auto-tune button<br />
as before.<br />
7. To scan the <strong>FM</strong> band in a opposite direction press and release either<br />
the Up Tuning button (to scan low frequency to high frequency) or<br />
the Down Tuning button (to scan high frequency to low frequency)<br />
and then press the Auto-tune button again.<br />
8. When the end of the waveband is reached your radio will recommence<br />
tuning from the opposite end.<br />
9. Adjust the Volume to the required setting.<br />
10. To switch off your radio press the On / Standby button.<br />
If you need any further advice, please call our Technical Helpline on :-<br />
020 8758 0338 (Mon-Fri)<br />
3<br />
2<br />
4,6,7<br />
7 7<br />
9 9<br />
<strong>FM</strong> <strong>Radio</strong><br />
<strong>FM</strong><br />
19
Manual tuning - <strong>FM</strong><br />
1. Press the On / Standby button to switch on your sound system.<br />
2. Press and release the <strong>Radio</strong> button to select the <strong>FM</strong> band and fully<br />
extend the Telescopic aerial for optimal <strong>FM</strong> reception.<br />
3. Press the Tuning Up or Down buttons to tune to a station. The<br />
frequency will change in steps of 50kHz. Pressing and holding one<br />
of the buttons will advance the frequency selection several times each<br />
second.<br />
4. When the end of the waveband is reached the radio will recommence<br />
tuning from the opposite end.<br />
5. Set the Volume to the desired setting.<br />
6. To switch off your sound system press the On / Standby button.<br />
<strong>FM</strong> stereo / mono<br />
1. If an <strong>FM</strong> station is received <strong>with</strong> a weak signal some hiss may be<br />
audible. To reduce the hiss press and release the Select button so<br />
that the Stereo indicator on the display is cancelled. Your radio will<br />
switch to mono mode.<br />
2. To return to stereo mode press and release the Select<br />
button so that Stereo indicator on the display is visible. The radio<br />
will switch to stereo mode.<br />
20<br />
3<br />
2<br />
1,6<br />
1,2<br />
3<br />
5 5<br />
<strong>FM</strong>
Display modes - <strong>FM</strong><br />
Your sound system has four display options for <strong>FM</strong> radio mode. In addition<br />
to the audio content of the programme, data is broadcast using the <strong>Radio</strong><br />
Data <strong>System</strong> (RDS). RDS is a system in which inaudible digital information<br />
is added to the normal <strong>FM</strong> radio transmission.<br />
In <strong>FM</strong> mode the lower line of the text display can be set to any of the<br />
following options. If RDS data is received, the upper line of the text display<br />
is used to show the radio station name as well as a stereo and RDS<br />
indicator ("St" and "RDS")<br />
1. Press the Info button to cycle through the various modes.<br />
a. <strong>Radio</strong> Text Displays radio text messages such as<br />
news items etc.<br />
b. Programme Type Displays the type of station being<br />
listened to e.g. Pop, Classic, News, etc.<br />
c. Time and date Displays the current time and date.<br />
d. Frequency Displays the frequency of the station<br />
being listened to.<br />
Note: When tuned to the <strong>FM</strong> band, information display is only available<br />
when the radio is able to receive RDS information from the broadcaster.<br />
2. If there is no RDS data available (or if the signal is too weak) then<br />
the radio will display only the <strong>FM</strong> frequency and the optional Stereo<br />
indicator.<br />
If you need any further advice, please call our Technical Helpline on :-<br />
020 8758 0338 (Mon-Fri)<br />
1<br />
a<br />
b<br />
c<br />
d<br />
2<br />
<strong>FM</strong> <strong>Radio</strong><br />
<strong>FM</strong><br />
21
Presetting stations<br />
You may store your preferred <strong>DAB</strong> and <strong>FM</strong> radio stations to the preset station<br />
memories (1 to 10). The procedure for setting presets and using them to<br />
tune stations is the same for <strong>FM</strong> and <strong>DAB</strong> modes, and is described below.<br />
Note that the radio stores <strong>FM</strong> and <strong>DAB</strong> presets separately and so there<br />
are ten of each. Presets are preserved in the event of a power failure.<br />
1. Press the On / Standby button to switch on your sound system.<br />
2. Tune to the required station as previously described.<br />
3. Press and hold down the required Preset button (1 to 10) until the<br />
display shows for example "Preset 1 saved". The station will be<br />
stored using the chosen preset number. Repeat this procedure for<br />
the remaining presets as you wish.<br />
4. Preset memories which have already been stored may be overwritten<br />
by following the above procedure if required.<br />
Recalling a preset station<br />
1. Press the On / Standby button to switch on your sound system.<br />
2. Select the required waveband by pressing the <strong>Radio</strong> button.<br />
3. Momentarily press the required Preset button (1-10) to cause your<br />
radio to tune to the station stored in preset memory.<br />
22<br />
Note: If you have not previously stored a preset station and the preset<br />
button is pressed "Empty preset" will be displayed.<br />
2<br />
1<br />
3<br />
3<br />
<strong>DAB</strong>
Compact discs<br />
Use only <strong>Digital</strong> Audio <strong>CD</strong>s which have the symbol.<br />
Use only full size <strong>CD</strong>s (12cm diameter) <strong>with</strong> the sound system. Mini<br />
<strong>CD</strong>s (8cm diameter) are not compatible <strong>with</strong> the player and may jam<br />
the <strong>CD</strong> mechanism.<br />
Never write on a <strong>CD</strong> or attach any sticker to the <strong>CD</strong>. Always hold the <strong>CD</strong><br />
at the edge and store it in its box after use <strong>with</strong> the label facing up.<br />
To remove dust and dirt, breathe on the <strong>CD</strong> and wipe it <strong>with</strong> a soft, lint free<br />
cloth in a straight line from the centre towards the edge.<br />
Cleaning agents may damage the <strong>CD</strong>.<br />
Do not expose the <strong>CD</strong> to rain, moisture, sand or to excessive heat. (e.g.<br />
from heating equipment or in motor cars parked in the sun).<br />
<strong>CD</strong>-R / <strong>CD</strong>-RW discs<br />
Your MP-43 can playback <strong>CD</strong>-DA format audio <strong>CD</strong>-R/<strong>CD</strong>-RW discs that<br />
have been finalised* upon completion of recording.<br />
Your MP-43 may fail to play some <strong>CD</strong>-R/<strong>CD</strong>-RW discs due to poor recording<br />
and wide variation in quality of the <strong>CD</strong>-R/<strong>CD</strong>-RW disc.<br />
*Finalising enables a <strong>CD</strong>-R/<strong>CD</strong>-RW disc to playback on audio players such<br />
as your MP-43. A disc which has not been finalised may have information<br />
added to it using a computer but may not always be playable.<br />
If you need any further advice, please call our Technical Helpline on :-<br />
020 8758 0338 (Mon-Fri)<br />
<strong>CD</strong> / MP3 / WMA<br />
23
Inserting a <strong>CD</strong><br />
Ensure the <strong>CD</strong> player is empty before inserting a disc. If there is a disc in<br />
the player then the <strong>CD</strong> indicator will be lit. If you cannot insert a disc, press<br />
the <strong>CD</strong> Eject button to remove the <strong>CD</strong> currently in the player.<br />
1. Press the On / Standby button to switch on your sound system.<br />
2. To select the <strong>CD</strong> mode press the Media button until "<strong>CD</strong>" shows on<br />
the upper line of the display.<br />
3. To eject a <strong>CD</strong> press and release the <strong>CD</strong> Eject button. To reload a <strong>CD</strong><br />
that has just been ejected, press the Eject button a second time.<br />
4. Insert a disc <strong>with</strong> printed side facing up into the <strong>CD</strong> slot. The disc will<br />
be loaded automatically. The unit will check the <strong>CD</strong> type and load its<br />
track list. The display will show "LOADING" and then "READING" as<br />
the information is read.<br />
5. If you load a disc containing MP3 or WMA files your sound system<br />
will enter the MP3 / WMA mode (see page 28).<br />
Playing a <strong>CD</strong><br />
1. Press the Play / Pause button to start playing the disc. The display<br />
will show the first track number.<br />
2. Adjust the Volume to the required setting.<br />
3. To pause playing press the Play / Pause button. To resume press<br />
the Play / Pause button again.<br />
24<br />
1<br />
2<br />
3<br />
1,3<br />
<strong>CD</strong>
4. To stop play, press the Stop button. The total number of <strong>CD</strong> tracks<br />
and the stop symbol ( ) will be displayed.<br />
If you put the unit into standby mode <strong>with</strong>out pressing the Stop button,<br />
then the next time the unit is switched on it will return to the previously<br />
played track.<br />
5. To take out the <strong>CD</strong>, press the <strong>CD</strong> Eject button. The display will show<br />
"EJECT". In order to protect the disc if it is not removed, the unit will<br />
reload the <strong>CD</strong> after 10 seconds and then enter standby mode.<br />
Selecting a track<br />
1. While the <strong>CD</strong> is playing, press either the Fast-forward or Rewind<br />
buttons to change to the desired track. The updated track number is<br />
shown in the display.<br />
2. You can also skip tracks when the player is paused or stopped. Skip to<br />
the desired track using the Fast-forward or Rewind buttons, release<br />
the button when the desired track is displayed.<br />
3. Press the Play / Pause button to play the selected track.<br />
Select a desired track<br />
1. For track numbers 1-9 simply press the corresponding digit button.<br />
For track numbers ten and above press the required digits using the<br />
10/0 button to enter the digit zero.<br />
3. If the track number entered exceeds the number of tracks on the <strong>CD</strong>,<br />
then the last track on the <strong>CD</strong> will be played.<br />
If you need any further advice, please call our Technical Helpline on :-<br />
020 8758 0338 (Mon-Fri)<br />
5<br />
4<br />
1,2 1,2<br />
3<br />
1<br />
<strong>CD</strong> / MP3 / WMA<br />
25
Search function<br />
1. While the <strong>CD</strong> is playing, press and hold the Fast-forward or Rewind<br />
buttons. Release the button when the desired part of the track is<br />
reached.<br />
Repeat a single track<br />
2. While the <strong>CD</strong> is playing, press the Repeat button until the repeat<br />
single track symbol ( ) appears in the display. The current track will<br />
be repeated.<br />
Repeat all tracks<br />
3. While the <strong>CD</strong> is playing, press the Repeat button until the repeat all<br />
tracks symbol ( ) appears in the display. All of the tracks on the<br />
<strong>CD</strong> will be played repeatedly.<br />
Play tracks introduction<br />
4. While the <strong>CD</strong> is playing, press the Repeat button until the track<br />
introduction symbol ( ) appears in the display. The first 10 seconds<br />
of each track will be played. When the desired track is reached, press<br />
the Repeat button once more to revert to normal play mode.<br />
Play tracks in random order<br />
5. While the <strong>CD</strong> is playing, press the Random button until the random<br />
symbol ( ) appears in the display. The tracks will be played in<br />
random order. To cancel the random playback function, press the<br />
Random button a second time.<br />
26<br />
1<br />
2<br />
3<br />
4<br />
5<br />
1
<strong>CD</strong> track programming<br />
In addition to playing of complete <strong>CD</strong>s, selected tracks, or a random<br />
selection, the <strong>CD</strong> player allows you to programme a sequence of up to<br />
20 tracks to be played in whatever order you choose.<br />
1. With the unit in <strong>CD</strong> mode and <strong>with</strong> a <strong>CD</strong> inserted, make sure that the<br />
<strong>CD</strong> is stopped (press the Stop / Select button).<br />
2. To enter programming mode, press the Menu button.<br />
3. Choose the first track using the Fast-forward or Rewind buttons.<br />
4. Press the Menu button to enter the selected track into the<br />
programme.<br />
5. Choose another track using the Fast-forward or Rewind buttons,<br />
and enter it into the programme using the Menu button (track 6 in<br />
example shown).<br />
6. Repeat step 5 to store as many as 20 tracks in the programme.<br />
7. When the programme is complete, press the Play / Pause button to<br />
start playing. The tracks will then be played in the order that you have<br />
just programmed.<br />
8. Pressing the Stop / Select button, or switching to another operating<br />
mode will erase the programme.<br />
Note: If you are programming the tracks using a <strong>CD</strong> <strong>with</strong> MP3 or WMA<br />
files in folders (see the following pages), you can also use the Up or Down<br />
Folder buttons to specify the folder in steps 3 and 5 above.<br />
If you need any further advice, please call our Technical Helpline on :-<br />
020 8758 0338 (Mon-Fri)<br />
3,5<br />
2<br />
1<br />
4,5<br />
7<br />
3,5<br />
<strong>CD</strong> / MP3 / WMA<br />
<strong>CD</strong><br />
<strong>CD</strong><br />
<strong>CD</strong><br />
27
MP3 / WMA <strong>CD</strong> Mode<br />
The MP-43 is able to play <strong>CD</strong>-R and <strong>CD</strong>-RW discs containing MP3 and<br />
WMA files. It is assumed in this section that a file is equivalent to a <strong>CD</strong><br />
track.<br />
An MP3 / WMA <strong>CD</strong> may not contain more than 511 files and not more than<br />
99 folders. MP3 and WMA files should be created <strong>with</strong> an audio sample<br />
rate of 44.1kHz (this is normal for files created from <strong>CD</strong> audio content).<br />
MP3 and WMA data rates up to 320 kilobits per second are supported.<br />
WMA Lossless files are not supported. The unit will not play files which<br />
include digital rights management (DRM) protection.<br />
When burning <strong>CD</strong>-R and <strong>CD</strong>-RW discs <strong>with</strong> audio files, various problems<br />
may arise which could lead to problems <strong>with</strong> playback. Typically such<br />
problems are caused by poor <strong>CD</strong> writing or audio encoding software, or<br />
by the hardware settings of the PC's <strong>CD</strong> writer, or by the <strong>CD</strong> being used.<br />
Should such problems arise, contact the customer services of your <strong>CD</strong><br />
writer or software manufacturer or look in their product documentation<br />
for relevant information. When you are making audio <strong>CD</strong>s, take care to<br />
observe all legal guidelines and ensure that the copyright of third parties<br />
is not infringed.<br />
1. To select the <strong>CD</strong> mode press the Media button until "<strong>CD</strong>" shows on<br />
the display, or insert a suitably prepared <strong>CD</strong>-R or <strong>CD</strong>-RW disc.<br />
2. Insert a <strong>CD</strong> <strong>with</strong> printed side facing up into the <strong>CD</strong> slot. The disc will<br />
be loaded automatically. The unit will check the <strong>CD</strong> type and load its<br />
track list. The display will show "loading" and then "reading" as the<br />
information is read.<br />
If there are many files or folders on the <strong>CD</strong> then it may take some<br />
tens of seconds to read all of the file and folder names and to identify<br />
those which are playable (<strong>with</strong> .mp3 or .wma filename extension).<br />
28<br />
1<br />
<strong>CD</strong>
Playing an MP3 / WMA <strong>CD</strong><br />
1. Press the Play / Pause button to start playing from the <strong>CD</strong>. The<br />
display will show the first folder and file numbers - "01" and "001".<br />
2. To pause playing press the Play / Pause button. To resume playing<br />
press the Play / Pause button again.<br />
3. To stop play, press the Stop button. The total number of files on the<br />
disc and "STOP" will be displayed.<br />
If you put the unit into standby mode <strong>with</strong>out pressing the Stop button,<br />
then the next time the unit is switched on it will return to the previously<br />
played file.<br />
4. To take out the <strong>CD</strong>, press the <strong>CD</strong> Eject button. The display will show<br />
"EJECT". In order to protect the disc if it is not removed, the unit will<br />
reload the disc after 10 seconds and then enter standby mode. To<br />
reload a <strong>CD</strong> that has just been ejected, press the Eject button a<br />
second time.<br />
Selecting a file<br />
1. While the <strong>CD</strong> is playing, press either the Fast-forward or Rewind<br />
buttons to change to the desired file, the file number is updated in the<br />
display. If there is more than one folder, when all files in the current<br />
folder have been played the next folder will be played.<br />
2. You can also skip files when the player is in stop mode. Skip to the<br />
desired file using the Fast-forward or Rewind buttons and release<br />
the button when the desired file number is displayed.<br />
3. Press the Play / Pause button to play the selected file.<br />
If you need any further advice, please call our Technical Helpline on :-<br />
020 8758 0338 (Mon-Fri)<br />
1,2<br />
1,2<br />
4<br />
3<br />
3<br />
1,2<br />
<strong>CD</strong> / MP3 / WMA<br />
29
Select a specific file<br />
1. For file numbers 1-9 simply press the corresponding digit button. For<br />
file numbers ten and above press the required digits using the 10/0<br />
button to enter the digit zero.<br />
3. If the file number entered exceeds the number of playable files on the<br />
<strong>CD</strong>, then the last file will be played.<br />
File numbers up to 511 may be entered. The numbers of files in folders<br />
are added together. So, for example, if the first two folders each contain<br />
10 files, then entering 15 will play the fifth file in the second folder.<br />
Search function<br />
1. While the MP3 / WMA <strong>CD</strong> is playing, press and hold the Fast-forward<br />
or Rewind buttons. Release the button when the desired part of the<br />
current file is reached.<br />
To skip to another folder<br />
1. With the MP3 / WMA <strong>CD</strong> in stop or play mode, press and release either<br />
the Up or Down Folder button. The first file of the next or previous<br />
folder will be played.<br />
Repeat, Intro, Random and Programmed play<br />
The MP-43 allows you to use the same playback options for files as can be<br />
used for conventional audio <strong>CD</strong>s (see pages 26-27). In addition to Repeat<br />
Once and Repeat All options, there is also a Repeat Folder facility.<br />
30<br />
1<br />
1<br />
1<br />
1<br />
1
iPod <strong>dock</strong>ing<br />
Your MP-43 sound system has an iPod <strong>dock</strong> facility which allows you to<br />
play digital audio files and video soundtracks held on your iPod directly.<br />
The MP-43 uses the Universal Dock Connector developed for use <strong>with</strong><br />
iPods. Recent models of iPod are supplied <strong>with</strong> adaptor inserts which<br />
ensure correct alignment of the iPod <strong>with</strong> the electrical connector. Earlier<br />
models of iPod were not supplied <strong>with</strong> the necessary inserts, and so<br />
your MP-43 is supplied <strong>with</strong> insert types 1 - 7. Should you require a<br />
later insert to use your iPod <strong>with</strong> the MP-43, then please contact an iPod<br />
accessories supplier.<br />
1. Ensure that the sound system is in standby. Carefully remove the iPod<br />
<strong>dock</strong> connector cover from the top of your sound system.<br />
2. Place the iPod <strong>dock</strong>ing adaptor (types 1 - 7 supplied <strong>with</strong> the MP-43)<br />
into the iPod <strong>dock</strong>ing recess so that it is securely seated.<br />
3. Carefully place your iPod on the universal iPod <strong>dock</strong> connector then<br />
press the On / Standby button to switch on the sound system. To<br />
avoid possible damage to either device, not use your iPod <strong>with</strong>out<br />
the correct adaptor fitted in the <strong>dock</strong> connector.<br />
4. To select the iPod mode press the Media button until "iPod" shows<br />
on the display. If it was previously playing, your iPod will switch on<br />
and continue playing from where it was previously stopped.<br />
Note: The MP-43 sound system is able to recharge your iPod's internal<br />
battery. Recharging does not take place while your MP-43 is using <strong>DAB</strong><br />
or <strong>FM</strong> radio.<br />
Your iPod will use its backlight settings as configured. If these need<br />
changing, use the iPod's Settings menu.<br />
If you need any further advice, please call our Technical Helpline on :-<br />
020 8758 0338 (Mon-Fri)<br />
3<br />
4<br />
iPod <strong>dock</strong> connector<br />
2,3<br />
Docking recess<br />
iPod Docking<br />
31
Navigating your iPod<br />
1. Use the Menu button on the remote control to navigate to higher level<br />
menus on your iPod.<br />
2. Use the Folder Up or Down buttons on the remote control as required<br />
to move up and down a menu screen on your iPod.<br />
3. Press the Select button to choose the highlighted on screen menu<br />
item. If this item is a lower level menu item, you may then navigate<br />
further using the Folder Up or Down and Select buttons.<br />
Playing a file on your iPod<br />
1. When you have found the required item use the Select button to start<br />
the iPod playing (or the Play / Pause button - but see note below).<br />
2. Adjust the volume to the required setting using the Volume Up and<br />
Down buttons on your sound system.<br />
3. To pause playback press the Play / Pause button. To resume playback<br />
press the Play / Pause button again.<br />
4. iPod's do not have a Stop button (they use the Pause function). To play<br />
an alternative selection, use the iPod menus to make the selection using<br />
the Play / Pause button to stop playing the current item if needed.<br />
Note: iPods vary in how they respond to the Play / Pause button dependent<br />
upon the iPod model and software revision. Play / Pause may pause and<br />
resume the current selection, or it may pause the current selection and<br />
then start playing a new selection. The use of the Select button to start<br />
playing an item avoids this inconsistency.<br />
32<br />
1<br />
3<br />
2<br />
2<br />
1<br />
2 2<br />
3
Search function<br />
1. While the iPod is playing, press and hold the Fast-forward or Rewind<br />
buttons.<br />
2. Release the button when the desired part of the item is reached.<br />
Repeat a single file<br />
1. While the iPod is playing, press the Repeat button until the repeat<br />
single file symbol appears in the iPod display. The currently playing<br />
item will be repeated.<br />
Repeat all<br />
2. While the iPod is playing, press the Repeat button until the repeat all<br />
files symbol appears in the iPod display. All files in the current album<br />
or playlist will be repeated.<br />
Repeat cancel<br />
3. While the iPod is playing, press the Repeat button until the repeat<br />
symbol is removed from the iPod display. Remaining files in the current<br />
album or playlist will be played.<br />
Shuffle<br />
4. While the iPod is playing, press the Random button to control the<br />
shuffle symbol in the iPod display. The tracks in the current album or<br />
playlist will be played in random when shuffle is enabled.<br />
If you need any further advice, please call our Technical Helpline on :-<br />
020 8758 0338 (Mon-Fri)<br />
1<br />
1-3<br />
4<br />
1<br />
iPod Docking<br />
33
Alarms<br />
Your MP-43 sound system has two alarms which can each be set to wake<br />
you to <strong>DAB</strong>, <strong>FM</strong> radio, <strong>CD</strong>, iPod or buzzer alarm. The alarms may be set<br />
while the unit is in standby mode or while playing.<br />
1. Before setting an alarm ensure that the clock time is set (see page 37).<br />
Press and release the Alarm button. "Alarm 1" will show on the<br />
display.<br />
2. Press the Tuning Up or Down buttons to select the required alarm,<br />
1 or 2. Press and release the Select button to cause "Alarm setting"<br />
to show on the display.<br />
3. Press and release the Select button to choose alarm setting. "Alarm:<br />
On/Off" will show on the upper line of the text display.<br />
4. Press the Tuning Up or Down buttons to choose whether to set the<br />
alarm to On or Off.<br />
5. Press and release the Select button. If the previous selection was to<br />
switch on the alarm, then "Alarm: Time" will show on the upper line of<br />
the text display and the Alarm hour digits will flash. If Off was selected,<br />
the unit will exit the alarm menu.<br />
6. Press the Tuning Up or Down buttons to choose the alarm hour and<br />
then press and release the Select button to enter the hour setting.<br />
The Alarm minute digits will then flash on the display.<br />
7. Press the Tuning Up or Down buttons to choose the alarm minute and<br />
then press and release the Select button to enter the minute setting.<br />
"Alarm: Mode" will show on the upper line of the text display.<br />
34<br />
2,4<br />
6,7<br />
1<br />
2,3<br />
5-7<br />
2,4<br />
6,7
8. Press the Tuning Up or Down buttons to choose the required alarm<br />
mode and then press the Select button to confirm the setting.<br />
Each alarm can be set to any of the following modes:<br />
BUZZER - will wake you <strong>with</strong> a buzzer alarm<br />
<strong>DAB</strong> - will wake you <strong>with</strong> <strong>DAB</strong> radio<br />
<strong>FM</strong> - will wake you <strong>with</strong> <strong>FM</strong> radio<br />
<strong>CD</strong> - will wake you playing a <strong>CD</strong><br />
iPod - will wake you playing your iPod<br />
9. Press and release the Select button to select the alarm mode.<br />
"Alarm: Day" will show on the upper line of the text display.<br />
10. Press the Tuning Up or Down buttons to select the required day<br />
option and then press the Select button to confirm the setting.<br />
Your alarm can be set to the following options:<br />
Once - will sound once in the next 24 hours only<br />
Daily - will sound everyday<br />
Weekdays - will sound only on weekdays<br />
Weekends - will sound only on weekends<br />
11. The alarm has now been set and the unit will revert to the previous<br />
display. The alarm indicator (alarm 1 or 2) will show on the display.<br />
To view an alarm setting, select "View" instead of "Setting" at steps 2 and 3.<br />
Successive presses of the Select button will display the alarm details.<br />
Note: When the alarm is set to wake by <strong>DAB</strong> or <strong>FM</strong> radio, the last used<br />
<strong>DAB</strong> or <strong>FM</strong> station will be used and the alarm volume will be the volume<br />
previously listened to.<br />
When the buzzer alarm activates, the alarm will start softly and gradually<br />
increase in level.<br />
The alarm will sound for 60 minutes unless cancelled.<br />
If you need any further advice, please call our Technical Helpline on :-<br />
020 8758 0338 (Mon-Fri)<br />
8,10<br />
8-10<br />
8,10<br />
Clock and Alarms<br />
35
Cancelling alarms<br />
1. While an alarm is sounding it can be cancelled by pressing the On /<br />
Standby button.<br />
2. To cancel an alarm at any other time, enter the alarm setup menu and<br />
set the alarm On/Off option to "Off". See steps 1 - 5 on page 34.<br />
Snooze<br />
1. When the alarm sounds, pressing any button other than the Standby<br />
button will silence the alarm for five minutes. The snooze symbol ( SNOOZE)<br />
will appear in the display.<br />
Sleep function<br />
Your sound system can be set to turn off after a preset time has elapsed.<br />
The sleep setting can be adjusted between 15 and 120 minutes.<br />
1. To use the sleep timer, press and release the Sleep / Clock set button<br />
to enter the sleep setup. "Sleep off" will appear on the display.<br />
2. Repeatedly press and release the Sleep / Clock set button to select<br />
the desired sleep time. The options are 15, 30, 60, 90 or 120 minutes.<br />
Use the OFF option to cancel the sleep function.<br />
3. Your radio will switch off after the preset sleep time has elapsed.<br />
4. To cancel the sleep function before the preset time has elapsed, either<br />
set the sleep timer to off (step 2) or press the On / Standby button.<br />
36<br />
Z<br />
Z<br />
Z<br />
1<br />
1,2<br />
4
Setting the clock manually<br />
The MP-43 will automatically set its clock when tuned to a <strong>DAB</strong> radio station<br />
or to an <strong>FM</strong> station which is broadcasting the time via RDS.<br />
If the clock cannot be set using <strong>DAB</strong> or <strong>FM</strong> radio then you will need to<br />
set the clock manually before the alarm function can be used. The clock<br />
may be set while the unit is in standby mode or while playing. The clock<br />
display is always in 24 hour format.<br />
If it becomes necessary to set the clock manually, please follow these<br />
steps:<br />
1. Press and hold the Clock Set button. The hour digits on the<br />
display will flash.<br />
2. Press the Tuning Up or Down buttons to change the hour digits as<br />
needed. Keep the button pressed to cause the digits to change more<br />
quickly.<br />
3. Press and release the Select button to confirm the hour setting. The<br />
minute digits on the display will flash.<br />
4. Press the Tuning Up or Down buttons to change the minute digits<br />
as needed. Keep the button pressed to cause the digits to change<br />
more quickly.<br />
5. Press and release the Select button to confirm the minutes setting.<br />
The year digits on the display will flash.<br />
If you need any further advice, please call our Technical Helpline on :-<br />
020 8758 0338 (Mon-Fri)<br />
2,4<br />
1<br />
3,5<br />
2,4<br />
Clock and Alarms<br />
37
6. Press the Tuning Up or Down buttons until the desired year is set.<br />
Keep the button pressed to cause the digits to change more quickly.<br />
7. Press and release the Select button to confirm the year setting. The<br />
month will flash on the display.<br />
8. Press the Tuning Up or Down buttons until the desired month is<br />
set. Keep the button pressed to cause the month to change more<br />
quickly.<br />
9. Press and release the Select button to confirm the month setting.<br />
The day number will flash on the display.<br />
10. Press the Tuning Up or Down buttons until the desired day is set.<br />
Keep the button pressed to cause the digits to change more quickly.<br />
11. Press and release the Select button to confirm the day and to complete<br />
the clock and date setting. The display will revert to the display for the<br />
previous operating mode.<br />
38<br />
6,8<br />
10<br />
7,9<br />
11<br />
6,8<br />
10
Standby brightness control<br />
The brightness of the display when the unit is in standby mode may be<br />
adjusted. If you use the unit in the bedroom, you may prefer a lower standby<br />
brightness level than the standard setting.<br />
1. Press and hold the Menu button so that the display shows "Set<br />
Brightness" on the lower line of the text display<br />
2. Press and release the Select button to show the current setting.<br />
3. Press and release the Tuning Up or Down buttons to change the<br />
standby brightness level. The backlight level will change at the same<br />
time so that you can see the effect of the change.<br />
4. Press and release the Select button to save the new setting.<br />
The default setting after a system reset is 5. Possible brightness values<br />
range from 1 - 7.<br />
If you need any further advice, please call our Technical Helpline on :-<br />
020 8758 0338 (Mon-Fri)<br />
3<br />
1<br />
2,4<br />
3<br />
Clock and Alarms<br />
39
Equalizer function<br />
The sound on your sound system can be adjusted to suit your personal<br />
taste for the material that you are listening to. The MP-43 has six preset<br />
equalizer modes. Alternatively, you may set the treble and bass levels to<br />
your own preferences.<br />
1. Press the Equalizer button to cycle through the various modes.<br />
a. Flat - no tone modification is applied<br />
b. Jazz<br />
c. Rock<br />
d. Classic<br />
e. Pop<br />
f. News<br />
g. Treble - tone setting may be adjusted<br />
h. Bass - tone setting may be adjusted<br />
Treble control<br />
2. Press the Equalizer button to cycle through the modes until "Treble"<br />
appears on the upper line of the text display. The current treble setting<br />
will be shown on the lower line.<br />
3. To adjust the treble setting press and release the Tuning Up or Down<br />
buttons until the desired level is displayed.<br />
4. If you wish also to adjust the bass, then press the Equalizer button<br />
once more as described in step 5. Alternatively press the Select<br />
button to revert to the play mode display.<br />
40<br />
2<br />
1<br />
2<br />
3<br />
2
Bass control<br />
5. Press the Equalizer button to cycle through the modes until "Bass"<br />
appears on the upper line of the text display. The current bass setting<br />
will be shown on the lower line.<br />
6. To adjust the bass setting press and release the Tuning Up or Down<br />
buttons until the desired level is displayed.<br />
7. Press the Select button to revert to the play mode display.<br />
• To quickly cancel the effect of the treble or bass settings press the<br />
Equaliser button until "Flat" appears on the upper line of the text<br />
display. The treble and bass settings will be remembered for the next<br />
time that you wish to adjust them.<br />
Mute function<br />
Pressing the Mute button will mute the output from the loudspeakers.<br />
1. Press the Mute button to mute the sound output. The speaker volume<br />
symbol on the display will disappear.<br />
2. Press the Mute button again or one of the Volume buttons to un-mute<br />
the sound output.<br />
If you need any further advice, please call our Technical Helpline on :-<br />
020 8758 0338 (Mon-Fri)<br />
6<br />
5<br />
7<br />
1,2<br />
6<br />
Audio and Setup<br />
<strong>DAB</strong><br />
41
Auxiliary input socket<br />
A 3.5mm stereo Auxiliary Input socket is provided on the rear of your<br />
sound system to permit an audio signal to be fed into the unit from an<br />
external audio device such as iPod, MP3 or <strong>CD</strong> player.<br />
1. Repeatedly press and release the <strong>Radio</strong> button until "AUX IN" is<br />
displayed.<br />
2. Connect an external audio source (for example, iPod, MP3 or <strong>CD</strong><br />
player) to the Auxiliary input socket.<br />
3. Adjust the volume setting on your iPod, MP3 or <strong>CD</strong> player if necessary<br />
to ensure an adequate signal level, and then use the Volume Up<br />
or Down buttons on the sound system as needed for comfortable<br />
listening.<br />
Line Out socket<br />
A 3.5mm stereo Line Out socket is provided on the rear of your sound<br />
system to permit the audio signal to be fed to an external amplifier or<br />
other audio device.<br />
Inserting an audio cable into this socket will not mute the internal loudspeaker.<br />
Set the volume control to a low level if desired (minimum level = 1). Setting<br />
the volume to MIN may cause the line output to be muted.<br />
42<br />
2<br />
1<br />
AUX
Headphone socket<br />
A 3.5mm stereo Headphone Socket is provided on the rear of your sound<br />
system for use <strong>with</strong> headphones. Inserting a plug automatically mutes the<br />
internal loudspeakers.<br />
IMPORTANT: Excessive sound pressure from earphones and headphones<br />
can cause hearing loss.<br />
Aerial removal<br />
The fitted telescopic aerial is suitable for most applications. In some<br />
locations if reception conditions are poor, an external antenna may be<br />
more suitable. For this purpose the telescopic aerial may be removed to<br />
allow connection to an external aerial using a coaxial cable.<br />
First remove the two small screws holding the antenna connector cover in<br />
place using a small cross-head screw driver. Then using a suitable spanner<br />
(11mm across the flats), remove the telescopic aerial by rotating in an<br />
anti-clockwise direction when viewed from the rear of the product.<br />
This will expose an F-type connector to which a coaxial cable may then<br />
be connected.<br />
If you need any further advice, please call our Technical Helpline on :-<br />
020 8758 0338 (Mon-Fri)<br />
Audio and Setup<br />
43
Touch panel sensitivity control<br />
The sensitivity of the touch panel may be adjusted. The default setting will<br />
normally be found to provide satisfactory operation, however, the touch<br />
panel system may respond differently depending upon the moisture of the<br />
skin. The touch panel sensitivity may be reduced or increased relative to<br />
the standard setting.<br />
1. Press and hold the Menu button so that the display shows "Set<br />
Brightness" on the lower line of the text display<br />
2. Press and release the Tuning Up or Down buttons until the display<br />
shows "Touch Pad Set".<br />
3. Press and release the Select button to show the current setting.<br />
4. Press and release the Tuning Up or Down buttons to change the<br />
touch panel sensitivity level.<br />
5. Press and release the Select button to save the new setting.<br />
The default setting after a system reset is Normal.<br />
44<br />
2,4<br />
1<br />
3,5<br />
2,4
<strong>System</strong> reset<br />
If your radio fails to operate correctly, or some digits on the display are<br />
missing or incomplete carry out the following procedure.<br />
1. Press and hold the Menu button so that the display shows "Set<br />
Brightness" on the lower line of the text display.<br />
2. Press and release the Tuning Up or Down buttons until the display<br />
shows "<strong>System</strong> reset".<br />
3. Press and release the Select button. The display will show "Press<br />
SELECT to reset".<br />
4. Press and release the Select button again to confirm the reset<br />
operation.<br />
5. After a system reset, all radio station presets will be set to empty.<br />
Alarms will be cancelled, audio equaliser, display brightness and<br />
touch panel settings will have been set to their default values. The<br />
clock will be reset and the unit will behave as when first switched on<br />
(see page 9).<br />
In case of malfunction due to electrostatic discharge, reset the product<br />
using the above procedure. In some circumstances it may be necessary<br />
to disconnect and then reconnect the mains power in order to resume<br />
normal operation.<br />
If a problem persists our technical staff would be pleased to help offer<br />
any assistance on operating the radio. Our technical helpline number<br />
is 020 8758 0338.<br />
If you need any further advice, please call our Technical Helpline on :-<br />
020 8758 0338 (Mon-Fri)<br />
2<br />
1<br />
3,4<br />
2<br />
Audio and Setup<br />
45
Cautions<br />
Do not allow this sound system to be exposed to water, steam or sand.<br />
Do not leave your sound system where excessive heat could cause<br />
damage.<br />
It is recommended that the <strong>DAB</strong> band is used for radio listening where<br />
possible since this may result in better sound quality and freedom from<br />
interference than will often be obtained on the <strong>FM</strong> band.<br />
The name plate is located on the rear of your sound system.<br />
Specifications<br />
Power Requirements<br />
Mains AC 230 volts, 50Hz only<br />
Battery (Remote control) 2 x AAA<br />
Frequency Coverage<br />
<strong>FM</strong> 87.5-108MHz<br />
<strong>DAB</strong> 174.928 - 239.200MHz<br />
46<br />
The Company reserves the right to amend the specification <strong>with</strong>out notice.<br />
• The sound system shall not be exposed to dripping or splashing and<br />
that no objects filled <strong>with</strong> liquids, such as vases, shall be placed on<br />
the sound system.<br />
• It is recommended to operate the product such that there is a minimum<br />
distance (10cm recommended) to adjacent objects in order to ensure<br />
good ventilation.<br />
• The ventilation of the product should not be restricted by covering it or<br />
its ventilation openings <strong>with</strong> items such as newspapers, tablecloths,<br />
curtains etc.<br />
• No naked flame sources such as lighted candles should be placed on<br />
the product.<br />
• It is recommended to avoid using or storing the product at extremes<br />
of temperature. Avoid leaving the unit in cars, on window sills, in direct<br />
sunlight etc.<br />
Circuit features<br />
Output Power 2 x 7 watts<br />
Headphone socket 3.5mm dia<br />
Auxiliary in socket 3.5mm dia<br />
Line Out socket 3.5mm dia<br />
Aerial <strong>System</strong> <strong>FM</strong> Telescopic aerial<br />
<strong>DAB</strong> Telescopic aerial
Mains supply<br />
The MP-43 will operate from a supply of AC 230 volts, 50Hz only.<br />
DO NOT cut off the mains plug from this equipment. If the plug fitted is<br />
not suitable for the power points in your home or the cable is too short to<br />
reach a power point, then obtain an appropriate safety approved extension<br />
lead or adaptor. If in doubt consult your dealer.<br />
If nonetheless the mains plug is cut off, remove the fuse and dispose of<br />
the plug immediately to avoid a possible shock hazard by inadvertent<br />
connection to the mains supply.<br />
If this product is not supplied <strong>with</strong> a mains plug, or one has to be fitted,<br />
then follow the instructions given below:<br />
IMPORTANT. DO NOT make any connection to the larger terminal which<br />
is marked <strong>with</strong> the letter E or by the safety earth symbol or coloured<br />
Green or Green-and-yellow.<br />
The wires in the mains lead are coloured in accordance <strong>with</strong> the following<br />
codes :-<br />
If you need any further advice, please call our Technical Helpline on :-<br />
020 8758 0338 (Mon-Fri)<br />
BLUE - NEUTRAL BROWN - LIVE<br />
The wire coloured BLUE must be connected to the terminal marked N or<br />
coloured BLACK.<br />
The wire coloured BROWN must be connected to the terminal marked L<br />
or coloured RED.<br />
Fuse<br />
Information<br />
When replacing the fuse only a 3A ASTA approved to BS1362 type should<br />
be used and be sure to re-fit the fuse cover.<br />
IF IN DOUBT - CONSULT A QUALIFIED ELECTRICIAN.<br />
Replacement fuse holders are available from <strong>Roberts</strong> <strong>Radio</strong> Technical<br />
Services at the address shown on the rear of this manual.<br />
47
Notes<br />
......................................................................................................................................................................................................<br />
......................................................................................................................................................................................................<br />
......................................................................................................................................................................................................<br />
......................................................................................................................................................................................................<br />
......................................................................................................................................................................................................<br />
......................................................................................................................................................................................................<br />
......................................................................................................................................................................................................<br />
......................................................................................................................................................................................................<br />
......................................................................................................................................................................................................<br />
......................................................................................................................................................................................................<br />
......................................................................................................................................................................................................<br />
......................................................................................................................................................................................................<br />
......................................................................................................................................................................................................<br />
......................................................................................................................................................................................................<br />
......................................................................................................................................................................................................<br />
......................................................................................................................................................................................................<br />
......................................................................................................................................................................................................<br />
......................................................................................................................................................................................................<br />
......................................................................................................................................................................................................<br />
......................................................................................................................................................................................................<br />
......................................................................................................................................................................................................<br />
48
If you need any further advice, please call our Technical Helpline on :-<br />
020 8758 0338 (Mon-Fri)<br />
Guarantee<br />
Information<br />
This instrument is guaranteed for twelve months from the date of delivery to the original owner against failure due to faulty workmanship or component<br />
breakdown, subject to the procedure stated below. Should any component or part fail during this guarantee period it will be repaired or replaced free<br />
of charge.<br />
The guarantee does not cover:<br />
1. Damage resulting from incorrect use.<br />
2. Consequential damage.<br />
3. Receivers <strong>with</strong> removed or defaced serial numbers.<br />
N.B. Damaged or broken telescopic aerials will not be replaced under guarantee.<br />
Procedure:<br />
Any claim under this guarantee should be made through the dealer from whom the instrument was purchased. It is likely that your <strong>Roberts</strong>' dealer<br />
will be able to attend to any defect quickly and efficiently but should it be necessary the dealer will return the instrument to the Company’s service<br />
department for attention. In the event that it is not possible to return the instrument to the <strong>Roberts</strong>' dealer from whom it was purchased, please contact<br />
<strong>Roberts</strong> <strong>Radio</strong> Technical Services at the address shown overleaf.<br />
These statements do not affect the statutory rights of a consumer.<br />
49
Issue 3<br />
ROBERTS RADIO TECHNICAL SERVICES<br />
97-99 Worton Road<br />
Isleworth<br />
Middlesex<br />
TW7 6EG<br />
Technical Helpline :- 020 8758 0338 (Mon-Fri during office hours)<br />
Website: http://www.robertsradio.co.uk<br />
© 2008 <strong>Roberts</strong> <strong>Radio</strong> Limited