NXT Controller Manual IP Assignment in WAN ... - Keri Systems
NXT Controller Manual IP Assignment in WAN ... - Keri Systems
NXT Controller Manual IP Assignment in WAN ... - Keri Systems
Create successful ePaper yourself
Turn your PDF publications into a flip-book with our unique Google optimized e-Paper software.
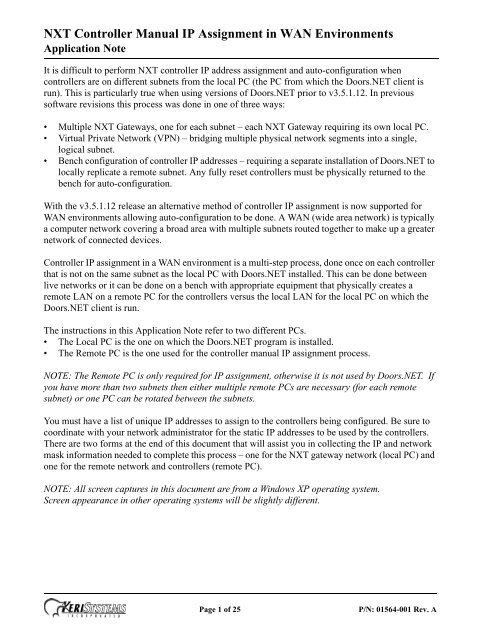
<strong>NXT</strong> <strong>Controller</strong> <strong>Manual</strong> <strong>IP</strong> <strong>Assignment</strong> <strong>in</strong> <strong>WAN</strong> Environments<br />
Application Note<br />
It is difficult to perform <strong>NXT</strong> controller <strong>IP</strong> address assignment and auto-configuration when<br />
controllers are on different subnets from the local PC (the PC from which the Doors.NET client is<br />
run). This is particularly true when us<strong>in</strong>g versions of Doors.NET prior to v3.5.1.12. In previous<br />
software revisions this process was done <strong>in</strong> one of three ways:<br />
• Multiple <strong>NXT</strong> Gateways, one for each subnet – each <strong>NXT</strong> Gateway requir<strong>in</strong>g its own local PC.<br />
• Virtual Private Network (VPN) – bridg<strong>in</strong>g multiple physical network segments <strong>in</strong>to a s<strong>in</strong>gle,<br />
logical subnet.<br />
• Bench configuration of controller <strong>IP</strong> addresses – requir<strong>in</strong>g a separate <strong>in</strong>stallation of Doors.NET to<br />
locally replicate a remote subnet. Any fully reset controllers must be physically returned to the<br />
bench for auto-configuration.<br />
With the v3.5.1.12 release an alternative method of controller <strong>IP</strong> assignment is now supported for<br />
<strong>WAN</strong> environments allow<strong>in</strong>g auto-configuration to be done. A <strong>WAN</strong> (wide area network) is typically<br />
a computer network cover<strong>in</strong>g a broad area with multiple subnets routed together to make up a greater<br />
network of connected devices.<br />
<strong>Controller</strong> <strong>IP</strong> assignment <strong>in</strong> a <strong>WAN</strong> environment is a multi-step process, done once on each controller<br />
that is not on the same subnet as the local PC with Doors.NET <strong>in</strong>stalled. This can be done between<br />
live networks or it can be done on a bench with appropriate equipment that physically creates a<br />
remote LAN on a remote PC for the controllers versus the local LAN for the local PC on which the<br />
Doors.NET client is run.<br />
The <strong>in</strong>structions <strong>in</strong> this Application Note refer to two different PCs.<br />
• The Local PC is the one on which the Doors.NET program is <strong>in</strong>stalled.<br />
• The Remote PC is the one used for the controller manual <strong>IP</strong> assignment process.<br />
NOTE: The Remote PC is only required for <strong>IP</strong> assignment, otherwise it is not used by Doors.NET. If<br />
you have more than two subnets then either multiple remote PCs are necessary (for each remote<br />
subnet) or one PC can be rotated between the subnets.<br />
You must have a list of unique <strong>IP</strong> addresses to assign to the controllers be<strong>in</strong>g configured. Be sure to<br />
coord<strong>in</strong>ate with your network adm<strong>in</strong>istrator for the static <strong>IP</strong> addresses to be used by the controllers.<br />
There are two forms at the end of this document that will assist you <strong>in</strong> collect<strong>in</strong>g the <strong>IP</strong> and network<br />
mask <strong>in</strong>formation needed to complete this process – one for the <strong>NXT</strong> gateway network (local PC) and<br />
one for the remote network and controllers (remote PC).<br />
NOTE: All screen captures <strong>in</strong> this document are from a W<strong>in</strong>dows XP operat<strong>in</strong>g system. <br />
Screen appearance <strong>in</strong> other operat<strong>in</strong>g systems will be slightly different.<br />
Page 1 of 25<br />
P/N: 01564-001 Rev. A
<strong>NXT</strong> <strong>Controller</strong> <strong>Manual</strong> <strong>IP</strong> <strong>Assignment</strong> <strong>in</strong> <strong>WAN</strong> Environments<br />
Application Note<br />
1.0 Telnet<br />
<strong>Manual</strong> <strong>IP</strong> assignment is done us<strong>in</strong>g Telnet. Telnet is a network protocol that provides pla<strong>in</strong>-text,<br />
command communication between devices.<br />
The Telnet client is a standard part of a W<strong>in</strong>dows XP <strong>in</strong>stallation, but must be enabled/<strong>in</strong>stalled <strong>in</strong> a<br />
Vista, W<strong>in</strong>dows 7, or W<strong>in</strong>dows Server <strong>in</strong>stallation.<br />
1.1 Enable Telnet <strong>in</strong> Vista or W<strong>in</strong>dows 7<br />
Use the W<strong>in</strong>dows Features tool to enable Telnet <strong>in</strong> Vista or W<strong>in</strong>dows 7.<br />
NOTE: You must have Adm<strong>in</strong>istrator Rights for the operat<strong>in</strong>g system to enable Telnet for all users.<br />
1. Click Start and then click Control Panel.<br />
2. On the Control Panel Home page, click Programs.<br />
3. In the Programs and Features section, click Turn W<strong>in</strong>dows features on or off.<br />
4. If the User Account Control dialog box appears, confirm that the action it displays is what you<br />
want and then click Cont<strong>in</strong>ue.<br />
5. In the W<strong>in</strong>dows Features list, select Telnet Client, and then click OK.<br />
1.2 Install Telnet <strong>in</strong> W<strong>in</strong>dows Server<br />
Use the Role Management tool to <strong>in</strong>stall Telnet <strong>in</strong> W<strong>in</strong>dows Server.<br />
1. Start Server Manager. Click Start, right-click Computer, and then click Manage.<br />
2. If the User Account Control dialog box appears, confirm that the action it displays is what you<br />
want and then click Cont<strong>in</strong>ue.<br />
3. In the Features Summary section, click Add features.<br />
4. In the Add Features Wizard, select Telnet Client and then click Next.<br />
5. On the Confirm Installation Options page, click Install.<br />
6. When <strong>in</strong>stallation f<strong>in</strong>ishes click Close.<br />
2.0 Configure Remote PC for Access <br />
to 169.254.x.y <strong>IP</strong> Addresses<br />
The remote PC must be configured (at least temporarily) with an <strong>IP</strong> address to communicate with a<br />
controller <strong>in</strong> the 169.254.x.y address range. This is required for the remote PC to communicate with<br />
the controller us<strong>in</strong>g the controller’s default <strong>IP</strong> address. Refer to your IT professional on how to<br />
configure the remote PC.<br />
Page 2 of 25<br />
P/N: 01564-001 Rev. A
<strong>NXT</strong> <strong>Controller</strong> <strong>Manual</strong> <strong>IP</strong> <strong>Assignment</strong> <strong>in</strong> <strong>WAN</strong> Environments<br />
Application Note<br />
3.0 Verify Ethernet Communication to the <strong>Controller</strong><br />
Before Telnett<strong>in</strong>g <strong>in</strong>to the controller to set its <strong>IP</strong> address you should verify the controller and the<br />
remote PC be<strong>in</strong>g used <strong>in</strong> the <strong>IP</strong> assignment process are properly communicat<strong>in</strong>g through the local<br />
network. This is done by send<strong>in</strong>g a p<strong>in</strong>g command to the controller and look<strong>in</strong>g for a response.<br />
Verify the follow<strong>in</strong>g to ensure proper communication:<br />
• one controller is connected to the network at a time<br />
• the controller’s <strong>IP</strong> is set at its factory default <strong>IP</strong> of 169.254.1.1<br />
• the remote PC used for <strong>IP</strong> assignment can communicate with the default controller <strong>IP</strong> address –<br />
this PC must have a compatible <strong>IP</strong> address and network mask for both the default <strong>IP</strong> address and<br />
the new <strong>IP</strong> address to be assigned<br />
1. Connect the controller to the local PC network and power up the controller.<br />
2. Open a DOS Command prompt.<br />
• Click Start > Run<br />
3. Type cmd <strong>in</strong> the entry field and click OK.<br />
Page 3 of 25<br />
P/N: 01564-001 Rev. A
<strong>NXT</strong> <strong>Controller</strong> <strong>Manual</strong> <strong>IP</strong> <strong>Assignment</strong> <strong>in</strong> <strong>WAN</strong> Environments<br />
Application Note<br />
The DOS command w<strong>in</strong>dow opens.<br />
4. Enter the p<strong>in</strong>g command at the x:\> prompt:<br />
• x:\>p<strong>in</strong>g 169.254.1.1 (Enter)<br />
5. After a short delay the p<strong>in</strong>g command results appear.<br />
• A communicat<strong>in</strong>g p<strong>in</strong>g command appears as:<br />
Cont<strong>in</strong>ue to the Telnet step.<br />
Page 4 of 25<br />
P/N: 01564-001 Rev. A
<strong>NXT</strong> <strong>Controller</strong> <strong>Manual</strong> <strong>IP</strong> <strong>Assignment</strong> <strong>in</strong> <strong>WAN</strong> Environments<br />
Application Note<br />
• A non-communicat<strong>in</strong>g p<strong>in</strong>g command appears as:<br />
3.1 Troubleshoot<strong>in</strong>g a Failed P<strong>in</strong>g Command<br />
There are several, basic troubleshoot<strong>in</strong>g steps to try to ensure your network connection and<br />
communication configuration is correct.<br />
1. Verify there is only one controller connected to the remote PC’s network with the default<br />
configuration and the default <strong>IP</strong> address. TCP communication will not work correctly if there are<br />
multiple devices with the same address on the same network. Remove the other devices and try<br />
the p<strong>in</strong>g command aga<strong>in</strong>.<br />
2. Verify basic Ethernet connectivity between the remote PC and the controller. The remote PC must<br />
have a valid <strong>IP</strong> address <strong>in</strong> the 169.254.x.y range (See Section 2). If you are directly connected and<br />
are us<strong>in</strong>g dynamic address<strong>in</strong>g (DHCP) you may have to wait up to a m<strong>in</strong>ute for the remote PC to<br />
come up with its own <strong>IP</strong> address, <strong>in</strong>clud<strong>in</strong>g each time the Ethernet l<strong>in</strong>k is disconnected from the<br />
remote PC. If you have the Local Area Connection icon displayed on your operat<strong>in</strong>g system<br />
toolbar you will see the icon flicker whenever there is any network activity.<br />
• There is a status LED on the body of the Ethernet connector on the remote PC. It should be lit<br />
when connected to a network and flicker<strong>in</strong>g when transferr<strong>in</strong>g data.<br />
• The L<strong>in</strong>k LED (D22) is on the controller PCB. It also should be lit when connected to a network.<br />
The Activity LED (D33) should be flicker<strong>in</strong>g when transferr<strong>in</strong>g data. Refer to the figure on the<br />
next page.<br />
If these LEDs are not lit or flicker<strong>in</strong>g, check the cable connections and verify the Ethernet cable is<br />
good.<br />
Depend<strong>in</strong>g upon the type of Ethernet device <strong>in</strong> the remote PC it may be necessary to use an Ethernet<br />
switch, hub, or crossover cable to provide a network connection between the PC and the controller.<br />
Try these various comb<strong>in</strong>ations and look for the status LEDs to be lit on both devices. Try the p<strong>in</strong>g<br />
command aga<strong>in</strong> once both LEDs are lit.<br />
Page 5 of 25<br />
P/N: 01564-001 Rev. A
<strong>NXT</strong> <strong>Controller</strong> <strong>Manual</strong> <strong>IP</strong> <strong>Assignment</strong> <strong>in</strong> <strong>WAN</strong> Environments<br />
Application Note<br />
Ethernet RJ-45 Connection<br />
Reset LED<br />
TB9<br />
<strong>NXT</strong> <strong>Controller</strong><br />
1<br />
2<br />
3<br />
4<br />
J2<br />
S1<br />
J3<br />
10/100 (D21)<br />
Activity (D33)<br />
L<strong>in</strong>k (D22)<br />
3. Cycle power on the controller. Try the p<strong>in</strong>g command aga<strong>in</strong>.<br />
4. Reset the controller. This will restore the controller to a factory default state, restor<strong>in</strong>g the factory<br />
default <strong>IP</strong> address. Try the p<strong>in</strong>g command aga<strong>in</strong>.<br />
Perform the follow<strong>in</strong>g to reset a controller:<br />
• Remove power from the <strong>NXT</strong> controller.<br />
• Install a Jumper across the J3 p<strong>in</strong> header.<br />
• Press the S1 switch and hold it down while apply<strong>in</strong>g power. Keep the button pressed until the<br />
Reset LED (D48) comes lit. This <strong>in</strong>dicates the reset rout<strong>in</strong>e has begun.<br />
• DO NOT REMOVE POWER FROM THE <strong>NXT</strong> CONTROLLER <br />
WHILE THE RESET LED IS LIT.<br />
• The Reset is complete when the Reset LED goes dark.<br />
• Cycle power on the controller.<br />
If these steps do not resolve your communication issues your setup requires more detailed<br />
troubleshoot<strong>in</strong>g that cannot be covered <strong>in</strong> this document.<br />
Page 6 of 25<br />
P/N: 01564-001 Rev. A
<strong>NXT</strong> <strong>Controller</strong> <strong>Manual</strong> <strong>IP</strong> <strong>Assignment</strong> <strong>in</strong> <strong>WAN</strong> Environments<br />
Application Note<br />
4.0 Information Collection Prior to <strong>Manual</strong> <strong>IP</strong> <strong>Assignment</strong><br />
There are two blank forms at the end of this document that you can use to assist you <strong>in</strong> collect<strong>in</strong>g all<br />
network communication related <strong>in</strong>formation necessary to perform this task. This <strong>in</strong>formation is used<br />
<strong>in</strong> various sections of the <strong>Manual</strong> <strong>IP</strong> <strong>Assignment</strong> procedure.<br />
4.1 Sample <strong>NXT</strong> Gateway Network Information Form<br />
<strong>NXT</strong> Gateway Network Information Form<br />
Router<br />
Local Router <strong>IP</strong> =<br />
Network Mask =<br />
192 . 168 . 0 . 1<br />
255 . 255 . 255 . 0<br />
<strong>NXT</strong><br />
Gateway<br />
Local<br />
PC<br />
Local PC <strong>IP</strong> =<br />
196 . 168 . 0 . 123<br />
NOTE: All addresses are <strong>in</strong>ternal with<strong>in</strong> the subnet.<br />
Fill <strong>in</strong> the follow<strong>in</strong>g <strong>in</strong>formation associated with the local PC and the router to which it is connected:<br />
• <strong>IP</strong> address of the router connected to the local PC<br />
• Network Mask for that router<br />
• <strong>IP</strong> address of the local PC<br />
You will only need to fill out one of these forms for the local PC and its router.<br />
Page 7 of 25<br />
P/N: 01564-001 Rev. A
<strong>NXT</strong> <strong>Controller</strong> <strong>Manual</strong> <strong>IP</strong> <strong>Assignment</strong> <strong>in</strong> <strong>WAN</strong> Environments<br />
Application Note<br />
4.2 Sample Remote Network Information Form<br />
<strong>Controller</strong> #<br />
1<br />
Remote Network Information Form<br />
Remote Router <strong>IP</strong> =<br />
10 . 10 . 10 . 10<br />
Router<br />
Network Mask =<br />
255 . 0 . 0 . 0<br />
Remote PC <strong>IP</strong> =<br />
10 . 10 . 12 . 34<br />
& 169 . 254 . 123 . 45<br />
Remote<br />
PC<br />
<strong>NXT</strong><br />
<strong>Controller</strong><br />
<strong>Controller</strong> <strong>IP</strong> =<br />
10 . 1 . 2 . 3<br />
& 169 . 254 . 1 . 1<br />
(default controller <strong>IP</strong>)<br />
NOTE: All addresses are <strong>in</strong>ternal with<strong>in</strong> the subnet.<br />
Fill <strong>in</strong> the follow<strong>in</strong>g <strong>in</strong>formation associated with the remote PC, the router to which it is connected,<br />
and the <strong>NXT</strong> controller be<strong>in</strong>g assigned an <strong>IP</strong> address:<br />
• <strong>IP</strong> address of the router connected to the remote PC<br />
• Network Mask for that router<br />
• <strong>IP</strong> address of the remote PC<br />
• Secondary <strong>IP</strong> address that allows the remote PC to connect to the local PC<br />
• <strong>IP</strong> address to be manually assigned to the controller<br />
You will need to fill one of these forms out for each controller be<strong>in</strong>g assigned a new <strong>IP</strong> address.<br />
Page 8 of 25<br />
P/N: 01564-001 Rev. A
<strong>NXT</strong> <strong>Controller</strong> <strong>Manual</strong> <strong>IP</strong> <strong>Assignment</strong> <strong>in</strong> <strong>WAN</strong> Environments<br />
Application Note<br />
5.0 Telnet to the <strong>Controller</strong> and Set Its New <strong>IP</strong> Address<br />
Us<strong>in</strong>g Telnet you will send commands to the <strong>NXT</strong> controller that enter the new <strong>IP</strong> address <strong>in</strong>to the<br />
controller.<br />
1. Follow Steps 1 through 3 <strong>in</strong> Section 2 to open a DOS command prompt. If the DOS prompt from<br />
the p<strong>in</strong>g command is still open you can use this DOS prompt.<br />
2. Enter the telnet command and default <strong>IP</strong> address/port at the x:\> prompt:<br />
x:\>telnet 169.254.1.1 2323<br />
After a short delay the telnet log<strong>in</strong> prompt appears:<br />
NOTE: If your controller has firmware at revision 2.3.12 or earlier it will not prompt for a log<strong>in</strong> or<br />
Password, but will go straight to the telnet prompt. Skip ahead to Step 6.<br />
3. Enter the log<strong>in</strong>: keri (Enter).<br />
4. Enter the Password: nxt (Enter) – type carefully as the password will not be shown as you type.<br />
Page 9 of 25<br />
P/N: 01564-001 Rev. A
<strong>NXT</strong> <strong>Controller</strong> <strong>Manual</strong> <strong>IP</strong> <strong>Assignment</strong> <strong>in</strong> <strong>WAN</strong> Environments<br />
Application Note<br />
5. If the log<strong>in</strong> and password are entered correctly the telnet command prompt appears.<br />
6. Enter the ifconfig command.<br />
169.254.1.1#0> ifconfig eth0 <strong>in</strong>et add ip1.ip2.ip3.ip4 netmask nm1.nm2.nm3.nm4 (Enter)<br />
• ip1 ip2 ip3 ip4 are the four elements of the <strong>IP</strong> address you wish to assign to the controller<br />
– for example, 10.1.2.3<br />
• nm1 nm2 nm3 nm4 are the four elements of the remote network mask you wish to assign to the<br />
controller<br />
– for example, 255.0.0.0<br />
• This example would be entered as<br />
169.254.1.1#0> ifconfig eth0 <strong>in</strong>et add 10.1.2.3 netmask 255.0.0.0 (Enter)<br />
7. Enter the route command.<br />
169.254.1.1#0> route set ga1.ga2.ga3.ga4 (Enter)<br />
• ga1 ga2 ga3 ga4 are the four elements of the <strong>IP</strong> gateway address<br />
– for example, 10.10.10.10<br />
• This example would be entered as<br />
169.254.1.1#0> route set 10.10.10.10 (Enter)<br />
NOTE: Typically the <strong>IP</strong> gateway address is the router’s <strong>IP</strong> address that will be connect<strong>in</strong>g the remote<br />
<strong>NXT</strong> controller to the local PC with Doors.NET (this is NOT the <strong>NXT</strong> gateway itself). This is the<br />
remote router's <strong>in</strong>ternal <strong>IP</strong> address which uses the same address<strong>in</strong>g scheme (on the same subnet) as<br />
the controller <strong>IP</strong> address.<br />
Page 10 of 25<br />
P/N: 01564-001 Rev. A
<strong>NXT</strong> <strong>Controller</strong> <strong>Manual</strong> <strong>IP</strong> <strong>Assignment</strong> <strong>in</strong> <strong>WAN</strong> Environments<br />
Application Note<br />
8. If you have entered your <strong>in</strong>formation <strong>in</strong> a recognized, accepted format you will be prompted with<br />
a route: ok prompt.<br />
If you receive any other response, you probably didn’t enter a value <strong>in</strong> the expected format. <br />
Reenter both the ifconfig and route commands.<br />
NOTE: All the 0s and 1s entered <strong>in</strong> the ifconfig and route commands are numbers, <br />
not the letter “O” or the letter “l.”<br />
9. Exit the telnet session.<br />
169.254.1.1#0> exit<br />
Telnet responds with “Connection to host lost.”<br />
10. Close the telnet w<strong>in</strong>dow.<br />
Page 11 of 25<br />
P/N: 01564-001 Rev. A
<strong>NXT</strong> <strong>Controller</strong> <strong>Manual</strong> <strong>IP</strong> <strong>Assignment</strong> <strong>in</strong> <strong>WAN</strong> Environments<br />
Application Note<br />
5.1 Verify Communication to the <strong>Controller</strong>’s New <strong>IP</strong> Address<br />
Use the p<strong>in</strong>g command to verify communication to the <strong>NXT</strong> controller’s new <strong>IP</strong> address. This<br />
procedure should be repeated us<strong>in</strong>g the local connection, then through the router that will connect the<br />
two subnets together, then from the local PC that will be runn<strong>in</strong>g Doors.NET. This will confirm the<br />
complete communication path.<br />
NOTE: This assumes the router is configured correctly and the local PC runn<strong>in</strong>g Doors.NET has had<br />
its firewall configured to accept the Doors.NET program.<br />
1. Verify the <strong>IP</strong> address has been correctly assigned. Follow the <strong>in</strong>structions <strong>in</strong> Section 2, Steps 2<br />
through 5 to p<strong>in</strong>g the controller from the local computer us<strong>in</strong>g the newly assigned <strong>IP</strong> address.<br />
• In the case of our example, <br />
x:\>p<strong>in</strong>g 10.1.2.3 (Enter)<br />
2. Verify the p<strong>in</strong>g command communicates. If it does not communicate, go back to Step 2 of this<br />
section and try the <strong>IP</strong> assignment process aga<strong>in</strong>.<br />
3. Repeat this process at both routers of the two subnets (local and remote) and at the local PC<br />
runn<strong>in</strong>g the Doors.NET client. Both locations should be able to p<strong>in</strong>g the controller. If at any po<strong>in</strong>t<br />
<strong>in</strong> this process you cannot p<strong>in</strong>g the controller, then there is a communication issue specific to that<br />
location (either the router configuration or the local PC network configuration). Doors.NET will<br />
not be able to communicate with the controller.<br />
Page 12 of 25<br />
P/N: 01564-001 Rev. A
<strong>NXT</strong> <strong>Controller</strong> <strong>Manual</strong> <strong>IP</strong> <strong>Assignment</strong> <strong>in</strong> <strong>WAN</strong> Environments<br />
Application Note<br />
6.0 Auto-Configuration <strong>in</strong> Doors.NET With <br />
<strong>Manual</strong>ly <strong>IP</strong> Assigned <strong>Controller</strong>s<br />
Perform the follow<strong>in</strong>g steps <strong>in</strong> preparation for Auto-Configuration.<br />
1. Open the Doors.NET program.<br />
2. <strong>Manual</strong>ly add the controller to the system <strong>in</strong> the Hardware Browser.<br />
• On the Ribbon Bar click Setup > Hardware Setup.<br />
• On the Hardware Setup pane click the All tab.<br />
• Select the desired gateway listed <strong>in</strong> the Setup pane. The Hardware Browser now opens.<br />
• In the <strong>NXT</strong> Series field on the Ribbon click on the Add <strong>NXT</strong> 2D or Add <strong>NXT</strong> 4D icon accord<strong>in</strong>g<br />
to your controller type.<br />
Page 13 of 25<br />
P/N: 01564-001 Rev. A
<strong>NXT</strong> <strong>Controller</strong> <strong>Manual</strong> <strong>IP</strong> <strong>Assignment</strong> <strong>in</strong> <strong>WAN</strong> Environments<br />
Application Note<br />
• Enter a description of the controller, and click Accept.<br />
• On the Ribbon Bar click View > Advanced View.<br />
• Enter the default password of “<strong>Keri</strong>10” and click OK.<br />
Page 14 of 25<br />
P/N: 01564-001 Rev. A
<strong>NXT</strong> <strong>Controller</strong> <strong>Manual</strong> <strong>IP</strong> <strong>Assignment</strong> <strong>in</strong> <strong>WAN</strong> Environments<br />
Application Note<br />
• In the All tab click on the controller <strong>in</strong> the tree view.<br />
• In the Properties Grid click on the Advanced View icon and enable Advanced View. An additional<br />
set of configuration options appears.<br />
• Enter the MAC Address of the controller. For our example this is 00-14-34-0B-07-CA.<br />
• Enter the controller’s new <strong>IP</strong> address <strong>in</strong> the properties grid. For our example this is 10.1.2.3.<br />
Page 15 of 25<br />
P/N: 01564-001 Rev. A
<strong>NXT</strong> <strong>Controller</strong> <strong>Manual</strong> <strong>IP</strong> <strong>Assignment</strong> <strong>in</strong> <strong>WAN</strong> Environments<br />
Application Note<br />
• Click on the Save icon to save these entries.<br />
Page 16 of 25<br />
P/N: 01564-001 Rev. A
<strong>NXT</strong> <strong>Controller</strong> <strong>Manual</strong> <strong>IP</strong> <strong>Assignment</strong> <strong>in</strong> <strong>WAN</strong> Environments<br />
Application Note<br />
3. Prepare for the auto configuration operation.<br />
• In the All tab click on the gateway.<br />
• In the Ribbon Bar click Auto Config.<br />
Page 17 of 25<br />
P/N: 01564-001 Rev. A
<strong>NXT</strong> <strong>Controller</strong> <strong>Manual</strong> <strong>IP</strong> <strong>Assignment</strong> <strong>in</strong> <strong>WAN</strong> Environments<br />
Application Note<br />
• If network rout<strong>in</strong>g and the firewall are properly configured, and the controller addresses are<br />
correct, the controller will be found.<br />
• Verify the <strong>IP</strong> address and MAC address displayed.<br />
• Unselect the Select All check box.<br />
• Select the Take Ownership box of the desired available controller.<br />
Page 18 of 25<br />
P/N: 01564-001 Rev. A
<strong>NXT</strong> <strong>Controller</strong> <strong>Manual</strong> <strong>IP</strong> <strong>Assignment</strong> <strong>in</strong> <strong>WAN</strong> Environments<br />
Application Note<br />
4. Click Apply and confirm the task to perform the Auto Configuration.<br />
• Wait for the Update Network Complete message <strong>in</strong> Status Messages screen (may take a m<strong>in</strong>ute or<br />
more).<br />
• Open Live Events Screen, and watch for Update Network Completed event (may take another<br />
m<strong>in</strong>ute or more).<br />
• The controller is added and communicat<strong>in</strong>g with Doors.NET. You have successfully completed<br />
these <strong>in</strong>structions.<br />
Page 19 of 25<br />
P/N: 01564-001 Rev. A
<strong>NXT</strong> <strong>Controller</strong> <strong>Manual</strong> <strong>IP</strong> <strong>Assignment</strong> <strong>in</strong> <strong>WAN</strong> Environments<br />
Application Note<br />
5. Follow<strong>in</strong>g Auto-Configuration you may have to perform a Firmware Update.<br />
• On the Ribbon Bar click the Hardware Browser tab.<br />
• Click on the controller requir<strong>in</strong>g firmware update.<br />
Page 20 of 25<br />
P/N: 01564-001 Rev. A
<strong>NXT</strong> <strong>Controller</strong> <strong>Manual</strong> <strong>IP</strong> <strong>Assignment</strong> <strong>in</strong> <strong>WAN</strong> Environments<br />
Application Note<br />
• Click the Firmware Upgrade icon.<br />
Page 21 of 25<br />
P/N: 01564-001 Rev. A
<strong>NXT</strong> <strong>Controller</strong> <strong>Manual</strong> <strong>IP</strong> <strong>Assignment</strong> <strong>in</strong> <strong>WAN</strong> Environments<br />
Application Note<br />
• Select the firmware revision.<br />
• Click Apply.<br />
• Confirm the upgrade command.<br />
• The upgrade beg<strong>in</strong>s. This process can take several m<strong>in</strong>utes to complete and may have several<br />
pauses dur<strong>in</strong>g the process. You can track progress by monitor<strong>in</strong>g the green Progress Bar and the<br />
Progress Percentage field.<br />
Page 22 of 25<br />
P/N: 01564-001 Rev. A
<strong>NXT</strong> <strong>Controller</strong> <strong>Manual</strong> <strong>IP</strong> <strong>Assignment</strong> <strong>in</strong> <strong>WAN</strong> Environments<br />
Application Note<br />
• When the upgrade is complete you can verify success by click<strong>in</strong>g on the Live Events tab and<br />
review<strong>in</strong>g message status.<br />
7.0 Caveats<br />
If you are configur<strong>in</strong>g controllers that physically will be <strong>in</strong> different time zones the time zone applied<br />
to all controllers is the one associated with the gateway connected to the controllers.<br />
Page 23 of 25<br />
P/N: 01564-001 Rev. A
<strong>NXT</strong> <strong>Controller</strong> <strong>Manual</strong> <strong>IP</strong> <strong>Assignment</strong> <strong>in</strong> <strong>WAN</strong> Environments<br />
Application Note<br />
8.0 Remote Network Information Collection Form<br />
Use one of these forms per controller or create a table/list of your own with this <strong>in</strong>formation.<br />
<strong>Controller</strong> #<br />
Remote Network Information Form<br />
Remote Router <strong>IP</strong> =<br />
Router<br />
Network Mask =<br />
Remote PC <strong>IP</strong> =<br />
<strong>Controller</strong> <strong>IP</strong> =<br />
& 169 . 254 . .<br />
Remote<br />
PC<br />
<strong>NXT</strong><br />
<strong>Controller</strong><br />
& 169 . 254 . 1 .1<br />
(default controller <strong>IP</strong>)<br />
NOTE: All addresses are <strong>in</strong>ternal with<strong>in</strong> the subnet.<br />
Page 24 of 25<br />
P/N: 01564-001 Rev. A
<strong>NXT</strong> <strong>Controller</strong> <strong>Manual</strong> <strong>IP</strong> <strong>Assignment</strong> <strong>in</strong> <strong>WAN</strong> Environments<br />
Application Note<br />
9.0 <strong>NXT</strong> Gateway Network Information Collection Form<br />
<strong>NXT</strong> Gateway Network Information Form<br />
Local Router <strong>IP</strong> =<br />
Router<br />
Network Mask =<br />
<strong>NXT</strong><br />
Gateway<br />
Local<br />
PC<br />
Local PC <strong>IP</strong> =<br />
NOTE: All addresses are <strong>in</strong>ternal with<strong>in</strong> the subnet.<br />
10.0 Contact <strong>Keri</strong> <strong>Systems</strong><br />
<strong>Keri</strong> USA<br />
<strong>Keri</strong> UK, Ireland, Europe<br />
2305 Ber<strong>in</strong>g Drive<br />
San Jose, CA 95131<br />
Unit 17<br />
Park Farm Industrial Estate<br />
Erm<strong>in</strong>e Street<br />
Bunt<strong>in</strong>gford<br />
Herts SG9 9AZ UK<br />
Telephone: (800) 260-5265<br />
Telephone: + 44 (0) 1763 273 243<br />
(408) 435-8400<br />
Fax: (408) 577-1792 Fax:+ 44 (0) 1763 274 106<br />
Web: www.kerisys.com<br />
E-mail: sales@kerisys.com<br />
techsupport@kerisys.com<br />
Web:www.kerisystems.co.uk<br />
E-mail:sales@kerisystems.co.uk<br />
tech-support@kerisystems.co.uk<br />
End of document.<br />
Page 25 of 25<br />
P/N: 01564-001 Rev. A


