EMS-2 Operating Instructions - CONTA-CLIP
EMS-2 Operating Instructions - CONTA-CLIP
EMS-2 Operating Instructions - CONTA-CLIP

You also want an ePaper? Increase the reach of your titles
YUMPU automatically turns print PDFs into web optimized ePapers that Google loves.
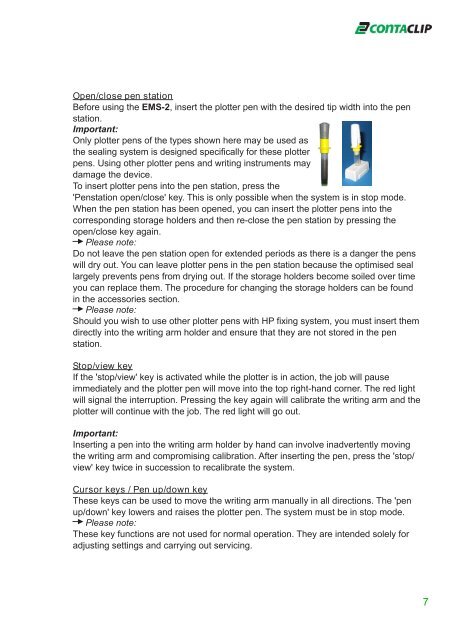
Open/close pen station<br />
Before using the <strong>EMS</strong>-2, insert the plotter pen with the desired tip width into the pen<br />
station.<br />
Important:<br />
Only plotter pens of the types shown here may be used as<br />
the sealing system is designed specifically for these plotter<br />
pens. Using other plotter pens and writing instruments may<br />
damage the device.<br />
To insert plotter pens into the pen station, press the<br />
'Penstation open/close' key. This is only possible when the system is in stop mode.<br />
When the pen station has been opened, you can insert the plotter pens into the<br />
corresponding storage holders and then re-close the pen station by pressing the<br />
open/close key again.<br />
Please note:<br />
Do not leave the pen station open for extended periods as there is a danger the pens<br />
will dry out. You can leave plotter pens in the pen station because the optimised seal<br />
largely prevents pens from drying out. If the storage holders become soiled over time<br />
you can replace them. The procedure for changing the storage holders can be found<br />
in the accessories section.<br />
Please note:<br />
Should you wish to use other plotter pens with HP fixing system, you must insert them<br />
directly into the writing arm holder and ensure that they are not stored in the pen<br />
station.<br />
Stop/view key<br />
If the 'stop/view' key is activated while the plotter is in action, the job will pause<br />
immediately and the plotter pen will move into the top right-hand corner. The red light<br />
will signal the interruption. Pressing the key again will calibrate the writing arm and the<br />
plotter will continue with the job. The red light will go out.<br />
Important:<br />
Inserting a pen into the writing arm holder by hand can involve inadvertently moving<br />
the writing arm and compromising calibration. After inserting the pen, press the 'stop/<br />
view' key twice in succession to recalibrate the system.<br />
Cursor keys / Pen up/down key<br />
These keys can be used to move the writing arm manually in all directions. The 'pen<br />
up/down' key lowers and raises the plotter pen. The system must be in stop mode.<br />
Please note:<br />
These key functions are not used for normal operation. They are intended solely for<br />
adjusting settings and carrying out servicing.<br />
7