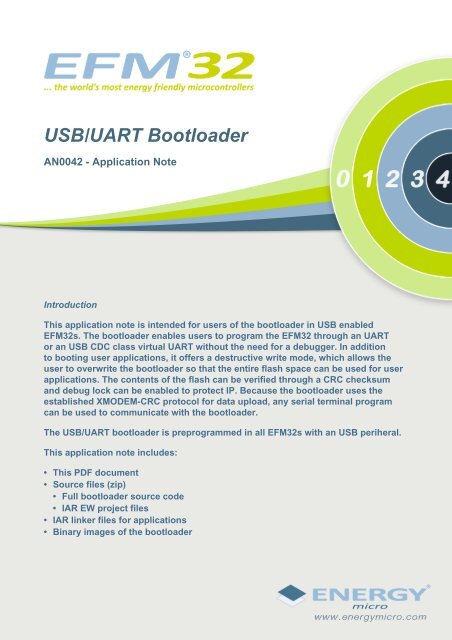
USB/UART Bootloader - AN0042 - Application Note - Energy Micro
USB/UART Bootloader - AN0042 - Application Note - Energy Micro
USB/UART Bootloader - AN0042 - Application Note - Energy Micro

Create successful ePaper yourself
Turn your PDF publications into a flip-book with our unique Google optimized e-Paper software.
...the world's most energy friendly microcontrollers<br />
<strong>USB</strong>/<strong>UART</strong> <strong>Bootloader</strong><br />
<strong>AN0042</strong> - <strong>Application</strong> <strong>Note</strong><br />
Introduction<br />
This application note is intended for users of the bootloader in <strong>USB</strong> enabled<br />
EFM32s. The bootloader enables users to program the EFM32 through an <strong>UART</strong><br />
or an <strong>USB</strong> CDC class virtual <strong>UART</strong> without the need for a debugger. In addition<br />
to booting user applications, it offers a destructive write mode, which allows the<br />
user to overwrite the bootloader so that the entire flash space can be used for user<br />
applications. The contents of the flash can be verified through a CRC checksum<br />
and debug lock can be enabled to protect IP. Because the bootloader uses the<br />
established XMODEM-CRC protocol for data upload, any serial terminal program<br />
can be used to communicate with the bootloader.<br />
The <strong>USB</strong>/<strong>UART</strong> bootloader is preprogrammed in all EFM32s with an <strong>USB</strong> periheral.<br />
This application note includes:<br />
• This PDF document<br />
• Source files (zip)<br />
• Full bootloader source code<br />
• IAR EW project files<br />
• IAR linker files for applications<br />
• Binary images of the bootloader
1 Starting the <strong>Bootloader</strong><br />
1.1 Entering bootloader mode<br />
...the world's most energy friendly microcontrollers<br />
To enter the bootloader DBG_SWCLK must be pulled high and the EFM32 must be reset. If<br />
DBG_SWCLK is low, the bootloader will check the application in the flash. If the application space<br />
contains a valid application the bootloader will run this application. If a valid application is not present,<br />
the bootloader will sleep in EM2 to to conserve power, while periodically checking the bootloader pins.<br />
<strong>Note</strong><br />
DBG_SWDCLK has an internal pull-down. Leaving this pin unconnected will not invoke the<br />
bootloader.<br />
1.2 Initializing communication with the bootloader<br />
<strong>Bootloader</strong> communication is initialized by transmitting an uppercase 'U' on the <strong>UART</strong> (which starts the<br />
autobaud algorithm), or by enumeration of the <strong>USB</strong> CDC device. Whichever happens first will govern the<br />
rest of the bootloader operation. The bootloader use GPIO pins E11 and E10 for <strong>UART</strong> communication.<br />
The <strong>UART</strong> use 1 stop bit, no parity and 8 data bits. To enable a wide variety of different terminal emulators<br />
the bootloader uses an autobaud algorithm (not applicable if using the <strong>USB</strong> serial port). Upon reception<br />
of an uppercase 'U' on the <strong>UART</strong>, the host baudrate will be measured and <strong>UART</strong> baudrate adjusts<br />
accordingly. The autobaud algorithm works with baudrates in the range from 2400 to 115200. Once the<br />
bootloader has completed the autobaud sequence, it will print the bootloader version and chip unique ID:<br />
BOOTLOADER version x.yy, Chip ID F08AB6000B153525<br />
If using the <strong>USB</strong> <strong>UART</strong> you will not see the version string. Issue command 'i' (see below) to check<br />
version information.<br />
<strong>Note</strong><br />
If neither the autobaud algorithm nor <strong>USB</strong> enumeration completes within 30 seconds, the<br />
chip will be reset.<br />
If using a Windows host and you want to use the <strong>USB</strong> CDC virtual <strong>UART</strong>, a <strong>USB</strong> CDC<br />
device driver must be installed. This is most easily done by opening the Device Manager,<br />
rigth-clicking on the device and selecting Update Driver Software... Do a manual install and<br />
browse to the location of the EFM32-Cdc.inf file.<br />
1.3 Command line interface<br />
The command line interface uses single letter characters as commands. The following commands are<br />
supported:<br />
u<br />
d<br />
t<br />
p<br />
b<br />
l<br />
Upload application. This command lets the user upload an application to the flash, while keeping<br />
the bootloader intact. For an application to work correctly it must use a linker file which places the<br />
application start address at 0x4000. The application is transferred using the XMODEM-CRC protocol.<br />
Destructive upload. This command lets the user upload an application to flash, overwriting the<br />
bootloader. The application is transferred using the XMODEM-CRC protocol.<br />
Upload to user page. This command lets the user write to the user information page. The data is<br />
uploaded using the XMODEM-CRC protocol.<br />
Upload to lock page. This command lets the user write to the lock bits information page. The data<br />
is uploaded using the XMODEM-CRC protocol.<br />
Boot application. This command will start the uploaded application.<br />
Debug lock. This command sets the debug lock bit in the lock page. The EFM32 will be locked for<br />
debugging.<br />
2012-11-12 - an0042_Rev1.02 2 www.energymicro.com
...the world's most energy friendly microcontrollers<br />
v<br />
c<br />
n<br />
m<br />
r<br />
i<br />
Verify flash checksum. This command calculates the CRC-16 checksum of the entire flash and prints<br />
it. This is suitable for use in conjunction with the 'd' command.<br />
Verify application checksum. This command calculates the CRC-16 checksum of the application and<br />
prints it. This is suitable for use in conjunction with the 'u' command.<br />
Verify user page checksum. This command calculates the CRC-16 checksum of the user page and<br />
prints it. This is suitable for use in conjunction with the 't' command.<br />
Verify lock page checksum. This command calculates the CRC-16 checksum of the lock page and<br />
prints it. This is suitable for use in conjunction with the 'p' command.<br />
Reset the EFM32<br />
Print bootloader version and chip unique ID.<br />
<strong>Note</strong><br />
The 'b' and 'r' commands will when using the <strong>USB</strong> CDC virtual <strong>UART</strong>, delay 7 seconds<br />
before the commands are actually performed. The first 5 seconds to allow an operator to<br />
disconnect the <strong>UART</strong> connection, then the bootloader performs an <strong>USB</strong> soft disconnect<br />
before waiting an additional 2 seconds to allow time for the host OS to tear down the <strong>USB</strong><br />
CDC driver stack.<br />
The reason for this procedure is that most terminal emulators are unaware of the concepts<br />
of <strong>USB</strong> CDC serial ports, which can be detached any time.<br />
2012-11-12 - an0042_Rev1.02 3 www.energymicro.com
2 Uploading applications<br />
...the world's most energy friendly microcontrollers<br />
To upload an application to the EFM32 either the 'u' or 'd' command must be used. After pressing the key<br />
use the terminal software built-in support for XMODEM-CRC to transfer the file. Any terminal software<br />
may be used, as long as it supports XMODEM-CRC transfers.<br />
Figure 2.1 (p. 4) Shows an example of transferring a file using the built in transfer support in Tera<br />
Term.<br />
Figure 2.1. Transferring a file using XMODEM-CRC with Tera Term on Windows XP.<br />
2.1 Creating applications for use with the bootloader<br />
There are two possibilities when uploading applications using the bootloader; destructive and regular<br />
upload. Destructive upload will overwrite the bootloader. No additional steps are required for creating<br />
applications in this case. Regular uploading keeps the bootloader. This allows future upgrades using<br />
the bootloader. However; the applications must be prepared for this to work. For applications to work<br />
with the bootloader they must be created with a starting address of 0x4000. The reason for this is that<br />
the bootloader itself occupies this flash area. To achieve this the linker file must be changed from the<br />
default flash start address of 0x0.<br />
2.1.1 Creating an application with IAR<br />
To create an application using IAR use the included linker files for your project. This will set up the correct<br />
starting address for the binary. In the project options menu, select "Output Converter" and "Generate<br />
additional output". Select the "binary" output format. The resulting binary can be used with the <strong>UART</strong><br />
<strong>Bootloader</strong>.<br />
2.1.2 Creating an application with Keil uVision 4/MDK-ARM<br />
To create applications with Keil uVision 4/MDK-ARM, you must first change the target settings for your<br />
project. In the options dialog change IROM1 to a start of 0x4000 and subtract 0x4000 from the size field.<br />
To generate a binary output file, you can use the command line utility "fromelf.exe", that's usually installed<br />
under<br />
C:\Keil\ARM\BIN40\fromelf.exe<br />
2012-11-12 - an0042_Rev1.02 4 www.energymicro.com
See the "Realview Utilities Guide" in the uVision Help for details.<br />
Figure 2.2. Setting up Keil uVision 4/MDK-ARM<br />
...the world's most energy friendly microcontrollers<br />
<strong>Note</strong><br />
If you need to debug your application while using one of these linker files, you must<br />
explicitly set the position of the vector table in your code. This can be done with:<br />
SCB->VTOR=0x4000<br />
In the released application this is not necessary as VTOR is set by the bootloader itself,<br />
before starting the application. (See Boot.c for details.)<br />
2.2 Non-destructive application upload<br />
The 'u' command will upload an application without overwriting the bootloader itself. Use your terminal<br />
software to transfer the application binary to the chip. After completing the upload you might wish to<br />
verify the correctness by calculating the CRC-16 on the uploaded binary. This can be achieved by the<br />
'verify application checksum' command (See Section 3.1 (p. 7) ). To start the application from the<br />
bootloader use the 'boot' command ('b' - see Section 4.1 (p. 8) ).<br />
2.3 Destructive application upload<br />
The 'd' command will start a destructive upload. Use your terminal software to transfer the binary to the<br />
chip. Destructive upload differs from regular uploads in that it overwrites the bootloader. This enables<br />
you to upload another bootloader, or, if a bootloader is not needed, to reclaim the flash occupied by<br />
the bootloader. After completing the upload you might wish to verify the correctness by calculating the<br />
CRC-16 checksum. This can be achieved by the 'verify flash content' command (see Section 3.2 (p.<br />
7) ). To start the application, you can use the 'reset' command ('r' - see Section 4.2 (p. 8) ).<br />
2.4 Writing to the user information page<br />
The 't' command enables you to write data to the user information page. Use your terminal software to<br />
transfer the user data to the user information page.<br />
2012-11-12 - an0042_Rev1.02 5 www.energymicro.com
2.5 Writing to the lock bits information page<br />
...the world's most energy friendly microcontrollers<br />
The 'p' command enables you to write data to the lock bits information page. Use your terminal software<br />
to transfer the user data to the user information page. This command enables you to lock pages in flash<br />
from writing and erasing, but does not protect contents. See the reference manual for details on lock bits.<br />
2012-11-12 - an0042_Rev1.02 6 www.energymicro.com
3 Verify upload<br />
...the world's most energy friendly microcontrollers<br />
<strong>Note</strong><br />
XMODEM-CRC transfers data in blocks of 128 bytes. If the binary's size is not a multiple of<br />
128 bytes, the terminal program will pad the remaining bytes. Refer to the terminal program's<br />
documentation for details.<br />
3.1 Verify application checksum<br />
The 'c' command will calculate and print the CRC-16 checksum of the flash from base 0x4000 (beginning<br />
of application) to the end of flash space.<br />
3.2 Verify flash content<br />
The 'v' command will calculate and print the CRC-16 checksum of the flash from base 0x0 (beginning<br />
of flash space) to the end of the flash space.<br />
2012-11-12 - an0042_Rev1.02 7 www.energymicro.com
4 Miscellaneous commands<br />
4.1 Boot application<br />
...the world's most energy friendly microcontrollers<br />
The 'b' command will boot the uploaded application in a similar manner as if the bootloader had not been<br />
enabled by pulling the debug pins high. The bootloader does this by first setting the Cortex-M3's vector<br />
table to the base of the application. Then, it reads out the first word in the new vector table and sets SP<br />
accordingly. Finally, it performs a vector reset by setting PC to the value defined by the reset vector.<br />
4.2 Reset the Device;<br />
The 'r' command resets the device. If this command is issued after a destructive upload, the new binary<br />
will be started. If this command is issued after a regular upload and the debug pins are not pulled high,<br />
the application will start. Otherwise, the bootloader will restart.<br />
4.3 Debug lock<br />
The 'l' command will lock the debug interface. After locking regular debugging facilities will not be<br />
accessible, only a device erase is possible through the debug interface.<br />
<strong>Note</strong><br />
The device must be reset once before the debug interface is locked. This command will<br />
return 'OK' if the locking was successful, 'Fail' otherwise. If debug locking fails, please make<br />
sure that SWDIO is not connected and SWDCLK is tied high.<br />
2012-11-12 - an0042_Rev1.02 8 www.energymicro.com
5 Revision History<br />
...the world's most energy friendly microcontrollers<br />
5.1 Revision 1.02<br />
2012-11-12<br />
Adapted software projects to new kit-driver and bsp structure.<br />
5.2 Revision 1.01<br />
2012-04-20<br />
Adapted software projects to new peripheral library naming and CMSIS_V3.<br />
5.3 Revision 1.00<br />
2011-11-17<br />
Initial revision.<br />
2012-11-12 - an0042_Rev1.02 9 www.energymicro.com
A Disclaimer and Trademarks<br />
A.1 Disclaimer<br />
...the world's most energy friendly microcontrollers<br />
<strong>Energy</strong> <strong>Micro</strong> AS intends to provide customers with the latest, accurate, and in-depth documentation<br />
of all peripherals and modules available for system and software implementers using or intending to<br />
use the <strong>Energy</strong> <strong>Micro</strong> products. Characterization data, available modules and peripherals, memory<br />
sizes and memory addresses refer to each specific device, and "Typical" parameters provided can and<br />
do vary in different applications. <strong>Application</strong> examples described herein are for illustrative purposes<br />
only. <strong>Energy</strong> <strong>Micro</strong> reserves the right to make changes without further notice and limitation to product<br />
information, specifications, and descriptions herein, and does not give warranties as to the accuracy<br />
or completeness of the included information. <strong>Energy</strong> <strong>Micro</strong> shall have no liability for the consequences<br />
of use of the information supplied herein. This document does not imply or express copyright licenses<br />
granted hereunder to design or fabricate any integrated circuits. The products must not be used within<br />
any Life Support System without the specific written consent of <strong>Energy</strong> <strong>Micro</strong>. A "Life Support System"<br />
is any product or system intended to support or sustain life and/or health, which, if it fails, can be<br />
reasonably expected to result in significant personal injury or death. <strong>Energy</strong> <strong>Micro</strong> products are generally<br />
not intended for military applications. <strong>Energy</strong> <strong>Micro</strong> products shall under no circumstances be used in<br />
weapons of mass destruction including (but not limited to) nuclear, biological or chemical weapons, or<br />
missiles capable of delivering such weapons.<br />
A.2 Trademark Information<br />
<strong>Energy</strong> <strong>Micro</strong>, EFM32, EFR, logo and combinations thereof, and others are the registered trademarks or<br />
trademarks of <strong>Energy</strong> <strong>Micro</strong> AS. ARM, CORTEX, THUMB are the registered trademarks of ARM Limited.<br />
Other terms and product names may be trademarks of others.<br />
2012-11-12 - an0042_Rev1.02 10 www.energymicro.com
B Contact Information<br />
...the world's most energy friendly microcontrollers<br />
B.1 <strong>Energy</strong> <strong>Micro</strong> Corporate Headquarters<br />
Postal Address Visitor Address Technical Support<br />
<strong>Energy</strong> <strong>Micro</strong> AS<br />
P.O. Box 4633 Nydalen<br />
N-0405 Oslo<br />
NORWAY<br />
www.energymicro.com<br />
Phone: +47 23 00 98 00<br />
Fax: + 47 23 00 98 01<br />
B.2 Global Contacts<br />
<strong>Energy</strong> <strong>Micro</strong> AS<br />
Sandakerveien 118<br />
N-0484 Oslo<br />
NORWAY<br />
support.energymicro.com<br />
Phone: +47 40 10 03 01<br />
Visit www.energymicro.com for information on global distributors and representatives or contact<br />
sales@energymicro.com for additional information.<br />
Americas Europe, Middle East and Africa Asia and Pacific<br />
www.energymicro.com/americas www.energymicro.com/emea www.energymicro.com/asia<br />
2012-11-12 - an0042_Rev1.02 11 www.energymicro.com
...the world's most energy friendly microcontrollers<br />
Table of Contents<br />
1. Starting the <strong>Bootloader</strong> ............................................................................................................................... 2<br />
1.1. Entering bootloader mode ................................................................................................................ 2<br />
1.2. Initializing communication with the bootloader ...................................................................................... 2<br />
1.3. Command line interface ................................................................................................................... 2<br />
2. Uploading applications ............................................................................................................................... 4<br />
2.1. Creating applications for use with the bootloader .................................................................................. 4<br />
2.2. Non-destructive application upload ..................................................................................................... 5<br />
2.3. Destructive application upload ........................................................................................................... 5<br />
2.4. Writing to the user information page ................................................................................................... 5<br />
2.5. Writing to the lock bits information page .............................................................................................. 6<br />
3. Verify upload ............................................................................................................................................ 7<br />
3.1. Verify application checksum .............................................................................................................. 7<br />
3.2. Verify flash content ......................................................................................................................... 7<br />
4. Miscellaneous commands ........................................................................................................................... 8<br />
4.1. Boot application .............................................................................................................................. 8<br />
4.2. Reset the Device; .......................................................................................................................... 8<br />
4.3. Debug lock .................................................................................................................................... 8<br />
5. Revision History ........................................................................................................................................ 9<br />
5.1. Revision 1.02 ................................................................................................................................. 9<br />
5.2. Revision 1.01 ................................................................................................................................. 9<br />
5.3. Revision 1.00 ................................................................................................................................. 9<br />
A. Disclaimer and Trademarks ....................................................................................................................... 10<br />
A.1. Disclaimer ................................................................................................................................... 10<br />
A.2. Trademark Information ................................................................................................................... 10<br />
B. Contact Information ................................................................................................................................. 11<br />
B.1. <strong>Energy</strong> <strong>Micro</strong> Corporate Headquarters .............................................................................................. 11<br />
B.2. Global Contacts ............................................................................................................................ 11<br />
2012-11-12 - an0042_Rev1.02 12 www.energymicro.com
...the world's most energy friendly microcontrollers<br />
List of Figures<br />
2.1. Transferring a file using XMODEM-CRC with Tera Term on Windows XP. ......................................................... 4<br />
2.2. Setting up Keil uVision 4/MDK-ARM ........................................................................................................... 5<br />
2012-11-12 - an0042_Rev1.02 13 www.energymicro.com