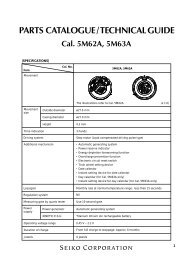
PDF Version - The American Watchmakers-Clockmakers Institute
PDF Version - The American Watchmakers-Clockmakers Institute
PDF Version - The American Watchmakers-Clockmakers Institute

You also want an ePaper? Increase the reach of your titles
YUMPU automatically turns print PDFs into web optimized ePapers that Google loves.
<strong>The</strong> Tourbillon Carriage, New Beginnings<br />
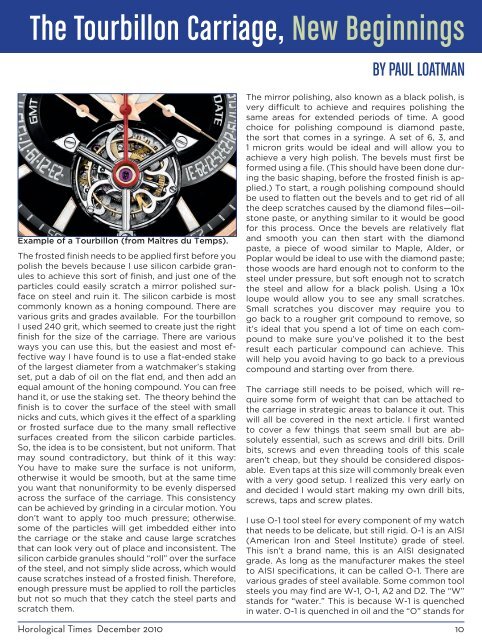
Example of a Tourbillon (from Maîtres du Temps).<br />
<strong>The</strong> frosted finish needs to be applied first before you<br />
polish the bevels because I use silicon carbide granules<br />
to achieve this sort of finish, and just one of the<br />
particles could easily scratch a mirror polished surface<br />
on steel and ruin it. <strong>The</strong> silicon carbide is most<br />
commonly known as a honing compound. <strong>The</strong>re are<br />
various grits and grades available. For the tourbillon<br />
I used 240 grit, which seemed to create just the right<br />
finish for the size of the carriage. <strong>The</strong>re are various<br />
ways you can use this, but the easiest and most effective<br />
way I have found is to use a flat-ended stake<br />
of the largest diameter from a watchmaker’s staking<br />
set, put a dab of oil on the flat end, and then add an<br />
equal amount of the honing compound. You can free<br />
hand it, or use the staking set. <strong>The</strong> theory behind the<br />
finish is to cover the surface of the steel with small<br />
nicks and cuts, which gives it the effect of a sparkling<br />
or frosted surface due to the many small reflective<br />
surfaces created from the silicon carbide particles.<br />
So, the idea is to be consistent, but not uniform. That<br />
may sound contradictory, but think of it this way:<br />
You have to make sure the surface is not uniform,<br />
otherwise it would be smooth, but at the same time<br />
you want that nonuniformity to be evenly dispersed<br />
across the surface of the carriage. This consistency<br />
can be achieved by grinding in a circular motion. You<br />
don’t want to apply too much pressure; otherwise.<br />
some of the particles will get imbedded either into<br />
the carriage or the stake and cause large scratches<br />
that can look very out of place and inconsistent. <strong>The</strong><br />
silicon carbide granules should “roll” over the surface<br />
of the steel, and not simply slide across, which would<br />
cause scratches instead of a frosted finish. <strong>The</strong>refore,<br />
enough pressure must be applied to roll the particles<br />
but not so much that they catch the steel parts and<br />
scratch them.<br />
By Paul Loatman<br />
<strong>The</strong> mirror polishing, also known as a black polish, is<br />
very difficult to achieve and requires polishing the<br />
same areas for extended periods of time. A good<br />
choice for polishing compound is diamond paste,<br />
the sort that comes in a syringe. A set of 6, 3, and<br />
1 micron grits would be ideal and will allow you to<br />
achieve a very high polish. <strong>The</strong> bevels must first be<br />
formed using a file. (This should have been done during<br />
the basic shaping, before the frosted finish is applied.)<br />
To start, a rough polishing compound should<br />
be used to flatten out the bevels and to get rid of all<br />
the deep scratches caused by the diamond files—oilstone<br />
paste, or anything similar to it would be good<br />
for this process. Once the bevels are relatively flat<br />
and smooth you can then start with the diamond<br />
paste, a piece of wood similar to Maple, Alder, or<br />
Poplar would be ideal to use with the diamond paste;<br />
those woods are hard enough not to conform to the<br />
steel under pressure, but soft enough not to scratch<br />
the steel and allow for a black polish. Using a 10x<br />
loupe would allow you to see any small scratches.<br />
Small scratches you discover may require you to<br />
go back to a rougher grit compound to remove, so<br />
it’s ideal that you spend a lot of time on each compound<br />
to make sure you’ve polished it to the best<br />
result each particular compound can achieve. This<br />
will help you avoid having to go back to a previous<br />
compound and starting over from there.<br />
<strong>The</strong> carriage still needs to be poised, which will require<br />
some form of weight that can be attached to<br />
the carriage in strategic areas to balance it out. This<br />
will all be covered in the next article. I first wanted<br />
to cover a few things that seem small but are absolutely<br />
essential, such as screws and drill bits. Drill<br />
bits, screws and even threading tools of this scale<br />
aren’t cheap, but they should be considered disposable.<br />
Even taps at this size will commonly break even<br />
with a very good setup. I realized this very early on<br />
and decided I would start making my own drill bits,<br />
screws, taps and screw plates.<br />
I use O-1 tool steel for every component of my watch<br />
that needs to be delicate, but still rigid. O-1 is an AISI<br />
(<strong>American</strong> Iron and Steel <strong>Institute</strong>) grade of steel.<br />
This isn’t a brand name, this is an AISI designated<br />
grade. As long as the manufacturer makes the steel<br />
to AISI specifications, it can be called O-1. <strong>The</strong>re are<br />
various grades of steel available. Some common tool<br />
steels you may find are W-1, O-1, A2 and D2. <strong>The</strong> “W”<br />
stands for “water.” This is because W-1 is quenched<br />
in water. O-1 is quenched in oil and the “O” stands for<br />
Horological Times December 2010 10