How to Configure WSJT with PowerSDR and VAC How to Configure ...
How to Configure WSJT with PowerSDR and VAC How to Configure ...
How to Configure WSJT with PowerSDR and VAC How to Configure ...

You also want an ePaper? Increase the reach of your titles
YUMPU automatically turns print PDFs into web optimized ePapers that Google loves.
<strong>How</strong> <strong>to</strong> <strong>Configure</strong> <strong>WSJT</strong> <strong>with</strong> <strong>PowerSDR</strong> <strong>and</strong> <strong>VAC</strong><br />
<strong>How</strong> <strong>to</strong> <strong>Configure</strong> <strong>WSJT</strong> <strong>with</strong> <strong>PowerSDR</strong> <strong>and</strong> <strong>VAC</strong><br />
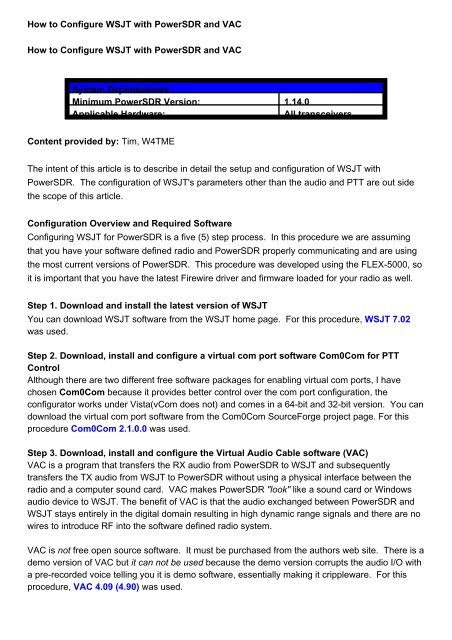
System Dependencies<br />
Minimum <strong>PowerSDR</strong> Version: 1.14.0<br />
Applicable Hardware:<br />
All transceivers<br />
Content provided by: Tim, W4TME<br />
The intent of this article is <strong>to</strong> describe in detail the setup <strong>and</strong> configuration of <strong>WSJT</strong> <strong>with</strong><br />
<strong>PowerSDR</strong>. The configuration of <strong>WSJT</strong>'s parameters other than the audio <strong>and</strong> PTT are out side<br />
the scope of this article.<br />
Configuration Overview <strong>and</strong> Required Software<br />
Configuring <strong>WSJT</strong> for <strong>PowerSDR</strong> is a five (5) step process. In this procedure we are assuming<br />
that you have your software defined radio <strong>and</strong> <strong>PowerSDR</strong> properly communicating <strong>and</strong> are using<br />
the most current versions of <strong>PowerSDR</strong>. This procedure was developed using the FLEX-5000, so<br />
it is important that you have the latest Firewire driver <strong>and</strong> firmware loaded for your radio as well.<br />
Step 1. Download <strong>and</strong> install the latest version of <strong>WSJT</strong><br />
You can download <strong>WSJT</strong> software from the <strong>WSJT</strong> home page. For this procedure, <strong>WSJT</strong> 7.02<br />
was used.<br />
Step 2. Download, install <strong>and</strong> configure a virtual com port software Com0Com for PTT<br />
Control<br />
Although there are two different free software packages for enabling virtual com ports, I have<br />
chosen Com0Com because it provides better control over the com port configuration, the<br />
configura<strong>to</strong>r works under Vista(vCom does not) <strong>and</strong> comes in a 64-bit <strong>and</strong> 32-bit version. You can<br />
download the virtual com port software from the Com0Com SourceForge project page. For this<br />
procedure Com0Com 2.1.0.0 was used.<br />
Step 3. Download, install <strong>and</strong> configure the Virtual Audio Cable software (<strong>VAC</strong>)<br />
<strong>VAC</strong> is a program that transfers the RX audio from <strong>PowerSDR</strong> <strong>to</strong> <strong>WSJT</strong> <strong>and</strong> subsequently<br />
transfers the TX audio from <strong>WSJT</strong> <strong>to</strong> <strong>PowerSDR</strong> <strong>with</strong>out using a physical interface between the<br />
radio <strong>and</strong> a computer sound card. <strong>VAC</strong> makes <strong>PowerSDR</strong> "look" like a sound card or Windows<br />
audio device <strong>to</strong> <strong>WSJT</strong>. The benefit of <strong>VAC</strong> is that the audio exchanged between <strong>PowerSDR</strong> <strong>and</strong><br />
<strong>WSJT</strong> stays entirely in the digital domain resulting in high dynamic range signals <strong>and</strong> there are no<br />
wires <strong>to</strong> introduce RF in<strong>to</strong> the software defined radio system.<br />
<strong>VAC</strong> is not free open source software. It must be purchased from the authors web site. There is a<br />
demo version of <strong>VAC</strong> but it can not be used because the demo version corrupts the audio I/O <strong>with</strong><br />
a pre-recorded voice telling you it is demo software, essentially making it crippleware. For this<br />
procedure, <strong>VAC</strong> 4.09 (4.90) was used.
NOTE: Some earlier version of <strong>VAC</strong> less than 4.08 have been known not <strong>to</strong> work properly<br />
<strong>with</strong> <strong>WSJT</strong>.<br />
Step 4. <strong>Configure</strong> <strong>PowerSDR</strong> <strong>to</strong> use <strong>VAC</strong> <strong>and</strong> Com0Com <strong>to</strong> interface <strong>with</strong> <strong>WSJT</strong><br />
Once the required software is downloaded <strong>and</strong> installed on your computer, the next step is <strong>to</strong><br />
configure <strong>PowerSDR</strong> <strong>to</strong> use the <strong>VAC</strong> virtual audio cable for audio transfer <strong>and</strong> <strong>to</strong> configure a PTT<br />
line so that <strong>WSJT</strong> can key the transceiver. For this procedure <strong>PowerSDR</strong> 1.14.0 was used.<br />
Step 5. <strong>Configure</strong> the Audio <strong>and</strong> PTT ports in <strong>WSJT</strong><br />
The final step is <strong>to</strong> configure PTT control <strong>and</strong> the audio input <strong>and</strong> output connections for <strong>WSJT</strong>.<br />
This is probably the most confusing part of the <strong>WSJT</strong> configuration since the audio setup interface<br />
is very rudimentary.<br />
Step 1. Download <strong>and</strong> install the latest version of <strong>WSJT</strong><br />
Using the URL listed above in Step 1 of the Configuration Overview <strong>and</strong> Required Software<br />
section for the <strong>WSJT</strong> home page download <strong>and</strong> install <strong>WSJT</strong>. As of the date of this article, <strong>WSJT</strong><br />
5.9.7 (r383) is the released version of the software. I am using the newer beta release <strong>WSJT</strong> 7.02<br />
<strong>and</strong> it seems <strong>to</strong> work well.<br />
The installation instructions for <strong>WSJT</strong> are located in the <strong>WSJT</strong>6 User Guide <strong>and</strong> Reference<br />
Manual that can be downloaded from the <strong>WSJT</strong> web site's documentation pages. There are<br />
translations of this manual in several different languages.<br />
For additional information regarding the installation <strong>and</strong> initial setup of <strong>WSJT</strong>, please see The<br />
Complete Bozo's Guide <strong>to</strong> HF JT65A (a work in progress) by Andy K3UK. This is a very<br />
comprehensive, well written <strong>and</strong> humorous guide for setting up <strong>WSJT</strong> for HF using the JT65A<br />
mode of operation.<br />
Step 2. Download, install <strong>and</strong> configure a virtual com port software Com0Com for PTT<br />
Control<br />
If you are unfamiliar <strong>with</strong> the concept of virtual com port pairs that are sometimes called virtual null<br />
modem cables, you can refer <strong>to</strong> the Knowledge Center article, What is a virtual com port or null<br />
modem emula<strong>to</strong>r, for a detailed description of how virtual com port software works.<br />
As noted above, in this example, Com0Com virtual com port software is used. You can refer <strong>to</strong><br />
this Knowledge Center article, Virtual Serial Port Driver (com0com) for additional information about<br />
Com0Com.<br />
Using the Knowledge Center article, Com0Com Installation <strong>and</strong> Configuration Guide, download<br />
<strong>and</strong> execute the instructions for obtaining the Com0Com software, installing, configuring <strong>and</strong><br />
optimizing a virtual com port pair. For this configuration only one pair is required. I have<br />
configured my virtual com port pair as 8/18.<br />
Step 3. Download, install <strong>and</strong> configure the Virtual Audio Cable software (<strong>VAC</strong>)<br />
As noted above, you must purchase <strong>VAC</strong> as it is a commercial product. Using the URL listed<br />
above in Step 3 of the Configuration Overview <strong>and</strong> Required Software section for the <strong>VAC</strong> home<br />
page you can purchase your copy of <strong>VAC</strong> if you have not already done so. If you have <strong>VAC</strong> 4.x,
ut it is not version 4.09, you are entitled <strong>to</strong> get minor version upgrades. To get them, you must<br />
contact the company or software distribu<strong>to</strong>r from whom you purchased <strong>VAC</strong> from initially as the<br />
upgrades are not directly available from the <strong>VAC</strong> home page. This procedure has not been tested<br />
<strong>with</strong> the 3.x version of <strong>VAC</strong> <strong>and</strong> some older versions of <strong>VAC</strong> 4.x have been reported not <strong>to</strong> work<br />
for whatever reason.<br />
The <strong>VAC</strong> package is distributed as a ZIP archive. Simply unpack it in<strong>to</strong> an empty folder, run<br />
setup.exe application <strong>and</strong> follow the instructions displayed. If you are installing <strong>VAC</strong> for the first<br />
time, please review the readme.txt <strong>and</strong> vac.chm (Windows Help) files before installation. If you<br />
have already installed previous version of <strong>VAC</strong> 4.x, don't forget <strong>to</strong> uninstall it before installation.<br />
Using the Knowledge Center article, <strong>How</strong> <strong>to</strong> Setup Virtual Audio Cable (<strong>VAC</strong>) 4.0x <strong>with</strong> <strong>PowerSDR</strong><br />
1.x, execute steps 1 through 3 for the instructions <strong>to</strong> configure the two (2) <strong>VAC</strong> audio cables. The<br />
instruction in the KC article represent a very "conservative" configuration. For the <strong>WSJT</strong><br />
configuration, we will use a more optimized configuration.<br />
Make the following changes:<br />
1. Ms per Int = 5<br />
2. Stream Fmt = Cable Range<br />
3. BPS = 8 .. 16<br />
Step 4. <strong>Configure</strong> <strong>PowerSDR</strong> <strong>to</strong> use <strong>VAC</strong> <strong>and</strong> Com0Com <strong>to</strong> interface <strong>with</strong> <strong>WSJT</strong><br />
<strong>Configure</strong> the <strong>PowerSDR</strong> sampling rate <strong>to</strong> 96 KHz <strong>and</strong> the audio buffers <strong>to</strong> 1024. Make sure the<br />
FLEX-5000 Firewire device driver is set <strong>to</strong> the same parameters <strong>and</strong> SafeMode 1 is the operating<br />
mode. If you are unsure how <strong>to</strong> do this operation, refer <strong>to</strong> the Knowledge Center article <strong>How</strong> <strong>to</strong><br />
<strong>Configure</strong> Hardware Sampling Rate, Hardware Buffers <strong>and</strong> Operation Mode in the FLEX-5000<br />
Control Panel.<br />
Using the same Knowledge Center article referenced in Step 3, <strong>How</strong> <strong>to</strong> Setup Virtual Audio Cable<br />
(<strong>VAC</strong>) 4.0x <strong>with</strong> <strong>PowerSDR</strong> 1.x, execute steps 4 through 6 of the instructions <strong>to</strong> configure the<br />
<strong>PowerSDR</strong> <strong>VAC</strong> Audio parameters. As <strong>with</strong> Step 3, we need <strong>to</strong> modify the default configuration <strong>to</strong><br />
a more optimized one for <strong>WSJT</strong>.<br />
Make the following changes:<br />
1. Driver = Windows WDM-KS<br />
2. Virtual Audio Cable Setup (Input) = Virtual Cable 1<br />
3. Virtual Audio Cable Setup (Output) = Virtual cable 2<br />
NOTE: Do not worry about the TX <strong>and</strong> RX Gain (dB) values, those will be set later<br />
<strong>Configure</strong> <strong>PowerSDR</strong> <strong>to</strong> use a com port for external keying by configuring. <strong>PowerSDR</strong> will use the<br />
virtual com port 18 of the virtual comport pair 8/18.<br />
1.<br />
2.<br />
3.<br />
4.<br />
5.<br />
6.<br />
Start <strong>PowerSDR</strong> <strong>and</strong> open the Setup form<br />
Select the CAT Control tab.<br />
In the PTT Control section, click on the drop down box <strong>and</strong> select the virtual com port of the<br />
virtual com port pair defied previously in a step above. In this example I used COM18.<br />
Check both the RTS <strong>and</strong> DTR check boxes.<br />
Check the Enable PTT check box.<br />
Check on the Apply but<strong>to</strong>n <strong>and</strong> close the Setup form<br />
Step 5. <strong>Configure</strong> the Audio <strong>and</strong> PTT ports in <strong>WSJT</strong>
First, we will set up the PTT port for <strong>WSJT</strong> since that is the most straightforward process.<br />
PTT Port Configuration<br />
1. Start <strong>WSJT</strong><br />
2. From the main <strong>WSJT</strong> window (GUI), left click on Setup <strong>and</strong> choose Options<br />
3. In the Station Parameters Section, enter 8, the other half of the 8/18 virtual com port pair<br />
defined previously.<br />
Now comes the part that isn't so intuitive; setting up the audio input <strong>and</strong> output channels in <strong>WSJT</strong><br />
Audio Channel Configuration<br />
When <strong>WSJT</strong> is started, Windows comm<strong>and</strong> window (aka "dos" box) is displayed that shows all of<br />
the audio devices configured on your computer. There can be a lot of them. The ones that<br />
concern us are the Virtual Cable 1 <strong>and</strong> Virtual Cable 2 which are the <strong>VAC</strong> audio channels for<br />
<strong>PowerSDR</strong>. See the screen shot below<br />
What we have <strong>to</strong> do is set up <strong>WSJT</strong> so that the <strong>PowerSDR</strong> <strong>VAC</strong>output channel (Virtual cable 2 in<br />
this example) is configured <strong>to</strong> send audio <strong>to</strong> the <strong>WSJT</strong> INPUT channel. Since the audio is bidirectional<br />
the <strong>PowerSDR</strong> <strong>VAC</strong> input channel (Virtual cable 1 in this example) must be<br />
configured <strong>to</strong> receive audio from the <strong>WSJT</strong> OUTPUT channelas well.<br />
Using the display shown above, the <strong>WSJT</strong> input channels are devices numbered 0 <strong>to</strong> 4 (NOTE:<br />
audio devices 0-4 have "0" output channels). Since the <strong>PowerSDR</strong> <strong>VAC</strong> output (<strong>VAC</strong> virtual<br />
cable 2) needs <strong>to</strong> be directed <strong>to</strong> the <strong>WSJT</strong> input, we need <strong>to</strong> select audio device 4 for the <strong>WSJT</strong><br />
input.<br />
Again, using the display shown above, the <strong>WSJT</strong> output channels are devices numbered 5 <strong>to</strong> 10 (<br />
NOTE: audio devices 5-10 have "0" input channels). Since the <strong>PowerSDR</strong> <strong>VAC</strong> input (<strong>VAC</strong><br />
virtual cable 1) needs <strong>to</strong> receive audio from the <strong>WSJT</strong> output, we need <strong>to</strong> select audio device 9<br />
for the <strong>WSJT</strong> output.<br />
- <strong>WSJT</strong> Input = <strong>VAC</strong> Output (virtual cable 2) = Audio Device #4<br />
- <strong>WSJT</strong> Output = <strong>VAC</strong> Input (virtual cable1) = Audio Device #9<br />
===>>> Do NOT use the audio channels labeled FlexRadio Flex-5000 Audio or FlexRadioFlex-<br />
5000 SPDIF/AC3.<br />
Now that we know (hopefully) what audio devices are required, we have <strong>to</strong> set them up in <strong>WSJT</strong>:<br />
1. Start <strong>WSJT</strong><br />
2. From the main <strong>WSJT</strong> window (GUI), left click on Setup <strong>and</strong> choose Options<br />
3. Enter the number 4 in the Audio In Station Parameters data entry field<br />
4. Enter the number 9 in the Audio Out Station Parameters data entry field<br />
5. Close the Options dialog box <strong>and</strong> shut down <strong>WSJT</strong><br />
6. Restart <strong>WSJT</strong><br />
7. Verify that the devices listed in the "Will Open Devices" line reports Input=4 <strong>and</strong> Output=9<br />
(See the screen shot above)
NOTE: The ordering of the audio devices is not permanent. Adding or changing an audio<br />
device on your computer WILL change the number associated <strong>with</strong> the audio device<br />
requiring you <strong>to</strong> set the audio channels up again<br />
To test the configuration, start up <strong>PowerSDR</strong> <strong>and</strong> <strong>WSJT</strong> in this manner<br />
1. Start <strong>PowerSDR</strong><br />
2. Switch <strong>to</strong> DigiU mode <strong>and</strong> make sure <strong>VAC</strong> is enabled<br />
3. Start <strong>WSJT</strong><br />
4. Confirm that the <strong>WSJT</strong> audio input <strong>and</strong> output device number are correct<br />
5. In the main <strong>WSJT</strong> window (GUI), click on the Moni<strong>to</strong>r but<strong>to</strong>n.<br />
6. In the SpecJT window, you should see signal in the lower right h<strong>and</strong> corner bar graph.<br />
7. Adjust the <strong>PowerSDR</strong> <strong>VAC</strong> RX Gain until you achieve a signal input reading of between -4 <strong>and</strong><br />
0 dB.<br />
If you do not see any output from <strong>PowerSDR</strong> in the SpecJT window, recheck that you have the<br />
<strong>WSJT</strong> audio channels setup correctly. 99% of the time this is the reason for not receiving any<br />
signals.<br />
This KB article may reference additional files that are available on the FlexRadio Systems web site<br />
Downloads page. Please use the URL(s) below <strong>to</strong> download the referenced materials.<br />
An Adobe Acrobat Reader may be required <strong>to</strong> open the file. You can download Adobe Acrobat<br />
from here.<br />
KB Source Document(s):<br />
None Referenced<br />
Last Modified By: Administra<strong>to</strong>r, Saturday, Oc<strong>to</strong>ber 03, 2009<br />
http://kc.flex-radio.com/KnowledgebaseArticle50362.aspx<br />
Wednesday, Oc<strong>to</strong>ber 07, 2009