How to Setup Virtual Audio Cable (VAC) 4.0x with PowerSDR 1.x ...
How to Setup Virtual Audio Cable (VAC) 4.0x with PowerSDR 1.x ...
How to Setup Virtual Audio Cable (VAC) 4.0x with PowerSDR 1.x ...

Create successful ePaper yourself
Turn your PDF publications into a flip-book with our unique Google optimized e-Paper software.
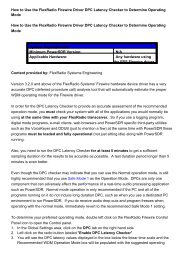
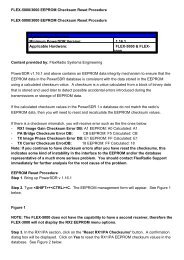
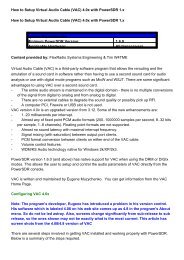
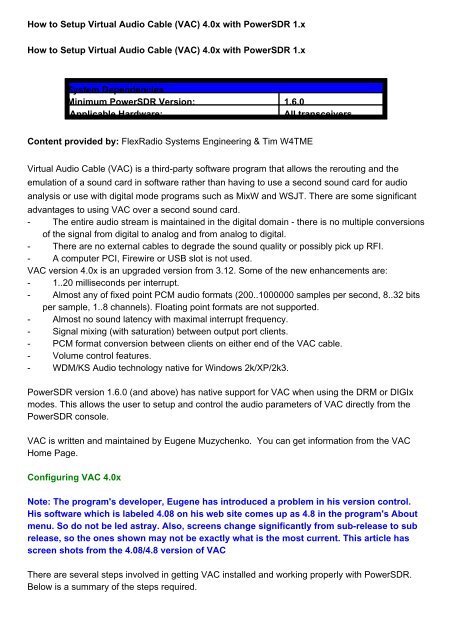
1. Obtain and install <strong>VAC</strong> <strong>4.0x</strong> on the same computer that is running <strong>PowerSDR</strong>2. Configure <strong>VAC</strong> "cables"3. Configure <strong>PowerSDR</strong> <strong>to</strong> utilize <strong>VAC</strong>Step 1. Install <strong>VAC</strong> <strong>4.0x</strong> as per the installation directions. If <strong>VAC</strong> was previously loaded, you mustfirst uninstall all versions before installing a new version of <strong>VAC</strong> <strong>4.0x</strong>Step 2. Once installed, set up a pair of <strong>VAC</strong> audio "cables" for use <strong>with</strong> <strong>PowerSDR</strong> by opening the<strong>VAC</strong> Control Panel.Figure 1 - <strong>VAC</strong> ConsoleStep 3. By default only one audio cable is defined. You will need <strong>to</strong> create two cables by changingthe driver parameters <strong>to</strong> 2 cables then click SET and Restart. Highlight the appropriate cable andchange the values <strong>to</strong> match the figure above. In the "Ms per int" box enter a value between 1 and20 ms. The lower the value, the smaller the <strong>VAC</strong> audio buffer. In the example above, 7 ms wasselected. Depending on your computer setup you may have <strong>to</strong> adjust this value <strong>to</strong> prevent theaudio from dropping out or "popping".You can choose two different Stream limit formats; cable format and cable range. Since<strong>PowerSDR</strong> defines both audio cables' format when <strong>VAC</strong> support is enabled, using the <strong>Cable</strong>Format is recommended. If you decide <strong>to</strong> use the <strong>Cable</strong> Range stream format, one thing <strong>to</strong>consider, when a format conversion occurs, it takes significant CPU resources and it maynoticeably slow your applications causing audio drops outs. Therefore using <strong>Cable</strong> Format as thestream format may help <strong>with</strong> audio drop outs. In the example above, I am using <strong>Cable</strong> Rangebecause it provides the most flexibility and does not adversely affect the performance of<strong>PowerSDR</strong> on the computer I am using.After completing all of the necessary changes, click on Set for each cable when completed.NOTE: Repeat these changes for the second audio cable as well.NOTE: Do NOT check the Volume Control box in the <strong>VAC</strong> control panel. This enables theWindows Mixer and can cause unpredictable results.Step 4. Start up <strong>PowerSDR</strong> version 1.6.0 (or higher). Click <strong>Setup</strong> on the Menu Bar. The<strong>PowerSDR</strong> <strong>Setup</strong> program is displayed. See example below.Figure 2 - <strong>PowerSDR</strong> <strong>Setup</strong> (default page)Step 5. Click on the <strong>Audio</strong> tab and then click on the <strong>VAC</strong> tab.Figure 3 - <strong>VAC</strong> <strong>Setup</strong>
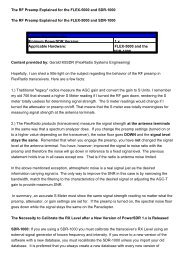
Step 6. In the "<strong>Virtual</strong> <strong>Audio</strong> <strong>Cable</strong> <strong>Setup</strong>" section, set the "Driver" <strong>to</strong> MME using the drop downbox (other driver options, such as Windows WDM-KS are supported but may work depending onthe sound card application being used. For this article, MME is used because it is the mostcompatible. Once you have <strong>VAC</strong> working, you can experiment <strong>with</strong> the other drivers. Theiradvantage is that they have less inherent latency for audio transfer). In the "Input" drop down box,select <strong>Virtual</strong> <strong>Cable</strong> 1. In the "Output" drop down box, select <strong>Virtual</strong> <strong>Cable</strong> 2. In the "Au<strong>to</strong>Enable" section, select this option if you want <strong>VAC</strong> <strong>to</strong> au<strong>to</strong>matically engage when any of the digitalmodes (DIGIx or DRM) are selected on the <strong>PowerSDR</strong> console. This is the preferred setting. Inthe "Buffer Size" section, select a buffer size from the drop down box. Depending on yourcomputer setup you may have <strong>to</strong> adjust this value <strong>to</strong> prevent the audio from dropping out or"popping". In the "Sample Rate" section, select a higher sampling rate from the drop down boxoption that exceeds the sampling rate of the sound card program you are using. Using asampling rate of 48K provides the best audio quality and produces the fewest drop outs.Troubleshooting Technique: In some cases the sound card program can not handle formatdown conversion very well resulting in no or poor audio processing. If this is the case,change the Sample rate <strong>to</strong> exactly match that of the sound card program you are using.If the soundcard program uses a stereo mode, such as DReaM, then select the Stereo option inthe "Mono/Stereo" section. And finally, the "Gain (dB)" section is the place where you adjust theAF gain of the <strong>VAC</strong> cable. Since the Volume Control was not checked on the <strong>VAC</strong> Control Panel(step #3) the Windows Mixer is not available for <strong>VAC</strong> cables. Use only the adjustments in<strong>PowerSDR</strong> <strong>to</strong> increase or decrease the volume (AF gain) going <strong>to</strong> and from the sound cardapplication.NOTE: Always start <strong>PowerSDR</strong> <strong>with</strong> <strong>VAC</strong> enabled before starting the sound card programso that <strong>PowerSDR</strong> can define the <strong>VAC</strong> cable formatSetp 7. To check <strong>to</strong> see if <strong>VAC</strong> is properly working, Select a digital mode in <strong>PowerSDR</strong> and makesure the radio is "On" and not in "Stand By" mode. The Open the <strong>VAC</strong> Control panel and youshould see the audio cables active.Figure 4 - <strong>VAC</strong> Control PanelAs displayed above, the <strong>VAC</strong> channels are active, but only for <strong>PowerSDR</strong>. If you look at <strong>Cable</strong> 1,you will see that the number of "Pb streams" is 0 (zero) and the "Rc streams" for <strong>Cable</strong> 2 is also 0.<strong>VAC</strong> <strong>4.0x</strong> au<strong>to</strong>matically sets up both ends of the audio cable even if the client (sound card)program is not configured or even running.Step 8. When setting up <strong>VAC</strong> <strong>with</strong> two audio programs, the audio output of one program uses thesame audio cable as the input of the other. Conversely, the audio input of the first program usesthe same audio cable as the output of the other.
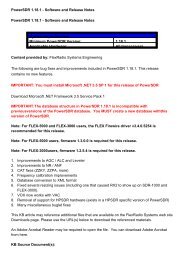
In your sound card program's setup for which sound card you are using, you will need <strong>to</strong> set thesound card input <strong>to</strong> "<strong>Virtual</strong> <strong>Cable</strong> 2" and the output <strong>to</strong> "<strong>Virtual</strong> <strong>Cable</strong> 1". Below is an example ofhow MixW is configured. Note that the sampling rate does not match what was setup in<strong>PowerSDR</strong> - This asymmetric configuration seems <strong>to</strong> provide the best audio quality and the fewestaudio drop outs.Figure 5 - MixW Sound Device SettingsStep 9. After you have the sound card program's audio input and output set, you should star<strong>to</strong>bserving audio either by hearing it or watching it on a spectrum display such as a waterfall. Youcan verify the <strong>VAC</strong> channel for the client program is active by looking at the <strong>VAC</strong> control panel.Figure 6 - <strong>VAC</strong> Control Panel <strong>with</strong> MixW receivingNotice that the value in the RcStream for <strong>Cable</strong> 2 has changed for a 0 (zero) <strong>to</strong> a 1 (one). Thisindicates that cable 2, which is the input for MixW is actively receiving audio from <strong>PowerSDR</strong>.Note: The Pb Stream value for <strong>VAC</strong> audio cable 1 is still 0 (zero). This will not change <strong>to</strong> aone (1) until you are transmitting using the sound card program and MixW is sending audiothrough that cable.Figure 7 - <strong>VAC</strong> Control Panel <strong>with</strong> MixW TransmittingStep 10. At this point you have completed the set up of <strong>VAC</strong> <strong>4.0x</strong> <strong>with</strong> a sound card program.This KB article may reference additional files that are available on the FlexRadio Systems web siteDownloads page. Please use the URL(s) below <strong>to</strong> download the referenced materials.An Adobe Acrobat Reader may be required <strong>to</strong> open the file. You can download Adobe Acrobatfrom here.KB Source Document(s):NoneReferencedLast Modified By: Administra<strong>to</strong>r, Sunday, Oc<strong>to</strong>ber 19, 2008http://kc.flex-radio.com/KnowledgebaseArticle50230.aspxFriday, September 11, 2009