Cyborg 06 - MacDev
Cyborg 06 - MacDev
Cyborg 06 - MacDev

You also want an ePaper? Increase the reach of your titles
YUMPU automatically turns print PDFs into web optimized ePapers that Google loves.
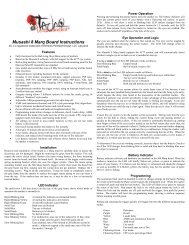
Getting Started<br />
Your <strong>Cyborg</strong> requires a source of Compressed air to be installed before use. The best air system to use with your<br />
<strong>Cyborg</strong> is the Conquest air system. However, thanks to the 04 Gladiator inline regulator, your <strong>Cyborg</strong> can accept air<br />
input from any air system supplying 400-900psi of compressed air (DO NOT USE CO2).<br />
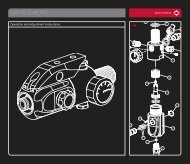
Mounting an air system<br />
Two mounting holes are provided on the base of the <strong>Cyborg</strong> grip frame for the purpose of attatching your air system.<br />
Please see your air system users manual for details on how to attatch your air system to these mounting points.<br />
Connecting the gas<br />
Now that your air system is mounted, you will need to connect the gas to the base of the Gladiator inline regulator.<br />
This is best achieved using MacLine (if you are using a air system output of 400-700psi) or braided hose (700psi+).<br />
Your <strong>Cyborg</strong> comes from the factory with a MacLine fitting installed in the Gladiator. If you intend to use MacLine, then<br />
you can plumb your gun by pushing the MacLine from your air system into the fitting at the bottom of your Gladiator.<br />
Your <strong>Cyborg</strong> is now ready to use. Screw the barrel into the <strong>Cyborg</strong> and carefully push a paintball hopper into the feed<br />
neck. Your <strong>Cyborg</strong> is now ready to operate. Never operate your <strong>Cyborg</strong> without eye, ear, mouth and neck protection<br />
for yourself and anybody within range.<br />
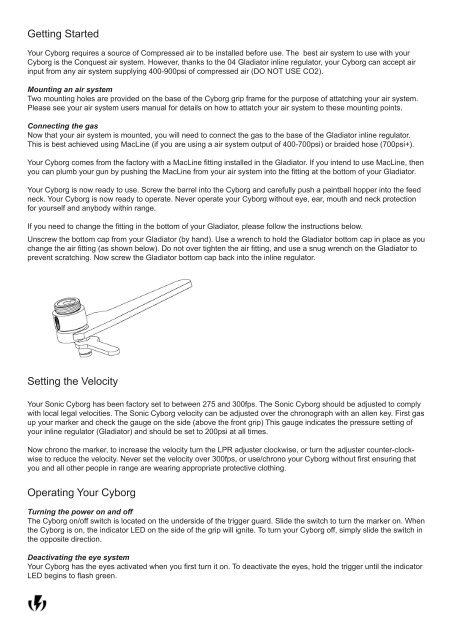
If you need to change the fitting in the bottom of your Gladiator, please follow the instructions below.<br />
Unscrew the bottom cap from your Gladiator (by hand). Use a wrench to hold the Gladiator bottom cap in place as you<br />
change the air fitting (as shown below). Do not over tighten the air fitting, and use a snug wrench on the Gladiator to<br />
prevent scratching. Now screw the Gladiator bottom cap back into the inline regulator.<br />
Setting the Velocity<br />
Your Sonic <strong>Cyborg</strong> has been factory set to between 275 and 300fps. The Sonic <strong>Cyborg</strong> should be adjusted to comply<br />
with local legal velocities. The Sonic <strong>Cyborg</strong> velocity can be adjusted over the chronograph with an allen key. First gas<br />
up your marker and check the gauge on the side (above the front grip) This gauge indicates the pressure setting of<br />
your inline regulator (Gladiator) and should be set to 200psi at all times.<br />
Now chrono the marker, to increase the velocity turn the LPR adjuster clockwise, or turn the adjuster counter-clockwise<br />
to reduce the velocity. Never set the velocity over 300fps, or use/chrono your <strong>Cyborg</strong> without first ensuring that<br />
you and all other people in range are wearing appropriate protective clothing.<br />
Operating Your <strong>Cyborg</strong><br />
Turning the power on and off<br />
The <strong>Cyborg</strong> on/off switch is located on the underside of the trigger guard. Slide the switch to turn the marker on. When<br />
the <strong>Cyborg</strong> is on, the indicator LED on the side of the grip will ignite. To turn your <strong>Cyborg</strong> off, simply slide the switch in<br />
the opposite direction.<br />
Deactivating the eye system<br />
Your <strong>Cyborg</strong> has the eyes activated when you first turn it on. To deactivate the eyes, hold the trigger until the indicator<br />
LED begins to flash green.