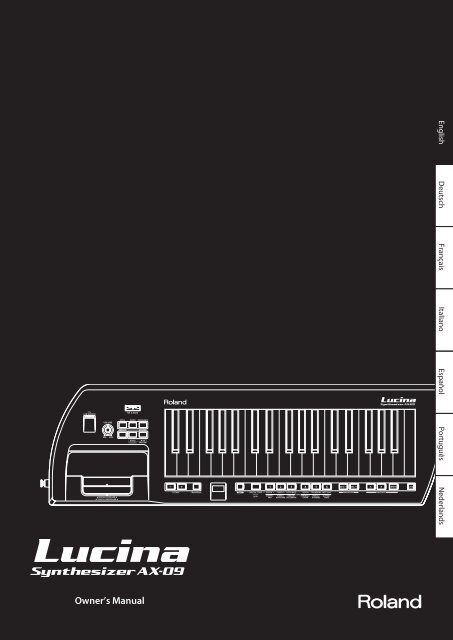
Owners Manual - Roland
Owners Manual - Roland
Owners Manual - Roland

Create successful ePaper yourself
Turn your PDF publications into a flip-book with our unique Google optimized e-Paper software.
English<br />
Deutsch Français Italiano Español Português Nederlands
Features<br />
Sounds that you’ll enjoy playing!<br />
• The total of 144 sounds covers all the bases, including not only synthesizer sounds but also<br />
piano, organ, strings, brass, and guitar, all immediately playable for instant enjoyment.<br />
• There are also six highly expressive “Special Tones” as well.<br />
These six high-quality sounds were created specifically for the Lucina AX-09 (synth lead, poly<br />
synth, synth bass, jazz scat, violin and trombone).<br />
Easy to use and handle!<br />
• Operation is easy — simply turn on the power and choose a sound.<br />
• With a lightweight, stylish body, and support for battery operation, you can play the Lucina<br />
AX-09 anywhere, anytime. Since you can sling the Lucina AX-09 over your shoulder when playing<br />
it, your performances can be more active and versatile.<br />
Enjoy performing more than ever!<br />
• All of the unique expressive capabilities of a traditional synthesizer are at your fingertips, thanks<br />
to the Lucina AX-09’s D Beam controller, modulation bar, and touch controller.<br />
• You can easily play along with your favorite songs, either by connecting your portable audio<br />
player to the EXT IN jack, or by using the USB memory audio playback function.<br />
How Letters are Shown on the Lucina AX-09<br />
A<br />
A<br />
B<br />
B<br />
C<br />
C<br />
D<br />
D<br />
E<br />
E<br />
F<br />
F<br />
G<br />
G<br />
H<br />
h<br />
I<br />
i<br />
J K<br />
J<br />
L<br />
L<br />
M N<br />
N n<br />
O<br />
o<br />
P<br />
P<br />
Q<br />
Q<br />
R<br />
r<br />
S<br />
S<br />
T<br />
t<br />
U<br />
U<br />
V W X<br />
u X<br />
Y<br />
Y<br />
Z<br />
Z<br />
Copyright © 2010 ROLAND CORPORATION<br />
All rights reserved. No part of this publication may be reproduced in any form without the written permission of ROLAND<br />
CORPORATION.<br />
Before using this unit, carefully read the sections entitled: “USING THE UNIT SAFELY” (p. 24) and “IMPORTANT NOTES” (p. 25). These sections provide<br />
important information concerning the proper operation of the unit. Additionally, in order to feel assured that you have gained a good grasp<br />
of every feature provided by your new unit, Owner’s <strong>Manual</strong> should be read in its entirety. The manual should be saved and kept on hand as a<br />
convenient reference.<br />
2
Contents<br />
Features. . . . . . . . . . . . . . . . . . . . . . . . . . . . . . . . . . 2<br />
How Letters are Shown on the Lucina AX-09 .. . . . . . . . . 2<br />
Panel Descriptions.. . . . . . . . . . . . . . . . . . . . . . . . 4<br />
Front Panel. . . . . . . . . . . . . . . . . . . . . . . . . . . . . . . . . . . . . . . . . . 4<br />
Bottom Panel .. . . . . . . . . . . . . . . . . . . . . . . . . . . . . . . . . . . . . . . 5<br />
Rear Panel .. . . . . . . . . . . . . . . . . . . . . . . . . . . . . . . . . . . . . . . . . . 5<br />
About Batteries.. . . . . . . . . . . . . . . . . . . . . . . . . . . 6<br />
Installing Batteries .. . . . . . . . . . . . . . . . . . . . . . . . . . . . . . . . . . 6<br />
Checking the Remaining Battery Power.. . . . . . . . 6<br />
Removing Batteries. . . . . . . . . . . . . . . . . . . . . . . . . . . . 6<br />
Getting Ready.. . . . . . . . . . . . . . . . . . . . . . . . . . . . 7<br />
Connecting the AC Adaptor .. . . . . . . . . . . . . . . . . . . . . . . . . 7<br />
Attaching the Strap .. . . . . . . . . . . . . . . . . . . . . . . . . . . . . . . . . 7<br />
Connecting Your Speakers.. . . . . . . . . . . . . . . . . . . . . . . . . . . 8<br />
Connecting Your Headphones.. . . . . . . . . . . . . . . . . . . . . . . 8<br />
Turning the Power On.. . . . . . . . . . . . . . . . . . . . . . . . . . . . . . . 8<br />
Selecting Tones.. . . . . . . . . . . . . . . . . . . . . . . . . . . 9<br />
Selecting a Regular Tone .. . . . . . . . . . . . . . . . . . . . . . . . . . . . 9<br />
Selecting a Special Tone.. . . . . . . . . . . . . . . . . . . . . . . . . . . . . 9<br />
Previewing Tones. . . . . . . . . . . . . . . . . . . . . . . . . . . . . . . . . . . . 9<br />
Registering Frequently Used Tones in Memory<br />
(FAVORITE).. . . . . . . . . . . . . . . . . . . . . . . . . . . . . . . . . . . . . . . . . 10<br />
Using the Performance Functions. . . . . . . . . 11<br />
Raising or Lowering the Key Range by Octaves.. . . . . . 11<br />
Raising or Lowering the Key Range by Semitones .. . . 11<br />
Using the Touch Controller .. . . . . . . . . . . . . . . . . . . . . . . . . 11<br />
Setting the Pitch Range of the Touch<br />
Controller.. . . . . . . . . . . . . . . . . . . . . . . . . . . . . . . . . . . . 11<br />
Using the Modulation Bar .. . . . . . . . . . . . . . . . . . . . . . . . . . 11<br />
Assigning the Modulation Bar’s Effect.. . . . . . . . . 12<br />
Using the D Beam Controller. . . . . . . . . . . . . . . . . . . . . . . . 12<br />
Changing the ASSIGNABLE Setting. . . . . . . . . . . . 12<br />
Using a Foot Pedal .. . . . . . . . . . . . . . . . . . . . . . . . . . . . . . . . . 13<br />
Preventing Tones from Changing During<br />
Performance (Lock function). . . . . . . . . . . . . . . . . . . . . . . . 14<br />
Playing Along with a Portable Audio Player .. . . . . . . . . 14<br />
Playing Along with an Audio File from USB Memory.. 14<br />
Making Audio Player Settings.. . . . . . . . . . . . . . . . . 15<br />
Adjusting the Tuning. . . . . . . . . . . . . . . . . . . . . 17<br />
Master Tune. . . . . . . . . . . . . . . . . . . . . . . . . . . . . . . . . . . . . . . . 17<br />
Key Scale Tune.. . . . . . . . . . . . . . . . . . . . . . . . . . . . . . . . . . . . . 17<br />
Adjusting the Keyboard’s Touch Sensitivity. 17<br />
Setting a Fixed Value for the Keyboard’s Velocity. . . . . 17<br />
Count In / Metronome .. . . . . . . . . . . . . . . . . . . 18<br />
Count In Settings. . . . . . . . . . . . . . . . . . . . . . . . . . . . . . . . . . . 18<br />
Various Settings (Utility) .. . . . . . . . . . . . . . . . . 18<br />
Checking the Lucina AX-09’s Version.. . . . . . . . . . . . . . . . 18<br />
USB Driver Settings. . . . . . . . . . . . . . . . . . . . . . . . . . . . . . . . . 18<br />
Backing Up Lucina AX-09 Settings to USB Memory .. . 19<br />
Restoring Lucina AX-09 Settings from USB Memory .. 19<br />
Restoring the Factory Settings (Factory Reset).. . . . . . . 19<br />
Connecting Other Equipment .. . . . . . . . . . . . 20<br />
Controlling MIDI Devices.. . . . . . . . . . . . . . . . . . . . . . . . . . . 20<br />
MIDI Messages that can be Transmitted and<br />
Received.. . . . . . . . . . . . . . . . . . . . . . . . . . . . . . . . . . . . . 20<br />
Connecting a MIDI Sound Module.. . . . . . . . . . . . 20<br />
Making MIDI-related Settings.. . . . . . . . . . . . . . . . . 20<br />
Connecting to Your Computer via USB.. . . . . . . . . . . . . . 21<br />
Controlling Video (V-LINK).. . . . . . . . . . . . . . . . . . . . . . . . . . 21<br />
Troubleshooting.. . . . . . . . . . . . . . . . . . . . . . . . . 22<br />
Specifications .. . . . . . . . . . . . . . . . . . . . . . . . . . . 23<br />
Error Message List .. . . . . . . . . . . . . . . . . . . . . . . 23<br />
USING THE UNIT SAFELY. . . . . . . . . . . . . . . . . . 24<br />
IMPORTANT NOTES.. . . . . . . . . . . . . . . . . . . . . . 25<br />
Index .. . . . . . . . . . . . . . . . . . . . . . . . . . . . . . . . . . . 26<br />
MIDI Implementation Chart.. . . . . . . . . . . . . . 26<br />
English<br />
Deutsch Français Italiano Español Português Nederlands<br />
Editing the Tone Settings. . . . . . . . . . . . . . . . . 16<br />
Editing the Tone Parameters.. . . . . . . . . . . . . . . . . . . . . . . . 16<br />
3
Panel Descriptions<br />
Front Panel<br />
11 12 13<br />
14 15<br />
16<br />
19 17 1 2<br />
3<br />
4 5 6<br />
7<br />
8<br />
9 10 18<br />
1. OCTAVE [+] / [–] Buttons<br />
These buttons raise or lower the keyboard range in steps<br />
of one octave (p. 11).<br />
2. [TRANSPOSE] Button<br />
By holding down this button and pressing the OCTAVE [+],<br />
[–] buttons you can raise or lower the keyboard range in<br />
steps of one semitone (p. 11).<br />
3. Display<br />
This shows the selected tone or mode, or the value of the<br />
parameter you’re editing.<br />
4. [SHIFT] Button<br />
Use this button in conjunction with other buttons to<br />
execute various functions.<br />
5. [SPECIAL TONE] Button<br />
Press this to select special tones.<br />
6. TONE [1]–[6] Buttons<br />
Use these buttons to select the tone group for regular<br />
tones, or to select special tones.<br />
7. [INC/+] / [DEC/–] Buttons<br />
Use these buttons to select variations of the regular tones.<br />
8. FAVORITE [A] / [B] Buttons<br />
Use these buttons to select the FAVORITE memory bank<br />
(p. 10) in which you want to register a favorite tone.<br />
9. [WRITE] Button<br />
This button stores the Lucina AX-09 settings you’ve edited,<br />
or the tone you registered in FAVORITE (p. 10, p. 18).<br />
10. [LOCK] Button<br />
If this button is turned on, you won’t be able to switch<br />
tones. Use this to prevent the tone from being accidentally<br />
switched during a performance (p. 14).<br />
11. USB MEMORY Slot<br />
You can insert USB memory (sold separately) here (p. 15).<br />
12. [VOLUME] Knob<br />
This knob adjusts the volume.<br />
13. D Beam<br />
[PITCH] / [FILTER] / [ASSIGNABLE] Buttons<br />
These buttons turn the D Beam on/off.<br />
By placing your hand above the D Beam you can apply<br />
various effects to the sound (p. 12).<br />
14. [V-LINK] Button<br />
This button turns V-LINK on/off (p. 21).<br />
15. [AUDIO PLAYER] Button<br />
If you turn this on, you’ll be able to play back audio files<br />
from USB memory (p. 14).<br />
16. [ / PREVIEW] Button<br />
When the [AUDIO PLAYER] button is lit, this button starts/<br />
stops playback of audio files in USB memory.<br />
When the [AUDIO PLAYER] button is unlit, this button<br />
starts/stops a preview demo of the currently selected tone.<br />
You can also get a count in to begin sounding by pressing<br />
the modulation bar while you press the [PREVIEW] button.<br />
4
17. MODULATION BAR / TOUCH CONTROLLER<br />
By pressing the modulation bar, you can apply vibrato. You<br />
can also switch to a Hold effect that sustains the sound<br />
you’re playing (p. 11).<br />
If you hold your finger on the touch controller and move it<br />
to left or right, the pitch will change (p. 11).<br />
18. Strap Pin<br />
Attach the included strap to this pin (p. 7).<br />
19. Strap Pin (A)<br />
Attach the included strap to this pin.<br />
Depending on your playing style, you can use either this<br />
pin or the strap pin (B) located on the rear of the Lucina<br />
AX-09 (p. 7).<br />
Rear Panel<br />
Bottom Panel<br />
1 2<br />
1. Strap Pin (B)<br />
Attach the included strap to this pin.<br />
Depending on your playing style, you can use either this<br />
pin or the strap pin (A) located on the side of the Lucina<br />
AX-09 (p. 7).<br />
2. Battery Compartment<br />
You can install Ni-MH AA rechargeable batteries here (p. 6).<br />
1 2 3 4 5 6<br />
7<br />
8<br />
9<br />
10<br />
1. OUTPUT Jacks (L/MONO, R)<br />
The sound of the Lucina AX-09 is output from these jacks.<br />
Connect them to your amplified speakers.<br />
To employ monaural output, connect to only the L/MONO<br />
jack.<br />
2. MIDI OUT Connector<br />
If you connect this to another MIDI device, MIDI messages<br />
from the Lucina AX-09 will be transmitted to that device,<br />
allowing you to play it remotely (p. 20).<br />
3. FOOT PEDAL Jack<br />
Connect a separately sold <strong>Roland</strong> DP-series pedal here.<br />
Alternatively, you can connect an expression pedal (EV-5;<br />
sold separately) (p. 13).<br />
4. [POWER] Switch<br />
This turns the power on/off (p. 8).<br />
If you’re using the included AC adaptor and need to turn<br />
off the power completely, turn off this POWER switch, and<br />
then disconnect the AC adaptor from the outlet.<br />
5. DC IN Jack<br />
Connect the included AC adaptor here (p. 7).<br />
6. Cord Hook<br />
Use this to secure the cord of the included AC adaptor<br />
(p. 7).<br />
7. Security Slot ( )<br />
http://www.kensington.com/<br />
8. USB COMPUTER Connector<br />
Use a USB cable to connect the Lucina AX-09 to your<br />
computer (p. 21).<br />
9. EXT IN Jack<br />
Connect your portable audio player or other audio source<br />
here. The sound that’s input via this jack will be output<br />
from the OUTPUT jacks and the PHONES jack (p. 14).<br />
10. PHONES Jack<br />
Headphones (sold separately) with a stereo mini plug (1/8”<br />
jack) can be connected here (p. 8).<br />
English<br />
Deutsch Français Italiano Español Português Nederlands<br />
5
About Batteries<br />
If you’re operating the Lucina AX-09 on batteries, you’ll need eight Ni-MH AA rechargeable batteries. The battery<br />
life will differ depending on the conditions of use, but for continuous usage, it is approximately 4 hours.<br />
About rechargeable batteries<br />
When using rechargeable batteries, the battery lifespan will normally become shorter with each recharge cycle. If<br />
the batteries run down soon after being recharged, it’s time to replace them.<br />
Installing Batteries<br />
1. Switch.off..the.Lucina.AX-09’s.power.(p..8).<br />
2. Remove.the.cover.of.the.battery.compartment.<br />
located.on.the.Lucina.AX-09’s.bottom.panel.<br />
While pressing the tabs of the cover, lift the cover up and<br />
remove it.<br />
3. Insert.the.batteries.into.the..battery.compartment.<br />
Make sure to observe the correct polarity (+/– orientation)<br />
for each battery when inserting it.<br />
4. Replace.the.battery.compartment.cover.<br />
* When.turning.the.unit.upside-down,.get.a.bunch.of.newspapers.<br />
or.magazines,.and.place.them.under.the.four.corners.or.at.both.<br />
ends.to.prevent.damage.to.the.buttons.and.controls..Also,.<br />
you.should.try.to.orient.the.unit.so.no.buttons.or.controls.get.<br />
damaged.<br />
* When.turning.the.unit.upside-down,.handle.with.care.to.avoid.<br />
dropping.it,.or.allowing.it.to.fall.or.tip.over.<br />
Checking the Remaining Battery<br />
Power<br />
When the remaining battery power runs<br />
low, three dots will blink in the display.<br />
If this indication appears, replace the<br />
batteries as soon as possible.<br />
A while after this indication, the display will indicate “Lo,”<br />
and it will no longer be possible to operate the Lucina<br />
AX-09.<br />
You can also check the remaining battery power in the<br />
following way.<br />
1. Hold.down.the.[SHIFT].button.and.press.the.<br />
[LOCK].button.<br />
The display will indicate the remaining battery power as a<br />
percentage (“0”–”100”).<br />
MEMO<br />
• The remaining battery power indication is an<br />
approximation.<br />
• If you check the remaining battery power when the AC<br />
adaptor is connected, the display will always indicate<br />
“100.”<br />
Removing Batteries<br />
To remove the batteries, power off the Lucina AX-09, open<br />
the battery compartment cover, and remove the batteries.<br />
Note the following when using batteries<br />
• Do not use alkaline batteries or zinc-carbon batteries.<br />
• The Lucina AX-09 will not operate on batteries if the AC adaptor is connected.<br />
• If batteries are installed, disconnecting or reconnecting the power cord at the AC outlet or disconnecting the DC plug from the Lucina AX-09’s rear panel while the<br />
power is on will cause the power to turn off. You must turn off the power before you connect or disconnect the power cord or AC adaptor.<br />
• Do not allow any objects (e.g., flammable material, coins, pins); or liquids of any kind (water, soft drinks, etc.) to penetrate the unit.<br />
• If used improperly, batteries may explode or leak and cause damage or injury. In the interest of safety, please read and observe the following precautions.<br />
• Carefully follow the installation instructions for batteries, and make sure you observe the correct polarity.<br />
• Avoid using new batteries together with used ones. In addition, avoid mixing different types of batteries.<br />
• Remove the batteries whenever the unit is to remain unused for an extended period of time.<br />
• If a battery has leaked, use a soft piece of cloth or paper towel to wipe all remnants of the discharge from the battery compartment. Then install new batteries.<br />
To avoid inflammation of the skin, make sure that none of the battery discharge gets onto your hands or skin. Exercise the utmost caution so that none of the<br />
discharge gets near your eyes. Immediately rinse the affected area with running water if any of the discharge has entered the eyes.<br />
• Never keep batteries together with metallic objects such as ballpoint pens, necklaces, hairpins, etc.<br />
6
Getting Ready<br />
Connecting the AC Adaptor<br />
The Lucina AX-09 can operate using the included AC<br />
adaptor, or using Ni-MH AA rechargeable batteries.<br />
1. Make.sure.that.the.Lucina.AX-09’s.power.is.turned.<br />
off..(the.[POWER].switch.is.in.the.OFF.position).<br />
2. Turn.the.[VOLUME].knob.all.the.way.to.the.left.<br />
(minimum).<br />
3. Connect.the.AC.adaptor.to.the.Lucina.AX-09’s.<br />
rear.panel..DC.IN.jack,.and.then.plug.it.into.an.AC.<br />
outlet.<br />
To prevent the inadvertent disruption<br />
of power to your unit (should the plug<br />
be pulled out accidentally), and to avoid<br />
applying undue stress to the DC IN jack,<br />
anchor the power cord using the cord hook,<br />
as shown in the illustration.<br />
Place the AC adaptor so<br />
the side with the indicator<br />
(see illustration) faces<br />
upwards and the side with<br />
textual information faces<br />
downwards. The indicator<br />
will light when you plug the<br />
AC adaptor into an AC outlet.<br />
Attaching the Strap<br />
Attach the strap to the<br />
Lucina AX-09 as shown in the<br />
illustrations below.<br />
1. Attach.one.end.of.the.included.strap.to.the..strap.<br />
pin.shown.in.the.illustration.below.<br />
2. Attach.the.other.end.of.the.included.strap.to.one.<br />
of.the.other.two.strap.pins.<br />
A strap pin is provided in two locations; “A” and “B.” You<br />
can use either one, whichever is more comfortable for you.<br />
For a larger-bodied person, attaching the strap to pin “A”<br />
will provide better stability.<br />
A<br />
B<br />
NOTE<br />
If you use strap pin “B,” twist the strap as shown below.<br />
If you attach the strap without twisting it, the strap may<br />
come off of the Lucina AX-09.<br />
Back of strap<br />
Twist<br />
Front of strap<br />
English<br />
Deutsch Français Italiano Español Português Nederlands<br />
7
Connecting Your Speakers<br />
The Lucina AX-09 does not contain an amp or speakers.<br />
In order to produce sound, you’ll need to connect the<br />
rear panel OUTPUT jacks to an audio device such as an<br />
amplified speaker system (subsequently referred to as<br />
“speakers”), or use headphones.<br />
Turning the Power On<br />
* Once.the.connections.have.been.completed.(p..8),.turn.<br />
on.power.to.your.various.devices.in.the.order.specifi.ed..<br />
By.turning.on.devices.in.the.wrong.order,.you.risk.<br />
causing.malfunction.and/or.damage.to.speakers.and.<br />
other.devices.<br />
1. Minimize.the.volume.of.the.Lucina.AX-09.and.your.<br />
speakers.<br />
2. On.the.Lucina.AX-09’s.rear.panel,.turn.the.<br />
.[POWER].switch.ON.<br />
Use audio cables (PCS series;<br />
sold separately) to make<br />
connections.<br />
This unit is equipped with a protection<br />
circuit. A brief interval (a few seconds)<br />
after power up is required before the unit<br />
will operate normally.<br />
If you’re outputting in monaural, connect only the L/<br />
MONO jack.<br />
* To.prevent.malfunction.and/or.damage.to.speakers.or.<br />
other.devices,.always.turn.down.the.volume,.and.turn.off..<br />
the.power.on.all.devices.before.making.any.connections.<br />
Connecting Your Headphones<br />
Connect headphones to the rear panel PHONES jack.<br />
3. Turn.on.the.power.of.your.speakers.<br />
4. Use.the..[VOLUME].knob.to.adjust.the.volume.<br />
appropriately.<br />
While you play the keyboard<br />
to produce sound, slowly turn<br />
the [VOLUME] knob toward the<br />
right, and adjust the volume<br />
on the Lucina AX-09 and on<br />
your speakers.<br />
Turning the Power Off<br />
1. Minimize.the.volume.of.the.Lucina.AX-09.and.your.<br />
speakers.<br />
2. Turn.off..the.power.of.your.speakers.<br />
3. Turn.the.Lucina.AX-09’s.[POWER].switch.OFF.<br />
You can connect headphones that<br />
have a stereo mini (1/8”) plug.<br />
8
Selecting Tones<br />
On the Lucina AX-09, each of the sounds you play is called<br />
a “tone.” There are two types of tones: “regular tones” and<br />
“special tones.”<br />
Selecting a Regular Tone<br />
The Lucina AX-09 contains 144 regular tones that bring<br />
you the best sounds of <strong>Roland</strong>’s synthesizers.<br />
The regular tones are organized into six tone groups, with<br />
24 tones in each group.<br />
1. If.the.[SPECIAL.TONE].button.or.FAVORITE.[A]./.<br />
[B].button.is.lit,.press.the.lit.button.to.turn.off..its.<br />
illumination.<br />
2. Press.one.of.the..TONE.[1]–[6].buttons.to.select.a.<br />
tone.group.<br />
The button will light, and that tone group will be selected.<br />
The name of the tone group is printed in black below each<br />
tone button.<br />
MEMO<br />
When you turn on the power, TONE [1] number 1 will<br />
always be selected.<br />
3. Use.the..[INC/+]./.[DEC/–].buttons.to.select.a.tone.<br />
within.the.group.<br />
Each group contains tones 1–24, and the number of the<br />
selected tone (1–24) is shown in the display.<br />
Press the [INC/+] button to select the next tone, or press<br />
the [DEC/–] button to select the preceding tone.<br />
MEMO<br />
• For a list of the tones, refer to the “Tone List” at the end<br />
of this manual.<br />
• As indicated by the black characters printed below the<br />
TONE buttons, each tone group is subdivided into two<br />
categories. (For example, the TONE [1] button group<br />
contains the two categories “SYNTH” and “PAD.”)<br />
Each time you hold down the TONE button of the<br />
currently selected (lit) tone group and press the [INC/+]<br />
/ [DEC/–] button, the first tone of that category will be<br />
selected.<br />
• By holding down the [INC/+] / [DEC/–] button, you can<br />
select tones rapidly. To select tones even more rapidly,<br />
hold down one button and then press the other button<br />
as well.<br />
Selecting the Rhythm Tone<br />
No. 23–24 of the GUITAR/BASS group is the rhythm<br />
tone. For details, refer to the “Tone List” at the end of this<br />
manual.<br />
Selecting a Special Tone<br />
The Lucina AX-09 contains six “special tones” that were<br />
created specifically for it.<br />
1. Press.the..[SPECIAL.TONE].button.so.it’s.lit.<br />
2. Press.one.of.the.TONE.[1]–[6].buttons.to.select.the.<br />
desired.special.tone.<br />
The names of the special tones are printed in blue<br />
characters below each tone button.<br />
MEMO<br />
To return to the regular tones, press the [SPECIAL TONE]<br />
button to turn it off.<br />
Previewing Tones<br />
With the [AUDIO PLAYER] button off, press the [PREVIEW]<br />
button; the button will light and the currently selected<br />
tone will be played using a demo phrase that’s suitable for<br />
that tone.<br />
To stop the phrase before it has finished playing, press the<br />
[PREVIEW] button once again to turn off its illumination.<br />
English<br />
Deutsch Français Italiano Español Português Nederlands<br />
9
Registering Frequently Used<br />
Tones in Memory ( FAVORITE)<br />
The Lucina AX-09 provides “FAVORITE memory locations”<br />
that allow you to register twelve of the tones. If you use<br />
this to register the tones that you use frequently, you’ll be<br />
able to select those tones quickly and easily at any time.<br />
Your settings for volume and reverb can also be registered<br />
along with the tone selections in the FAVORITE memory<br />
locations (p. 16).<br />
MEMO<br />
Only regular tones can be registered in FAVORITE<br />
memory.<br />
Registering a tone as a FAVORITE<br />
FAVORITE memory contains two banks, A and B; you can<br />
register six tones in each bank.<br />
1. Select.the.tone.that.you.want.to.register.in.a.<br />
FAVORITE.memory.location.<br />
2. Press.the..[WRITE].button.to.make.it.light.<br />
Recalling a FAVORITE tone<br />
Here’s how to recall a tone you’ve registered in FAVORITE<br />
memory.<br />
1. Press.the.FAVORITE.[A]./.[B].button.to.select.the.<br />
bank.in.which.you.registered.the.tone.you.want.<br />
to.recall.<br />
The FAVORITE button you pressed will light.<br />
2. Press.one.of.the.TONE.[1]–[6].buttons.to.select.a.<br />
FAVORITE.memory.location.from.the.current.bank.<br />
You can also use the [INC/+] / [DEC/–] buttons to<br />
consecutively select FAVORITE memory locations in the<br />
same bank.<br />
MEMO<br />
To return to regular tones, press the lit FAVORITE [A] /<br />
[B] button to turn off its illumination.<br />
3. Press.the..FAVORITE.[A]./.[B].button.to.select.the.<br />
bank.in.which.you.want.to.register.the.favorite.<br />
The FAVORITE button you pressed will light.<br />
The display will indicate “A -” (bank “A”) or “b -” (bank<br />
“B”).<br />
4. Press.one.of.the.TONE.[1]–[6].buttons.to.select.the.<br />
memory.location.in.which.you.want.to.register.the.<br />
favorite.tone.<br />
The button you pressed will light, and the tone will be<br />
registered in that FAVORITE memory location. The [WRITE]<br />
button will go out.<br />
MEMO<br />
To return to regular tones, press the lit FAVORITE [A] /<br />
[B] button to turn off its illumination.<br />
10
Using the Performance Functions<br />
The Lucina AX-09 provides various performance functions<br />
that can make your performance more expressive.<br />
Raising or Lowering the Key<br />
Range by Octaves<br />
You can raise or lower the range of the keyboard in steps<br />
of one octave, for a maximum of three octaves upward or<br />
downward.<br />
Value -3–3<br />
1. Press.an..OCTAVE.[+]./.[–].button.<br />
The display will indicate a value.<br />
The OCTAVE [+] button will light if the octave setting is<br />
in the “+” direction; the OCTAVE [–] button will light if the<br />
octave setting is in the “–” direction.<br />
MEMO<br />
To return the octave setting to “0,” press the OCTAVE [+]<br />
and [–] buttons simultaneously.<br />
The OCTAVE [+] / [–] button will go out, and the<br />
keyboard will return to its normal range of pitches.<br />
Raising or Lowering the Key<br />
Range by Semitones<br />
You can raise or lower the range of the keyboard in steps<br />
of a semitone.<br />
This function can be convenient when you need to play a<br />
song in an unfamiliar key signature.<br />
Value -5–6<br />
1. Hold.down.the.[TRANSPOSE].button.<br />
The current setting will blink in the display.<br />
2. Hold.down.the..[TRANSPOSE].button,.and.press.<br />
the.OCTAVE.[+]./.[–].button.to.set.the.desired.<br />
value.<br />
MEMO<br />
To return the setting to “0,” hold down the [TRANSPOSE]<br />
button and press the OCTAVE [+] and [–] buttons<br />
simultaneously.<br />
The [TRANSPOSE] button will go out, and the keyboard<br />
will return to its normal range of pitches.<br />
Using the Touch Controller<br />
By placing your finger on the touch controller and moving<br />
it to left or right, you can vary the pitch of the sound you’re<br />
playing. Touching the left side of the controller will lower<br />
the pitch, and touching the right side will raise the pitch.<br />
Setting the Pitch Range of the Touch Controller<br />
By following the procedure below, you can set the range<br />
of pitches within which the pitch can be changed when<br />
you operate the Touch Controller. This setting is specified<br />
in terms of a value in semitones. For example, if you specify<br />
a value of “12,” the pitch will rise by a whole octave when<br />
you touch the rightmost edge of the Touch Controller (12<br />
semitones is equivalent to one octave).<br />
1. While.holding.down.[SHIFT],.touch.the.Touch.<br />
Controller.<br />
The value currently set for the pitch range will appear,<br />
blinking, in the display.<br />
2. Continue.holding.down.the.[SHIFT].button,.and.<br />
use.the.[INC/+]./.[DEC/–].buttons.to.change.the.<br />
setting.<br />
Value 0–24<br />
3. Release.the.[SHIFT].button.<br />
4. To.save.this.setting,.hold.down.the.[SHIFT].button.<br />
and.press.the.[WRITE].button.<br />
Using the Modulation Bar<br />
You can apply vibrato by pressing the modulation bar<br />
while you play the Lucina AX-09.<br />
MEMO<br />
The same effect is applied to all tones. However, if<br />
you’ve selected 4 VIOLIN or 5 TROMBONE of the special<br />
tones, the dynamics (expression) will change in a way<br />
that’s distinctive of that instrument, allowing you to<br />
play with highly realistic expressiveness.<br />
English<br />
Deutsch Français Italiano Español Português Nederlands<br />
3. The.value.will.be.applied.when.you.release.the.<br />
[TRANSPOSE].button.<br />
The [TRANSPOSE] button will be lit if you’ve specified a<br />
value other than “0.”<br />
11
Assigning the Modulation Bar’s Effect<br />
You can also change the assignment of the modulation<br />
bar so that it will hold notes or hold notes while applying<br />
vibrato.<br />
1. Hold.down.the.[SHIFT].button.and.press.the.<br />
modulation.bar.<br />
The current setting will blink in the display.<br />
2. Continue.to.hold.down.the.[SHIFT].button,.and.<br />
use.the.[INC/+]./.[DEC/–].buttons.to.assign.the.<br />
desired.eff.ect.<br />
This specifies the effect that will be applied when you<br />
operate the modulation bar.<br />
Value<br />
NoD<br />
hLD<br />
CNB<br />
Explanation<br />
Vibrato will be applied to the sounds you’re playing.<br />
The sounds you’re playing will be sustained while you<br />
press the modulation bar.<br />
Vibrato and Hold will both be applied to the sounds<br />
you’re playing.<br />
MEMO<br />
The same effect is applied to all tones. However, if<br />
you’ve selected 4 VIOLIN or 5 TROMBONE of the special<br />
tones, the dynamics (expression) of the instrument will<br />
be modified instead of the vibrato effect.<br />
3. Release.the.[SHIFT].button.<br />
4. To.save.this.setting,.hold.down.the.[SHIFT].button.<br />
and.press.the.[WRITE].button.<br />
Using the D Beam Controller<br />
By moving your hand above the D Beam controller’s<br />
sensor, you can modify the sound by applying the effect<br />
you’ve assigned to the D Beam.<br />
The D Beam controller’s effective range<br />
The illustration below shows the approximate effective<br />
range of the D Beam controller.<br />
No effect will be obtained if you position your hand<br />
outside this effective range.<br />
1. Press.one.of.the.following.buttons.to.select.the.<br />
function.that.you.want.to.control.using.the.<br />
D.Beam.controller.<br />
Value<br />
.PITCH<br />
.FILTER<br />
.ASSIGNABLE<br />
Explanation<br />
Moving your hand above the D Beam controller<br />
will vary the pitch of the sounds you play.<br />
Moving your hand above the D Beam controller<br />
will vary the tonal character of the sounds you<br />
play.<br />
* For.some.tones,.the.change.in.character.<br />
may.be.diffi..cult.to.notice.<br />
The D Beam controller will transmit the assigned<br />
function or control change message.<br />
2. While.you.play.the.keyboard,.move.your.hand.<br />
slowly.up.and.down.above.the.D.Beam.controller.<br />
The button you pressed in step 1 will blink.<br />
3. To.turn.off..the.D.Beam.controller,.once.again.press.<br />
the.button.you.pressed.in.step.1;.it.will.go.out.<br />
Changing the ASSIGNABLE Setting<br />
You can assign a MIDI control change number (CC) or<br />
function to the [ASSIGNABLE] button, and use the D Beam<br />
controller to control that parameter in real time.<br />
1. Hold.down.the.[SHIFT].button.and.press.<br />
[ASSIGNABLE].<br />
The currently assigned function will blink in the display.<br />
2. Continue.to.hold.down.the.[SHIFT].button,.<br />
and.use.the.[INC/+]./.[DEC/–].button.to.specify.<br />
the.desired.function.or.parameter.that.will.be.<br />
controlled.by.the.D.Beam.controller.<br />
Display Value Explanation<br />
CC01<br />
C01<br />
Apply vibrato.<br />
( MODULATION)<br />
C05<br />
CC05<br />
( PORTA TIME)<br />
Control the portamento time<br />
over which the pitch changes<br />
between notes when playing with<br />
portamento.<br />
C07 CC07 ( VOLUME) Control the volume.<br />
C10 CC10 ( PAN) Control the panning.<br />
* The.usable.range.of.D.Beam.controller.will.become.<br />
extremely.small.when.used.under.strong.direct.<br />
sunlight..Please.be.aware.of.this.when.using.the.D.Beam.<br />
controller.outside.<br />
C11 CC11 ( EXPRESSION) Control the expression.<br />
C64 CC64 ( HOLD) Sustain the notes.<br />
C65<br />
CC65<br />
( PORTAMENTO)<br />
Smoothly connect the pitch from one<br />
note to the next.<br />
12
Display Value Explanation<br />
C66<br />
C71<br />
C72<br />
C73<br />
C74<br />
AFt<br />
Adb ADLIB<br />
CC66 ( SOSTENUTO)<br />
CC71 ( RESONANCE)<br />
CC72 ( RELEASE TIME)<br />
CC73 ( ATTACK TIME)<br />
CC74 ( CUTOFF)<br />
AFTERTOUCH<br />
(Default)<br />
SLo SOLO SYNTH<br />
Sustain the notes that are currently<br />
being held down.<br />
Control the resonance. Increasing<br />
the resonance value will produce<br />
a distinctive tonal character that is<br />
typical of a synthesizer.<br />
Control the time from note-off (when<br />
the key is released) until the sound<br />
is no longer heard (i.e., the release<br />
time).<br />
Control the sharpness (attack speed)<br />
with which the sound begins.<br />
Control the cutoff. Higher values will<br />
make the sound harder (brighter);<br />
lower values will make the sound<br />
softer (more mellow).<br />
Apply the most suitable effect for<br />
each of the Lucina AX-09’s tones.<br />
By fingering a chord and moving<br />
your hand above the D Beam<br />
controller, you can produce an<br />
arpeggio of that chord.<br />
The distance from the D Beam<br />
controller will determine the octave<br />
span of the chord that is played, and<br />
the speed at which you move your<br />
hand up and down will determine<br />
the speed at which the chord is<br />
arpeggiated.<br />
For example if you use your right<br />
hand to hold down the four notes<br />
“C D E G” and move your left hand<br />
above the D Beam controller, a<br />
phrase such as “C D E G C D E G C D E<br />
G...” will play.<br />
The Lucina AX-09 will operate as a<br />
monophonic synthesizer whose pitch<br />
can be controlled by moving your<br />
hand above the D Beam controller.<br />
MEMO<br />
By holding down the [INC/+] / [DEC/–] button you can<br />
choose this setting rapidly. To choose even faster, hold<br />
down the button and press the other button as well.<br />
3. Release.the.[SHIFT].button.<br />
4. To.save.this.setting,.hold.down.the.[SHIFT].button.<br />
and.press.the.[WRITE].button.<br />
Using a Foot Pedal<br />
If you connect a pedal switch (DP series; sold separately)<br />
to the FOOT PEDAL jack, you can hold down the pedal to<br />
make notes continue sustaining even after you release the<br />
keyboard.<br />
Alternatively, you can use the pedal to apply numerous<br />
other effects.<br />
Connecting a foot pedal<br />
MEMO<br />
Alternatively, you can connect an expression pedal<br />
(EV-5) instead of a pedal switch (DP series).<br />
NOTE<br />
Use only the specified expression pedal (EV-5; sold<br />
separately). By connecting any other expression pedals,<br />
you risk causing malfunction and/or damage to the<br />
unit.<br />
Specifying the foot pedal assignment<br />
Hold down the [SHIFT] button and press the [V-LINK]<br />
button twice; the screen will indicate “PDL,” allowing you<br />
to assign the effect applied by the foot pedal.<br />
You can assign the following functions to the pedal.<br />
To save this setting, hold down the [SHIFT] button and<br />
press the [WRITE] button.<br />
Display Value Explanation<br />
C01 CC01 ( MODULATION) Apply vibrato.<br />
C05<br />
CC05 ( PORTA TIME)<br />
Control the portamento time over<br />
which the pitch changes between<br />
notes when playing with portamento.<br />
C07 CC07 ( VOLUME) Control the volume.<br />
C10 CC10 ( PAN) Control the panning.<br />
English<br />
Deutsch Français Italiano Español Português Nederlands<br />
C11 CC11 ( EXPRESSION) Control the expression.<br />
C64 CC64 ( HOLD) Sustain the notes.<br />
C65<br />
C66<br />
CC65 ( PORTAMENTO)<br />
CC66 ( SOSTENUTO)<br />
Smoothly connect the pitch from one<br />
note to the next.<br />
Sustain the notes that are currently<br />
being held down.<br />
13
Display Value Explanation<br />
C71<br />
C72<br />
C73<br />
C74<br />
CC71 ( RESONANCE)<br />
CC72<br />
( RELEASE TIME)<br />
CC73<br />
( ATTACK TIME)<br />
CC74 ( CUTOFF)<br />
AFt AFTERTOUCH<br />
PUP PEDAL UP<br />
PDn PEDAL DOWN<br />
Control the resonance. Increasing<br />
the resonance value will produce<br />
a distinctive tonal character that is<br />
typical of a synthesizer.<br />
Control the time from note-off (when<br />
the key is released) until the sound is<br />
no longer heard (i.e., the release time).<br />
Control the sharpness (attack speed)<br />
with which the sound begins.<br />
Control the cutoff. Higher values will<br />
make the sound harder (brighter);<br />
lower values will make the sound<br />
softer (more mellow).<br />
Apply the most suitable effect for each<br />
of the Lucina AX-09’s tones.<br />
Select the tone of the next tone<br />
number.<br />
Select the tone of the preceding tone<br />
number.<br />
MEMO<br />
With the factory settings, the foot pedal is assigned to<br />
C64 (Hold).<br />
If using a foot pedal not made by <strong>Roland</strong><br />
If you’re using a foot pedal that was made by a<br />
manufacturer other than <strong>Roland</strong>, the pedal polarity might<br />
be reversed, so that the operations that occur when you<br />
press and release the pedal are the opposite of what you<br />
expect. If so, hold down the [SHIFT] button and press the<br />
[V-LINK] button three times to make the display indicate<br />
“PoL.” Then use the [INC/+] / [DEC/–] buttons to make the<br />
display indicate “rEu.”<br />
To save this setting, hold down the [SHIFT] button and<br />
press the [WRITE] button.<br />
Value<br />
Std.(Standard)<br />
rEu.(Reverse)<br />
Explanation<br />
Pedals made by <strong>Roland</strong><br />
Pedals with a polarity opposite to that<br />
of <strong>Roland</strong> pedals<br />
Preventing Tones from Changing<br />
During Performance ( Lock function)<br />
You can lock the tone selected on the Lucina AX-09 to<br />
prevent a different sound from being selected even if you<br />
accidentally press a tone button while performing.<br />
1. Hold.down.the..[LOCK].button.until.it.lights.<br />
Playing Along with a Portable<br />
Audio Player<br />
You can connect your portable audio player, and play the<br />
Lucina AX-09 along with your favorite songs.<br />
1. Connect.your.portable.audio.player.to.the.Lucina.<br />
AX-09’s..EXT.IN.jack.<br />
Use a stereo mini-plug<br />
(1/8”) cable to connect<br />
your player to the EXT<br />
IN jack.<br />
2. Play.back.a.song.on.your.portable.audio.player,.<br />
and.play.along.on.the.Lucina.AX-09.<br />
Use the controls of your player to adjust the volume and<br />
select songs.<br />
* When.connection.cables.with.resistors.are.used,.the.<br />
volume.level.of.equipment.connected.to.the.inputs.(EXT.<br />
IN).may.be.low..If.this.happens,.use.connection.cables.<br />
that.do.not.contain.resistors.<br />
Playing Along with an Audio<br />
File from USB Memory<br />
The Lucina AX-09 can play back audio<br />
files (MP3, WAV, AIFF) that you’ve copied<br />
to USB memory from your computer,<br />
allowing you to play along with your<br />
favorite songs.<br />
Copying audio files from your<br />
computer to USB memory<br />
You’ll need to copy the audio files from your computer to<br />
the root level of your USB memory.<br />
Copy.to.a.USB.drive<br />
MP3, WAV, AIFF<br />
The Lock function will turn on; in this state, button<br />
operations will not switch the tone.<br />
To re-enable tone switching, hold down the button once<br />
again until [LOCK] button goes out.<br />
14
Audio files that can be played<br />
.MP3<br />
Format MPEG-1 audio layer 3<br />
Sampling.<br />
Frequency<br />
44.1 kHz<br />
Bit.Rate<br />
.WAV,..AIFF<br />
Sampling.<br />
Frequency<br />
Bit.Rate<br />
32/40/48/56/64/80/96/112/128/160/192/224/256/320 kbps,<br />
VBR (Variable Bit Rate)<br />
44.1 kHz<br />
8/16/24 -bit<br />
Insert the USB memory<br />
1. Insert.your.USB.memory.into.the..USB.MEMORY.<br />
slot.as.shown.in.the.illustration.below.<br />
NOTE<br />
• Never insert or remove a USB memory while this unit’s<br />
power is on. Doing so may corrupt the unit’s data or the<br />
data on the USB memory.<br />
• Carefully insert the USB memory all the way in—until it<br />
is firmly in place.<br />
• Use USB memory sold by <strong>Roland</strong>. We cannot guarantee<br />
operation if other products are used.<br />
Play back audio files<br />
1. Insert.the.USB.memory.containing.the.copied.<br />
audio.fi.les.into.the.Lucina.AX-09’s.USB.MEMORY.<br />
slot.<br />
2. Press.the..[AUDIO.PLAYER].button.<br />
The [AUDIO PLAYER] button will light and the [ ]<br />
button will blink; now you can play back audio files from<br />
USB memory.<br />
If you press the [AUDIO PLAYER] button once again, the<br />
button will go out; now audio files will not be played.<br />
MEMO<br />
The [ ] button will not blink if USB memory is not<br />
inserted, or if the USB memory contains no song that<br />
can be played.<br />
3. Select.a.song.<br />
When you hold down the [AUDIO PLAYER] button, the<br />
display will show the first three characters of the file name<br />
of the currently selected audio file.<br />
Continue holding down the [AUDIO PLAYER] button, and<br />
press the [INC/+] button to jump to the next song, or press<br />
the [DEC/–] button to jump to the beginning of the song<br />
(or the preceding song if you’re already at the beginning<br />
of the song).<br />
MEMO<br />
The songs will be ordered by their file name (in the<br />
order of numerals, uppercase letters, and lowercase<br />
letters).<br />
4. Play.or.stop.the.song.<br />
When you press the [ ] button, the button that was<br />
blinking will light, and the selected audio file will play.<br />
If you press the [ ] button during playback, the lit<br />
button will blink, and playback will stop.<br />
If you press the [ ] button once again, playback will<br />
resume from where it was stopped.<br />
Switching songs during playback<br />
During playback, you can hold down the [AUDIO PLAYER]<br />
button and press the [DEC/–] button to interrupt playback<br />
and return to the beginning of the current song. Similarly,<br />
pressing the [INC/+] button will move to the beginning of<br />
the next song, and resume playback.<br />
MEMO<br />
If you hold down the [AUDIO PLAYER] button and press<br />
the [DEC/–] button at the beginning of the song, you’ll<br />
return to the beginning of the preceding song.<br />
Making Audio Player Settings<br />
1. Hold.down.the.[SHIFT].button.and.press.the.<br />
[AUDIO.PLAYER].button;.the.current.audio.player.<br />
setting.will.blink.in.the.display.<br />
2. Continue.holding.down.the.[SHIFT].button,.and.<br />
press.the.[AUDIO.PLAYER].button.once.again.to.<br />
switch.parameters.<br />
After a brief interval, the value will appear; continue<br />
holding down the [SHIFT] button, and use the [INC/+] /<br />
[DEC/–] buttons to edit the value.<br />
Parameter Value Explanation<br />
LuL 0–127 Audio file playback volume level<br />
PLY<br />
1P (SINGLE PLAY),<br />
CP (CHAIN PLAY)<br />
Choose whether playback will stop at<br />
the end of the selected song (SINGLE<br />
PLAY) or continue playing to the next<br />
song (CHAIN PLAY).<br />
3. To.save.this.setting,.hold.down.the.[SHIFT].button.<br />
and.press.the.[WRITE].button.<br />
English<br />
Deutsch Français Italiano Español Português Nederlands<br />
15
Editing the Tone Settings<br />
Editing the Tone Parameters<br />
You can edit tone parameters such as the volume and<br />
reverb for a regular tone, and save your settings in a<br />
FAVORITE memory location (p. 10).<br />
* You can’t edit the tone parameters of a special tone.<br />
1. Select the regular tone whose tone parameters<br />
you want to edit (p. 9).<br />
2. Hold down the [SHIFT] button and press the TONE<br />
button of the tone you selected in step 1 (i.e., the<br />
TONE button that’s lit).<br />
The parameter name (PS ) will blink in the display, and<br />
then its value (oFF or oN) will appear.<br />
3. Continue holding down the [SHIFT] button, and<br />
press the same TONE button to switch parameters.<br />
The parameters will switch from top to bottom of the<br />
“Parameter” column in the following table.<br />
* Don’t release your finger from the [SHIFT] button while<br />
making this setting.<br />
Parameter Value Explanation<br />
Portamento Switch<br />
OFF, ON<br />
Portamento is an effect that creates a<br />
PS<br />
smooth change in pitch from one note<br />
to the next.<br />
PtN 0–127<br />
uoL 0–127<br />
rEu 0–127<br />
rEL -64–63<br />
At<br />
-64–63<br />
CUt -64–63<br />
rES -64–63<br />
Portamento Time<br />
This specifies the time over which<br />
the pitch will change when using<br />
portamento. Higher values will lengthen<br />
the time over which the pitch will reach<br />
the next note.<br />
Volume<br />
This specifies the volume of the tone.<br />
Reverb<br />
This effect adds the reverberation that<br />
is characteristic of a performance in a<br />
large hall. Higher values produce deeper<br />
reverberation.<br />
Release Time (*1)<br />
This adjusts the time from note-off<br />
(i.e., when you release the key) until<br />
the sound disappears. Higher values<br />
produce a longer release time.<br />
Attack Time (*1)<br />
This adjusts the sharpness (speed) at<br />
which the sound begins. Higher values<br />
produce a more gentle attack.<br />
Cutoff (*1)<br />
Increasing the cutoff value will make<br />
the sound harder (brighter); decreasing<br />
it will make the sound more mellow<br />
(darker). Use this parameter to make<br />
adjustments if the sound is too muffled<br />
or too bright.<br />
Resonance (*1)<br />
Increasing the resonance value will<br />
produce a distinctive tonal character<br />
that is typical of a synthesizer. If you<br />
want to emphasize the effect of<br />
resonance, it’s a good idea to slightly<br />
lower the cutoff.<br />
*1 The values you specify here are an adjustment relative to the value<br />
assigned by each tone. If this value is set to 0, the parameter will be as<br />
specified by the tone’s own settings.<br />
4. When the parameter value appears, continue<br />
holding down the [SHIFT] button and use the<br />
[INC/+] / [DEC/–] buttons to edit the value.<br />
MEMO<br />
• You can make the value change more quickly by<br />
holding down the [INC/+] / [DEC/–] button. If you want<br />
the value to change even faster, hold down the button<br />
and press the other button as well.<br />
• Even while editing the value, you can play the keyboard<br />
to hear the result.<br />
5. Release the [SHIFT] button.<br />
* If you select a different sound or turn off the Lucina<br />
AX-09’s power in this state, the changes you made will<br />
be lost. If you want to keep your changes, you must store<br />
them in a FAVORITE memory location as follows.<br />
6. Press the [WRITE] button.<br />
The [WRITE] button will blink.<br />
7. Press the FAVORITE [A] button or [B] button to<br />
select a bank.<br />
8. Press one of the TONE [1]–[6] buttons to select the<br />
memory location in which you’ll store the settings.<br />
When the [WRITE] button goes out, the settings have been<br />
stored.<br />
16
Adjusting the Tuning<br />
Master Tune<br />
This is the overall tuning setting for the entire Lucina<br />
AX-09. With the factory settings, this is set to 440 Hz. The<br />
displayed value is the frequency of the A4 key (middle “A”).<br />
Value<br />
415.3–466.2 Hz<br />
1. Hold down the [SHIFT] button and press the<br />
[TRANSPOSE] button.<br />
The display will indicate “Ntn,” and then the current value<br />
of Master Tune will blink.<br />
The display shows only the last three digits (the initial<br />
numeral of “4” is omitted).<br />
2. Continue holding down the [SHIFT] button, and<br />
use the [INC/+] / [DEC/–] buttons to adjust the<br />
tuning value.<br />
MEMO<br />
• You can make the value change more quickly by<br />
holding down the [INC/+] / [DEC/–] button. If you want<br />
the value to change even faster, hold down the button<br />
and press the other button as well.<br />
• Even while editing the value, you can play the keyboard<br />
to hear the result.<br />
3. Release the [SHIFT] button.<br />
4. To save this setting, hold down the [SHIFT] button<br />
and press the [WRITE] button.<br />
Key Scale Tune<br />
You can choose either equal temperament or an Arabian<br />
scale as the keyboard tuning.<br />
Value<br />
EQL<br />
ArB<br />
Explanation<br />
Equal temperament<br />
Arabian scale<br />
1. Hold down the [SHIFT] button and press the<br />
[TRANSPOSE] button twice.<br />
The display will indicate “ EY”; then the current setting of<br />
Key Scale Tune will blink.<br />
2. Continue holding down the [SHIFT] button, and<br />
use the [INC/+] / [DEC/–] buttons to choose the<br />
desired value for Key Scale Tune.<br />
MEMO<br />
Even while editing the value, you can play the keyboard<br />
to hear the result.<br />
3. Release the [SHIFT] button.<br />
4. To save this setting, hold down the [SHIFT] button<br />
and press the [WRITE] button.<br />
Adjusting the Keyboard’s Touch Sensitivity<br />
Setting a Fixed Value for the Keyboard’s<br />
Velocity<br />
In order to play using notes that all have a uniform level<br />
(velocity), regardless of the amount of force you use when<br />
pressing keys, carry out the following procedure.<br />
1. Hold down the [SHIFT] button and press the<br />
[V-LINK] button once.<br />
The display will indicate “uEL,” and then the value of the<br />
current setting will appear.<br />
2. Continue holding down the [SHIFT] button, and<br />
use the [INC/+] / [DEC/–] buttons to change the<br />
setting.<br />
3. Release the [SHIFT] button.<br />
4. To save this setting, hold down the [SHIFT] button<br />
and press the [WRITE] button.<br />
English<br />
Deutsch Français Italiano Español Português Nederlands<br />
Value<br />
rAL (Real)<br />
1–127<br />
Explanation<br />
Notes reflecting the actual amount of force you use<br />
when pressing keys will be output.<br />
Notes having the specified velocity value will be output,<br />
regardless of the amount of force you use when pressing<br />
keys.<br />
17
Count In / Metronome<br />
“Count in” refers to a feature that counts you in to the<br />
beginning of the performance. To have a two-measure<br />
count in be sounded, press the modulation bar while you<br />
press the [PREVIEW] button.<br />
Note that, if you wish, you can have a metronome be<br />
sounded instead—simply change the Count Mode to Ntr<br />
(METRONOME) using the setting below. The metronome<br />
will continue to sound until you press the [PREVIEW]<br />
button a second time.<br />
* A.count.in.will.not.be.sounded.when.the.[AUDIO.<br />
PLAYER].button.is.lighted..<br />
Count In Settings<br />
1. Hold.down.the.[SHIFT].button.and.press.the.<br />
[PREVIEW].button;.the.current.count.in.setting.will.<br />
blink.in.the.display.<br />
2. Continue.holding.down.the.[SHIFT].button,.and.<br />
press.the.[PREVIEW].button.once.again.to.switch.<br />
parameters.<br />
After a brief interval, the value will appear; continue<br />
holding down the [SHIFT] button, and use the [INC/+] /<br />
[DEC/–] buttons to edit the value.<br />
Parameter Value Explanation<br />
Cnt<br />
oFF(OFF),<br />
Cin(COUNT IN),<br />
Ntr (METRONOME)<br />
Count mode<br />
Determines whether count in<br />
or metronome will sound<br />
bPN 20–250 Tempo of count<br />
bAt 0.4, 2.4, 3.4, 4.4, 5.4, 6.4, 7.4<br />
Time signature of count<br />
(2.4 indicates 2/4 time)<br />
LuL 0–10 Volume of count<br />
tyP<br />
1 (Electronic metronome)<br />
2 (Mechanical metronome)<br />
3 (Pulse)<br />
4 (Beep)<br />
5 (Cowbell)<br />
6 (Stick)<br />
Sound used for count<br />
3. To.save.this.setting,.hold.down.the.[SHIFT].button.<br />
and.press.the.[WRITE].button.<br />
MEMO<br />
To have the tempo of the count be shown in the<br />
display, hold down the [PREVIEW] button. While in this<br />
state, you can set a new tempo by tapping the [SHIFT]<br />
button at least four times at the desired tempo; or you<br />
can set it using the [INC/+] and [DEC/-] buttons.<br />
Various Settings ( Utility)<br />
18<br />
Checking the Lucina AX-09’s<br />
Version<br />
Here’s how to check the Lucina AX-09’s version.<br />
1. While.holding.down.the.FAVORITE.[A],.[B],.and.<br />
.[WRITE].buttons.simultaneously,.turn.on.the.<br />
Lucina.AX-09’s.power.<br />
The display will indicate “UtL”; the Lucina AX-09 will be in<br />
Utility mode.<br />
2. Press.the.TONE.[1].button.<br />
The display will indicate the version of your Lucina AX-09.<br />
If you want to continue playing the Lucina AX-09, turn off<br />
the power and wait several seconds before turning it on<br />
again.<br />
USB Driver Settings<br />
When using a USB cable to connect the<br />
Lucina AX-09 to your computer, you can<br />
choose whether to use the standard USB<br />
driver that’s provided by your computer<br />
or the USB driver provided by <strong>Roland</strong>.<br />
MEMO<br />
For details on connecting the Lucina AX-09 to your<br />
computer via USB, refer to “Connecting to Your<br />
Computer via USB” (p. 21).<br />
1. While.holding.down.the.FAVORITE.[A],.[B],.and.<br />
[WRITE].buttons.simultaneously,.turn.on.the.<br />
Lucina.AX-09’s.power.<br />
The display will indicate “UtL”; the Lucina AX-09 will be in<br />
Utility mode.<br />
2. Press.the.TONE.[2].button.<br />
The display will indicate “dru”; then the current value is<br />
shown and the [WRITE] button will blink.<br />
3. Use.the.[INC/+]./.[DEC/–].buttons.to.choose.the.<br />
desired.setting.<br />
Value<br />
GEn.(Generic)<br />
(Default)<br />
unD.(Vendor)<br />
Explanation<br />
Choose this if you’re using the standard USB driver<br />
provided by your computer.<br />
Normally you’ll use this mode.<br />
Choose this if you’re using the USB driver<br />
downloaded from the <strong>Roland</strong> website.<br />
4. Press.the.[WRITE].button.to.save.the.setting.<br />
5. Turn.the.Lucina.AX-09’s.power.off.,.then.on.again.<br />
Now you’ll be able to use the USB driver you choose.
Backing Up Lucina AX-09<br />
Settings to USB Memory<br />
Here’s how to back up your Lucina<br />
AX-09 settings and the tone settings in<br />
FAVORITE memory (p. 16) to USB memory<br />
(sold separately).<br />
1. Insert.your.USB.memory.into.the.USB.MEMORY.<br />
slot.(p..15).<br />
2. While.holding.down.the.FAVORITE.[A],.[B],.and.<br />
[WRITE].buttons.simultaneously,.turn.on.the.<br />
Lucina.AX-09’s.power.<br />
The display will indicate “UtL”; the Lucina AX-09 will be in<br />
Utility mode.<br />
3. Press.TONE.[3].button.<br />
The display will indicate “bUp” and the [WRITE] button will<br />
blink.<br />
4. Press.the.[WRITE].button.<br />
The backup will begin.<br />
5. When.the.display.indicates.“DnE,”.turn.the.Lucina.<br />
AX-09’s.power.off.,.then.on.again.<br />
MEMO<br />
If USB memory is not inserted in the Lucina AX-09 when<br />
you press the [WRITE] button, the display will indicate<br />
“Err.”<br />
Restoring Lucina AX-09 Settings<br />
from USB Memory<br />
Here’s how settings you saved as<br />
described in “Backing Up Lucina AX-09<br />
Settings to USB Memory” (p. 19) can be<br />
restored to the Lucina AX-09.<br />
1. Insert.the.USB.memory.containing.the.backed.up.<br />
settings.into.the.USB.MEMORY.slot.(p..15).<br />
2. While.holding.down.the.FAVORITE.[A],.[B],.and.<br />
[WRITE].buttons,.turn.on.the.Lucina.AX-09’s.power.<br />
The display will indicate “UtL”; the Lucina AX-09 will be in<br />
Utility mode.<br />
3. Press.the.TONE.[4].button.<br />
5. When.the.display.indicates.“DnE,”.turn.the.Lucina.<br />
AX-09’s.power.off.,.then.on.again.<br />
MEMO<br />
If USB memory is not inserted in the Lucina AX-09<br />
when you press the [WRITE] button, or if backup data<br />
does not exist in the appropriate location of the USB<br />
memory, the display will indicate “Err.”<br />
Restoring the Factory Settings<br />
( Factory Reset)<br />
Here’s how to return the Lucina AX-09 to its factory-set<br />
state.<br />
NOTE<br />
• When you execute this operation, all settings you’ve<br />
modified since purchasing the Lucina AX-09, including<br />
the tone settings you’ve stored in FAVORITES, will be<br />
lost.<br />
• If you want to keep your settings, be sure to back them<br />
up to USB memory before you execute the factory<br />
reset.<br />
“Backing Up Lucina AX-09 Settings to USB Memory” (p.<br />
19)<br />
1. While.holding.down.the.FAVORITE.[A],.[B],.and.<br />
[WRITE].buttons,.turn.on.the.Lucina.AX-09’s.power.<br />
The display will indicate “UtL”; the Lucina AX-09 will be in<br />
Utility mode.<br />
2. Press.the.TONE.[5].button.<br />
The display will indicate “FCt,” and the [WRITE] button<br />
will blink.<br />
3. Press.the.[WRITE].button.<br />
The [WRITE] button will light, and the factory reset will<br />
begin.<br />
NOTE<br />
While the [WRITE] button is lit, the factory reset is being<br />
executed. Never turn off the power during this time.<br />
The Lucina AX-09 may malfunction if you do so.<br />
4. When.the.display.indicates.“DnE,”.turn.the.Lucina.<br />
AX-09’s.power.off.,.then.on.again.<br />
English<br />
Deutsch Français Italiano Español Português Nederlands<br />
The display will indicate “rSt” and the [WRITE] button will<br />
blink.<br />
4. Press.the.[WRITE].button.<br />
The [WRITE] button will light, and the restore operation<br />
will begin.<br />
19
Connecting Other Equipment<br />
Controlling MIDI Devices<br />
If you’re using the Lucina AX-09 by itself, there’s no need<br />
for you to have a detailed understanding of MIDI. The<br />
following explanation of MIDI is provided for those who<br />
wish to connect the Lucina AX-09 to other MIDI devices<br />
and control them.<br />
MEMO<br />
MIDI stands for Musical Instrument Digital Interface,<br />
and is a global standard that allows electronic musical<br />
instruments and computers to exchange performance<br />
data.<br />
“MIDI Implementation Chart” (p. 26) is a chart that<br />
provides an easy way of checking which MIDI messages<br />
the Lucina AX-09 is able to receive. By comparing the<br />
MIDI implementation charts of the Lucina AX-09 and<br />
some other MIDI device, you can see which messages<br />
are compatible between the two devices.<br />
MIDI Messages that can be<br />
Transmitted and Received<br />
The Lucina AX-09 can transmit and receive the following<br />
MIDI messages.<br />
MEMO<br />
The Lucina AX-09 always receives MIDI messages from<br />
the USB COMPUTER connector.<br />
MIDI.message Explanation<br />
Note.On/Off..(*1) Transmission Key on/off messages<br />
Velocity Transmission Strength with which you play the key<br />
Aftertouch<br />
Program.Change<br />
Bank.Select.(*2)<br />
Modulation<br />
CC01.(Modulation)<br />
CC05.(Porta-Time)<br />
CC07.(Volume)<br />
CC10.(Panpot)<br />
CC11.(Expression)<br />
CC64.(Hold)<br />
CC65.(Porta-Sw)<br />
CC66.(Sostenute)<br />
CC71.(Resonance)<br />
CC72.(ReleaseTime)<br />
CC73.(AttackTime)<br />
CC74.(Cutoff. )<br />
Transmission<br />
Receive<br />
Transmission<br />
Transmission<br />
Channel aftertouch messages<br />
transmitted by the D Beam [ASSIGNABLE]<br />
button assigned to “ AFt ” or by the<br />
PEDAL. (This message is not transmitted<br />
by the keyboard.)<br />
Channel aftertouch, polyphonic<br />
aftertouch.<br />
Cannot be specified from the Lucina<br />
AX-09<br />
Cannot be specified from the Lucina<br />
AX-09<br />
CC01, transmission: MODULATION BAR<br />
Transmission<br />
Control change number assigned to<br />
the D Beam [ASSIGNABLE] button or to<br />
the PEDAL<br />
*1 Local control is always on. It cannot be turned off. If you want to control a<br />
connected external sound module without playing the Lucina AX-09’s own<br />
sounds, you can either disconnect the Lucina AX-09’s OUTPUT jacks, lower the<br />
Lucina AX-09’s volume, or lower the volume of the connected amp or mixer.<br />
*2 The transmitted program change number and bank select data (CC00, CC32)<br />
cannot be specified from the Lucina AX-09, but when you select an internal<br />
tone, that tone’s program change number and bank select data (CC00, CC32;<br />
see the “Tone List” at the end of this manual) will be transmitted according to<br />
the MIDI settings (p. 20).<br />
Connecting a MIDI Sound Module<br />
1. Use.a.MIDI.cable.to.connect.the.Lucina.AX-09’s.<br />
MIDI.OUT.connector.to.the.MIDI.IN.connector.of.<br />
the.MIDI.sound.module.you.want.to.control.<br />
MIDI Sound Module<br />
MIDI IN connector<br />
As necessary, connect an amp or speakers to the MIDI<br />
sound module or synthesizer you’re using. For details,<br />
refer to the owner’s manual of the sound module (or other<br />
device) you’re using.<br />
Making MIDI-related Settings<br />
1. Hold.down.the.[SHIFT].button.and.press.the.<br />
[V-LINK].button.the.appropriate.number.of.times.<br />
to.access.the.desired.MIDI.setting;.four.times.for.<br />
“Ch,”.fi.ve.times.for.“Bn ,”.or.six.times.for.“PC.”<br />
2. Continue.holding.down.the.[SHIFT].button,.and.<br />
use.the.[INC/+]./.[DEC/–].buttons.to.edit.the.<br />
setting.<br />
Parameter Value Explanation<br />
1–16<br />
Ch<br />
MIDI channel setting<br />
(Default: 1)<br />
Bn<br />
PC<br />
OFF, ON<br />
(Default: OFF)<br />
OFF, ON<br />
(Default: ON)<br />
Specifies whether MSB/LSB will be<br />
transmitted<br />
Specifies whether program change<br />
data will be transmitted<br />
3. Release.the.[SHIFT].button.<br />
4. To.save.this.setting,.hold.down.the.[SHIFT].button.<br />
and.press.the.[WRITE].button.<br />
20
Connecting to Your Computer<br />
via USB<br />
If you use a commercially available USB cable to connect<br />
the Lucina AX-09’s rear panel USB COMPUTER connector to<br />
a USB connector of your computer, you’ll be able to do the<br />
following things using MIDI.<br />
• Play your software synthesizers by performing the<br />
Lucina AX-09.<br />
• Record into your sequencer software by performing the<br />
Lucina AX-09.<br />
• Use your sequencer software to play the Lucina AX-09.<br />
USB cable (sold separately)<br />
* For.details.on.operating.requirements,.refer.to.the.<br />
<strong>Roland</strong>.website.<br />
<strong>Roland</strong> website<br />
Here you can download the original driver, and view<br />
installation instructions and operating requirements.<br />
http://www.roland.com/<br />
NOTE<br />
• Only MIDI data can be transmitted or received via USB.<br />
• Power-on the Lucina AX-09 before starting the MIDI<br />
application on your computer. Do not turn the Lucina<br />
AX-09’s power on or off while your MIDI application is<br />
running.<br />
USB driver settings<br />
Normally it will not be necessary to install a USB driver in<br />
your computer. However if you experience problems with<br />
the computer connection (if a malfunction occurs, or if<br />
the performance is poor), you may be able to solve the<br />
problem by downloading and installing <strong>Roland</strong>’s original<br />
driver as described below.<br />
1. As.described.in.“USB.Driver.Settings”.(p..18),.change.<br />
the.driver.setting.to.“unD”.(Vendor).<br />
2. Turn.the.Lucina.AX-09’s.power.off.,.and.then.on.<br />
again.<br />
3. Download.and.install.the.original.<strong>Roland</strong>.driver.<br />
For details on downloading and installing the original<br />
<strong>Roland</strong> driver, refer to the <strong>Roland</strong> website.<br />
Controlling Video ( V-LINK)<br />
V-LINK (<br />
) is a function that allows music<br />
and images to be performed together. By using MIDI to<br />
connect two or more V-LINK compatible devices, you can<br />
easily enjoy performing a wide range of visual effects<br />
that are linked to the expressive elements of a music<br />
performance.<br />
For example, if you use the Lucina AX-09 in conjunction<br />
with the EDIROL P-10, you’ll be able to do the following.<br />
• You can use the Lucina AX-09’s keyboard to switch<br />
images on the P-10.<br />
• You can use the Lucina AX-09’s touch controller to<br />
control the speed of image playback.<br />
This example shows the Lucina AX-09 connected to an<br />
EDIROL P-10.<br />
Use a MIDI cable to connect the Lucina AX-09’s MIDI OUT<br />
connector to the EDIROL P-10’s MIDI IN connector.<br />
EDIROL P-10<br />
MIDI IN connector<br />
* You.can’t.perform.V-LINK.communication.via.USB.<br />
Turning V-LINK On<br />
1. Press.the.[V-LINK].button.to.make.it.light.<br />
Operations on the Lucina AX-09<br />
V-LINK data is transmitted on MIDI channel 15. The following<br />
functions can be controlled from the Lucina AX-09.<br />
Controller<br />
Keyboard<br />
(the.far-left.octave)<br />
Touch.Controller<br />
Local switch settings<br />
Explanation<br />
Switch images.<br />
* Normally, the keyboard will sound at the same<br />
time that the clip is switched. If you don’t want<br />
the keyboard to sound, change the Local Switch<br />
setting to “OFF.”<br />
Control the playback speed.<br />
* However, the touch controller will also transmit<br />
pitch bend data at the same time.<br />
1. Hold.down.the.[SHIFT].button.and.press.the.<br />
[V-LINK].button.seven.times.<br />
The display will indicate “LCL,” and then the value of the<br />
current setting will appear.<br />
2. Continue.holding.down.the.[SHIFT].button,.and.<br />
use.the.[INC/+]./.[DEC/–].buttons.to.change.the.<br />
setting.<br />
English<br />
Deutsch Français Italiano Español Português Nederlands<br />
Value<br />
on<br />
oFF<br />
Explanation<br />
When V-LINK is on, the leftmost octave of the keyboard<br />
will sound.<br />
When V-LINK is on, the leftmost octave of the keyboard<br />
will not sound.<br />
* This.setting.is.not.saved..It.will.always.be.ON.when.the.<br />
Lucina.AX-09.starts.up.<br />
21
Troubleshooting<br />
Problem Items to check Action<br />
Power won’t turn on<br />
Three dots are blinking in the<br />
display<br />
Are the included AC adaptor and power cord correctly<br />
connected to an AC outlet and to the Lucina AX-09<br />
Do not use any AC adaptor or power cord other than those supplied with<br />
the Lucina AX-09. Doing so may cause malfunctions (p. 7).<br />
Could the batteries have run low Check the remaining battery power (p. 6).<br />
Are the batteries inserted in the correct orientation<br />
Open the battery compartment, and verify that the batteries are oriented<br />
correctly (p. 6).<br />
Battery power has run low. Replace the batteries as soon as possible (p. 6).<br />
Three dots are lit in the display The batteries have run down completely. Install fresh batteries (p. 6).<br />
No sound<br />
No sound from an external MIDI<br />
device<br />
The volume level of the instrument<br />
connected to EXT IN jack is too low<br />
Something is wrong with the pitch<br />
Can’t play back audio files from<br />
USB memory<br />
USB memory is not recognized/<br />
Files are not shown<br />
Can’t back up to USB memory<br />
Is the connected amp or speaker turned on<br />
Could the volume of the connected equipment be<br />
lowered<br />
Could the [VOLUME] knob be set to the minimum<br />
level<br />
Turn on the power of the connected amp or speaker.<br />
Adjust the volume of the connected equipment.<br />
Adjust the [VOLUME] knob.<br />
Are the connections correct Make the correct connections (p. 8).<br />
Do you hear sound when you connect headphones<br />
Could the volume have been lowered by pedal<br />
operations, D Beam controller operations, or by MIDI<br />
messages (volume messages or expression messages)<br />
received from an external MIDI device<br />
Could you have selected a FAVORITE memory location<br />
whose volume level is set to “0”<br />
Could you be using a connection cable that has a<br />
built-in resistor<br />
Does the Lucina AX-09’s MIDI transmit channel match<br />
the connected device’s MIDI receive channel<br />
Could you be using a connection cable that contains<br />
a resistor<br />
If you hear sound in the headphones, it may be that the connection<br />
cable is broken, or that your amp or mixer has malfunctioned. Check your<br />
connection cable and equipment once again.<br />
Press the pedal, move your hand above the D Beam controller, or check<br />
the controller settings.<br />
Increase the volume level (p. 16).<br />
Use a connection cable that does not have a built-in resistor (such as one<br />
from the <strong>Roland</strong> PCS series).<br />
Set the Lucina AX-09’s transmit channel to match the connected device’s<br />
receive channel (p. 20).<br />
Use a connection cable that does not contain a resistor.<br />
For some tones, pitches in a certain range may sound different than the pitch of other tones.<br />
It may be that the pitch was changed when you touched the touch controller, or when pitch bend messages were received from an<br />
external MIDI device.<br />
Could the Lucina AX-09’s tuning be set inappropriately Check the master tune setting and the key scale tune setting (p. 17).<br />
Audio files of a sample rate other than 44.1 kHz cannot<br />
be played by the Lucina AX-09.<br />
It may be that the audio file is of a file type that cannot<br />
be played by the Lucina AX-09.<br />
It may be that the audio file is damaged.<br />
Check the format of the USB memory. The Lucina<br />
AX-09 can use USB memory that is formatted as<br />
FAT. (Normally, USB memory you purchase will<br />
be formatted as FAT, and can be used without<br />
reformatting.) USB memory that was formatted by<br />
a computer with a file system other than FAT (for<br />
example, as NTFS) will not be recognized by the Lucina<br />
AX-09.<br />
Could the USB memory be write protected<br />
Is there sufficient free space on the USB memory<br />
Check the format of the USB memory. The Lucina AX-09<br />
can use USB memory that is formatted as FAT.<br />
Please use audio files whose sample rate is 44.1 kHz.<br />
Use an audio file of a type listed in “Audio files that can be played” (p. 15).<br />
Check the audio file.<br />
Use your computer to format the USB memory as FAT. (The Lucina AX-09<br />
is not able to format USB memory.)<br />
In Computer (or My Computer), right-click the USB drive, choose “Format,”<br />
and choose “FAT” as the file system to format the drive as FAT. For more<br />
about how to format USB memory, refer to your computer’s owner’s<br />
manual.<br />
Turn off the write-protect setting.<br />
Use USB memory that has sufficient free space.<br />
(Refer to the item “USB memory is not recognized/ Files are not shown.”)<br />
22
Specifications<br />
Lucina AX-09: Synthesizer<br />
Keyboard<br />
37 Keys (with velocity)<br />
Sound Generator Section<br />
Maximum Polyphony 128 Voices<br />
Parts<br />
1 Part<br />
Tones 150 Tones (Regular Tones 144, Special Tones: 6)<br />
Audio Player Section (playable formats)<br />
MP3<br />
WAV, AIFF<br />
Others<br />
Controllers<br />
Connectors<br />
Display<br />
Format MPEG-1 audio layer 3<br />
Sampling Frequency<br />
Bit Rate<br />
Sampling Frequency<br />
Bit Depth<br />
D Beam Controller<br />
Modulation Bar<br />
Touch Controller<br />
44.1 kHz<br />
32/40/48/56/64/80/96/112/128/<br />
160/192/224/256/320 kbps,<br />
VBR (Variable Bit Rate)<br />
44.1 kHz<br />
8/16/24 -bit<br />
OUTPUT Jacks (L (MONO), R) (1/4 inch phone type)<br />
PHONES Jack (Stereo 1/4 inch phone type)<br />
EXT IN Jack (Stereo mini type)<br />
FOOT PEDAL Jack (Assignable)<br />
USB COMPUTER Connector (for USB MIDI)<br />
USB MEMORY Slot<br />
MIDI OUT Connector (V-LINK)<br />
DC IN jack<br />
7 segments, 3 characters (LED)<br />
Error Message List<br />
Power Supply<br />
Current Draw<br />
Battery Life for<br />
Continuous Use<br />
Dimensions<br />
Weight<br />
Accessories<br />
Options<br />
AC Adaptor<br />
Ni-MH AA SIZE Rechargeable Battery x 8<br />
* Batteries sold separately.<br />
* Do not use alkaline batteries or zinc-carbon batteries.<br />
600 mA<br />
Ni-MH Rechargeable batteries: approximately 4 hours<br />
(This figure will vary depending on the actual conditions<br />
of use.)<br />
832 (W) x 245 (D) x 95 (H) mm<br />
32-13/16 (W) x 9-11/16 (D) x 3-3/4 (H) inches<br />
3.7 kg<br />
8 lbs 3 oz<br />
(Excluding AC Adaptor)<br />
Owner’s <strong>Manual</strong>, Quick Guide<br />
Tutorial DVD<br />
Strap<br />
Panel Sticker<br />
USB MEMORY Connector Cap<br />
AC adaptor (PSB-1U (S))<br />
Pedal Switch: DP Series<br />
Expression Pedal: EV-5<br />
USB Memory<br />
* Use USB memory sold by <strong>Roland</strong>. We cannot<br />
guarantee operation if other products are used.<br />
* In the interest of product improvement, the specifications and/or appearance of<br />
this unit are subject to change without prior notice.<br />
Message<br />
Description<br />
LoC Lock USB memory is locked. Unlock the USB memory before using it.<br />
ENP Empty The USB memory does not contain the necessary data.<br />
Err Error Can’t access USB memory. Make sure that the USB memory is inserted.<br />
FUL Memory Full Processing could not be carried out because there is insufficient free space on the USB memory.<br />
English<br />
Deutsch Français Italiano Español Português Nederlands<br />
23
USING THE UNIT SAFELY<br />
Used for instructions intended to alert the<br />
user to the risk of death or severe injury<br />
should the unit be used improperly.<br />
Used for instructions intended to alert the<br />
user to the risk of injury or material damage<br />
should the unit be used improperly.<br />
* Material damage refers to damage or<br />
other adverse effects caused with respect<br />
to the home and all its furnishings, as well<br />
to domestic animals or pets.<br />
The symbol alerts the user to important instructions or<br />
warnings.The specific meaning of the symbol is<br />
determined by the design contained within the triangle. In<br />
the case of the symbol at left, it is used for general<br />
cautions, warnings, or alerts to danger.<br />
The symbol alerts the user to items that must never be<br />
carried out (are forbidden). The specific thing that must<br />
not be done is indicated by the design contained within<br />
the circle. In the case of the symbol at left, it means that<br />
the unit must never be disassembled.<br />
The symbol alerts the user to things that must be carried<br />
out. The specific thing that must be done is indicated by<br />
the design contained within the circle. In the case of the<br />
symbol at left, it means that the power-cord plug must be<br />
unplugged from the outlet.<br />
24<br />
WARNING<br />
Do not open (or modify in any way) the unit or<br />
its AC adaptor.<br />
Do not attempt to repair the unit, or replace<br />
parts within it (except when this manual<br />
provides specific instructions directing you to<br />
do so). Refer all servicing to your retailer, the<br />
nearest <strong>Roland</strong> Service Center, or an authorized<br />
<strong>Roland</strong> distributor, as listed on the “Information”<br />
page.<br />
Never install the unit in any of the following<br />
locations.<br />
• Subject to temperature extremes (e.g.,<br />
direct sunlight in an enclosed vehicle, near<br />
a heating duct, on top of heat-generating<br />
equipment); or are<br />
• Damp (e.g., baths, washrooms, on wet<br />
floors); or are<br />
• Exposed to steam or smoke; or are<br />
• Subject to salt exposure; or are<br />
• Humid; or are<br />
• Exposed to rain; or are<br />
• Dusty or sandy; or are<br />
• Subject to high levels of vibration and<br />
shakiness.<br />
If you’re using the Lucina AX-09 without a<br />
shoulder strap, make sure you always place it<br />
so it’s level and sure to remain stable. Never<br />
place it on stands that could wobble, or on<br />
inclined surfaces.<br />
Be sure to use only the AC adaptor supplied<br />
with the unit. Also, make sure the line voltage<br />
at the installation matches the input voltage<br />
specified on the AC adaptor’s body. Other<br />
AC adaptors may use a different polarity, or<br />
be designed for a different voltage, so their<br />
use could result in damage, malfunction, or<br />
electric shock.<br />
Use only the attached power-supply cord. Also,<br />
the supplied power cord must not be used with<br />
any other device.<br />
Do not excessively twist or bend the power<br />
cord, nor place heavy objects on it. Doing<br />
so can damage the cord, producing severed<br />
elements and short circuits. Damaged cords are<br />
fire and shock hazards!<br />
This unit, either alone or in combination with<br />
an amplifier and headphones or speakers, may<br />
be capable of producing sound levels that<br />
could cause permanent hearing loss. Do not<br />
operate for a long period of time at a high volume<br />
level, or at a level that is uncomfortable.<br />
If you experience any hearing loss or ringing<br />
in the ears, you should immediately stop using<br />
the unit, and consult an audiologist.<br />
Do not allow any objects (e.g., flammable material,<br />
coins, pins); or liquids of any kind (water,<br />
soft drinks, etc.) to penetrate the unit.<br />
WARNING<br />
Immediately turn the power off, remove the AC<br />
adaptor from the outlet, and request servicing<br />
by your retailer, the nearest <strong>Roland</strong> Service<br />
Center, or an authorized <strong>Roland</strong> distributor, as<br />
listed on the “Information” page when:<br />
• The AC adaptor, the power-supply cord, or<br />
the plug has been damaged; or<br />
• If smoke or unusual odor occurs<br />
• Objects have fallen into, or liquid has been<br />
spilled onto the unit; or<br />
• The unit has been exposed to rain (or<br />
otherwise has become wet); or<br />
• The unit does not appear to operate<br />
normally or exhibits a marked change in<br />
performance.<br />
In households with small children, an adult<br />
should provide supervision until the child is<br />
capable of following all the rules essential for<br />
the safe operation of the unit.<br />
Protect the unit from strong impact.<br />
(Do not drop it!)<br />
Do not force the unit’s power-supply cord to<br />
share an outlet with an unreasonable number<br />
of other devices. Be especially careful when<br />
using extension cords—the total power used<br />
by all devices you have connected to the extension<br />
cord’s outlet must never exceed the power<br />
rating (watts/amperes) for the extension cord.<br />
Excessive loads can cause the insulation on the<br />
cord to heat up and eventually melt through.<br />
Before using the unit in a foreign country,<br />
consult with your retailer, the nearest <strong>Roland</strong><br />
Service Center, or an authorized <strong>Roland</strong> distributor,<br />
as listed on the “Information” page.<br />
Batteries must never be recharged, heated,<br />
taken apart, or thrown into fire or water.<br />
Never expose Battery to excessive heat such as<br />
sunshine, fire or the like.<br />
CAUTION<br />
The unit and the AC adaptor should be located<br />
so their location or position does not interfere<br />
with their proper ventilation.<br />
Always grasp only the plug on the AC adaptor<br />
cord when plugging into, or unplugging from,<br />
an outlet or this unit.<br />
At regular intervals, you should unplug the AC<br />
adaptor and clean it by using a dry cloth to<br />
wipe all dust and other accumulations away<br />
from its prongs. Also, disconnect the power<br />
plug from the power outlet whenever the unit<br />
is to remain unused for an extended period of<br />
time. Any accumulation of dust between the<br />
power plug and the power outlet can result in<br />
poor insulation and lead to fire.<br />
CAUTION<br />
Try to prevent cords and cables from becoming<br />
entangled. Also, all cords and cables should be<br />
placed so they are out of the reach of children.<br />
Never climb on top of, nor place heavy objects<br />
on the unit.<br />
Never handle the AC adaptor or its plugs with<br />
wet hands when plugging into, or unplugging<br />
from, an outlet or this unit.<br />
Before moving the unit, disconnect the AC<br />
adaptor and all cords coming from external<br />
devices.<br />
Before cleaning the unit, turn off the power and<br />
unplug the AC adaptor from the outlet (p. 7).<br />
Whenever you suspect the possibility of lightning<br />
in your area, disconnect the AC adaptor<br />
from the outlet.<br />
If used improperly, batteries may explode or<br />
leak and cause damage or injury. In the interest<br />
of safety, please read and observe the following<br />
precautions (p. 6).<br />
• Carefully follow the installation instructions<br />
for batteries, and make sure you observe the<br />
correct polarity.<br />
• Avoid using new batteries together with<br />
used ones. In addition, avoid mixing different<br />
types of batteries.<br />
• Remove the batteries whenever the unit is<br />
to remain unused for an extended period<br />
of time.<br />
• If a battery has leaked, use a soft piece of<br />
cloth or paper towel to wipe all remnants<br />
of the discharge from the battery<br />
compartment. Then install new batteries.<br />
To avoid inflammation of the skin, make<br />
sure that none of the battery discharge<br />
gets onto your hands or skin. Exercise the<br />
utmost caution so that none of the discharge<br />
gets near your eyes. Immediately rinse the<br />
affected area with running water if any of the<br />
discharge has entered the eyes.<br />
• Never keep batteries together with metallic<br />
objects such as ballpoint pens, necklaces,<br />
hairpins, etc.<br />
Used batteries must be disposed of in compliance<br />
with whatever regulations for their safe<br />
disposal that may be observed in the region in<br />
which you live.<br />
Keep the USB MEMORY connector cap you<br />
may remove and the included USB MEMORY<br />
connector cap in a safe place out of children’s<br />
reach, so there is no chance of them being<br />
swallowed accidentally.
IMPORTANT NOTES<br />
Power Supply: Use of Batteries<br />
• Do not connect this unit to same electrical outlet that is<br />
being used by an electrical appliance that is controlled<br />
by an inverter (such as a refrigerator, washing machine,<br />
microwave oven, or air conditioner), or that contains a<br />
motor. Depending on the way in which the electrical<br />
appliance is used, power supply noise may cause this<br />
unit to malfunction or may produce audible noise. If it is<br />
not practical to use a separate electrical outlet, connect<br />
a power supply noise filter between this unit and the<br />
electrical outlet.<br />
• The AC adaptor will begin to generate heat after long<br />
hours of consecutive use. This is normal, and is not a cause<br />
for concern.<br />
• The use of an AC adaptor is recommended as the unit’s<br />
power consumption is relatively high. Should you prefer<br />
to use batteries, please use the nickel hydrogen type.<br />
• When installing or replacing batteries, always turn off<br />
the power on this unit and disconnect any other devices<br />
you may have connected. This way, you can prevent<br />
malfunction and/or damage to speakers or other devices.<br />
• Before connecting this unit to other devices, turn off the<br />
power to all units. This will help prevent malfunctions<br />
and/or damage to speakers or other devices.<br />
• If batteries are installed, disconnecting or reconnecting<br />
the power cord at the AC outlet or disconnecting the DC<br />
plug from the Lucina AX-09’s rear panel while the power is<br />
on will cause the power to turn off. You must turn off the<br />
power before you connect or disconnect the power cord<br />
or AC adaptor.<br />
Placement<br />
• Using the unit near power amplifiers (or other equipment<br />
containing large power transformers) may induce hum. To<br />
alleviate the problem, change the orientation of this unit;<br />
or move it farther away from the source of interference.<br />
• This device may interfere with radio and television<br />
reception. Do not use this device in the vicinity of such<br />
receivers.<br />
• Noise may be produced if wireless communications<br />
devices, such as cell phones, are operated in the vicinity<br />
of this unit. Such noise could occur when receiving<br />
or initiating a call, or while conversing. Should you<br />
experience such problems, you should relocate such<br />
wireless devices so they are at a greater distance from this<br />
unit, or switch them off.<br />
• Do not expose the unit to direct sunlight, place it near<br />
devices that radiate heat, leave it inside an enclosed<br />
vehicle, or otherwise subject it to temperature extremes.<br />
Excessive heat can deform or discolor the unit.<br />
• When moved from one location to another where the<br />
temperature and/or humidity is very different, water<br />
droplets (condensation) may form inside the unit.<br />
Damage or malfunction may result if you attempt to use<br />
the unit in this condition. Therefore, before using the<br />
unit, you must allow it to stand for several hours, until the<br />
condensation has completely evaporated.<br />
• Do not allow objects to remain on top of the keyboard.<br />
This can be the cause of malfunction, such as keys ceasing<br />
to produce sound.<br />
• Depending on the material and temperature of the<br />
surface on which you place the unit, its rubber feet may<br />
discolor or mar the surface.<br />
You can place a piece of felt or cloth under the rubber feet<br />
to prevent this from happening. If you do so, please make<br />
sure that the unit will not slip or move accidentally.<br />
Maintenance<br />
• For everyday cleaning wipe the unit with a soft, dry cloth<br />
or one that has been slightly dampened with water. To<br />
remove stubborn dirt, use a cloth impregnated with a<br />
mild, non-abrasive detergent. Afterwards, be sure to wipe<br />
the unit thoroughly with a soft, dry cloth.<br />
• Never use benzine, thinners, alcohol or solvents of any<br />
kind, to avoid the possibility of discoloration and/or<br />
deformation.<br />
Repairs and Data<br />
• Please be aware that all data contained in the unit’s<br />
memory may be lost when the unit is sent for repairs.<br />
Important data should always be backed up the USB<br />
memory, or written down on paper (when possible).<br />
During repairs, due care is taken to avoid the loss of data.<br />
However, in certain cases (such as when circuitry related<br />
to memory itself is out of order), we regret that it may not<br />
be possible to restore the data, and <strong>Roland</strong> assumes no<br />
liability concerning such loss of data.<br />
Using USB Memories<br />
• Carefully insert the USB memory all the way in-until it is<br />
firmly in place.<br />
• Never touch the terminals of the USB memory. Also, avoid<br />
getting the terminals dirty.<br />
• USB memories are constructed using precision<br />
components; handle the cards carefully, paying particular<br />
note to the following.<br />
• To prevent damage to the cards from static<br />
electricity, be sure to discharge any static electricity<br />
from your own body before handling the cards.<br />
• Do not touch or allow metal to come into contact<br />
with the contact portion of the cards.<br />
• Do not bend, drop, or subject cards to strong shock<br />
or vibration.<br />
• Do not keep cards in direct sunlight, in closed<br />
vehicles, or other such locations.<br />
• Do not allow cards to become wet.<br />
• Do not disassemble or modify the cards.<br />
Handling DVDs<br />
• Avoid touching or scratching the shiny underside<br />
(encoded surface) of the disc. Damaged or dirty DVD<br />
discs may not be read properly. Keep your discs clean<br />
using a commercially available disk cleaner.<br />
Strap Holder Precautions<br />
• Never unscrew the strap pins to avoid damaging<br />
the Lucina AX-09’s plastic housing, which eventually<br />
compromises overall stability and safety.<br />
• To avoid dropping the unit and damaging it or causing<br />
injuries to yourself or other people, be sure to doublecheck<br />
whether the supplied strap is securely attached to<br />
the two pins before using the Lucina AX-09.<br />
• <strong>Roland</strong> recommends installing commercially available<br />
strap locks for guitar to guard against damage and<br />
injuries caused by the strap coming loose while your are<br />
playing.<br />
Additional Precautions<br />
• Please be aware that the contents of memory can be<br />
irretrievably lost as a result of a malfunction, or the<br />
improper operation of the unit. To protect yourself against<br />
the risk of loosing important data, we recommend that<br />
you periodically save a backup copy of important data<br />
you have stored in the USB memory.<br />
• Unfortunately, it may be impossible to restore the<br />
contents of data that was stored on a USB memory<br />
or the internal memory once it has been lost. <strong>Roland</strong><br />
Corporation assumes no liability concerning such loss<br />
of data.<br />
• Use a reasonable amount of care when using the unit’s<br />
buttons, sliders, or other controls; and when using<br />
its jacks and connectors. Rough handling can lead to<br />
malfunctions.<br />
• Never strike or apply strong pressure to the display.<br />
• When connecting / disconnecting all cables, grasp the<br />
connector itself-never pull on the cable. This way you will<br />
avoid causing shorts, or damage to the cable’s internal<br />
elements.<br />
• To avoid disturbing your neighbors, try to keep the<br />
unit’s volume at reasonable levels. You may prefer to use<br />
headphones, so you do not need to be concerned about<br />
those around you (especially when it is late at night).<br />
• When you need to transport the unit, package it in the<br />
box (including padding) that it came in, if possible.<br />
Otherwise, you will need to use equivalent packaging<br />
materials.<br />
• Use only the specified expression pedal (EV-5; sold<br />
separately). By connecting any other expression pedals,<br />
you risk causing malfunction and/or damage to the unit.<br />
• Some connection cables contain resistors. Do not use<br />
cables that incorporate resistors for connecting to this<br />
unit. The use of such cables can cause the sound level to<br />
be extremely low, or impossible to hear. For information<br />
on cable specifications, contact the manufacturer of<br />
the cable.<br />
• The usable range of D Beam controller will become<br />
extremely small when used under strong direct sunlight.<br />
Please be aware of this when using the D Beam controller<br />
outside.<br />
• The explanations in this manual include illustrations that<br />
depict what should typically be shown by the display.<br />
Note, however, that your unit may incorporate a newer,<br />
enhanced version of the system (e.g., includes newer<br />
sounds), so what you actually see in the display may not<br />
always match what appears in the manual.<br />
• Microsoft and Windows are registered trademarks of<br />
Microsoft Corporation.<br />
• Windows® is known officially as: “Microsoft® Windows®<br />
operating system.”<br />
• MMP (Moore Microprocessor Portfolio) refers to a patent<br />
portfolio concerned with microprocessor architecture,<br />
which was developed by Technology Properties Limited<br />
(TPL). <strong>Roland</strong> has licensed this technology from the TPL<br />
Group.<br />
• MPEG Layer-3 audio compression technology is<br />
licensed from Fraunhofer IIS Corporation and THOMSON<br />
Multimedia Corporation.<br />
• MatrixQuest 2010<br />
TEPCO UQUEST, LTD. All<br />
rights reserved.<br />
The Lucina AX-09’s USB functionality uses MatrixQuest<br />
middleware technology from TEPCO UQUEST, LTD.<br />
• Featuring digital fonts by Yourname, Inc.<br />
Digital font: Copyright © Yourname, Inc.<br />
• <strong>Roland</strong> is a registered trademark of <strong>Roland</strong> Corporation in<br />
the United States and/or other countries.<br />
• All product names mentioned in this document are<br />
trademarks or registered trademarks of their respective<br />
owners.<br />
English<br />
Deutsch Français Italiano Español Português Nederlands<br />
25
Index<br />
A<br />
AC adaptor.. . . . . . . . . . . . . . . . . . . . . . . 7<br />
ADLIB.. . . . . . . . . . . . . . . . . . . . . . . . . . . . 13<br />
AFTERTOUCH. . . . . . . . . . . . . . . . . . 13, 14<br />
AIFF.. . . . . . . . . . . . . . . . . . . . . . . . . . . . . . 15<br />
Arabian scale.. . . . . . . . . . . . . . . . . . 17<br />
ASSIGNABLE. . . . . . . . . . . . . . . . . . . . . . . 12<br />
ATTACK TIME.. . . . . . . . . . . . . . 13, 14, 16<br />
Audio File.. . . . . . . . . . . . . . . . . . . . . . . 14<br />
audio player .. . . . . . . . . . . . . . . . . . . 15<br />
[AUDIO PLAYER] button. . . . . . . . . 15<br />
B<br />
Backing Up. . . . . . . . . . . . . . . . . . . . . . 19<br />
Batteries. . . . . . . . . . . . . . . . . . . . . . . . . . 6<br />
battery compartment. . . . . . . . . . . 6<br />
C<br />
Computer.. . . . . . . . . . . . . . . . . . . . . . . 21<br />
cord hook. . . . . . . . . . . . . . . . . . . . . . . . 7<br />
Count In .. . . . . . . . . . . . . . . . . . . . . . . . 18<br />
CUTOFF.. . . . . . . . . . . . . . . . . . . 13, 14, 16<br />
D<br />
D Beam Controller.. . . . . . . . . . . . 12<br />
DC IN jack.. . . . . . . . . . . . . . . . . . . . . . . . . 7<br />
E<br />
Equal temperament.. . . . . . . . . . . 17<br />
Error Message List .. . . . . . . . . . . . 23<br />
EXPRESSION. . . . . . . . . . . . . . . . . . . 12, 13<br />
expression pedal .. . . . . . . . . . . . . . 13<br />
EXT IN jack.. . . . . . . . . . . . . . . . . . . . . . 14<br />
F<br />
Factory Reset.. . . . . . . . . . . . . . . . . . 19<br />
FAVORITE. . . . . . . . . . . . . . . . . . . . . . . . . 10<br />
FAVORITE [A] / [B] button .. . . . . . . 10<br />
FILTER.. . . . . . . . . . . . . . . . . . . . . . . . . . . . 12<br />
Foot Pedal .. . . . . . . . . . . . . . . . . . 13, 14<br />
FOOT PEDAL jack.. . . . . . . . . . . . . . . . 13<br />
H<br />
Headphones.. . . . . . . . . . . . . . . . . . . . . . 8<br />
HOLD .. . . . . . . . . . . . . . . . . . . . . . . . . 12, 13<br />
I<br />
[INC/+] / [DEC/–] buttons.. . . . . . . . . 9<br />
K<br />
Key Scale Tune .. . . . . . . . . . . . . . . . . 17<br />
L<br />
Letters.. . . . . . . . . . . . . . . . . . . . . . . . . . . . 2<br />
L/MONO jack.. . . . . . . . . . . . . . . . . . . . . . 8<br />
[LOCK] button .. . . . . . . . . . . . . . . . . . 14<br />
Lock function .. . . . . . . . . . . . . . . . . 14<br />
M<br />
Master Tune.. . . . . . . . . . . . . . . . . . . . 17<br />
Metronome. . . . . . . . . . . . . . . . . . . . . 18<br />
MIDI. . . . . . . . . . . . . . . . . . . . . . . . . . . . . . 20<br />
MIDI Implementation Chart.. . . 26<br />
MODULATION.. . . . . . . . . . . . . . . . . 12, 13<br />
Modulation Bar .. . . . . . . . . . . . . . . 11<br />
MP3.. . . . . . . . . . . . . . . . . . . . . . . . . . . . . . 15<br />
N<br />
Ni-MH AA rechargeable batteries. 6<br />
O<br />
OCTAVE [+] / [–] button.. . . . . . . . . 11<br />
OUTPUT jacks.. . . . . . . . . . . . . . . . . . . . . 8<br />
P<br />
PAN .. . . . . . . . . . . . . . . . . . . . . . . . . . . 12, 13<br />
PEDAL DOWN.. . . . . . . . . . . . . . . . . . . . 14<br />
pedal switch.. . . . . . . . . . . . . . . . . . . 13<br />
PEDAL UP .. . . . . . . . . . . . . . . . . . . . . . . . 14<br />
PHONES jack.. . . . . . . . . . . . . . . . . . . . . . 8<br />
PITCH .. . . . . . . . . . . . . . . . . . . . . . . . . . . . 12<br />
Portable Audio Player.. . . . . . . . 14<br />
PORTAMENTO.. . . . . . . . . . . . . 12, 13, 16<br />
Portamento Time. . . . . . . . 12, 13, 16<br />
[POWER] switch.. . . . . . . . . . . . . . . . . . . 8<br />
Preview .. . . . . . . . . . . . . . . . . . . . . . . . . . . 9<br />
[PREVIEW] button. . . . . . . . . . . . . . . . . 9<br />
R<br />
Registering a tone.. . . . . . . . . . . . . 10<br />
Regular Tone. . . . . . . . . . . . . . . . . . . . . 9<br />
RELEASE TIME.. . . . . . . . . . . . . 13, 14, 16<br />
Reset.. . . . . . . . . . . . . . . . . . . . . . . . . . . . 19<br />
RESONANCE. . . . . . . . . . . . . . . 13, 14, 16<br />
Restoring. . . . . . . . . . . . . . . . . . . . . . . 19<br />
Reverb. . . . . . . . . . . . . . . . . . . . . . . . . . . 16<br />
S<br />
Security slot.. . . . . . . . . . . . . . . . . . . . . 5<br />
SOLO SYNTH .. . . . . . . . . . . . . . . . . . . . . 13<br />
SOSTENUTO.. . . . . . . . . . . . . . . . . . . . . . 13<br />
MIDI Implementation Chart<br />
Speakers.. . . . . . . . . . . . . . . . . . . . . . . . . . 8<br />
Special Tone.. . . . . . . . . . . . . . . . . . . . . . 9<br />
[SPECIAL TONE] button.. . . . . . . . . . . 9<br />
Specifications. . . . . . . . . . . . . . . . . . 23<br />
strap.. . . . . . . . . . . . . . . . . . . . . . . . . . . . . . 7<br />
strap pin.. . . . . . . . . . . . . . . . . . . . . . . . . . 7<br />
T<br />
Tone.. . . . . . . . . . . . . . . . . . . . . . . . . . . . . . . 9<br />
TONE [1]–[6] buttons.. . . . . . . . . . . . . 9<br />
Tone Parameters. . . . . . . . . . . . . . . 16<br />
Tone Settings.. . . . . . . . . . . . . . . . . . 16<br />
Touch Controller. . . . . . . . . . . . . 11<br />
[TRANSPOSE] button .. . . . . . . . . . . 11<br />
Troubleshooting. . . . . . . . . . . . . . 22<br />
Tuning.. . . . . . . . . . . . . . . . . . . . . . . . . . 17<br />
U<br />
USB COMPUTER connector .. . . . 21<br />
USB Driver .. . . . . . . . . . . . . . . . . . . 18, 21<br />
USB memory .. . . . . . . . . . . . . . . . . 15, 19<br />
USB MEMORY slot. . . . . . . . . . . . . . . 15<br />
Utility. . . . . . . . . . . . . . . . . . . . . . . . . . . 18<br />
V<br />
Version .. . . . . . . . . . . . . . . . . . . . . . . . . 18<br />
V-LINK. . . . . . . . . . . . . . . . . . . . . . . . . . . . 21<br />
VOLUME. . . . . . . . . . . . . . . . . . . 12, 13, 16<br />
[VOLUME] knob. . . . . . . . . . . . . . . . . . . . 8<br />
W<br />
WAV.. . . . . . . . . . . . . . . . . . . . . . . . . . . . . . 15<br />
[WRITE] button .. . . . . . . . . . . . . . 10, 18<br />
26<br />
Synthesizer<br />
Date : Jan. 1, 2010<br />
Lucina AX-09 Version : 1.00<br />
Function...<br />
Transmitted Recognized Remarks<br />
Basic<br />
Default<br />
1–16<br />
1–16<br />
Channel<br />
Changed<br />
1–16<br />
1–16<br />
Memorized<br />
Mode<br />
Note<br />
Number<br />
Velocity<br />
After<br />
Touch<br />
Pitch Bend<br />
Control<br />
Change<br />
Program<br />
Change<br />
System Exclusive<br />
System<br />
Common<br />
System<br />
Real Time<br />
Aux<br />
Messages<br />
Notes<br />
Default<br />
Message<br />
Altered<br />
True Voice<br />
Note ON<br />
Note OFF<br />
Key’s<br />
Ch’s<br />
True #<br />
Mode 1: OMNI ON, POLY<br />
Mode 3: OMNI OFF, POLY<br />
0, 32<br />
1<br />
5<br />
6, 38<br />
7<br />
10<br />
11<br />
64<br />
65<br />
66<br />
71<br />
72<br />
73<br />
74<br />
75<br />
84<br />
91<br />
93<br />
100, 101<br />
Song Position Pointer<br />
Song Sel<br />
Tune<br />
Clock<br />
Commands<br />
All Sounds Off<br />
Reset All Controllers<br />
Local On/Off<br />
All Notes Off<br />
Active Sensing<br />
Reset<br />
Mode 3<br />
Mono, Poly<br />
**************<br />
7–126<br />
**************<br />
O<br />
O<br />
X<br />
O<br />
O<br />
O<br />
O<br />
O<br />
X<br />
O<br />
O<br />
O<br />
O<br />
O<br />
O<br />
O<br />
O<br />
O<br />
O<br />
X<br />
X<br />
X (Reverb)<br />
X (Chorus)<br />
X<br />
O *1<br />
**************<br />
X<br />
X<br />
X<br />
X<br />
X<br />
X<br />
X<br />
X<br />
X<br />
X<br />
O<br />
X<br />
*1 O X is selectable<br />
*2 Recognized as M=1 even if M≠1<br />
Mode 2: OMNI ON, MONO<br />
Mode 4: OMNI OFF, MONO<br />
Mode 3<br />
Mode 3, 4 (M=1)<br />
X<br />
0–127<br />
0–127<br />
O<br />
O<br />
O<br />
O<br />
O<br />
*1 O<br />
O<br />
O<br />
O<br />
O<br />
O<br />
O<br />
O<br />
O<br />
O<br />
O<br />
O<br />
O<br />
O<br />
O<br />
O<br />
O<br />
O<br />
O<br />
O<br />
0–127<br />
X<br />
X<br />
X<br />
X<br />
X<br />
X<br />
O<br />
O<br />
X<br />
O (123–127)<br />
X<br />
X<br />
*2<br />
Bank Select<br />
Modulation<br />
Portamento Time<br />
Data entry<br />
Volume<br />
Panpot<br />
Expression<br />
Hold 1<br />
Portamento SW<br />
Sostenuto<br />
Resonance<br />
Release Time<br />
Attack Time<br />
Cutoff<br />
Sound Control<br />
Portamento Control<br />
Effect 1 Depth<br />
Effect 3 Depth<br />
RPN LSB, MSB<br />
Program No. 1–128<br />
O: Yes<br />
X: No
Model Name :<br />
Type of Equipment :<br />
Responsible Party :<br />
Address :<br />
Telephone :<br />
DECLARATION OF CONFORMITY<br />
Compliance Information Statement<br />
AX-09<br />
Synthesizer<br />
<strong>Roland</strong> Corporation U.S.<br />
5100 S. Eastern Avenue, Los Angeles, CA 90040-2938<br />
(323) 890-3700<br />
For the USA<br />
For EU Countries<br />
This product complies with the requirements of EMC Directive 2004/108/EC.<br />
FEDERAL COMMUNICATIONS COMMISSION<br />
RADIO FREQUENCY INTERFERENCE STATEMENT<br />
For the USA<br />
This equipment has been tested and found to comply with the limits for a Class B digital device, pursuant to Part 15 of the<br />
FCC Rules. These limits are designed to provide reasonable protection against harmful interference in a residential<br />
installation. This equipment generates, uses, and can radiate radio frequency energy and, if not installed and used in<br />
accordance with the instructions, may cause harmful interference to radio communications. However, there is no guarantee<br />
that interference will not occur in a particular installation. If this equipment does cause harmful interference to radio or<br />
television reception, which can be determined by turning the equipment off and on, the user is encouraged to try to correct the<br />
interference by one or more of the following measures:<br />
– Reorient or relocate the receiving antenna.<br />
– Increase the separation between the equipment and receiver.<br />
– Connect the equipment into an outlet on a circuit different from that to which the receiver is connected.<br />
– Consult the dealer or an experienced radio/TV technician for help.<br />
This device complies with Part 15 of the FCC Rules. Operation is subject to the following two conditions:<br />
(1) this device may not cause harmful interference, and<br />
(2) this device must accept any interference received, including interference that may cause undesired operation.<br />
Unauthorized changes or modification to this system can void the users authority to operate this equipment.<br />
This equipment requires shielded interface cables in order to meet FCC class B Limit.<br />
NOTICE<br />
For Canada<br />
This Class B digital apparatus meets all requirements of the Canadian Interference-Causing Equipment Regulations.<br />
AVIS<br />
Cet appareil numérique de la classe B respecte toutes les exigences du Règlement sur le matériel brouilleur du Canada.<br />
WARNING<br />
For C.A. US (Proposition 65)<br />
This product contains chemicals known to cause cancer, birth defects and other reproductive harm, including lead.