

The Temple Between.pdf
The Temple Between.pdf
The Temple Between.pdf

Create successful ePaper yourself
Turn your PDF publications into a flip-book with our unique Google optimized e-Paper software.
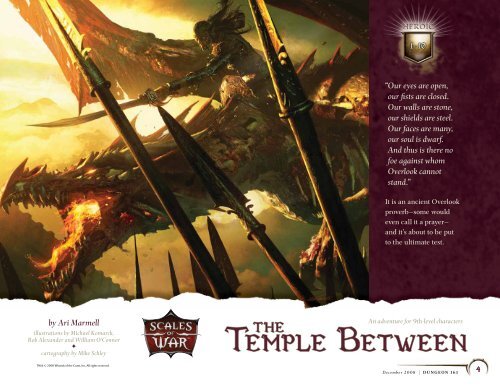
“ Our eyes are open,<br />
our fists are closed.<br />
Our walls are stone,<br />
our shields are steel.<br />
Our faces are many,<br />
our soul is dwarf.<br />
And thus is there no<br />
foe against whom<br />
Overlook cannot<br />
stand.”<br />
It is an ancient Overlook<br />
proverb—some would<br />
even call it a prayer—<br />
and it’s about to be put<br />
to the ultimate test.<br />
by Ari Marmell<br />
illustrations by Michael Komarck,<br />
Rob Alexander and William O'Connor<br />
✦<br />
cartography by Mike Schley<br />
TM & © 2008 Wizards of the Coast, Inc. All rights reserved.<br />
the<br />
An adventure for 9th-level characters<br />
<strong>Temple</strong> <strong>Between</strong><br />
4<br />
December 2008 |<br />
4<br />
DUNGEON 161
<strong>The</strong> <strong>Temple</strong> <strong>Between</strong><br />
<strong>The</strong> western end of Elsir Vale has been greatly<br />
troubled in recent days. <strong>The</strong> threat of the orc hordes<br />
from beyond the Stonehome Mountains, though<br />
turned back at Bordrin’s Watch, still lingers in the<br />
people’s minds. Peculiar and hostile creatures of<br />
shadow lurk in the caverns and caves below. Political<br />
squabbling grows among the city’s powerful dwarf<br />
clans.<br />
All this makes the city particularly vulnerable<br />
to an enemy nobody saw coming—that nobody even<br />
imagined. This enemy has goals and objectives far<br />
beyond the ultimately unimportant Elsir Vale, but the<br />
first step is the utter subjugation of Overlook.<br />
An enemy who, at least in part, is already here.<br />
“<strong>The</strong> <strong>Temple</strong> <strong>Between</strong>” is an adventure for 9thlevel<br />
characters, and it is challenging enough to take<br />
them to 11th level by the time all is said and done.<br />
Although intended as the final chapter of the heroic<br />
tier portion of the Scales of War Adventure Path, it<br />
can be run as a standalone adventure, or as an adventure<br />
in a campaign of your own making, with a small<br />
degree of modification. It contains elements of urban<br />
investigation, dungeon delving, and even wartime<br />
conflict, making it a suitable adventure to players of<br />
many tastes and preferences.<br />
BACKGROUND<br />
Few today are aware of it, but the western regions<br />
of Elsir Vale have long been rich in planar magic.<br />
Perhaps this is due to the fact that the giants, soldiers,<br />
and servants of the primordials once dwelt<br />
nearby in large numbers, driving their dwarf slaves<br />
to great works. Whatever the cause, the region is run<br />
through with “cracks” in reality—portals that lead to<br />
other worlds. In the course of the Adventure Path,<br />
the PCs have already discovered one, traveling to the<br />
Shadowfell through the caverns beneath the Happy<br />
Beggar poorhouse. What they do not yet know—<br />
though they might discover it soon enough—is that a<br />
gateway to the Astral Sea waits in a great cathedral<br />
beneath the Stonehome Mountains, and a doorway to<br />
the Feywild lies hidden where the Elsir River flows<br />
from the mountains. (<strong>The</strong> region might well also contain<br />
a portal to the Elemental Chaos, but if so, it does<br />
not influence this adventure.)<br />
No, the humans and elves and dwarves of Elsir<br />
Vale know nothing about this, but not everyone is so<br />
ignorant. A few sages know. A few priests know.<br />
And the githyanki know.<br />
Indeed, at the behest of their leaders in the<br />
astral city of Tu’narath, they have caused much of<br />
Elsir’s worries of late. <strong>The</strong>y arranged the theft of the<br />
platinum sword from Brindol, and they employed<br />
the shadar-kai, not only as weapons suppliers but<br />
to encourage the orcs of the west to rise. For the<br />
githyanki want Elsir Vale, badly, and particularly the<br />
planar portals it contains. Using it as a beachhead,<br />
they could easily launch an incursion, not merely<br />
into the mortal realm, but other worlds besides. And<br />
there is no reality, no plane of existence, on which the<br />
githyanki do not have some design or other.<br />
<strong>The</strong> semi-disgraced General Zithiruun is in charge<br />
of this operation, or at least commands the forces<br />
seeking to carry it out. Forced to make use of mercenaries<br />
and lesser soldiers, to keep the githyanki<br />
involvement secret, he has carefully set up his pawns,<br />
maneuvering and manipulating, and now the time<br />
draws near to take Overlook by force.<br />
Unknown to Zithiruun, and even to his commanding<br />
officers, they themselves are merely pawns<br />
WHAT IS AN<br />
ADVENTURE PATH<br />
Scales of War is the fourth Adventure Path to<br />
appear in the pages of Dungeon® Magazine. But<br />
what, you ask, is an Adventure Path Quite simply,<br />
it is a series of related adventures intended to form<br />
a complete D&D campaign that takes your players<br />
from 1st level all the way to, in the case of Scales<br />
of War, 30th level.<br />
Previous Adventure Paths, presented with the<br />
3rd Edition D&D® rules, took characters from 1st<br />
to 20th level. But with all three tiers in the new edition<br />
ripe and ready to explore, we’re pushing the<br />
limit with Scales of War. Each tier takes roughly six<br />
adventures to traverse, which means we’ll finish off<br />
this Adventure Path in about eighteen issues. Each<br />
adventure advances characters from between one<br />
and a half to two levels of experience. We recognize<br />
that not everyone will meet every encounter<br />
or complete every quest, however, so periodically,<br />
we’ll point you to a supplemental Side Trek or short<br />
adventure to keep your PCs on pace. Plus, roughly<br />
every few months, Dragon® will feature new support<br />
content for Scales of War.<br />
Finally, this Adventure Path is intended to function<br />
as a complete D&D campaign. That means<br />
we’ll be making assumptions about the history of<br />
the world as we move along, just as you would in<br />
any campaign you run. We’ll be borrowing heavily<br />
from the D&D mythology of 4th Edition, as well as<br />
all the great ideas that have cropped up in other<br />
products over the years—including the pages of<br />
past issues of Dungeon!<br />
Enjoy your stay in Scales of War, and keep an<br />
eye out for next month’s installment.<br />
December 2008 |<br />
5<br />
DUNGEON 161
<strong>The</strong> <strong>Temple</strong> <strong>Between</strong><br />
on a larger board; schemes far more devious than a<br />
simple githyanki invasion are afoot. But this is a discovery,<br />
and a challenge, for a future adventure. For<br />
now, the PCs have more than enough on their plates<br />
as it is.<br />
<strong>The</strong> Mountainroot <strong>Temple</strong><br />
A subterranean structure built by the same order that<br />
would later go on to construct the Monastery of the<br />
Sundered Chain, the Mountainroot <strong>Temple</strong> stands<br />
deep beneath the Stonehome Mountains. Built when<br />
the dwarves were still celebrating their freedom<br />
from the giants, it was not a dwarven structure, but a<br />
temple built for anyone who wanted to pay tribute to<br />
Moradin, of any race. It held great reliquaries of holy<br />
icons, enormous cathedrals where hundreds could<br />
worship at once, and even a doorway to the Astral<br />
Plane whence angels and exarchs of Moradin would<br />
appear to discourse with the god’s most favored<br />
priests and champions. To facilitate a grand community<br />
of Moradin worshipers, the Mountainroot <strong>Temple</strong><br />
had, in addition to its astral doors and its main<br />
entryway into the mountains, four mystical doorways<br />
constructed. Each linked to another temple of<br />
Moradin elsewhere in the world, so the faithful could<br />
come and go with ease.<br />
And for decades, even centuries, the temple<br />
thrived. Slowly, however, relations between<br />
Moradin’s faithful grew strained. Priests assigned<br />
to other, “lesser” temples grew envious of those at<br />
Mountainroot. Many of the dwarf faithful grew<br />
haughty, considering themselves Moradin’s “true”<br />
children, and sought to oust all others, or at least put<br />
them in lesser places, denying them access to the<br />
temple’s wonders.<br />
Was it Moradin’s wrath A curse brought upon<br />
them by the giants they’d so long ago escaped Or<br />
simply a natural catastrophe without greater meaning<br />
None can say. Whatever the case, some centuries<br />
ago, the mountain was struck by an earthquake.<br />
Portions of the inner tunnels collapsed, damaging<br />
several chambers of the Mountainroot <strong>Temple</strong>,<br />
destroying others entirely. Panicked, the priests and<br />
the faithful grabbed up their treasures and holy<br />
icons—at least most of them—and fled using the surviving<br />
magical portals.<br />
Once they’d settled elsewhere, the bulk of<br />
Moradin’s priests decided that this way was better.<br />
By scattering from the temple, they would allow the<br />
dwarves to build their own shrines, without feeling<br />
constrained by the other races, and the jealousy<br />
that marred the priesthood would fade. Although<br />
they mourned the loss of the great cathedral, and<br />
those few treasures they’d been unable to save, they<br />
declared the quake to have been Moradin’s will and<br />
left the temple abandoned. In time, most faithful,<br />
even most priests save those most thoroughly learned<br />
in their history, forgot it had ever been.<br />
Most, but not all. After a few decades, a small<br />
group of Moradin worshipers—mostly dwarves, but<br />
with members of other races as well—returned to the<br />
Mountainroot <strong>Temple</strong>. <strong>The</strong>y cleaned it up as best they<br />
could and vowed to maintain it until it should some<br />
day become important once again. <strong>The</strong> most powerful<br />
of their number took on the title of Caretaker and<br />
lived within the temple, in a small structure built<br />
inside the larger reliquary. <strong>The</strong> Caretaker carefully<br />
attuned himself to the temple’s surviving magic,<br />
allowing him to control the constructs and divine<br />
defenses and traps that protected the structure from<br />
outside invasion.<br />
Zithiruun’s Plan<br />
And so it remained, until the githyanki learned of<br />
the temple and decided controlling it would better<br />
enable them to control Overlook, and by extension,<br />
Elsir Vale.<br />
Zithiruun’s plan is to take Overlook by simultaneously<br />
attacking from without and from within.<br />
Already he has a force of mercenary soldiers hiding<br />
in the wilds, ready to march on the city. Now, he’s<br />
working to gain full control of the Mountainroot<br />
<strong>Temple</strong>—and the Stone Anvil, its anchor in Overlook—<br />
through which he can move a second force from the<br />
Astral Sea into the city’s undefended heart.<br />
To that end, Zithiruun has suborned a number<br />
of Overlook’s priests and military officers. Most of<br />
them, including several priests and Watch Captain<br />
Aerun, were kidnapped and subject to a difficult<br />
psychic ritual cast by incredibly powerful githyanki.<br />
<strong>The</strong> result is that these poor people’s minds were<br />
destroyed, and they have been possessed by several<br />
githyanki, who are even capable of manifesting some<br />
of their normal powers (albeit in weakened form).<br />
Unfortunately, the possessing githyanki cannot<br />
access anything more than the victim’s base personality;<br />
they have no access to specific memories. So High<br />
Priest Durkik of the Stone Anvil has not been possessed.<br />
Rather, he is being held captive and tortured<br />
for information, while a hired doppelganger takes his<br />
place in public, holding the Stone Anvil in readiness<br />
for Zithiruun’s forces.<br />
All of which would have gone undetected, if not for<br />
the alertness and curiosity of an old woman named<br />
Haelyn . . .<br />
December 2008 | DUNGEON 161<br />
6
<strong>The</strong> <strong>Temple</strong> <strong>Between</strong><br />
THE QUESTS<br />
“<strong>The</strong> <strong>Temple</strong> <strong>Between</strong>” offers PCs several opportunities<br />
to earn quest XP. Provided here is a list of<br />
quests, and their rewards, in the adventure.<br />
Minor Quest—Learn Haelyn’s Fate<br />
As requested by the priest Lavinya, the PCs must<br />
investigate the shrine of Erathis, and Grovald, its<br />
new caretaker, to learn what happened to the<br />
kindly old woman who once attended it.<br />
Reward: 400 XP.<br />
Major Quest—Recover the Incunabulum Primeval<br />
This ancient religious text, dating back to the dwarf<br />
rebellion against the giants, exists somewhere<br />
within the depths of the Mountainroot <strong>Temple</strong>.<br />
Durkik wants it returned before their enemies<br />
can get their hands on it. (It’s currently on the<br />
hag Hethralga, in area M8 of the Mountainroot<br />
<strong>Temple</strong>.)<br />
Reward: 2,000 XP (and 3,600 gp—the equivalent<br />
of three 9th-level treasure parcels—as promised<br />
by the priests of Moradin).<br />
Major Quest—Prevent the Fall of Overlook<br />
Once his scheme is prematurely cut short, General<br />
Zithiruun decides to take the city with what forces<br />
he already has available. Although Overlook is<br />
hardly a population of weaklings, they do require<br />
the PCs’ aid.<br />
Reward: Up to 2,500 XP, depending on Victory<br />
Point totals; see page 37 (and up to 7,000 gp—the<br />
equivalent of four 10th-level treasure parcels—as<br />
promised by the Council of Elders).<br />
ADVENTURE SYNOPSIS<br />
<strong>The</strong> PCs have just completed an adventure of obvious<br />
importance (the freeing of Amyria from her imprisonment<br />
in the form of a platinum sword, if they’re<br />
playing through the Adventure Path). It appears as<br />
though nothing of consequence immediately follows—<br />
at least until the next night, when the PCs, through<br />
one of various means, receive hints that all is not well<br />
back in Overlook.<br />
Returning to their home away from home, the<br />
heroes initially find nothing amiss. Slowly, however,<br />
they discover—through the prodding of Lavinya,<br />
priestess of Erathis, if not on their own—that several<br />
of the city’s priests are acting peculiarly and, perhaps<br />
more importantly, Haelyn, keeper of Erathis’s shrine,<br />
has vanished. Following up on these minor discrepancies,<br />
the PCs swiftly find hints leading to a conspiracy<br />
worming its way into the city’s hierarchy. Several of<br />
the conspiracy’s members are possessed (though the<br />
PCs do not learn by whom), while others—including<br />
High Priest Durkik Forgeheart of the Stone Anvil—<br />
have been replaced by doppelganger mercenaries.<br />
<strong>The</strong> PCs trace the conspirators back to their headquarters<br />
in a large warehouse, where they have the<br />
opportunity to rescue the real Durkik.<br />
<strong>The</strong> PCs then learn of the Mountainroot <strong>Temple</strong><br />
and find out that one of its mystical portals is located<br />
in a hidden sepulcher beneath the Stone Anvil. Using<br />
it, the PCs go to the abandoned ancient temple, where<br />
they must confront both a cadre of fey and a band of<br />
mercenaries employed by General Zithiruun. <strong>The</strong>y<br />
also find, unfortunately, that they cannot leave! Here,<br />
assuming the PCs defeat their various foes, they make<br />
the following discoveries:<br />
✦ <strong>The</strong> Caretaker of the temple is currently being<br />
tortured, and the pain and madness inflicted upon<br />
him have thrown the temple’s defenses into chaos.<br />
This is why, among other things, nobody can leave.<br />
✦ <strong>The</strong> fey are seeking an ancient tome of great<br />
power. <strong>The</strong>y were sent by Cachlain, the Stone-<br />
Skinned King, a fomorian noble who—along with<br />
his new advisor, Sovacles—will play an important<br />
role in future installments of the Scales of War.<br />
✦ <strong>The</strong> mercenaries serve someone called General<br />
Zithiruun, who seeks the temple—and indeed, the<br />
entire region!—for access to the various planar portals.<br />
<strong>The</strong> conspiracy in Overlook was only the first<br />
step, and the city will soon be facing a full-scale<br />
military invasion!<br />
Finally, once the Caretaker allows them to leave,<br />
the PCs must return to the Council of Elders with a<br />
warning of the forthcoming siege. Here, the PCs can<br />
finally cement their place as heroes to this military<br />
city, as their help proves instrumental in Overlook’s<br />
survival—and as they finally come face to face with<br />
General Zithiruun, and learn of the githyanki involvement<br />
in all that has come before.<br />
December 2008 |<br />
7<br />
DUNGEON 161
<strong>The</strong> <strong>Temple</strong> <strong>Between</strong><br />
PREPARING FOR<br />
ADVENTURE<br />
“<strong>The</strong> <strong>Temple</strong> <strong>Between</strong>” allows the PCs a variety of<br />
opportunities to shine, from investigation to exploration,<br />
and from skill challenges to a variety of combat<br />
situations. <strong>The</strong>y face a diversity of foes and must<br />
SKILL CHALLENGES AND<br />
EXPERIENCE POINTS<br />
This adventure makes use of a number of skill challenges—in<br />
particular, offering several opportunities<br />
for the PCs to interrogate prisoners or survivors<br />
of their various combats. It’s important for you,<br />
as DM, to give XP only for those skill challenges<br />
that are meaningful, without allowing unnecessary<br />
repetition.<br />
Here’s what we mean, by way of example. In<br />
the Shrine of Erathis, the PCs have the opportunity<br />
to interrogate Grovald, as well as a number of his<br />
soldiers, both human and doppelganger. Because<br />
the PCs receive different information from Grovald<br />
than from his soldiers, they can receive XP for both<br />
skill challenges—one for Grovald, one for any of the<br />
soldiers. Once they have successfully interrogated<br />
a soldier, however, they should not receive XP for<br />
interrogating any other soldiers at the same location,<br />
because they all offer the same information.<br />
Similarly, because all the fey in the Mountain Root<br />
temple give the same information, and all the soldiers<br />
of the githyanki give the same information,<br />
the PCs can gain XP for only two interrogations—<br />
one fey, one other—in that area.<br />
figure out the right questions to ask the right people.<br />
As such, it’s important that you, as DM, have at least a<br />
reasonable level of familiarity with the events herein.<br />
It’s best if you can read through the entire adventure<br />
beforehand, but if you’re in a hurry, you should at<br />
least review each specific section, and its related<br />
encounters, before play. (<strong>The</strong> adventure is divided<br />
into three chapters, making a piecemeal approach<br />
feasible, if not the most recommended.)<br />
What You Need to Play<br />
This adventure includes the encounters the PCs face<br />
as they explore and adventure in the area. It also provides<br />
tactical maps and more for the adventure. If you<br />
and your players haven’t read through the DUNGEONS<br />
& DRAGONS 4th Edition rules yet, that is your first best<br />
step so that you make certain you understand the<br />
rules. Also as mentioned above, read through at least<br />
the first of the adventure’s three “chapters” before<br />
starting. This review enables you to become familiar<br />
with the material and the style of presentation. You<br />
might also want to take a look at the sections below<br />
regarding the adventure format.<br />
Using Tactical Encounters<br />
Each encounter includes several common elements,<br />
as described below.<br />
Encounter Level<br />
Each tactical encounter assumes a group of five player<br />
characters. An encounter of average difficulty is one<br />
where the encounter level is equal to the level of the<br />
party. Encounters that are 1 or 2 levels lower than the<br />
party are easy encounters, while encounters that are<br />
2 or more levels higher than the party are difficult<br />
encounters.<br />
For overcoming an encounter, a group earns the<br />
XP value noted beside the encounter level. This<br />
amount should be divided by the number of group<br />
members, and an equal amount should be awarded to<br />
each character.<br />
ADAPTING THE ADVENTURE<br />
“<strong>The</strong> <strong>Temple</strong> <strong>Between</strong>” is designed with five players<br />
in mind. You can easily adapt the adventure for<br />
larger groups easily by adding more treasure and<br />
inserting a few extra monsters using the guidelines<br />
presented in the Dungeon Master’s Guide. When<br />
adapting the adventure for larger groups, keep<br />
it simple. Where possible, just add one monster<br />
whose level equals the encounter level for each<br />
additional PC. Otherwise, look for appropriate<br />
monsters from this adventure (see the Appendix, in<br />
particular) and the Monster Manual to help stiffen<br />
up the resistance.<br />
This adventure is also designed for 9th-level<br />
characters. As written, a slightly larger group of<br />
8th-level characters can play through the adventure,<br />
but be sure to give the characters plenty<br />
of chances to take extended rests so that they<br />
can have a fair shot at surviving the expedition.<br />
For higher-level groups, adapting the adventure<br />
takes a bit more work. You need to add monsters<br />
and increase the treasure rewards to amounts<br />
appropriate for the characters. In all, adjusting<br />
the adventure is not too arduous, and with a little<br />
work, you can run this scenario for groups of three<br />
to eight players, and for characters of 8th through<br />
13th level.<br />
December 2008 | DUNGEON 161<br />
8
<strong>The</strong> <strong>Temple</strong> <strong>Between</strong><br />
Setup<br />
This section of a tactical encounter provides you<br />
with the basic parameters of the encounter. First, it<br />
provides context or background information for the<br />
encounter. Next, it provides a key to the monsters in<br />
the encounter so you can locate them on the tactical<br />
map. <strong>The</strong> map of each encounter area indicates where<br />
the monsters are located when the encounter begins.<br />
<strong>The</strong> setup section also describes what monsters are<br />
doing and how they react when the PCs arrive.<br />
Several encounters include monsters that are either<br />
hidden, or do not appear until later in combat. In these<br />
instances, do not place those monsters on the map<br />
unless at least one PC has succeeded on the Perception<br />
check to notice them, or when they enter combat.<br />
Treasure Parcels<br />
Parcel A: _________________ C-4 (the Shrine of Erathis).<br />
Parcel B: ________________ C-9 (the Warehouse).<br />
Parcel C: ________________ M-5 (the Vault).<br />
Parcel D: _________________ M-5 (the Vault).<br />
Parcel E: ________________ M-5 (the Vault).<br />
Parcel F: ________________ M-6 (the Grand Cathedral, on<br />
the persons of the spitting trolls and/or the two-headed troll).<br />
Parcel G: _________________ M-8 (the Lesser Sanctum, on<br />
the persons of Hethralga and/or the cyclopses).<br />
Read-Aloud Text<br />
Read aloud text provides information about what the<br />
characters can see and are aware of. You do not have<br />
to read it word for word; feel free to paraphrase and<br />
use your own words when describing this information.<br />
Use read aloud text wisely; they are written for<br />
the most common approach to a particular situation<br />
and what your player characters do might require you<br />
to alter the information in any number of ways.<br />
Monster Statistics<br />
Encounters include stat blocks for each monster type<br />
present in the encounter. If more than one monster<br />
of a particular kind is present, the stat block indicates<br />
how many creatures can be found.<br />
Parcel H: ________________ M-9 (the Reliquary).<br />
Parcel I: ________________ M-9 (the Reliquary).<br />
Parcel J: ________________ M-9 (the Reliquary).<br />
Parcel K: _________________ M-10 (the Underchambers).<br />
Parcel L: ________________ T-2 (Death from Above, on the<br />
person of the berbalang).<br />
Parcel M: ________________ T-5 (the Final Encounter, on the<br />
person of Zithiruun).<br />
Based on the guidelines in the Dungeon Master’s Guide, the following parcels can go in the spaces above. Rely on the wish lists your<br />
players gave you for the first eight parcels.<br />
Parcel 1: Magic item, level 14.<br />
Parcel 2: Magic item, level 13.<br />
Parcel 3: Magic item, level 13.<br />
Parcel 4: Magic item, level 12.<br />
Parcel 5: Magic item, level 12.<br />
Parcel 6: Magic item, level 11.<br />
Parcel 7: Magic item, level 11.<br />
Parcel 8: Magic item, level 10.<br />
Parcel 9: A gold statuette of a female dwarf blacksmith<br />
at work at the forge, worth 1,500 gp; and a sapphire<br />
worth 1,000 gp.<br />
Parcel 10: A small ruby carefully chiseled into the shape<br />
of a burning flame, worth 1,500 gp; 800 gp; and 2<br />
potions of healing.<br />
Parcel 11: A small pouch containing 4 polished stones of<br />
alexandrite, worth 500 gp each (2,000 gp total); and<br />
100 gp.<br />
Parcel 12: A silver hammer (useless as a tool or weapon)<br />
worth 250 gp; and 3 potions of healing.<br />
Parcel 13: A small gold-framed portrait of an old priest,<br />
worth 400 gp; and two potions of healing.<br />
Tactics<br />
This entry describes special actions the monsters take<br />
to defeat the adventurers. Sometimes this means the<br />
monsters take advantage of special features of the<br />
area or make use of special powers or equipment.<br />
Map<br />
Each encounter includes a map keyed with the initial<br />
locations of each monster. <strong>The</strong> map also indicates the<br />
location of any special features of the area.<br />
Features of the Area<br />
This section describes special features noted on the<br />
map. If the location has items or areas of interest with<br />
which the characters can interact, those features are<br />
described here. Look here to see if a door is out of the<br />
ordinary, if an altar has a secret compartment, or<br />
the like.<br />
Treasure Preparation<br />
As with previous installments of the Scales of War<br />
campaign, “<strong>The</strong> <strong>Temple</strong> <strong>Between</strong>” makes use of the<br />
parcel system of treasure rewards as described in the<br />
Dungeon Master’s Guide. <strong>The</strong> characters should accumulate<br />
seventeen parcels by the end of the adventure.<br />
Of these, they should gain the reward for completing<br />
the quests (four parcels for 1,000 gp), and then whatever<br />
treasures they find along the way (the remaining<br />
thirteen). You can supply these treasures in whatever<br />
way you wish, but the Treasure Parcels sidebar presents<br />
the most likely rooms to bear treasure. During<br />
your preparation, assign parcels from those that<br />
follow to the rooms in the spaces provided. Use the<br />
players’ wish lists to come up with magic items for the<br />
first eight parcels. (Consider saving at least one or two<br />
of the highest level magic items for later in the adventure,<br />
after the PCs have obtained 10th level.)<br />
December 2008 |<br />
9<br />
DUNGEON 161
<strong>The</strong> <strong>Temple</strong> <strong>Between</strong><br />
STARTING THE<br />
ADVENTURE<br />
As noted in the previous adventure, Amyria requests<br />
that the PCs accompany her to Overlook as they leave<br />
the fortress. If they choose not to go with her, she goes<br />
by herself. If they do travel with her, she fares them<br />
well once they reach the entrance to the city, and then<br />
she slips into the crowd around the entrance. PCs can<br />
choose to attempt to follow her at this point, and if so,<br />
they find that she heads to the <strong>Temple</strong> of Ioun in the<br />
Nine Bells district, where she prays.<br />
Alternate Hooks<br />
If you’re running this adventure on its own or as part<br />
of your own campaign, rather than as part of the<br />
Scales of War—or if you prefer a different means of<br />
starting things off—one of these hooks might work<br />
better for you.<br />
<strong>The</strong> Message<br />
One night, as the party beds down to camp, a PC<br />
abruptly hears a voice in his head. A DC 10 Arcana<br />
check identifies it as the result of the Sending ritual.<br />
“My name is Lavinya. I believe a hidden danger is growing<br />
within Overlook. Please come to Erathis’s old temple as<br />
soon as you’re able.”<br />
It’s a cryptic message, yes, but that’s the problem<br />
with Sending. <strong>The</strong> PCs might wonder how a woman<br />
they’ve never met can send them a Sending at all. If<br />
they ask her later on, Lavinya tells them that she was<br />
in one of the crowds that greeted them after their<br />
heroic triumph against the orc hordes in “<strong>The</strong> Siege<br />
of Bordrin’s Watch” (or some other adventure in your<br />
own campaign).<br />
No Place Like Home<br />
It’s entirely possible that the PCs have taken to thinking<br />
of Overlook as their home—or at least a base of<br />
operations—by this point in the Adventure Path. If<br />
they appear inclined to return to Overlook on their<br />
own, without any outside encouragement, allow<br />
them to do so. <strong>The</strong>y can arrive at the city without<br />
any inkling that something is amiss, and remain that<br />
way until they either visit the shrine of Erathis or the<br />
Stone Anvil, or until they receive Lavinya’s message at<br />
their favorite inn or tavern.<br />
OVERLOOK LOCATIONS SUMMARY<br />
<strong>The</strong> following Overlook locations come into play in this adventure. <strong>The</strong> numbers given refer to the location’s<br />
position on the map of Overlook in “Siege of Bordrin’s Watch.”<br />
Caer Overlook (High Hall district), 21: <strong>The</strong> seat of government in Overlook, this fortress houses the meeting<br />
chamber of the Council of Elders—called the High Hall, after which the district is named—as well as the offices<br />
of various district representatives.<br />
<strong>The</strong> Divine Knot (Nine Bells District), 24: <strong>The</strong> Divine Knot is a corner of the Nine Bells district, occupied<br />
by an array of dirty, dilapidated temples all but clustered together, like old men huddling against the cold. <strong>The</strong><br />
temples of Avandra, Bahamut, Erathis, Kord, the Raven Queen, and Zehir still operate, albeit with small and<br />
impoverished congregations. <strong>The</strong> old temples of Ioun, Moradin, and Pelor have long since closed. <strong>The</strong> temple of<br />
Moradin was replaced with the Stone Anvil, while the other two no longer have organized services in the city.<br />
<strong>The</strong> Ministry of War (High Hall District), 22: A complex of several buildings around a courtyard, the Ministry<br />
of War trains Overlook’s soldiers, and houses the barracks and offices of the city garrison.<br />
<strong>The</strong> Pig and Bucket Tavern (Blister District), 5: An infamous tavern, well known for its beer hall, its wide<br />
selection of cheap drinks, and the great many criminals, mercenaries, and adventurers who frequent the place<br />
looking for work.<br />
<strong>The</strong> Shrine of Erathis (Tradetown District), 13: A small shrine, little more than an altar and a statue. So far<br />
as the PCs know, the shrine is tended by a kindly old woman named Haelyn.<br />
<strong>The</strong> Stone Anvil (Hammerstone District), 15: A grand cathedral to Moradin, the Stone Anvil is a combination<br />
temple and fortress. It is the most powerful church in the city, and it is currently run by High Priest Durkik<br />
Forgeheart, an old dwarf whose faith and sense of social responsibility have been slowly chipped away beneath<br />
the weight of years.<br />
December 2008 | DUNGEON 161<br />
10
<strong>The</strong> <strong>Temple</strong> <strong>Between</strong><br />
PART ONE:<br />
RETURN TO OVERLOOK<br />
Parts One and Three of this adventure take place in<br />
the city of Overlook, first introduced in “<strong>The</strong> Siege of<br />
Bordrin’s Watch,” the second installment of the Scales<br />
of War (Dungeon #157). “<strong>The</strong> <strong>Temple</strong> <strong>Between</strong>”<br />
assumes that PCs are familiar with—and somewhat<br />
well known within—Overlook, and it details only<br />
those portions of the city important to this adventure.<br />
You might wish to have that adventure handy, for easy<br />
reference.<br />
As the PCs approach the city, read:<br />
<strong>The</strong> towering walls of Overlook rise slowly but steadily over<br />
the horizon as you draw ever nearer your destination. From<br />
a distance, the city looks as secure and serene as ever, but<br />
as you move closer, you can see that all is not as you left it.<br />
A great mass of activity bustles around the gates, people<br />
lugging stone and timber this way and that, all beneath the<br />
watchful eyes of sentinels who stand dutifully atop the wall.<br />
One particular blond-bearded dwarf in plate armor—an<br />
officer, you would assume—stands atop the gate shouting<br />
orders to everyone in sight.<br />
Although the activity doesn’t appear especially rushed<br />
or frantic—indeed, you see people pausing to talk or jest<br />
with one another as they work (and when the officer isn’t<br />
looking)—it appears as though Overlook were mobilizing<br />
for war.<br />
<strong>The</strong> PCs are hailed as they approach, while the sentinels<br />
atop the walls and by the gates offering friendly<br />
but careful greetings. Multiple crossbows are trained<br />
on the party until they identify themselves, but once<br />
they do, their welcome becomes far warmer. Several<br />
workers and soldiers stop to claps their hands, and<br />
the sentinels swiftly lower their weapons and stand<br />
taller at their posts. Word has spread of the PCs’ heroics<br />
on behalf of the city so far, and their return is seen<br />
as a good omen.<br />
If the PCs ask, any one of the workers or soldiers—<br />
or the officer, who introduces himself as Captain<br />
Aerun—tells them that yes, the city is making preparations<br />
for war. It’s not that they anticipate any specific<br />
trouble, and indeed, the Council of Elders and the<br />
various priesthoods have reason to hope that, with<br />
the defeat of the orc invasion and the closing of the<br />
Shadowfell gate, their city is good and safe for a<br />
long time to come. Still, recent troubles have stirred<br />
up a strong “better safe than slaughtered” mentality<br />
among the populace and the city leaders, and so<br />
the Council of Elders have ordered that Overlook’s<br />
defenses be repaired and enhanced.<br />
Should the PCs question any of the locals about<br />
any current troubles, they receive only puzzled and<br />
slightly concerned replies. “No problems going on<br />
that I know about,” is the common response. “Why, is<br />
there something we should be worried about”<br />
For at least their first few hours in Overlook, then,<br />
the PCs find no signs of the troubles that drew them<br />
here—or at least, they probably don’t.<br />
At least in this part of the adventure, no random<br />
urban encounters occur. At this point, the PCs are<br />
famous enough—and, more importantly, skilled<br />
enough and of a high enough level—that your average<br />
street thief or other ne’er-do-well gives them a substantially<br />
wide berth.<br />
Subtle Changes<br />
If the PCs have come in response to Lavinya’s sending,<br />
they can proceed immediately to the temple of<br />
Erathis in the Divine Knot. If so, continue with “<strong>The</strong><br />
Shadow of Civilization,” below. Similarly, depending<br />
on what personal connections they’ve made in<br />
past visits to Overlook, they might also decide to visit<br />
either the Stone Anvil or Haelyn at the Shrine of<br />
Erathis. In these cases, proceed either to C3 or C4,<br />
respectively.<br />
But in most instances, the PCs likely find somewhere<br />
to take their ease, an establishment where they<br />
can grab a bite to eat other than trail rations, and a<br />
bed somewhat softer and less bug-infested than the<br />
open earth.<br />
It is possible that the PCs might seek out old allies<br />
(or enemies), as long as they feel they have nothing else<br />
to do. At the moment, this isn’t likely to accomplish<br />
much of anything. <strong>The</strong> Council is currently far too<br />
busy dealing with preparations for war and various<br />
administrative catastrophes (some of which were engineered<br />
by Captain Aerun or other infiltrators to keep<br />
them busy), and has nothing for the PCs to do except<br />
maybe lend a hand reinforcing the gates. Bram Ironfell<br />
is currently out of town. Although you’re welcome to<br />
have the PCs talk to any NPCs with whom they have a<br />
past relationship, none of it amounts to much.<br />
KEEP TRACK OF TIME<br />
From the moment the PCs arrive in Overlook,<br />
keep track of how much time they spend.<br />
Whether they complete their exploration of the<br />
Mountainroot <strong>Temple</strong> within five days from this<br />
point, or not, impacts their ultimate chances of<br />
success when the city falls under siege. See “Victory<br />
Points,” page 37, in Part Three: <strong>The</strong> Siege<br />
of Overlook.<br />
December 2008 |<br />
11<br />
DUNGEON 161
<strong>The</strong> <strong>Temple</strong> <strong>Between</strong><br />
<strong>The</strong> First Night Home<br />
Lavinya has been making a concerted effort at contacting<br />
the PCs, and there are few places in the city<br />
she hasn’t visited. Regardless of what establishment<br />
the PCs wind up patronizing, one of the servers or<br />
proprietors approaches them a few moments after<br />
they’ve ordered refreshments or paid for a room.<br />
Read the following aloud:<br />
“Begging your pardon, m’lords and ladies, but you look<br />
familiar to me. You are the folks who saved us from the orcs,<br />
and from those foul creatures of shadow, aren’t you”<br />
Assuming the PCs affirm their identities, the<br />
server continues:<br />
“Well, I’m sorry to disturb you and all, but there’s someone<br />
been looking for you. Woman named Lavinya She’s<br />
a priestess at the temple of Erathis, over in the Divine<br />
Knot. She’s been leaving messages all over town—says she<br />
desperately needs to speak with you. She begs you to come<br />
see her at the temple, just as soon as you can get there.”<br />
It’s vaguely possible the PCs might refuse to go (in<br />
which case, one has to wonder if they’re the heroes<br />
they’re reputed to be), in which case you can have<br />
Lavinya track them down at some point over the next<br />
day or two. <strong>The</strong> adventure, as written, assumes that<br />
the PCs agree to meet with her, either immediately<br />
or the following day.<br />
<strong>The</strong> Shadow of Civilization<br />
As the PCs pass through the Divine Knot, read<br />
the following:<br />
You cannot help but notice, as you pass, that the old temple<br />
of Moradin appears to be under as much construction as<br />
the city ramparts. Great frameworks and ladders stand<br />
alongside the building, and you can see lumber stacked<br />
along the inner walls through the open windows. It looks<br />
as though not every priesthood in Overlook is as badly off<br />
these days as that of Erathis.<br />
Even as compared to other temples of the Knot,<br />
the temple of Erathis has seen better days. As the<br />
PCs approach, read:<br />
It’s all but impossible to tell what color the stones of this<br />
temple might once have been, for now they’re a repugnant<br />
mixture of smoke-stained gray, dirty-handprint brown,<br />
and bird-dropping white. <strong>The</strong> stenches of the Nine Bells<br />
district appear to congregate here, as though seeking<br />
admittance and absolution, and you’ve seen zombies<br />
that looked (and smelled) healthier than some of the<br />
unfortunate, impoverished souls shambling along the<br />
streets with empty eyes.<br />
Three wide steps that don’t appear to have been swept<br />
in days rise toward a heavy wooden door that boasts a<br />
relatively fresh coat of polish—one that cannot begin to<br />
conceal the rot beneath.<br />
Regardless of the time of day or night, when the PCs<br />
enter they see a largely empty cathedral, its pews old<br />
and candles burned down to nubs. At the far end<br />
stands an altar to Erathis, which is far better maintained<br />
than anything around it. A dark-haired and<br />
gold-robed half-elf, grown old before her time, kneels<br />
before the altar, rising and turning at the sound of the<br />
door.<br />
“Thank you,” she says as she recognizes the PCs. “I<br />
knew Erathis would guide you to me.”<br />
For a few moments she waits on the PCs, offering<br />
what comfort she can, pointing them toward the pews<br />
at the front of the cathedral (the cleanest ones), offering<br />
a few glasses of cheap wine, and the like.<br />
Only once they’re settled—or when they lose<br />
patience and press her on why she summoned<br />
them—does she frown thoughtfully and begin.<br />
“My name is Lavinya,” she tells you. “I’m the last priestess<br />
here; the others all departed years ago, when the Nine Bells<br />
went all to seed, and the temples with it. I keep it open and<br />
functioning as best I can on my own, but . . ”<br />
She shakes her head, as though reminding herself to stay<br />
on topic. “Do you know Haelyn” she asks.<br />
If the PCs do not, she says the following:<br />
“Haelyn is a wonderful old woman. She’s the caretaker of<br />
the shrine to Erathis, over in Tradetown.”<br />
If the PCs do know Haelyn, skip that particular<br />
bit of dialogue and continue with the following<br />
sets of text. <strong>The</strong>y have been broken up to allow<br />
for more interaction, but if none is forthcoming,<br />
continue to the next set of text.<br />
“I’m sure you know,” she continues, “that most worship of<br />
Erathis in Overlook takes place there, rather than here. I<br />
must admit, I haven’t always been a friend to Haelyn. I<br />
was . . . bitter, very bitter, at what happened to my temple.<br />
But after a time, we got to know each other, and we’ve<br />
become great friends.<br />
December 2008 | DUNGEON 161<br />
12
<strong>The</strong> <strong>Temple</strong> <strong>Between</strong><br />
“And that’s why I need you!” Lavinya looks up, her eyes<br />
suddenly narrowed. “Something is wrong! Something’s<br />
happened to Haelyn, I know it, and maybe not just to her!”<br />
At this point, Lavinya takes a sip of her drink,<br />
then says:<br />
“A few weeks ago, Haelyn just disappeared. I went by the<br />
shrine to speak with her and she was gone. <strong>The</strong>re’s a man<br />
named Grovald maintaining the shrine now. I don’t know<br />
him; I’ve never met him before, and nobody I talk to knows<br />
him, either. He told me that Haelyn left on a spiritual<br />
retreat and would be back in a few months.<br />
“But I know better! Haelyn needed no ‘spiritual retreat.’<br />
Her faith was strong, and it was centered on that shrine!<br />
And even if she had, she wouldn’t have up and left—not<br />
without telling me.”<br />
Now Lavinya shakes her head and gauges the<br />
reactions of the PCs, then continues:<br />
“I must confess, I went back at night and snooped around a<br />
bit, not just in the shrine, but peering through the windows<br />
of the groundskeeper’s cottage. I’ve offered penance to<br />
Erathis for my trespass, but I had to know what happened!<br />
I didn’t . . . I found no trace of Haelyn, but I did catch a<br />
glimpse of a letter through the cracks in the shutters. I<br />
couldn’t read much of it, and I dared not stay long, but<br />
I’m certain it was addressed to ‘G’—that must be Grovald,<br />
right—and it began with ‘I am commanded to ask if you’ve<br />
had any further problems with the worshipers of . . .’ That’s<br />
all I saw, but it sounds sinister enough!<br />
“And that,” she says morosely, “is where things got even<br />
worse. I went to the authorities, but they told me there was<br />
nothing to look into, that Haelyn—or any citizen—can travel<br />
as they please. I spoke to some of the other priests—Aelys of<br />
Bahamut, Durkik of Moradin at the Stone Anvil, Kyrrist of<br />
Avandra, even Matron Volorvyn of the Raven Queen. Some<br />
of these have long been my friends, and even those who<br />
were not have at least been respected colleagues. And all of<br />
them brushed me off! <strong>The</strong>y were distant, uncaring, even<br />
cold, as though my worries were of no moment! Volorvyn<br />
appeared barely to recognize me, and while we’ve never<br />
been close, we’ve known one another on and off for years.”<br />
Lavinya looks at each of the PCs, one by one,<br />
while continuing:<br />
“And that’s when I thought of you, Overlook’s new heroes.<br />
I’m terrified that something has happened to my friend and<br />
that something is wrong with my fellow priests. I should,<br />
we all should, be showering you with gifts and thanks, not<br />
heaping even more cares onto your shoulders—but I’ve little<br />
influence left in this city, and I have nobody else to whom I<br />
can turn.”<br />
Lavinya smiles gratefully when the PCs agree. (Again,<br />
the adventure, as written, assumes they do so.)<br />
She can’t offer much in the way of additional<br />
information, though she does try to advise the<br />
PCs if they ask her council.<br />
“You could talk to one of the priests, I suppose,” she<br />
mutters doubtfully. “I’m not sure they’d agree to speak<br />
with you at any length, though. Everyone’s so busy with the<br />
mobilization. And these are important people; you can’t<br />
just, uh, ‘hero’ your way into the building and confront<br />
them,” she adds with a smile. “Still you might learn<br />
something from them.<br />
“You could examine the shrine of Erathis. You might<br />
well find something I missed. Or you could search Haelyn’s<br />
home, which is on the same lot as the shrine. I looked for<br />
her there, but when she didn’t answer, it felt wrong for me to<br />
just barge in. But now . . .” She shrugs.<br />
Lavinya can, of course, give the PCs directions to<br />
any of these locations, or any other public location of<br />
which they might ask her.<br />
If the PCs ask her (or anyone else around town)<br />
about the work going on at the old temple of Moradin,<br />
she answers as follows:<br />
“Oh, that. High Ancestor Durkik recently assigned most<br />
of his underpriests to restoring the old temple. Something<br />
about wanting to expand, I think, so that other races who<br />
might not be comfortable in the Stonehammer district<br />
could return to Moradin.”<br />
Finally, if your players are accustomed to using sword<br />
and spell to deal with every obstacle and aren’t used<br />
to subtlety and restraint, you can use Lavinya—who<br />
is, after all, a priest of the goddess of civilization—to<br />
remind them to behave themselves. <strong>The</strong> PCs do not<br />
have any legal authority here, after all. <strong>The</strong>y can fight to<br />
defend themselves, and against any criminal element<br />
they might discover, but they can’t just pull steel on a<br />
high priest or a squad of city watch and expect things<br />
to go their way. Some element of discretion is vital.<br />
OUT OF ORDER<br />
Don’t worry if the PCs do things in a different order<br />
than presented here; everything still works. For<br />
instance, if they go to the Shrine of Erathis and begin<br />
investigating Haelyn’s disappearance on their own,<br />
you can still have them receive Lavinya’s message<br />
later that same evening. Everything that needs to<br />
happen can happen regardless of when the PCs get<br />
to it.<br />
December 2008 |<br />
13<br />
DUNGEON 161
<strong>The</strong> <strong>Temple</strong> <strong>Between</strong><br />
Investigating Overlook<br />
<strong>The</strong> PCs have a variety of approaches they can take<br />
here, and a number of locations of interest.<br />
Don’t, however, feel that you must force the PCs to<br />
stick only to the locations presented below. If they come<br />
up with another avenue of investigation, you can “wing<br />
it” and let them pursue that course, perhaps allowing<br />
them to find their answers some other way. You can<br />
try to gently guide them back on track; perhaps other<br />
NPCs also express suspicion of Grovald, or comment<br />
on priests acting peculiarly. Or you might run an extra<br />
ambush encounter (see C7, below), giving the PCs<br />
another opportunity to question their attackers, and<br />
thus pointing them back toward Captain Aerun.<br />
C1: <strong>The</strong> Stone Anvil<br />
Under normal circumstances, a group with such a<br />
disparate racial makeup as the party would have a<br />
few problems sauntering through the dwarf-heavy<br />
(and elitist) district of Stonehammer. <strong>The</strong>ir current<br />
status as heroes of the city, however, grants the PCs a<br />
bit of leeway.<br />
As they approach the Stone Anvil, read the<br />
following:<br />
As compared to so much of the rest of Overlook, the<br />
Stonehammer district might almost be a different city.<br />
Broad, clean streets flow like rivers of rock between<br />
enormous, sweeping edifices, carved with near magical<br />
precision. <strong>The</strong> air is clean here, and the voices you hear<br />
are raised in laughter or negotiation, without the tinge of<br />
desperation so common in some of the poorer quarters.<br />
And then you are there. It rises up before you like a<br />
fortress, constructed of blocks of stone larger than many of<br />
Overlook’s houses. At its height, looking down upon even its<br />
tallest neighboring buildings, glint leaded windows in the<br />
shape of hammers. <strong>The</strong> doors at the entryway stand open,<br />
inviting all who would worship, and a good thing it is—for<br />
these doors are 40 feet high if they’re an inch, and the lot of<br />
you together might have difficulty dragging them open.<br />
This is the Stone Anvil, temple of Moradin and the<br />
spiritual heart of Overlook.<br />
A COLLECTION OF CLUES<br />
For DMs not accustomed to running this sort of<br />
investigation, this sidebar presents the various bits of<br />
information the PCs can pick up in each of the following<br />
encounters, just to help you keep it straight.<br />
C1: At the Stone Anvil, the PCs learn that High<br />
Ancestor Durkik adamantly doesn’t want them snooping<br />
around.<br />
C2: <strong>The</strong> PCs learn that the Ironfell Clan is one of<br />
the investors in the reconstruction of the old temple<br />
of Moradin in the Divine Knot—but this is a red herring<br />
and is not relevant to the ongoing investigation. More<br />
relevant is the admission by Ancestor Karros that High<br />
Ancestor Durkik is not acting himself lately.<br />
C3: At the other temples, the PCs can experience for<br />
themselves the fact that many of the city’s high priests<br />
are acting peculiarly.<br />
C4 and C5: During the day, the PCs learn only that<br />
the people don’t especially trust the new caretaker,<br />
Grovald, and possibly that Haelyn didn’t pack up for<br />
a “spiritual journey.” If they return at night, they can<br />
locate the body of Haelyn and learn of Grovald’s connection<br />
to Durkik either through an interrogation or<br />
the half-burned note.<br />
C6: If the PCs go to the authorities, they might discover<br />
that Captain Aerun appears more interested in<br />
keeping them out of any subsequent investigation than<br />
in investigating.<br />
C7: If the PCs question their ambushers, they learn<br />
that a corrupt city watchperson has hired them and can<br />
be found nightly at the Pig and Bucket.<br />
C8: At the Pig and Bucket, the PCs learn (or confirm)<br />
that the corrupt guardsman is Aerun.<br />
Culmination: <strong>The</strong> PCs should be suspicious of either<br />
Durkik, Aerun, or both. <strong>The</strong>y can follow either of them<br />
to the warehouse (C9), leading to the conclusion of this<br />
portion of the adventure.<br />
December 2008 | DUNGEON 161<br />
14
<strong>The</strong> <strong>Temple</strong> <strong>Between</strong><br />
If the PCs peer into the sanctuary—which is no less<br />
sweeping, magnificent, and ostentatious than the<br />
building’s exterior—they see about a hundred worshipers<br />
(if they came during the day) or about a dozen<br />
worshipers (if they came at night) engaged in prayer,<br />
heads bowed and chanting in low, sonorous voices. As<br />
usual, the overwhelming majority of the faithful here<br />
are dwarves. <strong>The</strong> services are being led by a young<br />
dwarf female who reads from a great, steel-bound<br />
tome that, when open, is nearly as broad as she is.<br />
<strong>The</strong>re is no sign here of anything out of the ordinary,<br />
or of High Ancestor Durkik himself.<br />
If the PCs examine the halls surrounding the main<br />
sanctuary, however, things don’t appear so mundane.<br />
A great many tasks appear to have been left undone;<br />
floors are not swept, candelabras are unpolished,<br />
torches and braziers have been allowed to burn out.<br />
(If the PCs ask any of the faithful about this, they are<br />
once again told that most of Durkik’s underpriests are<br />
currently hard at work restoring the old temple in the<br />
Divine Knot.)<br />
If they explore farther still, going deeper into the<br />
temple than most worshipers ever travel, they don’t<br />
have long to explore. Within mere moments, High<br />
Ancestor Durkik appears, accompanied by a contingent<br />
of the city watch. He demands, in no uncertain<br />
terms, that the PCs depart immediately. <strong>The</strong> guards<br />
are apologetic—they recognize the PCs as heroes—<br />
but adamant. <strong>The</strong> priest has the legal and religious<br />
authority to demand that the party leaves, and the<br />
guards are here to ensure they do just that.<br />
Still, while they haven’t learned any concrete<br />
details, the PCs can now be pretty sure that something<br />
odd is afoot at the Stone Anvil.<br />
If the PCs return at night, with the intent of spying<br />
on or following High Ancestor Durkik, proceed to the<br />
Heart of the Conspiracy skill challenge, below.<br />
INTERROGATION<br />
Several of the following encounters allow the PCs the<br />
opportunity to interrogate their foes, if they take any<br />
alive. When dealing with a human thug or a doppelganger<br />
assassin, this is a level 8 skill challenge; when<br />
dealing with Grovald or the false Durkik, it is level<br />
9. In either case, the challenge has a complexity of<br />
2, with Bluff, Diplomacy, Intimidate, and Insight as<br />
the primary skills. PCs can use Religion, with an easy<br />
check, against Grovald or the false Durkik (revealing<br />
that they’re not true followers of Erathis or Moradin),<br />
or Streetwise, with an easy check, against the others<br />
(to discover some of their criminal affiliations). <strong>The</strong>se<br />
don’t qualify as successes, but grant the PCs +2<br />
bonuses to other checks in the challenge until their<br />
next failure. Similarly, a promise of freedom buys a +2<br />
bonus to all such checks, and a bribe of at least 100<br />
gp grants an automatic success with the thugs and<br />
doppelgangers, but not Grovald or the false Durkik.<br />
If the PCs succeed, the subject answers all their<br />
questions. If they fail, but with one or more successes,<br />
the subject answers a number of questions equal to<br />
the PCs successes, but at least one answer is a lie.<br />
If the PCs wish, they can question enemies they’ve<br />
killed, using the Speak with Dead ritual. In this case,<br />
use the “Dead Witness” skill challenge (Dungeon<br />
Master’s Guide, page 78, as either a level 8 or level 9<br />
challenge, as appropriate).<br />
See the individual entries for suggestions on what<br />
information the NPCs can offer.<br />
C2: <strong>The</strong> <strong>Temple</strong> of Moradin<br />
in the Divine Knot<br />
<strong>The</strong> PCs might decide to look more thoroughly at<br />
the old temple of Moradin to see if any answers lie<br />
there. Although the PCs might be briefly misdirected<br />
by a red herring or two, they can also make a friend<br />
within the ranks of Moradin’s priests who reinforces<br />
their suspicions of High Ancestor Durkik.<br />
As the PCs arrive at the temple, read:<br />
<strong>The</strong> amount of work going on here makes the place look<br />
less like a house of worship and more like an anthill on a<br />
massive scale. Workers of all races scurry through doors<br />
and windows, clambering up scaffolds of wood and iron.<br />
<strong>The</strong> sounds of grunts, curses, shouted orders, and the<br />
monotonous thump of hammers on nails make it all but<br />
impossible to hear yourself think.<br />
Once the PCs enter the structure, continue:<br />
<strong>The</strong> work continues inside as well as out. Workers with<br />
boards on their shoulders, wheelbarrows, or heavy<br />
hammers move back and forth before you. <strong>The</strong> floor is<br />
covered with dust, both stone and wood, and heaps of rubble<br />
lie in every corner.<br />
Not everyone here is a simple laborer, however. Leaning<br />
against the leftmost wall, her eyes narrowing as she<br />
watches you, is a young, heavily muscled woman clad in<br />
scale armor. One hand rests on the hilt of a longsword at<br />
her waist.<br />
Assuming the PCs have played through prior installments<br />
of the Scales of War, they recognize the warrior<br />
immediately. This is Megan Swiftblade, leader of an<br />
adventuring party called the Freeriders. Though their<br />
interactions when they first met might have been<br />
friendly enough, Megan and her team resent the PCs<br />
December 2008 |<br />
15<br />
DUNGEON 161
<strong>The</strong> <strong>Temple</strong> <strong>Between</strong><br />
for becoming greater heroes of Overlook than they,<br />
and while that resentment doesn’t equate to true<br />
hatred or hostility—the Freeriders aren’t evil—they<br />
aren’t inclined to do the PCs any favors.<br />
<strong>The</strong>n again, Megan’s not the one the PCs have<br />
the most worry about. As soon as the PCs<br />
attempt to move farther into the room, or to<br />
speak to or attract anyone’s attention, read:<br />
Abruptly, one of the dwarf workers turns and stops in front<br />
of you, coming within inches of running his wheelbarrow<br />
over [insert a character’s name]’s foot. He hitches his<br />
thumbs through his belt—a gesture that puts one hand<br />
uncomfortably near the haft of his hammer—and glares<br />
with beady eyes above a dirty beard. “You bastards ain’t<br />
welcome here,” he announces gruffly. “You might have the<br />
rest of the city hoodwinked, but not us.”<br />
This particularly unpleasant dwarf is Murrik Ironfell,<br />
a member of the Ironfell Clan with whom the PCs<br />
came into conflict back in “<strong>The</strong> Lost Mines of Karak.”<br />
He’s not shy about introducing himself, so the PCs<br />
shouldn’t wonder long why he’s bothering them. And<br />
many of the other workers on site are also of that clan,<br />
slowly assembling around Murrik as he continues to<br />
taunt the PCs. Megan and the other Freeriders begin<br />
to assemble as well. If the PCs ask her why she’s here,<br />
she tells them, “<strong>The</strong> priests of Moradin hired us to<br />
make sure the old temple was free of any dangerous<br />
people or creatures for the renovation. You’re starting<br />
to look dangerous to me.”<br />
You can let this go on for a few minutes, allowing<br />
the PCs and Murrik to exchange threats and insults.<br />
Once it appears ready to escalate into violence,<br />
the PCs agree to back down, or they continue<br />
to insist to see someone in charge, read the<br />
following:<br />
A red-bearded dwarf, clad in worker’s leathers and a smock<br />
but with the hammer of Moradin hanging about his neck,<br />
pushes his way through the crowd. “All right, all of you back<br />
to work!” he barks. Turning to you, he bows his head with<br />
cold politeness. “I’m Ancestor Karros of Moradin,” he says.<br />
“Why don’t I escort you out”<br />
Ancestor Karros says little as he walks with the PCs<br />
back through the main door and down the steps,<br />
but the party can get him to open up. This level 7<br />
skill challenge has a complexity of 1 and uses Bluff,<br />
Diplomacy, and Religion (to establish a common<br />
ground) as the primary skills. If the PCs succeed,<br />
Karros becomes a bit more talkative and—assuming<br />
the PCs ask the right questions or steer the conversation<br />
in the right direction—eventually provides the<br />
following information.<br />
✦ High Priest Durkik has assigned almost the entire<br />
staff of the Stone Anvil to working on the reconstruction<br />
of the old temple. He’s barely kept enough<br />
priests on hand there to conduct regular services.<br />
Karros doesn’t speak ill of Durkik, but he hints at the<br />
fact that he doesn’t approve. <strong>The</strong> idea of the renovation<br />
came out of nowhere, and neither Karros nor<br />
the other priests can figure out why it’s being done.<br />
✦ Durkik called for investors from Overlook’s<br />
dwarves to aid in the reconstruction. <strong>The</strong> Ironfell<br />
Clan was among those to contribute money and<br />
workers. Many of the workers have been speaking<br />
poorly about the PCs any time their status as<br />
“heroes” comes up in conversation.<br />
✦ Although he appears almost unwilling to admit it,<br />
Karros confesses that Durkik hasn’t been himself<br />
for weeks now. He’s worried about the old priest.<br />
C3: Other <strong>Temple</strong>s in the<br />
Divine Knot<br />
If the PCs attempt to speak with any of the other<br />
priests in the Divine Knot, the priests politely listen to<br />
their concerns, promise to look into them, thank the<br />
PCs for their time, and ask them to leave. Allow the<br />
PCs to attempt a DC 20 Insight check; if they succeed,<br />
they realize that the priests act somewhat distant—<br />
as though they were distracted or preoccupied with<br />
something pressing.<br />
If the PCs return at night, with the intent of spying<br />
on or following any of the priests, proceed to the<br />
Heart of the Conspiracy skill challenge, below.<br />
C4: <strong>The</strong> Shrine of Erathis<br />
As the PCs approach the shrine, read:<br />
As compared to Overlook’s temples, this shrine is poor<br />
indeed—and yet it offers a sense of intimacy that the greater<br />
edifices do not. Several wooden poles stuck in the earth<br />
support walls and ceiling of heavy fabric, barely enough<br />
to keep the rain off the altar within it. <strong>The</strong> altar is littered<br />
with candle stubs and scraps of parchment, which are the<br />
remnants of prayers and offerings.<br />
Beyond the makeshift sanctuary, a statue of Erathis<br />
stands in the middle of a pool of stagnant water, staring<br />
off toward the horizon. Many of the bricks of the pool<br />
are broken or missing, and a closer glance suggests that<br />
the “statue” was in fact a fountain at one point, but the<br />
mechanism has failed—likely many years ago.<br />
Several rickety cottages stand on the edge of the<br />
property, apparently held together by little more than faith<br />
and an extra coating of paint.<br />
December 2008 | DUNGEON 161<br />
16
<strong>The</strong> <strong>Temple</strong> <strong>Between</strong><br />
If the PCs come during the day, continue with<br />
the following:<br />
Several townsfolk move in and out of the curtain-housed<br />
shrine, leaving written prayers on the altar and occasionally<br />
glancing askance at a fellow who paces behind it. He is a tall<br />
human, bald-headed with features sharp as an eagle’s, clad<br />
all in somber black. He mutters to himself as he paces.<br />
voice, she says, “I couldn’t help but overhear, and a lot of<br />
us have asked him the same questions. We don’t trust him,<br />
and we’re worried about Haelyn. Almost nobody comes<br />
here after dark anymore, so if you want the chance to talk to<br />
him in private, when he’s not so ‘busy,’ that’d be a good time<br />
to come back. Maybe you can find out what’s going on.”<br />
<strong>The</strong> PCs can take a casual look around the grounds<br />
during the day, and Grovald doesn’t stop them. But<br />
any attempt to look inside cottage C4A, or any thorough<br />
searching (such as climbing inside the fountain)<br />
brings threats of him calling the watch and having<br />
the PCs charged with trespassing. (As long as they’re<br />
at least a little bit subtle, he doesn’t appear to notice if<br />
Insight Check<br />
DC 16: It’s pretty clear from his body language that the<br />
man doesn’t want to be here, though any time one of the<br />
citizens utters a prayer to Erathis, he replies with a quick<br />
“So may it be.”<br />
If the PCs speak with him, he introduces himself as<br />
Grovald. He answers any questions about Haelyn<br />
with the same “spiritual retreat” story he gave Lavinya<br />
(and no, he doesn’t know where she went or when<br />
she’ll be back). If the PCs press him or try to talk<br />
about any other issue, he insists that he’s busy praying<br />
along with his faithful and returns to pacing. At<br />
this point, he starts muttering more loudly, offering<br />
prayers to Erathis. A DC 18 Insight check suggests<br />
he’s lying about Haelyn.<br />
Again, the PCs’ reputation as saviors of Overlook<br />
comes to the rescue.<br />
After the quick exchange with Grovald (and<br />
before the PCs can contemplate doing something<br />
foolish in front of witnesses), read the following:<br />
One of the faithful, an older woman dressed in shabby but<br />
well-mended shawl and dress, stands up from the altar and<br />
turns her eyes on you. “I know you!” she calls out. “Thank<br />
you so much for all you’ve done!”<br />
As she approaches you, however, she glances once at<br />
Grovald and her eyes narrow. In a much softer tone of<br />
INTERROGATING GROVALD OR HIS SOLDIERS<br />
Assuming the PCs ask the right questions or guide the most of his time at the temple, but that the high priest<br />
conversation down the proper path, they learn the following<br />
information.<br />
doesn’t know.<br />
frequently disappears for the night; to where, Grovald<br />
From the Thugs or Doppelgangers: <strong>The</strong>se are If pressed on the issue, Grovald confesses that he<br />
simple hoods and members of the Lost Ones criminal is the priest of “the master of darkness.” (A DC 10<br />
organization. Someone has been coming to the Lost Religion check reveals this to be an occasional title<br />
Ones to hire out a lot of extra muscle. This particular for Zehir.) Grovald claims that his involvement here<br />
group of thugs was hired by Grovald. <strong>The</strong>y don’t know is purely mercenary—and this is the truth because he<br />
who he works for, but they’ve seen him meeting with was paid for his assistance—but PCs who don’t believe<br />
a dwarf on occasion. <strong>The</strong>y don’t know who else has him might wind up chasing false clues for a bit, seeking<br />
been hiring muscle, or if they’re tied into the same a Zehir connection..<br />
conspiracy, but they know that they’re far from the<br />
SPEAKING WITH HAELYN<br />
only thugs to be hired as soldiers lately.<br />
From Grovald: Grovald grudgingly admits that he If the PCs use Speak with Dead on Haelyn, there’s<br />
killed Haelyn and buried her behind the fountain. He no need for a skill challenge; she’s happy to aid them.<br />
claims he was ordered to do so by individuals who Alas, all she can tell them is that Grovald murdered<br />
didn’t like her poking her nose in where it wasn’t her as she prayed in the shrine for guidance. She had<br />
wanted. If pressed, he confesses that he’s ultimately recently noticed a change in the personalities of various<br />
priests in the city, but was laughed off when she<br />
working for someone named General Zithiruun. Grovald<br />
doesn’t know what he’s a general of, and he doesn’t confronted them. (She admits, now, that it was foolish<br />
of her to let on that she suspected them, but she’s<br />
know what species, for the general wears a hooded<br />
cloak, but he does wear a strange armor of iron joints been a trusting sort.) She was praying that Erathis<br />
and leather harnesses. At the moment, though, Grovald<br />
takes his orders from Durkik, high priest of “that entered and slew her with his magic. She asks the PCs<br />
would send a sign of what to do next when Grovald<br />
rock-headed idiot god.” He knows that Durkik spends to please thank Lavinya for her concern.<br />
December 2008 |<br />
17<br />
DUNGEON 161
<strong>The</strong> <strong>Temple</strong> <strong>Between</strong><br />
they poke around Haelyn’s shack at C5, at least not<br />
during the day.)<br />
If and when the PCs return here at night, proceed<br />
to the tactical encounter.<br />
Tactical Encounter: C4/C5 <strong>The</strong> Shrine of Erathis<br />
and Haelyn’s Home (page 41).<br />
C5: Haelyn’s Home<br />
As the PCs approach, read:<br />
This small cottage on the grounds of the shrine looks<br />
comfortable, but old and rickety. Bricks are missing from<br />
the chimney, and the paint is peeling from the walls.<br />
<strong>The</strong> door is locked, requiring a DC 18 Thievery<br />
check to open. Once the PCs enter, read:<br />
<strong>The</strong> dust of days, if not weeks, lies over a homey little abode.<br />
An ash-filled fireplace stands in one corner, with an old<br />
table and two equally old, but comfortable looking, chairs<br />
beside it. A pantry stands alongside a door that would<br />
almost have to lead to the bedroom.<br />
A faint stench, foul and out of place with the cottage’s<br />
peaceful appearance, tickles your nostrils.<br />
<strong>The</strong> PCs find no trace that anyone has been in here in<br />
some time. In the bedroom, clothes are packed neatly<br />
in the chest by the foot of the bed, piled almost as<br />
high as the lid will allow.<br />
<strong>The</strong> stench is coming from the pantry, which<br />
contains several rotting vegetables, fruits, and cuts<br />
of meat, all swarming with ants and fruit flies. <strong>The</strong><br />
players can probably figure out what this means, but<br />
if not, allow them a DC 5 Intelligence check to realize<br />
that perishable foods in the pantry and a chest of<br />
clothes almost completely full are not signs of someone<br />
who was preparing for a long journey.<br />
C6: <strong>The</strong> Ministry of War<br />
At some point in their investigations, the PCs might<br />
decide to try going to the authorities and getting some<br />
help. If they do so, they’re directed to the Ministry of<br />
War—specifically, the office wherein the officers of<br />
the city garrison work.<br />
As the PCs approach, read the following:<br />
<strong>The</strong> Ministry of War is huge, consisting of six buildings<br />
arrayed around a central courtyard—all within an imposing<br />
set of guard walls, of course. As you approach the gate, two<br />
guards, a dwarf and a dragonborn, step forward and cross<br />
their spears before you. “State your business within,” the<br />
dwarf demands.<br />
<strong>The</strong> guards have no intention of barring the PCs’<br />
path, since the Ministry of War is open to all during<br />
business hours. <strong>The</strong>y’re just following protocol. Once<br />
the PCs explain their purpose, the guards are happy<br />
to provide directions to the office, which is in one<br />
of the buildings nearest the main entrance to the<br />
compound.<br />
Once the PCs enter the office, read:<br />
A dwarf stands up from behind the desk as you enter. His<br />
blond beard is tightly braided, his armor brightly polished.<br />
It takes you only a moment to recognize him as the officer<br />
you saw shouting orders from the wall when you first<br />
arrived in Overlook.<br />
“I’m Captain Aerun,” he says in a gruff voice. “I’m<br />
honored to have Overlook’s heroes in my office. What can I<br />
help you with”<br />
Aerun listens intently and politely, scowling in<br />
anger when the PCs mention some of the vile things<br />
they’ve seen, and shaking his head if they mention<br />
having found Haelyn’s body and/or killing Grovald.<br />
Ultimately, however, regardless of what the PCs tell<br />
him, Aerun’s response is the same.<br />
“<strong>The</strong>se are indeed grave matters you bring to me,” he says.<br />
“I’ll get looking into them at once. And you once again<br />
have the thanks of a grateful city. Go on and take a load<br />
off, wherever you’re staying. I’ll let you know how the<br />
investigation turns out.”<br />
No matter how the PCs argue, Aerun refuses to allow<br />
them to take part in the investigation, going so far as<br />
to order them to stay out of it, and leave further efforts<br />
to the proper authorities. If they show any signs of<br />
hostility, argue with him for too long, or demand to<br />
speak to someone else, he calls in several guards to<br />
escort the PCs out. <strong>The</strong> guards are deferential, since<br />
they respect the party a great deal, but they follow<br />
orders.<br />
During this exchange, allow the PCs to make<br />
Insight checks. With a DC 16, a character recognizes<br />
that Aerun is more interested in keeping them out of<br />
the investigation than he is in finding out the truth.<br />
With a DC 20, the character realizes that something<br />
about Aerun’s behavior isn’t right; even though he’s<br />
engaged in the conversation, something about him<br />
appears vaguely distant, as though he’s thinking<br />
about something else. If the PCs have been to visit the<br />
priests at the various temples in the Divine Knot, they<br />
recognize this as the same behavioral quirk.<br />
If the PCs come back at night, with the intent of<br />
spying on or following Aerun, they see him depart in<br />
civilian clothes. Eventually, he leads them to the Pig<br />
and Bucket (see C8).<br />
December 2008 | DUNGEON 161<br />
18
<strong>The</strong> <strong>Temple</strong> <strong>Between</strong><br />
C7: Ambush in the Alley<br />
Precisely when this encounter occurs depends on the<br />
PCs. (Don’t assume it has to happen after the scenes<br />
described previously, just because it’s given as C7 on<br />
the list.) <strong>The</strong> attack happens on a random street corner<br />
when any one of the following events have occurred:<br />
INTERROGATING THE<br />
AMBUSHERS<br />
Assuming the PCs ask the right questions or guide the<br />
conversation down the proper path, they can learn<br />
the following information:<br />
<strong>The</strong>se hoods had orders to attack them. <strong>The</strong>y normally<br />
work for the Lost Ones criminal organization,<br />
but in recent weeks, customers have been coming<br />
to the Lost Ones to hire out a lot of extra muscle.<br />
This particular group of thugs was hired out to, of all<br />
people, a city watch member! <strong>The</strong> hoods don’t know<br />
his name, but they know him by appearance. He<br />
shows up at the Pig and Bucket almost every night<br />
so they can report to him and receive their orders.<br />
<strong>The</strong>y don’t know who he works for, only that they’re<br />
to follow his orders. <strong>The</strong>y know that he often heads<br />
out into the city after leaving the Pig and Bucket, and<br />
not in the direction of the High Hall district, but they<br />
don’t know where he goes.<br />
Similarly, they don’t know who else has been hiring<br />
muscle, or if they’re tied into the same conspiracy, but<br />
they know that they’re far from the only thugs to be<br />
hired as soldiers lately.<br />
If asked, they describe the guardsman as a blondbearded<br />
dwarf with a gruff voice. If the PCs have<br />
been to see Captain Aerun, further description<br />
appears to match him perfectly.<br />
✦ <strong>The</strong> PCs have been to the Stone Anvil and at least<br />
one other location mentioned here as part of this<br />
investigation, or<br />
✦ <strong>The</strong> PCs have been to see Captain Aerun and at<br />
least one other location mentioned here as part of<br />
this investigation, or<br />
✦ <strong>The</strong> PCs have defeated Grovald and his soldiers in<br />
combat.<br />
Obviously, the attack doesn’t occur instantly after<br />
these conditions are met, but some point in the<br />
next few hours, as the PCs are traveling about the<br />
city.<br />
Tactical Encounter: C7 Ambush in the Alley<br />
(page 43).<br />
C8: <strong>The</strong> Pig and Bucket<br />
<strong>The</strong> Pig and Bucket is a cheap, filthy, yet unaccountably<br />
popular one-story tavern in the district called<br />
the Blister. Squished between a couple of boarding<br />
houses said to sell a lot more than just board, it’s<br />
known for its wide variety of beers, and its wide variety<br />
of crooks, mercenaries, and thugs who frequent<br />
the place looking for work.<br />
If the PCs enter, read:<br />
Most of the building’s interior consists of the beer hall.<br />
Booths line the walls, while long tables and rear-bruising<br />
benches fill the middle of the room between. Along the far<br />
wall runs a wooden bar—you can see the graffiti carved into<br />
it even from here—behind which stand stacks of kegs.<br />
Assuming the PCs are here at night, looking for (or<br />
having followed) Captain Aerun, they can see him<br />
in one of the far booths, speaking to a scruffy looking<br />
individual in a shabby gray cloak. If the PCs have<br />
taken steps to disguise themselves, Aerun doesn’t<br />
recognize them. If they have not, they have exactly<br />
1 round to do something with themselves before he<br />
notices them.<br />
Hopefully, the PCs are wise enough either to disguise<br />
themselves, or to wait outside. If he sees them,<br />
he keeps drinking for a few minutes, then leaves and<br />
casually returns to the Ministry of War, and the PCs<br />
have lost their chance to follow him that night.<br />
If the PCs remain unnoticed, however, and try<br />
to follow Aerun after he departs, continue with the<br />
Heart of the Conspiracy skill challenge.<br />
INTERROGATING<br />
THE POSSESSED<br />
Unfortunately, the possessed individuals—including<br />
Aerun and several priests other than Durkik—are<br />
effectively immune to interrogation. After all, the<br />
PCs cannot offer them anything they require, and<br />
they have no fear, for they can abandon the body<br />
and return to their own. If, however, the PCs try to<br />
interrogate them, a DC 21 Insight check reveals that<br />
the individuals are possessed by an outside force. If<br />
the possessing githyanki realizes the PCs know this,<br />
it immediately leaves the body, which falls to the<br />
ground as a dead shell.<br />
December 2008 |<br />
19<br />
DUNGEON 161
<strong>The</strong> <strong>Temple</strong> <strong>Between</strong><br />
<strong>The</strong> Heart<br />
of the Conspiracy<br />
After a day or two of investigation, the PCs should<br />
have a couple of strong suspects: Captain Aerun and<br />
High Ancestor Durkik. <strong>The</strong>y might suspect some of<br />
the other priests as well. If they choose, and put themselves<br />
in a position to do so, they can follow any one of<br />
these individuals to the warehouse wherein the conspiracy<br />
makes its headquarters. <strong>The</strong>y can accomplish<br />
this with an extended skill challenge.<br />
Skill Challenge: SC1 Catching Durkik (page 44).<br />
C9: <strong>The</strong> Warehouse<br />
This warehouse, located in the midst of the Blister<br />
district, is the headquarters of the conspiracy and the<br />
location where they’re holding the real Durkik.<br />
As the PCs approach, read:<br />
Nothing in particular makes this warehouse stand out. It’s<br />
a large, squat building, with a huge front door that opens<br />
by sliding up into the ceiling on rails. A rickety wooden<br />
staircase along one wall leads to a door that presumably<br />
opens onto an upper level.<br />
Under normal circumstances, assume that the two<br />
githyanki-possessed individuals at the warehouse<br />
are Captain Aerun and Goodman Kyrrist, priest of<br />
Avondra. If the PCs have done something to prevent<br />
one of these two from being present, replace the missing<br />
with one of the other possessed priests (named in<br />
Lavinya’s tale).<br />
Tactical Encounter: C9 <strong>The</strong> Warehouse (page<br />
45).<br />
INTERROGATING<br />
THE CONSPIRATORS<br />
As before, the PCs can interrogate any captives or<br />
survivors (except the two possessed individuals).<br />
Assuming the PCs ask the right questions or guide<br />
the conversation down the proper path, they can<br />
learn the following information:<br />
<strong>The</strong> conspirator reveals that a doppelganger has<br />
taken the place of the real high priest Durkik, who<br />
is being held prisoner in a secret chamber beneath<br />
the warehouse. He tells the PCs he is working for<br />
someone called General Zithiruun. Like Grovald, he<br />
hasn’t seen Zithiruun’s face, but recognizes him by<br />
his hooded cloak and his strange leather-and-steel<br />
harness. He knows that Zithiruun wants them to<br />
hold the Stone Anvil, and to question Durkik about<br />
the security and magic of another temple, called<br />
“Mountainroot.” <strong>The</strong> false Durkik assigned most of<br />
the priests of Moradin to rebuilding the old temple<br />
as a means of keeping them occupied and out of the<br />
Stone Anvil.<br />
<strong>The</strong> conspirator does not know why Zithiruun is<br />
interested in this “Mountainroot <strong>Temple</strong>.” He knows<br />
only that Zithiruun has grown more and more frustrated<br />
with Durkik’s failure to answer their questions;<br />
a few days ago, he stormed off insisting that he was<br />
going to “find out for himself,” though he ordered<br />
them to keep trying in his absence, and record what<br />
they learned.<br />
December 2008 | DUNGEON 161<br />
20
<strong>The</strong> <strong>Temple</strong> <strong>Between</strong><br />
C9A: Rescuing Durkik<br />
When the PCs descend the ladder beneath the<br />
trapdoor in the warehouse, read:<br />
You are within a narrow, stone-walled hallway. Mildew<br />
darkens the mortar between the bricks and fills the air<br />
with the damp scent of rot. A steel door, speckled with rust,<br />
stands at the far end of the hall. It boasts a small barred<br />
window, but from here you cannot see what might lie<br />
beyond.<br />
Once the PCs near the door and can see through<br />
the bars, continue:<br />
A dwarf, his flesh bruised and beaten, his hair and beard<br />
matted with blood, stands chained to the far wall of a<br />
stench-ridden, claustrophobic cell. It takes you a moment<br />
to recognize him as none other than High Priest Durkik<br />
Forgeheart!<br />
Slowly, as though even so minor a move pains him,<br />
he looks up to meet your gaze through the bars, his eyes<br />
widening slightly as he recognizes you. “Be careful,” he<br />
rasps in a hoarse voice. “<strong>The</strong> door’s trapped.”<br />
He gestures with a finger, the chain clinking, to indicate<br />
a series of tubes that protrude from the walls of the cell,<br />
pointing in his direction. “And not to kill you, either,” he<br />
adds impassively. “<strong>The</strong>y don’t want me escaping.”<br />
<strong>The</strong> door can be picked with a DC 21 Thievery check<br />
(as can the chains on his wrists, once the PCs move<br />
inside), but if the door is opened without the safeguards<br />
being disabled, one or more of the tubes fires a<br />
sharpened spike into Durkik’s chest, killing him. <strong>The</strong><br />
“trap” is three traps, each of which must be disabled.<br />
3 Spike Tubes Level 9 Warder<br />
Trap XP 400<br />
Hidden tubes with powerful springs lurk within the walls,<br />
waiting to launch brutal iron spikes.<br />
Perception<br />
✦ DC 24: Through careful study, you determine how the<br />
mechanism fits together, allowing you to advise your<br />
allies how to work on it. This grants your allies a +2<br />
bonus to Thievery checks made to disable the trap. (Each<br />
of the three traps requires a separate Perception check to<br />
grant this bonus.)<br />
Initiative +10<br />
Trigger<br />
If the PCs open the door without disarming all three<br />
traps, or if the characters fail four total countermeasure<br />
attempts (see below), all remaining traps fire.<br />
Attack<br />
Standard Action Melee 2<br />
Target: Everyone within the cell.<br />
Attack: +17 vs. AC; a prisoner chained by the manacles in<br />
the cell is hit automatically.<br />
Hit: 2d8+7 damage; against a prisoner chained by the<br />
manacles, this is considered a coup de grace attack,<br />
dealing 23 damage per functioning trap. In Durkik’s case,<br />
this is more than enough to kill him.<br />
Countermeasures<br />
✦ A character adjacent to the cell door can reach through<br />
the bars and attempt to physically wrench a tube offtarget,<br />
thus disarming it, with a DC 28 Athletics check.<br />
Only two of the three traps are positioned to make this<br />
possible.<br />
✦ A character adjacent to the cell door can disarm one of<br />
the three tubes with a DC 28 Thievery check.<br />
If the PCs accidentally trigger the trap, Durkik<br />
gasps, “Bring me . . . to Karros . . .” with his last, choking<br />
breath.<br />
Some Answers and Some Help<br />
<strong>The</strong> following section is written under the assumption<br />
that the PCs successfully rescue Durkik from the cell<br />
(or, failing that, that one of them casts the Raise Dead<br />
ritual on him). If this is not the case, the PCs might<br />
cast Speak with Dead or, if they follow his dying wish,<br />
take him to Ancestor Karros. After finding out from<br />
the PCs what happened, Karros casts Speak with<br />
Dead. In these cases, do not use the standard rules for<br />
Speak with Dead, since Durkik’s spirit is lingering,<br />
hoping to help. Instead, it uses the connection opened<br />
by the ritual to converse with them normally. Thus,<br />
you can still run the scene largely as written here;<br />
change any of his offers to accompany the PCs to him<br />
ordering Karros to do the same.<br />
Once the PCs free Durkik, read the following:<br />
<strong>The</strong> dwarf slowly limps from his cell, wincing with every<br />
step. Clearly he is in a great deal of pain, but despite that<br />
fact, his eyes are alert.<br />
“Thank you,” he says simply. “You’re the answer to every<br />
prayer I’ve offered Moradin. But I fear, as grateful as I am<br />
to be out and alive, that I’ve little good news for you.”<br />
<strong>The</strong> PCs can help him as he talks. You can allow the<br />
PCs to ask questions and roleplay the conversation, or<br />
give them the information Durkik provides.<br />
First, thanks to everything he overheard and the<br />
questions he was asked, Durkik knows roughly what<br />
the conspirators were up to. If the PCs don’t already<br />
have it, he can provide all the information given<br />
above under the “Interrogating the Conspirators” text.<br />
He tells the PCs that Aerun and some of the other<br />
priests were possessed in a dark ritual, but that he<br />
was not because General Zithiruun required information<br />
from him.<br />
At this point, Durkik tells the PCs about the<br />
Mountainroot <strong>Temple</strong> (all the information presented<br />
under that heading in the Background section).<br />
December 2008 |<br />
21<br />
DUNGEON 161
<strong>The</strong> <strong>Temple</strong> <strong>Between</strong><br />
Once he has shared the above information, read<br />
the following:<br />
“As you’ve doubtless guessed,” he says to you, his voice still<br />
weak, “the Stone Anvil contains one of those portals to<br />
the Mountainroot <strong>Temple</strong>. I don’t know why this General<br />
Zithiruun wants the temple, but it’s clearly what he’s after.<br />
“It’s funny, he’s had me tortured for days to make me<br />
describe the Mountainroot’s mystical defenses, but the<br />
truth is, I don’t know much about them. I know about the<br />
temple only because, as High Priest, I was told of it by my<br />
predecessor. I can tell you that the defenses are psychically<br />
linked to the Caretaker, allowing him to control them, but<br />
beyond that, I know little. But even had I told them that<br />
much, I doubt they’d have believed me.”<br />
Durkik coughs twice, then continues:<br />
“I don’t know why he wants the temple,” he repeats, “but I<br />
know it cannot be good for us. I know not who else in this<br />
city might have been compromised—who can be trusted.<br />
That leaves only you.<br />
“<strong>The</strong> entrance from the Stone Anvil is carefully hidden<br />
within an old sepulcher. <strong>The</strong> chamber is hidden behind a<br />
secret door; I can escort you to it, but no farther. What I<br />
cannot do is tell you how to access the portal, for I don’t know,<br />
and I am oathbound never to enter the sepulcher. But my<br />
hope is that, once you find it, you can figure out how to use it.<br />
“I must ask you one thing more,” he adds swiftly. “When<br />
the Mountainroot <strong>Temple</strong> was abandoned, the priesthood<br />
took most of our ancient religious relics with them. Most,<br />
but not all. Somewhere within the temple lies a tome<br />
entitled, when translated into Common, the Incunabulum<br />
Primeval. It is a book of great power for those who know<br />
how to use it. If you can find it and return it to us, I can<br />
promise you a reward of no less than 3,600 gp from the<br />
temple treasury, as well as legal right to any other treasure<br />
you find in, and can carry out of, the Mountainroot.”<br />
Back to the Stone Anvil<br />
Durkik (or Karros, if Durkik is dead) leads the PCs<br />
back through the towering halls of the Stone Anvil.<br />
(<strong>The</strong> PCs might decide to take an extended rest first<br />
and approach the temple the following day. If they’re<br />
badly depleted, you might even suggest this to them.)<br />
Several of the priests and guards appear nervous<br />
about allowing the PCs to pass, but none are prepared<br />
to gainsay their guide.<br />
Read the following:<br />
After a dozen halls and several wide stairs, your guide stops<br />
inside a great chamber. Shelves of old scrolls line the stone<br />
walls, and great marble tables occupy the room’s center. Dust<br />
lies thick over it all, proving that this room is rarely used.<br />
For a few moments, the priest fumbles with the scrolls<br />
on one particular rack. Finally, a loud click resounds<br />
throughout the room, and one of the walls slides open with<br />
a deafening rumble and a cascade of powdered stone.<br />
“This is it,” he tells you. “<strong>The</strong> sepulcher. I cannot go any<br />
farther.”<br />
C10: <strong>The</strong> Portal in the Sepulcher<br />
Read the following (and consider drawing out<br />
the map whether or not combat ensues, since the<br />
room can be difficult to envision):<br />
You are standing at one end of a long chamber. Chandeliers<br />
hanging from the ceiling spring to life even as you pass<br />
through the secret door, illuminating all that lies before you.<br />
To the right and left, stairs lead down to an open lower<br />
level, transforming the floor on which you now stand into a<br />
central walkway, with two narrower ledges along both sides<br />
of the room. At even intervals along those walkways the<br />
floor abruptly widens, almost like the teeth on a gear.<br />
At the far end of the chamber, a bright silver filigree of<br />
unimaginable complexity bulges from the wall. It shows a<br />
scene of Moradin hard at work at his forge. Four statues—<br />
two flanking the filigree, two flanking the entrance—show<br />
Moradin with a pair of ravens perched on his shoulders.<br />
Perhaps these are meant to honor the Raven Queen, who<br />
watches over even Moradin’s dead<br />
<strong>The</strong> PCs can discover that the remains of the honored<br />
dead must be interred inside, and they must descend<br />
to the lower level to find the name plates.<br />
Read the following when they move down:<br />
<strong>The</strong> open space between those protrusions slopes sharply<br />
down from the walkway to lower level.<br />
Once the PCs draw near the filigree imagine,<br />
continue:<br />
Now that you’ve come closer, you can see an old stone door<br />
in the wall behind the filigree image. You can, however, see<br />
no way to access it.<br />
Should any PC touch the filigree in any way,<br />
read:<br />
<strong>The</strong> image suddenly bends as the face of Moradin turns<br />
toward you and speaks in a voice of rending metal. “Who<br />
would step through the portal to the heart of Moradin’s<br />
worship must first prove he understands Moradin in his<br />
own heart.<br />
“Think you carefully on Moradin’s precepts, his<br />
teachings, his actions, and his favored disciples. <strong>The</strong>n speak<br />
unto me a parable, a tale of Moradin, not that you have<br />
learned from his texts, but that you have created yourself.<br />
Let it show your understanding of his words and his ways,<br />
and you may pass.”<br />
December 2008 | DUNGEON 161<br />
22
<strong>The</strong> <strong>Temple</strong> <strong>Between</strong><br />
Should any PC touch the filigree in any way, begin<br />
the skill challenge.<br />
Skill Challenge: SC2 Entering the Portal (page<br />
48).<br />
Tactical Encounter: C10 <strong>The</strong> Portal in the<br />
Sepulcher (page 49).<br />
PART TWO: THE<br />
MOUNTAINROOT TEMPLE<br />
<strong>The</strong> PCs are almost certainly expecting danger in the<br />
Mountainroot <strong>Temple</strong>. <strong>The</strong>y’re probably not expecting<br />
two competing factions.<br />
No Exit<br />
Perhaps the single most important feature of the<br />
Mountainroot is that nobody can leave. Because of the<br />
Caretaker’s torment, the magical security has gone<br />
off-kilter. Anyone can enter the temple, but nobody<br />
can leave. Any attempt to do so, even by using teleportation,<br />
rebounds as though the individual has hit an<br />
invisible wall. (This is why the fey have not departed<br />
and why Zithiruun hasn’t returned to Overlook.) <strong>The</strong><br />
PCs can leave only by locating the Caretaker and<br />
assisting in his recovery.<br />
Dungeon Features<br />
Certain elements of the dungeon are universal<br />
throughout the complex.<br />
Doors: Unless otherwise mentioned, none of the<br />
doors are locked and all can be opened by depressing<br />
a lever in the handle. Doors open inward, and so the<br />
hinges are in the room’s interior.<br />
Stairs: Stairs count as difficult terrain and are<br />
made from stone.<br />
Extended Rest<br />
Fortunately for the PCs, since they cannot depart,<br />
they have several areas in which they can safely rest.<br />
Once they have defeated the fey in M1, the broken<br />
corridors in the northeast are a safe place to camp.<br />
Areas A and F of M10 are safe, and once the PCs have<br />
dealt with the marching hammers and the trap, the<br />
rest of M10 is safe as well. Should the PCs try to sleep<br />
in M2, M3, or M4, they’re attacked briefly by some of<br />
the fey from M5, who then retreat back to that area.<br />
Similarly, if the PCs try to sleep in M6, the forces<br />
from M9 might launch a few attacks.<br />
Keep track of how much time the PCs spend resting;<br />
remember they’re still on a deadline if they want<br />
to earn the most victory points.<br />
Mountainroot <strong>Temple</strong><br />
Overview<br />
<strong>The</strong> temple includes the following areas.<br />
M1: <strong>The</strong> Chamber of Doors<br />
Numerous doors open up into a chamber that leads<br />
to other connected temples, and deeper into the<br />
Mountainroot.<br />
Tactical Encounter: M1 <strong>The</strong> Chamber of Doors<br />
(page 50).<br />
M2: Tea Room<br />
Read the following:<br />
A small round table and a few chairs occupy this otherwise<br />
empty chamber. Several cracked teacups and ale mugs,<br />
covered in dust and cobwebs, stand on the table where they<br />
were abandoned so long ago.<br />
<strong>The</strong> secret door requires a DC 22 Perception check<br />
to locate. It is not locked, and it opens by depressing a<br />
hidden catch in the wall.<br />
M3: Dining Room and Kitchen<br />
Read the following:<br />
Several long tables, capable of seating dozens, stretch the<br />
length of the room. Chairs are scattered about, some having<br />
been knocked over or broken just recently. A few humanoid<br />
corpses—small, with gray skin and wicked teeth—lie strewn<br />
about. Of whatever slew them, there’s no sign.<br />
<strong>The</strong>se are the bodies of several quicklings who came<br />
out second-best against some of Zithiruun’s trolls. <strong>The</strong><br />
above description applies to M3A: <strong>The</strong> Dining Room.<br />
If the PCs enter M3B: <strong>The</strong> Kitchen, they find huge<br />
fire pits full of ash, large wooden counters with knife<br />
marks and meat stains, and a plethora of old brass<br />
tools and pots that are worth pretty much nothing.<br />
<strong>The</strong> door in the east wall leads to M10, the area<br />
beneath M6.<br />
M4: Wine Storage<br />
Read the following:<br />
Wooden racks line the walls, empty and dust-covered. From<br />
their size and shape, you’d guess that they once held bottles<br />
of wine and kegs of ale.<br />
M5: <strong>The</strong> Vault<br />
<strong>The</strong> vault is a multilevel room that contains storage<br />
for valuables behind heavy portcullises.<br />
Tactical Encounter: M5 <strong>The</strong> Vault (page 52).<br />
December 2008 |<br />
23<br />
DUNGEON 161
<strong>The</strong> <strong>Temple</strong> <strong>Between</strong><br />
QUESTIONING THE FALLEN<br />
As with their enemies in the city, the PCs can learn<br />
much by interrogating survivors here in the temple.<br />
(Well, some of the survivors; any attempt to interrogate<br />
the trolls or the two-headed troll is likely met with an<br />
utter lack of anything useful or even intelligible.)<br />
This interrogation is a level 10 skill challenge with a<br />
complexity of 2 and Bluff, Diplomacy, Intimidate, and<br />
Insight as the primary skills. PCs can use Arcana, with<br />
an easy check, against any of the fey (to know that they<br />
are not behaving as normal fey of their type should).<br />
This doesn’t qualify as a success, but it grants the PCs<br />
+2 bonuses to other checks in the challenge until their<br />
next failure. Similarly, a promise of freedom buys a +2<br />
bonus to all such checks.<br />
If the PCs succeed, the subject answers all their<br />
questions. If they fail, but with one or more successes,<br />
the subject answers a number of questions equal to<br />
the PCs successes, but at least one answer is a lie.<br />
If the PCs wish, they can question dead foes by using<br />
the Speak with Dead ritual. In this case, use the “Dead<br />
Witness” skill challenge (Dungeon Master’s Guide, page<br />
78, as a level 10 skill challenge).<br />
FROM THE FEY . . .<br />
<strong>The</strong> characters learn that the fey were sent “to this<br />
foul place” by someone they call Cachlain, the Stone-<br />
Skinned King. (Further questioning, or a DC 25 Arcana<br />
check, reveals that Cachlain is an infamous fomorian<br />
king of the Feywild.) He sent these fey in search of a<br />
valuable prize, which they refer to as “the parchment<br />
voice you call Incunabulum Primeval.” <strong>The</strong>y know that it<br />
is a tome of great power and that Cachlain has sought<br />
it for some time. Only recently, however, have they<br />
learned that its retrieval has become urgent, because<br />
the court’s divinations suggested that someone else<br />
was about to get their hands on it. <strong>The</strong> fey admit that<br />
Cachlain’s new counselor—someone named Sovacles,<br />
whom they have never met—tried to talk him out of<br />
sending them, but that the king was too desperate to<br />
get the book.<br />
<strong>The</strong> fey admit that their group’s leader, whom they<br />
call “Our Lady of the Deathly Song,” already has the<br />
tome. (If the PCs are questioning Hethralga, the howling<br />
hag, she admits to having it on her person after a<br />
bit of hemming and hawing.) Alas, they cannot leave<br />
because “the Others”—a band of humanoids consisting<br />
mostly of trolls—appeared and took the Caretaker<br />
prisoner, thus cutting off all possible exit. “<strong>The</strong>y are<br />
organized and serve some higher master,” the fey<br />
muse, “but we know not who. Perhaps they are the<br />
reason Cachlain felt we must retrieve the parchment<br />
voice so swiftly.”<br />
If the PCs ask the fey what they want, they answer<br />
with, “Now We seek only to escape the temple. A<br />
portal to the Feywild stands at the base of the mountains,<br />
where the waters flow from above to reach the<br />
plains. We would return home—with the Incunabulum<br />
if possible, but at least with our lives.”<br />
FROM THE SOLDIERS OF<br />
GENERAL ZITHIRUUN . . .<br />
<strong>The</strong> characters learn that, as with the thugs in Overlook,<br />
these are hired mercenaries. <strong>The</strong>y can confirm the name<br />
“General Zithiruun,” but also as with his minions in Overlook,<br />
the general has avoided showing his face to these<br />
soldiers, even as he worked and fought alongside them.<br />
<strong>The</strong>y know he is humanoid and tall (for a human), but<br />
nothing more; his hood, cloak, and the combination armorand-harness<br />
hide his features.<br />
<strong>The</strong> soldiers admit that they have been instructed<br />
to look for the Incunabulum Primeval, but that the book<br />
is only a secondary objective. Zithiruun wants the<br />
temple. He intends to make use of its various magical<br />
portals to funnel soldiers into Overlook from elsewhere<br />
in the vale so that he can take the city in a combined<br />
attack from within and without. (This is why he wanted<br />
to keep people out of the Stone Anvil; he intends to<br />
use it as his assembly point for the soldiers who come<br />
through the portal.) Zithiruun seeks control over the<br />
entire western Elsir Vale, due to both its economic<br />
importance and because of the various portals that<br />
exist throughout it.<br />
Overlook is about to face an attack from the soldiers<br />
Zithiruun has assembled throughout the vale. He gathered<br />
these soldiers slowly enough, and in small enough<br />
groups that they’ve utterly bypassed Bordrin’s Watch—<br />
even if the PCs do stop him here! And it’s happening in<br />
a matter of days!<br />
<strong>The</strong>y also admit that, as frustrated as Zithiruun was<br />
over Durkik’s refusal to break, he has grown all but<br />
enraged that the Caretaker won’t relinquish control<br />
over the temple’s defenses, or even allow them to<br />
leave. He is keeping the Caretaker prisoner, and he has<br />
come near to torturing the fellow to death.<br />
December 2008 | DUNGEON 161<br />
24
<strong>The</strong> <strong>Temple</strong> <strong>Between</strong><br />
M6: <strong>The</strong> Grand Cathedral<br />
<strong>The</strong> Grand Cathedral is an enormous central chamber<br />
with multiple levels. <strong>The</strong> room served as the heart<br />
of Moradin worship in the days that the temple still<br />
functioned.<br />
Tactical Encounter: M6 <strong>The</strong> Grand Cathedral<br />
(page 54).<br />
M7 and M8: <strong>The</strong> Shattered<br />
Barracks and the<br />
Lesser Sanctum<br />
This portion of the temple, most thoroughly damaged<br />
by the ancient cave-ins, is currently the home camp<br />
for the invading fey.<br />
Tactical Encounter: M7/M8 <strong>The</strong> Shattered<br />
Barracks and the Lesser Sanctum (page 58).<br />
M9: <strong>The</strong> Reliquary<br />
This peculiar chamber housed the greatest of the<br />
temple’s religious treasures, as well as the astral<br />
portal through which Moradin’s exarchs occasionally<br />
traveled. It includes a great many subchambers.<br />
Tactical Encounter: M9 <strong>The</strong> Reliquary (page 61).<br />
M10: <strong>The</strong> Underchambers<br />
<strong>The</strong>se rooms beneath the upper levels of M6 were the<br />
day-to-day living quarters of the priests.<br />
Tactical Encounter: M10 <strong>The</strong> Underchambers<br />
(page 65).<br />
Departing<br />
the <strong>Temple</strong><br />
Once the PCs have found the<br />
Caretaker in area M9I, they might<br />
at first be stunned—or even believe<br />
that they are being tricked—to find<br />
that he is no normal dwarf, but an<br />
azer! (Monster Manual, page 22;<br />
his stats should not prove necessary,<br />
but if they do, treat him as an<br />
azer foot soldier with the Ritual<br />
Caster feat and training in Arcana<br />
and Religion.) <strong>The</strong> PCs can free<br />
him from his shackles with a DC<br />
22 Thievery check, but freeing his<br />
mind is something else entirely. <strong>The</strong><br />
Caretaker has been subject to hideous<br />
tortures, and he’s hovering on<br />
the brink of insanity.<br />
A DC 17 Heal check reveals that a Remove<br />
Affliction ritual could set him right in the head again.<br />
Alternatively, the PCs can attempt to help him by using<br />
skills. Do not treat this as a skill challenge; rather, the<br />
PCs must make four skill checks against a DC of 21.<br />
One success must be with the Heal skill; the others<br />
can be Diplomacy, Heal, or Religion. Once they’ve<br />
achieved four successes, they bring the Caretaker back<br />
from the brink of insanity. Each attempt, regardless<br />
of which skill is being used, takes 15 minutes, so even<br />
four straight successes requires a full hour.<br />
Incidentally, should the PCs ask, the Caretaker has<br />
no other name; he abandoned it when he assumed<br />
this duty and answers to nothing else.<br />
Once the PCs succeed, read the following:<br />
<strong>The</strong> azer blinks once, and when he looks at you again, his<br />
eyes are clear—or rather, they appear to burn with an inner<br />
fire that they lacked earlier. He speaks in heavily accented<br />
Common. “You have my thanks, strangers. You should not<br />
be here, but as you are—and as I needed you—I will take this<br />
to be Moradin’s will. I know not who these creatures were,<br />
who invaded my home and dealt so cruelly with me, but I<br />
know their intentions! I heard them plan! <strong>The</strong>y seek to attack<br />
the city of Overlook, from both without and—through my<br />
temple—within! Even though the latter has been thwarted,<br />
the former might yet lie ahead; Overlook, and indeed Elsir<br />
Vale, might suffer greatly. But tell me, who are these villains<br />
Do you know Tell me all that has happened, please.”<br />
Assuming the PCs are at least vaguely<br />
forthcoming, the Caretaker listens, shaking his<br />
head sadly.<br />
“I knew that the tall one wanted me to turn over<br />
stewardship of the temple to him,” he says. “I fear that, in<br />
my pain, I might indeed have granted him control over<br />
some of the constructs, but I denied him any more than<br />
December 2008 |<br />
25<br />
DUNGEON 161
<strong>The</strong> <strong>Temple</strong> <strong>Between</strong><br />
that. I . . . I fear that when you awoke me from my stupor,<br />
the portals were instantly unbarred. He has likely fled<br />
already. But at least I can swiftly return you to Overlook the<br />
same way.”<br />
If the PCs ask him about the Incunabulum, he reluctantly<br />
agrees to let them take it if they swear that they<br />
indeed intend to turn it over to Moradin’s church.<br />
As they are preparing to leave, however, read the<br />
following:<br />
“I realize time is short,” he tells you, “and that you must<br />
hurry back to warn the people of Overlook. Nevertheless,<br />
I must ask you . . . can you spare an hour, and perhaps a<br />
bit of your hard-won gains, to aid me with one final task<br />
After the blood that was shed here, I must perform a ritual<br />
to reconsecrate the temple to Moradin. I cannot do it alone,<br />
and if you do not aid me, I will have to walk several miles<br />
through the mountains to find assistance at Bordrin’s<br />
Watch. Perhaps this sounds to you like the ramblings of an<br />
old fool, but I believe fully that Moradin will smile upon us<br />
for doing so.”<br />
If the PCs agree, they need not make any rolls; the<br />
Caretaker is casting the ritual, while they assist. <strong>The</strong>y<br />
do, however, have to provide 500 gp worth of precious<br />
metals that the ritual requires. <strong>The</strong>y might feel<br />
as though they’re wasting time and money both, but<br />
indeed, reconsecrating the temple does aid them in<br />
their struggles to come. (See “Victory Points,” page 37).<br />
When they complete the ritual, read the<br />
following:<br />
For just an instant, as the last echoes of the rite fade away,<br />
the entire room grows ever so slightly warmer, as though<br />
heated from within by the fires of a small forge. <strong>The</strong> faint<br />
chime of hammers on steel reverberates from all around<br />
you, and then once more there is silence.<br />
December 2008 | DUNGEON 161<br />
26
<strong>The</strong> <strong>Temple</strong> <strong>Between</strong><br />
In addition, PCs who think quickly can provide even<br />
more aid to the city. Although he won’t think of it<br />
himself—he’s been through too much, and still isn’t<br />
thinking clearly—the Caretaker can make the walk<br />
to Bordrin’s Watch and request aid for the coming<br />
battle at Overlook. If a player suggests this, additional<br />
dwarves arrive in time to aid in the city’s defense, and<br />
the PCs earn additional victory points.<br />
Once these tasks are complete (or the PCs choose<br />
not to complete them at all), they can return to<br />
Overlook by using the Stone Anvil and bring warning<br />
of what’s to come to the Council of Elders.<br />
THE INCUNABULUM<br />
PRIMEVAL<br />
When the PCs finally get their hands on this<br />
tome, they find it to be an enormous book,<br />
nearly 2 feet tall by 18 inches wide, and almost<br />
a foot thick. <strong>The</strong> pages are an incredibly heavy<br />
parchment, while the cover consists of thin<br />
planks of wood that are bound and hinged in<br />
iron.<br />
<strong>The</strong> book is written in Dwarven, but also in<br />
a sort of cipher; no attempt at translating or<br />
decoding it functions without either the proper<br />
rituals, known only to the priesthood of Moradin,<br />
or magic more potent than any the PCs<br />
currently possess.<br />
<strong>The</strong> Incunabulum indeed has great powers,<br />
of which the PCs might see the slightest hint<br />
during the siege of Overlook, but any more<br />
detailed familiarity with this potent item must<br />
wait for future adventures.<br />
PART THREE: THE<br />
TAKING OF OVERLOOK<br />
<strong>The</strong> endgame is upon the PCs now—not only of<br />
Zithiruun’s plans, but the heroic tier, and the first<br />
third of the Scales of War. And that endgame is nothing<br />
less than the siege of Overlook. Zithiruun’s plans<br />
to funnel a “fifth column” into the heart of the city<br />
might have been thwarted, but his mercenary armies<br />
throughout the Vale still pose a deadly threat. <strong>The</strong><br />
PCs are not Overlook’s only defenders, but at this<br />
point they’re the most potent and the most important.<br />
Victory Points<br />
As with some prior DUNGEONS & DRAGONS adventures,<br />
“<strong>The</strong> <strong>Temple</strong> <strong>Between</strong>” makes use of a victory<br />
point system to help determine the outcome of the<br />
siege. Throughout the adventure so far, and indeed on<br />
into the siege, the PCs can accomplish certain goals<br />
that ultimately determine how well Overlook stands<br />
up to the attack. Once the adventure is concluded<br />
with the defeat (or victory) of Zithiruun, consult the<br />
table below to determine how many victory points the<br />
PCs have earned. <strong>The</strong> “Concluding the Adventure”<br />
section tells you how to interpret those points.<br />
In addition, some entries on the table include a<br />
read-aloud description. Insert these at various points<br />
throughout the days of the siege, wherever they are<br />
most appropriate, as hints to the PCs that their prior<br />
actions have indeed proved effective and are aiding<br />
them now.<br />
Wartime Urban<br />
Encounters<br />
During the siege, the PCs might have several extra<br />
encounters. This option exists in case the PCs have<br />
missed enough encounters or skill challenges that you<br />
don’t think they’ll make 11th level by the end of the<br />
adventure. Be careful, however, not to use too many<br />
of these encounters (or even any) if the PCs appear to<br />
be on track. Although you want them to achieve 11th<br />
level, you do not want them to do so before encountering<br />
Zithiruun.<br />
Enemy Soldiers (Level 9; XP 2,200)<br />
✦ 2 dragonborn gladiators (level 10 soldier; MM 86<br />
or encounter T5)<br />
✦ 3 trolls (level 9 brute; MM 254 or encounter T3)<br />
More Death from Above (Level 10; XP 2,500)<br />
✦ berbalang (level 10 solo skirmisher; MM 34 or<br />
encounter T2)<br />
Traitors Within (Level 9; XP 2,250)<br />
✦ 1 of the surviving possessed citizens (level 10 soldier;<br />
encounter C9)<br />
✦ 3 doppelganger assassins (level 8 lurker; MM 71 or<br />
encounter C9)<br />
✦ 5 streetwise thugs (level 9 minion; encounter C9)<br />
Looters (Level 8; XP 1,800)<br />
✦ 18 streetwise thugs (level 9 minion; encounter C9)<br />
December 2008 |<br />
27<br />
DUNGEON 161
<strong>The</strong> <strong>Temple</strong> <strong>Between</strong><br />
Victory Point Accumulation<br />
If the PCs...<br />
<strong>The</strong>y earn . . . Read-Aloud<br />
Rescue Durkik alive* 1 “As you race through the city toward your next objective, you notice a<br />
squad of soldiers standing victorious over a band of defeated trolls.<br />
Durkik stands beside them, his hands flickering with holy fire.”<br />
Kill or defeat 1 —<br />
Captain Aerun<br />
Complete their adventures 3 “Although the sentries fearfully report a large force of trolls and other<br />
in the Mountainroot<br />
creatures approaching the gates, the army sounds smaller than you feared.<br />
<strong>Temple</strong> and return to<br />
Perhaps Zithiruun wasn’t able to assemble as many troops as he’d hoped.”<br />
Overlook within 5 days of<br />
first arriving in Overlook<br />
Assist the Caretaker in 2 “For just an instant, as you face your enemies, you once again feel a faint<br />
casting the ritual<br />
warmth, as of a forge fire, and hear the distant sound of chiming hammers.<br />
Your spirits soar with Moradin’s blessing.”<br />
Send the Caretaker to 2 “A cheer arises from the sentries atop the wall, as a force of several<br />
Bordrin’s Watch for help<br />
hundred dwarves appears on the western horizon, striking at the enemy<br />
from behind.”<br />
Return the Incunabulum 1 “Farther down the street, you spot a team of dwarves wearing the<br />
to Durkik or Karros<br />
holy hammer of Moradin. <strong>The</strong>y are charging unharmed through a burning<br />
building to reach a band of mercenaries threatening civilians. Standing<br />
behind them, Durkik (or Karros) chants passages from the Incunabulum.”<br />
Succeed in the skill challenge 2 —<br />
to aid the Council in formulating<br />
defensive strategies<br />
Defeat the berbalang 1 —<br />
at encounter T2<br />
Defeat the enemies 2 —<br />
at encounter T3<br />
Defeat Zithiruun 3 —<br />
at encounter T5<br />
*If the PCs used their own magic and resources to resurrect Durkik, they earn these points as well.<br />
<strong>The</strong> Battle for the City:<br />
Day One<br />
<strong>The</strong> PCs emerge from the Stone Anvil to a welcoming<br />
committee of several Overlook soldiers. “<strong>The</strong> Council<br />
of Elders needs to speak with you immediately,”<br />
the squad’s commander tells the PCs. “Please come<br />
with me.”<br />
Read the following:<br />
Through the streets of Overlook and the gates of the mighty<br />
Caer Overlook, the soldiers escort you, until finally you<br />
have reached the imposing doors of the High Hall. Standing<br />
on the dais in the center of the chamber are three of the<br />
Council’s five members, as well as several more soldiers and<br />
High Priest Durkik Forgeheart.<br />
Upon seeing you, Great Elder Morgoff Stonefirst waves<br />
at you, not to speak to them from below, but to join them<br />
upon the dais!<br />
Once the PCs are on the dais, read:<br />
“I was hoping to wait until all our members were present,”<br />
he tells you without preamble, “but we’ve still not heard<br />
from Elders Itrika Mountainhome or Olman Sledgemore—<br />
they are, presumably, occupied with other duties and<br />
our messengers haven’t reached them to tell them of this<br />
emergency conclave—and we’ve no more time to wait.<br />
High Ancestor Durkik, as well as several other citizens,<br />
such as Priestess Lavinya, have told us a bit of what’s been<br />
happening our city. But I’m given to understand that you<br />
can tell us far more. Please, what’s going on Is Overlook<br />
in danger<br />
Obviously, if Durkik is dead, replace the prior<br />
references, and all subsequent references, with<br />
Ancestor Karros.<br />
SC3. Council of War<br />
Once the PCs tell the Council what has happened,<br />
and what is to come, Great Elder Morgoff asks them,<br />
as well as the guard officers and Durkik, to adjourn<br />
with the Council to the war room, where they can<br />
discuss defenses. On the way, Durkik moves to the<br />
PCs and asks, softly and almost reverently, if they’ve<br />
recovered the Incunabulum Primeval. If they give it to<br />
him, his eyes tear up, and he immediately hands the<br />
party a small pouch of platinum and gold coins equaling<br />
their promised reward.<br />
Skill Challenge: SC3 Council of War (page 67).<br />
December 2008 | DUNGEON 161<br />
28
<strong>The</strong> <strong>Temple</strong> <strong>Between</strong><br />
<strong>The</strong> Battle for the City:<br />
Day Two<br />
Over the course of the night, a small but fearsome<br />
mercenary army—consisting mostly of human soldiers<br />
and trolls, but with dragonborn and other creatures<br />
scattered throughout—creeps from the surrounding<br />
wilds and surrounds Overlook. <strong>The</strong> PCs awaken<br />
in the morning to the sound of catapult boulders<br />
slamming against the ramparts, and are swiftly summoned<br />
to the Council’s war room.<br />
<strong>The</strong> following three encounters can occur in<br />
whatever order you prefer. <strong>The</strong>y are written as assignments<br />
from the Council, but if you’d rather have the<br />
PCs stumble upon them while out and about, that’s<br />
fine, too.<br />
Other battles and events take place over the<br />
course of this day and into the night, but unless you<br />
wish to add some of the extra encounters previously<br />
described, the following are the only ones to involve<br />
the PCs directly.<br />
T2: Death From Above<br />
Read the following:<br />
As you stand in the war room, discussing tactics, a<br />
messenger barges in and drops to one knee, panting, at<br />
Great Elder Morgoff ’s feet.<br />
“My apologies for interrupting,” he gasps, “but Nine<br />
Bells is burning! A creature—gods, I’ve never seen anything<br />
like them—they’re flying over the district and dropping<br />
alchemical fire bombs! <strong>The</strong> local soldiers are dealing with<br />
some of them, but there are just too many!”<br />
Unless the PCs, for some bizarre reason, refuse to go<br />
investigate, proceed to the tactical encounter.<br />
Tactical Encounter: T2 Death From Above (page<br />
68).<br />
T3: Hold the Gate!<br />
Either back at Caer Overlook or while out in the<br />
streets, a military courier catches up with the<br />
PCs. “<strong>The</strong> outer wall!” he shouts at them. “<strong>The</strong>y’ve<br />
breached the outer wall, just north of the west gate!”<br />
Tactical Encounter: T3 Hold the Wall! (page 70).<br />
SC4: Combing<br />
the Wreckage<br />
<strong>The</strong> PCs need to find one of the city councilmembers<br />
before she’s killed by the attackers.<br />
Skill Challenge: SC4 Combing the Wreckage<br />
(page 72).<br />
<strong>The</strong> Battle<br />
for the City: Day Three<br />
<strong>The</strong> PCs face only one major encounter on the third<br />
day—which is fine, because they’re going to need<br />
everything they have to win.<br />
T5: <strong>The</strong> Final Encounter<br />
Read the following:<br />
Even as you rise from a night of troubled, martial dreams, a<br />
knock sounds on your chamber door. High Ancestor Durkik<br />
stands outside, looking grim.<br />
“I bring word from Councilor Morgoff. In the late<br />
hours of the night, a squadron of soldiers was dispatched<br />
to investigate reports of enemies in the streets close to Caer<br />
Overlook. None have returned. As soon as you’ve risen and<br />
readied yourself, I’m to show you on the map where they<br />
were assigned, and ask you to investigate.”<br />
Tactical Encounter: T5 <strong>The</strong> Final Encounter<br />
(page 73).<br />
December 2008 |<br />
29<br />
DUNGEON 161
<strong>The</strong> <strong>Temple</strong> <strong>Between</strong><br />
CONCLUDING<br />
THE ADVENTURE<br />
Once word of Zithiruun’s death spreads through<br />
the invaders, they gradually break off and retreat<br />
back into the wild. Most are mercenaries, after<br />
all, and there’s little point in fighting on behalf of<br />
someone who’s too dead to pay. (If the PCs attempt<br />
to question Zithiruun—or his corpse—treat it as an<br />
interrogation skill challenge, as per his soldiers in<br />
the Mountainroot <strong>Temple</strong>, but at 14th level. He can<br />
explain that the githyanki wanted the region for its<br />
various portals, and that the assignment came down<br />
from officers above him, but he knows nothing about<br />
who originated it or why it was happening now. <strong>The</strong>se<br />
are details for a future adventure.)<br />
But for now, the PCs have learned that the<br />
githyanki are behind at least some of the troubles that<br />
have beset Elsir Vale, and they can be content in the<br />
knowledge that they’ve defeated one of their major<br />
enemies and saved Overlook.<br />
Or at least, they’ve probably saved it.<br />
Victory Point Totals<br />
How well the PCs did—and how well Overlook<br />
survives—depends on their total number of victory<br />
points. (Future adventures in the Scales of War<br />
adventure path assume that the PCs achieved at least<br />
13 victory points. If this is not the case in your campaign,<br />
you can either modify future adventures to<br />
make use of different NPCs than those who died here,<br />
or you can arrange to have these NPCs resurrected<br />
“behind the scenes.”<br />
6 or fewer: If the PCs did this poorly, Overlook<br />
has likely either been conquered, or razed to the point<br />
where it requires almost complete rebuilding. <strong>The</strong><br />
PCs gain no XP or monetary reward for the “Prevent<br />
the Fall of Overlook” quest. You’ll have to modify<br />
future adventures in the Scales of War to account<br />
for the city’s destruction—but then again, it’s almost<br />
impossible for the PCs to have done this poorly without<br />
dying, so odds are you have other alterations to<br />
make anyway.<br />
7 to 12: Overlook is severely damaged, but not<br />
to the point of destruction. <strong>The</strong> PCs earn 1,500 XP<br />
and 3,000 gp as reward for the “Prevent the Fall of<br />
Overlook” quest; the Council of Elders cannot afford<br />
to spare any more money from the reconstruction<br />
effort.<br />
Lavinya and Durkik, alas, did not survive the city’s<br />
final battles, though they gave their lives fighting for<br />
their homes and their neighbors. Any alliances the<br />
PCs might have established with them will have to be<br />
reforged with new NPCs.<br />
<strong>The</strong> PCs are heroes of the city, but nobody has the<br />
time to honor them; in fact, the PCs are probably put<br />
to work with the rebuilding. Still, Overlook remains,<br />
and things have returned to at least some semblance<br />
of normal by the time the next adventure in the<br />
Scales of War begins.<br />
13 or more: Overlook has weathered the storm,<br />
and though damaged, the city stands tall and proud.<br />
<strong>The</strong> PCs are hailed as great heroes, and several different<br />
establishments offer them free room and board<br />
for several months. <strong>The</strong> PCs gain 2,500 XP and 7,000<br />
gp as rewards for the “Prevent the Fall of Overlook”<br />
quest, and they are invited to dine with the Council of<br />
Elders several times over the next few weeks.<br />
Lavinya abandons the temple and instead takes<br />
over Haelyn’s duties at the shrine. “If this is where the<br />
people wish to pray,” she tells the PCs, “then who am<br />
I to tell them otherwise Erathis needs no stone walls,<br />
merely the hearts and souls of those who would bring<br />
civilization and culture to the world. Haelyn understood<br />
this long ago,” she adds with a sad smile. “I wish<br />
I’d not taken so long to learn it myself.”<br />
Durkik, if he survived, has experienced a reawakening<br />
of faith. His time of confinement and torture,<br />
followed by his rescue at the hands of the PCs and<br />
his survival of the siege, have caused him to reevaluate<br />
the previous years. From a beaten-down, tired,<br />
and increasingly corrupt politician, he returns to his<br />
younger identity as a devout priest of Moradin. In<br />
helping to turn him around, the PCs have gained a<br />
grateful and powerful ally, and they have done great<br />
good to the religious community of Overlook as a<br />
whole. This is particularly important, considering that<br />
the high priests of other temples were suborned by<br />
the githyanki, and their replacements are all younger<br />
and inexperienced. Over the next months, Durkik<br />
emerges as a spiritual leader for the entire city.<br />
And thus does the curtain fall on the PCs’ heroic<br />
tier. Greater dangers and challenges await, as those<br />
behind the githyanki’s efforts plot their vengeance<br />
and advance schemes of which the heroes have not<br />
yet learned. But for now, at least, the PCs have earned<br />
a few weeks of rest and the acclaim of Overlook’s<br />
citizenry.<br />
December 2008 | DUNGEON 161<br />
30
<strong>The</strong> <strong>Temple</strong> <strong>Between</strong><br />
C4/C5: THE SHRINE<br />
OF ERATHIS AND<br />
HAELYN’S HOME<br />
Encounter Level 9 (2,000 XP)<br />
Setup<br />
2 doppelganger assassins (D)<br />
Grovald, human priest (G)<br />
5 streetwise thugs (S)<br />
<strong>The</strong> shrine of Erathis is currently under the auspices<br />
of Grovald, Haelyn’s “replacement.” He dwells here,<br />
with a number of hired guards who spend the days<br />
lurking in Grovald’s shack (C4A).<br />
None of these individuals are present at first if<br />
the PCs appear at night. Grant them five minutes<br />
to search the grounds as they see fit before their<br />
enemies arrive. Use the positions marked in RED if<br />
the PCs are in the shrine when the enemies appear;<br />
those marked in GREEN if the PCs are in or near the<br />
fountain, or in cottage C5; and those marked in BLUE<br />
if the PCs are in cottage C4A.<br />
<strong>The</strong> doppelgangers appear as humans, though<br />
dressed in darker clothes than the other thugs.<br />
When the enemies first appear, read:<br />
From the darkness, an arrogant voice says, “I’m just as glad<br />
you chose to come here at night. It makes things so much<br />
neater when we need not involve the authorities, don’t you<br />
think” You see a bald, sharp-faced man in dark clothes all<br />
but fading into the shadows, and movement comes from<br />
several other individuals in the night around him.<br />
Perception Check<br />
DC 24: Two other individuals, cloaked in darker hues<br />
than the rest, lurk around corners or in pools of shadow.<br />
When a doppelganger assassin is slain, read:<br />
<strong>The</strong> body at your feet warps and shifts, the skin turning pale<br />
gray, the eyes growing wide and dark. This is no human<br />
who lies before you!<br />
When the PCs enter C4, read:<br />
This cottage—more of a hut—is no more enticing inside than<br />
out. An old, rickety table and chair stand beside an ash- and<br />
charcoal-filled fireplace, and a door, standing slightly ajar,<br />
reveals what appears to be an equally cheap bed beyond.<br />
Perception Check<br />
DC 20: A scrap of parchment, only partly burned, lies in<br />
the ashes of the fireplace.<br />
THE NOTE<br />
<strong>The</strong> PCs have found an important clue in this<br />
scrap, even though much of it has been burned<br />
away. <strong>The</strong> legible portions read as follows:<br />
. . . unreachable for a time, as I must . . . the priests’<br />
orders as you would my own, for he . . . s always, be<br />
certain you destroy this mis . . .<br />
. . . eneral Zi . . .<br />
Features of the Area<br />
Illumination: Several lanterns, hanging on the<br />
posts that support the fabric “tent,” cast their light<br />
over the area. <strong>The</strong> bulk of the area is brightly lit, but<br />
the interiors of the buildings marked C4A and C5 are<br />
dimly lit.<br />
Ceiling: <strong>The</strong> bulk of the shrine is outdoors. <strong>The</strong><br />
shacks (C4A and C5) have 8-foot ceilings, and the<br />
fabric roof of the shrine is 10 feet overhead.<br />
Beds, Chests, and Tables: Each of these can provide<br />
cover. Creatures can step up onto the furniture;<br />
this costs an extra square of movement.<br />
Chairs: <strong>The</strong> chairs are not sufficient to provide<br />
cover, but a character can step up onto one with an<br />
extra square of movement, or use one as a makeshift<br />
weapon.<br />
Doors: <strong>The</strong> outer doors of the two shacks are<br />
locked (DC 18 Thievery to open). <strong>The</strong> inner doors are<br />
not locked.<br />
Fabric Curtains: <strong>The</strong> curtains that make up the<br />
covering of the shrine block line of sight. Pushing<br />
through or past them costs an extra square of<br />
movement.<br />
December 2008 |<br />
31<br />
DUNGEON 161
<strong>The</strong> <strong>Temple</strong> <strong>Between</strong><br />
Fireplaces: Both fireplaces hold ashes and<br />
charcoal. A character can move into the fireplace<br />
(though a Medium character has to squeeze; see<br />
Player’s Handbook, page 292). Climbing up the inside<br />
of the chimney requires a DC 15 Athletics check.<br />
Pantry: <strong>The</strong> pantry in C5 provides cover.<br />
Pool: <strong>The</strong> water in the pool is not deep enough to<br />
swim in. It qualifies as difficult terrain.<br />
If the PCs conduct a thorough search of the<br />
fountain, and make a DC 19 Perception Check, read:<br />
Behind the fountain, not far from the nearest tree, a faint<br />
bulge in the earth mars the contours of the soil. It looks as<br />
though something was buried here recently.<br />
If the PCs dig here, they find Haelyn’s dead body.<br />
Statue: <strong>The</strong> large statue of Erathis in the pool’s<br />
center provides cover, and it can be climbed with a<br />
DC 12 Athletics check.<br />
5 Streetwise Thugs (S) Level 9 Minion<br />
Medium natural humanoid, human<br />
XP 100 each<br />
Initiative +3 Senses Perception +3<br />
HP 1; a missed attack never damages a minion.<br />
AC 21; Fortitude 19, Reflex 16, Will 16<br />
Speed 6<br />
m Longsword (standard; at-will) ✦ Weapon<br />
+14 vs. AC; 6 damage.<br />
r Crossbow (standard; at-will) ✦ Weapon<br />
Ranged 15/30; +13 vs. AC; 6 damage.<br />
Murder is a Team Sport<br />
If a streetwise thug is flanking an enemy, it deals 1<br />
extra point of damage per ally adjacent to the flanked<br />
enemy (including the ally who is granting the flank), to a<br />
maximum of +4.<br />
Alignment Evil Languages Common<br />
Skills Athletics +11, Thievery +8<br />
Str 16 (+7) Dex 12 (+5) Wis 10 (+4)<br />
Con 15 (+6) Int 9 (+3) Cha 11 (+4)<br />
Equipment leather armor, crossbow, longsword, case<br />
with 20 bolts<br />
Trees: <strong>The</strong> trees provide cover and can be climbed<br />
with a DC 15 Athletics check. Most are only between<br />
10 and 20 feet (2 to 4 squares) high.<br />
2 Doppelganger Assassins (D) Level 8 Lurker<br />
Medium natural humanoid (shapechanger) XP 350 each<br />
Initiative +13 Senses Perception +10<br />
HP 69; Bloodied 34<br />
AC 23; Fortitude 18, Reflex 21, Will 21<br />
Speed 6<br />
m Dagger (standard; at-will) ✦ Weapon<br />
+13 vs. AC; 1d4 + 5 damage.<br />
r Hand Crossbow (standard; at-will) ✦ Weapon<br />
Ranged 10/20; +13 vs. AC; 1d4+5 damage.<br />
M Shapeshifter Feint (minor; at-will)<br />
+11 vs. Reflex; the doppelganger assassin gains combat<br />
advantage against the target until the end of the<br />
doppelganger assassin’s next turn.<br />
C Cloud Mind (standard; sustain minor; encounter) ✦ Charm<br />
Close burst 5; +11 vs. Will; the doppelganger assassin<br />
is invisible to the target. Affected targets are unable to<br />
see the doppelganger for as long as it sustains the<br />
effect, until the doppelganger attacks, or until it is hit<br />
by an attack.<br />
Combat Advantage<br />
<strong>The</strong> doppelganger assassin deals 2d6 extra damage against<br />
any target it has combat advantage against.<br />
Change Shape (minor; at-will) ✦ Polymorph<br />
A doppelganger can alter its physical form to take on the<br />
appearance of any Medium humanoid, including a unique<br />
individual (see Change Shape, Monster Manual page 280).<br />
Alignment Evil Languages Common<br />
Skills Bluff +15, Insight +12, Stealth +14<br />
Str 12 (+5) Dex 21 (+9) Wis 12 (+5)<br />
Con 15 (+6) Int 13 (+5) Cha 19 (+8)<br />
Equipment dagger, hand crossbow, case with 20 bolts<br />
Tactics<br />
Since Grovald’s area attack affects enemies only, he<br />
stays in the back and lobs area and ranged powers,<br />
trying to weaken the PCs fast and impair their ability<br />
to maneuver. <strong>The</strong> thugs make straightforward attacks,<br />
Grovald (G) Level 9 Elite Controller (Leader)<br />
Medium natural humanoid, human XP 800<br />
Initiative +5 Senses Perception +9<br />
Unhallowed Resilience aura 3; when allies enter the aura or<br />
start their turns there, they gain a +1 bonus to all saving<br />
throws.<br />
HP 194; Bloodied 97<br />
AC 25; Fortitude 21, Reflex 23, Will 24<br />
Saving Throws +2<br />
Speed 5<br />
Action Points 1<br />
m Longsword (standard; at-will) ✦ Force, Weapon<br />
+13 vs. Fortitude; 1d6 + 5 damage, plus 1d6 force damage<br />
and push 3.<br />
r Phantom Spear (standard; at-will) ✦ Force<br />
Ranged 12; +13 vs. Reflex; 1d8 + 5 force damage, and the<br />
target is immobilized until the end of Grovald’s next turn.<br />
R Twin Spears (standard; at-will) ✦ Force<br />
Grovald makes two phantom spear attacks.<br />
A Phantom Spikes (standard; sustain minor; recharge ⚄ ⚅)<br />
✦ Force, Zone<br />
Area burst 1 within 15; +13 vs. Reflex; 3d8 + 5 force<br />
damage. Aftereffect: Any enemy that begins its turn in the<br />
area takes 5 force damage, and Grovald’s enemies treat<br />
the zone as difficult terrain. Grovald can sustain or dismiss<br />
the zone as a minor action.<br />
R Phantom Riposte (immediate reaction when hit or missed<br />
by a melee attack; at-will) ✦ Force<br />
Grovald makes an immediate phantom spear attack against<br />
the triggering enemy. This use of phantom spear does not<br />
provoke opportunity attacks.<br />
Alignment Evil Languages Common, Deep Speech<br />
Skills Religion +12<br />
Str 10 (+4) Dex 12 (+5) Wis 20 (+9)<br />
Con 17 (+7) Int 16 (+7) Cha 14 (+6)<br />
Equipment chainmail, longsword<br />
while the doppelgangers move around the combat,<br />
working to flank or otherwise gain combat advantage.<br />
Everyone involved fights to the end.<br />
December 2008 | DUNGEON 161<br />
32
<strong>The</strong> <strong>Temple</strong> <strong>Between</strong><br />
C7: ALLEY AMBUSH<br />
Encounter Level 9 (2,100 XP)<br />
Setup<br />
4 doppelganger assassins (D)<br />
7 streetwise thugs (S)<br />
<strong>The</strong> conspirators have learned that the PCs are investigating<br />
them, and they want the party dead. A band<br />
of cutthroats ambushes the PCs in an alley or on a<br />
street corner somewhere.<br />
Once again, the doppelgangers begin the encounter<br />
in human form.<br />
When the attack begins, read:<br />
Without warning, a number of thugs come charging from<br />
around corners and out of doorways, and they hold their<br />
blades high!<br />
Perception Check<br />
DC 24: A handful of other attackers, clad in black, blend<br />
into the shadows, but you spot them coming.<br />
When a doppelganger assassin is slain, read:<br />
<strong>The</strong> body at your feet warps and shifts—the skin turns pale<br />
gray and the eyes grow wide and dark. This is no human<br />
who lies before you!<br />
4 Doppelganger Assassins (D) Level 8 Lurker<br />
Medium natural humanoid (shapechanger) XP 350 each<br />
Initiative +13 Senses Perception +10<br />
HP 69; Bloodied 34<br />
AC 23; Fortitude 18, Reflex 21, Will 21<br />
Speed 6<br />
m Dagger (standard; at-will) ✦ Weapon<br />
+13 vs. AC; 1d4 + 5 damage.<br />
r Hand Crossbow (standard; at-will) ✦ Weapon<br />
Ranged 10/20; +13 vs. AC; 1d4+5 damage.<br />
M Shapeshifter Feint (minor; at-will)<br />
+11 vs. Reflex; the doppelganger assassin gains combat<br />
advantage against the target until the end of the<br />
doppelganger assassin’s next turn.<br />
C Cloud Mind (standard; sustain minor; encounter) ✦ Charm<br />
Close burst 5; +11 vs. Will; the doppelganger assassin is<br />
invisible to the target. Affected targets are unable to see<br />
the doppelganger for as long as it sustains the effect, until<br />
the doppelganger attacks, or until it is hit by an attack.<br />
Combat Advantage<br />
<strong>The</strong> doppelganger assassin deals 2d6 extra damage against<br />
any target it has combat advantage against.<br />
Change Shape (minor; at-will) ✦ Polymorph<br />
A doppelganger can alter its physical form to take on the<br />
appearance of any Medium humanoid, including a unique<br />
individual (see Change Shape, Monster Manual page 280).<br />
Alignment Evil Languages Common<br />
Skills Bluff +15, Insight +12, Stealth +14<br />
Str 12 (+5) Dex 21 (+9) Wis 12 (+5)<br />
Con 15 (+6) Int 13 (+5) Cha 19 (+8)<br />
Equipment dagger, hand crossbow, case with 20 bolts<br />
7 Streetwise Thugs (S) Level 9 Minion<br />
Medium natural humanoid, human<br />
XP 100 each<br />
Initiative +3 Senses Perception +3<br />
HP 1; a missed attack never damages a minion.<br />
AC 21; Fortitude 19, Reflex 16, Will 16<br />
Speed 6<br />
m Longsword (standard; at-will) ✦ Weapon<br />
+14 vs. AC; 6 damage.<br />
r Crossbow (standard; at-will) ✦ Weapon<br />
Ranged 15/30; +13 vs. AC; 6 damage.<br />
Murder is a Team Sport<br />
If a streetwise thug is flanking an enemy, it deals 1<br />
extra point of damage per ally adjacent to the flanked<br />
enemy (including the ally who is granting the flank), to a<br />
maximum of +4.<br />
Alignment Evil Languages Common<br />
Skills Athletics +11, Thievery +8<br />
Str 16 (+7) Dex 12 (+5) Wis 10 (+4)<br />
Con 15 (+6) Int 9 (+3) Cha 11 (+4)<br />
Equipment leather armor, crossbow, longsword, case<br />
with 20 bolts<br />
Tactics<br />
<strong>The</strong> combat is straightforward. <strong>The</strong> thugs attack en<br />
masse, while the doppelgangers flit in and out of shadows<br />
or flank the PCs, trying for combat advantage.<br />
Features of the Area<br />
Illumination: <strong>The</strong> lighting here is dependent<br />
entirely on the time: brightly lit by the sun during the<br />
day or dimly lit by distant street-side lanterns at night.<br />
Buildings: <strong>The</strong> buildings here range from two to<br />
four stories (figure 4 to 8 squares) in height. <strong>The</strong> walls<br />
can be climbed with a DC 15 Athletics check.<br />
<strong>The</strong> List: If the PCs search the bodies, they find<br />
on one of the doppelgangers a list of descriptions—of<br />
the PCs themselves! <strong>The</strong> parchment is stained with<br />
something which (with a DC 16 Perception check)<br />
appears to be beer and sausage grease. A DC 17<br />
Streetwise check suggests that the source for the stain<br />
is the Pig and Bucket tavern.<br />
December 2008 |<br />
33<br />
DUNGEON 161
<strong>The</strong> <strong>Temple</strong> <strong>Between</strong><br />
SC1: CATCHING DURKIK<br />
Encounter Level 9 (1,200 XP)<br />
Setup<br />
Begin by reading the following:<br />
After some time waiting, when the city is fully cloaked<br />
in the shadows of night, your quarry finally emerges.<br />
Glancing around, he turns and begins walking at a swift<br />
but inconspicuous pace.<br />
If the PCs are following Durkik in specific, continue<br />
with:<br />
Durkik ducks into an alley after walking a few blocks. Mere<br />
seconds later, another dwarf—slightly taller, with different<br />
hair and beard—emerges onto the street. You wouldn’t even<br />
have noticed had you not been specifically watching, but<br />
much of his outfit appears to match Durkik’s own, and his<br />
posture as he walks is identical.<br />
If the PCs glance into the alley as they pass, they<br />
can confirm that neither Durkik, nor anyone else,<br />
remains within it. <strong>The</strong>y’ve just witnessed the doppelganger<br />
who has taken Durkik’s place alter his form,<br />
hoping to make himself less noticeable.<br />
At this point, regardless of who they’re following,<br />
begin the skill challenge.<br />
Catching Durkik Level 9<br />
Skill Challenge XP 1,200<br />
You make your way as silently through the streets of Overlook<br />
as you can, attempting to keep Durkik in sight without alerting<br />
him to your presence.<br />
<strong>The</strong> party attempts to shadow their target through<br />
the city.<br />
Complexity<br />
3 (requires 8 successes before 3 failures).<br />
Primary Skills<br />
Acrobatics, Athletics, Perception, Stealth, Streetwise.<br />
Victory<br />
If the PCs succeed with 0 failures, they reach the warehouse<br />
without being detected. Only half their potential enemies<br />
are present (run the scene as two separate combat<br />
encounters, as described in the tactical encounter), and<br />
the PCs gain a surprise round when they arrive.<br />
Partial Victory<br />
If the PCs succeed with 1 failure, they’re detected only at<br />
the last minute. Only half their potential enemies are<br />
present (run the scene as two separate encounters, as<br />
described in the tactical encounter), but the enemies are<br />
not surprised.<br />
If the PCs succeed with 2 failures, they’re detected as they<br />
near the warehouse. <strong>The</strong>y face the entire complement of<br />
enemies (run the scene as a single 12th-level encounter),<br />
and the enemy is not surprised.<br />
Defeat<br />
<strong>The</strong> PCs are detected, and their quarry shakes them as he<br />
nears the warehouse. <strong>The</strong> PCs know the general area to<br />
which their target went, but not the specific building.<br />
<strong>The</strong>y eventually find the warehouse, but it takes 2d6<br />
hours of wandering, searching, and perhaps various<br />
bribes or Diplomacy and Streetwise checks made to the<br />
merchants and citizens of the area. <strong>The</strong> result is that not<br />
only must they face the entire complement of enemies (a<br />
single 12th-level encounter), but they’ve lost a great deal<br />
of time off their deadline. (See “Victory Points,” page 37.)<br />
Special If at least one member of the party is capable of<br />
turning invisible, the party gains 1 success automatically.<br />
Acrobatics (DC 16)<br />
Any given character can attempt Acrobatics only once in<br />
this fashion, whether he or she succeeds or fails, and a<br />
failure costs the PC a healing surge as well as counting<br />
as a failure. A successful check counts as a success on the<br />
skill challenge.<br />
<strong>The</strong> PC darts around a corner, tumbles over a gap<br />
between rooftops, or otherwise stays near the quarry at<br />
an angle that makes the PC harder to detect.<br />
Athletics (DC 16)<br />
Any given character can attempt Athletics only once in this<br />
fashion, whether the PC succeeds or fails, and a failure<br />
costs the PC a healing surge as well as counting as a<br />
failure. A successful check counts as a success on the skill<br />
challenge.<br />
Much like Acrobatics, the PC climbs walls, leaps between<br />
roofs or balconies, and otherwise follows by staying out<br />
of direct line of sight.<br />
Perception (DC 20)<br />
This does not qualify as a success, but succeeding on this<br />
check grants the party a +2 bonus to all further checks in<br />
this challenge until someone fails a check.<br />
<strong>The</strong> PC carefully watches the target to keep him in view<br />
even from a distance or behind other people on the<br />
street.<br />
Stealth (DC 20)<br />
A successful check counts as a success on the skill challenge.<br />
Darting behind pedestrians, into doorways, and through<br />
shadows, you move street to street without being seen.<br />
Streetwise (DC 24)<br />
A successful check counts as two successes. Once made,<br />
the characters cannot use Streetwise again for this skill<br />
challenge.<br />
By using knowledge of Overlook’s seedier areas, the PC<br />
can anticipate where the quarry is going.<br />
Other Methods<br />
If the PCs can’t (or don’t think to) follow Durkik or<br />
Aerun, they have other ways to find out what they<br />
need to know. If they can catch Durkik alone, they can<br />
attempt to interrogate him, as described previously.<br />
If they successfully interrogate him, Durkik can<br />
tell the PCs where the warehouse is. He also reveals<br />
all the information presented in the “Interrogating<br />
the Conspirators” sidebar, below.<br />
Because the false Durkik didn’t show up at the<br />
warehouse, the forces there are ready for trouble. Run<br />
the scenario as a 12th-level encounter, and the enemy<br />
cannot be surprised.<br />
December 2008 | DUNGEON 161<br />
34
<strong>The</strong> <strong>Temple</strong> <strong>Between</strong><br />
C9: THE WAREHOUSE<br />
Encounter Level 12 (3,250 XP) or<br />
Encounter Level 8 (1,700 XP) and<br />
Encounter Level 8 (1,550 XP)<br />
Setup<br />
3 doppelganger assassins (D)<br />
2 possessed citizens (P)<br />
12 streetwise thugs (S)<br />
Or<br />
First encounter (use RED placements)<br />
2 doppelganger assassins (D)<br />
1 possessed citizen (P)<br />
5 streetwise thugs (S)<br />
And<br />
Second encounter (do not use the marks on the map since<br />
these enemies enter through one or two of the doors and<br />
position themselves based on the PCs’ actions)<br />
1 doppelganger assassin<br />
1 possessed citizen<br />
7 streetwise thugs<br />
This warehouse has long been used by one of the<br />
criminal elements of Overlook as a headquarters,<br />
a central depot for illegal goods, and an occasional<br />
hideout. It has since been taken over by General<br />
Zithiruun’s conspiracy.<br />
Any creature on the map placed on the catwalk is<br />
on the catwalk; no enemies begin directly beneath it.<br />
If the PCs enter on the ground floor, read:<br />
A vast chamber stretches before you. Rows upon rows of<br />
crates—some stacked as high as 15 feet—form aisles and<br />
corridors. A catwalk runs around the perimeter, as well as<br />
across the cavernous room at several points, with an array<br />
of chains and pulleys dangling beneath.<br />
If the PCs are in a position to see the office and<br />
balcony, read:<br />
In one corner, a flight of stairs leads to a balcony built into<br />
the catwalk. Several walls surround what you would guess<br />
to be an office or counting house.<br />
Perception Check<br />
DC 13: Several gruff-looking fellows, the sort you might<br />
not want to meet in a dark alley but wouldn’t be surprised<br />
to find there, lurk atop the catwalk, atop several crates, and<br />
around a few corners, crossbows held at the ready.<br />
DC 24: A few other foes stand hiding in the shadows, also<br />
aiming weapons your way. <strong>The</strong>ir gray flesh and huge dark<br />
eyes are strong indications that they’re not human!<br />
If the PCs somehow prevented Aerun from getting<br />
here, refer to one of the possessed priests instead<br />
in the text below this. If they haven’t met Aerun,<br />
describe him as the officer from the wall when they<br />
first arrived.<br />
If the PCs enter by the office door, read:<br />
You are in a small counting house, which is occupied by<br />
little more than a table, a chair—and Captain Aerun, shock<br />
evident on his face as he rises. <strong>The</strong> wall behind him boasts a<br />
shuttered, glass-free window.<br />
Tactics<br />
<strong>The</strong> doppelgangers and thugs initially launch volleys<br />
of crossbow bolts at the PCs, using the crates as cover.<br />
<strong>The</strong>y keep moving, almost never staying in the same<br />
spot from round to round. <strong>The</strong> thugs prefer to close on<br />
the PCs in groups, but do so by maneuvering around<br />
and atop crates; they know better than to make a<br />
beeline for the enemy in an open corridor. <strong>The</strong> doppelgangers<br />
make use of similar tactics, but switch<br />
constantly from melee to range and back again. <strong>The</strong><br />
possessed citizens use their telekinetic leap to obtain an<br />
optimal position, and then maintain melee combat.<br />
If the PCs enter through the office, the githyankipossessed<br />
citizen takes his first move to fly out the<br />
window into the main warehouse, so as not to face the<br />
PCs alone.<br />
<strong>The</strong> possessed citizens fight to the death. If two of<br />
the doppelgangers and over half the thugs are slain,<br />
the remainder attempt to flee.<br />
1, 2, or 3 Doppelganger Level 8 Lurker<br />
Assassins (D)<br />
Medium natural humanoid (shapechanger) XP 350 each<br />
Initiative +13 Senses Perception +10<br />
HP 69; Bloodied 34<br />
AC 23; Fortitude 18, Reflex 21, Will 21<br />
Speed 6<br />
m Dagger (standard; at-will) ✦ Weapon<br />
+13 vs. AC; 1d4 + 5 damage.<br />
r Hand Crossbow (standard; at-will) ✦ Weapon<br />
Ranged 10/20; +13 vs. AC; 1d4+5 damage.<br />
M Shapeshifter Feint (minor; at-will)<br />
+11 vs. Reflex; the doppelganger assassin gains combat<br />
advantage against the target until the end of the<br />
doppelganger assassin’s next turn.<br />
C Cloud Mind (standard; sustain minor; encounter) ✦ Charm<br />
Close burst 5; +11 vs. Will; the doppelganger assassin is<br />
invisible to the target. Affected targets are unable to see<br />
the doppelganger for as long as it sustains the effect, until<br />
the doppelganger attacks, or until it is hit by an attack.<br />
Combat Advantage<br />
<strong>The</strong> doppelganger assassin deals 2d6 extra damage against<br />
any target it has combat advantage against.<br />
Change Shape (minor; at-will) ✦ Polymorph<br />
A doppelganger can alter its physical form to take on the<br />
appearance of any Medium humanoid, including a unique<br />
individual (see Change Shape, Monster Manual page 280).<br />
Alignment Evil Languages Common<br />
Skills Bluff +15, Insight +12, Stealth +14<br />
Str 12 (+5) Dex 21 (+9) Wis 12 (+5)<br />
Con 15 (+6) Int 13 (+5) Cha 19 (+8)<br />
Equipment dagger, hand crossbow, case with 20 bolts<br />
December 2008 |<br />
35<br />
DUNGEON 161
<strong>The</strong> <strong>Temple</strong> <strong>Between</strong><br />
1 or 2 Possessed Citizens (P) Level 10 Soldier<br />
Medium natural humanoid<br />
XP 500 each<br />
Initiative +10 Senses Perception +6<br />
HP 101; Bloodied 50<br />
AC 26; Fortitude 23, Reflex 21, Will 20<br />
Saving Throws +2 against charm effects<br />
Speed 5; see also telekinetic leap<br />
m Greatsword (standard; at-will) ✦ Psychic, Weapon<br />
+17 vs. AC; 1d12 + 4, plus 3d6 extra psychic damage if the<br />
target is immobilized, and the target takes a –2 penalty to<br />
saving throws against the immobilized condition until the<br />
start of the possessed citizen’s next turn.<br />
R Telekinetic Grasp (standard; encounter)<br />
Ranged 5; Medium or smaller target; +15 vs. Fortitude; the<br />
target is immobilized (save ends).<br />
Telekinetic Leap (move; encounter)<br />
Ranged 10; the possessed citizen can fly 5 squares.<br />
Alignment Evil Languages Common, Deep Speech<br />
Skills History +11, Insight +11<br />
Str 20 (+10) Dex 16 (+8) Wis 12 (+6)<br />
Con 13 (+6) Int 12 (+6) Cha 13 (+6)<br />
Equipment leather armor, greatsword<br />
5, 7, or 12 Streetwise Thugs (S) Level 9 Minion<br />
Medium natural humanoid, human<br />
XP 100 each<br />
Initiative +3 Senses Perception +3<br />
HP 1; a missed attack never damages a minion.<br />
AC 21; Fortitude 19, Reflex 16, Will 16<br />
Speed 6<br />
m Longsword (standard; at-will) ✦ Weapon<br />
+14 vs. AC; 6 damage.<br />
r Crossbow (standard; at-will) ✦ Weapon<br />
Ranged 15/30; +13 vs. AC; 6 damage.<br />
Murder is a Team Sport<br />
If a streetwise thug is flanking an enemy, it deals 1<br />
extra point of damage per ally adjacent to the flanked<br />
enemy (including the ally who is granting the flank), to a<br />
maximum of +4.<br />
Alignment Evil Languages Common<br />
Skills Athletics +11, Thievery +8<br />
Str 16 (+7) Dex 12 (+5) Wis 10 (+4)<br />
Con 15 (+6) Int 9 (+3) Cha 11 (+4)<br />
Equipment leather armor, crossbow, longsword, case<br />
with 20 bolts<br />
If the fight is divided into two encounters (see the<br />
rules for the Heart of the Conspiracy skill challenge,<br />
page 30), the second group arrives 1d4 + 4 minutes<br />
after the first battle ends. Unless a member of the first<br />
group escaped, they all enter through the office and<br />
the PCs can ambush them, thus gaining surprise. If<br />
someone did escape the first encounter, this second<br />
group has been warned, and they split up, entering<br />
by both the office and the door. <strong>The</strong>y are ready for<br />
trouble and cannot be surprised.<br />
Features of the Area<br />
Illumination: <strong>The</strong> warehouse is brightly illuminated<br />
by a sequence of lanterns and sunrods placed<br />
along the railing of the catwalk.<br />
Ceiling: <strong>The</strong> ceiling is 35 feet overhead.<br />
Catwalks: <strong>The</strong>se metallic walkways, standing 20<br />
feet above the floor, aid in the movement and placement<br />
of crates. A sequence of chains and pulleys runs<br />
across the underside of the catwalks. This enables a<br />
character to climb, hand-over-hand, along the underside<br />
of these catwalks with a DC 22 Acrobatics or<br />
Athletics check, at normal climbing speed.<br />
Except where the ladders stand, the catwalk has a<br />
railing all the way around. Anyone wishing to deliberately<br />
climb or leap over the railing must spend an<br />
extra square of movement to do so, and any push,<br />
pull, or slide effect that would drag a creature over<br />
that railing must also spend an extra square to do so.<br />
Chair: <strong>The</strong> chair is not sufficient to provide cover,<br />
but a character can step up onto it with an extra<br />
square of movement or use it as a makeshift weapon.<br />
Crates: Each individual crate is roughly 5 feet<br />
(1 square) high, but they are often stacked two or<br />
three crates (that is, 10 or 15 feet, or 2 or 3 squares)<br />
in height, as marked on the map. Stepping up on a<br />
single crate requires an extra square of movement,<br />
while moving down a single crate does not cost any<br />
additional movement. Climbing two or three crates<br />
requires a DC 20 Athletics check.<br />
Doors: <strong>The</strong> central door slides upward into the<br />
ceiling. It isn’t locked, but it cannot be opened stealthily,<br />
since the chains and pulleys rumble. <strong>The</strong> two side<br />
doors are both locked, and require a DC 19 Thievery<br />
check to open.<br />
Ladders: <strong>The</strong> ladders are all 20 feet (4 squares)<br />
in height, but count as 6 squares of movement. A DC<br />
12 Acrobatics or Athletics check allows a character to<br />
climb them at the normal 4 squares of movement.<br />
Stairs: <strong>The</strong> stairs count as difficult terrain.<br />
Table: A character can step up onto the table with<br />
an extra square of movement. A DC 19 Strength check<br />
topples the table over, allowing it to serve as cover and<br />
knocking prone any creatures standing on it.<br />
Trapdoor: <strong>The</strong> trapdoor requires a DC 21<br />
Thievery check to open. <strong>The</strong> ladder beneath leads to<br />
an underground passage (unmapped) that itself leads<br />
to the cell (C9A) containing High Priest Durkik.<br />
Weakened Crates: Several of the crates, as<br />
marked on the map, are weaker than others. A<br />
creature that moves atop that crate partially breaks<br />
through the wood. This immediately ends the<br />
creature’s move action, even if it had movement<br />
remaining, and that crate is considered difficult terrain<br />
from that point onward.<br />
Window: <strong>The</strong> window in the “office” upstairs is a<br />
simple wooden shutter over an empty frame. Moving<br />
through it does not cost extra squares (though anyone<br />
incapable of flight had better be prepared for a<br />
20-foot fall).<br />
December 2008 | DUNGEON 161<br />
36
<strong>The</strong> <strong>Temple</strong> <strong>Between</strong><br />
December 2008 |<br />
37<br />
DUNGEON 161
<strong>The</strong> <strong>Temple</strong> <strong>Between</strong><br />
SC2: ENTERING<br />
THE PORTAL<br />
Encounter Level 9 (2,000 XP)<br />
Setup<br />
Once one of the PCs touches the filigree, the skill<br />
challenge begins.<br />
Entering the Portal Level 9<br />
Skill Challenge XP 2,000<br />
<strong>The</strong> image suddenly bends as the face of Moradin turns toward<br />
you and speaks in a voice of rending metal. “Who would step<br />
through the portal to the heart of Moradin’s worship must first<br />
prove he understands Moradin in his own heart.<br />
“Think you carefully on Moradin’s precepts, his teachings,<br />
his actions, and his favored disciples. <strong>The</strong>n speak unto me a<br />
parable, a tale of Moradin, not that you have learned from his<br />
texts, but that you have created yourself. Let it show your understanding<br />
of his words and his ways, and you may pass.”<br />
<strong>The</strong> PCs must convince the mystical portal that they have<br />
a sufficient understanding of Moradin’s teachings by<br />
constructing a parable that accurately portrays the god’s<br />
behavior and precepts, yet all is not lost if the PCs fail.<br />
<strong>The</strong>y can still attempt to physically break through the<br />
filigree to reach the door. Doing so activates the room’s<br />
magical defenses: a number of homunculi. Proceed to<br />
tactical encounter C10. Once the PCs have successfully<br />
completed that encounter, they can cut through the<br />
filigree as though it were a standard wooden door (it’s<br />
metal, but it’s thin).<br />
Complexity<br />
5 (12 successes before 3 failures)<br />
Primary Skills<br />
Athletics, Bluff, Diplomacy, History, Religion.<br />
Victory<br />
<strong>The</strong> portal judges the PCs worthy and opens, allowing them<br />
access to the Mountainroot <strong>Temple</strong>.<br />
Partial Victory<br />
<strong>The</strong> PCs are partially worthy, and this deactivates part of<br />
the malfunctioning magical wards. <strong>The</strong>ir partial success<br />
means they have to fight fewer of the guardians in<br />
tactical encounter C10.<br />
3 or fewer successes: <strong>The</strong> PCs are considered to have failed<br />
the challenge completely, as described below.<br />
4 or 5 successes: <strong>The</strong> PCs face four writhing chains.<br />
6 or 7 successes: <strong>The</strong> PCs face three writhing chains.<br />
8 or 9 successes: <strong>The</strong> PCs face two writhing chains.<br />
10 or 11 successes: <strong>The</strong> PCs fight only one writhing chain.<br />
Defeat<br />
<strong>The</strong> PCs must face all five writhing chain homunculi in the<br />
tactical encounter if they attempt to force their way<br />
through.<br />
Special If the players go through the effort of coming up<br />
with a Moradin-based parable, grant them 2 automatic<br />
successes. If the party contains a divine character who<br />
worships Moradin, they gain 1 success automatically, and<br />
that character gains a +2 bonus to all Religion checks in<br />
this challenge.<br />
Athletics (DC 20)<br />
This does not count as a success in itself, but grants a +2<br />
bonus to the next check attempted in this challenge. Any<br />
given character can attempt this use of Athletics only<br />
once.<br />
<strong>The</strong> PC portrays (or fakes) a knowledge of forging<br />
techniques and other endeavors of which Moradin<br />
approves.<br />
Bluff (DC 20)<br />
This does not grant any successes, but it can be used to<br />
remove 1 failure. Bluff can be used in this fashion only<br />
once during this challenge.<br />
<strong>The</strong> PC swiftly steps into the conversation, covering for<br />
an error made by one of his or her companions.<br />
Diplomacy (DC 16)<br />
Only one success can be achieved in this fashion. A failure on<br />
this check bestows a –2 penalty to further checks in this<br />
challenge until the next success, in addition to counting<br />
as a failure.<br />
<strong>The</strong> PC attempts to convince the portal that the party<br />
is worthy, without offering any solid knowledge of<br />
Moradin’s teachings.<br />
History (DC 20)<br />
Each success on this check counts as a success toward the<br />
skill challenge. Although there are no limits on the<br />
number of successes that can be obtained with History,<br />
History cannot account for all successes; the party must<br />
rely on at least one other skill to achieve complete<br />
success.<br />
Using the PC’s knowledge of past champions, priests,<br />
and followers of Moradin, the PC contributes to the<br />
construction of the parable.<br />
Religion (DC 20)<br />
Each success on this check counts as a success toward the<br />
skill challenge. A success against DC 25 counts as a<br />
success and removes 1 failure; this extra level of success<br />
can occur only once in this challenge.<br />
<strong>The</strong> PC draws on religious knowledge and an<br />
understanding of Moradin’s precepts and teachings to aid<br />
in the construction of the parable.<br />
December 2008 | DUNGEON 161<br />
38
<strong>The</strong> <strong>Temple</strong> <strong>Between</strong><br />
C10: THE PORTAL<br />
IN THE SEPULCHER<br />
Encounter Level 9 (2,500 XP*)<br />
Setup<br />
5 or fewer writhing chains (W)<br />
If the PCs fail the skill challenge to enter the<br />
Mountainroot <strong>Temple</strong>, they can attempt to force their<br />
way past the filigree imagery. Doing so activates the<br />
temple’s defenses, which causes several constructs to<br />
attack. If the PCs successfully defeat the homunculi,<br />
however, nothing prevents them from destroying the<br />
barrier between them and the door.<br />
Remove one or more writhing chains based on the<br />
number of successes, as described in the challenge.<br />
<strong>The</strong> first chain to be removed is the southwestern one,<br />
then the northwestern, than the southern, then the<br />
northeastern.<br />
When the chains appear, read:<br />
From the iron image, thin strings of metal—liquid, as<br />
though melting—shoot forth. <strong>The</strong>y strike not at you, but<br />
at several of the hanging chandeliers, forming a canopy of<br />
metallic strands overhead. From those chandeliers, great<br />
lengths of chain drop to the floor and then rear up like<br />
striking serpents<br />
Tactics<br />
<strong>The</strong> writhing chains might attempt to yank a PC off<br />
a ledge, but they otherwise fight in a straightforward<br />
fashion. <strong>The</strong>y are smart enough to focus on one or<br />
two PCs, with one chain restraining the foe while the<br />
others pound on him.<br />
If the PCs attack the iron strands running overhead,<br />
the strings break but instantly reform. Hacking<br />
at them provides no benefit.<br />
Features of the Area<br />
Illumination: <strong>The</strong> room is brightly lit by everburning<br />
flames in the chandeliers. <strong>The</strong> chandeliers<br />
hang 10 feet down from the ceiling (and thus, 10 feet<br />
above the upper level and 20 above the lower).<br />
Ceiling: <strong>The</strong> ceiling is 30 feet overhead from the<br />
lowest level.<br />
Slopes: <strong>The</strong> slopes count as difficult terrain<br />
for creatures moving up, but not down. A creature<br />
pushed or slid down a slope moves an extra square,<br />
and a character who falls prone on the slope slides 1<br />
square toward the bottom.<br />
Stairs: <strong>The</strong> stairs are considered difficult terrain.<br />
Statues: <strong>The</strong>se statues are of the god Moradin,<br />
with a pair of ravens—representing the Queen of<br />
Death—perched on his shoulders.<br />
Writhing Chains Guarded Area: <strong>The</strong> guarded<br />
areas of the homunculi are marked on the map.<br />
5* Writhing Chains (W) Level 10 Skirmisher<br />
Medium natural animate (construct, homunculus) XP 500 each<br />
Initiative +10 Senses Perception +7; darkvision<br />
HP 131; Bloodied 65<br />
AC 23; Fortitude 23, Reflex 23, Will 21<br />
Immune disease, poison<br />
Speed 7; see also serpentine strike<br />
m Slam (standard; at-will)<br />
+13 vs. AC; 2d6 + 5 damage.<br />
M Winding Strike (standard; recharge ⚄ ⚅)<br />
+13 vs. AC; 2d6 + 5 damage, and target slides 2 squares<br />
and is grabbed and restrained.<br />
Guarded Area<br />
When making attacks against a creature in its guarded<br />
area, the writhing chain gains a +2 bonus to hit, and can<br />
stretch itself, granting itself reach 3 on all melee attacks.<br />
Threatening Reach (within guarded area only)<br />
This creature can make opportunity attacks against all<br />
enemies within its reach (3 squares).<br />
Serpentine Strike (move; at-will)<br />
<strong>The</strong> chain shifts 3 squares.<br />
Alignment Unaligned Languages —<br />
Skills Stealth +13<br />
Str 19 (+9) Dex 17 (+8) Wis 15 (+7)<br />
Con 21 (+10) Int 18 (+9) Cha 12 (+6)<br />
*Exact number of writhing chains could be fewer than five.<br />
Adjust encounter XP as necessary.<br />
December 2008 |<br />
39<br />
DUNGEON 161
<strong>The</strong> <strong>Temple</strong> <strong>Between</strong><br />
M1: THE CHAMBER<br />
OF DOORS<br />
Encounter Level 9 (1,800 XP)<br />
Setup<br />
2 harpy screechers (H)<br />
2 slystone dwarf ruffians (S)<br />
<strong>The</strong> great vestibule of the Mountainroot <strong>Temple</strong><br />
once held mystic portals to four separate temples of<br />
Moradin, as well as a single nonmagical entry: a stair<br />
that leads up into the Stonehome Mountains. Now,<br />
one of those magical doorways has been destroyed—as<br />
has much of the eastern side of the chamber—in various<br />
cave-ins. <strong>The</strong> PCs arrive through the door in the<br />
southwest.<br />
<strong>The</strong> contingent of fey dispatched by King Cachlain<br />
has left behind a rearguard, assigned to watch for<br />
anyone entering the temple.<br />
When the PCs enter the chamber by using the<br />
portal, read:<br />
You feel no magic—no tingling or shimmering. It occurs<br />
between steps; one instant, you’re in the sepulcher, and<br />
the next you’re . . . not. You are in a great, stone-walled<br />
chamber. Numerous doorways—many of which are<br />
contained within deep stone arches, almost like artificial<br />
caves—provide egress. A platform with multiple stairs<br />
stands near the chamber’s center, presumably for a<br />
ceremonial purpose long since forgotten. <strong>The</strong> eastern<br />
portion of the room appears to have been largely damaged<br />
in an ancient cave-in, marring one of two great reliefs that<br />
adorn the far wall.<br />
Perched on one of the archways and atop the<br />
undamaged relief, a pair of foul females with ragged hair<br />
and the claws and wings of vultures turn piercing eyes in<br />
your direction, letting loose with a terrible, predatory cry.<br />
Only a few yards from you, what appears to be a scruffy,<br />
abnormally short dwarf peers at you between slitted lids.<br />
Perception Check<br />
DC 22: From the corner of your eye, you spot a second<br />
thuggish-looking dwarf skulking quietly in the shadows of<br />
the broken wall.<br />
2 Harpy Screechers (H) Level 9 Controller<br />
Medium fey humanoid<br />
XP 400 each<br />
Initiative +7 Senses Perception +6<br />
HP 96; Bloodied 48<br />
AC 23; Fortitude 20, Reflex 20, Will 22<br />
Resist 10 thunder<br />
Speed 6, fly 8 (clumsy)<br />
m Claw (standard; at-will)<br />
+14 vs. AC; 1d8 + 3 damage.<br />
C Alluring Song (standard; at-will) ✦ Charm<br />
Close burst 5; deafened creatures are immune; +15 vs. Will;<br />
the target is pulled 3 squares and immobilized (save ends).<br />
C Brutal Scream (standard; recharge ⚄ ⚅) ✦ Thunder<br />
Close burst 5; +15 vs. Fortitude; 1d6 + 5 thunder damage.<br />
Secondary Attack: Area burst 1 within 5; centered on<br />
a target hit by brutal scream’s primary attack; targets<br />
enemies only; +15 vs. Fortitude; 1d6 + 5 thunder damage<br />
and the target slides 3 squares.<br />
Alignment Evil Languages Common<br />
Skills Stealth +12<br />
Str 16 (+7) Dex 16 (+7) Wis 15 (+6)<br />
Con 16 (+7) Int 11 (+4) Cha 20 (+9)<br />
2 Slystone Dwarf Ruffians (S) Level 10 Soldier<br />
Small fey humanoid<br />
XP 500 each<br />
Initiative +12 Senses Perception +5; low-light vision<br />
HP 104; Bloodied 52<br />
AC 26; Fortitude 23, Reflex 22, Will 21<br />
Speed 6; see also mad dash<br />
m Hammer (standard; at-will) ✦ Weapon<br />
+17 vs. AC; 2d6 + 5 damage, and the target is marked until<br />
the end of the slystone ruffian’s next turn.<br />
M Mighty Strike (standard; recharge ⚄ ⚅) ✦ Weapon<br />
+17 vs. AC; 3d8 + 5 damage, and target is pushed 3<br />
squares. <strong>The</strong> slystone dwarf ruffian can use this power as a<br />
part of a charge.<br />
Mad Dash<br />
When the slystone dwarf ruffian makes a charge attack,<br />
the enemy is knocked prone on a hit, in addition to any<br />
other effects of the attack.<br />
Alignment Evil Languages Common, Elven<br />
Skills Athletics +14<br />
Str 18 (+9) Dex 21 (+10) Wis 11 (+5)<br />
Con 16 (+8) Int 11 (+5) Cha 18 (+9)<br />
Equipment leather armor, hammer<br />
Tactics<br />
<strong>The</strong> harpies use alluring song to split up the PCs and<br />
move them into position where the slystone ruffians<br />
can attack—preferably with combat advantage—then<br />
shift to brutal scream as soon as a foe is in range. <strong>The</strong><br />
harpies take to the air only if they must to keep the<br />
PCs in effective range, or if a foe draws too near their<br />
perch, and they attempt to remain perched on spots<br />
too high for melee combatants to easily reach. <strong>The</strong><br />
slystone ruffians use ranged attacks initially, then<br />
charge their foes from multiple sides. <strong>The</strong> fey know<br />
that the broken passage in the east leads back to the<br />
room, and one of them might fake a retreat in an<br />
attempt to sneak up on the party from behind.<br />
If three of the fey are slain and the last is bloodied,<br />
the survivor attempts to escape and might surrender<br />
if escape proves impossible.<br />
December 2008 | DUNGEON 161<br />
40
<strong>The</strong> <strong>Temple</strong> <strong>Between</strong><br />
Features of the Area<br />
Illumination: <strong>The</strong> chamber is brightly lit by the<br />
fires carved into the two reliefs and the statue, which<br />
glow with a magical light. In the broken passage in<br />
the east, however, the only light is what the PCs bring<br />
with them.<br />
Ceiling: <strong>The</strong> ceiling is 25 feet overhead.<br />
Archways: <strong>The</strong> stone archways surrounding the<br />
double doors are 10 feet high and are steady enough<br />
for perching, standing, or even combat. <strong>The</strong>y require<br />
a mere DC 14 Athletics check to climb.<br />
Reliefs: <strong>The</strong>se reliefs show scenes of dwarf smiths<br />
at work on a huge forge, while Moradin looks on<br />
from beyond. <strong>The</strong> eastern relief is broken off halfway<br />
across, but the fires still glow. <strong>The</strong> reliefs stick out far<br />
enough from the wall that they can serve the harpies<br />
as perches, but a normal humanoid attempting to<br />
stand on one must make a DC 17 Acrobatics check<br />
every round or topple off. <strong>The</strong>y are, however, easy to<br />
climb, with a DC 10 Athletics check.<br />
Doors: <strong>The</strong> southeast door, the southwest door<br />
(through which the PCs entered), and the western<br />
door are the surviving magical portals.<br />
THE MAGIC DOORS<br />
If the PCs open the door through which they entered,<br />
they see the sepulcher—but of course they can no<br />
longer reach it. If they open one of the other two,<br />
decide for yourself what sort of sights they see, based<br />
on where else in the campaign world you want the<br />
two remaining portals to lead. (You might use these<br />
to provide side adventures later on, as a brief diversion<br />
from the Scales of War adventure path.)<br />
Remember that, until the PCs rescue the Caretaker,<br />
none of the external doors—either these<br />
magic ones, or the southern door that leads into<br />
the Stonehome Mountains—are usable. <strong>The</strong> PCs can<br />
look through them, but passing through them proves<br />
impossible.<br />
Platform: <strong>The</strong> platform stands 10 feet off the<br />
ground. It has no sides or guardrail.<br />
Statue: A statue of Moradin holds two fistfuls of<br />
fire that provide some of the chamber’s lighting.<br />
December 2008 |<br />
41<br />
DUNGEON 161
<strong>The</strong> <strong>Temple</strong> <strong>Between</strong><br />
M5: THE VAULT<br />
Encounter Level 10 (2,500 XP)<br />
Setup<br />
2 harpy screechers (H)<br />
3 quickling runners (Q)<br />
Daggerspring floor<br />
<strong>The</strong> Mountainroot <strong>Temple</strong> used the vault to store its<br />
valuables—not its religious icons and relics, which<br />
were kept in the reliquary (M9), but simple monetary<br />
treasures. <strong>The</strong>se included works of art, jewels, the legal<br />
forms for grants of land, raw ore, and of course coins.<br />
When the PCs enter the vault, read:<br />
This uneven room is clearly a repository of a sort. <strong>The</strong><br />
walls are of heavy stone—heavier, even, than you’ve seen<br />
elsewhere in the temple—and several short flights of stairs<br />
lead to vaultlike rooms. <strong>The</strong>se separate chambers boast<br />
heavy portcullises, though the gates are currently all raised.<br />
A pair of twisted, grotesque little humanoids, with deadgray<br />
skin and inhuman features, drop the coins they were<br />
examining as you enter.<br />
Perception Check<br />
DC 25: You spot another pair of harpies, skulking just<br />
beyond two of the entries to the vaults!<br />
DC 26: You can just barely make out another twisted gray<br />
humanoid, lurking in the chamber to the northeast.<br />
2 Harpy Screechers (H) Level 9 Controller<br />
Medium fey humanoid<br />
XP 400 each<br />
Initiative +7 Senses Perception +6<br />
HP 96; Bloodied 48<br />
AC 23; Fortitude 20, Reflex 20, Will 22<br />
Resist 10 thunder<br />
Speed 6, fly 8 (clumsy)<br />
m Claw (standard; at-will)<br />
+14 vs. AC; 1d8 + 3 damage.<br />
C Alluring Song (standard; at-will) ✦ Charm<br />
Close burst 5; deafened creatures are immune; +15 vs. Will;<br />
the target is pulled 3 squares and immobilized (save ends).<br />
C Brutal Scream (standard; recharge ⚄ ⚅) ✦ Thunder<br />
Close burst 5; +15 vs. Fortitude; 1d6 + 5 thunder damage.<br />
Secondary Attack: Area burst 1 within 5; centered on<br />
a target hit by brutal scream’s primary attack; targets<br />
enemies only; +15 vs. Fortitude; 1d6 + 5 thunder damage<br />
and the target slides 3 squares.<br />
Alignment Evil Languages Common<br />
Skills Stealth +12<br />
Str 16 (+7) Dex 16 (+7) Wis 15 (+6)<br />
Con 16 (+7) Int 11 (+4) Cha 20 (+9)<br />
3 Quickling Runners (Q) Level 9 Skirmisher<br />
Small fey humanoid<br />
XP 400 each<br />
Initiative +13 Senses Perception +7; low-light vision<br />
HP 96; Bloodied 48<br />
AC 24 (28 against opportunity attacks); Fortitude 20, Reflex<br />
24, Will 20<br />
Speed 12, climb 6; see also fey shift and quick cuts<br />
m Short Sword (standard; at-will) ✦ Weapon<br />
+14 vs. AC; 1d6 + 7 damage.<br />
M Quick Cuts (standard; at-will) ✦ Weapon<br />
<strong>The</strong> quickling moves its speed. At any two points during<br />
its move, the quickling makes a melee basic attack at a<br />
–2 penalty. <strong>The</strong> quickling cannot use this power while<br />
immobilized or slowed.<br />
Fey Shift (standard; encounter)<br />
<strong>The</strong> quickling runner shifts 10 squares.<br />
Maintain Mobility (minor; recharge ⚃ ⚄ ⚅)<br />
An immobilized quickling runner is no longer immobilized.<br />
Alignment Evil Languages Elven<br />
Skills Acrobatics +21, Bluff +9, Stealth +16<br />
Str 9 (+3) Dex 24 (+11) Wis 17 (+7)<br />
Con 16 (+7) Int 14 (+6) Cha 10 (+4)<br />
Equipment short sword<br />
Daggerspring Floor<br />
Level 10 Obstacle<br />
Trap<br />
500 XP<br />
Several squares of the room (marked on the map) are<br />
trapped with spring-loaded blades, which trigger when<br />
stepped on. <strong>The</strong> trigger plates are old and stiff, and do not<br />
trigger when stepped on by Small or smaller creatures.<br />
While this renders any halfling (or other Small) PCs safe, it<br />
also means that the quicklings can run across the squares<br />
without harm.<br />
Perception<br />
✦ DC 26: <strong>The</strong> character can discern all adjacent trapped plates.<br />
Additional Skill: Thievery<br />
✦ DC 22: <strong>The</strong> party gains a +2 bonus to Perception checks to<br />
notice the trapped plates and Thievery checks to delay or<br />
disable the plates.<br />
Trigger<br />
When a creature enters or begins its turn in a trapped<br />
square, the trap attacks that creature.<br />
Attack<br />
Opportunity Action Melee 1<br />
Target: Creature in a trapped square<br />
Attack: +13 vs. Reflex<br />
Hit: 2d10+6 damage. On a critical hit, the target is knocked<br />
prone and slowed (save ends).<br />
Miss: Half damage.<br />
Countermeasures<br />
✦ A character who makes a successful Athletics check (DC 6,<br />
or DC 11 without a running start) can jump over a<br />
single plate.<br />
✦ An adjacent character can disable a trigger plate with a<br />
DC 26 Thievery check.<br />
December 2008 | DUNGEON 161<br />
42
<strong>The</strong> <strong>Temple</strong> <strong>Between</strong><br />
Tactics<br />
<strong>The</strong> harpies use alluring song to drag PCs onto trapped<br />
squares, while the quicklings take advantage of the<br />
fact that they are too small to trigger the trap and seek<br />
to trick characters into chasing them onto the plates.<br />
(Because the harpies know where these squares<br />
are, they never voluntarily land or step onto them.)<br />
Otherwise, both use the interconnecting nature of the<br />
vault to maneuver, striking and then dashing behind<br />
cover, only to strike again from a different angle.<br />
<strong>The</strong> quicklings have no interest in parley, but if all<br />
are slain, the surviving harpies might surrender (particularly<br />
if only one is left, or if both are bloodied).<br />
SPECIAL ATTACK<br />
A creature adjacent to a portcullis can yank it shut<br />
with a DC 22 Strength check. If another creature is<br />
directly beneath the gate (that is, in the square with<br />
the gate marked on the map), the character pulling<br />
down the gate can make a Strength vs. Reflex<br />
attack. If the attack succeeds, the gate closes on<br />
the creature, knocking it prone and causing ongoing<br />
5 damage and restraining the creature (save ends<br />
both). <strong>The</strong> prone creature cannot stand until it has<br />
saved against the restraint.<br />
Only Medium or larger creatures can attempt<br />
this, since Small or smaller creatures cannot reach<br />
the portcullis.<br />
Features of the Area<br />
Illumination: <strong>The</strong> fey have scattered several<br />
sunrods across the room and in the vaults. This provides<br />
lighting for the entire area. <strong>The</strong> larger, central<br />
chamber is brightly lit, while the individual vaults are<br />
dimly lit.<br />
Ceiling: <strong>The</strong> ceiling is 20 feet overhead.<br />
Daggerspring Squares: <strong>The</strong> trapped squares are<br />
marked on the map.<br />
Portcullises: <strong>The</strong> gates are all currently raised<br />
and are corroded in place. A DC 22<br />
Strength check allows a character to<br />
yank the bars down, thus closing a portcullis,<br />
at which point it requires a DC 20<br />
Strength check to open again. See the<br />
sidebar.<br />
Secret Door: <strong>The</strong> secret door to the<br />
east requires a DC 22 Perception check<br />
to locate. If the PCs entered by this door,<br />
however, they need not roll to find it again.<br />
Secret Trapdoor: <strong>The</strong> trapdoor<br />
requires a DC 25 Perception check to<br />
locate. It opens onto a spiral stair that<br />
leads into an underground passage<br />
(not mapped). This eventually leads to<br />
another spiral stair, which comes up to<br />
the secret door in the statue in the northwest<br />
corner of the reliquary (M9).<br />
Slope: <strong>The</strong> slope counts as difficult terrain for<br />
creatures moving up, but not down. A creature<br />
pushed or slid down the slope moves an extra square,<br />
and a character who falls prone on the slope slides 1<br />
square south.<br />
December 2008 |<br />
43<br />
DUNGEON 161
<strong>The</strong> <strong>Temple</strong> <strong>Between</strong><br />
M6: THE GRAND<br />
CATHEDRAL<br />
Encounter Level 13 (4,300 XP,<br />
but see below)<br />
Setup<br />
This encounter initially includes the following<br />
creatures:<br />
3 banshrae dartswarmers (B)<br />
5 quickling runners (Q)<br />
1 slystone dwarf ruffian (S)<br />
Once the second wave of adversaries appears, the<br />
encounter also includes the following creatures (not<br />
marked on the map, since they aren’t present at the<br />
beginning of the encounter):<br />
1 redspawn firebelcher<br />
2 spitting trolls<br />
4 trolls<br />
1 two-headed troll<br />
For years, the grand cathedral of the Mountainroot<br />
<strong>Temple</strong> was the heart of Moradin worship in the<br />
region. A truly gargantuan chamber—more an artificial<br />
cavern than a “room”—it has suffered the ravages<br />
of time. It has been badly damaged by cave-ins over<br />
the years, and rubble covers the floor.<br />
When the PCs enter, read:<br />
Some of you have seen keeps smaller than the vast chamber<br />
around you. Roughly oval in shape, save for the crumbling<br />
walls to the east, the chamber consists of multiple levels.<br />
Stairs in the room’s center, as well as great sweeping ramps<br />
around the sides, climb to the second level 20 feet above.<br />
One of those ramps has partly collapsed along with the<br />
walls. Steeps stairs and slopes lead from there to a third<br />
level, and a platform not unlike the one in the temple’s entry<br />
chamber stands high atop that. Huge chunks of wall and<br />
stone stand along the broken edge, forming natural ledges,<br />
and a deep crevice runs a jagged path to the southeast.<br />
Perception Check<br />
DC 20: <strong>The</strong>re’s another of the vile, bestial-looking dwarves<br />
hiding in the lee of the stairs.<br />
DC 21: Above, you spot several insectoid-featured<br />
humanoids perched on various ledges.<br />
DC 26: And there are yet more foes—twisted gray<br />
humanoids roughly the size of halflings, lurking around<br />
various corners and in the shadows.<br />
At the start of the third round of combat, read:<br />
A deafening boom rings out over the chamber, echoing<br />
through the vastness. Twice, three times, and then you hear<br />
a sudden shattering and the sound of wood rebounding off<br />
stone.<br />
If a PC is in a position to see the northernmost<br />
door at this time, read:<br />
<strong>The</strong> double doors burst open, and jagged bits of the lock<br />
hang loose. Through the open doorway barges an array of<br />
horrific figures: several green and mottled trolls, a pair of<br />
smaller creatures with similar features and narrowed eyes,<br />
and—most terrifying—a broad-shouldered troll with two<br />
shrieking heads. Accompanying one of the small trolls is a<br />
red-scaled reptile on a heavy chain, and smoke rises from its<br />
nostrils and from between its jagged teeth.<br />
3 Banshrae Dartswarmers (B) Level 11 Artillery<br />
Medium fey humanoid<br />
XP 600 each<br />
Initiative +11 Senses Perception +7; low-light vision<br />
HP 89; Bloodied 44<br />
AC 23; Fortitude 20, Reflex 23, Will 22<br />
Speed 8<br />
m Slam (standard; at-will)<br />
+13 vs. AC; 1d8 + 3 damage.<br />
R Blowgun Dart (standard; at-will) ✦ Weapon<br />
Ranged 5/10; +16 vs. AC; 1d10 + 6 damage, and the target<br />
is dazed and takes a –2 penalty to attack rolls (save ends<br />
both).<br />
C Dart Flurry (standard; recharge ⚃ ⚄ ⚅) ✦ Weapon<br />
Close blast 5; +16 vs. AC; 1d10 + 6 damage, plus the<br />
target is dazed and takes a –2 penalty to attack rolls (save<br />
ends both).<br />
Alignment Unaligned Languages telepathy 20<br />
Str 16 (+8) Dex 22 (+11) Wis 15 (+7)<br />
Con 17 (+8) Int 14 (+7) Cha 20 (+10)<br />
Equipment blowgun, darts<br />
5 Quickling Runners (Q) Level 9 Skirmisher<br />
Small fey humanoid<br />
XP 400 each<br />
Initiative +13 Senses Perception +7; low-light vision<br />
HP 96; Bloodied 48<br />
AC 24 (28 against opportunity attacks); Fortitude 20, Reflex<br />
24, Will 20<br />
Speed 12, climb 6; see also fey shift and quick cuts<br />
m Short Sword (standard; at-will) ✦ Weapon<br />
+14 vs. AC; 1d6 + 7 damage.<br />
M Quick Cuts (standard; at-will) ✦ Weapon<br />
<strong>The</strong> quickling moves its speed. At any two points during<br />
its move, the quickling makes a melee basic attack at a<br />
–2 penalty. <strong>The</strong> quickling cannot use this power while<br />
immobilized or slowed.<br />
Fey Shift (standard; encounter)<br />
<strong>The</strong> quickling runner shifts 10 squares.<br />
Maintain Mobility (minor; recharge ⚃ ⚄ ⚅)<br />
An immobilized quickling runner is no longer immobilized.<br />
Alignment Evil Languages Elven<br />
Skills Acrobatics +21, Bluff +9, Stealth +16<br />
Str 9 (+3) Dex 24 (+11) Wis 17 (+7)<br />
Con 16 (+7) Int 14 (+6) Cha 10 (+4)<br />
Equipment short sword<br />
December 2008 | DUNGEON 161<br />
44
<strong>The</strong> <strong>Temple</strong> <strong>Between</strong><br />
Slystone Dwarf Ruffian<br />
Level 10 Soldier<br />
Small fey humanoid XP 500<br />
Initiative +12 Senses Perception +5; low-light vision<br />
HP 104; Bloodied 52<br />
AC 26; Fortitude 23, Reflex 22, Will 21<br />
Speed 6; see also mad dash<br />
m Hammer (standard; at-will) ✦ Weapon<br />
+17 vs. AC; 2d6 + 5 damage, and the target is marked until<br />
the end of the slystone ruffian’s next turn.<br />
M Mighty Strike (standard; recharge ⚄ ⚅) ✦ Weapon<br />
+17 vs. AC; 3d8 + 5 damage, and target is pushed 3<br />
squares. <strong>The</strong> slystone dwarf ruffian can use this power as a<br />
part of a charge.<br />
Mad Dash<br />
When the slystone dwarf ruffian makes a charge attack,<br />
the enemy is knocked prone on a hit, in addition to any<br />
other effects of the attack.<br />
Alignment Evil Languages Common, Elven<br />
Skills Athletics +14<br />
Str 18 (+9) Dex 21 (+10) Wis 11 (+5)<br />
Con 16 (+8) Int 11 (+5) Cha 18 (+9)<br />
Equipment leather armor, hammer<br />
Redspawn Firebelcher<br />
Level 12 Artillery<br />
Large natural beast (reptile) XP 700<br />
Initiative +7 Senses Perception +6; low-light vision<br />
Fire Within (Fire) aura 5; allies who enter or start their turns<br />
within the aura gain resist 10 fire.<br />
HP 97; Bloodied 48<br />
AC 25; Fortitude 25, Reflex 22, Will 21<br />
Resist 20 fire<br />
Speed 4<br />
m Bite (standard; at-will) ✦ Fire<br />
+16 vs. AC; 1d10 + 4 damage, and ongoing 5 fire damage<br />
(save ends).]<br />
R Fire Belch (standard; at-will) ✦ Fire<br />
Ranged 12; +15 vs. Reflex; 2d6 + 1 damage, and ongoing 5<br />
fire damage (save ends).<br />
A Fire Burst (standard; recharge ⚄ ⚅) ✦ Fire<br />
Area burst 2 within 10; +15 vs. Reflex 3d6 + 1 damage,<br />
and ongoing 5 fire damage (save ends). Miss: Half damage,<br />
and no ongoing fire damage.<br />
Alignment Unaligned Languages —<br />
Str 18 (+10) Dex 13 (+7) Wis 13 (+6)<br />
Con 19 (+10) Int 2 (+2) Cha 8 (+5)<br />
2 Spitting Trolls Level 10 Soldier (Leader)<br />
Medium natural humanoid<br />
XP 500 each<br />
Initiative +12 Senses Perception +8<br />
HP 106; Bloodied 53; see also troll healing<br />
Regeneration 10 (if the troll takes acid or fire damage,<br />
regeneration does not function until the end of its<br />
next turn)<br />
AC 26; Fortitude 22, Reflex 23, Will 22<br />
Speed 6, climb 4<br />
m Claw (standard; at-will) ✦ Poison<br />
+17 vs. AC; 1d6 + 5 damage, plus 1d6 poison damage.<br />
r Javelin (standard; at-will) ✦ Poison, Weapon<br />
Ranged 10/20; +17 vs. AC; 1d6 + 5 damage, plus 1d6<br />
poison damage.<br />
R Acid Spit (minor; recharge ⚄ ⚅) ✦ Acid<br />
Ranged 5; +15 vs. Reflex; 1d6 acid damage.<br />
Regenerative Empowerment (minor 1/turn, at-will)<br />
One troll within 10 squares whose regeneration is<br />
currently inactive (as a result of taking acid or fire damage)<br />
immediately reactivates the regeneration.<br />
Troll Healing ✦ Healing<br />
If the troll is reduced to 0 hit points by an attack that does<br />
not deal acid or fire damage, it rises on its next turn (as a<br />
move action) with 10 hit points.<br />
Alignment Chaotic evil Languages Common, Giant<br />
Skills Athletics +13, Endurance +14<br />
Str 16 (+8) Dex 21 (+10) Wis 17 (+8)<br />
Con 18 (+9) Int 10 (+5) Cha 13 (+6)<br />
Equipment leather armor, 10 javelins<br />
Two-Headed Troll<br />
Level 10 Elite Brute<br />
Large natural humanoid XP 1,000<br />
Initiative +5 Senses Perception +7<br />
HP 264; Bloodied 132; see also troll healing<br />
Regeneration 10 (if the troll takes acid or fire damage,<br />
regeneration does not function until the end of its<br />
next turn)<br />
AC 25; Fortitude 27, Reflex 19, Will 20<br />
Saving Throws +2<br />
Speed 6<br />
Action Points 1<br />
m Claw (standard; at-will)<br />
Reach 2; +13 vs. AC; 3d6 + 7 damage.<br />
M Smackdown (immediate reaction, when an enemy moves into<br />
a position that flanks the two-headed troll; at-will)<br />
<strong>The</strong> two-headed troll targets one creature flanking it; +11<br />
vs. Fortitude; the target is knocked prone.<br />
Double Actions<br />
A two-headed troll rolls initiative twice, gets two turns<br />
during a round, and has a full set of actions (standard,<br />
move, minor) on each turn. Each set of actions corresponds<br />
to a different head. <strong>The</strong> troll’s ability to take immediate<br />
actions refreshes on each of its turns.<br />
Dual Brain<br />
At the end of its turn, the two-headed troll automatically<br />
succeeds on all saving throws against the dazed and<br />
stunned conditions and against charm effects that a save<br />
can end.<br />
Troll Healing ✦ Healing<br />
If the troll is reduced to 0 hit points by an attack that does<br />
not deal acid or fire damage, it rises on its next turn (as a<br />
move action) with 10 hit points.<br />
Alignment Chaotic evil Languages Giant<br />
Str 24 (+12) Dex 10 (+5) Wis 14 (+7)<br />
Con 22 (+11) Int 6 (+3) Cha 10 (+5)<br />
Equipment hide armor<br />
December 2008 |<br />
45<br />
DUNGEON 161
<strong>The</strong> <strong>Temple</strong> <strong>Between</strong><br />
4 Trolls Level 9 Brute<br />
Large natural humanoid<br />
XP 400 each<br />
Initiative +7 Senses Perception +11<br />
HP 100; Bloodied 50; see also troll healing<br />
Regeneration 10 (if the troll takes acid or fire damage,<br />
regeneration does not function until the end of its<br />
next turn)<br />
AC 20; Fortitude 21, Reflex 18, Will 17<br />
Speed 8<br />
m Claw (standard; at-will)<br />
Melee 2; +13 vs. AC; 2d6 + 6 damage; see also frenzied<br />
strike.<br />
M Frenzied Strike (free, when the troll’s attack bloodies<br />
an enemy; at-will)<br />
<strong>The</strong> troll makes a claw attack.<br />
Troll Healing ✦ Healing<br />
If the troll is reduced to 0 hit points by an attack that does<br />
not deal acid or fire damage, it rises on its next turn (as a<br />
move action) with 10 hit points.<br />
Alignment Chaotic evil Languages Giant<br />
Skills Athletics +15, Endurance +14<br />
Str 22 (+10) Dex 16 (+7) Wis 14 (+6)<br />
Con 20 (+9) Int 5 (+1) Cha 10 (+4)<br />
Tactics<br />
Initially, the fey fight to their strengths. <strong>The</strong> banshrae<br />
stay at range and snipe the PCs, while the<br />
quicklings and slystone ruffian maneuver in and out<br />
of melee combat. <strong>The</strong> slystone ruffian is particularly<br />
fond of bullrushing enemies off edges or into the<br />
ravine. <strong>The</strong> quicklings and slystone avoid bunching<br />
up or staying in one spot for long, preferring to make<br />
the PCs keep moving across the room and up and<br />
down between levels.<br />
Once the trolls arrive, however, the fey split their troll also tries to remain near the firebelcher to take<br />
attentions between the party and the new foes.<br />
advantage of the creature’s granted fire resistance.<br />
Similarly, the trolls and firebelcher treat the fey and <strong>The</strong> trolls and firebelcher fight to the death, no<br />
the PCs as equal threats.<br />
matter what, but if any fey survive after all the trolls<br />
<strong>The</strong> trolls spread out once they appear through the and firebelcher are slain, they attempt to flee rather<br />
northernmost door. One spitting troll attempts to stay than continuing the fight against the PCs. If cornered,<br />
within 10 squares or so of the two-headed troll, where they surrender.<br />
it can move in and use poison spit if the troll takes<br />
acid or fire damage. <strong>The</strong> other spitting troll—the one<br />
accompanying the firebelcher—remains near one of<br />
the other, normal trolls. Where possible, that spitting<br />
THREE-WAY FIGHTING<br />
Once the battle between all three factions is engaged, Obviously, if one faction is whittled down faster than<br />
it’s vital that the DM play the monsters as focusing on the others, the larger faction can devote more attacks<br />
both the PCs and the other monstrous faction. Some to the PCs, and that’s fine. But this should happen only<br />
DMs might be tempted to have the monsters focus if and when one group becomes markedly smaller than<br />
more on the PCs than on each other, while others the other, and even then, the winning faction’s attentions<br />
should be split proportionately between the party<br />
might be tempted to give the PCs an easy time by<br />
having the monsters focus more on each other.<br />
and the smaller group of foes.<br />
Avoid these temptations! This encounter (and its XP Players might grow impatient if the DM spends too<br />
reward) is balanced under the assumption that, once long rolling dice for NPCs attacking NPCs. Feel free to<br />
all three factions are involved, each group of creatures use average results for damage for each creature during<br />
focuses equally on the party and the other group. That this encounter. Do not use these averages when rolling<br />
doesn’t mean that any individual monster needs to damage against a PC, or when a monster is attempting<br />
split its attacks, or that a monster should be stupid to save against a PC’s ability. But when monsters are<br />
and ignore a particular threat. But in any given round, attacking each other, these average values speed up<br />
the troll faction should average the same number of play and allow the DM to more swiftly return to the<br />
attacks against the PCs as it does against the fey, and players.<br />
vice-versa.<br />
December 2008 | DUNGEON 161<br />
46
<strong>The</strong> <strong>Temple</strong> <strong>Between</strong><br />
Features of the Area<br />
Illumination: <strong>The</strong> grand cathedral generates its<br />
own magical light. <strong>The</strong> chamber is brightly lit.<br />
Ceiling: <strong>The</strong> ceiling is 70 feet overhead from the<br />
bottom level.<br />
Altar: This great stone altar, shaped roughly like a<br />
primitive anvil, stands 5 feet in height, atop the platform<br />
at the highest level. Stepping up onto the altar<br />
requires an extra square of movement, and the altar<br />
provides cover.<br />
Broken Stone Platforms: Along the eastern<br />
side of the room, enormous chunks of stone—broken<br />
parts of the wall, bits of the ceiling, and the like—lie<br />
scattered about. Many are flat enough that combatants<br />
can maneuver on top of them. <strong>The</strong>y require a<br />
DC 21 Athletics check to climb, and vary in height<br />
as marked.<br />
Crevice: <strong>The</strong> jagged crevice is roughly 20 feet<br />
deep, and—thanks to various doors and passages that<br />
were caved in long ago—provides the only means<br />
of accessing areas M7 and M8. It requires a DC 21<br />
Athletics check to climb.<br />
Doors: <strong>The</strong> doors to the reliquary at M9 were<br />
locked, until the trolls broke through them. Now they<br />
cannot be locked.<br />
Edges: <strong>The</strong> edge of the second level overhangs<br />
level one slightly; see the map of M10.<br />
Gap: This wide break in the eastern ramp has a<br />
ragged edge, and it ranges from 15 to 20 feet across.<br />
Rubble: <strong>The</strong> rubble scattered across the floor is<br />
difficult terrain.<br />
Slope, Shallow: <strong>The</strong> two<br />
curved ramps that provide access<br />
from the first to the second level<br />
are shallow and do not qualify<br />
as difficult terrain. A creature<br />
pushed or slid down the slope<br />
moves an extra square.<br />
Slope, Steep: <strong>The</strong> northern<br />
slopes require a DC 11 Athletics<br />
check to climb. A creature that<br />
steps (or is moved) onto the<br />
slope from the top immediately<br />
slides to the bottom of the slope<br />
and, unless it makes a DC 10<br />
Acrobatics check, falls prone.<br />
Stairs, Steep: <strong>The</strong> stairs that<br />
provide access from the second<br />
level to the third level are particularly<br />
steep. <strong>The</strong>y are difficult<br />
terrain. A creature pushed or slid<br />
down the stairs moves an extra<br />
square, and a character who falls<br />
prone on the stairs also slides 1<br />
square south.<br />
Statue: <strong>The</strong> statue in the<br />
southwest is another statue of<br />
Moradin; this one holds an enormous<br />
hammer in both hands.<br />
December 2008 |<br />
47<br />
DUNGEON 161
<strong>The</strong> <strong>Temple</strong> <strong>Between</strong><br />
M7/M8: THE SHATTERED<br />
BARRACKS AND THE<br />
LESSER SANCTUM<br />
Encounter Level 14 (5,100 XP)<br />
Setup<br />
1 banshrae dartswarmer (B)<br />
4 cyclops guards (C)<br />
Hethralga, unique howling hag (H)<br />
4 slystone ruffians (S)<br />
Cave-in hazard<br />
Here, in these broken and precarious chambers where<br />
the priests of the Mountainroot <strong>Temple</strong> once made<br />
their homes, and in the smaller sanctuary where they<br />
conducted services and rites too small or private for the<br />
grand cathedral, the leaders of the fey have made their<br />
camp. Hethralga, personal servant of King Cachlain,<br />
lurks here with her bodyguards and most trusted servants.<br />
She has already acquired the Incunabulum; now<br />
she seeks a way to return to the Feywild and grows<br />
ever more nervous with each passing hour that her followers<br />
fail to find a means of escape.<br />
If the players enter M7 by using the crevice, read:<br />
Hauling yourself up onto the ledge, you are in an uneven<br />
cave—clearly a result of one of the ancient cave-ins and not<br />
of any deliberate building. To the right, rubble litters the<br />
floor, making footing precarious.<br />
Once the players move in far enough to see the<br />
eastern portion of M7, continue:<br />
As you progress, it becomes apparent that some<br />
construction took place here at one point. Several broken<br />
walls and sharp corners suggest that the cave-in reshaped<br />
what was once a part of the temple.<br />
A faint glimmer of light, almost invisible, shines from<br />
the east.<br />
Perception Check<br />
DC 20: Barely visible, outlined against that faint light, are<br />
a pair of those short, gruff-looking dwarves.<br />
If the players enter M7 by using the door<br />
from M8, read:<br />
You are in a small chamber that has clearly seen better<br />
days. Whatever furniture was once here has long since<br />
either been removed or crumbled to dust, and the walls are<br />
webbed with cracks.<br />
Once the players move down the western<br />
passage, or through the northern door, continue:<br />
More wreckage and ruin. Clearly, old cave-ins have reduced<br />
what was once a series of carved chambers to broken rooms,<br />
twisted passages, and the occasional freestanding wall.<br />
Thick heaps of rubble stand here and there on the floor.<br />
If the players enter M8 by using the crevice, read:<br />
Climbing up from the crevice, you have a brief instant to look<br />
around. You are in a cathedral or religious sanctuary, far<br />
smaller than the main one behind you, and the hall boasts<br />
a dais at the far end, behind which looms a great relief of<br />
Moradin at his forge. A line of columns runs down both sides<br />
of the room; two of the great pillars have fallen, apparently<br />
toppled in the same cataclysm that created the crevice.<br />
And then your brief moment of observation has passed, as<br />
a cadre of one-eyed giants, axes held high, converges on you!<br />
Perception Check<br />
DC 20: A handful of gnome-sized fey skulk in the shadows<br />
and around the various pillars.<br />
DC 21: You spy an old dwarf crone, ancient beyond belief,<br />
atop the dais, almost blending in to the relief beyond.<br />
DC 22: Not far from her, another of the insectoid fey<br />
crouches upon the steps of the dais, its unblinking eyes<br />
gazing in your direction.<br />
If the players enter M8 through the door from<br />
M7, read:<br />
<strong>The</strong> fleeing fey have led you into a much larger chamber.<br />
You are in a cathedral or religious sanctuary, far smaller<br />
than the main one behind you, and the hall boasts a dais at<br />
the far end, behind which looms a great relief of Moradin<br />
at his forge. A line of columns runs down both sides of<br />
the room; two of the great pillars have fallen, apparently<br />
toppled in the same cataclysm that created the crevice.<br />
Retreating off the dais as you approach are another of the<br />
inhuman, insectoid fey and what appears to be an ancient<br />
dwarf crone, at least several centuries old. From beyond them,<br />
a cadre of one-eyed giants, axes held high, converges on you!<br />
Perception Check<br />
DC 20: A handful of gnome-sized fey skulk in the shadows<br />
and around the various pillars.<br />
When a cyclops makes a cave-in attack, read:<br />
<strong>The</strong> enormous figure slams a palm into the nearby pillar.<br />
<strong>The</strong> entire column of stone shudders—followed by a much<br />
louder rumble as a portion of the roof jars loose from above<br />
and tumbles downward!<br />
When the cave-in hazard is triggered, read:<br />
A low groan reverberates through the sanctum, sending<br />
dust raining down from above. And then the rain is far<br />
more than dust, as bits of rock begin to shake loose.<br />
December 2008 | DUNGEON 161<br />
48
<strong>The</strong> <strong>Temple</strong> <strong>Between</strong><br />
Banshrae Dartswarmer (B) Level 11 Artillery<br />
Medium fey humanoid XP 600<br />
Initiative +11 Senses Perception +7; low-light vision<br />
HP 89; Bloodied 44<br />
AC 23; Fortitude 20, Reflex 23, Will 22<br />
Speed 8<br />
m Slam (standard; at-will)<br />
+13 vs. AC; 1d8 + 3 damage.<br />
R Blowgun Dart (standard; at-will) ✦ Weapon<br />
Ranged 5/10; +16 vs. AC; 1d10 + 6 damage, and the<br />
target is dazed and takes a –2 penalty to attack rolls<br />
(save ends both).<br />
C Dart Flurry (standard; recharge ⚃ ⚄ ⚅) ✦ Weapon<br />
Close blast 5; +16 vs. AC; 1d10 + 6 damage, plus the target<br />
is dazed and takes a –2 penalty to attack rolls (save ends<br />
both).<br />
Alignment Unaligned Languages telepathy 20<br />
Str 16 (+8) Dex 22 (+11) Wis 15 (+7)<br />
Con 17 (+8) Int 14 (+7) Cha 20 (+10)<br />
Equipment blowgun, darts<br />
4 Slystone Dwarf Ruffians (S) Level 10 Soldier<br />
Small fey humanoid<br />
XP 500 each<br />
Initiative +12 Senses Perception +5; low-light vision<br />
HP 104; Bloodied 52<br />
AC 26; Fortitude 23, Reflex 22, Will 21<br />
Speed 6; see also mad dash<br />
m Hammer (standard; at-will) ✦ Weapon<br />
+17 vs. AC; 2d6 + 5 damage, and the target is marked until<br />
the end of the slystone ruffian’s next turn.<br />
M Mighty Strike (standard; recharge ⚄ ⚅) ✦ Weapon<br />
+17 vs. AC; 3d8 + 5 damage, and target is pushed 3<br />
squares. <strong>The</strong> slystone dwarf ruffian can use this power as a<br />
part of a charge.<br />
Mad Dash<br />
When the slystone dwarf ruffian makes a charge attack,<br />
the enemy is knocked prone on a hit, in addition to any<br />
other effects of the attack.<br />
Alignment Evil Languages Common, Elven<br />
Skills Athletics +14<br />
Str 18 (+9) Dex 21 (+10) Wis 11 (+5)<br />
Con 16 (+8) Int 11 (+5) Cha 18 (+9)<br />
Equipment leather armor, hammer<br />
Hethralga, Unique Howling Hag Level 12 Controller<br />
Medium fey humanoid XP 700<br />
Initiative +11 Senses Perception +10; low-light vision<br />
HP 126; Bloodied 63; see also shriek of pain<br />
AC 26; Fortitude 25, Reflex 24, Will 23<br />
Speed 6; see also fey step<br />
m Quarterstaff (standard; at-will) ✦ Weapon<br />
+15 vs. AC; 1d10 + 5 damage.<br />
C Howl (standard; at-will) ✦ Thunder<br />
Close blast 3; +16 vs. Fortitude; 1d6 + 6 thunder damage,<br />
and the target is pushed 3 squares.<br />
C Shriek of Pain (standard; recharges when first bloodied)<br />
✦ Thunder<br />
Close blast 5; +16 vs. Fortitude; 3d6 + 6 thunder damage,<br />
or 3d6 + 11 thunder damage if the howling hag is<br />
bloodied. Miss: Half damage.<br />
Change Shape (minor; at-will) ✦ Polymorph<br />
A howling hag can alter its physical form to appear as<br />
an old crone of any Medium humanoid race (see Change<br />
Shape, Monster Manual page 280).<br />
Fey Step (move; encounter) ✦ Teleportation<br />
<strong>The</strong> howling hag can teleport 10 squares.<br />
Alignment Evil Languages Common, Elven<br />
Skills Bluff +15, Insight +15, Nature +15<br />
Str 21 (+11) Dex 21 (+11) Wis 18 (+10)<br />
Con 22 (+12) Int 13 (+7) Cha 19 (+10)<br />
Equipment quarterstaff<br />
4 Cyclops Guards (C) Level 14 Minion<br />
Large fey humanoid<br />
XP 250 each<br />
Initiative +8 Senses Perception +13; truesight 6<br />
HP 1; a missed attack never damages a minion.<br />
AC 27; Fortitude 26, Reflex 23, Will 23<br />
Speed 6<br />
m Battleaxe (standard; at-will) ✦ Weapon<br />
Melee 2; +17 vs. AC; 7 damage.<br />
M Evil Eye (immediate reaction, when a melee attack misses<br />
the cyclops guard; at-will)<br />
<strong>The</strong> cyclops guard makes a melee basic attack against<br />
the attacker.<br />
Alignment Unaligned Languages Elven<br />
Str 22 (+11) Dex 16 (+8) Wis 17 (+8)<br />
Con 20 (+10) Int 11 (+5) Cha 11 (+5)<br />
Equipment hide armor, heavy shield, battleaxe<br />
Cave-In<br />
Hazard<br />
Level 13 Lurker<br />
800 XP<br />
A disruption sets off a chain reaction that doesn’t end until all<br />
the room is covered in rubble.<br />
Perception<br />
✦ DC 31: <strong>The</strong> character notices that the area is unstable.<br />
Additional Skill: Dungeoneering<br />
✦ DC 26: Same as Perception, above.<br />
Initiative +6<br />
Trigger<br />
Two rounds after the first time a cyclops makes a cave-in<br />
attack, or 4 rounds after combat has begun (whichever<br />
comes first), the cave-in hazard is triggered. <strong>Between</strong> the<br />
trigger and the cave-in’s attack, characters in the area<br />
know that a cave-in is beginning. On its turn, the cave-in<br />
attacks a random area within the encounter area (M8).<br />
Attack<br />
Standard Action Close burst 1<br />
Targets: Creatures in burst<br />
Attack: +16 vs. Reflex<br />
Hit: 2d12 + 8 damage<br />
Miss: Half damage<br />
Effect: <strong>The</strong> burst area becomes difficult terrain.<br />
Sustain Standard: <strong>The</strong> cave-in attacks each round, targeting<br />
a different square.<br />
Countermeasures<br />
✦ A character who makes a DC 31 Dungeoneering check<br />
as a minor action can determine the square the trap will<br />
attack on its next turn.<br />
Tactics<br />
<strong>The</strong> cyclopses immediately attempt to converge on<br />
the PCs, making use of their ability to trigger cave-ins<br />
any time a PC is appropriately positioned. <strong>The</strong>y’re<br />
also fond of bullrushing PCs back into the crevice as<br />
they climb out, and might even ready actions to do<br />
so. <strong>The</strong> hag and the banshrae stay at maximum range<br />
for their various powers; if the PCs attempt to close,<br />
the pair conducts a fighting retreat, moving either<br />
through the door to M7 or into the crevice, depending<br />
on which way the PCs are coming from. At least one<br />
of the slystones accompanies them when they do this,<br />
December 2008 |<br />
49<br />
DUNGEON 161
<strong>The</strong> <strong>Temple</strong> <strong>Between</strong><br />
potentially leading to a combat that makes multiple<br />
circuits of M7 and M8. <strong>The</strong> hag resumes her normal<br />
form after several rounds of combat.<br />
If the PCs approach M8 by M7, rather than by<br />
the crevice, the slystone ruffians retreat so they can<br />
fight alongside their allies. Otherwise, they enter<br />
M8 in the second round of combat, having heard the<br />
commotion.<br />
Once the random cave-in begins, Hethralga and<br />
the banshrae retreat to M7. <strong>The</strong> slystones and the<br />
cyclopses retreat as well, but more slowly, attempting<br />
to maintain melee as they do so (and, hopefully,<br />
keeping the PCs in the sanctum, and in range of the<br />
cave-in, longer).<br />
Features of the Area<br />
Illumination: Area M8 is brightly lit by a magical<br />
glow emanating from the relief and the standing pillars.<br />
<strong>The</strong> light leaks through the door to M7, providing<br />
dim light for the easternmost room and passage. <strong>The</strong><br />
rest of M7 is illuminated only by whatever light the<br />
PCs bring with them.<br />
Ceiling: <strong>The</strong> ceiling of M7 is 15 feet overhead,<br />
while that of M8 is 30 feet overhead.<br />
Crevice: <strong>The</strong> jagged crevice at the southwest is<br />
roughly 20 feet deep, and—thanks to various doors<br />
and passages that were caved in long ago—provides<br />
the only means of accessing area M6 from here. It<br />
requires a DC 21 Athletics check to climb its ledges.<br />
Dais: <strong>The</strong> steps of the dais are shallow enough that<br />
they do not impede movement.<br />
<strong>The</strong> Incunabulum Primeval: In addition to any<br />
other treasure she might have, Hehtralga has the<br />
Incunabulum on her person.<br />
Pillar, Fallen: <strong>The</strong> fallen pillar provides cover.<br />
A creature can climb over or onto it; this requires<br />
an extra square of movement, and requires a DC 17<br />
Acrobatics check if the creature wishes to move more<br />
than 1 square atop it.<br />
Pillar, Leaning: <strong>The</strong> southwesternmost pillar in<br />
M8 leans precariously against the wall. It can be used<br />
as a makeshift weapon, as described above.<br />
Rubble: <strong>The</strong> rubble is difficult terrain.<br />
SPECIAL ATTACK<br />
A Large or larger creature can deliberately cause<br />
rocks to fall from the ceiling by striking high up on<br />
one of the chamber’s standing pillars. This requires<br />
a standard action, and the attacker can decide what<br />
square the attack is centered on, as long as it is within<br />
4 squares of the pillar. This is a close burst 1, Strength<br />
vs. Reflex attack that deals 2d12 + 8 damage (half<br />
damage on miss) and causes the area to become difficult<br />
terrain.<br />
<strong>The</strong> leaning pillar (see below) can also be used as a<br />
makeshift attack. If pushed from the west with a DC<br />
19 Strength check (being jammed against the wall, it<br />
won’t move if shoved from any other direction), it falls<br />
to the ground and rolls to the position marked on the<br />
map. It makes a +16 vs. Reflex attack against anyone<br />
standing in its path; if it hits, it deals 2d8 damage,<br />
pushes the target as far as it needs to for the target to<br />
be out of the way, and knocks the target prone. Once<br />
it lands, it is another fallen pillar, as defined below.<br />
December 2008 | DUNGEON 161<br />
50
<strong>The</strong> <strong>Temple</strong> <strong>Between</strong><br />
M9: THE RELIQUARY<br />
Encounter Level 12 (3,700 XP)<br />
Setup<br />
2 dragonborn gladiators (G)<br />
1 eidolon (E)<br />
1 spitting troll (P)<br />
6 streetwise thugs (S)<br />
2 trolls (T)<br />
<strong>The</strong> first portion of the Mountainroot <strong>Temple</strong> ever<br />
carved from the Stonehome range, the reliquary<br />
served as the home for the sect’s greatest religious<br />
treasures for years on end, though most were removed<br />
when the temple was largely abandoned. Its peculiar<br />
design was intended to allow priests and worshipers<br />
to come and gaze upon these great relics, without<br />
allowing anyone to approach. It was also here that<br />
angels and exarchs of Moradin appeared from the<br />
Astral Sea, entering by using the great double doors to<br />
the north. (Remember that, until the PCs rescue the<br />
Caretaker, exit from the temple—even by these astral<br />
doors—is impossible.)<br />
Zithiruun and his soldiers arrived here from the<br />
Astral Sea as well, and here they have set up camp.<br />
<strong>The</strong>y are holding the Caretaker hostage in the small<br />
building labeled I, where they have spent days torturing<br />
him. Although the Caretaker hasn’t broken, he<br />
has slowly gone slightly mad, resulting in the peculiar<br />
behavior of some of the temple’s magical defenses.<br />
This, alas, includes the temple’s guardian eidolon,<br />
which has come to accept the githyanki soldiers and<br />
treats them as allies in combat.<br />
Although they do not face him here, or even<br />
identify him for what he is, this is the PCs’ first opportunity<br />
to spot their true enemy, General Zithiruun.<br />
He is the cloaked figure (described below) they see<br />
atop the platform. As soon as he steps out of sight, he<br />
heads at full speed for the secret door in the northwest.<br />
Given his ability to fly, he can reach that hidden<br />
exit and be through it in 2 rounds—possibly before the<br />
PCs even reach the platform.<br />
Creatures indicated on the map in red are on the<br />
top platform or stairs. Creatures in yellow are on the<br />
ground floor, although possibly visible through the<br />
platform.<br />
When the PCs enter, read:<br />
You are in a wide corridor. Ahead of you, two flights of<br />
stairs, separated by a long landing, lead to a platform high<br />
above. Two figures stand atop that platform, apparently<br />
conversing. One is a rust-hued dragonborn clad in heavy<br />
armor. <strong>The</strong> other is a slender figure, its features hidden<br />
by a hooded cloak. He is clad in a sort of leather-and-steel<br />
harness. It looks less like armor than like the creation of<br />
a maddened surgeon—a full-bodysuit version of a brace<br />
designed to hold a broken limb in place.<br />
You see them only for a split second, for before the door<br />
has even fully opened, both have stepped away from the<br />
edge and out of sight.<br />
When the PCs reach the center platform, read:<br />
Four stone stairs come together here, forming a small<br />
platform about 20 feet above a larger, circular surface.<br />
That surface appears to be made of glass or crystal,<br />
allowing a full view of the various chambers below. Some of<br />
those chambers extend out from beneath the crystal—openroofed<br />
so that you can still see in. <strong>The</strong> stairs to the north<br />
rise upward, rather than down, culminating in a large<br />
set of double doors several dozen feet above your current<br />
level, and a pair of massive statues of Moradin stand in the<br />
northwest and northeast corners. To the southwest stand<br />
a pair of small buildings—the only structures in the entire<br />
cavern that appear to have a roof.<br />
An array of humanoid creatures stands scattered about<br />
the chamber, both on the platform or stairs, and down on<br />
the ground level. Not a one of them looks especially thrilled<br />
to see you.<br />
WHAT IF THEY COME<br />
FROM THE VAULT<br />
If the PCs make their way to the reliquary from the<br />
hidden trapdoor in the vault (M5), rather than from<br />
the grand cathedral, the situation is only moderately<br />
different. You can give the PCs the same basic<br />
description (though obviously from a ground perspective,<br />
rather than above the platform). <strong>The</strong>y still catch<br />
only a quick glimpse of Zithiruun, before he disappears—down<br />
to the south, rather than toward the<br />
secret door through which the PCs have emerged.<br />
If the PCs open the double-doors in the north<br />
(marked A), read:<br />
For an eternal instant, the world fades away as you stand<br />
upon the precipice of infinity. An ocean of pearlescent<br />
silver stretches ever onward, its tides and crests all but<br />
invisible as they slowly traverse the great expanse. Beneath<br />
those waters, stars and constellations twinkle with almost<br />
blinding clarity, and far in the distance, the great peaks of<br />
an unknown isle protrude from the endless waters.<br />
<strong>The</strong> sense of vertigo here, at the edge of the world, is<br />
almost overwhelming, striking not merely at the body but at<br />
the mind and soul.<br />
December 2008 |<br />
51<br />
DUNGEON 161
<strong>The</strong> <strong>Temple</strong> <strong>Between</strong><br />
When the PCs first enter area B (or examine it<br />
from above), read:<br />
Pedestals and podiums scattered across the room, as well<br />
as hooks and shelves along the walls, suggest that this was<br />
once a display chamber or gallery. Though most are empty,<br />
a few hooks still boast old tapestries and paintings, while<br />
the occasional podium displays a small sculpture. It looks<br />
as though the vast majority of the artwork has been gone<br />
for ages.<br />
When the PCs first enter area C (or examine it<br />
from above), read:<br />
Alcoves along the walls and great stone sarcophagi across<br />
the chamber indicate rather dramatically that this was<br />
once a sepulcher, likely for particularly holy members of<br />
the Church. Most of the sarcophagi have been broken into,<br />
ransacked, and desecrated. <strong>The</strong> air here smells a bit stale<br />
and dusty, but any scent of decay faded centuries ago.<br />
When the PCs first enter area D (or examine it<br />
from above), read:<br />
Apparently a sitting or study room, this chamber contains<br />
little but old, decaying chairs and a few small tables barely<br />
wide enough for a large tome.<br />
When the PCs first enter area E (or examine it<br />
from above), read:<br />
This room was obviously a library at some point. <strong>The</strong><br />
shelves are mostly empty now, but they are large enough to<br />
have held several hundred books. A few heaps of molding<br />
parchment and leather are all that remain of those books<br />
that were dropped and left behind when the temple was<br />
abandoned.<br />
Perception Check<br />
DC 20: One of the piles of books has recently been<br />
disturbed. It looks much like something was removed from<br />
the bottom, allowing the rest of the heap to crumple inward.<br />
(Although the PCs cannot know this for sure, they might<br />
guess that this is where the Incunabulum Primeval was<br />
taken from—and they’d be right.)<br />
When the PCs first enter area F (or examine it<br />
from above), read:<br />
<strong>The</strong> specially carved racks and concave shelves suggest that<br />
this was once a repository for scrolls of various sizes.<br />
When the PCs first enter area G (or examine it<br />
from above), read:<br />
This rather sizable room boasts a smattering of large<br />
statues, idols, and carven pillars. <strong>The</strong>ir random placement<br />
around the chamber indicates that they’ve been moved, and<br />
the great empty spaces suggest that this room once held<br />
many more such relics than it currently does.<br />
When the PCs first enter area H, read:<br />
This building and its attachment, the only two structures<br />
in this cavern to have roofs, are clearly of far more recent<br />
construction than most everything else herein. <strong>The</strong> walls<br />
are of thin stone and do not match the surroundings, and<br />
the floor is covered haphazardly with a thin rug. Several<br />
tables and chairs sit scattered about, and a cooking<br />
cauldron occupies one corner.<br />
When the PCs first enter area I, read:<br />
What was once a bedroom has been transformed into a<br />
chamber of horrors. Old blood has matted the carpet into<br />
a thin film that crunches beneath your feet. Dull blades<br />
and needles protrude from the surface of a desk, where they<br />
were apparently stuck for safekeeping. A wooden bed frame<br />
leans against the wall at an angle; chained to it, dangling by<br />
his chafed and bloody wrists, is what appears to be a dwarf<br />
with hair and beard of writhing flame! Despite its touch,<br />
the wood of the frame shows no evidence of burning.<br />
Once the PCs begin interacting with the<br />
Caretaker—assuming combat is over—consult<br />
“Departing the <strong>Temple</strong>” in the “Mountainroot <strong>Temple</strong><br />
Overview.”<br />
2 Dragonborn Gladiators (G) Level 10 Soldier<br />
Medium natural humanoid<br />
XP 500 each<br />
Initiative +9 Senses Perception +6<br />
HP 106; Bloodied 53; see also dragonborn fury<br />
AC 24; Fortitude 23, Reflex 20, Will 21<br />
Speed 5<br />
m Bastard Sword (standard; at-will) ✦ Weapon<br />
+15 vs. AC (+16 while bloodied); see also lone fighter;<br />
1d10 + 5 damage.<br />
M Finishing Blow (standard; at-will) ✦ Weapon<br />
Target must be bloodied; +15 vs. AC (+16 while bloodied);<br />
2d10 + 5 damage, and the dragonborn gladiator’s allies<br />
gain a +2 bonus to attack rolls until the end of the<br />
dragonborn gladiator’s next turn.<br />
C Dragon Breath (minor; encounter) ✦ Fire<br />
Close blast 3; +12 vs. Reflex (+13 while bloodied); 1d6 + 4<br />
fire damage.<br />
Dragonborn Fury (only while bloodied)<br />
A dragonborn gains a +1 racial bonus to attack rolls.<br />
Gladiator’s Strike<br />
When the dragonborn gladiator hits an enemy with an<br />
opportunity attack, the target is knocked prone.<br />
Lone Fighter<br />
<strong>The</strong> dragonborn gladiator gains a +2 bonus to melee attack<br />
rolls when adjacent to only one enemy.<br />
Alignment Unaligned Languages Common, Draconic<br />
Skills Athletics +15, History +7, Intimidate +15<br />
Str 12 (+10) Dex 15 (+7) Wis 12 (+6)<br />
Con 18 (+9) Int 10 (+5) Cha 16 (+8)<br />
Equipment scale armor, bastard sword<br />
December 2008 | DUNGEON 161<br />
52
<strong>The</strong> <strong>Temple</strong> <strong>Between</strong><br />
Eidolon (E)<br />
Level 13 Controller (Leader)<br />
Large natural animate (construct) XP 800<br />
Initiative +8 Senses Perception +9<br />
Fearless Followers aura 5; allies who enter or start their turns<br />
within the aura are immune to fear.<br />
HP 132; Bloodied 66<br />
AC 28; Fortitude 26, Reflex 22, Will 23<br />
Immune disease, fear, sleep<br />
Speed 5<br />
m Slam (standard; at-will)<br />
Melee 2; +19 vs. AC; 2d8+6 damage.<br />
R Divine Retribution (immediate reaction, when an enemy<br />
attacks the eidolon while hallowed stance is active; at-will)<br />
✦ Radiant<br />
Divine radiance strikes the creature that attacked the<br />
eidolon: ranged 20; +17 vs. Reflex; 2d8 + 5 radiant<br />
damage. Miss: Half damage. This attack does not provoke<br />
opportunity attacks.<br />
R Vengeful Flames (immediate reaction, when an enemy kills<br />
one of the eidolon’s allies in the eidolon’s line of<br />
sight; at-will) ✦ Fire<br />
Divine fire engulfs the enemy: ranged 20; +17 vs. Reflex;<br />
1d8 + 5 fire damage, and ongoing 5 fire (save ends). This<br />
attack does not provoke opportunity attacks.<br />
Hallowed Stance (standard; at-will) ✦ Radiant<br />
<strong>The</strong> eidolon assumes a meditative stance. Until the end<br />
of its next turn, the eidolon gains resist 20 to all damage,<br />
and all allies in its line of sight deal 1d8 extra radiant<br />
damage on their melee attacks. If the eidolon moves, the<br />
effect ends.<br />
Alignment Unaligned Languages —<br />
Str 22 (+12) Dex 14 (+8) Wis 16 (+9)<br />
Con 20 (+11) Int 7 (+4) Cha 11 (+6)<br />
Tactics<br />
<strong>The</strong> monsters’ tactics depend largely on the PCs. If<br />
the heroes allow themselves to become trapped up<br />
on the platform, the monsters converge and try to<br />
surround them. Otherwise, they use a combination<br />
of focusing on specific PCs and fighting withdrawals<br />
to try to force the party to split up. In either case, the<br />
monsters do not remain in their starting positions,<br />
but converge on their foes as rapidly as possible. <strong>The</strong><br />
Spitting Troll<br />
Level 10 Soldier (Leader)<br />
Medium natural humanoid<br />
XP 500 each<br />
Initiative +12 Senses Perception +8<br />
HP 106; Bloodied 53; see also troll healing<br />
Regeneration 10 (if the troll takes acid or fire damage,<br />
regeneration does not function until the end of its<br />
next turn)<br />
AC 26; Fortitude 22, Reflex 23, Will 22<br />
Speed 6, climb 4<br />
m Claw (standard; at-will) ✦ Poison<br />
+17 vs. AC; 1d6 + 5 damage, plus 1d6 poison damage.<br />
r Javelin (standard; at-will) ✦ Poison, Weapon<br />
Ranged 10/20; +17 vs. AC; 1d6 + 5 damage, plus<br />
1d6 poison damage.<br />
R Acid Spit (minor; recharge ⚄ ⚅) ✦ Acid<br />
Ranged 5; +15 vs. Reflex; 1d6 acid damage.<br />
Regenerative Empowerment (minor 1/turn, at-will)<br />
One troll within 10 squares whose regeneration is<br />
currently inactive (as a result of taking acid or fire damage)<br />
immediately reactivates the regeneration.<br />
Troll Healing ✦ Healing<br />
If the troll is reduced to 0 hit points by an attack that does<br />
not deal acid or fire damage, it rises on its next turn (as a<br />
move action) with 10 hit points.<br />
Alignment Chaotic evil Languages Common, Giant<br />
Skills Athletics +13, Endurance +14<br />
Str 16 (+8) Dex 21 (+10) Wis 17 (+8)<br />
Con 18 (+9) Int 10 (+5) Cha 13 (+6)<br />
Equipment leather armor, 10 javelins<br />
larger and stronger creatures are fond of bullrushing<br />
foes off the edge of the stairs or the crystal platform.<br />
<strong>The</strong> eidolon never retreats to ground level, since it<br />
can keep line of sight to more allies from on high. If<br />
all the creatures but the eidolon are slain, it freezes,<br />
awaiting further instructions from the Caretaker. All<br />
other creatures here fight to the death.<br />
6 Streetwise Thugs (S) Level 9 Minion<br />
Medium natural humanoid, human<br />
XP 100 each<br />
Initiative +3 Senses Perception +3<br />
HP 1; a missed attack never damages a minion.<br />
AC 21; Fortitude 19, Reflex 16, Will 16<br />
Speed 6<br />
m Longsword (standard; at-will) ✦ Weapon<br />
+14 vs. AC; 6 damage.<br />
r Crossbow (standard; at-will) ✦ Weapon<br />
Ranged 15/30; +13 vs. AC; 6 damage.<br />
Murder is a Team Sport<br />
If a streetwise thug is flanking an enemy, it deals 1 extra<br />
point of damage per ally adjacent to the flanked enemy<br />
(including the ally who is granting the flank), to<br />
a maximum of +4.<br />
Alignment Evil Languages Common<br />
Skills Athletics +11, Thievery +8<br />
Str 16 (+7) Dex 12 (+5) Wis 10 (+4)<br />
Con 15 (+6) Int 9 (+3) Cha 11 (+4)<br />
Equipment leather armor, crossbow, longsword, case<br />
with 20 bolts<br />
2 Trolls (T) Level 9 Brute<br />
Large natural humanoid<br />
XP 400 each<br />
Initiative +7 Senses Perception +11<br />
HP 100; Bloodied 50; see also troll healing<br />
Regeneration 10 (if the troll takes acid or fire damage,<br />
regeneration does not function until the end of its<br />
next turn)<br />
AC 20; Fortitude 21, Reflex 18, Will 17<br />
Speed 8<br />
m Claw (standard; at-will)<br />
Melee 2; +13 vs. AC; 2d6 + 6 damage; see also<br />
frenzied strike.<br />
M Frenzied Strike (free, when the troll’s attack bloodied an<br />
enemy; at-will)<br />
<strong>The</strong> troll makes a claw attack.<br />
Troll Healing ✦ Healing<br />
If the troll is reduced to 0 hit points by an attack that does<br />
not deal acid or fire damage, it rises on its next turn (as a<br />
move action) with 10 hit points.<br />
Alignment Chaotic evil Languages Giant<br />
Skills Athletics +15, Endurance +14<br />
Str 22 (+10) Dex 16 (+7) Wis 14 (+6)<br />
Con 20 (+9) Int 5 (+1) Cha 10 (+4)<br />
December 2008 |<br />
53<br />
DUNGEON 161
<strong>The</strong> <strong>Temple</strong> <strong>Between</strong><br />
Features of the Area<br />
Illumination: <strong>The</strong> crystalline platform provides<br />
its own glow, as does the door to the Astral Sea, and it<br />
brightly illuminates the entire chamber.<br />
Ceiling: <strong>The</strong> ceiling of the chamber is a full 100<br />
feet above the ground floor. <strong>The</strong> crystal platform—<br />
which forms a ceiling or partial ceiling for the rooms<br />
on the ground—is 20 feet above that level. <strong>The</strong> ceiling<br />
of buildings H and I is 10 feet above the ground.<br />
Crystal Platform: Although hard as stone, the<br />
crystal platform is as transparent as fine glass. This<br />
allows line of sight, but not line of effect. <strong>The</strong>re is no<br />
railway or wall around the platform.<br />
Doors: <strong>The</strong> doors into areas H and I are locked,<br />
requiring a DC 22 Thievery check to open. <strong>The</strong><br />
doors to the Astral Sea (marked A) are covered in all<br />
manner of abstract carvings and flowing runes.<br />
Furniture, Display Cases, and Shelves: <strong>The</strong><br />
various chambers are filled with furniture—some<br />
intact, some broken. Assume that, at any time it matters,<br />
a piece of furniture requires an extra square of<br />
movement to stand on and can provide cover.<br />
Secret Doors: <strong>The</strong> secret doors in the statues<br />
require a DC 25 Perception check to locate. <strong>The</strong> door<br />
in the northwest statue opens onto a spiral stair that<br />
leads into an underground passage (not mapped).<br />
This eventually leads to another spiral stair, which<br />
comes up to the secret trapdoor in the vault (M5). <strong>The</strong><br />
secret door in the northeast statue leads to a spiral<br />
stair that leads to a dead end passage (not mapped).<br />
This used to connect to the barracks at M7, but most<br />
of the corridor, and the specific room to which it<br />
connected, have long since collapsed.<br />
Walls: <strong>The</strong> walls of the<br />
chamber, and the walls<br />
of the southern passage/<br />
staircase, rise from floor<br />
to ceiling. <strong>The</strong> walls of<br />
the various chambers that<br />
stand partly or entirely<br />
beneath the crystalline<br />
platform rise 20 feet high.<br />
<strong>The</strong> portions of those<br />
rooms that jut beyond the<br />
crystal are not roofed; a<br />
creature can walk along<br />
the top of the walls, but<br />
they’re narrow, requiring<br />
a DC 25 Acrobatics check<br />
for each standard or move<br />
action taken.<br />
December 2008 | DUNGEON 161<br />
54
<strong>The</strong> <strong>Temple</strong> <strong>Between</strong><br />
M10:<br />
THE UNDERCHAMBERS<br />
Encounter Level 8 (1,800 XP)<br />
Setup<br />
2 marching hammers (H)<br />
Radiant tendrils trap<br />
In the chambers formerly used by priests of Moradin<br />
for elements of daily life, the temple’s mystical<br />
defenses are as crazed as ever, thanks to the<br />
Caretaker’s incipient madness.<br />
When the PCs trigger the radiant tendrils, read:<br />
A whiplike tendril of piercing white light, so bright it<br />
threatens to blind the eye, reaches through the floor, as<br />
though the room seeks to wrap you in its coils.<br />
When the PCs first see the marching hammers,<br />
either because they have come to the constructs<br />
or vice-versa, read:<br />
A halfling-sized block of iron lumbers into view. It appears<br />
to be little more than an anvillike body with squat legs and<br />
a pair of heavy hammers at the end of long, writhing arms.<br />
When the PCs first enter area A, read:<br />
This chamber was apparently a foyer or waiting room. A<br />
ragged rug covers the floor, with a few old indentations<br />
indicating where chairs used to sit. <strong>The</strong> northeast door is<br />
ajar, showing a cloakroom with empty pegs protruding<br />
from the walls.<br />
When the PCs first enter area B, read:<br />
A great many doors line the walls in this chamber. A few are<br />
ajar, showing what appear to be wooden-walled monastic<br />
cells beyond them.<br />
When the PCs first enter area C, read:<br />
Nothing remains in this room but a few smatterings of<br />
broken furniture. Any hint of its original purpose was lost<br />
when the eastern wall partially collapsed long ago.<br />
When the PCs first enter area D, read:<br />
Despite the damage, this room still obviously serves as a<br />
combination meeting hall and library. A long table sits<br />
amid a smattering of chairs, and the chamber’s western<br />
side is occupied by a more heavily upholstered chair, a<br />
bookcase, and a small altar to Moradin. All are covered in a<br />
fine coating of dust.<br />
When the PCs first enter area E, read:<br />
You’ve stepped into what appears to be an actual forge,<br />
which was perhaps used for ceremonial purposes or the<br />
creation of magic items. Two anvils occupy the room’s<br />
northern side, while a fire pit filled with ancient white-gray<br />
ashes takes up the center of the chamber. Against the south<br />
wall, a larger anvil stands beneath the unblinking gaze of a<br />
statue of Moradin.<br />
When the PCs first enter area F, read:<br />
Whatever purpose this cave-in damaged chamber might<br />
once have served, it now appears as little more than an<br />
empty hollow.<br />
Radiant Tendrils<br />
Level 13 Obstacle<br />
Trap<br />
800 XP<br />
Gleaming tendrils of white light whip out to lash at you.<br />
Perception<br />
✦ DC 27: <strong>The</strong> character notices something strange about<br />
the area ahead, as though the floor was somehow<br />
absorbing a bit of the ambient light.<br />
Additional Skill: Arcana<br />
✦ DC 23: <strong>The</strong> character recognizes a faint glow from, and a<br />
sequence of runes scratched into, the fire pit, and realizes<br />
this is the trap’s source. (<strong>The</strong> character must be in the<br />
forge [room E] to accomplish this.)<br />
✦ DC 31: <strong>The</strong> party gains a +2 bonus to Thievery checks to<br />
disable the trap.<br />
Trigger<br />
When a creature enters or begins its turn in a trapped<br />
square, the trap attacks.<br />
Attack<br />
Opportunity Action Melee<br />
Target: Creature in a trapped square<br />
Attack: +18 vs. AC<br />
Hit: 2d10 + 6 radiant damage and blind until the end of the<br />
target’s next turn.<br />
Aftereffect: –2 to attack rolls and checks until the end of<br />
the target’s next turn.<br />
Countermeasures<br />
✦ A character who makes a successful DC 27 Acrobatics<br />
check can move through a trigger square without<br />
provoking the attack. <strong>The</strong> squares count as difficult<br />
terrain.<br />
✦ An adjacent character can disable a trigger plate with a<br />
DC 31 Thievery check.<br />
December 2008 |<br />
55<br />
DUNGEON 161
<strong>The</strong> <strong>Temple</strong> <strong>Between</strong><br />
2 Marching Hammers (H) Level 10 Brute<br />
Small natural animate (construct, homunculus) XP 500 each<br />
Initiative +4 Senses Perception +12; darkvision<br />
HP 129; Bloodied 64<br />
AC 23; Fortitude 23, Reflex 17, Will 19<br />
Immune disease, poison, sleep<br />
Speed 6<br />
m Hammer Hand (standard; at-will)<br />
+13 vs. AC; 3d6 + 5 damage.<br />
M Hammering Charge (standard; at-will)<br />
<strong>The</strong> marching hammer can use this power as a part of<br />
a charge; +13 vs. AC; 3d6 + 5 damage, plus target is<br />
knocked prone.<br />
Beat <strong>The</strong>m When <strong>The</strong>y’re Down<br />
<strong>The</strong> marching hammer deals 1d6 extra damage when<br />
attacking a prone enemy.<br />
Guard Area (see Monster Manual, page 156)<br />
A marching hammer can make a hammering charge attack<br />
against any creature in its guarded area, even if the power<br />
hasn’t recharged. If the marching hammer uses a charge<br />
attack to make its hammering charge, its speed increases to<br />
8 when making that charge.<br />
Alignment Unaligned Languages —<br />
Skills Perception +12<br />
Str 21 (+10) Dex 8 (+4) Wis 14 (+7)<br />
Con 19 (+9) Int 5 (+2) Cha 13 (+6)<br />
Tactics<br />
<strong>The</strong> marching hammers attack characters in their<br />
guarded area over other targets, but otherwise seek to<br />
slay all intruders. <strong>The</strong>y try to approach intruders from<br />
opposite directions, making use of various doorways<br />
and corridors to flank foes. <strong>The</strong>y fight in or near the<br />
trapped squares, since the trap is mystically attuned<br />
to them and they do not trigger it. <strong>The</strong> hammers have<br />
no compunctions about going through the wooden<br />
walls between penitent’s cells if that’s the best means<br />
of getting at an enemy.<br />
Features of the Area<br />
Illumination: <strong>The</strong> only illumination is what the<br />
PCs bring with them.<br />
Ceiling: <strong>The</strong> ceiling is 15 feet overhead.<br />
Anvils: <strong>The</strong> three anvils in the forge are all but<br />
impossible to move. <strong>The</strong>y provide cover, and a creature<br />
can step up onto one with an extra square of<br />
movement.<br />
Bookcase: <strong>The</strong> bookcase in room D has no more<br />
books left on it, but it can be climbed with a DC 10<br />
Athletics check.<br />
Chairs: <strong>The</strong> chairs are not sufficient<br />
to provide cover, but a character can step<br />
up onto one with an extra square of movement,<br />
or use one as a makeshift weapon.<br />
Fire Pit: <strong>The</strong> fire pit has no fire in it,<br />
but it is the source of the radiant tendrils<br />
trap.<br />
Marching Hammer Guarded Areas:<br />
<strong>The</strong> guarded areas of the homunculi are<br />
marked on the map.<br />
Radiant Tendrils: <strong>The</strong> trapped<br />
squares are marked on the map.<br />
Statue: This statue of Moradin carries<br />
a hammer and tongs, as though in the<br />
midst of forging.<br />
Table: A character can step up onto<br />
the table with an extra square of movement.<br />
A DC 25 Strength check topples the<br />
table over, allowing it to serve as cover and<br />
knocking prone any creatures standing<br />
on it.<br />
Wooden Walls: <strong>The</strong> walls between the penitent’s<br />
cells are flimsy wood. <strong>The</strong>y can be broken through<br />
with a DC 15 Strength check; this takes an extra<br />
square of movement. If the creature beats a DC 20<br />
Strength check, this does not require an extra square.<br />
December 2008 | DUNGEON 161<br />
56
<strong>The</strong> <strong>Temple</strong> <strong>Between</strong><br />
SC3: COUNCIL OF WAR<br />
Encounter Level 9 (1,200 XP)<br />
Setup<br />
Once the PCs reach the council chamber, begin the<br />
skill challenge.<br />
Council of War Level 9<br />
Skill Challenge XP 1,200<br />
You find yourselves, along with the present members of the<br />
council, High Priest Durkik, and several officers, standing in<br />
a perfectly square room of stone walls. A table in the center of<br />
the room boasts an intricate model of Overlook, while each of<br />
the walls showcases maps of the surrounding area.<br />
Great Elder Morgoff asks Durkik to offer a prayer to Moradin<br />
to open the meeting. Once done, he says, “Overlook is a<br />
martial city. We have mighty walls, strong soldiers. But we<br />
are accustomed to fighting foes such as orcs, not monstrous<br />
enemies such as trolls, who rise again each time they fall. My<br />
friends, you have more experience with such things. Will you<br />
help us plan And would you make yourselves available to us<br />
throughout the siege, to deal with such dangers as our guards—<br />
skilled though they are—are unprepared to face I offer you<br />
what reward I can for your help, though I cannot cite you<br />
numbers or amounts until I see what resources remain when—<br />
if—Overlook survives the coming days.”<br />
<strong>The</strong> PCs must aid the Council of Elders and the officers of the<br />
garrison in devising a defense for the city.<br />
Complexity 3<br />
(requires 8 successes before 3 failures).<br />
Primary Skills<br />
History, Insight, Intimidate, Religion, Thievery.<br />
Victory<br />
<strong>The</strong> PCs have helped come up with a viable defensive plan,<br />
and they gain victory points accordingly.<br />
Defeat<br />
<strong>The</strong> PCs cannot meaningfully contribute, and do not gain<br />
victory points.<br />
Special If the players themselves come up with any<br />
creative uses of the city map or terrain for defensive<br />
purposes, grant them 1 or 2 automatic successes.<br />
History (DC 20)<br />
A successful check counts as a success on the skill challenge.<br />
<strong>The</strong> PC draws on knowledge of past sieges over the<br />
course of history and suggests strategies accordingly.<br />
Insight (DC 16)<br />
This doesn’t qualify as a success, but succeeding on this<br />
check grants the party a +2 bonus to all further checks<br />
in this challenge until someone fails a check. However,<br />
failure on this check imposes a –2 penalty to all further<br />
checks in this challenge until someone succeeds on a<br />
check. In either case, Insight can be used only once in<br />
this fashion.<br />
With thought and contemplation, the PC anticipates<br />
some of the actions that the enemy is likely to take.<br />
Intimidate (DC 20)<br />
A successful check counts as a success on the skill challenge,<br />
but the group can gain up to 3 successes with this skill<br />
only.<br />
By giving careful consideration to what sorts of positions<br />
and defenses are likely to be the most frightening or<br />
disheartening, the PC suggests effective placements for<br />
the soldiers.<br />
Religion (DC 20)<br />
A successful check counts as a success on the skill challenge.<br />
Rather than focusing on historical accounts, the PC<br />
instead draws on knowledge of various battles described<br />
in the myths and tales of the world’s religions.<br />
Thievery (DC 20)<br />
A successful check counts as a success on the skill challenge,<br />
but the group can gain up to 3 successes with this skill<br />
only.<br />
<strong>The</strong> PC’s knowledge of tricks and traps allows the PC<br />
to suggest various means to slow the enemy’s advance,<br />
either through stealthily placed troops or hidden traps<br />
and obstacles.<br />
Once the skill challenge is complete (for good or<br />
ill), Great Elder Morgoff’s shoulders slump. “I fear<br />
we’ve done all we can for now,” he says. “We must go<br />
and spread word to our soldiers of what is to come,<br />
and what they must do. My friends,” he says to the<br />
PCs, “if you are willing, I would have you stay here<br />
at Caer Overlook tonight, so that you are ready on a<br />
moment’s notice. I can have people show you to guest<br />
quarters. I suggest we all get a good night’s sleep; I<br />
fear the next days will be tiring indeed.”<br />
December 2008 |<br />
57<br />
DUNGEON 161
<strong>The</strong> <strong>Temple</strong> <strong>Between</strong><br />
T2: DEATH FROM<br />
ABOVE<br />
Encounter Level 10 (2,500 XP)<br />
Setup<br />
1 berbalang (B), initially with two duplicates (D)<br />
Among the various forces Zithiruun has hired for the<br />
assault on Overlook is a trio of berbalangs, who have<br />
been promised not only substantial riches, but first<br />
pick of the captives and of the dead for their larders.<br />
Thankfully, the PCs themselves only have to deal<br />
with one.<br />
As the battle commences, the berbalang swoops<br />
over a poor neighborhood in the Nine Bells district,<br />
dropping alchemical firebombs. It’s not a tactically<br />
important target, but it’s great for spreading panic,<br />
and the plethora of old buildings and wooden structures<br />
mean the flames will spread. <strong>The</strong> berbalang is<br />
already split into three different forms (the original<br />
and two duplicates), meaning the original currently<br />
has 204 hit points and the two duplicates each have<br />
102.<br />
Berbalang<br />
Level 10 Solo Skirmisher<br />
Medium immortal humanoid XP 2,500<br />
Initiative +13 Senses Perception +6<br />
HP 408; Bloodied 204<br />
AC 25; Fortitude 22, Reflex 25, Will 21; see also psychic<br />
deflection<br />
Saving Throws +5<br />
Speed 6, fly 8<br />
Action Points 2<br />
m Claw (standard; at-will)<br />
+14 vs. AC; 1d8 + 6 damage.<br />
Summon Duplicate (minor, not while bloodied; at-will) ✦<br />
Conjuration, Psychic<br />
<strong>The</strong> berbalang manifests an exact duplicate of itself in an<br />
unoccupied adjacent square. It can have no more than<br />
four duplicates at once, and duplicates cannot summon<br />
other duplicates. When a duplicate appears, it makes an<br />
initiative check and joins the battle on that initiative count.<br />
All damage a duplicate deals is treated as psychic damage.<br />
A duplicate has the same statistics as the berbalang<br />
except for its hit points. When the berbalang manifests a<br />
duplicate, the berbalang loses one-quarter of its current hit<br />
points and the duplicate appears with that quantity<br />
of hit points. <strong>The</strong> berbalang’s maximum number of hit<br />
points remains the same.<br />
When the PCs approach, read:<br />
Flames dance across a cluster of rooftops, and the crackling<br />
from the fire drowns out the screams of panic as citizens<br />
scramble in all directions. In the smoky air above, a trio of<br />
horrid winged humanoids, with mottled blue skin, whirl<br />
about on the inferno-birthed updrafts. Every few moments,<br />
one of them hurls a clay jug that bursts into flames as it<br />
strikes a nearby building.<br />
Duplicates last until the berbalang reaches 0 hit points,<br />
absorbs them, or uses sacrifice. A duplicate must stay within<br />
10 squares of the berbalang at all times or it disappears.<br />
Absorb Duplicate (standard; at-will) ✦ Healing<br />
<strong>The</strong> berbalang absorbs a duplicate adjacent to it and regains<br />
50 hit points.<br />
Berbalang Sneak Attack<br />
A berbalang or a duplicate that flanks an enemy with<br />
another duplicate deals 1d8 extra damage on melee<br />
attacks against that enemy.<br />
A Sacrifice (standard; at-will) ✦ Psychic<br />
Area burst 1 centered on a duplicate; the berbalang can<br />
cause one of its duplicates to explode in a burst of psychic<br />
gore; +11 vs. Fortitude; 2d8 + 6 psychic damage, plus the<br />
target is dazed (save ends). Miss: No damage, but the target<br />
is dazed (save ends). Effect: <strong>The</strong> berbalang takes 25 damage.<br />
Psychic Deflection (immediate reaction, when the berbalang is<br />
damaged by an attack; at-will) ✦ Psychic<br />
<strong>The</strong> berbalang can deflect the damage it takes from<br />
an attack to one of its duplicates. Any effects or secondary<br />
attacks included in the attack are also deflected to the<br />
duplicate. <strong>The</strong> damage a duplicate takes in this way is<br />
considered psychic damage.<br />
Alignment Evil Languages Supernal<br />
Str 16 (+8) Dex 22 (+11) Wis 13 (+6)<br />
Con 14 (+7) Int 14 (+7) Cha 15 (+7)<br />
Tactics<br />
<strong>The</strong> true berbalang stays at range for the first few<br />
rounds, allowing its duplicates to close for melee.<br />
If any PCs are far enough from its duplicates that it<br />
won’t hit them, it makes use of its special “firebomb”<br />
attack (see below). When a duplicate nears death<br />
(down to about one-quarter of its starting hit points),<br />
the berbalang moves in and absorbs it. It might then<br />
engage in combat, or spawn a new duplicate and<br />
retreat to range, depending on how effective the PCs<br />
are with distance attacks. Once the berbalang is<br />
down to fewer than 50 hit points, it won’t spawn any<br />
more duplicates, for fear of—so to speak—spreading<br />
itself too thin.<br />
December 2008 | DUNGEON 161<br />
58
<strong>The</strong> <strong>Temple</strong> <strong>Between</strong><br />
SPECIAL ATTACK<br />
<strong>The</strong> berbalang has three more firebombs in its possession.<br />
It makes an attack roll when it throws the<br />
firebomb, but it misses only on a natural 1, because<br />
it’s not aiming for an individual, merely a particular<br />
square. (On a natural 1, select a random square adjacent<br />
to the one at which it was aiming.) <strong>The</strong> firebomb<br />
explodes in a burst 1. It causes no immediate damage,<br />
but it fills those squares with fire as defined in “Features<br />
of the Area.”<br />
Features of the Area<br />
Illumination: <strong>The</strong> combination of daylight and<br />
fire provide as much bright light as the PCs could<br />
ever want.<br />
Boards: <strong>The</strong>se boards were placed to facilitate<br />
evacuation from one building to another. <strong>The</strong>y can be<br />
kicked or pushed off with a DC 5 Athletics check, or a<br />
DC 20 Athletics check if someone is currently standing<br />
on them.<br />
Buildings: <strong>The</strong> buildings range from one to four<br />
stories (2 to 8 squares) in height. Climbing the walls<br />
requires a DC 15 Athletics check.<br />
Fire: <strong>The</strong> marked squares are on fire when combat<br />
begins. Creatures can enter or move through the<br />
squares unharmed—essentially running through the<br />
flames—but any creature that begins its turn in a fiery<br />
square takes 2d6 fire damage.<br />
At the start of the berbalang’s turn each round, one<br />
square adjacent to each fiery square becomes a fiery<br />
square. (Either choose or determine randomly.)<br />
December 2008 |<br />
59<br />
DUNGEON 161
<strong>The</strong> <strong>Temple</strong> <strong>Between</strong><br />
T3: HOLD THE WALL!<br />
Encounter Level 12 (3,500 XP)<br />
Setup<br />
1 spitting troll (P)<br />
1 two-headed troll (T)<br />
2 war trolls (W)<br />
A squad of monstrous trolls, using a battering ram<br />
made of a bronze-capped tree trunk, has smashed a<br />
hole in one of the outer walls. <strong>The</strong> soldiers there have<br />
been driven back, and if someone doesn’t stop them,<br />
the trolls will have free run of the city. “Someone”<br />
being the PCs, of course.<br />
(Assume a few other trolls are present, but that the<br />
Overlook soldiers are dealing with them. On occasion,<br />
throw in a bit of description to remind the PCs<br />
that they aren’t the only ones fighting.)<br />
When the PCs arrive, read:<br />
Rubble lies strewn about—rubble that used to be a 15-foot<br />
stretch of wall. Visible just beyond is a huge tree trunk,<br />
capped with bronze—presumably, the battering ram that<br />
created that hole.<br />
Moving through the gap are several hideous trolls. <strong>The</strong><br />
city guards appear to have a few occupied, but others—two<br />
in heavy armor, one with two heads, and one far smaller<br />
than the others—are moving unimpeded into the streets.<br />
Spitting Troll (P)<br />
Level 10 Soldier (Leader)<br />
Medium natural humanoid XP 500<br />
Initiative +12 Senses Perception +8<br />
HP 106; Bloodied 53; see also troll healing<br />
Regeneration 10 (if the troll takes acid or fire damage,<br />
regeneration does not function until the end of its<br />
next turn)<br />
AC 26; Fortitude 22, Reflex 23, Will 22<br />
Speed 6, climb 4<br />
m Claw (standard; at-will) ✦ Poison<br />
+17 vs. AC; 1d6 + 5 damage, plus 1d6 poison damage.<br />
r Javelin (standard; at-will) ✦ Poison, Weapon<br />
Ranged 10/20; +17 vs. AC; 1d6 + 5 damage, plus<br />
1d6 poison damage.<br />
R Acid Spit (minor; recharge ⚄ ⚅) ✦ Acid<br />
Ranged 5; +15 vs. Reflex; 1d6 acid damage.<br />
Regenerative Empowerment (minor 1/turn, at-will)<br />
One troll within 10 squares whose regeneration is<br />
currently inactive (as a result of taking acid or fire damage)<br />
immediately reactivates the regeneration.<br />
Troll Healing ✦ Healing<br />
If the troll is reduced to 0 hit points by an attack that does<br />
not deal acid or fire damage, it rises on its next turn (as a<br />
move action) with 10 hit points.<br />
Alignment Chaotic evil Languages Common, Giant<br />
Skills Athletics +13, Endurance +14<br />
Str 16 (+8) Dex 21 (+10) Wis 17 (+8)<br />
Con 18 (+9) Int 10 (+5) Cha 13 (+6)<br />
Equipment leather armor, 10 javelins<br />
Tactics<br />
<strong>The</strong> two-headed troll is a straightforward combatant,<br />
charging in and attempting to pulp the PCs into<br />
the ground. <strong>The</strong> war trolls make use of slightly more<br />
intelligent tactics, flanking or trying to fight from<br />
behind difficult terrain, taking full advantage of<br />
reach. <strong>The</strong> spitting troll remains at range and throws<br />
javelins.<br />
Two-Headed Troll<br />
Level 10 Elite Brute<br />
Large natural humanoid XP 1,000<br />
Initiative +5 Senses Perception +7<br />
HP 264; Bloodied 132; see also troll healing<br />
Regeneration 10 (if the troll takes acid or fire damage,<br />
regeneration does not function until the end of its<br />
next turn)<br />
AC 25; Fortitude 27, Reflex 19, Will 20<br />
Saving Throws +2<br />
Speed 6<br />
Action Points 1<br />
m Claw (standard; at-will)<br />
Melee 2; +13 vs. AC; 3d6 + 7 damage.<br />
M Smackdown (immediate reaction, when an enemy moves into<br />
a position that flanks the two-headed troll; at-will)<br />
<strong>The</strong> two-headed troll targets one creature flanking it; +11<br />
vs. Fortitude; the target is knocked prone.<br />
Double Actions<br />
A two-headed troll rolls initiative twice, gets two turns<br />
during a round, and has a full set of actions (standard,<br />
move, minor) on each turn. Each set of actions corresponds<br />
to a different head. <strong>The</strong> troll’s ability to take immediate<br />
actions refreshes on each of its turns.<br />
Dual Brain<br />
At the end of its turn, the two-headed troll automatically<br />
succeeds on all saving throws against the dazed and<br />
stunned conditions and against charm effects that a save<br />
can end.<br />
Troll Healing ✦ Healing<br />
If the troll is reduced to 0 hit points by an attack that does<br />
not deal acid or fire damage, it rises on its next turn (as a<br />
move action) with 10 hit points.<br />
Alignment Chaotic evil Languages Giant<br />
Str 24 (+12) Dex 10 (+5) Wis 14 (+7)<br />
Con 22 (+11) Int 6 (+3) Cha 10 (+5)<br />
Equipment hide armor<br />
December 2008 | DUNGEON 161<br />
60
<strong>The</strong> <strong>Temple</strong> <strong>Between</strong><br />
2 War Trolls (W) Level 14 Soldier<br />
Large natural humanoid<br />
XP 1,000 each<br />
Initiative +12 Senses Perception +15<br />
HP 110; Bloodied 55; see also troll healing<br />
Regeneration 10 (if the troll takes acid or fire damage,<br />
regeneration does not function until the end of its<br />
next turn)<br />
AC 30; Fortitude 29, Reflex 25, Will 25<br />
Speed 7<br />
m Greatsword (standard; at-will) ✦ Weapon<br />
Melee 2; +20 vs. AC; 1d12 + 7 damage, and the target is<br />
marked until the end of the war troll’s next turn.<br />
m Claw (standard; at-will)<br />
Melee 2; +20 vs. AC; 2d6 + 7 damage.<br />
r Longbow (standard; at-will) ✦ Weapon<br />
Ranged 20/40; +20 vs. AC; 1d12 + 3 damage.<br />
C Sweeping Strike (standard; at-will) ✦ Weapon<br />
Requires greatsword; close blast 2; +20 vs. AC; 1d12 + 7<br />
damage, and the target is knocked prone.<br />
Blood Pursuit (immediate reaction, when a bloodied enemy<br />
within 2 squares of the war troll moves or shifts; at-will)<br />
<strong>The</strong> war troll shifts 1 square closer to the enemy.<br />
Threatening Reach<br />
<strong>The</strong> war troll can make opportunity attacks against all<br />
enemies within its reach (2 squares).<br />
Troll Healing ✦ Healing<br />
If the war troll is reduced to 0 hit points by an attack that<br />
does not deal acid or fire damage, it rises on its next turn<br />
(as a move action) with 15 hit points.<br />
Alignment Chaotic evil Languages Giant<br />
Skills Athletics +17, Endurance +15<br />
Str 24 (+14) Dex 16 (+10) Wis 16 (+10)<br />
Con 20 (+12) Int 10 (+7) Cha 12 (+8)<br />
Equipment plate armor, greatsword, longbow, quiver of<br />
30 arrows<br />
Features of the Area<br />
Illumination: This encounter takes place in<br />
bright daylight.<br />
Buildings: <strong>The</strong> buildings range from two to eight<br />
stories (4 to 16 squares) in<br />
height. Climbing the walls<br />
requires a DC 15 Athletics<br />
check.<br />
Rubble: <strong>The</strong> rubble<br />
qualifies as difficult terrain.<br />
December 2008 |<br />
61<br />
DUNGEON 161
<strong>The</strong> <strong>Temple</strong> <strong>Between</strong><br />
SC4: COMBING THE<br />
WRECKAGE<br />
Encounter Level 11 (1,800 XP)<br />
Setup<br />
One of the councilors is in trouble, and the PCs<br />
receive a request for assistance. <strong>The</strong> skill challenge<br />
begins with this request.<br />
Combing the Wreckage Level 11<br />
Skill Challenge XP 1,800<br />
Without warning, you hear Great Elder Morgoff ’s voice in<br />
your head. “Our diviners have located Councilor Mountainhome.<br />
A siege missile struck her home, which now burns as she<br />
lies unconscious! Please save her!”<br />
Although the PCs likely don’t know where Elder<br />
Mountainhome lives, anyone they ask can point them<br />
in the right direction: an expensive apartment in<br />
Stonehammer.<br />
<strong>The</strong> PCs must search through a burning, crumbling<br />
building in search of Counselor Itrika Mountainhome.<br />
Complexity 3<br />
(requires 8 successes before 3 failures).<br />
Primary Skills<br />
Acrobatics, Athletics, Endurance, Heal, Perception.<br />
Victory<br />
<strong>The</strong> party finds the unconscious Itrika and successfully pulls<br />
her out before she chokes to death or is crushed.<br />
Defeat<br />
<strong>The</strong> party is too late to save the councilor, who dies in the<br />
inferno.<br />
Special Reward creative use of magic. Perhaps various<br />
resistance-based spells can grant automatic Endurance<br />
successes, while using cold-based spells on the fires<br />
reduces the DCs of some of the checks.<br />
Acrobatics (DC 21)<br />
A successful check counts as a success on the skill challenge.<br />
Moving as swiftly and lithely as possible, the PC dodges<br />
around falling timbers and pockets of flame.<br />
Athletics (DC 21)<br />
A successful check counts as a success on the skill challenge.<br />
With a surge of strength, the PC bursts through<br />
intervening doors, reaches up to deflect crumbling roofs,<br />
or hauls a companion off a collapsing stair.<br />
Endurance (DC 17)<br />
At least one character must attempt this check every round,<br />
or it counts as attempting and failing the check. A success<br />
on this check grants no benefit; a failure on this check<br />
costs everyone in the party a healing surge, but does not<br />
count as a failure for purposes of the skill challenge.<br />
Despite the blazing heat, the choking smoke, and the<br />
blinding dust, the PC is not only able to keep going, but<br />
to keep friends moving as well.<br />
Heal (DC 25)<br />
A success on this check counts as both a success on the skill<br />
challenge and grants an automatic success on the party’s<br />
next Endurance check in this challenge (or counters an<br />
Endurance failure rolled earlier in the round).<br />
Acting swiftly, the PC uses moistened cloths and herbal<br />
remedies to alleviate some of the burns and choking<br />
among the party.<br />
Perception (DC 21)<br />
This does not count as a success on the skill challenge, but<br />
grants you a +2 bonus to all future Acrobatics, Athletics,<br />
and Heal checks in this challenge, until the next failure.<br />
Squinting and concentrating, the PC finds his or her way,<br />
and leads allies through the smoke, the embers, and the<br />
falling rubble.<br />
If the PCs succeed in rescuing the councilor, they<br />
receive thanks and an offer to meet up again after the<br />
current troubles are over. If she isn’t brought to consciousness<br />
by the PCs, you could allow them to find<br />
someone who is willing to do so and possibly even<br />
help get her to safety.<br />
December 2008 | DUNGEON 161<br />
62
<strong>The</strong> <strong>Temple</strong> <strong>Between</strong><br />
T5: THE FINAL<br />
ENCOUNTER<br />
Encounter Level 15 (6,100 XP)<br />
Setup<br />
General Zithiruun (Z)<br />
Rathoraiax (R)<br />
2 dragonborn gladiators (G)<br />
1 dragonborn raider (D)<br />
1 redspawn firebelcher (B)<br />
This is it. <strong>The</strong> party is about to come face to face with<br />
General Zithiruun and learn the identity of their<br />
enemy. This is the final battle of the siege and of the<br />
adventure, at least where the PCs are concerned. And<br />
if they’re not very careful and skilled, it might be their<br />
last one ever.<br />
When the PCs arrive, read:<br />
Scattered around the open courtyard, and across the<br />
stoops of the nearby buildings, are the corpses of dozens of<br />
Overlook’s soldiers. Some are badly burned, some slashed<br />
to ribbons, and some rotting as though they’d lain dead for<br />
weeks on end. Two dragonborn in heavy armor wait across<br />
the courtyard; one stands beside a large, red-scaled reptile<br />
exhaling large puffs of smoke.<br />
Perception Check<br />
DC 26: Hiding amid the rubble and ruin is another<br />
dragonborn, one of darker scales and armor, wielding a<br />
pair of broad-bladed daggers.<br />
On the second round of combat, on Zithiruun’s<br />
initiative, read:<br />
A horrific boom reverberates from a nearby building as<br />
a massive beast soars over the rooftop, knocking several<br />
of the stones from their place. What appears to be a dead<br />
dragon, its scales dull, its gray leather skin showing between<br />
the gaps, rises into the air on broken wings. <strong>The</strong> entire top<br />
of its jaw is missing, showing upward pointing teeth and a<br />
wormlike tongue that thrashes about with a mind of its own.<br />
And riding atop that beast is a humanoid figure clad<br />
in heavy hides, contained within a body harness of iron<br />
joints and leather straps. His limbs and face are gaunt,<br />
nearly desiccated. Several old wounds hang open, leaking<br />
trails of blood and puss, showing bare bone in some spots<br />
and metal plates in others. But despite his old injuries and<br />
deformities, his narrow features and his yellowed, leathery<br />
skin clearly mark him as one of the dread githyanki, raiders<br />
and conquerors of the Astral Sea.<br />
Zithiruun, the Broken General (Z) Level 14 Elite<br />
Skirmisher (Leader)<br />
Medium natural humanoid XP 2,000<br />
Initiative +15 Senses Perception +9<br />
HP 280; Bloodied 140<br />
AC 30; Fortitude 26; Reflex 29; Will 28<br />
Resist 10 psychic<br />
Saving Throws +2 (+4 against charm effects)<br />
Speed 6<br />
Action Points 1<br />
m Silver Saber (standard; at-will) ✦ Psychic, Weapon<br />
+19 vs. AC; 1d8 + 6 damage plus 1d8 psychic damage.<br />
r Thrown Saber (standard; at-will) ✦ Psychic, Weapon<br />
Ranged 5/10 if thrown; +19 vs. AC; 1d8 + 6 damage plus<br />
1d8 psychic damage.<br />
Special: If thrown, the weapon returns to Zithiruun’s hand<br />
immediately after the attack is resolved.<br />
M Silver Barrage (standard; at-will) ✦ Psychic, Weapon<br />
Zithiruun makes two silver saber attacks.<br />
M Silver Flurry (standard; recharge ⚄ ⚅) ✦ Psychic, Weapon<br />
Zithiruun makes up to 2 attacks, each against a different<br />
target; he can shift 2 squares before the first attack,<br />
between each attack, and after the final attack; +19 vs.<br />
AC; 2d8 + 6 damage plus 2d8 psychic damage.<br />
Psionic Aim (immediate reaction when an ally within 5 squares<br />
misses with an attack; encounter)<br />
<strong>The</strong> ally can reroll the attack, keeping the second result.<br />
Mind Over Body<br />
Due to the psionic energy of the harness and armor he<br />
wears, Zithiruun uses Charisma in place of Wisdom for<br />
determining hit points and Fortitude defense. (He still<br />
uses Constitution for other purposes such as Endurance<br />
checks.)<br />
Mind Shock ✦ Charm<br />
Whenever Zithiruun damages a target with his silver saber,<br />
thrown saber, silver flurry, or silver barrage attacks, the<br />
target cannot make opportunity attacks until the end of<br />
Zithiruun’s next turn.<br />
Telekinetic Leap (move; at-will)<br />
Zithiruun can fly 5 squares.<br />
Alignment Evil Languages Common, Deep Speech,<br />
Draconic<br />
Skills History +16, Insight +14<br />
Str 6 (+5) Dex 23 (+13) Wis 15 (+9)<br />
Con 6 (+5)* Int 19 (+11) Cha 20 (+12)<br />
*See mind over body<br />
Equipment: Hide armor and body harness, two silver sabers<br />
December 2008 |<br />
63<br />
DUNGEON 161
<strong>The</strong> <strong>Temple</strong> <strong>Between</strong><br />
Dragonborn Raider (D) Level 13 Skirmisher<br />
Medium natural humanoid XP 800<br />
Initiative +13 Senses Perception +13<br />
HP 129; Bloodied 64; see also dragonborn fury<br />
AC 27; Fortitude 23, Reflex 24, Will 21<br />
Speed 7<br />
m Katar (standard; at-will) ✦ Weapon<br />
+19 vs. AC (+20 while bloodied); 1d6 + 4 damage<br />
(crit 2d6 + 10).<br />
M Twin Katar Strike (standard; at-will) ✦ Weapon<br />
If the dragonborn raider doesn’t take a move action on its<br />
turn, it shifts 1 square and makes two katar attacks, or<br />
vice versa.<br />
C Dragon Breath (minor; encounter) ✦ Fire<br />
Close blast 3; +14 vs. Reflex (+15 while bloodied); 1d6 + 3<br />
fire damage.<br />
Combat Advantage<br />
<strong>The</strong> dragonborn raider deals 1d6 extra damage on melee<br />
and ranged attacks against any target it has combat<br />
advantage against.<br />
Dragonborn Fury (only while bloodied)<br />
A dragonborn gains a +1 racial bonus to attack rolls.<br />
Infiltrating Stride (move; recharges after the dragonborn raider<br />
attacks two different enemies with twin katar strike)<br />
<strong>The</strong> dragonborn raider shifts 3 squares.<br />
Alignment Unaligned Languages Common, Draconic<br />
Skills History +8, Intimidate +9, Stealth +16<br />
Str 18 (+10) Dex 21 (+11) Wis 14 (+8)<br />
Con 17 (+9) Int 10 (+6) Cha 12 (+7)<br />
Equipment leather armor, 2 katars<br />
Tactics<br />
<strong>The</strong> dragonborn gladiators close as rapidly as possible,<br />
while the dragonborn raider attempts to sneak or shift<br />
around the battle, working to obtain combat advantage.<br />
<strong>The</strong> redspawn firebelcher is trained to avoid its<br />
allies; it remains at range and snipes at the PCs.<br />
When they appear on round two, Zithiruun<br />
is mounted on Rathoraiax, but they immediately<br />
separate, preferring to fight as two entities. <strong>The</strong><br />
undead dragon is a clumsy flier, so once it lands and<br />
engages in battle, it normally remains on the ground.<br />
Zithiruun uses silver barrage to cut through the party,<br />
and then makes use of whatever powers are most<br />
appropriate for the circumstances. He keeps in constant<br />
motion and tries to avoid getting in melee with<br />
defenders (since loss of mobility is crippling for him),<br />
preferring to let his allies deal with them while he<br />
takes down controllers and leaders. He is willing to<br />
retreat from the battle, but only to regroup and come<br />
back at the PCs again. (Although Zithiruun normally<br />
doesn’t fight to the death, the success of this operation<br />
is his only means of regaining his position among the<br />
githyanki; he’ll die trying to make it work.)<br />
Rathoraiax (R)<br />
Level 13 Elite Brute<br />
Large natural animate (dragon, undead) XP 1,600<br />
Initiative +5 Senses Perception +9; darkvision<br />
HP 328; Bloodied 164<br />
AC 27; Fortitude 29; Reflex 22; Will 24<br />
Immune disease, poison; Resist 15 necrotic; Vulnerable 15<br />
radiant<br />
Saving Throws +2<br />
Speed 4, fly 8 (clumsy)<br />
Action Points 1<br />
m Claw (standard; at-will)<br />
Reach 2; +16 vs. AC; 2d10 + 6 damage, and the target is<br />
knocked prone if it is Large size or smaller.<br />
M Tail Crush (minor; at-will)<br />
Reach 2; prone targets only; +14 vs. Fortitude; 3d8 + 6<br />
damage.<br />
M Savage Fury (standard; recharge ⚃ ⚄ ⚅)<br />
Rathoraiax makes two claw attacks.<br />
C Breath of the Grave (standard; encounter) ✦ Necrotic,<br />
Poison<br />
Close blast 5; +14 vs. Fortitude; 4d10 + 6 poison and<br />
necrotic damage, plus the target takes ongoing 10 poison<br />
and necrotic damage and is weakened (save ends both).<br />
Alignment Unaligned Languages —<br />
Str 22 (+12) Dex 9 (+5) Wis 16 (+9)<br />
Con 24 (+13) Int 1 (+1) Cha 3 (+2)<br />
SPECIAL ATTACK<br />
When Rathoraiax first appears—and if it takes to the<br />
air again later in combat—it might attempt to knock<br />
loose stones off the tops of buildings onto PCs below.<br />
It can only target characters who are within 2 squares<br />
of a building, and it must be adjacent to the top of<br />
that building, on the same side as the target. This is<br />
an area burst 1, +14 vs. the target’s Reflex. <strong>The</strong> target<br />
takes 2d10 + 6 damage and is knocked prone. (On a<br />
miss, the target takes half damage and is not knocked<br />
prone.) <strong>The</strong> area becomes difficult terrain.<br />
2 Dragonborn Gladiators (G) Level 10 Soldier<br />
Medium natural humanoid<br />
XP 500 each<br />
Initiative +9 Senses Perception +6<br />
HP 106; Bloodied 53; see also dragonborn fury<br />
AC 24; Fortitude 23, Reflex 20, Will 21<br />
Speed 5<br />
m Bastard Sword (standard; at-will) ✦ Weapon<br />
+15 vs. AC (+16 while bloodied); see also lone fighter;<br />
1d10 + 5 damage.<br />
M Finishing Blow (standard; at-will) ✦ Weapon<br />
Target must be bloodied; +15 vs. AC (+16 while bloodied);<br />
2d10 + 5 damage, and the dragonborn gladiator’s allies<br />
gain a +2 bonus to attack rolls until the end of the<br />
dragonborn gladiator’s next turn.<br />
C Dragon Breath (minor; encounter) ✦ Fire<br />
Close blast 3; +12 vs. Reflex (+13 while bloodied); 1d6 + 4<br />
fire damage.<br />
Dragonborn Fury (only while bloodied)<br />
A dragonborn gains a +1 racial bonus to attack rolls.<br />
Gladiator’s Strike<br />
When the dragonborn gladiator hits an enemy with an<br />
opportunity attack, the target is knocked prone.<br />
Lone Fighter<br />
<strong>The</strong> dragonborn gladiator gains a +2 bonus to melee attack<br />
rolls when adjacent to only one enemy.<br />
Alignment Unaligned Languages Common, Draconic<br />
Skills Athletics +15, History +7, Intimidate +15<br />
Str 21 (+10) Dex 15 (+7) Wis 12 (+6)<br />
Con 18 (+9) Int 10 (+5) Cha 16 (+8)<br />
Equipment scale armor, bastard sword<br />
December 2008 | DUNGEON 161<br />
64
<strong>The</strong> <strong>Temple</strong> <strong>Between</strong><br />
Redspawn Firebelcher<br />
Level 12 Artillery<br />
Large natural beast (reptile) XP 700<br />
Initiative +7 Senses Perception +6; low-light vision<br />
Fire Within (Fire) aura 5; allies who enter or start their turns<br />
within the aura gain resist 10 fire.<br />
HP 97; Bloodied 48<br />
AC 25; Fortitude 25, Reflex 22, Will 21<br />
Resist 20 fire<br />
Speed 4<br />
m Bite (standard; at-will) ✦ Fire<br />
+16 vs. AC; 1d10 + 4 damage, and ongoing 5 fire damage<br />
(save ends).<br />
R Fire Belch (standard; at-will) ✦ Fire<br />
Ranged 12; +15 vs. Reflex; 2d6 + 1 damage, and ongoing 5<br />
fire damage (save ends).<br />
A Fire Burst (standard; recharge ⚄ ⚅) ✦ Fire<br />
Area burst 2 within 10; +15 vs. Reflex 3d6 + 1 damage,<br />
and ongoing 5 fire damage (save ends). Miss: Half damage,<br />
and no ongoing fire damage.<br />
Alignment Unaligned Languages —<br />
Str 18 (+10) Dex 13 (+7) Wis 13 (+6)<br />
Con 19 (+10) Int 2 (+2) Cha 8 (+5)<br />
Features of the Area<br />
Illumination: This encounter takes place in early<br />
morning and is thus brightly lit.<br />
Bodies: <strong>The</strong> corpses qualify as difficult terrain.<br />
Buildings: <strong>The</strong> buildings range from two to eight<br />
stories (4 to 16 squares) in height. Climbing the walls<br />
requires a DC 15 Athletics check.<br />
Rubble: <strong>The</strong> rubble is difficult terrain.<br />
Trees: <strong>The</strong> trees provide cover and can be climbed<br />
with a DC 15 Athletics check. Most are only between<br />
10 and 20 feet (2 to 4 squares) high.<br />
December 2008 |<br />
65<br />
DUNGEON 161
<strong>The</strong> <strong>Temple</strong> <strong>Between</strong><br />
APPENDIX I:<br />
NEW MONSTERS<br />
Harpy<br />
HARPIES USE THEIR SWEET SONGS to pacify victims<br />
before tearing them to pieces with their claws. For<br />
more on harpies in general, see the Monster Manual,<br />
page 154.<br />
Harpy screechers are closely related to the typical<br />
harpy, but they are a lot more potent—and hold a fearsome<br />
power in reserve.<br />
Harpy Screecher<br />
Level 9 Controller<br />
Medium fey humanoid XP 400<br />
Initiative +7 Senses Perception +6<br />
HP 96; Bloodied 48<br />
AC 23; Fortitude 20, Reflex 20, Will 22<br />
Resist 10 thunder<br />
Speed 6, fly 8 (clumsy)<br />
m Claw (standard; at-will)<br />
+14 vs. AC; 1d8 + 3 damage.<br />
C Alluring Song (standard; at-will) ✦ Charm<br />
Close burst 5; deafened creatures are immune; +15 vs. Will;<br />
the target is pulled 3 squares and immobilized (save ends).<br />
C Brutal Scream (standard; recharge ⚄ ⚅) ✦ Thunder<br />
Close burst 5; +15 vs. Fortitude; 1d6 + 5 thunder damage.<br />
Secondary Attack: Area burst 1 within 5; centered on<br />
a target hit by brutal scream’s primary attack; targets<br />
enemies only; +15 vs. Fortitude; 1d6 + 5 thunder damage<br />
and the target slides 3 squares.<br />
Alignment Evil Languages Common<br />
Skills Stealth +12<br />
Str 16 (+7) Dex 16 (+7) Wis 15 (+6)<br />
Con 16 (+7) Int 11 (+4) Cha 20 (+9)<br />
Harpy Screecher Tactics<br />
Like other harpies, screechers use alluring song to<br />
lure victims in close, and they prefer to fight from<br />
the ground rather than in the air. A harpy screecher<br />
uses brutal scream if foes clump together, not merely to<br />
cause great harm but to force them to disperse, hopefully<br />
leaving one or more in a vulnerable position.<br />
Harpy Lore<br />
In addition to the information given in the Monster<br />
Manual, a character knows the following information<br />
with a successful Arcana check.<br />
DC 20: Screechers are tougher relatives of normal<br />
harpies. <strong>The</strong>ir attacks appear to infuse the target<br />
with the harpy’s own deadly scream, forcing them to<br />
unleash it upon their allies.<br />
Homunculus<br />
HOMUNCULI ARE MINOR CONSTRUCTS created to guard<br />
specific places, objects, or beings. <strong>The</strong>y require no<br />
food or sleep, and they can maintain their watch<br />
indefinitely.<br />
<strong>The</strong> following types of homunculi, both dwarfcreated,<br />
follow the same rules as other homunculi<br />
(Monster Manual, page 156). Marching hammers are<br />
small bodies of iron—shaped vaguely like anvils—with<br />
squat legs and a pair of long, writhing arms that end<br />
in heavy, double-headed warhammers. Writhing<br />
chains are little more than their name implies—<br />
long, heavy chains that writhe, move, and strike like<br />
serpents.<br />
Marching Hammer<br />
Level 10 Brute<br />
Small natural animate (construct, homunculus) XP 500<br />
Initiative +4 Senses Perception +12; darkvision<br />
HP 129; Bloodied 64<br />
AC 23; Fortitude 23, Reflex 17, Will 19<br />
Immune disease, poison, sleep<br />
Speed 6<br />
m Hammer Hand (standard; at-will)<br />
+13 vs. AC; 3d6 + 5 damage.<br />
M Hammering Charge (standard; at-will)<br />
<strong>The</strong> marching hammer can use this power as a part of a<br />
charge; +13 vs. AC; 3d6 + 5 damage, plus target is<br />
knocked prone.<br />
Beat <strong>The</strong>m When <strong>The</strong>y’re Down<br />
<strong>The</strong> marching hammer deals 1d6 extra damage when<br />
attacking a prone enemy.<br />
Guard Area (see Monster Manual, page 156)<br />
A marching hammer can make a hammering charge attack<br />
against any creature in its guarded area, even if the power<br />
hasn’t recharged. If the marching hammer uses a charge<br />
attack to make its hammering charge, its speed increases to<br />
8 when making that charge.<br />
Alignment Unaligned Languages —<br />
Skills Perception +12<br />
Str 21 (+10) Dex 8 (+4) Wis 14 (+7)<br />
Con 19 (+9) Int 5 (+2) Cha 13 (+6)<br />
Marching Hammer Tactics<br />
Marching hammers are tasked with guarding a particular<br />
area. <strong>The</strong>y attack directly, moving in on the<br />
enemy—favoring foes already in their guarded area<br />
above those merely approaching it—and crushing<br />
them into pulp.<br />
December 2008 | DUNGEON 161<br />
66
<strong>The</strong> <strong>Temple</strong> <strong>Between</strong><br />
Writhing Chain<br />
Level 10 Skirmisher<br />
Medium natural animate (construct, homunculus) XP 500<br />
Initiative +10 Senses Perception +7; darkvision<br />
HP 131; Bloodied 65<br />
AC 23; Fortitude 23, Reflex 23, Will 21<br />
Immune disease, poison<br />
Speed 7; see also serpentine strike<br />
m Slam (standard; at-will)<br />
+13 vs. AC; 2d6 + 5 damage.<br />
M Winding Strike (standard; recharge ⚄ ⚅)<br />
+13 vs. AC; 2d6 + 5 damage, and target slides 2 squares<br />
and is grabbed and restrained.<br />
Guarded Area<br />
When making attacks against a creature in its guarded<br />
area, the writhing chain gains a +2 bonus to hit and can<br />
stretch itself, granting itself reach 3 on all melee attacks.<br />
Threatening Reach (within guarded area only)<br />
This creature can make opportunity attacks against all<br />
enemies within its reach (3 squares).<br />
Serpentine Strike (move; at-will)<br />
<strong>The</strong> chain shifts 3 squares.<br />
Alignment Unaligned Languages —<br />
Skills Stealth +13<br />
Str 19 (+9) Dex 17 (+8) Wis 15 (+7)<br />
Con 21 (+10) Int 18 (+9) Cha 12 (+6)<br />
Writhing Chain Tactics<br />
Like the hammers, writhing chains are normally<br />
assigned to guard an area. <strong>The</strong>y prefer to stay out of<br />
range of enemies within that area, striking with their<br />
reach. Writhing chains are particularly fond of teaming<br />
up, which allows one to restrain a foe while the<br />
others pummel him.<br />
Slystone Dwarf Ruffians<br />
CRAFTY, ILL-TEMPERED, AND VIOLENT, slystone<br />
dwarves are fey cousins of gnomes, with whom they<br />
share little in common, though they more closely<br />
resemble squat, scruffy dwarves. (It is that resemblance<br />
that gave them their Common-tongue name.)<br />
Slystone dwarves possess a gift they call “the unyielding<br />
soul,” which allows them several magical abilities.<br />
<strong>The</strong> slystone dwarf ruffian, below, represents only one<br />
of the most common varieties of this brutal race.<br />
Slystone Dwarf Ruffian<br />
Level 10 Soldier<br />
Small fey humanoid XP 500<br />
Initiative +12 Senses Perception +5; low-light vision<br />
HP 104; Bloodied 52<br />
AC 26; Fortitude 23, Reflex 22, Will 21<br />
Speed 6; see also mad dash<br />
m Hammer (standard; at-will) ✦ Weapon<br />
+17 vs. AC; 2d6 + 5 damage, and the target is marked until<br />
the end of the slystone ruffian’s next turn.<br />
M Mighty Strike (standard; recharge ⚄ ⚅) ✦ Weapon<br />
+17 vs. AC; 3d8 + 5 damage, and target is pushed 3<br />
squares. <strong>The</strong> slystone dwarf ruffian can use this power as a<br />
part of a charge.<br />
Mad Dash<br />
When the slystone dwarf ruffian makes a charge attack,<br />
the enemy is knocked prone on a hit, in addition to any<br />
other effects of the attack.<br />
Alignment Evil Languages Common, Elven<br />
Skills Athletics +14<br />
Str 18 (+9) Dex 21 (+10) Wis 11 (+5)<br />
Con 16 (+8) Int 11 (+5) Cha 18 (+9)<br />
Equipment leather armor, hammer<br />
Slystone Dwarf Ruffian Tactics<br />
Slystone ruffians initiate combat with raging stone,<br />
then charge into melee with mad dash. Once engaged<br />
in melee, they prefer to knock a foe away with mighty<br />
strike if they need some distance (perhaps to use<br />
raging stone again), rather than retreating.<br />
Slystone Dwarf Lore<br />
A character knows the following information with a<br />
successful Arcana check.<br />
DC 15: Slystone dwarves were misnamed by the<br />
first humans to encounter them. Though they might<br />
appear to be small dwarves, they are in fact cousins to<br />
gnomes, albeit far more vicious and cruel. <strong>The</strong>y take<br />
pleasure in the pain of others, and grow murderous at<br />
the slightest insult.<br />
DC 20: Some slystone dwarves serve fomorian<br />
kings, others evil eladrins. <strong>The</strong>y’re mercenary and<br />
are happy working for anyone who offers them the<br />
opportunity for violence.<br />
December 2008 |<br />
67<br />
DUNGEON 161
<strong>The</strong> <strong>Temple</strong> <strong>Between</strong><br />
Troll<br />
A TROLL EATS ANYTHING THAT MOVES, from grubs to<br />
humans, and is rightly feared for its ravenous<br />
appetite, feral cunning, and remarkable regenerative<br />
powers. For more on trolls in general, see the Monster<br />
Manual, page 254.<br />
Spitting trolls are smaller than their kin— averaging<br />
only the size of an adult human—but they’re also far<br />
smarter. A combination of their natural intelligence<br />
and the power that their poison spit grants them over<br />
other trolls often allows them to take leadership positions<br />
in troll packs.<br />
Spitting Troll<br />
Level 10 Soldier (Leader)<br />
Medium natural humanoid XP 500<br />
Initiative +12 Senses Perception +8<br />
HP 106; Bloodied 53; see also troll healing<br />
Regeneration 10 (if the troll takes acid or fire damage,<br />
regeneration does not function until the end of its<br />
next turn)<br />
AC 26; Fortitude 22, Reflex 23, Will 22<br />
Speed 6, climb 4<br />
m Claw (standard; at-will) ✦ Poison<br />
+17 vs. AC; 1d6 + 5 damage, plus 1d6 poison damage.<br />
r Javelin (standard; at-will) ✦ Poison, Weapon<br />
Ranged 10/20; +17 vs. AC; 1d6 + 5 damage, plus 1d6<br />
poison damage.<br />
R Acid Spit (minor; recharge ⚄ ⚅) ✦ Acid<br />
Ranged 5; +15 vs. Reflex; 1d6 acid damage.<br />
Regenerative Empowerment (minor 1/turn, at-will)<br />
One troll within 10 squares whose regeneration is<br />
currently inactive (as a result of taking acid or fire damage)<br />
immediately reactivates the regeneration.<br />
Troll Healing ✦ Healing<br />
If the troll is reduced to 0 hit points by an attack that does<br />
not deal acid or fire damage, it rises on its next turn (as a<br />
move action) with 10 hit points.<br />
Alignment Chaotic evil Languages Common, Giant<br />
Skills Athletics +13, Endurance +14<br />
Str 16 (+8) Dex 21 (+10) Wis 17 (+8)<br />
Con 18 (+9) Int 10 (+5) Cha 13 (+6)<br />
Equipment leather armor, 10 javelins<br />
<strong>The</strong> rare two-headed trolls are just as brutal as<br />
their standard cousins, but far more dangerous.<br />
Spitting Troll Tactics<br />
Spitting trolls prefer to let their allies move into<br />
melee and soften up the foe, while the spitting troll<br />
hangs back and throws javelins. After a few rounds,<br />
however, their bloodlust takes hold and they move<br />
in close. When fighting alongside other trolls, spitting<br />
trolls rarely use their poison spit as a weapon,<br />
preferring to hold it in reserve to aid their troll allies.<br />
<strong>The</strong> poison on a spitting troll’s claws and javelins is a<br />
variant of their naturally occurring poison, but the act<br />
of treating it for application to weapons removes its<br />
special properties where other trolls are concerned.<br />
Two-Headed Troll Tactics<br />
Like other trolls, the two-headed variety is not a<br />
subtle combatant. It wades into its foes, lashing<br />
out and counting on regeneration to keep it alive.<br />
Essentially, it fights just like a traditional troll, but<br />
with twice as many attacks.<br />
Troll Lore<br />
In addition to the information given in the Monster<br />
Manual, a character knows the following information<br />
with a successful Nature check.<br />
DC 20: Spitting trolls are smaller but smarter than<br />
other trolls. <strong>The</strong>y boast a poison spit that can either<br />
harm other trolls like acid, or cause a troll’s regeneration<br />
to resume after being suppressed by fire or acid.<br />
Two-headed trolls are much like normal trolls, but<br />
even more brutal and dangerous. Sages debate whether<br />
two-headed trolls are the results of crossbreeding<br />
between trolls and ettins, or a mutation caused when<br />
a troll’s regeneration ability manifests too early and<br />
warps the embryo while still in the womb.<br />
Two-Headed Troll<br />
Level 10 Elite Brute<br />
Large natural humanoid XP 1,000<br />
Initiative +5 Senses Perception +7<br />
HP 264; Bloodied 132; see also troll healing<br />
Regeneration 10 (if the troll takes acid or fire damage,<br />
regeneration does not function until the end of its<br />
next turn)<br />
AC 25; Fortitude 27, Reflex 19, Will 20<br />
Saving Throws +2<br />
Speed 6<br />
Action Points 1<br />
m Claw (standard; at-will)<br />
Melee 2; +13 vs. AC; 3d6 + 7 damage.<br />
M Smackdown (immediate reaction, when an enemy moves into<br />
a position that flanks the two-headed troll; at-will)<br />
<strong>The</strong> two-headed troll targets one creature flanking it; +11<br />
vs. Fortitude; the target is knocked prone.<br />
Double Actions<br />
A two-headed troll rolls initiative twice, gets two turns<br />
during a round, and has a full set of actions (standard,<br />
move, minor) on each turn. Each set of actions corresponds<br />
to a different head. <strong>The</strong> troll’s ability to take immediate<br />
actions refreshes on each of its turns.<br />
Dual Brain<br />
At the end of its turn, the two-headed troll automatically<br />
succeeds on all saving throws against the dazed and<br />
stunned conditions and against charm effects that a save<br />
can end.<br />
Troll Healing ✦ Healing<br />
If the troll is reduced to 0 hit points by an attack that does<br />
not deal acid or fire damage, it rises on its next turn (as a<br />
move action) with 10 hit points.<br />
Alignment Chaotic evil Languages Giant<br />
Str 24 (+12) Dex 10 (+5) Wis 14 (+7)<br />
Con 22 (+11) Int 6 (+3) Cha 10 (+5)<br />
Equipment hide armor<br />
December 2008 | DUNGEON 161<br />
68
<strong>The</strong> <strong>Temple</strong> <strong>Between</strong><br />
APPENDIX II: ZITHIRUUN,<br />
THE BROKEN GENERAL<br />
ONCE, HE REIGNED SUPREME.<br />
General Zithiruun was a great hero—one of the<br />
most respected military leaders of a militant race.<br />
From the great city of Tu’narath, he led armies of the<br />
githyanki on raids across the Astral Sea, and into a<br />
dozen different regions and kingdoms of the mortal<br />
realm. From the deck of the astral galleon Siun’kara<br />
or the back of Rathoraiax, his great red dragon steed,<br />
Zithiruun proved an unstoppable force—a champion<br />
among a race of champions. Even Vlaakith, the<br />
fearsome githyanki lich queen, acknowledged his<br />
greatness, heaped great praise upon him.<br />
And then the great General Zithiruun took on a<br />
foe beyond even his own prowess.<br />
That it was a dragon, a dragon far greater than<br />
Rathoraiax, everyone knows, but tales of the confrontation<br />
differ as to whether it was a black wyrm,<br />
one of the fearsome scourge dragons, or something<br />
else entirely. But while not everyone knows precisely<br />
what it was Zithiruun faced, everyone knows what<br />
happened as a result.<br />
A hideous burst of something—acid, perhaps, or<br />
pure necrotic energy—ripped the life from the red<br />
dragon Rathoraiax, shredding flesh and obliterating<br />
entire portions of the beast. And it was this attack<br />
that felled Zithiruun as well. It stripped the strength<br />
from his limbs, rotted bits of flesh and even weakened<br />
bone. Any lesser warrior would have died in that hideous<br />
moment, but the general clung to life through<br />
sheer force of stubborn, malignant will.<br />
It took years for Zithiruun to retrain and reinvigorate<br />
his broken body. Even today, he is a shadow of<br />
what he once was—weaker in body, far less sound in<br />
mind. His own people have all but turned their backs<br />
on him; though his great achievements prevented them<br />
from executing or exiling him utterly, they scorn his<br />
weakness and hold him in contempt for allowing himself<br />
and his mount to be so soundly defeated. Today,<br />
Zithiruun serves as a lowly operative of Tu’narath’s<br />
forces and he leads only lesser warriors into battle<br />
while answering to and obeying githyanki who would<br />
once have feared even to speak in his presence.<br />
Zithiruun’s native powers have mutated through<br />
his years of effort as he attempted to reinvigorate<br />
his body at the expense of his mental prowess. <strong>The</strong><br />
ambition all githyanki share has been subsumed by<br />
a burning need to prove himself and to regain the<br />
position and the respect that were once his by right—<br />
even as he nurses a resentful hatred of the very people<br />
whose adulation he so desperately craves.<br />
Appearance<br />
Zithiruun has been large for a githyanki, but since the<br />
destruction and atrophy of much of his musculature,<br />
he now appears almost impossibly tall and gaunt.<br />
Mixed with and attached to the traditional leathers of<br />
his people, he wears a contraption of braces and harnesses,<br />
constructed of leather straps and iron joints.<br />
<strong>The</strong>se braces, supported at his shoulders and by a strap<br />
across his chest, run the length of his left arm and left<br />
leg, as well as a portion of his right leg. It is the straps<br />
that give those limbs rigidity; without them, they could<br />
scarcely move, and not support his weight. This harness<br />
also grants him full mobility; charged with both<br />
magic and psychic energy, it permits him motion and<br />
grants him strength he would otherwise lack.<br />
His flesh clings tightly to his skeleton and puckers<br />
away from old wounds, exposing muscle and even<br />
charred bone. His left cheek gapes open, revealing<br />
a bit of metal plate that replaces a fragment of skull.<br />
A leather strap holds the left side of his jaw in place,<br />
replacing obliterated muscle.<br />
He appears weak indeed, and in some ways he<br />
truly is. Yet Zithiruun wields his great silver saber<br />
with an astonishing, impossible precision, and his<br />
eyes burn with loathing and ambition to shame even<br />
the other githyanki.<br />
December 2008 |<br />
69<br />
DUNGEON 161
<strong>The</strong> <strong>Temple</strong> <strong>Between</strong><br />
Zithiruun, the Broken General Level 14 Elite<br />
Skirmisher (Leader)<br />
Medium natural humanoid XP 2,000<br />
Initiative +15 Senses Perception +9<br />
HP 280; Bloodied 140<br />
AC 30; Fortitude 26; Reflex 29; Will 28<br />
Resist psychic 10<br />
Saving Throws +2 (+4 against charm effects)<br />
Speed 6<br />
Action Points 1<br />
m Silver Saber (standard; at-will) ✦ Psychic, Weapon<br />
+19 vs. AC; 1d8 + 6 damage plus 1d8 psychic damage.<br />
r Thrown Saber (standard; at-will) ✦ Psychic, Weapon<br />
Ranged 5/10 if thrown; +19 vs. AC; 1d8 + 6 damage plus<br />
1d8 psychic damage.<br />
Special: If thrown, the weapon returns to Zithiruun’s hand<br />
immediately after the attack is resolved.<br />
M Silver Barrage (standard; at-will) ✦ Psychic, Weapon<br />
Zithiruun makes two silver saber attacks.<br />
M Silver Flurry (standard; recharge ⚄ ⚅) ✦ Psychic, Weapon<br />
Zithiruun makes up to 2 attacks, each against a different<br />
target; he can shift 2 squares before the first attack,<br />
between each attack, and after the final attack; +19 vs.<br />
AC; 2d8 + 6 damage plus 2d8 psychic damage.<br />
Psionic Aim (immediate reaction when an ally within 5 squares<br />
misses with an attack; encounter)<br />
<strong>The</strong> ally can reroll the attack, keeping the second result.<br />
Mind Over Body<br />
Due to the psionic energy of the harness and armor<br />
he wears, Zithiruun uses Charisma in place of Wisdom<br />
for determining hit points and Fortitude. (He still uses<br />
Constitution for other purposes such as Endurance<br />
checks.)<br />
Mind Shock ✦ Charm<br />
Whenever Zithiruun damages a target with his silver saber,<br />
thrown saber, silver flurry, or silver barrage attacks, the<br />
target cannot make opportunity attacks until the end of<br />
Zithiruun’s next turn.<br />
Telekinetic Leap (move; at-will)<br />
Zithiruun can fly 5 squares.<br />
Alignment Evil Languages Common, Deep Speech,<br />
Draconic<br />
Skills History +16, Insight +14<br />
Str 6 (+5) Dex 23 (+13) Wis 15 (+9)<br />
Con 6 (+5)* Int 19 (+11) Cha 20 (+12)<br />
*See mind over body<br />
Equipment: Hide armor and body harness, two silver sabers<br />
Development<br />
Zithiruun burns with shame and resentment, even<br />
as he scrambles to fulfill the orders of his superiors.<br />
Where he once commanded legions, he now leads<br />
only a handful of soldiers. He who charted the course<br />
of entire wars now understands only his part in larger<br />
strategies. Yet, though he aches to turn on those who<br />
would dare command him, he knows that through<br />
obedience lies his only hope of regaining the honor<br />
and position he craves.<br />
<strong>The</strong> Broken General is a tactical genius, but his<br />
once renowned patience and cunning are impeded<br />
by his ever-growing temper. Zithiruun frequently<br />
flies into a rage at his subordinates for the slightest<br />
failure or perceived disobedience, transforming his<br />
resentment for those above into punishment for those<br />
below. <strong>The</strong> strap that replaces one of his jaw muscles<br />
prevents him from opening his mouth wide, forcing<br />
him to eat soft, almost dainty morsels of food and<br />
occasionally to slur his words. Zithiruun’s speech is<br />
fully intelligible most of the time, but on those rare<br />
occasions when he garbles a word, he blames others<br />
for their failure to comprehend.<br />
Despite this temper, however, Zithiruun remains<br />
a consummate planner and a terror in combat, fully<br />
capable of leading his small teams to victory in even<br />
the most complex strategies. Zithiruun can also use his<br />
reputation for mad rage to his advantage, often faking<br />
a tantrum to make others underestimate his ability to<br />
scheme, to listen, and to advance his own agenda.<br />
Zithiruun’s Tactics<br />
Zithiruun prefers to fight alongside his mount<br />
Rathoraiax. He sweeps through his foes, opening<br />
with silver barrage if they greatly outnumber him and<br />
making use of his mind shock ability to stay mobile. If<br />
hard pressed, he flies to Rathoraiax’s back and tries to<br />
stay at range, using distance attacks.<br />
Despite his burning desire to prove himself,<br />
Zithiruun’s hatred for other githyanki means that he’s<br />
ill-disposed to sacrifice himself for their goals. Thus,<br />
he’s willing to retreat from combat if things go poorly,<br />
even abandoning other githyanki allies.<br />
Rathoraiax<br />
Level 13 Elite Brute<br />
Large natural animate (dragon, undead) XP 1,600<br />
Initiative +5 Senses Perception +9; darkvision<br />
HP 328; Bloodied 164<br />
AC 27; Fortitude 29; Reflex 22; Will 24<br />
Immune disease, poison; Resist 15 necrotic; Vulnerable 15<br />
radiant<br />
Saving Throws +2<br />
Speed 4, fly 8 (clumsy)<br />
Action Points 1<br />
m Claw (standard; at-will)<br />
Melee 2; +16 vs. AC; 2d10 + 6 damage, and the target is<br />
knocked prone if it is Large size or smaller.<br />
M Savage Fury (standard; recharge ⚃ ⚄ ⚅)<br />
Rathoraiax makes two claw attacks.<br />
M Tail Crush (minor; at-will)<br />
Reach 2; prone targets only; +14 vs. Fortitude; 3d8 + 6<br />
damage.<br />
C Breath of the Grave (standard; encounter) ✦ Necrotic,<br />
Poison<br />
Close blast 5; +14 vs. Fortitude; 4d10 + 6 poison and<br />
necrotic damage, plus target takes ongoing 10 poison and<br />
necrotic damage and is weakened (save ends both).<br />
Alignment Unaligned Languages —<br />
Str 22 (+12) Dex 9 (+5) Wis 16 (+9)<br />
Con 24 (+13) Int 1 (+1) Cha 3 (+2)<br />
December 2008 | DUNGEON 161<br />
70
<strong>The</strong> <strong>Temple</strong> <strong>Between</strong><br />
Rathoraiax<br />
As a sign of his shame, Zithiruun was never granted<br />
the honor of a new dragon mount. Rather, he must<br />
make do with the animated body of Rathoraiax. This<br />
is yet another insult that burns in Zithiruun’s craw,<br />
yet he’s too intelligent a fighter to abandon a useful<br />
weapon purely out of spite.<br />
Rathoraiax is clearly dead; most of his scales are a<br />
dull, rotten gray, gleaming with a faint red only in the<br />
brightest light. Many are missing completely, revealing<br />
desiccated, leathery skin. <strong>The</strong> entire top half of<br />
Rathoraiax’s snout was destroyed in the attack that<br />
slew him. This left behind a “shelf” of his lower jaw<br />
sticking out from beneath the broken skull around<br />
his eyes, fangs protruding upward, and a dull, dead<br />
tongue lashing slowly above.<br />
Zithiruun Lore<br />
<strong>The</strong> following information can be obtained with a<br />
successful History check. (In addition, see the standard<br />
githyanki lore, acquired with a Nature check, in<br />
the Monster Manual.)<br />
DC 25: General Zithiruun was a great military<br />
leader and hero to the githyanki of Tu’narath. It’s said<br />
that he was crippled and his mount slain in a battle<br />
against a sort of mighty dragon or fiend. Rumors disagree<br />
on whether he still lives and what position he<br />
might hold (if any) among the weakness-intolerant<br />
githyanki.<br />
Rathoraiax’s Tactics<br />
Rathoraiax lumbers into combat and seeks to pound<br />
its foes into the earth. After a few rounds of combat<br />
(or earlier, if Zithiruun orders it to do so), it looks for<br />
an opportunity to catch a handful of foes in its breath<br />
of the grave attack. Rathoraiax is relatively mindless<br />
and fights to the death unless ordered to retreat.<br />
December 2008 |<br />
71<br />
DUNGEON 161

![Scales of War - [Lvl 17] - Garaitha's Anvil.pdf](https://img.yumpu.com/49980560/1/190x146/scales-of-war-lvl-17-garaithas-anvilpdf.jpg?quality=85)
![[Lvl 27] - Test of Fire.pdf](https://img.yumpu.com/49457165/1/190x146/lvl-27-test-of-firepdf.jpg?quality=85)
![[Lvl 3] - Siege of Bordrin's Watch.pdf](https://img.yumpu.com/46813203/1/190x146/lvl-3-siege-of-bordrins-watchpdf.jpg?quality=85)
![[Lvl 1] - Rescue at Rivenroar with Printable Battle Mats.pdf](https://img.yumpu.com/45544975/1/190x147/lvl-1-rescue-at-rivenroar-with-printable-battle-matspdf.jpg?quality=85)

![Menace of the Icy Spire [Forgotten Realms].pdf - Property Is Theft!](https://img.yumpu.com/44650754/1/190x146/menace-of-the-icy-spire-forgotten-realmspdf-property-is-theft.jpg?quality=85)
![[Lvl 4] - The Shadow Rift of Umbraforge.pdf](https://img.yumpu.com/43339296/1/190x146/lvl-4-the-shadow-rift-of-umbraforgepdf.jpg?quality=85)
![Scales of War - [Lvl 10] - Fist of Mourning.pdf](https://img.yumpu.com/42937391/1/190x146/scales-of-war-lvl-10-fist-of-mourningpdf.jpg?quality=85)

![[Lvl 19] - A Tyranny of Souls.pdf](https://img.yumpu.com/41897394/1/190x146/lvl-19-a-tyranny-of-soulspdf.jpg?quality=85)
![Scales of War - [Lvl 11] - Beyond the Mottled Tower.pdf](https://img.yumpu.com/41072792/1/190x146/scales-of-war-lvl-11-beyond-the-mottled-towerpdf.jpg?quality=85)