You also want an ePaper? Increase the reach of your titles
YUMPU automatically turns print PDFs into web optimized ePapers that Google loves.
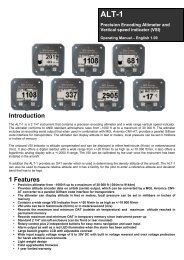
Stratomaster Smart Single<br />
<strong>RTC</strong>-2<br />
Aviation UTC Real time clock and OAT display<br />
The <strong>RTC</strong>-2 is a 2.25” format aviation Real Time Clock featuring a two time zone system,<br />
stopwatch, countdown timer, alarm and OAT (Outside Air Temperature) display.<br />
It is primarily intended to show UTC time (also known as Greenwich Mean Time, GMT or Zulu<br />
time) together with a local time to facilitate ordinary ATC time reporting.<br />
Each time zone may be programmed with an additional hour offset to allow for summer time or<br />
similar variances. Local offsets may be added or subtracted.<br />
Stopwatch and Timers can be operated simultaneously to a programmable alarm, making the<br />
<strong>RTC</strong>-2 particularly suitable for sport flying competitions.<br />
OAT can be shown in either degrees Celsius or degrees Fahrenheit. The <strong>RTC</strong>-2 can be setup to<br />
alternate between the Time functions and the OAT display.<br />
Time is maintained by an internal 10 year lithium battery which can be replaced by the user.
2<br />
The Main Display:<br />
The main display can be set up to show UTC time, Stopwatch, Countdown timer, Alarm or OAT.<br />
The main display can also be setup to alternate between the Time functions and OAT, giving the<br />
user a more versatile instrument.<br />
UTC display showing two independent time zones.<br />
The top display is normally used to display UTC time but this<br />
can be changed using the “Main time zone” selection<br />
This screen shows the stopwatch. The stopwatch can be started<br />
and stopped at any time and reset to zero.<br />
This screen shows the timer. The timer is loaded from a preset<br />
value that can be adjusted in the menu. Once loaded, the timer<br />
can be started and counts down. It can be stopped and<br />
restarted at any time.<br />
This screen shows the alarm time. The alarm time is set in the<br />
menu.<br />
This screen shows the OAT (Outside Air Temperature) value.<br />
The OAT can be setup in the menu to be displayed in either<br />
Degrees Celsius or in Degrees Fahrenheit.
3<br />
Setting up the <strong>RTC</strong>-2:<br />
Main Menu …<br />
Press the Menu key to enter the menu. You can move forward and<br />
backwards in the menu by using the + and – keys. To change or<br />
select a menu item, move the highlight to the desired item and then<br />
press the Menu key. To end an edit or function, press the Menu key<br />
again.<br />
To exit the menu and continue normal operation, select the<br />
***Done*** function and press the Menu key. Note, all changes you<br />
have initiated during your session will only be remembered by the<br />
instrument if you exit the menu using the ***Done*** function.<br />
Technical setup function “Temp Cal” is only accessible if you start up<br />
the instrument while pressing both “+” and “-“ buttons at the same<br />
time)<br />
Mode: …<br />
This function selects what the main display of the instrument will show<br />
during normal run mode.<br />
Display: …<br />
This function selects whether the main display must alternate<br />
between the selected time mode above and the OAT.<br />
Contrast: …<br />
This function allows you to change the display contrast to your liking.<br />
The contrast can be adjusted from 20 to 45. (Value can vary<br />
depending on display type).
4<br />
Backlight …<br />
This function allows you to switch the display backlight on or off.<br />
Timer Preset<br />
Enter the timer preload value. In the picture it is shown as 5 minutes.<br />
This is the value that it loaded into the timer when you perform a timer<br />
load. The timer counts down to zero when started, starting from this<br />
value.<br />
Use the + and – keys to adjust the item indicated by the ^^. Use the<br />
enter key to move the ^^.<br />
Alarm Preset<br />
Enter the local time that will activate the alarm.<br />
Note: Alarms are based on the time of your selected local time zone<br />
Set UTC time<br />
This function is used to set the internal real time clock. The time to be<br />
entered must be UTC in order for the system to operate correctly. Do<br />
not enter local time (unless it is the same as UTC).<br />
UTC is the same as Greenwich Mean Time (GMT) or Zulu time.<br />
Use the + and – keys to adjust the item indicated by the ^^. Use the<br />
enter key to move the ^^.
5<br />
Main Time Zone<br />
Select the main time zone that is to be displayed on the top section of<br />
the display. Normally this should be set to UTC.<br />
Local Offsets<br />
Each of the time zones can be individually modified by adding or<br />
subtracting one or more hours from its ordinary time.<br />
The picture shows that the London time zone has one hour added.<br />
This would set this time zone to “summer time”. Offsets can range<br />
from –12 to +12 hours. For normal operation of the time zone this<br />
value should be set to zero.<br />
Use the + and – keys to select the time zone to change.<br />
Once you have selected the time zone, press the enter key to<br />
highlight the offset value. Now the + and – keys can be used to<br />
change the offset value. Press enter key again to end the edit.<br />
Please note that only one time zone can be edited at a time.<br />
Temp In: …<br />
The OAT can be displayed in either degrees Celsius or in degrees<br />
Fahrenheit.<br />
Temp Cal: …<br />
This menu item is only available when you power up the unit and<br />
simultaneously press the “+” and “-“ key. Please use this menu item<br />
with care, as changing this value will recalibrate the temperature<br />
sensor.
6<br />
The Stopwatch<br />
Stopwatch is halted.<br />
Press “+” (GO) to start the stop watch.<br />
Press “-“ (Zero) to set the stop watch to zero<br />
Stopwatch is running.<br />
Press “-“ to halt the stop watch.<br />
The Timer<br />
Timer halted, loaded to 5.00 minutes.<br />
Press “+” to start the timer.<br />
Press “-“ to load the timer.<br />
Timer running.<br />
Press “-“ to stop the timer<br />
The timer is connected to the external alarm output of the <strong>RTC</strong>-1.<br />
The alarm will be activated if the timer reaches 00:00.00. In this case the timer will be shown<br />
flashing. Should the display be showing any other function when the timer reaches zero, it will<br />
change to display the timer (Menu excluded).<br />
The external alarm will be deactivated if you press any button.<br />
The Local Time Alarm<br />
You can use the “+” and “-“ buttons to enable or disable the alarm.<br />
The alarm time is entered in the menu. The alarm time is always<br />
“local time”.When the local time matches the alarm time, the alarm is<br />
activated and the alarm time will flash. Should the display be showing<br />
any other function when the alarm activates, it will change to display<br />
the alarm time (Menu excluded). The external alarm will be<br />
deactivated if you press any button.
7<br />
Technical specifications:<br />
Display temperature range (operational): -20 to +80 degrees C<br />
Supply voltage: +8 to +18V. +24/28V with optional pre-regulator.<br />
Supply current: 15mA/70mA (backlight off/on)<br />
Display: Graphic LCD with rear green/yellow LED backlight<br />
Weight: 90 grams<br />
Protection: Build in reverse voltage and 33V over voltage protection<br />
Battery type: CR2032<br />
Alarm output: Open collector transistor switch to ground. Maximum rating 0.5A DC only.<br />
Ambient Temperature Sender type: LM335 (National Semiconductor)<br />
Changing the battery.<br />
The <strong>RTC</strong>-2 maintains an internal Lithium battery to supply power to run the internal clock. This<br />
battery typically lasts for up to ten years. If you find the <strong>RTC</strong>-2 looses time when you switch off<br />
main power you should replace the battery. This battery is of type CR2032. It is used in many<br />
calculators and similar equipment and is easy to obtain. The battery holder is located on the<br />
middle PCB. Observe correct polarity when installing a new battery. The side marked “+” faces<br />
towards the back of the <strong>RTC</strong>-2.<br />
Installing the <strong>RTC</strong>-2<br />
Connect the supply terminals to your aircrafts power supply (you will need a dropping resistor or<br />
pre-regulator for 24/28V systems).Install suitable power supply protection if you have a supply<br />
that can contain large voltage transients such as can be created by starter motors and solenoids.<br />
Ensure that the supply voltage will not drop below 8V during operation as this may result in<br />
incorrect readings.<br />
Make sure the <strong>RTC</strong>-2 is installed in the same configuration as the above drawing.<br />
The installation of a fuse is highly recommended.
8<br />
Warranty:<br />
<strong>MGL</strong> avionics warrants their products for a period of one year from date of purchase against<br />
faulty workmanship. Warranty is limited to the replacement of faulty components and includes the<br />
cost of labour. Shipping costs are for the account of the purchaser.<br />
Note for operation on supplies with inductive loads:<br />
Any operation of electronic instrumentation on power supplies that are subject to high voltages<br />
caused by operation of inductive loads (starter motors, solenoids, relays) are required to be fitted<br />
with suitable protection.<br />
The <strong>RTC</strong>-2 instrument is guaranteed to withstand temporary over voltage up to 33V without<br />
additional protection. We recommend that measures are taken to prevent voltage transients in<br />
excess of this limit. <strong>MGL</strong> <strong>Avionics</strong> recommends the fitment of a fuse in line to protect electronic<br />
instruments, radios and intercom systems.<br />
Please note that product warranty excludes damages caused by unprotected, unsuitable or<br />
incorrectly wired electrical supplies.<br />
Any signs of opening the instrument or tampering with any of the internal parts will invalidate the<br />
warranty.<br />
Disclaimer:<br />
<strong>MGL</strong> <strong>Avionics</strong> cannot be held responsible for incidents or damage by whatsoever nature caused<br />
by incorrect readings, displays, installation or operation of the instrument.<br />
Operation of the <strong>RTC</strong>-2 instrument is the responsibility of the pilot in command of the aircraft. The<br />
pilot in command has to make himself familiar with the operation and limitations of the <strong>RTC</strong>-2<br />
instrument before commencing ground or flight operations as well as all other aspects of<br />
operation.<br />
The <strong>RTC</strong>-2 is intended for operation by a licensed pilot who is the holder of a MPL (Micro light<br />
pilot license) or PPL (Private Pilot license) or the equivalent thereof. The pilot should further be<br />
rated on the aircraft type on which the <strong>RTC</strong>-2 is being operated.<br />
The <strong>RTC</strong>-2 has not been submitted to the CAA or FAA or any of its agencies for any form of<br />
certification. Operation and installation of this instrument is subject to the relevant rules and<br />
regulations of your country and flight authority. If any of the above is not acceptable to the pilot in<br />
command then they must refrain from operating the aircraft or remove the <strong>RTC</strong>-2 from the aircraft<br />
before commencing aircraft operations.