Quickstart Guide - Dish TV Technologies
Quickstart Guide - Dish TV Technologies
Quickstart Guide - Dish TV Technologies

You also want an ePaper? Increase the reach of your titles
YUMPU automatically turns print PDFs into web optimized ePapers that Google loves.
LEDs And Buttons<br />
LED<br />
Status<br />
Description<br />
Power<br />
Ethernet<br />
Data<br />
Pair/ Security<br />
Factory Reset<br />
Quick Start <strong>Guide</strong><br />
*<br />
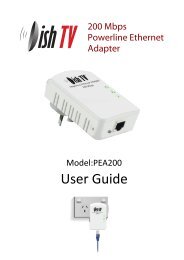
200 Mbps<br />
Powerline Ethernet Adapter<br />
Thank you for choosing <strong>Dish</strong> <strong>TV</strong> for your Powerline Ethernet Adapter.<br />
This guide will provide you with simple instructions for connecting and<br />
operating your <strong>Dish</strong> <strong>TV</strong> Powerline Ethernet Adapter<br />
Further help can be found at www.dishtv.co.nz<br />
Before you start<br />
Please check that your <strong>Dish</strong> <strong>TV</strong> Powerline Ethernet Adapter box<br />
contains all of the following components.<br />
Power<br />
-Solid<br />
-Blinking<br />
-Off<br />
-Power is on<br />
-Device is in power-saving mode<br />
-Power is off<br />
Ethernet<br />
-Solid<br />
-Blinking<br />
-Off<br />
-Ethernet is connected, no data<br />
transmission<br />
-Data is transmitted<br />
-No ethernet connection<br />
2x Powerline Ethernet Adapter (200Mbps*)<br />
Data<br />
-Solid<br />
-Blinking<br />
-Off<br />
-Device is connected to a<br />
powerline network<br />
-Device is receiving or sending data<br />
-Device not connected to powerline<br />
network or in power-saving mode<br />
Button<br />
Description<br />
CD-ROM (Advanced Configuration and User Manual)<br />
www.dishtv.co.nz<br />
Factory Reset<br />
Pair/ Security<br />
Press the Factory Reset button for 1 second,<br />
then the Powerline Adapter device will<br />
return to its factory default settings.<br />
After plugging in your new PEA adapter, press<br />
the pair button for 3-10 seconds, then press<br />
the pair button on one of the other PEA<br />
adapters in your existing network for 3-10<br />
seconds. Both buttons should be pressed<br />
within 2 minutes of each other.<br />
www.dishtv.co.nz<br />
2x Ethernet Cables<br />
*Note: Access speed is a maximum theoretical acheivable speed.
Installation<br />
Requirements<br />
For advanced settings and<br />
User Manual use:<br />
- Computer<br />
- Windows 98SE, 2000, ME, XP,<br />
Vista, Windows 7, Mac OS, Linux<br />
- CD-ROM Drive<br />
- Network Interface Card<br />
Power Supply:<br />
- 100~240VAC, 50-60HZ<br />
Installation<br />
After plugging in your new<br />
PEA adapters, press the pair<br />
button on one for 3-10 seconds,<br />
then press the pair button on the<br />
other PEA adapters for 3-10<br />
seconds. All buttons need to be<br />
pressed within 2 minutes of the<br />
first for pairing to happen.<br />
Scenario Two: Extend Powerline Network<br />
Room 2<br />
For Internet Access:<br />
- Cable or DSL Modem<br />
- Subscription with an Internet<br />
Service Provider (ISP)<br />
Room1<br />
Room 3<br />
Scenario One: General Installation<br />
www.dishtv.co.nz<br />
After plugging in your new<br />
PEA adapters, press the pair<br />
button on one for 3-10 seconds,<br />
then press the pair button on the<br />
other PEA adapter in for 3-10<br />
seconds. Both buttons need to<br />
be pressed within 2 minutes<br />
of each other for pairing to happen.<br />
www.dishtv.co.nz<br />
Note: If you want to add more<br />
PEA adapters to your exsiting<br />
paired adapters, press the pair<br />
button on one of your exsiting<br />
adapters first, then the pair<br />
button on the new adapter/s<br />
within 2 min.<br />
Room 4