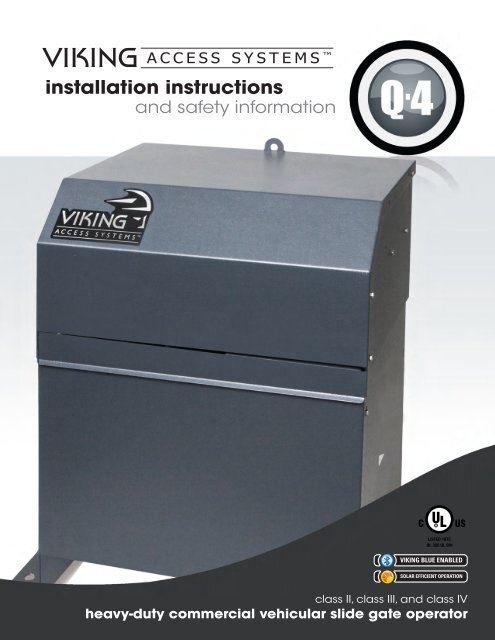
Q-4⢠Installation Manual - Viking Access
Q-4⢠Installation Manual - Viking Access
Q-4⢠Installation Manual - Viking Access
Create successful ePaper yourself
Turn your PDF publications into a flip-book with our unique Google optimized e-Paper software.
VIKING<br />
installation instructions<br />
and safety information<br />
VIKING BLUE ENABLED<br />
SOLAR EFFICIENT OPERATION<br />
class II, class III, and class IV<br />
heavy-duty commercial vehicular slide gate operator
The Q-4 incorporates a powerful and efficient DC motor, a high ampacity<br />
power supply, an integrated battery back-up system and intelligent controller. The<br />
incorporation of these features results in outstanding performance on heavy duty<br />
slide gates. The advanced motor control circuit driving the motor guarantees long life.<br />
The Q-4 brings the advantages of DC gate operators into heavy duty applications.<br />
the viking Q-4 slide gate operation
Q-4 Vehicular Gate Operator • Revision B3 • November 2009
PARTS DIAGRAM<br />
Item Description<br />
Part No.<br />
1 Main Chassis VAQ4CH10<br />
2 Chassis Top Cover VAQ4CTC10<br />
3 Chassis Front Cover VAQ4CFC10<br />
4 Chain Guard VAQ4CHGA10<br />
5 Q4 Motor VAQ4MO<br />
6 Motor Brake Q4MOB10<br />
7 Limit Switch (2) DULS10<br />
8 Limit Switch Cam L3LC10<br />
9 Limit Switch Holder L3LH10<br />
10 Limit Switch Gear Box DULSG<br />
11 Electric Box DUEB10<br />
12 Control Board DUPCB10-Q4<br />
13 Q4 Battery DUBAQ4<br />
14 Q4 Modular Power Supply Q4MPS10<br />
15 Transformer 15amp DUTT15<br />
16 Power Supply Q4PSH10<br />
17 EMI Board Q4EMI<br />
18 Alarm DUAL10<br />
19 Limit Switch Harness Q4LSH<br />
20 Power Harness Q4POH10<br />
21 Power Supply Housing Q4PSH10<br />
22 Battery Retainer Q4BREA10<br />
23 Fuse Kit Q4FUSKT<br />
24 Chain #50 x 10' x 3 Q4C50CHK<br />
25 Sprocket 50B25 Q4S50B25<br />
26 Idler Pulley Q4IDPLY<br />
27 Idler Bushing Q4IDBSH<br />
28 Warning Placard DUWPA<br />
29 Reset Switch (20 Amp) DUMRS20<br />
30 Reset Switch (10 Amp) DUMRS10<br />
31 120V Receptacle DUOL120<br />
13<br />
6<br />
5<br />
24<br />
7<br />
8<br />
9<br />
10<br />
25<br />
28<br />
23<br />
2<br />
12<br />
11<br />
4<br />
27<br />
26<br />
Overall Dimensions<br />
0.625"<br />
Center of<br />
Drive Chain<br />
22<br />
17<br />
15<br />
1<br />
26"<br />
15.75"<br />
11.75" 13.75"<br />
18<br />
16<br />
21<br />
14"<br />
2.60"<br />
20"<br />
26"<br />
3<br />
30<br />
29<br />
14<br />
31<br />
19<br />
Weight<br />
185 lb.<br />
20<br />
WARNING - For <strong>Installation</strong> By Qualified Personnel Only.<br />
i<br />
TECHNICAL SUPPORT 1 800 908 0884
TABLE OF CONTENTS<br />
Parts Diagram/Parts List . . . . . . . . . . . . . . . . . . . . . . . . . . . . . . . . . . . . . . . . . . .i<br />
Important Safety Information<br />
Important Safety Instructions . . . . . . . . . . . . . . . . . . . . . . . . . . . . . . . . . . . . . .2<br />
Important <strong>Installation</strong> Instructions . . . . . . . . . . . . . . . . . . . . . . . . . . . . . . . . .2-3<br />
Maintenance/General Safety Precautions . . . . . . . . . . . . . . . . . . . . . . . . . . . . . .4<br />
Terminology . . . . . . . . . . . . . . . . . . . . . . . . . . . . . . . . . . . . . . . . . . . . . . . . . .5<br />
Photo Beam (non-contact sensor) <strong>Installation</strong> . . . . . . . . . . . . . . . . . . . . . . . . . .6<br />
Edge Sensor (contact sensor) <strong>Installation</strong> . . . . . . . . . . . . . . . . . . . . . . . . . . . . . .7<br />
<strong>Manual</strong> Release . . . . . . . . . . . . . . . . . . . . . . . . . . . . . . . . . . . . . . . . . . . . . . . .7<br />
Audible Alarm Reset Switch <strong>Installation</strong> . . . . . . . . . . . . . . . . . . . . . . . . . . . . . .8<br />
Warning Placard <strong>Installation</strong> . . . . . . . . . . . . . . . . . . . . . . . . . . . . . . . . . . . . . .8<br />
Important <strong>Installation</strong> Information . . . . . . . . . . . . . . . . . . . . . . . . . . . . . . . . . .9<br />
Specifications . . . . . . . . . . . . . . . . . . . . . . . . . . . . . . . . . . . . . . . . . . . . . . . . .9<br />
Plans of <strong>Installation</strong> . . . . . . . . . . . . . . . . . . . . . . . . . . . . . . . . . . . . . . . . . . . . .10<br />
Plan of <strong>Installation</strong> – Concrete Pads . . . . . . . . . . . . . . . . . . . . . . . . . . . . . . . . . .11<br />
Gate Operator <strong>Installation</strong><br />
Step 1 through 3 – Operator <strong>Installation</strong> . . . . . . . . . . . . . . . . . . . . . . . . . . . .12-13<br />
Electrical <strong>Installation</strong><br />
Step 4 – Electrical <strong>Installation</strong> (120/220 VAC) . . . . . . . . . . . . . . . . . . . . . . . . . .14<br />
Step 5 – Power Connections . . . . . . . . . . . . . . . . . . . . . . . . . . . . . . . . . . . . . .15<br />
Gate Operator <strong>Installation</strong><br />
Limit Switch Connections . . . . . . . . . . . . . . . . . . . . . . . . . . . . . . . . . . . . . . . .16<br />
Step 6 through 8 – Limit Switch Setup . . . . . . . . . . . . . . . . . . . . . . . . . . . . .16-17<br />
Special Features<br />
Fine Tune Limit Setting . . . . . . . . . . . . . . . . . . . . . . . . . . . . . . . . . . . . . . . . .18<br />
Electrical <strong>Installation</strong><br />
Master/Slave Connections . . . . . . . . . . . . . . . . . . . . . . . . . . . . . . . . . . . . . . . .19<br />
Vehicular Loop Detector <strong>Installation</strong><br />
Loop Layout Diagrams . . . . . . . . . . . . . . . . . . . . . . . . . . . . . . . . . . . . . . . . . .20<br />
<strong>Installation</strong> Guidelines . . . . . . . . . . . . . . . . . . . . . . . . . . . . . . . . . . . . . . . . . . .21<br />
Loop Rack <strong>Installation</strong> . . . . . . . . . . . . . . . . . . . . . . . . . . . . . . . . . . . . . . . . . . . . . .22<br />
<strong>Access</strong>ory Connections<br />
Open Commands; Safety Connections . . . . . . . . . . . . . . . . . . . . . . . . . . . . . . . .23<br />
Radio Receiver . . . . . . . . . . . . . . . . . . . . . . . . . . . . . . . . . . . . . . . . . . . . . . . .24<br />
Guard Station . . . . . . . . . . . . . . . . . . . . . . . . . . . . . . . . . . . . . . . . . . . . . . . . .25<br />
Special Features<br />
Auto Open Feature . . . . . . . . . . . . . . . . . . . . . . . . . . . . . . . . . . . . . . . . . . . . . . . .26<br />
Intelligent Obstruction Sensor (Primary Entrapment Protection) . . . . . . . . . . . . .27<br />
Fail Safe/Fail Secure Operation; Hold Open Timer . . . . . . . . . . . . . . . . . . . . . . .28<br />
Optional <strong>Viking</strong>Blue Wireless Master/Slave <strong>Installation</strong> . . . . . . . . . . . . . . . . . .29<br />
Optional <strong>Viking</strong>Blue Diagnostics Software <strong>Installation</strong> . . . . . . . . . . . . . . . . . . .30<br />
Troubleshooting . . . . . . . . . . . . . . . . . . . . . . . . . . . . . . . . . . . . . . . . . . . . . . . .31-33<br />
TECHNICAL SUPPORT 1 800 908 0884 1
IMPORTANT SAFETY INFORMATION<br />
WARNING - Not following these instructions may cause severe injury or death to persons.<br />
IMPORTANT SAFETY INSTRUCTIONS<br />
WARNING – To reduce the risk of severe injury or death:<br />
1. READ AND FOLLOW ALL INSTRUCTIONS.<br />
2. Never let children operate or play with gate controls. Keep the remote control away from children.<br />
3. Always keep people and objects away from the gate. NO ONE SHOULD CROSS THE PATH OF<br />
THE MOVING GATE.<br />
4. Test the gate operator monthly. The gate MUST reverse on contact with a rigid object or when<br />
an object activates the non-contact sensors. After adjusting the force or the limit of travel,<br />
retest the gate operator. Failure to adjust and retest the gate operator properly can increase the<br />
risk of injury or death.<br />
5. Use the manual release only when the gate is not moving.<br />
6. KEEP GATES PROPERLY MAINTAINED. Read the owner’s manual. Have a qualified service person<br />
make repairs to gate hardware.<br />
7. The entrance is for vehicles only. Pedestrians must use separate entrance.<br />
8. Every gate operator installation MUST have secondary protection devices<br />
against entrapment, such as edge sensors and photo beams more in particularly<br />
in places where the risk of entrapment is more likely to occur.<br />
9. SAVE THESE INSTRUCTIONS.<br />
IMPORTANT INSTALLATION INSTRUCTIONS<br />
1. Install the gate operator only when:<br />
a) The operator is appropriate for the construction of the gate and the usage Class of the gate<br />
(refer to page 5),<br />
b) All openings of a horizontal slide gate are guarded or screened from the bottom of the gate<br />
to a minimum of 4 feet (1.22 m) above the ground to prevent a 2-1/4 inch (57.2 mm)<br />
diameter sphere from passing through the openings anywhere in the gate, and in that<br />
portion of the adjacent fence that the gate covers in the open position,<br />
c) ALL EXPOSED PINCH POINTS ARE ELIMINATED OR GUARDED, AND<br />
d) GUARDING IS SUPPLIED FOR EXPOSED ROLLERS.<br />
2. The operator is intended for installation only on gates used for vehicles. Pedestrians must be<br />
supplied with a separate access opening. The pedestrian access opening shall be designed to<br />
promote pedestrian usage. Locate the gate such that persons will not come in contact with the<br />
vehicular gate during the entire path of travel of the vehicular gate.<br />
3. The gate must be installed in a location so that enough clearance is supplied between the gate<br />
and adjacent structures when opening and closing to reduce the risk of entrapment. Swinging<br />
gates shall not open into public access areas.<br />
4. The gate must be properly installed and work freely in both directions prior to the installation<br />
of the gate operator. Do not over-tighten the operator clutch or pressure<br />
relief valve to compensate for a damaged gate.<br />
5. The gate operator controls must be placed so that the user has full view<br />
of the gate area when the gate is moving AND AWAY FROM THE GATE<br />
PATH PERIMETER,<br />
2<br />
TECHNICAL SUPPORT 1 800 908 0884
IMPORTANT SAFETY INFORMATION<br />
WARNING - Not following these instructions may cause severe injury or death to persons.<br />
IMPORTANT INSTALLATION INSTRUCTIONS Continued<br />
6. Controls intended for user activation must be located at least six feet (6’) away from any moving<br />
part of the gate and where the user is prevented from reaching over, under, around or<br />
through the gate to operate the controls. Outdoor or easily accessible controls shall have a security<br />
feature to prevent unauthorized use.<br />
7. The Stop and/or Reset button must be located in the line-of-sight of the gate. Activation of the<br />
reset control shall not cause the operator to start.<br />
8. All warning signs and placards must be installed where visible in the area of the gate. A minimum<br />
of two placards shall be installed. A placard is to be installed in the area of each side of the<br />
gate and be visible to persons located on the side of the gate on which the placard is installed.<br />
9. For gate operators utilizing a non-contact sensor (Photo beam or like) in<br />
accordance with section 31.1.1 of the UL325 standard:<br />
a) See instructions on the placement of non-contact sensors for each Type of<br />
application (refer to page 6),<br />
b) Care shall be exercised to reduce the risk of nuisance tripping, such as when<br />
a vehicle, trips the sensor while the gate is still moving, and<br />
c) One or more non-contact sensors shall be located where the risk of entrapment<br />
or obstruction exists, such as the perimeter reachable by a moving gate or<br />
barrier (refer to page 6).<br />
d) Use only Omron E3K-R10K4 photoelectric eye to comply with UL325<br />
10. For a gate operator utilizing a contact sensor (Edge sensor or like) in<br />
accordance with section 31.1.1 of the UL325 standard:<br />
a) One or more contact sensors shall be located where the risk of entrapment or<br />
obstruction exists, such as at the leading edge, trailing edge, and post mounted<br />
both inside and outside of a vehicular horizontal slide gate (refer to page 7).<br />
b) One or more contact sensors shall be located at the bottom edge of a vehicular<br />
vertical lift gate.<br />
c) One or more contact sensors shall be located at the pinch point of a vehicular<br />
vertical pivot gate.<br />
d) A hardwired contact sensor shall be located and its wiring arranged so that the<br />
communication between the sensor and the gate operator is not subjected to<br />
mechanical damage.<br />
e) A wireless contact sensor such as one that transmits radio frequency (RF)<br />
signals to the gate operator for entrapment protection functions shall be<br />
located where the transmission of the signals are not obstructed or impeded<br />
by building structures, natural landscaping or similar obstruction. A wireless<br />
contact sensor shall function under the intended end-use conditions.<br />
f) One or more contact sensors shall be located on the inside and outside leading<br />
edge of a swing gate. Additionally, if the bottom edge of a swing gate is greater<br />
than 6 inches (152 mm) above the ground at any point in its arc of travel, one<br />
or more contact sensors shall be located on the bottom edge (refer to page 7).<br />
g) One or more contact sensors shall be located at the bottom<br />
edge of a vertical barrier (arm).<br />
h) Use only Miller Edge Model MGR20 or MGS20 edge sensor<br />
to comply with UL325<br />
TECHNICAL SUPPORT 1 800 908 0884 3
IMPORTANT SAFETY INFORMATION<br />
WARNING - Not following these instructions may cause severe injury or death to persons.<br />
MAINTENANCE<br />
Remove the Power Harness from the Control Board (refer to page 14)<br />
• Clean and lubricate the gate track wheels using the recommended lubricant.<br />
• Inspect the track for any signs of cracking or separation.<br />
• Check that all mounting hardware of the gate operator is properly tighten.<br />
• Ensure that the gate moves freely.<br />
• Check for corroded parts and replace if necessary.<br />
• Check the battery for the following:<br />
Battery connections must be free of corrosion.<br />
Battery voltage must be 26 VDC (fully charged battery).<br />
Reconnect the Power Harness for the Control Board (refer to page 14)<br />
• Check and confirm the proper operation of all safety devices (photoelectric eye, edge sensors or like).<br />
• Check and confirm the operation of all installed accessories.<br />
• Check and confirm the operation of all special features such as the Intelligent Obstruction Sensor, Hold<br />
Open Timer (refer to page 20 to 27)<br />
• Check and confirm the operation of the manual release (refer to page 7)<br />
• Verify battery backup functionally by turning off the power source (120 VAC and 220 VAC). DO NOT<br />
FORGET TO TURN ON THE POWER SOURCE AFTER VERIFICATION.<br />
GENERAL SAFETY PRECAUTIONS<br />
The following precautions are an integral and essential part of the product and must be supplied to the user.<br />
Read them carefully as they contain important indications for the safe installation, use and maintenance.<br />
• These instruction must be kept and forwarded to all possible future users of the system.<br />
• This product must be used only for that which it has been expressly designed.<br />
• Any other use is to be considered improper and therefore dangerous.<br />
• The manufacturer cannot be held responsible for possible damage caused by improper, erroneous or<br />
unreasonable use.<br />
• Avoid operating in the proximity of the hinges or moving mechanical parts.<br />
• Do not enter the path of the moving gate while in motion.<br />
• Do not obstruct the motion of the gate as this may cause a situation of danger.<br />
• Do not allow children to play or stay within the the path of the moving gate.<br />
• Keep remote control or any other control devices out of the reach of children, in order to avoid possible<br />
involuntary activation of the gate operator.<br />
• In case of break down or malfunctioning of the product, disconnect from the main power source. Do not<br />
attempt to repair or intervene directly, contact only qualified personnel for repair.<br />
• Failure to comply with the above may create a situation of danger.<br />
• All cleaning, maintenance or repair work must be carried out by qualified personnel.<br />
• In order to guarantee that the system works efficiently and correctly it is important to have the manufacturer’s<br />
instructions on maintenance of the gate and operator carried out by qualified personnel.<br />
• In particular, regular checks are recommended in order to verify that the safety devices are operating correctly.<br />
All installation, maintenance and repair work must be documented and made available to the user.<br />
Installer:<br />
_____________________________________________________<br />
Signature<br />
____________<br />
Date<br />
Contact:<br />
_________________________________________________________<br />
_________________________________________________________<br />
4<br />
TECHNICAL SUPPORT 1 800 908 0884
IMPORTANT SAFETY INFORMATION<br />
CAUTION: To Reduce the Risk of Fire or Injury to Persons<br />
a) Use only the following type and size of battery(ies): Yuasa NP7-12<br />
b) Do not dispose of the battery(ies) in fire. The cells may explode. Check with local codes for possible disposal<br />
instructions.<br />
c) Do not open or mutalate the battery(ies). Released electrolyte is corrosive and may cause damage to the<br />
eyes or skin. It may be toxic fi swallowed.<br />
d) Exercise care in handling batteries in order not to short the battery with conductying materials such as<br />
rings, bracelets and keys.<br />
e) Change the battery(ies) provided with or identified for use with this product only in accordance with the<br />
instructions and limitations specified in this manual.<br />
f) Observe proper polarity orientation between the battery(ies) and charging circuit.<br />
g) Do not mix batteries of different sizes or from different manufacturers in this product (applies to products<br />
employing more than one user replaceable secondary battery).<br />
h) A battery-operated product employing a secondary battery supply intended to be charged within the<br />
product shall contain specific instructions concerning the proper method of charging.<br />
UL325 Gate Operator Classification<br />
GLOSSARY<br />
RESIDENTIAL VEHICULAR GATE OPERATOR<br />
CLASS I – A vehicular gate operator (or system) intended for use<br />
in a home of one-to four single family dwelling, or a garage or<br />
parking area associated therewith.<br />
COMMERCIAL/GENERAL ACCESS VEHICULAR GATE OPERATOR<br />
CLASS II – A vehicular gate operator (or system) intended for use<br />
in a commercial location or building such as a multi-family housing<br />
unit (five or more single family units), hotel, garages, retail<br />
store, or other building servicing the general public.<br />
INDUSTRIAL/LIMITED ACCESS VEHICULAR GATE OPERATOR<br />
CLASS III – A vehicular gate operator (or system) intended for<br />
use in an industrial location or building such as a factory or<br />
loading dock area or other locations not intended to service the<br />
general public.<br />
RESTRICTED ACCESS VEHICULAR GATE OPERATOR<br />
CLASS IV – A vehicular gate operator (or system) intended for<br />
use in a guarded industrial location or building such as an airport<br />
security area or other restricted access locations not servicing<br />
the general public, in which unauthorized access is prevented<br />
via supervision by security personnel.<br />
Install the gate operator only when:<br />
The operator is appropriate for the construction of the gate<br />
and the Usage Class of the gate.<br />
5<br />
TECHNICAL SUPPORT 1 800 908 0884 5
IMPORTANT SAFETY INFORMATION<br />
WARNING - Not following these instructions may cause severe injury or death to persons.<br />
NOTE - This type of installation DOES NOT reverse the gate all the way back to its limits when the photo-beam<br />
is obstructed. This installation is only to protect against entrapment and to comply with UL325.<br />
Photo Beam (non-contact sensor) <strong>Installation</strong><br />
Secondary Entrapment Protection<br />
Photo beams or like must be installed to reduce the risk of entrapment.<br />
Use only Omron E3K-R10K4 photoelectric eye to comply with UL325<br />
Make the electrical connections of the photoelectric sensor as described here in this page.<br />
Care shall be exercised to reduce the risk of nuisance tripping, such as when a<br />
vehicle, trips the sensor while the gate is still moving, and<br />
One or more non-contact sensors shall be located where the risk of entrapmentor<br />
obstruction exists, such as the perimeter reachable by a moving gate or barrier.<br />
Turn Switch to<br />
'Light On' Position<br />
Gnd<br />
+28v<br />
Radio<br />
E3K-R10<br />
adio Station Loop Connector Open Commands Guard Station<br />
Radio Station<br />
Gnd<br />
+28v<br />
Gnd<br />
UL<br />
Gnd<br />
Reopen<br />
Gnd<br />
Safety Connector<br />
Center<br />
Exit<br />
Gnd<br />
Gnd<br />
1<br />
(C1)<br />
3<br />
(NC1)<br />
Strike<br />
24VDC<br />
Gnd<br />
Fire<br />
Open Commands<br />
Gnd<br />
Omron Model<br />
Shown<br />
Open<br />
Stop<br />
Close<br />
GND<br />
Guard Station<br />
.O.<br />
OM<br />
N.C.<br />
nsor<br />
Moto<br />
ttery<br />
Low B<br />
ower<br />
Powe<br />
arger<br />
Mag. Lock<br />
Mag.<br />
Lock<br />
Mag.<br />
Lock<br />
Mag.<br />
Lock<br />
6<br />
Off 1 Center<br />
Loop<br />
Safety<br />
Loop<br />
UL<br />
Sens<br />
Radio<br />
Rec.<br />
Reflector<br />
Radio<br />
Rec.<br />
UL<br />
Sensor<br />
Potential Entrapment<br />
Area (Shaded)<br />
Contact Sensor<br />
Safety<br />
Loop<br />
Connection '1' (C1)<br />
Connection '3' (NC1)<br />
24 VDC Power Connections<br />
24 VDC Power Connections<br />
Photo Beam Unit<br />
Center<br />
Loop<br />
off<br />
1sec<br />
30sec<br />
Hold Open<br />
Timer<br />
Hold Open<br />
Timer<br />
MAX<br />
Sensor<br />
Charg<br />
60sec<br />
min.<br />
min. MAX<br />
Hold Open<br />
Timer<br />
Obstruction<br />
TECHNICAL SUPPORT 1 800 908 0884<br />
Open<br />
Gate in Closed Position<br />
Contact Sensor<br />
Close Stop Open<br />
Limit<br />
0 3<br />
One or more non-contact sensors shall be located where the risk of entrapment or<br />
obstruction exists, such as the perimeter reachable by a moving gate or barrier.<br />
Consult the installation manual for the UL325 device (photo<br />
beam Radio or like) for UL detail information Safety about Center the usage,<br />
1.5<br />
Rec. Sensor Loop Loop<br />
Obstruction<br />
installation and maintenance.<br />
Sensor Overlap Delay<br />
30<br />
60<br />
Obstruction<br />
Sensor<br />
0<br />
Open<br />
1.5<br />
3<br />
Overlap Delay<br />
Stop<br />
Overlap<br />
Delay<br />
Stop<br />
Close<br />
Limit<br />
Close
IMPORTANT SAFETY INFORMATION<br />
WARNING - Not following these instructions may cause severe injury or death to persons.<br />
Edge Sensor (contact sensor) <strong>Installation</strong><br />
For Secondary Entrapment Protection<br />
All Contact Sensors<br />
to be Wired In Parallel<br />
+28v<br />
Gnd<br />
+28v<br />
Radio<br />
Radio Station Loop Connector Open Commands Guard Station Master/Slave<br />
Radio Station<br />
Gnd<br />
+28v<br />
Gnd<br />
UL<br />
Gnd<br />
Reopen<br />
Gnd<br />
Safety Connector<br />
Center<br />
Gnd<br />
Exit<br />
Gnd<br />
Strike<br />
Gnd<br />
Fire<br />
Gnd<br />
Open Commands<br />
Open<br />
Stop<br />
Close<br />
GND<br />
Guard Station<br />
Open<br />
Stop<br />
Close<br />
Master/Slave<br />
GND<br />
UL<br />
Siren<br />
UL<br />
Siren<br />
Siren<br />
N.O.<br />
COM<br />
N.C.<br />
Motor Sensor<br />
Motor Sensor<br />
Low Battery<br />
Low Battery<br />
Power<br />
Mag. Lock<br />
Mag.<br />
Lock<br />
Mag.<br />
Lock<br />
Obstruction<br />
Sensor Center Safety UL Radio<br />
Charger<br />
Loop Loop Sensor Rec.<br />
Power<br />
Charger<br />
Mag.<br />
Lock<br />
Off 1 Center<br />
Loop<br />
Safety<br />
Loop<br />
UL<br />
Sens<br />
Radio<br />
Rec.<br />
Use only Miller Edge 3-sided 30sec activation type Open MGR20 Stop or Close MGS20 to comply with UL325<br />
Brake<br />
One or more contact sensors Hold shall Openbe located on the inside and outside leading edge<br />
Timer Limit<br />
Limit<br />
OPEN LEFT<br />
off<br />
1sec<br />
60sec<br />
Hold Open<br />
Timer<br />
Close Stop Open<br />
contact sensors shall be located MAX on min. the bottom edge.<br />
0 3<br />
Radio<br />
Rec.<br />
30<br />
60<br />
min. MAX<br />
Hold Open<br />
Timer<br />
Obstruction<br />
Sensor<br />
0<br />
communication UL Safety between Center the sensor and 1.5the gate operator is not subjected to<br />
Sensor Loop Loop<br />
Obstruction<br />
Sensor Overlap Delay<br />
<strong>Manual</strong> Release<br />
Remove the top cover.<br />
Move the Brake Handle to the Released<br />
Position.<br />
To resume Fail Safe/Secure Fail normal operation, move the<br />
Safe/Secure<br />
Handle to the Engaged Position.<br />
Contact Sensor<br />
Open<br />
1.5<br />
3<br />
Overlap<br />
Delay<br />
Overlap Delay<br />
Stop<br />
Close<br />
Contact Sensor<br />
Edge sensor or like must be installed to reduce the risk of entrapment.<br />
of a swing gate. Additionally, if the bottom edge of a swing gate is greater than 6<br />
inches (152 mm) above the ground at any point in its arc of travel, one or more<br />
1. A hardwired contact sensor shall be located and its wiring arranged so that the<br />
mechanical damage.<br />
2. A wireless contact sensor such as one that transmits radio frequency (RF) signals<br />
to the gate operator for entrapment protection functions shall be located where<br />
the transmission of the signals are not obstructed or impeded by building<br />
structures, natural landscaping or similar obstruction. A wireless contact sensor<br />
shall function under the intended end-use conditions.<br />
Brake<br />
Brake<br />
Brake<br />
Engaged<br />
Brake<br />
Released<br />
Brake in Released<br />
Position<br />
TECHNICAL SUPPORT 1 800 908 0884 7
IMPORTANT SAFETY INFORMATION<br />
WARNING - Not following these instructions may cause severe injury or death to persons.<br />
Audible Alarm Reset Switch <strong>Installation</strong><br />
<strong>Manual</strong> Reset for the Audible Alarm<br />
UL325 standard requires an audible alarm to go off after two consecutive events<br />
detected by the primary entrapment protection of the gate operator (obstruction sensor).<br />
The audible alarm will continue to sound for 5 minutes or until a stop command<br />
gets actuated.<br />
The Stop command can be actuated in two different forms<br />
1. Using the Built in Stop switch on the Control Box or<br />
2. Using an External Stop button within the sight of the gate, away from moving<br />
parts of the gate and out of reach of children.<br />
3. Controls intended for user activation must be located at least six feet (6’) away<br />
from any moving part of the gate and where the user is prevented from reaching<br />
over, under, around or through the gate to operate the controls. Outdoor or easily<br />
accessible controls shall have a security feature to prevent unauthorized use.<br />
4. The Stop and/or Reset button must be located in the line-of-sight of the gate.<br />
Activation of the reset control shall not cause the operator to start.<br />
6'<br />
STOP<br />
N.O.<br />
COM<br />
STOP<br />
5'<br />
Minimum<br />
+28v<br />
Out of Reach<br />
<strong>Manual</strong> Stop<br />
Radio Station Loop Connector<br />
Button<br />
Open Commands Guard Station Master/Slave<br />
Gnd<br />
Warning N.O. Placard <strong>Installation</strong><br />
Motor Sensor<br />
Low Battery<br />
Radio Station<br />
COM<br />
N.C.<br />
Motor Sensor<br />
Low Battery<br />
+28v<br />
Mag. Lock<br />
Mag.<br />
Lock<br />
Radio<br />
Mag.<br />
Lock<br />
Mag.<br />
Lock<br />
Gnd<br />
+28v<br />
Gnd<br />
UL<br />
Safety Connector<br />
Obstruction<br />
Sensor Center Safety UL Radio<br />
Charger<br />
Loop Loop Sensor Rec.<br />
Power<br />
Gnd<br />
Reopen<br />
Gnd<br />
Center<br />
Gnd<br />
Off 1 Center<br />
Loop<br />
Safety<br />
Loop<br />
UL<br />
Sens<br />
Radio<br />
Rec.<br />
off<br />
1sec<br />
Exit<br />
30sec<br />
Open Commands<br />
Hold Open<br />
Timer<br />
MAX<br />
Gnd<br />
min.<br />
Strike<br />
60sec<br />
Hold Open<br />
Timer<br />
min. MAX<br />
Hold Open<br />
Timer<br />
Obstruction<br />
Sensor<br />
Gnd<br />
Fire<br />
Open<br />
Gnd<br />
Guard Station<br />
Close Stop Open<br />
0 3<br />
Power Radio UL Safety Center<br />
1.5<br />
Obstruction<br />
Charger<br />
Rec. Sensor Loop Loop<br />
Sensor Overlap Delay<br />
of the gate. A minimum of two placards shall be installed. A placard is<br />
Limit<br />
0<br />
1.5<br />
3<br />
Overlap Delay<br />
Open<br />
Stop<br />
Overlap<br />
Delay<br />
All Warning Signs and Placards must be installed where visible in the area<br />
to be installed in the area of each side of the gate and be visible.<br />
30<br />
60<br />
Open<br />
Stop<br />
Stop<br />
Close<br />
Close<br />
Limit<br />
GND<br />
Close<br />
Open<br />
Stop<br />
Close<br />
Master/Slave<br />
GND<br />
UL<br />
Siren<br />
UL<br />
Siren<br />
Siren<br />
Brake<br />
Brake<br />
Brake<br />
8<br />
TECHNICAL SUPPORT 1 800 908 0884<br />
OPEN<br />
OPEN
OPEN<br />
STOP<br />
CLOSE<br />
IMPORTANT INSTALLATION INFORMATION<br />
CAUTION - FOR USE WITH GATES OF A MAXIMUM OF 60 FT IN LENGTH AND 4000 LBS. IN WEIGHT.<br />
WARNING - TO REDUCE THE RISK OF SEVERE INJURY OR DEATH TO PERSONS:<br />
Do not allow pedestrian use of this gate!<br />
Do NOT Install the gate operator to lift gates<br />
55'-0"<br />
Control<br />
Buttons<br />
60’ maximum gate length<br />
4000 lb.<br />
MAX.<br />
4000 pounds maximum gate weight<br />
Specifications<br />
Maximum Gate Length:<br />
Maximum Gate Weight:<br />
Power Requirements:<br />
Operating Temperature:<br />
Locate Control Buttons:<br />
1. Within sight of the gate,<br />
2. At a minimum height of 5 feet so small<br />
children are not able to reach it,<br />
and<br />
3. Away from the gate opening so that<br />
someone cannot operate the controls<br />
while in the path of the gate, and<br />
3. Away from all moving parts of<br />
the gate.<br />
55 feet<br />
4000 lbs.<br />
120 VAC Single Phase at 6 Amps<br />
Or<br />
220 VAC Single Phase at 3 Amp<br />
-20°C (-4°F) to 70°C (158°F)<br />
TECHNICAL SUPPORT 1 800 908 0884 9
PLANS OF INSTALLATION<br />
All openings of a horizontal slide gate are guarded or screened from the bottom of<br />
the gate to a minimum of 4 feet (1.22 m) above the ground to prevent a 2-1/2 inch<br />
(57.2 mm) diameter sphere from passing through the openings anywhere in the gate,<br />
and in that portion of the adjacent fence that the gate covers in the open position.<br />
Gate In Open Position<br />
Gate In Closed Position<br />
Track Concrete Pad<br />
Gate Operator<br />
Concrete Pad<br />
Gate Operator<br />
Track Concrete Pad<br />
Gate Operator<br />
Concrete Pad<br />
Gate Operator<br />
Figure A<br />
Plan of Front <strong>Installation</strong><br />
Gate In Open Position<br />
Gate In Closed Position<br />
Gate Operator<br />
Concrete Pad<br />
Track Concrete Pad<br />
See Detail Below<br />
Gate Operator<br />
Concrete Pad<br />
Track Concrete Pad<br />
Gate<br />
Route Chain<br />
As Shown<br />
Safety Guard<br />
Fixed Pulley<br />
Parts Not Supplied by<br />
<strong>Viking</strong> <strong>Access</strong> Systems<br />
Gate Operator<br />
Concrete Pad<br />
Detail of Rear Install Chain Route<br />
Figure B<br />
Plan of Rear <strong>Installation</strong><br />
10<br />
TECHNICAL SUPPORT 1 800 908 0884
PLAN OF INSTALLATION – CONCRETE PADS<br />
Track<br />
Gate<br />
10"<br />
2"<br />
4"<br />
Minimum<br />
Install a<br />
Positive Stop<br />
at Both Ends 24"<br />
of the Track<br />
Track Concrete Pad<br />
Operator Chassis<br />
Gate Operator Concrete Pad<br />
28"<br />
Drill for a 1/2" x 3-1/2"<br />
Red Head Anchor<br />
(4) Places<br />
5.5"<br />
13"<br />
Center of<br />
Drive Chain<br />
Recommended<br />
Area for<br />
Conduit(s)<br />
5"<br />
18"<br />
6"<br />
11.75"/13.75"/15.75"<br />
4"<br />
Minimum<br />
Conduit Location<br />
24"<br />
See Note 1<br />
Below<br />
Grade Level<br />
See Note 2<br />
Track Concrete Pad<br />
Gate Operator Concrete Pad<br />
1. Follow the local building code to determine the required depth of the concrete pad.<br />
2. Pad measurements recommended by <strong>Viking</strong> <strong>Access</strong> Systems are at lease 24” long,<br />
18” wide and 24” deep to ensure the stable operation of the operator, and a<br />
minimum of 4” above level grade to avoid any flooding of the machinery.<br />
3. The path of the track must be 10” wide and at least 6” deep to support the<br />
weight of the gate. Please consult the local building code for verification and<br />
further details.<br />
4. Provide a sufficient number of conduit pathways for all low power accessories<br />
such as loop detector leads, maglock, non-contact sensors, contact sensors, safety<br />
and other commands. Also provide conduit for the power supply (either 110 or<br />
220 VAC). Extend the conduit the recommended height of 1” above the level of<br />
the concrete pad. Install all conduit in the shaded area shown above.<br />
TECHNICAL SUPPORT 1 800 908 0884 11
GATE OPERATOR INSTALLATION<br />
Note: Before starting the installation procedure;<br />
• Open and close the gate manually, making sure there is sufficient space between<br />
the gate and adjacent walls.<br />
• Check that the wheels are turning freely on the track and there are no restrictions<br />
while pushing the gate to the open and closed positions.<br />
• Confirm that there is adequate spacing for the guide rollers and that there are no<br />
restrictions throughout the travel of the gate.<br />
STEP 1<br />
Before anchoring the chassis to the concrete<br />
pad, make sure the gate and operator are<br />
LEVEL and PARALLEL. Minimum distance<br />
between the operator and gate is 3”.<br />
STEP 2<br />
Attach the operator to the concrete pad<br />
using Red Head 1/2” x 3-1/2” Anchors.<br />
Follow the manufacturers instructions for<br />
proper installation. Refer to page 11 for hole<br />
center dimensions.<br />
12 TECHNICAL SUPPORT 1 800 908 0884<br />
16
GATE OPERATOR INSTALLATION<br />
Step 3<br />
Chain <strong>Installation</strong>: Before welding the<br />
provided chain brackets, make sure the<br />
chain will be in a straight line with, and at<br />
the same height as, the chain leaving the<br />
gate operator rollers.<br />
17<br />
TECHNICAL SUPPORT 1 800 908 0884 13
ELECTRICAL INSTALLATION<br />
Caution – Do not connect the power harness to the board<br />
until the installation is ready for verification.<br />
115V/220V<br />
Power Switch<br />
3A FUSE<br />
To<br />
Transformer<br />
OPEN RIGHT<br />
Part # VAEMI<br />
Obstruction<br />
Sensor Center Safety UL Radio<br />
Charger<br />
Loop Loop Sensor Rec.<br />
Black<br />
24V BAT 24VAC<br />
Red<br />
Green<br />
White<br />
Power Harness<br />
Earth Ground<br />
Power Ground<br />
Neutral<br />
Hot<br />
adio<br />
Rec.<br />
OPEN LEFT<br />
UL<br />
ens<br />
ction<br />
ensor<br />
rlap<br />
elay<br />
Overlap Delay<br />
STEP 4<br />
The Gate Operator requires a single phase AC<br />
line to operate the gate and charge the batteries.<br />
A. Turn off the main switch or breaker for<br />
the power line being used.<br />
Fail<br />
Safe/Secure<br />
open<br />
oop<br />
enter<br />
oop<br />
B. Move the selector switch on the Incoming<br />
Voltage Selector to the proper position<br />
(115 for 110 to 120VAC, 230 for 200 to 240VAC).<br />
C. Connect the incoming power wires to the<br />
terminals as shown in the illustration.<br />
D. Turn on the main switch or breaker once<br />
the installation is ready for final<br />
adjustments.<br />
E. To verify that there is AC power to the<br />
system, check that the ‘Charger’ LED on the<br />
Control Board is on.<br />
Tips for proper ground installation<br />
A good ground in a gate operator<br />
installation will minimize or prevent damage<br />
to the operator cause by natural events such<br />
as lightning strikes.<br />
The following will provide a guideline for<br />
proper grounding:<br />
1. Use a ground rod to provide a ground<br />
reference.<br />
2. Consult your city code and be aware of<br />
under-ground services in the site of the<br />
gate operator to prevent inconveniences.<br />
3. Use always a single bonding point for<br />
grounding.<br />
4. All ground wires must be as short and as<br />
thick as possible.<br />
5. Prevent unnecessary turns or loops in all<br />
ground wires.<br />
.5<br />
Earth Ground<br />
Ground Rod<br />
14 TECHNICAL SUPPORT 1 800 908 0884<br />
18
ELECTRICAL INSTALLATION<br />
Low Battery<br />
Motor Sensor<br />
Power Connections<br />
Charger<br />
Power<br />
Radio<br />
Rec.<br />
UL<br />
Sensor<br />
afety<br />
Loop<br />
STEP 5<br />
Connect the wire harness to the “OPEN RIGHT”<br />
connector if the gate opens to the right.<br />
Connect the wire harness to the “OPEN LEFT”<br />
connector if the gate opens to the left.<br />
OPEN<br />
OPEN<br />
OPEN RIGHT<br />
OPEN LEFT<br />
Gate Opens Right<br />
Safety<br />
Motor Sensor<br />
UL<br />
Radio<br />
Charger<br />
Loop<br />
Sensor<br />
Rec.<br />
Power<br />
Low Battery<br />
Inside View<br />
OPEN OPEN<br />
OPEN RIGHT<br />
OPEN LEFT<br />
Inside View<br />
Gate Opens Left<br />
Limit Switch Connections<br />
The Limit Switches are pre-wired. Should the<br />
wires become disconnected, use this diagram<br />
to reconnect them.<br />
Red<br />
Black<br />
COM<br />
NO<br />
NC<br />
Lower Limit Switch<br />
Upper Cam<br />
Green<br />
COM<br />
NO<br />
NC<br />
White<br />
Upper Limit Switch<br />
TECHNICAL SUPPORT 1 800 908 0884 15
LIMIT SWITCH SET-UP<br />
Note:<br />
Open and close the gate without interruption every<br />
time you change the adjustment.<br />
OPEN LEFT<br />
OPEN RIGHT<br />
R<br />
Gnd<br />
+28v<br />
Gnd<br />
UL<br />
Upper Cam sets<br />
Open Position<br />
Lower Cam sets<br />
Close Position<br />
Gnd<br />
Reopen<br />
Gnd<br />
Safety Connector<br />
Center<br />
Gnd<br />
Exit<br />
Gnd<br />
Strike<br />
Gnd<br />
Fire<br />
Open Commands<br />
Upper Cam sets<br />
Close Position<br />
Lower Cam sets<br />
Open Position<br />
Loop Connector Open Commands Guard Station Master/Slave<br />
Gnd<br />
Open<br />
Stop<br />
Close<br />
GND<br />
Guard Station<br />
Open<br />
Stop<br />
Close<br />
Master/Slave<br />
GND<br />
UL<br />
Siren<br />
UL<br />
Siren<br />
Siren<br />
Off 1 Center<br />
Loop<br />
Safety<br />
Loop<br />
UL<br />
Sens<br />
Radio<br />
Rec.<br />
Radio<br />
Rec.<br />
Radio<br />
Rec.<br />
STEP 1<br />
Set the Fine Tune Limit Pot to Hold zero Open on the Control Board.<br />
UL<br />
Sensor<br />
UL<br />
Sensor<br />
Trim Pot Location<br />
Safety<br />
Loop<br />
Safety<br />
Loop<br />
Center<br />
Loop<br />
Center<br />
Loop<br />
off<br />
1sec<br />
30sec<br />
30<br />
Hold Open<br />
Timer<br />
MAX<br />
60sec<br />
60<br />
Timer<br />
min.<br />
min. MAX<br />
Obstruction<br />
Sensor<br />
Sensor<br />
Hold Open<br />
Timer<br />
Obstruction<br />
Sensor<br />
Obstruction<br />
Open<br />
Close Stop Open<br />
Limit<br />
0 3<br />
0<br />
Open<br />
1.5<br />
1.5<br />
3<br />
Overlap Delay<br />
Overlap Delay<br />
Stop<br />
Overlap<br />
Delay<br />
Stop<br />
Close<br />
Close<br />
Limit<br />
This ‘Trim Pot’ can be<br />
used to FINE ADJUST the<br />
closing position of the<br />
gate with a high degree<br />
of accuracy (up to 1/16”).<br />
The number on the Trim<br />
Pot dial sets the number<br />
of inches the gate travels<br />
after initial set-up.<br />
Brake<br />
Brake<br />
Brake<br />
OPEN LEFT<br />
STEP 2<br />
Open the gate to the desired open<br />
position. Loosen and rotate the ‘Open’<br />
Cam until the Limit Switch “clicks”.<br />
Tighten the cam.<br />
STEP 3<br />
Close the gate to within 6” of desired<br />
closed position. Loosen and rotate the<br />
cam until the Limit Switch “clicks”.<br />
Tighten the cam.<br />
Upper Limit Switch<br />
Upper Cam<br />
Set Upper Cam<br />
in the Direction Shown<br />
Lower Limit Switch<br />
Lower Cam<br />
Set Lower Cam<br />
in the Direction Shown<br />
16<br />
Fail Safe/Secure Fail<br />
Safe/Secure<br />
TECHNICAL SUPPORT 1 800 908 0884 15
LIMIT SWITCH SET-UP<br />
STEP 4<br />
Press both limit switches at the same time to<br />
initiate the set-up (the open and close LEDs<br />
will blink on the Control Board).<br />
Click!<br />
Click!<br />
Activate Both<br />
Limit Switches<br />
At the Same Time<br />
STEP 5<br />
Open and close the gate from limit to limit<br />
without interruption for two complete cycles.<br />
2X<br />
STEP 6<br />
Fully Open and Close<br />
the Gate 2 Times<br />
Use the Fine Tune Limit Pot to perform minor adjustments to the closed position.<br />
6"<br />
Initial Setting<br />
2-1/2"<br />
First Adjustment<br />
1/2"<br />
Fully Open and Close the Gate<br />
After Every Adjustment<br />
Second Adjustment<br />
TECHNICAL SUPPORT 1 800 908 0884 17
Radio<br />
Mag. Lock<br />
Mag<br />
Lock<br />
Radio<br />
SPECIAL FEATURES<br />
tation Loop Connector Open Commands Guard Station Master/Sla<br />
ag.<br />
ock<br />
Mag.<br />
Gnd<br />
Safety Connector<br />
Fine Tune Limit Setting<br />
Radio<br />
Rec.<br />
+28v<br />
Gnd<br />
UL<br />
off 60sec<br />
The Fine Tune Limit Pot is used to closely set the final stop of the gate travel. The<br />
1sec<br />
position can be set to the nearest 1/2” via the markings for the Trim Pot. See page<br />
16-17 for setup procedure.<br />
30sec Open Stop Close<br />
UL<br />
Sensor<br />
Gnd<br />
Reopen<br />
Safety<br />
Loop<br />
Gnd<br />
Trim Pot Location<br />
Center<br />
Gnd<br />
Off 1 Center<br />
Loop<br />
Safety<br />
Loop<br />
UL<br />
Sens<br />
Radio<br />
Rec.<br />
Radio<br />
Rec.<br />
UL<br />
Sensor<br />
Safety<br />
Loop<br />
Center<br />
Loop<br />
Center<br />
Loop<br />
Exit<br />
30<br />
Open Commands<br />
Hold Open<br />
Timer<br />
MAX<br />
Gnd<br />
60<br />
min.<br />
Obstruction<br />
Sensor<br />
Sensor<br />
Strike<br />
Hold Open<br />
Timer<br />
min. MAX<br />
Hold Open<br />
Timer<br />
Obstruction<br />
Sensor<br />
Obstruction<br />
Gnd<br />
Fire<br />
Gnd<br />
Guard Station<br />
Close Stop Open<br />
Limit<br />
0 3<br />
0<br />
Open<br />
1.5<br />
1.5<br />
3<br />
Overlap<br />
Delay<br />
Overlap Delay<br />
Overlap Delay<br />
Open<br />
Stop<br />
Stop<br />
Close<br />
Limit<br />
GND<br />
Close<br />
Open<br />
Stop<br />
Close<br />
ster/Slave<br />
OPEN LEFT<br />
Fail Safe/Secure Fail<br />
Safe/Secure<br />
18<br />
TECHNICAL SUPPORT 1 800 908 0884
ELECTRICAL INSTALLATION – MASTER/SLAVE<br />
Master/Slave Connections<br />
Outside<br />
Interconnecting<br />
Conduit<br />
Opens First<br />
Master Unit<br />
Inside<br />
Slave Unit<br />
Caution – Do not run Master/Slave communication cable in<br />
the same conduit as the power supply (120-220V) cable.<br />
Use 18 AWG stranded wire<br />
with foil overshield and drain<br />
wire or better.<br />
Conduit<br />
Shielded Cable<br />
NOTE:<br />
Use 16 Gauge<br />
Wire for runs<br />
up to 100'<br />
Shield Wire<br />
Open<br />
Stop<br />
Close<br />
GND<br />
Guard Station<br />
Guard Station<br />
Open<br />
Stop<br />
Close<br />
Master/Slave<br />
Master/Slave<br />
GND<br />
UL<br />
Siren<br />
UL<br />
Siren<br />
Open<br />
Stop<br />
Close<br />
GND<br />
Guard Station<br />
Guard Station<br />
Open<br />
Stop<br />
Close<br />
Master/Slave<br />
Master/Slave<br />
GND<br />
UL<br />
Siren<br />
UL<br />
Siren<br />
The control board provides a connector for master/slave connectivity. This<br />
connector will allow synchronized operation with a second gate operator.<br />
Wire the operators as shown above and interconnect the two operators as follows:<br />
Master Board Slave Board Purpose<br />
GND . . . . . . . . . . . . . . . . . . . .GND<br />
Reference<br />
Close . . . . . . . . . . . . . . . . . . .Close<br />
Close Command<br />
Stop . . . . . . . . . . . . . . . . . . . .Stop<br />
Stop Command<br />
Open . . . . . . . . . . . . . . . . . . .Open<br />
Open Command<br />
Shield (to Earth)<br />
Shield (to Earth)<br />
Note: It is recommended to connect all external<br />
devices and set timer and overlap delay control<br />
on the master unit. Ensure Slave Control Board<br />
has timer set to ‘OFF’ to allow the Master to<br />
control the timer.<br />
TECHNICAL SUPPORT 1 800 908 0884 19
VEHICULAR LOOP DETECTOR INSTALLATION<br />
Outside<br />
Outside<br />
Reopen Loop<br />
Inside Reopen Loop<br />
Exit Loop<br />
Inside<br />
Note: Not all loops may be necessary<br />
for every installation. Check local<br />
regulations and accepted bestpractice<br />
design requirements.<br />
A<br />
Outside<br />
Outside<br />
Reopen<br />
Loop<br />
A<br />
A<br />
Inside<br />
Reopen<br />
Loop<br />
5'<br />
Exit<br />
Loop<br />
Inside<br />
A<br />
Gates in<br />
Closed Position<br />
Dimension A – 5’ for Single Gate Operator<br />
6’ for Master/Slave Gate<br />
Operator<br />
20<br />
TECHNICAL SUPPORT 1 800 908 0884
VEHICULAR LOOP DETECTOR INSTALLATION<br />
WARNING –Consult the installation instructions from the loop detector manufacturer. The following<br />
statements are provided as a guide but different requirements may be required by the<br />
vehicular loop detector manufacturer.<br />
Guidelines for Vehicular Loop Detector <strong>Installation</strong><br />
1. Prevent sharp corners in the geometry of the loop sensor.<br />
2. Install the appropriate number of turns for your loop geometry based on the loop perimeter. Use<br />
Table C (below) as a guide.<br />
3. Use XLP (cross-linked-polyethylene) type of wire. This wire reduces the effects of moisture and<br />
other environmental events in altering the functionality of the vehicular loop detector.<br />
4. Twist the lead wire at least 6 turns per foot.<br />
5. Use BACKER-ROD to minimize damage to the loop detector wire prior to using the sealant.<br />
6. Place the loop detector wire and adjust the sensitivity of the vehicular loop detector unit in a<br />
way to minimize the effects of the gate over the loop detector wire.<br />
IMPORTANT – Some of the following parameters may affect the proper functionality of the<br />
vehicular loop detector (consult the installation manual and the manufacturer of the<br />
vehicular loop detector).<br />
• Gate size,<br />
• Number of turns in the loop sensor wire;<br />
• Distance from the loop sensor wire to the gate either at the open or close position.<br />
Saw Cut<br />
1" Min.<br />
Sealant<br />
Backer-Rod<br />
Vehicular Loop<br />
Detector Wire<br />
(3 Turns Shown)<br />
Table C – Recommended Number of Turns<br />
Perimeter in Feet Number of Turns<br />
10 5<br />
20 4<br />
30-40 3<br />
50-100 2<br />
Continuously Wind Wire<br />
in Loop Slot for the<br />
Required Number of Loops<br />
(2 Loops Shown)<br />
Provide Additional Saw Cuts<br />
to Eliminate Sharp Corners<br />
1/8" to 1/4" Saw Slot<br />
Twist Wire Outside the<br />
Loop 6 Twists/Foot<br />
Until Its Connection<br />
to the Loop Detector<br />
TECHNICAL SUPPORT 1 800 908 0884 21
O<br />
LOOP RACK INSTALLATION<br />
Looprack – <strong>Viking</strong> Part # VA LR<br />
Looprack Wiring Harness – <strong>Viking</strong> Part # VA LRH<br />
<strong>Viking</strong> Loop Rack<br />
Twist Wire Outside the<br />
Loop 6 Twists/Foot<br />
Until Its Connection<br />
to the Loop Rack<br />
Outside<br />
Outside Safety<br />
Loop<br />
Exit<br />
Center<br />
Reopen<br />
28V<br />
Gnd<br />
Exit<br />
Center<br />
Reopen<br />
OP CN RO<br />
Exit<br />
Center<br />
Reopen<br />
Center<br />
Loop<br />
Inside Safety<br />
Loop<br />
Control Board<br />
Connector<br />
Exit<br />
Loop<br />
Inside<br />
Loop Connector<br />
+28v<br />
Gnd<br />
+28v<br />
Radio<br />
Radio Station Loop Connector Open Commands Guard Station Master/Slave<br />
Radio Station<br />
Gnd<br />
+28v<br />
Gnd<br />
UL<br />
Gnd<br />
Reopen<br />
Gnd<br />
Safety Connector<br />
Center<br />
Gnd<br />
Exit<br />
Gnd<br />
Strike<br />
Gnd<br />
Fire<br />
Gnd<br />
Open Commands<br />
Open<br />
Stop<br />
Close<br />
GND<br />
Guard Station<br />
Open<br />
Stop<br />
Close<br />
Master/Slave<br />
GND<br />
UL<br />
Siren<br />
UL<br />
iren<br />
Siren<br />
22<br />
N.O.<br />
COM<br />
N.C.<br />
Motor Sensor<br />
Motor Sensor<br />
Low Battery<br />
Low Battery<br />
Power<br />
Mag. Lock<br />
Mag.<br />
Lock<br />
Mag.<br />
Lock<br />
Hold Open<br />
Timer<br />
Safety Center<br />
1.5<br />
Loop Loop<br />
Obstruction<br />
Sensor Overlap Delay<br />
TECHNICAL SUPPORT 1 800 908 0884<br />
Obstruction<br />
Sensor Center Safety UL Radio<br />
Charger<br />
Loop Loop Sensor Rec.<br />
Power<br />
Charger<br />
Mag.<br />
Lock<br />
Off 1 Center<br />
Loop<br />
Safety<br />
Loop<br />
UL<br />
Sens<br />
Radio<br />
Rec.<br />
Radio<br />
Rec.<br />
UL<br />
Sensor<br />
off<br />
1sec<br />
30sec<br />
30<br />
Hold Open<br />
Timer<br />
MAX<br />
60sec<br />
60<br />
min.<br />
min. MAX<br />
Hold Open<br />
Timer<br />
Obstruction<br />
Sensor<br />
Open<br />
Close Stop Open<br />
Limit<br />
0 3<br />
0<br />
Open<br />
1.5<br />
3<br />
Overlap Delay<br />
Stop<br />
Overlap<br />
Delay<br />
Stop<br />
Close<br />
Limit<br />
Close<br />
Brake<br />
Brak<br />
ake
ACCESSORY CONNECTIONS<br />
1<br />
2<br />
Photo<br />
Beam<br />
Safety Connections<br />
Edge Sensor<br />
Safety<br />
Loop<br />
Detector<br />
Center<br />
Loop<br />
Detector<br />
Connection Locations<br />
1<br />
Vehicle loop detectors must be installed to<br />
decrease the possibility of vehicle<br />
entrapment on the gate (see page 20).<br />
The SECONDARY ENTRAPMENT PROTECTION COM<br />
like the edge sensor and the photoelectric N.C.<br />
beam MUST BE PART OF EVERY SINGLE<br />
INSTALLATION to prevent pedestrian or<br />
animal entrapment (see pages 6 and 7).<br />
The edge sensor and/or the photoelectric<br />
beam must be UL325 compliant devices.<br />
+28v<br />
Gnd<br />
Motor Sensor<br />
Low Battery<br />
Radio Station Loop Connector Open Commands G<br />
Radio Station<br />
N.O.<br />
Motor Sensor<br />
Low Battery<br />
Power<br />
Mag. Lock<br />
Mag.<br />
Lock<br />
off<br />
Open Commands<br />
1sec<br />
Exit<br />
Loop<br />
Detector<br />
Safety Connector<br />
Keypad<br />
FireHold Open<br />
Override Timer<br />
Obstruction<br />
Sensor Center Safety UL Radio<br />
Charger<br />
Loop Loop Sensor Rec.<br />
Power<br />
Charger<br />
+28v<br />
Radio<br />
Mag.<br />
Lock<br />
Mag.<br />
Lock<br />
Gnd<br />
+28v<br />
Gnd<br />
UL<br />
Gnd<br />
Reopen<br />
Gnd<br />
Center<br />
Gnd<br />
Off 1 Center<br />
Loop<br />
Safety<br />
Loop<br />
UL<br />
Sens<br />
Radio<br />
Rec.<br />
Radio<br />
Rec.<br />
UL<br />
Sensor<br />
Safety<br />
Loop<br />
Center<br />
Loop<br />
Exit<br />
30sec<br />
30<br />
Open Commands<br />
Hold Open<br />
Timer<br />
MAX<br />
Gnd<br />
FIRE<br />
min.<br />
Strike<br />
60sec<br />
60<br />
min. MAX<br />
Hold Open<br />
Timer<br />
Obstruction<br />
Sensor<br />
Obstruction<br />
Sensor<br />
Gnd<br />
Fire<br />
Open<br />
Open<br />
Limit<br />
0 3<br />
0<br />
Gnd<br />
Open<br />
op<br />
1.5<br />
Overlap Delay<br />
1.5<br />
3<br />
Sto<br />
Overlap<br />
Delay<br />
Overlap Delay<br />
Open<br />
+28v<br />
Gnd<br />
Motor Sensor<br />
Low Battery<br />
+28v<br />
Radio Station Loop Connector Open Commands Guard Station Ma<br />
Radio Station<br />
N.O.<br />
As an alternative to the COMOutside Reopen Loop,<br />
a photo beam unit can N.C. be used as shown.<br />
Motor Sensor<br />
Low Battery<br />
Power<br />
Mag. Lock<br />
Mag.<br />
Lock<br />
Radio<br />
Mag.<br />
Lock<br />
Gnd<br />
+28v<br />
Gnd<br />
UL<br />
Safety Connector<br />
Obstruction<br />
Sensor Center Safety UL Radio<br />
Charger<br />
Loop Loop Sensor Rec.<br />
Power<br />
Charger<br />
Mag.<br />
Lock<br />
Outside<br />
Inside<br />
OPEN RIGHT<br />
Radio<br />
Rec.<br />
UL<br />
Sensor<br />
Gnd<br />
Reopen<br />
2<br />
Safety<br />
Loop<br />
Gnd<br />
OPEN LEFT<br />
Center<br />
Gnd<br />
Off 1 Center<br />
Loop<br />
Safety<br />
Loop<br />
UL<br />
Sens<br />
Radio<br />
Rec.<br />
+28v<br />
Center<br />
Loop<br />
off<br />
1sec<br />
Exit<br />
30sec<br />
30<br />
Gnd<br />
Strike<br />
Open Commands<br />
Reopen Photo Beam<br />
Gnd<br />
Photo<br />
Beam<br />
+28v<br />
60sec<br />
60<br />
Hold Open<br />
Timer<br />
Hold Open<br />
Timer<br />
MAX min.<br />
Fail Safe/Secure Fail<br />
Safe/Secure<br />
Radio<br />
Radio Station<br />
min. MAX<br />
Gnd<br />
Hold Open<br />
Timer<br />
Obstruction<br />
Sensor<br />
Obstruction<br />
Sensor<br />
+28v<br />
Gnd<br />
Gnd<br />
Fire<br />
Open<br />
Gnd<br />
Guard Station<br />
Close Stop Open<br />
Limit<br />
0 3<br />
0<br />
Open<br />
1.5<br />
1.5<br />
3<br />
Overlap Delay<br />
Overlap Delay<br />
UL<br />
Gnd<br />
Open<br />
Stop<br />
Overlap<br />
Delay<br />
Safety Connector<br />
Stop<br />
Stop<br />
Close<br />
Close<br />
Limit<br />
Radio Station Loop Connector Open Co<br />
Reopen<br />
Gnd<br />
Center<br />
Gnd<br />
GND<br />
Close<br />
Exit<br />
Gnd<br />
mands<br />
Open<br />
ve<br />
Strike<br />
22<br />
OPEN RI<br />
N.O.<br />
TECHNICAL SUPPORT 1 800 908 0884<br />
COM<br />
23<br />
OPEN L<br />
N.C.<br />
Mag. Lock<br />
off<br />
1sec<br />
Off 1<br />
30sec<br />
30<br />
60sec<br />
60<br />
Hol
ACCESSORY CONNECTIONS<br />
Radio Receiver<br />
When connecting the Radio Receiver carefully verify the proper connections.<br />
The maximum voltage that the control board provides for external accessories is the<br />
maximum voltage of the battery, which is about 28 volts.<br />
In the event of an electrical short the board will protect itself by shutting down and<br />
will remain shut down until the short is corrected.<br />
The control board provides two modes of<br />
operation that a radio receiver can control<br />
the gate:<br />
Open-Stop-Close<br />
1. By having the radio receiver connected as<br />
illustrated and with the Hold Open Timer<br />
OFF (see page 28):<br />
Every command of the radio transmitter<br />
will control the gate as follow:<br />
a) First command opens the gate,<br />
b) Second command stops the gate and<br />
c) Third command closes the gate<br />
d) Any subsequent commands will continue<br />
in the same order to control the gate.<br />
This type of configuration is not<br />
recommended for a commercial<br />
installations.<br />
Open Only<br />
2. By having the radio receiver connected as<br />
illustrated and with the Hold Open Timer<br />
ON (see page 28):<br />
Each command of the radio transmitter is<br />
ALWAYS AN OPEN COMMAND to the gate.<br />
External<br />
<strong>Access</strong>ories<br />
+28v<br />
Gnd<br />
Motor Sensor<br />
Low Battery<br />
+28v<br />
Radio Station<br />
Radio Station<br />
N.O.<br />
COM<br />
N.C.<br />
Motor Sensor<br />
Low Battery<br />
Power<br />
Mag. Lock<br />
Mag.<br />
Lock<br />
Radio<br />
Mag.<br />
Lock<br />
Gnd<br />
+28v<br />
Gnd<br />
Loop Connector<br />
Safety Connector<br />
n<br />
Center Safety UL Radio<br />
Charger<br />
Loop Loop Sensor Rec.<br />
Power<br />
Charger<br />
Mag.<br />
Lock<br />
Radio<br />
Rec.<br />
+24VDC<br />
Gnd<br />
NO<br />
COM<br />
UL<br />
UL<br />
Sensor<br />
Gnd<br />
Reopen<br />
Safety<br />
Loop<br />
Gnd<br />
Center<br />
Gnd<br />
Off 1 Center<br />
Loop<br />
Safety<br />
Loop<br />
UL<br />
Sens<br />
Radio<br />
Rec.<br />
Center<br />
Loop<br />
off<br />
1sec<br />
MA<br />
Exit<br />
30<br />
Ho<br />
X<br />
OPEN LEFT<br />
OPEN RIGHT<br />
24 TECHNICAL SUPPORT 1 800 908 0884<br />
Fail 23<br />
Fail Safe/Secure<br />
Safe/Secure
ACCESSORY CONNECTIONS<br />
Note: All controls are normally open.<br />
N.O.<br />
N.O.<br />
N.O.<br />
COM<br />
OPEN<br />
STOP<br />
CLOSE<br />
+28v<br />
Gnd<br />
+28v<br />
Radio<br />
Radio Station Loop Connector Open Commands Guard Station Master/Slave<br />
Radio Station<br />
Gnd<br />
+28v<br />
Gnd<br />
UL<br />
Gnd<br />
Reopen<br />
Gnd<br />
Safety Connector<br />
Center<br />
Gnd<br />
Exit<br />
Gnd<br />
Strike<br />
Gnd<br />
Fire<br />
Gnd<br />
Open Commands<br />
Open<br />
Stop<br />
Close<br />
GND<br />
Guard Station<br />
Open<br />
Stop<br />
Close<br />
Master/Slave<br />
GND<br />
UL<br />
Siren<br />
UL<br />
Siren<br />
Siren<br />
OPEN RIGHT<br />
N.O.<br />
COM<br />
N.C.<br />
Mag. Lock<br />
Lock<br />
Guard Station<br />
Mag.<br />
Lock<br />
The guard station provides control of the<br />
gate operator to open, stop and close the<br />
gate.<br />
Motor Sensor<br />
Motor Sensor<br />
Low Battery<br />
Low Battery<br />
Power<br />
Mag.<br />
Obstruction<br />
Sensor Center Safety UL Radio<br />
Charger<br />
Loop Loop Sensor Rec.<br />
Power<br />
All three switches<br />
Rec. Sensor<br />
must be<br />
Loop<br />
Normally<br />
Loop<br />
Open<br />
type of switch, and can share the same<br />
common (ground).<br />
Charger<br />
Mag.<br />
Lock<br />
Connection Locations<br />
Off 1 Center<br />
Loop<br />
Safety<br />
Loop<br />
UL<br />
Sens<br />
Radio<br />
Rec.<br />
Radio<br />
Place the control switch box within sight of<br />
the gate, away from moving parts of the<br />
gate and out of reach of children.<br />
OPEN LEFT<br />
UL<br />
Safety<br />
Center<br />
off<br />
1sec<br />
30sec<br />
30<br />
Hold Open<br />
Timer<br />
Hold Open<br />
Timer<br />
MAX<br />
60sec<br />
60<br />
min.<br />
min. MAX<br />
Hold Open<br />
Timer<br />
Obstruction<br />
Sensor<br />
Obstruction<br />
Sensor<br />
Open<br />
Close Stop Open<br />
Limit<br />
0 3<br />
0<br />
Open<br />
1.5<br />
Overlap Delay<br />
1.5<br />
3<br />
Overlap Delay<br />
Stop<br />
Overlap<br />
Delay<br />
Stop<br />
Close<br />
Limit<br />
Close<br />
Brake<br />
Brake<br />
Brake<br />
Fail Safe/Secure Fail<br />
Safe/Secure<br />
24<br />
TECHNICAL SUPPORT 1 800 908 0884 25
SPECIAL FEATURES<br />
Auto-Open Feature<br />
The Auto-Open feature in <strong>Viking</strong> Gate Operators enables the following functionality in<br />
the event of power failure:<br />
a) Open the gate in case of power failure (120 or 220 VAC).<br />
b) Keep the gate at the open position as long as the there is no power.<br />
c) Resume to normal operation when the power has been restored.<br />
The Auto-Open feature allows proper operation while opening in case of power failure<br />
for the following devices:<br />
• All accessories,<br />
• All safety devices,<br />
• All entrapment protections.<br />
Fail<br />
Safe/Secure<br />
The only operation that can not be executed while opening in case of power failure is to<br />
CLOSE the gate.<br />
Fail<br />
Safe/Secure<br />
JP3<br />
24V BAT 24VAC<br />
To enable the Auto-Open feature : Use the<br />
“jumper” provided and place it on the pinheader<br />
of JP3, on the terminals close to C35 as<br />
the illustration indicates.<br />
OPEN LEFT<br />
er<br />
p<br />
Loop<br />
Safety<br />
Loop<br />
Reopen<br />
Loop<br />
UL<br />
Sensor<br />
UL<br />
Sens<br />
OPEN LEFT<br />
Radio<br />
Rec.<br />
Radio<br />
Rec.<br />
C35 C36<br />
Brake<br />
Charger<br />
Brake<br />
Power<br />
Low Battery<br />
Motor Check Sensor Motor<br />
OPEN RIGHT<br />
Close<br />
Stop<br />
Overlap Delay<br />
Overlap<br />
Delay<br />
3<br />
1.5<br />
Open<br />
0<br />
Obstruction<br />
Sensor<br />
Obstruction<br />
Sensor<br />
min.<br />
Hold Open<br />
Timer<br />
60<br />
MAX<br />
30<br />
Center<br />
Loop<br />
Safety<br />
Loop<br />
UL<br />
Sensor<br />
Radio<br />
Rec.<br />
Off 1 Center<br />
Loop<br />
Reopen<br />
Loop<br />
UL<br />
Sens<br />
Radio<br />
Rec.<br />
Once you put the “jumper” on the control<br />
board the “Check Motor” light will come on<br />
Hold Open<br />
indicating that the Auto-Open Timer feature has been<br />
Close enabled. Stop Open<br />
Mag.<br />
Lock<br />
Mag.<br />
Lock<br />
MAG. Mag. LOCK Lock<br />
Mag.<br />
Lock<br />
Mag.<br />
Lock<br />
UL<br />
Siren<br />
Siren<br />
Master/Slave<br />
GND<br />
Close<br />
Stop<br />
Open<br />
Guard Station<br />
GND<br />
Close<br />
Stop<br />
Open<br />
Open Commands<br />
Gnd<br />
Fire<br />
Gnd<br />
Strike<br />
Gnd<br />
Exit<br />
Gnd<br />
Safety Loop Connector<br />
Center<br />
Gnd<br />
Reopen<br />
Gnd<br />
UL<br />
Gnd<br />
+28v<br />
Radio S<br />
Gnd<br />
Radio<br />
MAG. Mag. LOCK Lock<br />
N.C.<br />
COM<br />
N.O.<br />
Safety Loop Connector<br />
26<br />
Center<br />
Gnd<br />
Reopen<br />
Gnd<br />
UL<br />
Gnd<br />
+28v<br />
Radio Station<br />
Gnd<br />
Radio<br />
+28v<br />
Gnd<br />
+28v<br />
TECHNICAL SUPPORT 1 800 908 0884
Mag.<br />
Lock<br />
Mag.<br />
Lock<br />
Mag.<br />
Lock<br />
SPECIAL FEATURES<br />
30sec<br />
old Open<br />
Timer<br />
Hold Open<br />
Timer<br />
Hold Open<br />
Timer<br />
Open<br />
Limit<br />
Intelligent Obstruction Sensor (Primary Entrapment Protection)<br />
0<br />
Open<br />
Stop<br />
Stop<br />
Sensor<br />
Motor S<br />
Battery<br />
Low Bat<br />
Power<br />
Obstruction<br />
Sensor Center Safety UL Radio<br />
Charger<br />
Loop Loop Sensor Rec.<br />
Power<br />
harger<br />
Radio<br />
Rec.<br />
Radio<br />
Rec.<br />
UL<br />
Sensor<br />
UL<br />
Sens<br />
Safety<br />
Loop<br />
Safety<br />
Loop<br />
Center<br />
Loop<br />
Center<br />
Loop<br />
MAX<br />
min.<br />
min. MAX<br />
Obstruction<br />
Sensor<br />
Obstruction<br />
Sensor<br />
0 3<br />
0<br />
1.5<br />
1.5<br />
3<br />
Overlap<br />
Delay<br />
Overlap Delay<br />
Overlap Delay<br />
Trim Pot Location<br />
OPEN LEFT<br />
Turning the Trim Pot clockwise<br />
increases the sensitivity.<br />
Turning the Trim Pot counterclockwise<br />
decreases the sensitivity.<br />
Fail Safe/Secure Fail<br />
Safe/Secure<br />
The Obstruction Sensor detects obstructions<br />
in the path of the traveling gate. The Trim<br />
Pot for the Obstruction Sensor adjusts the<br />
sensitivity level that triggers the Sensor.<br />
When the Obstruction Sensor detects an<br />
obstruction it will:<br />
1. Stop the gate’s movement and reverse it<br />
momentarily.<br />
2. Bring the gate to a resting position.<br />
3. Disable the Hold Open Timer feature until the<br />
Gate Operator receives a new command.<br />
If another obstruction is detected before the<br />
gate reaches either limit it will:<br />
1. Stop the gate’s movement.<br />
2. Bring the gate to a resting position.<br />
3. Disable the Gate Operator.<br />
UL325 standard requires an audio alarm to<br />
go off after two consecutive entrapment<br />
events sensed by the Inherent Entrapment<br />
Protection of the Gate Operator.<br />
The audio alarm will sound for a period of 5<br />
minutes or until the “Stop” Button is<br />
pressed (see page 8 for remote installation<br />
of a “Stop” Button).<br />
24<br />
TECHNICAL SUPPORT 1 800 908 0884 27
Brake<br />
Engaged<br />
Brake<br />
Released<br />
SPECIAL FEATURES<br />
Fail Safe/Fail Secure Operation<br />
The gate operator contains a unique design that allows the user to move the gate<br />
manually in case of power failure.<br />
Fail Safe:<br />
By moving the Brake Handle to the<br />
Released positon:<br />
The gate can be moved manually<br />
with a relatively low amount of<br />
force during a power failure<br />
Fail Secure:<br />
By moving the Brake Lever to the<br />
Engaged postion:<br />
The gate can not be moved during<br />
a power failure.<br />
Brake in Engaged<br />
Position<br />
Brake in Released<br />
Position<br />
1<br />
28<br />
Connection Location<br />
+28v<br />
Gnd<br />
Motor Sensor<br />
Low Battery<br />
+28v<br />
Radio Station Loop Connector Open Commands Guard Station<br />
Radio Station<br />
N.O.<br />
Mag. Lock<br />
of time, prior to closing N.C. automatically.<br />
Low Battery<br />
Power<br />
Mag.<br />
Lock<br />
Radio<br />
Hold Open Timer<br />
The Hold Open Timer function holds the gate at<br />
the open position COM for a predetermined amount<br />
Set the Timer to the desired time, from 1 to<br />
60 seconds.<br />
Mag.<br />
If this feature is not needed, Lock turn the Trim<br />
Pot clockwise to the “off” position.<br />
Gnd<br />
+28v<br />
Gnd<br />
UL<br />
Safety Connector<br />
Open Commands<br />
Hold Open<br />
Timer<br />
UL Safety Center<br />
Sensor TECHNICAL LoopSUPPORT Loop 1 800 908 0884Obstruction<br />
Sensor<br />
Obstruction<br />
Sensor Center Safety UL Radio<br />
Charger<br />
Loop Loop Sensor Rec.<br />
Power<br />
Charger<br />
Mag.<br />
Lock<br />
Radio<br />
Rec.<br />
Gnd<br />
Reopen<br />
Gnd<br />
Center<br />
Gnd<br />
Off 1 Center<br />
Loop<br />
Safety<br />
Loop<br />
UL<br />
Sens<br />
Radio<br />
Rec.<br />
Note: The Hold Open Timer affects the “radio<br />
receiver command” Motor Sensor and the sequence of<br />
operation for the gate (see page 24).<br />
1<br />
off<br />
1sec<br />
Exit<br />
30sec<br />
30<br />
MAX<br />
Gnd<br />
min.<br />
Strike<br />
60sec<br />
60<br />
Hold Open<br />
Timer<br />
min. MAX<br />
Hold Open<br />
Timer<br />
Obstruction<br />
Sensor<br />
Gnd<br />
Fire<br />
Open<br />
Gnd<br />
Guard Station<br />
Close Stop Open<br />
Limit<br />
0 3<br />
0<br />
Open<br />
1.5<br />
1.5<br />
3<br />
25<br />
Overlap Delay<br />
Overlap Delay<br />
Open<br />
Stop<br />
Overlap<br />
Delay<br />
Stop<br />
Stop<br />
Close<br />
Close<br />
Limit<br />
GND<br />
Close
Overlap Delay<br />
Overlap<br />
Delay<br />
p<br />
3<br />
1.5<br />
Open<br />
0<br />
Open<br />
OPTIONAL VIKING BLUE Fail INSTALLATION<br />
24V BAT 24VAC<br />
OPEN RIGHT<br />
1. Decide which Operator will be the Master<br />
and which will be the Slave.<br />
2a. Install the “Master” <strong>Viking</strong> Blue Module on<br />
Fail<br />
Safe/Secure<br />
the Master Control Board.<br />
2b. Install the “Slave” <strong>Viking</strong> Blue Module on<br />
the Slave Control Board.<br />
Use care in connecting the plug to the Control<br />
Board. The pins are small and easily bent.<br />
Match the white dot on the plug to the white<br />
dot on the control board (near the JP2 legend<br />
as depicted).<br />
3. Install the Jumper (near the JP3 legend<br />
depicted). <strong>Viking</strong>-Blue requires this jumper<br />
Obstruction to operate as a Master/Slave device. The<br />
“Low Sensor Battery” LED will turn ON, indicating<br />
the Control Board is ready for use with the<br />
<strong>Viking</strong>-Blue Module.<br />
4. Attach the <strong>Viking</strong>-Blue Module to the<br />
min. MAX<br />
Operator. For better communication and<br />
performance follow these guidelines:<br />
• The Module must be under the Operator<br />
Cover.<br />
Hold Open<br />
• The Timer Modules must be facing each other as<br />
much as possible.<br />
The Light on the <strong>Viking</strong>-Blue module will turn<br />
green upon connection between the other Module.<br />
Be sure to test your Master/Slave communication.<br />
OPEN LEFT<br />
Charger<br />
Check Motor<br />
Low Low Battery Battery<br />
Power Power<br />
Rec.<br />
Off 1 Radio<br />
UL<br />
Sens<br />
Mag.<br />
Lock<br />
N.C.<br />
COM<br />
Reopen<br />
Loop<br />
N.O.<br />
MAG. LOCK<br />
+28v<br />
Gnd<br />
Radio Station<br />
Safe/Secure<br />
WARNING – Connecting the plug backwards can result in damage to the Control Board<br />
and will render the <strong>Viking</strong>-Blue Module useless.<br />
<strong>Viking</strong>Blue Wireless Master/Slave<br />
Obstruction<br />
Sensor<br />
Hold Open<br />
Timer<br />
60<br />
30<br />
Center<br />
Loop<br />
Reopen<br />
Loop<br />
Center<br />
Loop<br />
+28v<br />
OPEN LEFT<br />
Off 1 UL<br />
Sens<br />
Radio<br />
Rec.<br />
JP2<br />
Radio<br />
Gnd<br />
Sensor<br />
min. MAX<br />
Obstruction<br />
+28v<br />
Gnd<br />
Loop Connector<br />
1.5<br />
UL<br />
Overlap<br />
Delay<br />
Gnd<br />
0<br />
Reopen<br />
30<br />
Hold Open<br />
Timer<br />
Gnd<br />
3<br />
Center<br />
VIKINGBLUE<br />
Gnd<br />
60<br />
Open<br />
Match up<br />
White Dots<br />
Install<br />
Jumper<br />
Mag.<br />
Lock<br />
MAG. Mag. LOCK Lock<br />
JP3<br />
JP2<br />
24V BAT 24V<br />
Charger<br />
Power<br />
disconnected (red)<br />
connected (green)<br />
FCC ID: T9JRN41-1<br />
Serial #<br />
Exit<br />
Gnd<br />
Open Open Commands Commands<br />
Stop<br />
JP3<br />
Low Battery<br />
Strike<br />
Gnd<br />
Close<br />
C35 C36<br />
Check Motor<br />
N.C.<br />
COM<br />
N.O.<br />
Fire<br />
Gnd<br />
OPEN RIGHT<br />
Open<br />
Stop<br />
Guard Guard Station Station<br />
Close<br />
GND<br />
Brake<br />
Open<br />
Stop<br />
Master/Slave<br />
Master/Slave<br />
Close<br />
D<br />
Gnd<br />
Open Commands<br />
Fire<br />
Gnd<br />
Strike<br />
Gnd<br />
Exit<br />
Gnd<br />
Safety Loop Connector<br />
Center<br />
Gnd<br />
Reopen<br />
Gnd<br />
UL<br />
Gnd<br />
+28v<br />
Radio Station<br />
Gnd<br />
Radio<br />
+28v<br />
Gnd<br />
+28v<br />
TECHNICAL SUPPORT 1 800 908 0884 29
Check<br />
Lo Lo<br />
UL<br />
Rec.<br />
or r<br />
Off 1 Radio<br />
UL<br />
Sens<br />
Gnd<br />
UL<br />
Sens<br />
+28v<br />
Reopen<br />
Loop<br />
24V<br />
OPTIONAL VIKING BLUE INSTALLATION<br />
Center<br />
Loop<br />
OPEN LEFT<br />
Radio<br />
Rec.<br />
JP2<br />
OPEN RIGHT<br />
Radio Station<br />
If you are using the computer:<br />
• Hold the computer near the Gate<br />
Operator.<br />
• Run the application by clicking the<br />
icon on the desktop.<br />
• Select “Setting” in the top right of the<br />
screen.<br />
If you are using a PDA:<br />
• Hold the PDA near the Gate Operator.<br />
• Select “Start” and “Programs”.<br />
• Click the <strong>Viking</strong>-Blue Application.<br />
• Select “Connection” on the toolbar.<br />
Gnd<br />
Sensor<br />
min. MAX<br />
Obstruction<br />
Mag.<br />
Lock<br />
Radio<br />
1.5<br />
MAG. Mag. LOCK Lock<br />
Loop Conne<br />
Overlap<br />
Delay<br />
+28v<br />
0<br />
eopen<br />
30<br />
Hold Open<br />
Timer<br />
Gnd<br />
3<br />
Charger<br />
Power<br />
Low Battery<br />
Check Motor<br />
N.C.<br />
COM<br />
N.O.<br />
Gnd<br />
Center<br />
Gnd<br />
60<br />
Open<br />
Match up<br />
White Dots<br />
Install<br />
Jumper<br />
JP3<br />
JP2<br />
+28v<br />
Exit<br />
Gnd<br />
Open Open Commands Commands<br />
Stop<br />
JP3<br />
Strike<br />
Gnd<br />
Close<br />
C35 C36<br />
Fire<br />
Gnd<br />
Open<br />
Stop<br />
Guard Guard Station Station<br />
Close<br />
GND<br />
1. Insert CD into host computer<br />
2. Install MS ActiveSync (check your<br />
computer, it may already be installed to<br />
communicate with a PDA or smart phone.<br />
3. Install <strong>Viking</strong> Blue software<br />
Select Install <strong>Viking</strong>-Blue for PC (to have the<br />
computer to communicate with the Operator)<br />
Select Install <strong>Viking</strong>-Blue for PDA (to have<br />
the PDA to communicate with the Operator)<br />
WARNING: If this PDA is a new device, turn off<br />
all options when syncing with the computer.<br />
For either installation, follow the steps in the<br />
user manual.<br />
4. Plug the <strong>Viking</strong> Blue Module into the <strong>Viking</strong><br />
Gate Operator Control Board.<br />
WARNING: Connecting the plug backwards can<br />
result in damage to the Control Board and<br />
will render the <strong>Viking</strong> Blue Module useless.<br />
Use care in connecting the plug to the Control<br />
Board. The pins are small and easily bent.<br />
Match the white dot on the plug to the white<br />
dot on the control board (near the JP2 legend<br />
as depicted).<br />
5. Install the Jumper (near the JP3 legend<br />
depicted). <strong>Viking</strong>-Blue requires this jumper<br />
to operate. The “Low Battery” LED will turn<br />
ON, indicating the Control Board is ready for<br />
use with the <strong>Viking</strong>-Blue Module.<br />
6. Open <strong>Viking</strong> Blue software on the chosen<br />
device.<br />
Brake<br />
Open<br />
Stop<br />
Master/Slave<br />
Master/Slave<br />
Close<br />
GND<br />
Siren<br />
• Click “Search” (looking for available<br />
<strong>Viking</strong> devices).<br />
• Select the Operator you want to<br />
communicate with.<br />
• Click “Connect” to start communication.<br />
The Light on the <strong>Viking</strong>-Blue module<br />
will turn green upon connection to the<br />
Computer or PDA.<br />
Follow the steps in the user manual.<br />
.<br />
30<br />
TECHNICAL SUPPORT 1 800 908 0884
TROUBLESHOOTING<br />
Gate does not run – Check motor indicator comes ON<br />
Check all motor connections to<br />
be fully engaged. Refer to page<br />
15 and 16.<br />
Ensure that the motor<br />
connections are properly<br />
connected, Refer to page 15.<br />
Check that all motor cable<br />
connections, junctions and<br />
extensions are properly<br />
connected and color-coded.<br />
Refer to page 15.<br />
Check the 15 Amp fuse in the<br />
control board.<br />
Gate does not run – Check motor indicator is OFF<br />
Check all motor connections to<br />
be fully engaged. Refer to page<br />
15.<br />
Check that the UL command<br />
(photo beam and/or edge<br />
sensor) is not active. Refer to<br />
page 6, 7 and 23.<br />
Ensure that you external accessories<br />
are working properly.<br />
Gate does not run – Power failure<br />
Check the 15 Amp battery fuse.<br />
Ensure that the manual reset switch is at the ‘reset’ position.<br />
Refer to page 7 and 28.<br />
Check that limit switches are<br />
connected to the common and<br />
the normally close position<br />
refer to page 16.<br />
Check the battery connections<br />
and cables.<br />
Check that the stop command<br />
is not active. Refer to page 8<br />
and 25.<br />
Check the voltage of the<br />
battery.<br />
Gate does not run – Obstruction sensor ON and audio alarm is SOUNDING<br />
Ensure that the gate path is<br />
clear of obstructions.<br />
Note: To stop the audio alarm,<br />
use the stop command. Refer<br />
to page 8 and 25.<br />
Adjust the trim pot of the<br />
obstruction sensor. Refer to<br />
page 27.<br />
Gate runs, stops and reverse momentarily – Obstruction sensor ON and audio alarm OFF<br />
Ensure that the gate path is<br />
clear of obstructions.<br />
Gate ignores the limit switches<br />
Check that the open limit<br />
switch and close limit switch<br />
are in the corresponding place.<br />
Refer to page 16.<br />
Check that the vehicular loop<br />
detectors are working properly.<br />
Refer to page 20, 21 and 23.<br />
Check the 4 Amps fuse in the<br />
control board<br />
Check for proper functionality<br />
and lubrication of the gate and<br />
hardware (hinges and the like).<br />
Check that all motor cable<br />
connections, junctions and<br />
extensions are properly connected<br />
and color-coded. Specifically<br />
check the blue and black motor<br />
leads. Refer to page 16.<br />
Check that the radio command<br />
is not active. Refer to page 24.<br />
Ensure that you power cables are<br />
adequate in voltage and properly<br />
connected. Refer to page 14.<br />
Adjust the trim pot of the<br />
obstruction sensor. Refer to<br />
page 27.<br />
Check that the limit switch is<br />
not faulty<br />
Check that wires to the limit<br />
switch are not shorted.<br />
TECHNICAL SUPPORT 1 800 908 0884 Se habla Español 31
TROUBLESHOOTING<br />
Gate does not open or close<br />
Check all motor connections to<br />
be fully engaged. Refer to page<br />
15.<br />
Check that the UL command<br />
(photo beam and/or edge<br />
sensor) is not active. Refer to<br />
page 6, 7 and 23.<br />
Ensure that you external<br />
accessories are working<br />
properly<br />
Automatic close does not function<br />
Check that the trim pot of the<br />
hold open timer is set to the<br />
proper time delay. Refer to<br />
page 28.<br />
Note: Hold open timer closes<br />
the gate automatically once the<br />
gate reaches the limit open.<br />
The time delay to close is set<br />
by the trim pot.<br />
To turn this system off turn the<br />
trim pot all the way clockwise<br />
Gate opens in the opposite desired direction<br />
Verify your motor cable is<br />
connected to the proper<br />
connector. Refer to page 15<br />
and 16.<br />
Check that limit switches are<br />
connected to the common and<br />
the normally close position<br />
refer to page 16.<br />
Check that the vehicular loop<br />
detectors are working properly.<br />
Refer to page 20, 21 and 23.<br />
Check that all motor cable<br />
connections, junctions and<br />
extensions are properly<br />
connected and color-coded.<br />
Refer to 15.<br />
Check that the stop command<br />
is not active. Refer to page 8<br />
and 27.<br />
Check that the radio command<br />
is not active. Refer to page 24.<br />
• Make sure gate is fully open<br />
• Check photobeam path for<br />
obstruction<br />
• Check photobeam power<br />
• Check loop detectors for<br />
proper function<br />
On a Master/Slave installation, one gate runs in the opposite direction<br />
Check the motor and limit<br />
switch wiring. Refer to page 15<br />
and 16.<br />
Verify you are using shielded<br />
cables and that the shield is<br />
connected to the chassis ground<br />
at both ends, the master side<br />
and at the slave side.<br />
Verify that one unit is<br />
connected as open-left and one<br />
unit is connected as openright.<br />
Refer to page 15.<br />
Verify the interconnecting<br />
wiring color codes match on<br />
both the master and slave<br />
boards. Refer to page 19.<br />
32 TECHNICAL SUPPORT 1 800 908 0884<br />
29
TROUBLESHOOTING<br />
Gate opens. Closes or stops on its own<br />
Make sure that the ‘Charger’<br />
LED is on and not flashing,<br />
indicating that there is AC<br />
power.<br />
Check that your wires from<br />
your accessories are:<br />
a) Not shorting together<br />
b) Not shorting a power line<br />
c) Not shorting to metal or<br />
earth ground.<br />
‘Charger’ LED off. Gate does not run - alarm sounds upon any input command<br />
Check the 4 Amp fuse on the<br />
control board.<br />
Check the 3 Amp fuse on the<br />
EMI control board. Refer to<br />
page 14.<br />
Make sure the incoming AC<br />
line is properly connected.<br />
Refer to page 14.<br />
Check the incoming high<br />
voltage power supply.<br />
Check the proper selection of<br />
power supply (120/220 VAC).<br />
Refer to page 14.<br />
Verify the EMI board by<br />
reading high voltage across the<br />
(4) blue and red wires at the<br />
terminal block connections.<br />
Battery voltage reads zero or very low<br />
Ensure the batteries are connected as follows:<br />
a) Left battery - Black terminal connected to the black wire from the harness (jacketed wire)<br />
b) Left battery - Red terminal connected to the red wire from fuse holder<br />
c) Right battery - Black terminal connected to the red wire from fuse holder<br />
d) Right battery - Red terminal connected to the red wire from the harness (jacketed wire)<br />
TECHNICAL SUPPORT 1 800 908 0884 33
Notes
our continuous commitment to excellence<br />
<strong>Viking</strong> <strong>Access</strong> Systems is continuously working hard to identify and design products<br />
that will appeal to the industry and it’s needs. As technology continues to advance, we<br />
have developed a completely efficient and intelligent line of gate operators to meet the<br />
changing demands. These machines offer; full UL325 and UL991 compliance, soft-start<br />
and soft-stop, intelligent obstruction sensors, continuous operation (100% duty cycle)<br />
and extreme power efficiency. Innovative features include; adaptive and self-learning<br />
algorithms, redundancy design in both hardware and software to ensure operation and<br />
functionality, protection from lightning, short circuit and power surges, and our exclusive<br />
helical gearing offering the highest efficiency rating in the industry. Our entire product<br />
line is continually modified and improved based on the latest technology and our<br />
customer’s valuable feedback. The results are products that offer accuracy, efficiency,<br />
reliability and performance, all in sleek, high-tech designs.<br />
<br />
We pledge to continue establishing ourself as the leader in high quality, innovative gate<br />
operators by developing “Next Level” technology. We are committed to providing safety<br />
and convenience with innovative solutions for every security gate need.
VIKING<br />
standard features<br />
and operator specifications<br />
UL325 and UL991 Listed by Underwriter Laboratories (UL) • Option of both electronic<br />
and mechanical release • Fail-Safe option sets the gate to automatically transfer to<br />
a fail-safe mode in the event of a power failure, allowing the gate to be pushed open<br />
without the use of special knowledge of the equipment • Fail-Secure option sets<br />
the gate to mechanically lock in the event of a power failure, allowing no manual<br />
movement without the use of the manual release • Standard Auto Open feature •<br />
Elegant design, appealing to any architectural project • Plated and powder coated<br />
steel chassis • Opening up to 60' • Operation speed of 16" per second • 100%<br />
duty cycle under very wide temperature range • Very low power consumption • 100<br />
cycles of operation on backup battery (2000 lb. gate and 20' length) • Intelligent<br />
speed control with smooth start and stop, self-adjust system • Modulated speed<br />
regulator prevents exceeding operating speed that may reduce the service life of the<br />
gate operator and/or installation • Intelligent obstruction detection with adjustable<br />
sensitivity • Innovative fine tune adjustment for the end of gate travel (down to 1/8")<br />
• Built-in protection against lightning strikes or similar electrical surges • Inherent<br />
overload protection in the regulated power supply for external accessories<br />
with multiple devices of protection • Modular connectors for<br />
easy installation • LED indicators for verification of<br />
operation<br />
<strong>Viking</strong> <strong>Access</strong> Systems<br />
Phone 800.908.0884 Fax 949.753.1640<br />
631 Wald Irvine, CA 92618<br />
www.vikingaccess.com


