


You also want an ePaper? Increase the reach of your titles
YUMPU automatically turns print PDFs into web optimized ePapers that Google loves.
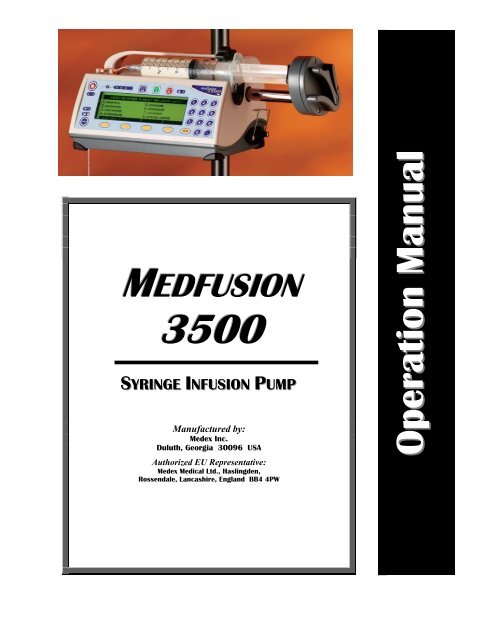
MEDFUSION<br />
<strong>3500</strong><br />
SYRIINGE INFUSIION PUMP<br />
Manufactured by:<br />
Medex Inc.<br />
Duluth, Georgia 30096 USA<br />
Authorized EU Representative:<br />
Medex Medical Ltd., Haslingden,<br />
Rossendale, Lancashire, England BB4 4PW<br />
Operation <strong>Manual</strong>
MEDEX <strong>Medfusion</strong> <strong>3500</strong><br />
Medex Part # G6000608 Revision 3 – Operation <strong>Manual</strong><br />
Table of Contents<br />
1. IMPORTANT NOTICES................................................................................................................................................1<br />
2. INTRODUCTION............................................................................................................................................................2<br />
3. INTENDED USE, FEATURES & CONTROLS........................................................................................................3<br />
Correct Use of This <strong>Pump</strong> ....................................................................................................................... 3<br />
Features & Controls................................................................................................................................. 4<br />
Keypad & Functions................................................................................................................................ 5<br />
Using Front Panel Control Buttons ......................................................................................................... 5<br />
Understanding Front Panel Indicators ..................................................................................................... 6<br />
What Indicators Mean ............................................................................................................................. 6<br />
4. TECHNICAL SPECIFICATIONS & DEFINITIONS...............................................................................................7<br />
Technical Definitions .............................................................................................................................. 8<br />
<strong>Syringe</strong> Manufacturers & Standard Sizes................................................................................................ 9<br />
Trademark Information ...................................................................................................................... 9<br />
5. OPERATION WARNINGS & CAUTIONS............................................................................................................ 10<br />
Warnings................................................................................................................................................ 10<br />
Cautions................................................................................................................................................. 12<br />
6. ALARMS & REMEDIES............................................................................................................................................ 13<br />
Alarms / Alerts ...................................................................................................................................... 13<br />
“Neglected <strong>Pump</strong>” Alarm...................................................................................................................... 13<br />
“<strong>Syringe</strong> Near Empty” Alarm During Delivery .................................................................................... 13<br />
“<strong>Syringe</strong> Empty” Alarm During Delivery ............................................................................................. 14<br />
“<strong>Syringe</strong> Empty − <strong>Manual</strong>” Alarm During Delivery............................................................................. 14<br />
General System Alarms & Alerts .......................................................................................................... 14<br />
7. GUIDELINES FOR ENHANCED PUMP PERFORMANCE ............................................................................. 17<br />
Always Use Smallest <strong>Syringe</strong> for Volume of Fluid Being Delivered.............................................. 17<br />
Use Small Internal Diameter Tubing................................................................................................ 17<br />
8. SETUP & LOAD SYRINGES .................................................................................................................................... 18<br />
Turning on the <strong>Pump</strong> ............................................................................................................................. 18<br />
What if the <strong>Pump</strong> Does Not Turn On ............................................................................................. 18<br />
Selecting Delivery Mode....................................................................................................................... 19<br />
<strong>Syringe</strong> Manufacturer/Type Setup......................................................................................................... 19<br />
What if Only One <strong>Syringe</strong> Manufacturer is Setup.......................................................................... 19<br />
Loading the <strong>Syringe</strong> onto the <strong>Pump</strong> ...................................................................................................... 20<br />
Priming the System................................................................................................................................ 21<br />
Unloading the <strong>Syringe</strong>........................................................................................................................... 22<br />
9. STARTING & STOPPING INFUSION DELIVERY............................................................................................. 23<br />
Start Delivery from Pause...................................................................................................................... 23<br />
Starting Delivery from Standby............................................................................................................. 23<br />
Making Changes During Delivery......................................................................................................... 24<br />
Stopping Delivery.................................................................................................................................. 24<br />
Turning Off the <strong>Pump</strong> ........................................................................................................................... 24<br />
10. PROGRAMMING DELIVERY MODES ................................................................................................................ 25<br />
Overview of Programming Steps .......................................................................................................... 25<br />
Page ii
MEDEX <strong>Medfusion</strong> <strong>3500</strong><br />
Apparently Missing or Different Steps ............................................................................................ 25<br />
A Repeated Warning ........................................................................................................................ 25<br />
Continuous Mode: ML/HR..................................................................................................................... 26<br />
Mass Modes........................................................................................................................................... 27<br />
Body Weight Infusion Deliveries .......................................................................................................... 28<br />
Volume / Time – ML/HR ........................................................................................................................ 28<br />
Intermittent Volume / Time................................................................................................................... 30<br />
Recall Last Settings ............................................................................................................................... 31<br />
Custom Dilution .................................................................................................................................... 32<br />
Types of Custom Dilution Available................................................................................................ 32<br />
Calculating Dilutions............................................................................................................................. 32<br />
11. BOLUS DOSING.......................................................................................................................................................... 35<br />
Setup Bolus Dosing ............................................................................................................................... 35<br />
Delivering a Bolus Dose........................................................................................................................ 36<br />
12. LOADING DOSES....................................................................................................................................................... 38<br />
Setting a Loading Dose ......................................................................................................................... 38<br />
Delivering a Loading Dose.................................................................................................................... 39<br />
13. VOLUME LIMIT.......................................................................................................................................................... 40<br />
Setting Volume Limit ............................................................................................................................ 40<br />
14. KEEP VEIN OPEN (KVO) RATE............................................................................................................................. 42<br />
Programming KVO Rate ....................................................................................................................... 42<br />
Delivery at KVO Rate ........................................................................................................................... 43<br />
15. STANDBY...................................................................................................................................................................... 44<br />
Programming Standby ........................................................................................................................... 44<br />
16. DELAYED START ...................................................................................................................................................... 45<br />
Programming Delayed Start .................................................................................................................. 45<br />
17. OVERRIDE AND TOGGLE FEATURES IN THE INFUSION PROGRAM OPTIONS............................... 46<br />
18. DELIVERY .................................................................................................................................................................... 47<br />
Starting Delivery ................................................................................................................................... 47<br />
Stopping Delivery.................................................................................................................................. 47<br />
Occlusion Trend Graph During Delivery .............................................................................................. 47<br />
FlowSentry (Rapid Occlusion Detection).............................................................................................. 48<br />
Post Occlusion Bolus Reduction ........................................................................................................... 49<br />
Time to Occlusion ................................................................................................................................. 49<br />
Flow Delivery Graphs ........................................................................................................................... 50<br />
Flow Delivery Graphs ........................................................................................................................... 51<br />
19. CHANGING DELIVERY RATE............................................................................................................................... 52<br />
Titrate Rate During Delivery................................................................................................................. 52<br />
Changing Rate During Delivery ............................................................................................................ 53<br />
Changing Rate When Paused ................................................................................................................ 53<br />
20. TOTAL VOLUME, PROGRAM VOLUME / DOSE DELIVERED ................................................................. 54<br />
Displaying Program Volume Delivered / Program Dose Delivered...................................................... 54<br />
Clearing Total Volume, Program Volume, or Program Dose Delivered Display ................................. 55<br />
21. KEYPAD LOCK ........................................................................................................................................................... 56<br />
Medex Part # G6000608 Revision 3 – Operation <strong>Manual</strong><br />
Page iii
MEDEX <strong>Medfusion</strong> <strong>3500</strong><br />
22. USER DEFINED LIBRARIES ................................................................................................................................... 57<br />
What Are Libraries .............................................................................................................................. 57<br />
For What Are Libraries and Templates Used................................................................................. 57<br />
Who Can Use These Libraries of Templates.................................................................................. 57<br />
Types of Programmable Libraries.................................................................................................... 57<br />
Library and Template Warnings & Cautions ................................................................................... 58<br />
Using “Standard” Libraries ................................................................................................................... 58<br />
How to Tell Whether E-Plates Are Enabled For Use............................................................................ 59<br />
E-Plates is Disabled.......................................................................................................................... 59<br />
E-Plates Is Enabled........................................................................................................................... 59<br />
Using E-Plates ....................................................................................................................................... 59<br />
Enabling E-Plates & Standard Libraries................................................................................................ 60<br />
Creating Library Templates................................................................................................................... 60<br />
Saving a New Template to a Library..................................................................................................... 61<br />
Template Naming Conventions........................................................................................................ 62<br />
Libraries Must Be Enabled to Use ................................................................................................... 62<br />
Transferring Libraries from <strong>Pump</strong> to <strong>Pump</strong> .......................................................................................... 63<br />
23. BATTERY, AC & EXTERNAL DC POWER OPERATION .............................................................................. 64<br />
Onscreen Display of Internal Battery Power Level Gauge ................................................................... 64<br />
Battery guidelines............................................................................................................................. 64<br />
External DC Power Option.................................................................................................................... 65<br />
24. CLEANING AND CARE............................................................................................................................................ 66<br />
25. MAINTENANCE & SERVICE.................................................................................................................................. 67<br />
Periodic Maintenance ............................................................................................................................ 67<br />
Using Medex Service Assistance .......................................................................................................... 68<br />
Returning a <strong>Medfusion</strong> <strong>3500</strong> <strong>Pump</strong> for Repair...................................................................................... 68<br />
Medex Limited Warranty ...................................................................................................................... 69<br />
26. APPENDIX 1: SYRINGE FLOW RATE BY MANUFACTURER & SIZE................................................... 70<br />
27. APPENDIX 2: FLOW DELIVERY CALCULATIONS...................................................................................... 71<br />
Mass modes ........................................................................................................................................... 71<br />
Body Weight modes .............................................................................................................................. 71<br />
Volume / Time & Intermittent modes ................................................................................................... 72<br />
Custom Dilution Algorithm................................................................................................................... 72<br />
The Results from the Dilution Calculation.......................................................................................72<br />
How the Calculation is Performed ................................................................................................... 73<br />
Goal of This Dilution Calculation .................................................................................................... 73<br />
28. APPENDIX 3: SERIAL COMMUNICATIONS................................................................................................... 74<br />
Serial Conversion Box........................................................................................................................... 74<br />
Medex Cloning Block............................................................................................................................ 74<br />
29. APPENDIX 4: POLE CLAMP ASSEMBLY & USE........................................................................................... 75<br />
3000 Series <strong>Pump</strong> Rotating/Detachable Pole Clamp (standard) ........................................................... 75<br />
Assembling the 3000 Series <strong>Pump</strong> Rotating/Detachable Pole Clamp................................................... 75<br />
3000 Series <strong>Pump</strong> Stationary Pole Clamp............................................................................................. 76<br />
Assembling the 3000 Series <strong>Pump</strong> Stationary Pole Clamp ................................................................... 77<br />
30. APPENDIX 5: MRI ROOM USAGE ........................................................................................................................ 78<br />
MRI Room Usage for the <strong>Medfusion</strong> <strong>3500</strong> ...........................................................................................78<br />
Medex Part # G6000608 Revision 3 – Operation <strong>Manual</strong><br />
Page iv
MEDEX <strong>Medfusion</strong> <strong>3500</strong><br />
♦ Proper Placement of <strong>Pump</strong> ................................................................................................................ 78<br />
♦ Pulse Sequences for MRI when using the <strong>Medfusion</strong> <strong>3500</strong>................................................................... 78<br />
Medex Part # G6000608 Revision 3 – Operation <strong>Manual</strong><br />
Page v
MEDEX <strong>Medfusion</strong> <strong>3500</strong><br />
1. IMPORTANT NOTICES<br />
The notices in the table below contain important information you need to know and understand before beginning to<br />
use the <strong>Medfusion</strong> <strong>3500</strong> pump. All users of this pump are responsible for knowing this information.<br />
!<br />
Warning!<br />
Caution<br />
Usability<br />
Before using any <strong>Medfusion</strong> <strong>3500</strong>, you the operator must be thoroughly familiar with the<br />
contents of the operations manual, including all warnings, cautions, and instructions for use. If<br />
you use this pump, you are responsible for knowing these things.<br />
This syringe infusion pump is intended for use only under direction of trained medical<br />
professionals.<br />
United States Federal law restricts this device to sale by or on the order of a physician.<br />
This manual and its contents are valid for use with all software versions starting with 3.0.x; for<br />
example, 3.0.0, 3.0.1, etc.<br />
© 1998 − 2003 by Medex Inc. All Rights Reserved.<br />
Manufacturer: Medex Inc., Carlsbad, CA, USA Tel: 800-848-1757<br />
0120<br />
Authorized EU representative: Medex Medical Ltd., St. Crispin Way, Haslingden<br />
Rossendale, Lancashire, BB4 4PW Great Britain Tel: +44 (0) 1706-233826<br />
Medex Part # G6000608 Revision 3 – Operation <strong>Manual</strong> Page 1
MEDEX <strong>Medfusion</strong> <strong>3500</strong><br />
2. INTRODUCTION<br />
The <strong>Medfusion</strong> <strong>3500</strong> syringe infusion pump is designed for use in critical care areas for the administration of fluids<br />
requiring precisely controlled infusion rates. Because of the pump’s simplicity and ease of use, this pump can also be<br />
used successfully in the non-critical areas of a clinical setting.<br />
The only people authorized to setup & monitor any infusion are nurses, physicians, or other health-care professionals<br />
with training in infusion therapy and operation of the syringe pump.<br />
The <strong>Medfusion</strong> <strong>3500</strong> syringe pump is indicated for use with the following delivery routes:<br />
• Arterial<br />
• Spinal<br />
• Epidural<br />
• Subcutaneous<br />
• Intravenous<br />
The <strong>Medfusion</strong> <strong>3500</strong> syringe pump is indicated for delivering the following fluids:<br />
• Intravenous solutions<br />
• Drug solutions<br />
• Blood or blood products<br />
The <strong>Medfusion</strong> <strong>3500</strong> syringe pump is indicated for use with the following delivery modes<br />
• Continuous<br />
• Body weight<br />
• Volume / Time<br />
• Custom dilution<br />
• Mass<br />
• Intermittent Volume / Time<br />
WARNING!<br />
<strong>Pump</strong> Usage<br />
This syringe infusion pump is intended for use only under direction of trained medical<br />
professionals.<br />
Before using any <strong>Medfusion</strong> <strong>3500</strong>, you must be thoroughly familiar with this manual,<br />
including all Warnings, Cautions, and instructions for use.<br />
Medex Part # G6000608 Revision 3 – Operation <strong>Manual</strong> Page 2
MEDEX <strong>Medfusion</strong> <strong>3500</strong><br />
3. INTENDED USE, FEATURES & CONTROLS<br />
This chapter defines basic use parameters, features, and control options of the <strong>Medfusion</strong> <strong>3500</strong> infusion pump.<br />
Correct Use of This <strong>Pump</strong><br />
The correct use of the <strong>Medfusion</strong> <strong>3500</strong> infusion pump should be based on the following principles:<br />
1. This syringe pump is intended for intravenous, subcutaneous, epidural, spinal, and arterial infusions of critical<br />
medications or fluids requiring precisely controlled infusion rates.<br />
2. Use only syringe manufacturers and sizes listed in the technical specifications of this manual.<br />
3. Ensure all medications or fluids are compatible with the syringe, catheters, tubing, and fittings used in the<br />
infusion setup.<br />
4. Always ensure fluids are compatible with each other when infusing more than one fluid or medication through the<br />
same infusion site. If connecting more than one pump to the same infusion site, use one-way check valves to<br />
prevent pumps from interfering with each other. Verify that the pumps will operate together without alarming.<br />
Warning!<br />
Warning!<br />
ECMO use<br />
Failure to strictly adhere to these principles of use can cause over infusion or under<br />
infusion, with possibility of serious injury or death.<br />
Do not use on the inlet side of Extracorporeal Membrane Oxygenation (ECMO) systems<br />
where the negative pressure is greater than –100mm Hg as the high negative<br />
pressures can result in uncontrolled fluid flow.<br />
Warning!<br />
Check Magnetic<br />
Fields Above<br />
150 Gauss<br />
Never use the pump in magnetic fields above 150 gauss. Always secure the pump to a<br />
non-moveable object. In magnetic fields above 150 gauss, the attraction of the pump<br />
to the magnet may be a hazard.<br />
This pump may be operated in static magnetic fields up to 150 gauss for specific MRI<br />
devices identified in Appendix 5.<br />
Medex Part # G6000608 Revision 3 – Operation <strong>Manual</strong> Page 3
MEDEX <strong>Medfusion</strong> <strong>3500</strong><br />
Features & Controls<br />
Below is an illustration of the pump in a front view, with callouts identifying major elements:<br />
A B C D E F<br />
G<br />
H<br />
A − Handle B − Tubing Holders C − Display<br />
D − <strong>Syringe</strong> Barrel Clamp E − <strong>Syringe</strong> Plunger Holders F − <strong>Syringe</strong> Plunger Release Lever<br />
G − <strong>Syringe</strong> Barrel Flange Clip<br />
H − <strong>Syringe</strong> Plunger Driver<br />
Medex Part # G6000608 Revision 3 – Operation <strong>Manual</strong> Page 4
MEDEX <strong>Medfusion</strong> <strong>3500</strong><br />
Keypad & Functions<br />
Below is an illustration of the front panel of the <strong>Medfusion</strong> <strong>3500</strong>, with tables below identifying functions and effects:<br />
Control Button When <strong>Pump</strong> is Paused When <strong>Pump</strong> is Delivering<br />
Power Push and hold to turn OFF pump. Push & release, then push & hold to turn OFF.<br />
Start Starts delivery. N/A<br />
Stop N/A Stops delivery.<br />
Bolus Begins priming after confirmation. Begins programmed bolus after confirmation.<br />
– Alarm Silence<br />
Silences audible alarm. Allows<br />
operator to switch the backlight from<br />
bright to dim, or dim to bright<br />
Silences audible alarm. Allows operator to switch the<br />
backlight from bright to dim, or dim to bright<br />
– Lock N/A Indicates pump controls are locked.<br />
Numerals & Decimal Set number values or selects options. Set number values or selects option.<br />
Back Reverts to previous step or level. Reverts to previous level or step if adjusting settings.<br />
“Menu Buttons 1-4” Function defined on screen. Function defined on screen.<br />
Using Front Panel Control Buttons<br />
Below is a table of the <strong>Medfusion</strong> <strong>3500</strong> front panel buttons and their assigned functions:<br />
Button<br />
Power<br />
Start<br />
Stop<br />
Bolus<br />
Alarm Silence<br />
<br />
Back<br />
Menu Buttons<br />
Function<br />
Push and hold to turn the pump ON. Push and hold to turn the pump OFF.<br />
Pressing the power button while the pump is infusing results in a message asking you to press the<br />
power button a second time to turn OFF power.<br />
Starts an infusion after settings are made. Press this button to start infusing after all infusion<br />
parameters have been set & reviewed.<br />
Stops an infusion. All delivery (including Keep-Vein-Open) pauses.<br />
Starts bolus infusion or primes the pump.<br />
• Press Bolus button when the pump is paused to call up the PRIMING screen, then<br />
press and hold this button to prime.<br />
• Press Bolus button when the pump is infusing to call up the BOLUS CONFIRM screen,<br />
and then press the menu button to confirm the bolus dose and start the bolus delivery.<br />
Silences an alarm for a programmed delay period. The usual is 2 minutes. Any new alarms<br />
occurring within the delay period sound immediately. When the delay period expires, any audible<br />
portion of the highest priority alarm still present will sound.<br />
Pressing this button exits the current data entry operation and reverts to previous operation screen.<br />
The four buttons directly below the display are software-defined buttons, with assigned function<br />
varying from screen to screen. The bottom line of the display defines the function for these buttons.<br />
Medex Part # G6000608 Revision 3 – Operation <strong>Manual</strong> Page 5
MEDEX <strong>Medfusion</strong> <strong>3500</strong><br />
Understanding Front Panel Indicators<br />
Below is a table of function indicators and their effects while using the pump.<br />
Indicator <strong>Pump</strong> Off <strong>Pump</strong> Paused <strong>Pump</strong> Delivering<br />
− AC Line Indicator ON when AC powered. ON when AC powered. ON when AC powered.<br />
– Battery Indicator ON when charging.<br />
ON when charging.<br />
ON when charging.<br />
Flashing when battery in use. Flashing when battery in use.<br />
– Lock Indicator OFF OFF ON when keypad is locked.<br />
− Infusing Indicator OFF OFF Flashing from right to left.<br />
What Indicators Mean<br />
Below is a table of front panel indicators and what each of them means:<br />
Indicator<br />
− Alarm Indicators<br />
- AC Line Indicator<br />
– Battery Indicator<br />
– Lock Indicator<br />
− Infusing Indicator<br />
What it means<br />
The ALARM indicators (yellow or red) are on whenever the pump is in an alarm condition.<br />
The specific details of each alarm are covered in the Alarm section later in this manual.<br />
The AC LINE indicator (green) is ON whenever the pump is connected to “mains” line<br />
power. It is OFF when the pump is not connected to an active AC line.<br />
The BATTERY indicator (green) blinks ON&OFF whenever the pump is operating on<br />
internal battery power, and remains ON when battery is charging.<br />
The LOCK indicator () tells you the pump has been locked into its current operational<br />
mode.<br />
While this indicator is lighted, the keypad is locked and no changes can be made to<br />
settings. Attempting to stop or change an infusion while locked will result in an alarm and<br />
an advisory message.<br />
The Infusing indicators are 3 green lights, which illuminate in sequence right to left when<br />
the pump is infusing.<br />
During intermittent delivery mode, a single Infusing indicator lights during the time<br />
between infusions.<br />
Medex Part # G6000608 Revision 3 – Operation <strong>Manual</strong> Page 6
MEDEX <strong>Medfusion</strong> <strong>3500</strong><br />
4. TECHNICAL SPECIFICATIONS & DEFINITIONS<br />
Below are the technical specifications of the <strong>Medfusion</strong> <strong>3500</strong> infusion pumps:<br />
Category<br />
Dimensions (pump only)<br />
Weight (pump only)<br />
Accuracy<br />
Flow Rate Range (depends on<br />
syringe size)<br />
Delivery modes (user<br />
customized)<br />
Delivery options (user<br />
customized)<br />
AC power source<br />
External DC power source<br />
(Optional)<br />
Internal Battery Capacity (at<br />
25°C)<br />
<strong>User</strong>-defined Delivery Libraries<br />
Normal Operating Conditions<br />
10.5” wide x 5.1” high x 5.5” deep<br />
(27 cm x 13 cm x 14 cm)<br />
3.8 lbs. (1.7 kg)<br />
Specification<br />
Nominal ± 2% excluding syringe variations<br />
(for infusion back pressures of -100 mm Hg to +300 mm Hg)<br />
0.01 ml/hr to 1130 ml/hr <strong>3500</strong><br />
ml/hr<br />
Volume / Time<br />
Mass<br />
Volume Limit<br />
Bolus Dose<br />
Loading Dose<br />
100-240 VAC, 50/60 Hz, 30VA<br />
Safety Class II – Type CF<br />
KVO Rate<br />
Standby<br />
Override Occlusion Limit<br />
Save to Library<br />
Toggle Rapid Occlusion<br />
Detection<br />
Body Weight<br />
Custom Dilution<br />
Intermittent Volume / Time<br />
Delayed Start<br />
Override Alarm Volume<br />
Toggle PVD/PVD<br />
Toggle Empty Tone<br />
Toggle Near Empty Tone<br />
External DC Input 6 – 14 VDC, 7 Watts<br />
Safety Class II – Type CF (must meet IEC 601-1 Medical Equipment Standards)<br />
Rechargeable. 10 hours at 5.0 ml/hr with 60 ml syringe − (from fully charged battery)<br />
Four libraries with 16 profiles per library<br />
One library option is “E-Plates” for rapid setup<br />
Temperature: 5° to 40° C (40° to 104° F)<br />
Relative Humidity:<br />
Ambient Pressure:<br />
15 to 95% non-condensing<br />
70 kPa to 106 kPa (10.2 psia to 15.4 psia)<br />
Infusion Back Pressure: -100 mmHg to 300 mmHg<br />
Medex Part # G6000608 Revision 3 – Operation <strong>Manual</strong> Page 7
MEDEX <strong>Medfusion</strong> <strong>3500</strong><br />
Technical Definitions<br />
Below is a table of technical definitions as required per international standards:<br />
Term<br />
Class<br />
II<br />
Infusion Class 4<br />
Infusion Class 5<br />
IPX3<br />
V ~<br />
Type<br />
CF<br />
Definition<br />
Equipment in which protection against electrical shock relies on double or reinforced insulation<br />
instead of basic insulation. Accessible metal components of pump enclosure use this higher level of<br />
insulation instead of safety grounding.<br />
Equipment in which level of protection from electrical shock is defined by leakage current (C)<br />
exposure and insulation by isolated or floating (F) metal of pump enclosure relative to earth<br />
grounding. Under normal conditions, users are exposed to no more than 100 microamps – when<br />
measured though the pump, and patients to no more than 10 microamps – when measured through IV<br />
path.<br />
An infusion pump that combines the functions of continuous infusion flow, intermittent flow, and<br />
discrete bolus delivery.<br />
An infusion pump that functions as a profile pump, providing a programmed sequence of delivery<br />
rates.<br />
Equipment that is ingress protected from fluid spraying at vertical angle from above, and from angles<br />
to 60° on either side of vertical.<br />
Symbol for operating voltage range for alternating current (i.e. AC or mains) power source.<br />
Symbol for infrared serial communications port on pump.<br />
Symbol for external DC jack connection. Tip (negative sign) is for power ground and ring (positive<br />
sign) is for positive power connection. [See warning below.]<br />
Warning!<br />
External Power<br />
must be<br />
IEC 601-1<br />
Certified<br />
Any external power source connected to the DC jack must be IEC 601-1 certified for<br />
medical equipment Type CF and meet Safety Class II. Connecting any external<br />
power source to the pump creates a medical system. Therefore, the user is<br />
responsible for compliance with IEC 601-1 standards. Refer all questions to the<br />
Medex Technical Service Department.<br />
Medex Part # G6000608 Revision 3 – Operation <strong>Manual</strong> Page 8
MEDEX <strong>Medfusion</strong> <strong>3500</strong><br />
<strong>Syringe</strong> Manufacturers & Standard Sizes<br />
Below is a table of syringe manufacturers for which the <strong>Medfusion</strong>/or <strong>3500</strong> has been designed, and the specific<br />
syringe sizes programmed into the pump database for use with the pump.<br />
Manufacturer<br />
B. Braun<br />
Becton-Dickinson Luer Lok ®<br />
Becton-Dickinson Glass<br />
Monoject ®<br />
Terumo ®<br />
AstraZeneca ®<br />
<strong>Syringe</strong> Sizes<br />
Omnifix ® 5, 10, 20, and 50 ml Luer Lock<br />
Perfusor ® 20 and 50ml Luer Lock<br />
B-D 3, 5, 10, 20, 30, and 60 ml Luer Lock<br />
B-D 1ml Luer Lock, and 1ml Tuberculin<br />
1, 2.5, 5 and 10 ml Luer Slip<br />
3, 6, 12, 20, 35, and 60 ml Luer Lock<br />
1ml Slip<br />
3, 5, 10, 20, 30, and 60 ml Luer Lock<br />
1ml Slip<br />
50 ml pre-filled Diprivan ® Luer Lock<br />
Warning!<br />
Critical Volume<br />
The critical volume (for volume limit) which could be infused in the event of a single<br />
point positional failure in this infusion pump is 1/100 th of the syringe fill volume.<br />
At any rate the critical volume (for rate) in this infusion pump is 1/400 th of the syringe<br />
fill volume.<br />
TRADEMARK INFORMATION<br />
Below is a table of registered trademarks and the manufacturers owning them:<br />
Trademark<br />
“Omnifix” and “Perfusor”<br />
“B-D”<br />
“Monoject”<br />
“Diprivan”<br />
B.Braun Medical AG<br />
Becton Dickinson and Co<br />
Sherwood Medical<br />
AstraZeneca Pharmaceutical<br />
Owner / Manufacturer<br />
Medex Part # G6000608 Revision 3 – Operation <strong>Manual</strong> Page 9
MEDEX <strong>Medfusion</strong> <strong>3500</strong><br />
5. OPERATION WARNINGS & CAUTIONS<br />
Warnings<br />
This chapter contains vital information in the form of warnings and cautions that apply to operation of this infusion<br />
pump. As an operator of this pump, you are responsible for knowing and using this information.<br />
Below is a table of warnings and conditions for operation of the <strong>Medfusion</strong><strong>3500</strong> infusion pump. Other warnings are<br />
posted throughout this manual. A Warning defines a potentially serious life-safety hazard, specific limitations for<br />
using this device imposed by the hazard, and the steps for avoiding the hazard.<br />
Operational Warnings<br />
Avoid Air Emboli<br />
Flammables<br />
Manufacturer<br />
Guidelines<br />
Priming New<br />
<strong>Syringe</strong>s<br />
Don’t Prime the<br />
Patient<br />
Confirm All Settings<br />
<strong>Syringe</strong> Matching<br />
Verify <strong>Syringe</strong> Make<br />
& Size<br />
Check Magnetic<br />
Fields Above 150<br />
Gauss<br />
Vertical<br />
Displacement<br />
Select right syringe<br />
size<br />
Trained <strong>User</strong>s<br />
Turn Off Fluid Flow<br />
When Loading a<br />
<strong>Syringe</strong><br />
Always purge all air from syringe and infusion lines before connecting to the patient. Air infused<br />
into a patient may cause serious injury and/or death.<br />
Never use pump in presence of flammable anesthetics, oxygen-enriched atmospheres, or explosive<br />
gases.<br />
Always read manufacturer precautions and guidelines for medications or fluids infused with this<br />
pump. Medications or fluids may interact with the plastic components of the infusion syringe and<br />
sets. This interaction may result in serious injury and/or death to the patient.<br />
Always use the Prime function on the pump when loading a new syringe in order to remove any<br />
mechanical slack. Failure to prime correctly can delay infusion delivery and cause Total Volume<br />
Delivered to read higher than what is actually delivered to the patient.<br />
Never operate the Prime function while pump is connected to the patient infusion site. Using the<br />
pump in the Prime function may cause over-infusion, with possible serious injury or death to<br />
patient.<br />
Before starting ANY delivery, ALWAYS confirm correctness of ALL infusion values you just set.<br />
Only use syringe sizes and manufacturers listed in this manual. Use of other syringe<br />
manufacturers or sizes may possibly cause an under-infusion or over-infusion to the patient that<br />
could result in serious injury and/or death.<br />
Always confirm syringe manufacturer and syringe size displayed on the pump match the<br />
manufacturer and syringe size loaded into the pump. Mismatching syringe make or size may<br />
possibly cause an under-infusion or over-infusion to the patient that could result in serious injury<br />
and/or death.<br />
Never use the pump in magnetic fields above 150 gauss. Always secure the pump to a nonmovable<br />
object. In magnetic fields above 150 gauss, the attraction of the pump to the magnet may<br />
be a hazard. This pump may be operated in static magnetic fields up to 150 gauss for specific<br />
MRI devices identified in Appendix 5.<br />
Once the syringe and tubing system is connected to the patient, raising the system above the patient<br />
(even briefly) can cause significant bolusing due to changes in hydrostatic pressure. Lowering the<br />
system below the patient (even briefly) can cause significant interruptions in flow due to changes<br />
in hydrostatic pressure.<br />
Use the smallest syringe size to deliver the fluid or medication. Running a large syringe at very<br />
low rates may cause under-delivery, e.g. a long time to occlusion alarm. See the section on<br />
guidelines for enhanced performance and review startup curves and time to occlusion information<br />
when selecting a syringe.<br />
Only use this pump under direction of trained medical professionals. Before using this pump, you<br />
must become thoroughly familiar with this manual, including warnings, cautions, and instructions<br />
for use.<br />
Always turn OFF fluid flow to patient in tubing via clamp or stopcock before loading or unloading<br />
syringe onto the pump. Uncontrolled fluid flow can occur when fluid set is not clamped or turned<br />
off, and may cause serious injury and/or death.<br />
Medex Part # G6000608 Revision 3 – Operation <strong>Manual</strong> Page 10
MEDEX <strong>Medfusion</strong> <strong>3500</strong><br />
Secure the <strong>Syringe</strong><br />
ECMO Use<br />
Horizontal Operation<br />
Only<br />
External DC Power<br />
must be IEC 601-1<br />
Certified<br />
AC Power<br />
1ml <strong>Syringe</strong><br />
Occlusion Pressure<br />
Always be sure to secure the syringe barrel, flange and plunger, with tubing threaded through<br />
holding clamp. Failure to properly secure the syringe and tubing can result in uncontrolled fluid<br />
flow into a patient, which can result in serious injury and/or death.<br />
Do Not use on the inlet side of Extracorporeal Membrane Oxygenation (ECMO) systems where<br />
the negative pressure is greater than –100 mm Hg as the high negative pressures can result in<br />
uncontrolled fluid flow.<br />
Always operate this pump in horizontal position to prevent fluid leakage into the pump. If you<br />
suspect fluid has leaked into it, remove pump from service until a trained biomedical technician<br />
can test it.<br />
Any external power source used with this pump must be IEC 601-1 certified for medical<br />
equipment Type CF and meet safety class II. Connecting an external power source to the pump<br />
creates a medical system. The user is responsible for complying with IEC 601-1 standards. Refer<br />
all questions to Medex Technical Service Department.<br />
The only means of removing AC power is to disconnect the AC power cord. While the AC power<br />
cord is attached to the pump and plugged into an AC outlet, live main voltage is present inside the<br />
pump.<br />
When a 1ml syringe is entered into the programming the occlusion pressure setting is fixed at very<br />
high - 35psi<br />
<strong>Pump</strong> Maintenance<br />
Manufacturer Recommended<br />
Maintenance<br />
Never open pump case<br />
System Failure Alarm<br />
Dropped or Damaged <strong>Pump</strong>s<br />
Service Warnings<br />
Only trained biomedical service personnel may service this pump. Service personnel<br />
should disconnect the AC power cord before servicing the pump.<br />
Always maintain this pump following manufacturer recommended instructions in the<br />
Service <strong>Manual</strong>. Improperly maintained pumps may cause either under-infusion or overinfusion<br />
to patient.<br />
<strong>User</strong>s should never open the pump case or battery compartment for any reason. Service<br />
personnel should always disconnect the AC power cord before servicing the pump.<br />
Never use a pump when it has signaled a system failure alarm. Withdraw it from service<br />
and send it to a trained biomedical technician for service.<br />
Never use a dropped or obviously damaged pump. Withdraw it from service until a<br />
trained biomedical service technician can test it.<br />
Medex Part # G6000608 Revision 3 – Operation <strong>Manual</strong> Page 11
MEDEX <strong>Medfusion</strong> <strong>3500</strong><br />
Cautions<br />
Below is a table of Cautions and conditions related to operation of the <strong>Medfusion</strong><strong>3500</strong> infusion pump.<br />
Other cautions are posted throughout this manual. An operational Caution defines any special care you must exercise<br />
for safe & effective use of this device.<br />
Operational Cautions<br />
Who Can Buy This<br />
<strong>Pump</strong><br />
Don’t Dunk the <strong>Pump</strong><br />
Never Autoclave<br />
Avoid Strong Solvents<br />
Use Correct <strong>Manual</strong>s<br />
Avoid Sharp Objects<br />
Check for Leaks<br />
Correct Disposal<br />
United States of America Federal law restricts this device to sale by or on the order of a<br />
physician.<br />
Never immerse the pump in water or other fluids. This pump is not waterproof.<br />
NEVER sterilize the pump in a steam autoclave or gas sterilizer. Using autoclave or gas<br />
sterilization can seriously damage the pump and void the warranty.<br />
Never use organic solvents to clean or disinfect the pump. Refer to the CLEAN & CARE section<br />
of this manual.<br />
Always ensure the software version of the pump and operations manuals agree. Refer to this<br />
manual’s front page.<br />
Never use sharp objects to depress control buttons on the pump. They may damage the pump<br />
by rendering buttons inoperable.<br />
Always periodically check the fluid pathway and connections for leaks. As with any infusion<br />
system, leaks may cause patient or infusate fluid loss.<br />
Follow your institution’s procedures and applicable laws regarding the proper disposal or<br />
recycling of device components.<br />
Medex Part # G6000608 Revision 3 – Operation <strong>Manual</strong> Page 12
MEDEX <strong>Medfusion</strong> <strong>3500</strong><br />
6. ALARMS & REMEDIES<br />
The <strong>Medfusion</strong><strong>3500</strong> infusion pump has numerous alarms built into it. These are triggered by situations, as a means of<br />
warning or advising you something is not functioning within normal parameters.<br />
Alarms / Alerts<br />
Below is a table of the alarms and alerts generated by the pump, including definitions and remedies:<br />
Type<br />
High-priority<br />
Medium-priority<br />
Low-priority<br />
Limit Priority<br />
Definition and Remedy<br />
A high-priority alarm is initiated by either any condition that halts an ongoing infusion, or any pump<br />
system fault, which effect infusion. High-priority alarms are signaled with a flashing red indicator, a<br />
viewing screen backlight that oscillates between bright and dim, and an audible signal. Press the Alarm<br />
Silence button to return the viewing screen backlight to bright, and silence the audible alarm for the<br />
programmed alarm silence period.<br />
If the front panel controls are locked when a high-priority alarm occurs, the pump controls do unlock.<br />
A high-priority alarm that stops delivery during loading dose or bolus will not return to the pause<br />
screen until the alarm is silenced – allowing the user to record the bolus volume delivered<br />
A medium-priority alarm indicates any condition requiring operator intervention but does not halt<br />
infusion. Medium-priority alarms are signaled with a flashing yellow indicator, a viewing screen<br />
backlight that oscillates between bright and dim, and an audible signal. Pressing the Alarm Silence<br />
button will return the viewing screen backlight to bright, and silence the audible alarm for the<br />
programmed alarm silence period.<br />
If the front panel controls are locked when a medium-priority alarm occurs, the pump controls do not<br />
unlock.<br />
A low-priority alarm indicates any condition not requiring immediate operator intervention.<br />
Low-priority alarms are announced with a continuous yellow indicator, a viewing screen backlight that<br />
oscillates between bright and dim and an audible signal – 2 Medex “Bing-Bongs”, or three international<br />
tones (on 1 sec – off 1 sec, on 1 sec – off 1 sec, on 1 sec – off) signal<br />
If the front panel controls are locked when a low-priority alarm occurs, the pump controls do not<br />
unlock.<br />
A limit-priority alarm sounds a tone and displays an advisory message onscreen for 3 seconds.<br />
If the front panel controls are locked when a low-priority alarm occurs, the pump controls do not<br />
unlock.<br />
“Neglected <strong>Pump</strong>” Alarm<br />
The “Neglected <strong>Pump</strong>” alarm is a medium priority alert. It is simply reminding you to finish what you started. Once<br />
you begin programming any infusion delivery, the pump expects you to continue until setup is complete.<br />
If you “forget” and leave the pump paused too long (30 seconds) on a data entry screen, then the pump initiates a<br />
medium-priority “user callback” alarm.<br />
There are several basic resolutions:<br />
• Press the Alarm Silence button “” or ANY button to silence the alarm for another 30 seconds.<br />
• Go to the BEGIN INFUSION screen. There the alarm silence interval is at least 2 minutes or longer −<br />
depending on custom configuration.<br />
• Press the Start button to begin the infusion.<br />
• You can cancel the infusion and return to the SELECT THE MODE screen, where no alarms sound.<br />
• You can press & hold the Power button and turn off the pump.<br />
“<strong>Syringe</strong> Near Empty” Alarm During Delivery<br />
Medex Part # G6000608 Revision 3 – Operation <strong>Manual</strong> Page 13
MEDEX <strong>Medfusion</strong> <strong>3500</strong><br />
The “Near Empty” alarm is a low-priority alarm during delivery telling you the syringe is “just about” empty. The<br />
pump sound the low priority alarm tone, displays the near empty alarm message appears on screen, and does not stop<br />
delivery.<br />
1. Press the Alarm Silence button “” to clear the alarm message.<br />
2. Confirm how long you have before the infusion ends.<br />
3. Then be prepared to load a new syringe onto the pump if necessary, and then start a new infusion.<br />
Calculating<br />
Near Empty<br />
Status<br />
Near empty status is calculated by checking the volume remaining in the syringe<br />
against the near empty alarm time setting divided by current delivery rate.<br />
“<strong>Syringe</strong> Empty” Alarm During Delivery<br />
The SYRINGE EMPTY alarm is a high priority alarm advising the syringe is empty.<br />
1. The EMPTY alarm stops delivery immediately.<br />
2. Press the Alarm Silence button “” to clear the alarm tone & message.<br />
3. Unload the syringe.<br />
4. Either prepare and load another syringe, return to the SELECT THE MODE screen, where no alarms sound or<br />
turn off the pump.<br />
Calculating<br />
Empty Status<br />
Caution<br />
Monoject 3ml<br />
Empty status is determined by measuring plunger position of syringe against the set<br />
value for syringe size & manufacturer.<br />
Because of variations in syringe manufacturing, the Monoject 3ml syringe may in some<br />
cases not fully empty. Here, the empty alarm sounds with some fluid left in the syringe.<br />
“<strong>Syringe</strong> Empty − <strong>Manual</strong>” Alarm During Delivery<br />
It is possible to override a “syringe empty” alarm sounded during delivery. There will be times when the pump<br />
calculates the syringe is empty and yet there remains a residual volume of medication or fluid in the syringes. A<br />
common cause is variation in manufacturing of syringes.<br />
1. Press the Alarm Silence button. The pump has stopped delivery and is at the BEGIN INFUSION screen.<br />
2. If you do not wish to deliver this remaining fluid, then:<br />
a) Unload the syringe.<br />
b) Either prepare and load another syringe, return to the SELECT THE MODE screen, where no alarms sound<br />
or turn off the pump.<br />
3. If you do wish to deliver the remaining fluid, then press the Start button.<br />
4. The pump begins delivery, and continues until no fluid remains in the syringe.<br />
5. As soon as the pump senses an occlusion, it halts delivery and displays the “<strong>Syringe</strong> Empty − <strong>Manual</strong>”<br />
message onscreen.<br />
6. Press the Alarm Silence button. The pump has stopped delivery and is at the BEGIN INFUSION screen.<br />
7. Either prepare and load another syringe, return to the Select the Mode screen, where no alarms sound or turn<br />
off the pump.<br />
General System Alarms & Alerts<br />
This section contains a table of the general system alarms you may encounter while operating the <strong>Medfusion</strong> <strong>3500</strong><br />
infusion pumps. This table identifies the alarm by message and type, and provides a definition and possible remedies.<br />
Medex Part # G6000608 Revision 3 – Operation <strong>Manual</strong> Page 14
MEDEX <strong>Medfusion</strong> <strong>3500</strong><br />
Alarm Message Priority Remedy<br />
Battery Communication<br />
Timeout<br />
Battery Not Charging<br />
Battery Not Working<br />
Calculated Rate Out of<br />
Range<br />
Check Clutch / Plunger<br />
Lever<br />
Check <strong>Syringe</strong> Flange<br />
Sensor<br />
Check <strong>Syringe</strong> Plunger<br />
Sensor<br />
Completing System<br />
Initialization<br />
Infusion Complete<br />
Low Battery (Each 1% drop<br />
in capacity following initial<br />
signal if power cord is not<br />
plugged in)<br />
Low<br />
Low<br />
Medium<br />
High<br />
High<br />
High<br />
High<br />
Limit<br />
High<br />
Limit<br />
The internal battery is not working. The pump may be used on AC power<br />
on a conditional basis. As soon as possible, remove pump from service for<br />
repair by a trained biomedical service technician.<br />
The internal battery is not charging. The pump may be used on AC power<br />
on a conditional basis. As soon as possible, remove pump from service for<br />
repair by a trained biomedical service technician.<br />
The internal battery is not working. The pump may be used on AC power<br />
on a conditional basis. As soon as possible, remove pump from service for<br />
repair by a trained biomedical service technician.<br />
The calculated rate is not valid. Verify that all infusion parameters have<br />
been entered correctly.<br />
The syringe is not loaded correctly. Check the plunger lever and ensure it is<br />
all the way up.<br />
Sensor is active when syringe is not loaded. Check the syringe flange<br />
holder. Ensure the flange holder pulls back to the side of the case. If holder<br />
does not operate correctly, immediately remove the pump from service for<br />
repair.<br />
Sensor is active when syringe is not loaded. Check the syringe plunger<br />
holders. Ensure the holders move freely. If they do not operate correctly,<br />
immediately remove the pump from service for repair.<br />
Allow pump startup to complete self-testing.<br />
Either begin a new infusion, return to the SELECT THE MODE screen, where<br />
no alarms sound or turn off the pump.<br />
Plug in the power cord and run pump on AC mains while recharging the<br />
battery.<br />
Low Battery (Initial Signal) Medium Plug in power cord and run pump on AC mains while recharging the battery<br />
KVO in Progress<br />
Invalid Rate for <strong>Syringe</strong> Size<br />
Invalid <strong>Syringe</strong> Size<br />
Occlusion − Check Infusion<br />
Line<br />
Pressure Increasing − Check<br />
Infusion Line<br />
Outside Range Limit<br />
<strong>Pump</strong> is Locked<br />
Restricted Flow – Bolus Rate<br />
Reduced<br />
Medium<br />
High<br />
High<br />
High<br />
Medium<br />
Medium<br />
Limit<br />
Medium<br />
Advisory message that volume limit has been reached and KVO infusion is<br />
in progress.<br />
Advisory message in custom dilution program. Consult syringe flow<br />
delivery tables in appendix to determine appropriate syringe size.<br />
<strong>Syringe</strong> size not recognized for the manufacturer selected. Review syringe<br />
sizes in the technical specifications section.<br />
Check infusion line for blockage. Clear or remedy any discovered<br />
occlusion. Press the Start button to begin infusion.<br />
Check infusion line for blockage. Clear or remedy any discovered<br />
occlusion.<br />
The entered rate is outside of the library limits. Press Alarm Silence button<br />
“” to continue. You may then chose to override the range limit or<br />
change the value entered.<br />
Keypad has been locked to prevent changes during infusion. The alarm<br />
initiated by pressing any button except Power or Unlock. Press Unlock if<br />
you need to make changes to delivery settings. Or press Power button twice<br />
to end delivery.<br />
If the bolus rate is high enough to trigger an occlusion alarm, the <strong>3500</strong><br />
software will reduce the bolus rate until the bolus is successfully delivered.<br />
With each rate reduction, this process repeats. Once silenced, the audible<br />
alarm tone will not reactivate, even if the process repeats.<br />
Medex Part # G6000608 Revision 3 – Operation <strong>Manual</strong> Page 15
MEDEX <strong>Medfusion</strong> <strong>3500</strong><br />
Alarm Message Priority Remedy<br />
<strong>Syringe</strong> Barrel Not in Place<br />
High<br />
The syringe is not loaded correctly. Make sure the syringe barrel clamp is<br />
correctly positioned and is holding the syringe in place. Proceed with the<br />
infusion.<br />
<strong>Syringe</strong> Flange Not in Place<br />
<strong>Syringe</strong> Plunger Not in Place<br />
<strong>Syringe</strong> Does Not Match<br />
Library Entry<br />
<strong>Syringe</strong> Empty<br />
<strong>Syringe</strong> Empty − <strong>Manual</strong><br />
High<br />
High<br />
Limit<br />
High<br />
High<br />
The syringe is not loaded correctly. Make sure the syringe flange is<br />
properly inserted into the flange clip. Proceed with the infusion.<br />
The syringe is not loaded correctly Make sure the syringe plunger head is<br />
properly inserted. Proceed with the infusion.<br />
Program the delivery for the type of syringe you are actually using. Then<br />
proceed with infusion setup and start it.<br />
The pump has halted infusion at empty. You may either:<br />
Prepare and load another syringe, then begin another infusion.<br />
Press the Start button to override the empty alarm and deliver any<br />
remaining fluid in the syringe.<br />
Return to the SELECT THE MODE screen, where no alarms sound.<br />
Turn off the pump.<br />
The pump has halted infusion after overriding empty alarm. You may<br />
either:<br />
Prepare and load another syringe, then begin another infusion.<br />
Return to the SELECT THE MODE screen, where no alarms sound.<br />
Turn off the pump.<br />
<strong>Syringe</strong> Near Empty Low The pump is telling you the syringe will soon be empty.<br />
System Advisory −<br />
Maintenance is<br />
Recommended<br />
System Advisory − Set Time<br />
and Date<br />
System Advisory − xx Data<br />
Corrupted<br />
System Failure − aa bb cc<br />
Below Recommended Rate<br />
Low<br />
Low<br />
Low<br />
High<br />
Limit<br />
As soon as possible, remove pump from service for testing and checkout by<br />
a trained biomedical service technician.<br />
As soon as possible, remove pump from service for testing and checkout by<br />
a trained biomedical service technician.<br />
Infusion will continue using backup copy of xx data. As soon as possible,<br />
remove pump from service for testing and checkout by a trained biomedical<br />
service technician.<br />
Press Power button to turn off pump. Immediately remove pump from<br />
service for repair by a trained biomedical service technician.<br />
Reminds user that the programmed rate is below that recommended for the<br />
syringe size - no remedy required<br />
Medex Part # G6000608 Revision 3 – Operation <strong>Manual</strong> Page 16
MEDEX <strong>Medfusion</strong> <strong>3500</strong><br />
7. GUIDELINES FOR ENHANCED PUMP PERFORMANCE<br />
The following are guidelines for enhanced syringe pump performance. Review occlusion time and flow delivery<br />
graphs in Delivery section. Because of the way syringe pumps operate, clinicians should use appropriate syringe size,<br />
tubing, and inline devices for expediting delivery of medication or fluid. Certain factors enhance syringe pump<br />
performance, where performance is defined as:<br />
a) Time to Detect Occlusion<br />
b) Continuity of Flow<br />
c) Startup Time<br />
ALWAYS USE SMALLEST SYRINGE FOR VOLUME OF FLUID BEING DELIVERED<br />
It is all too easy to fall into a pattern of using the same syringe size, or sizes to infuse medications or fluids. It is<br />
recommended to always using the smallest syringe that can get the job done. This can help avoid a variety of<br />
problems.<br />
Friction and compliance of the syringe plunger tip affect delivery startup and flow continuity. The bigger the syringe,<br />
the greater the friction and compliance, the slower the startup. Use a smaller syringe when running at a lower rate.<br />
The table below recommends minimum delivery rates by syringe size, when programming flow rates, a limited<br />
priority alarm will be activated with an advisory message on the screen if a rate below those recommended here is<br />
entered:<br />
<strong>Syringe</strong> size<br />
Lowest Recommended Rate<br />
USE SMALL INTERNAL DIAMETER TUBING<br />
60 ml 2.0 ml/hr<br />
30 ml 1.0 ml/hr<br />
20 ml 0.67 ml/hr<br />
10 ml 0.33 ml/hr<br />
5 ml 0.17 ml/hr<br />
3 ml 0.10 ml/hr<br />
1 ml 0.03 ml/hr<br />
Note: this table is only a guideline because syringes and infusion setups vary.<br />
For the most consistently precise control of all fluids and medications, it is recommended always using small internal<br />
diameter tubing. Always minimize residual volumes between syringe and patient by reducing:<br />
a) Tubing length<br />
b) Size of in-line filters<br />
c) Number of stopcocks.<br />
This makes the infusion setup less variable or compliant, which in turn reduces the start time for fluid to reach the<br />
patient – and reduces time required for detecting an occlusion.<br />
Medex Part # G6000608 Revision 3 – Operation <strong>Manual</strong> Page 17
MEDEX <strong>Medfusion</strong> <strong>3500</strong><br />
8. SETUP & LOAD SYRINGES<br />
<strong>Pump</strong> setup and syringe loading is a multi-step process, based on your daily practice of infusing patients with<br />
medication or other fluids.<br />
Turning on the <strong>Pump</strong><br />
Below are an illustration of the startup screen, and a list of basic steps for turning on the infusion pump.<br />
1. Press and hold the Power button until the dark screen appears. Verify the screen shows all pixels on, then<br />
all pixels off.<br />
2. The pump should “beep” twice and then the indicators flash for Alarm, Infusing, and Lock as the self-test<br />
cycles. The pump ID, if it has one, appears in the upper left corner. In this case, it is called “Jobara”. The<br />
pump serial number will appear at the middle right, if it has been set in the software. In this case, it is<br />
“M01234”.<br />
3. You should now verify the display indicates successful completion of system startup self-tests.<br />
WHAT IF THE PUMP DOES NOT TURN ON<br />
If the pump does not turn ON with successful completion of self-tests, remove it from service and have it checked by<br />
a trained biomedical technician.<br />
Medex Part # G6000608 Revision 3 – Operation <strong>Manual</strong> Page 18
MEDEX <strong>Medfusion</strong> <strong>3500</strong><br />
Selecting Delivery Mode<br />
Below are the steps for selecting a delivery mode for programming with infusion settings:<br />
1. After successfully completing its system startup self-tests, the pump displays the SELECT THE MODE screen.<br />
• The delivery modes on this screen were setup by Custom Configuration, which was completed by the<br />
person responsible for custom configuration before the pumps were delivered to your work area.<br />
• Also, if the pump has been configured with “E-Plates” enabled, the first screen is the SELECT THE<br />
LIBRARY ENTRY screen (see <strong>User</strong> Programmable Libraries).<br />
2. If the SELECT THE LIBRARY ENTRY screen appears, press the Main Menu button to call the SELECT THE<br />
MODE screen.<br />
3. Press any Number button to select the desired delivery mode. If you make a mistake use the Back button to<br />
undo it.<br />
4. If you do not see the mode you need, press the More button to display the next page of delivery modes.<br />
5. At the next menu, either:<br />
a) Select an option by pressing its number, and continue.<br />
b) Or press the Beginning button to return to the beginning screen.<br />
<strong>Syringe</strong> Manufacturer/Type Setup<br />
Below is an example for syringe manufacturer/type setup for use with the <strong>Medfusion</strong> <strong>3500</strong> pump:<br />
1. Use your standard protocol for preparing your syringe & tubing and filling the syringe.<br />
2. When delivery mode is chosen, set the syringe information. If more than one manufacturer is configured for<br />
the pump then the SELECT SYRINGE MANUFACTURER / TYPE screen appears.<br />
The syringe manufacturers on this screen were setup in Custom Configuration, which was completed by<br />
the person responsible for custom configuration before the pumps were delivered to your work area.<br />
3. Press any number button to select the syringe manufacturer. If you make a mistake use the Back button to<br />
undo it.<br />
WHAT IF ONLY ONE SYRINGE MANUFACTURER IS SETUP<br />
If only one syringe manufacturer has been setup for use by this pump (through custom configuration), then this entire<br />
level, and its screen, is skipped during infusion programming.<br />
Medex Part # G6000608 Revision 3 – Operation <strong>Manual</strong> Page 19
MEDEX <strong>Medfusion</strong> <strong>3500</strong><br />
Loading the <strong>Syringe</strong> onto the <strong>Pump</strong><br />
Below are the steps for loading a syringe onto the infusion pump:<br />
Warning!<br />
Always Turn<br />
Off Fluid Flows<br />
Always turn OFF fluid flow to patient in tubing via clamp or stopcock before loading or<br />
unloading syringe onto the pump. Uncontrolled fluid flow can occur when fluid set is not<br />
clamped or turned off, and may cause serious injury or death.<br />
After you set the syringe manufacturer information setup in the pump, it is time to install the syringe itself. Load the<br />
syringe using to the following steps:<br />
1. Using standard protocol, prepare the syringe by filling it with medication or other fluid, and attaching the<br />
tubing.<br />
2. Lift and swivel the syringe Barrel Clamp “A” out of the way.<br />
3. Squeeze Plunger Release Lever “B” on the syringe plunger driver and pull gently to extend it all the way.<br />
4. Load the syringe onto the pump as illustrated, making sure the flange of syringe barrel is pressed or rolled<br />
into Flange Clip “C”.<br />
A<br />
D<br />
B<br />
C<br />
5. Squeeze Plunger Release Lever “B” on the end of the syringe plunger driver and slip the end of the syringe<br />
plunger into place, then release the lever to close it around the syringe. Be sure both holders close around<br />
the syringe plunger.<br />
Warning!<br />
Capture Plunger<br />
Verify the plunger holders securely capture the syringe plunger. Failure to capture the<br />
syringe plunger may result in siphoning the syringe.<br />
6. Turn and lower Barrel Clamp “A” onto the barrel of the syringe. The size should appear in the display. If<br />
the syringe is incorrectly loaded, guide arrows appear onscreen to identify the problem.<br />
Down arrow “↓“ onscreen means check syringe barrel clamp “A”<br />
Right arrow “←“ onscreen means check syringe plunger holders “B”.<br />
Up arrow “↑” onscreen means check syringe flange clip “C”.<br />
Medex Part # G6000608 Revision 3 – Operation <strong>Manual</strong> Page 20
MEDEX <strong>Medfusion</strong> <strong>3500</strong><br />
7. There are no arrows onscreen when the syringe is correctly loaded.<br />
8. Make sure the pump correctly recognizes the syringe size, and the syringe manufacturer is correct. If not,<br />
verify that the manufacturer and size are listed in the technical specifications of this manual.<br />
9. Thread the tubing through the 3 Tubing Holders “D” on the top left side of the pump.<br />
10. Then press the Enter button to confirm this information.<br />
Warning!<br />
Match <strong>Syringe</strong>s<br />
The syringe manufacturer & size displayed onscreen must ALWAYS match the actual<br />
syringe you are loading. Mismatching syringe manufacturer or size may cause either<br />
under-infusion or over-infusion to the patient − with possible serious injury or death.<br />
Priming the System<br />
Priming is accomplished as a secondary function of the Bolus button. Always prime a new syringe after loading it<br />
onto the pump. This removes the mechanical slack in the pump and syringe, and significantly reduces start-up time.<br />
Warning!<br />
Never Prime the<br />
Patient<br />
NEVER prime any syringe while connected to a patient infusion site, as this may cause<br />
over-infusion, with possible serious injury or death.<br />
1. Press the Bolus button to call the priming screen illustrated below.<br />
2. To prime a loaded syringe, press and hold the Bolus button while observing for fluid movement at the<br />
patient end of the system.<br />
3. For safety reasons there is a built-in priming cutoff at 15 seconds. To continue priming after cutoff, release<br />
the Bolus button then press & hold again.<br />
Priming Data<br />
NOT counted in<br />
TVD<br />
The total priming volume accumulates onscreen, but is NOT counted in the Total<br />
Volume Delivered display. This is because the prime should never be delivered to the<br />
patient.<br />
Priming infusion rate is 300 ml/hr, or the default maximum Bolus rate for the syringe<br />
size being used, whichever is lower.<br />
The priming sequence is extremely important to assure the accuracy of the delivery and reduce the start-up time. The<br />
priming sequence is performed after the infusion is programmed, and before the delivery is started. The message at<br />
the top of the "BEGIN INFUSION" screen will alternate between "Press To Begin Infusion", and "Press<br />
To Prime" to remind the operator of the prime sequence.<br />
Medex Part # G6000608 Revision 3 – Operation <strong>Manual</strong> Page 21
MEDEX <strong>Medfusion</strong> <strong>3500</strong><br />
Unloading the <strong>Syringe</strong><br />
You unload a syringe exactly the opposite way as you load it. Just use the following steps:<br />
1. Press the Stop button to end delivery.<br />
2. Clamp or close infusion line from the syringe to patient.<br />
3. Unthread the tubing from the Tubing Holder “D” on the top left side of the pump.<br />
4. Lift and swivel the syringe Barrel Clamp “A” out of the way.<br />
5. Squeeze the Plunger Release Lever “B” on the syringe plunger and remove the syringe.<br />
A<br />
D<br />
B<br />
C<br />
Warning!<br />
Turn Off Fluid<br />
Flow<br />
Always turn OFF fluid flow to patient in tubing via clamp or stopcock before loading or<br />
unloading syringe onto the pump. Uncontrolled fluid flow can occur when fluid set is<br />
not clamped or turned off, and may cause serious injury and/or death.<br />
Medex Part # G6000608 Revision 3 – Operation <strong>Manual</strong> Page 22
MEDEX <strong>Medfusion</strong> <strong>3500</strong><br />
9. STARTING & STOPPING INFUSION DELIVERY<br />
You can start an infusion delivery at any time after you have setup a delivery mode. You can start infusion from a<br />
pause, standby, or delayed start screen.<br />
Start Delivery from Pause<br />
Whenever you begin an infusion setup and progress all the way through the setup levels, the pump pauses at the<br />
BEGIN INFUSION screen.<br />
1. Program the delivery mode by setting its variables like rate, volume limit, and so on.<br />
2. When you finish setting the delivery mode, the pump pauses at the BEGIN INFUSION screen.<br />
3. Press the Start button on the face of the pump.<br />
4. The pump begins the infusion.<br />
Starting Delivery from Standby<br />
You can start the infusion at any time when the pump is on standby. It is unnecessary to either cancel standby or wait<br />
until its period ends.<br />
1. To start infusion from standby, delayed start or pause, press the Start button.<br />
2. Before starting the infusion, you may also:<br />
a) Return to the Main menu.<br />
b) Change the Rate.<br />
c) Change delivery options, such as volume limit or bolus dose.<br />
d) Clear Totals<br />
Medex Part # G6000608 Revision 3 – Operation <strong>Manual</strong> Page 23
MEDEX <strong>Medfusion</strong> <strong>3500</strong><br />
Making Changes During Delivery<br />
Below is an illustration of a delivery screen. There are six options available during any standard infusion. While<br />
running an infusion, you may:<br />
• Lock the keypad.<br />
• Change the Dosage Rate.<br />
• Titrate the Rate.<br />
• Clear TVD<br />
• Press the Bolus button to set, change, or deliver a bolus.<br />
• Press the Stop button to pause or end the infusion delivery.<br />
Stopping Delivery<br />
You can stop infusion delivery at any time, in any delivery mode.<br />
1. Press the Stop button.<br />
2. The infusing indicators turn OFF and the pump pauses. You may restart infusion, or change settings and<br />
restart. Or turn OFF the pump.<br />
Turning Off the <strong>Pump</strong><br />
You can turn off the pump at any time, in any delivery mode, while the pump is running.<br />
1. Press and hold the Power button. This calls the SHUTDOWN OR CONTINUE screen. Infusion has not stopped<br />
at this point.<br />
2. Press and hold the Power button to turn OFF the pump. To cancel press the Continue or Back buttons.<br />
3. Infusion stops when you turn OFF the pump.<br />
Medex Part # G6000608 Revision 3 – Operation <strong>Manual</strong> Page 24
MEDEX <strong>Medfusion</strong> <strong>3500</strong><br />
10. PROGRAMMING DELIVERY MODES<br />
The <strong>Medfusion</strong> <strong>3500</strong> infusion pumps come with a variety of delivery modes ready for you to program to meet your<br />
specific patient care needs. In fact, all modes are customizable by the user. The actual modes available in a given<br />
pump, and their location on a given screen, depend on the custom setup performed by your in-house technician, or<br />
service representative.<br />
The following modes described in this chapter, and the steps given for programming them, are based on general setup<br />
parameters.<br />
Overview of Programming Steps<br />
This chapter describes the basic steps for programming the different delivery modes. However, there is a difficulty in<br />
describing these steps for an “average user”. This is caused by the extensive customization available in the <strong>Medfusion</strong><br />
<strong>3500</strong> infusion pumps.<br />
APPARENTLY MISSING OR DIFFERENT STEPS<br />
As you learn to program infusion deliveries on your infusion pump, you may find that certain features or screens do<br />
not appear when you program a delivery mode in your pump.<br />
In an effort to simplify the use of this manual, all features were not enabled for the writing of this operation manual.<br />
What steps you actually pass through in programming a delivery depend entirely on which features have been either<br />
“enabled” or “disabled” in the custom configuration process. So if you are programming and you find a step not<br />
included in these directions, it is because the step describes an optional feature that has been enabled for your<br />
particular machine.<br />
For a better understanding of the enabled or disabled features of your infusion pump, refer to the Configuration<br />
<strong>Manual</strong> and to the chapter titled “Tables of Default Settings for Anesthesia, General, and NICU”.<br />
All <strong>Medfusion</strong> <strong>3500</strong>s are shipped with the standard default settings for “Anesthesia” units or departments. These may<br />
be unchanged in your pump. Or they may have been used as a foundation for configuring your pump to meet the<br />
specific needs of your unit, department, organization, or hospital.<br />
A REPEATED WARNING<br />
You will see the following warning placed repeatedly throughout the steps for programming and starting all of the<br />
infusion delivery modes.<br />
Warning!<br />
Confirm All<br />
Settings<br />
Before starting ANY delivery, ALWAYS confirm correctness of ALL infusion values you<br />
just set.<br />
It is possible to fall into a pattern of expecting an infusion pump to function in a specific way. But each pump can be<br />
configured to be programmed differently. So a pump in one unit or department can be setup quite differently from<br />
one in the next unit or department or hospital.<br />
You are responsible for always verifying the correctness of any infusion delivery you program and start.<br />
Medex Part # G6000608 Revision 3 – Operation <strong>Manual</strong> Page 25
MEDEX <strong>Medfusion</strong> <strong>3500</strong><br />
Continuous Mode: ML/HR<br />
Continuous infusion is programmed by setting a flow rate in ml/hr. Actual range limits for flow rate are determined<br />
by syringe size (see table in Appendix) or custom configured maximum rate. If needed, a volume limit, loading dose,<br />
or bolus dose can be set.<br />
Neglected <strong>Pump</strong><br />
Alarm<br />
If you stop in the middle of a numerical entry, you will hear the “Neglected <strong>Pump</strong>” alarm.<br />
You can:<br />
• Press the Alarm Silence button “” to silence the alarm for another 30 seconds.<br />
• Finish numerical entries and reach the BEGIN INFUSION screen with the normal<br />
alarm silence interval.<br />
1. Use the number buttons to set flow rate and decimal point. Press Clear to clear an entry. Press Backspace<br />
to erase a character. Press the Enter button to accept the setting.<br />
2. After all infusion values are set, the pump pauses at the BEGIN INFUSION screen.<br />
E-PLATES or MAIN MENU – returns you to the beginning of setup.<br />
CHG RATE – allows modifying the set rate without starting from scratch.<br />
OPTIONS – lets you select from a list of variables (e.g., bolus, or volume limit).<br />
CLEAR TOTALS– lets you clear total volume delivered, and PVD or PDD.<br />
3. You may now accept the settings and start the infusion, or use the four menu buttons to modify the settings.<br />
4. Prior to beginning the infusion, press to initiate the priming sequence (page 21).<br />
5. When ready, press the Start button to begin infusion.<br />
Medex Part # G6000608 Revision 3 – Operation <strong>Manual</strong> Page 26
MEDEX <strong>Medfusion</strong> <strong>3500</strong><br />
Mass Modes<br />
Mass Modes: mg/min − mg/hr − mcg/min − mcg/hr − mU/min − mU/hr − u/min − u/hr:<br />
This Mass Mode is a continuous infusion mode you program by setting:<br />
• Drug concentration (i.e., mg/ml or U/ml).<br />
• Dose rate in mass/hr (e.g., mg/hr or µg/min).<br />
• You can also set volume limit, loading dose, or bolus dose.<br />
CLEAR − deletes an entry.<br />
BACKSPACE − deletes a character backward.<br />
1. Use the number buttons to set the fluid concentration. Concentration is limited to 4 digits.<br />
2. When ready, press the Enter button to accept the concentration value and go to the ENTER DOSE screen.<br />
3. Use the number buttons to set dosage rate. Range limits for dose rate are determined by syringe size. The<br />
maximum and minimum rates display onscreen.<br />
4. When ready, press the Enter button to go to the BEGIN INFUSION screen.<br />
5. At the BEGIN INFUSION screen all values are set and the pump pauses.<br />
6. You may now accept the settings and start the infusion, or use the four menu buttons shown below to<br />
modify the settings.<br />
E-PLATES OR MAIN MENU – RETURNS YOU TO THE BEGINNING OF SETUP.<br />
E-PLATES − When present, indicates E-Plates are enabled & returns you to beginning of setup.<br />
CHG DOSE – allows modifying the set dosage without starting from scratch.<br />
OPTIONS – LETS YOU SELECT FROM A LIST OF VARIABLES (E.G., BOLUS, OR VOLUME LIMIT).<br />
CLEAR TVD – LETS YOU CLEAR TOTAL VOLUME DELIVERED.<br />
7. Prior to beginning the infusion, press to initiate the priming sequence (page 21).<br />
8. When all delivery settings are correct, press the Start button to begin infusion.<br />
Medex Part # G6000608 Revision 3 – Operation <strong>Manual</strong> Page 27
MEDEX <strong>Medfusion</strong> <strong>3500</strong><br />
Body Weight Infusion Deliveries<br />
Body Weight Infusion Deliveries: mcg/kg/min − mcg/kg/hr − mg/kg/min − mg/kg/hr – Units/Kg/Min<br />
The body weight rate calculation allows programming by:<br />
• Drug Concentration<br />
• Patient’s Weight<br />
• Drug Dosage<br />
The pump calculates the correct flow rate in ml/hr to achieve the required drug dose. If desired, a volume limit,<br />
loading dose, or bolus dose can be set. From the SELECT THE MODE screen select the desired Body Weight Delivery<br />
Mode. These directions use select Micrograms / Kg / Minute as an example. This calls the ENTER CONCENTRATION<br />
Screen.<br />
1. Press the number buttons to set medication concentration. Concentration is limited to 4 digits.<br />
2. Press the Enter button to accept the concentration setting and go to the PATIENT WEIGHT screen.<br />
3. At the PATIENT WEIGHT screen, press the number buttons to set the patient’s weight in kilograms. Weight<br />
is limited to the indicated range.<br />
4. Press the Enter button to accept the patient weight setting and go to the DOSE RATE screen.<br />
5. At the DOSE RATE screen, press the number buttons to set the dose rate. Range limits here for dose rate are<br />
determined by installed syringe size.<br />
6. When ready, press the Enter button to accept the dosage rate go to the BEGIN INFUSION screen. Confirm all<br />
settings are correct.<br />
7. Prior to beginning the infusion, press to initiate the priming sequence (page 21).<br />
8. You may now accept the settings and start the infusion, or use the four menu buttons to modify the settings.<br />
When ready, press the Start button to begin the infusion.<br />
Volume / Time – ML/HR<br />
The volume over time rate calculation allows programming by:<br />
Medex Part # G6000608 Revision 3 – Operation <strong>Manual</strong> Page 28
MEDEX <strong>Medfusion</strong> <strong>3500</strong><br />
• Dose Volume<br />
• Delivery Time<br />
The pump calculates the correct flow rate by dividing the volume by the delivery time. Volume limit, loading or<br />
bolus dose can not be set in this mode. Find and select VOLUME / TIME from the SELECT THE MODE screen. You may<br />
have to press the More button to find it.<br />
1. When ready, press the Enter button to accept the syringe. This calls the VOLUME TO INFUSE Screen.<br />
2. At the VOLUME TO INFUSE screen, press the number buttons to program the volume setting. Volume is<br />
limited to the maximum fill volume for the syringe size – and minimum volume is 1/600th of the selected<br />
syringe size.<br />
3. When ready, press the Enter button to go to the DELIVERY TIME screen.<br />
4. At the DELIVERY TIME screen press the number buttons to set delivery time. Time is always limited by<br />
maximum and minimum rates for selected syringe size.<br />
5. When ready, press the Enter button to accept the setting to go to the BEGIN INFUSION screen.<br />
6. All settings are made, and the pump pauses at the BEGIN INFUSION screen. Confirm all settings are correct.<br />
You may now accept the settings and start the infusion, or use the three menu buttons to modify the settings.<br />
7. Prior to beginning the infusion, press to initiate the priming sequence (page 21).<br />
8. When ready, press the Start button to begin the infusion.<br />
Medex Part # G6000608 Revision 3 – Operation <strong>Manual</strong> Page 29
MEDEX <strong>Medfusion</strong> <strong>3500</strong><br />
Intermittent Volume / Time<br />
This Intermittent Volume / Time Mode lets you specify a delivery volume for a specific delivery time, after which the<br />
delivery stops for a programmed interval … then the pattern recycles. In other words, the pump delivers for a set<br />
period, then pauses a set period, then infuses for a set period, and so on.<br />
• The delivery stop interval equals “Time Between Starts” minus “Delivery Time.”<br />
• The pattern repeats at “Time Between Starts” interval.<br />
Below are the steps for programming an Intermittent Volume / Time infusion. Select Intermittent Volume / Time<br />
from the SELECT THE MODE screen. This calls the VOLUME TO INFUSE screen.<br />
1. Use the number buttons to set the volume. Volume here is limited to the maximum fill volume for the<br />
syringe size, and minimum volume is 1/600 th of syringe size.<br />
2. When ready, press the Enter button to accept the Volume to Infuse setting, and call the DELIVERY TIME<br />
screen.<br />
3. Use the number buttons to type in the Delivery Time setting. Maximum and minimum times are calculated<br />
for the syringe you are using. When ready, press the Enter button to call the TIME BETWEEN STARTS<br />
screen.<br />
4. Use the number buttons to set the Time Between Starts value. Time must be greater than delivery time and<br />
less than or equal to 24 hours. When ready, press the Enter button to accept the setting go to the BEGIN<br />
INFUSION screen.<br />
5. All settings are made, and the pump pauses at the BEGIN INFUSION screen. Confirm all settings are correct.<br />
You may now accept the settings and start the infusion, or use the four menu buttons to modify the settings.<br />
6. Prior to beginning the infusion, press to initiate the priming sequence (page 21).<br />
7. After confirming all settings are correct, press Start to begin intermittent volume / time infusion.<br />
Medex Part # G6000608 Revision 3 – Operation <strong>Manual</strong> Page 30
MEDEX <strong>Medfusion</strong> <strong>3500</strong><br />
Recall Last Settings<br />
The <strong>Medfusion</strong> <strong>3500</strong> will remember the settings used to run the last infusion indefinitely (or at least 10 years). This<br />
means you can reuse the same delivery settings to repeat an identical dosage of medication or fluids to a patient.<br />
1. You may reuse the last settings by selecting RECALL LAST SETTINGS from the SELECT THE MODE screen. (If<br />
you don’t see it, press the More button and search for it.)<br />
When selected, you must then press the Enter button to confirm data for each screen that applies for the last<br />
infusion. This includes all settings and options. The actual screens that appear depend on how your pump is<br />
configured and which features are enabled or disabled.<br />
2. After reviewing these previously used settings, the pump pauses.<br />
3. If you wish to clear the TVD and PVD or PDD, press the button<br />
4. Prior to beginning the infusion, press to initiate the priming sequence (page 21).<br />
5. Be sure all pump settings are correct before starting infusion.<br />
TVD and PVD /<br />
PDD Retention<br />
The pump also retains TVD and PVD or PDD from the last infusion. If you do not want<br />
to use these values, you must manually clear them before beginning a new infusion.<br />
Medex Part # G6000608 Revision 3 – Operation <strong>Manual</strong> Page 31
MEDEX <strong>Medfusion</strong> <strong>3500</strong><br />
Custom Dilution<br />
The Custom Dilution mode is a form of body weight delivery where you tell the pump a target delivery rate and the<br />
pump calculates the custom drug dilution to meet that target. The settings required are:<br />
a) Patient’s weight<br />
b) Initial (undiluted) drug concentration<br />
c) Target dose rate<br />
d) Target total volume (medication plus diluting fluid).<br />
From this data, the pump then calculates:<br />
a) Amount of fluid required to dilute the initial drug concentration<br />
b) Actual dose rate<br />
c) Actual total volume (as close to target rate & volume as possible by rounding dilution).<br />
Reasonable Dilution<br />
Range<br />
Enable / Disable<br />
Custom Dilution<br />
You must use a volume of diluent 20 ml or larger to give reasonable range for<br />
dilutions.<br />
If you do not see CUSTOM DILUTION, or any of these listed on the SELECT THE<br />
INFUSION UNITS screen for Custom Dilution, you must enable them through<br />
custom configuration.<br />
TYPES OF CUSTOM DILUTION AVAILABLE<br />
There are four different types of custom dilution infusion available in the <strong>Medfusion</strong><strong>3500</strong> infusion pump.<br />
Dilution Mode<br />
Micrograms / Kilogram /<br />
Minute<br />
Micrograms / Kilogram / Hour<br />
Milligrams / Kilogram / Minute<br />
Milligrams / Kilogram / Hour<br />
What the <strong>Pump</strong> does<br />
Calculates micrograms of medication or fluid per kilogram of patient body weight per<br />
minute of infusion to determine the mixing formula.<br />
Calculates micrograms of medication or fluid per kilogram of patient body weight per<br />
hour of infusion to determine the mixing formula.<br />
Calculates milligrams of medication or fluid per kilogram of patient body weight per<br />
minute of infusion to determine the mixing formula.<br />
Calculates milligrams of medication or fluid per kilogram of patient body weight per<br />
hour of infusion to determine the mixing formula.<br />
Calculating Dilutions<br />
Calculating Dilutions for: mcg/kg/min − mcg/kg/hr − mg/kg/min − mg/kg/hr<br />
This custom dilution mode calculates a mixing formula for dilutions of drug to reach a target dose rate for a given<br />
volume of fluid to be delivered.<br />
1. At the SELECT THE INFUSION screen, use the number buttons to select delivery mode<br />
Micrograms/KG/Minute, Micrograms/KG/Hour, Milligrams/ KG/Minute, or Milligrams/Kg/Hour.<br />
This calls the TARGET RATE screen.<br />
Medex Part # G6000608 Revision 3 – Operation <strong>Manual</strong> Page 32
MEDEX <strong>Medfusion</strong> <strong>3500</strong><br />
2. Use the number buttons to set the desired target infusion rate. The target rate should be based from the<br />
desired volume that you wish to give the patient over a given time. <strong>Syringe</strong> size limits the range of infusion<br />
rates.<br />
3. When ready, press the Enter button to accept the target rate setting, and go to INITIAL CONCENTRATION<br />
screen.<br />
4. At the INITIAL CONCENTRATION screen, set the value for initial or undiluted drug concentration. You are<br />
limited to 4 digits. When ready, press the Enter button to accept this value and go to the PATIENT WEIGHT<br />
screen.<br />
5. At the PATIENT WEIGHT screen, set the patient’s weight in kilograms (2.2 lbs/kg). Weight is limited to the<br />
range indicated. Press the Enter button to accept the value and go to the set target DOSE RATE screen.<br />
6. Use the number buttons to enter the desired target dose rate. The target dose rate is the desired rate for<br />
infusion of diluted drug into the patient. Units for this dose rate were set in the SELECT THE INFUSION<br />
screen. When ready, press the Enter button to accept the value and go to the set FINAL VOLUME screen.<br />
Medex Part # G6000608 Revision 3 – Operation <strong>Manual</strong> Page 33
MEDEX <strong>Medfusion</strong> <strong>3500</strong><br />
7. Use the number buttons to set the Final Volume to be infused. This can go to only one decimal place, and<br />
final volume must be equal-to-or-less-than the maximum fill volume of the syringe being used.<br />
8. When ready, press the Enter button. The pump calculates the formula for the Custom Dilution and displays<br />
it onscreen.<br />
9. Using aseptic techniques, prepare the dilution with this formula. Fill the syringe. Load syringe onto the<br />
infusion pump (see “<strong>Syringe</strong> Loading”).<br />
Warning!<br />
Fluids<br />
Compatibility<br />
Always confirm compatibility between drug and diluent. Verify that the actual dose &<br />
delivery rates are acceptable settings. Actual rate may differ from target rate because<br />
of “rounding” of volumes in the dilution formula.<br />
10. When ready, press the Continue button to call the SELECT SYRINGE MANUFACTURER screen. Now you will<br />
complete setup of the pump and begin infusion.<br />
11. At the Select SYRINGE MANUFACTURER / TYPE screen, select the syringe you are using, and then load the<br />
syringe. Step through the remaining levels, pressing the Enter button to verify each setting.<br />
12. After all values are confirmed, the pump pauses at the BEGIN INFUSION screen.<br />
13. Prior to beginning the infusion, press to initiate the priming sequence (page 21).<br />
14. When ready, press the Start button to begin infusion.<br />
Medex Part # G6000608 Revision 3 – Operation <strong>Manual</strong> Page 34
MEDEX <strong>Medfusion</strong> <strong>3500</strong><br />
11. BOLUS DOSING<br />
A Bolus dose is an optional parameter of some delivery modes wherein you specify a bolus volume to be delivered<br />
over a specified time. You may also configure bolus dose to be automatically “prompted” or called up in the<br />
programming steps.<br />
Enable /<br />
Disable Bolus<br />
You can permanently disable Bolus programming through pump custom configuration, or<br />
temporarily through the BOLUS DOSE screen.<br />
Setup Bolus Dosing<br />
Below are the steps for adding a bolus doing to an infusion you are about to begin, or to one you have paused to<br />
include a bolus:<br />
1. When paused at the BEGIN INFUSION screen, press the Options menu button to find bolus dose<br />
programming.<br />
2. Select bolus dose programming by pressing its number button. This calls the ENTER BOLUS DOSE screen.<br />
3. Use the number buttons to set the bolus volume desired for this infusion. Volume is limited to the<br />
maximum fill volume of the current syringe size, and minimum volume is 1/600th the syringe size. If the<br />
initial infusion is programmed in one of the body weight modes (eg. mcg/Kg/min), the bolus “dose” will be<br />
programmed in the parameters of that dose mode (eg. mcg/Kg)<br />
Disable – turns Bolus OFF. Clear – deletes an entry. Backspace – erases a character.<br />
4. When ready, press the Enter button to accept the volume setting (or dose setting if in body weight or mass<br />
mode).<br />
Medex Part # G6000608 Revision 3 – Operation <strong>Manual</strong> Page 35
MEDEX <strong>Medfusion</strong> <strong>3500</strong><br />
5. If the Bolus Time feature has been enabled, you will be able to set the bolus delivery time at the BOLUS<br />
TIME screen, use the number buttons to set bolus delivery time in minutes and seconds. The default value<br />
for bolus delivery rate is set in custom configuration. Maximum & minimum time is calculated from the<br />
maximum & minimum rate for the syringe size you are currently using. If the Bolus Time feature has been<br />
disabled the pump will default to the maximum bolus rate.<br />
6. When ready, press the Enter button to accept the settings and go to the BEGIN INFUSION screen.<br />
7. After the bolus settings have been programmed, the pump pauses. The Bolus setting now appears on the<br />
BEGIN INFUSION screen.<br />
Warning!<br />
Confirm All<br />
Settings<br />
Before starting ANY delivery, ALWAYS confirm correctness of ALL infusion values you<br />
just set.<br />
Delivering a Bolus Dose<br />
A bolus is a specified volume (or dose) to be delivered over a specified, usually short, period of time. You must have<br />
started a delivery before you can deliver a bolus dose.<br />
1. Press the Bolus button (the “” button next to Start) to call the BOLUS DELIVERY screen. A bolus delivery<br />
cannot be initiated until after you press the Start button to begin a programmed delivery.<br />
2. Press Yes to begin bolus delivery.<br />
• Or press No to skip the bolus and return to the NORMAL DELIVERY screen.<br />
• Or press the Chg Bolus button to change the bolus settings.<br />
• If you don’t press ANY button for 30 seconds, the neglected pump alarm will call you back to the pump.<br />
• If the bolus settings have been programmed in body weight, the key labeled CHG IN ML will allow<br />
the bolus to be changed in ML directly.<br />
3. Pressing YES calls the BOLUS DELIVERY screen.<br />
Medex Part # G6000608 Revision 3 – Operation <strong>Manual</strong> Page 36
MEDEX <strong>Medfusion</strong> <strong>3500</strong><br />
CANCEL – stops the bolus and returns to the normal delivery rate and screen.<br />
STOP – during a bolus delivery immediately halts all delivery and the pump pauses.<br />
4. The bolus delivery continues at the bolus delivery rate until the bolus volume is delivered. On completion<br />
of bolus dosing … the pump beeps, then resumes the programmed infusion delivery.<br />
5. The bolus volume delivered is automatically added to the Total Volume Delivered (TVD) as well as the<br />
Programmed Volume Delivered (PVD), or Programmed Dose Delivered (PDD) for that infusion.<br />
Medex Part # G6000608 Revision 3 – Operation <strong>Manual</strong> Page 37
MEDEX <strong>Medfusion</strong> <strong>3500</strong><br />
12. LOADING DOSES<br />
A loading dose is a specified volume (or dose) of drug infused as a one-time-only bolus prior to the start of normal<br />
delivery. You may also configure loading dose to be automatically “prompted” or called up in the programming<br />
steps.<br />
Enable /<br />
Disable<br />
Loading Dose<br />
You can permanently enable / disable the Loading Dose option through custom pump<br />
configuration.<br />
Setting a Loading Dose<br />
1. When paused, pressed the OPTIONS menu button to find the loading dose feature.<br />
2. Use the number buttons to call the ENTER LOADING DOSE screen.<br />
Disable – turns loading dose OFF. Clear – deletes an entry. Backspace – erases a character.<br />
3. At the ENTER LOADING DOSE screen, set the loading dose volume. Here, volume is limited to the maximum<br />
fill volume for the current syringe size, and minimum volume is 1/600th of syringe size.<br />
4. When ready, press the Enter button to accept the volume setting (or dose setting if in body weight or mass<br />
mode).<br />
5. Use the number buttons to set delivery time in minutes & seconds. The default value for loading (i.e.<br />
bolus) delivery rate is set in custom configuration. Maximum & minimum time is calculated from the<br />
maximum & minimum rate for the syringe size you are currently using.<br />
6. After the loading dose is set and accepted, the pump pauses at the BEGIN INFUSION screen. The Loading<br />
Dose setting now appears onscreen.<br />
Medex Part # G6000608 Revision 3 – Operation <strong>Manual</strong> Page 38
MEDEX <strong>Medfusion</strong> <strong>3500</strong><br />
Warning!<br />
Confirm All<br />
Settings<br />
Before starting ANY delivery, ALWAYS confirm correctness of ALL infusion values you<br />
just set.<br />
Delivering a Loading Dose<br />
1. When ready, press the Start button to begin infusion. The BEGIN LOADING DOSE screen appears.<br />
• Press Yes to confirm and begin loading dose delivery.<br />
• Press Chg Dose button to change the loading dose settings.<br />
• If the loading dose settings have been programmed in body weight, the key labeled CHG IN ML will<br />
allow the dose to be changed in ML directly.<br />
• Press No to skip the loading dose and return to the NORMAL DELIVERY screen.<br />
• If you don’t press ANY button for 30 seconds, the neglected pump alarm will call you back to the<br />
pump.<br />
2. Pressing Yes calls the LOADING DOSE DELIVERY screen and begins the infusion. The pump automatically<br />
completes the Loading Dose, then switches to normal delivery rate and screen. The loading dose volume<br />
delivered is automatically added to the Total Volume Delivered (TVD) as well as the Programmed Volume<br />
Delivered (PVD), or Programmed Dose Delivered (PDD) for that infusion.<br />
CANCEL – stops the loading dose and returns to the normal delivery rate and screen.<br />
STOP – during a loading dose delivery immediately halts all delivery and the pump pauses.<br />
Medex Part # G6000608 Revision 3 – Operation <strong>Manual</strong> Page 39
MEDEX <strong>Medfusion</strong> <strong>3500</strong><br />
13. VOLUME LIMIT<br />
A Volume Limit is an Option available for most delivery modes (except volume/time and intermittent volume/time).<br />
On reaching the preset volume limit, the pump stops – or changes to KVO if a keep vein open rate has been<br />
programmed.<br />
Volume limit is based on the quantity of programmed volume delivered.<br />
Enable /<br />
Disable<br />
Volume Limit<br />
If Volume Limit Dosing is not currently available as a dosing option, you can enable it through<br />
custom pump configuration.<br />
Setting Volume Limit<br />
You can set a volume limit either before starting an infusion, or by pausing the pump during an infusion. Volume<br />
limit is found on the OPTIONS screen, which you select from the BEGIN INFUSION screen.<br />
1. When pump is paused, press the Options button to find the volume limit feature.<br />
2. Press the number button for volume limit to call the ENTER VOLUME LIMIT screen.<br />
Disable – turns Volume Limit OFF.<br />
CLEAR – deletes an entry. Backspace – erases a character.<br />
3. Use the number buttons to set the volume limit. Volume is limited to the maximum fill volume for the<br />
current syringe size, and minimum volume is 1/100th the syringe size.<br />
4. When ready, press the Enter button to accept the settings and call the BEGIN INFUSION screen.<br />
5. With the volume limit set, the pump pauses at the BEGIN INFUSION screen. The volume limit setting now<br />
appears on the display. Program Volume Delivered (PVD) will appear on the screen directly above the V<br />
LIMIT.<br />
Medex Part # G6000608 Revision 3 – Operation <strong>Manual</strong> Page 40
MEDEX <strong>Medfusion</strong> <strong>3500</strong><br />
6. If you are initiating a new infusion, Prior to beginning the infusion, press to initiate the priming<br />
sequence (page 21).<br />
7. When ready, press Start to begin infusion. The infusion will stop when it reaches the preset volume limit.<br />
Warning!<br />
Confirm All<br />
Settings<br />
Before starting ANY delivery, ALWAYS confirm correctness of ALL infusion values you<br />
just set.<br />
Medex Part # G6000608 Revision 3 – Operation <strong>Manual</strong> Page 41
MEDEX <strong>Medfusion</strong> <strong>3500</strong><br />
14. KEEP VEIN OPEN (KVO) RATE<br />
The Keep Vein Open (KVO) rate is an Option available for most delivery modes (except volume/time and intermittent<br />
volume/time).<br />
• You must have a volume limit programmed for KVO to work. After a volume limit is reached, a low rate<br />
(KVO) is set to maintain patency of the infusion site.<br />
• The range of rates available appears on the ENTER KVO RATE screen. KVO rates are calculated by syringe<br />
size and its minimum flow rate.<br />
• The programmed KVO rate must be less than the normal delivery rate and greater than or equal to minimum<br />
flow rate for the syringe. Once the volume limit has been reached, the pump will begin infusing, at<br />
either the programmed KVO rate or the current infusion rate, which ever is less.<br />
Enable / Disable<br />
KVO dosing<br />
KVO dosing can be enabled or disabled through custom configuration pump.<br />
Programming KVO Rate<br />
1. You can set a KVO rate at the BEGIN INFUSION screen, either before starting an infusion, or by pausing the<br />
pump during an infusion. You can find it by pressing the Options button on the BEGIN INFUSION screen.<br />
2. When pump is paused, press the Options button to call the SELECT THE PROGRAM OPTION screen.<br />
3. Find the KVO option. Press its number button call the ENTER KVO RATE screen.<br />
4. Use the number buttons to set the KVO rate within the minimum and maximum rates onscreen.<br />
5. When ready, press the Enter button. After the KVO setting is complete, the pump pauses. The KVO<br />
setting now appears on the BEGIN INFUSION screen<br />
6. When ready, press the Start button to begin the infusion.<br />
Warning!<br />
Confirm All<br />
Settings<br />
Before starting ANY delivery, ALWAYS confirm correctness of ALL infusion values you<br />
just set.<br />
Medex Part # G6000608 Revision 3 – Operation <strong>Manual</strong> Page 42
MEDEX <strong>Medfusion</strong> <strong>3500</strong><br />
Delivery at KVO Rate<br />
The keep vein open feature is intended for use when you are delivering a series of infusions to a patient, and wish to<br />
ensure the delivery site remains patent between the end of one infusion and the beginning of the next.<br />
1. Set the delivery mode you want to use for infusion.<br />
2. Select and set the Volume Limit option.<br />
3. Select and set the KVO option.<br />
4. Press Start to begin an infusion.<br />
5. Normal delivery ceases when the pump reaches the programmed volume limit. The pump then begins to<br />
infuse at the preset keep-vein-open (KVO) delivery rate, or the infusion rate at the time the volume limit is<br />
reached, whichever is less.<br />
6. Here, the pump triggers a KVO alarm – informing you the infusion is complete & the pump is infusing at<br />
KVO rate.<br />
7. KVO delivery terminates when the syringe is empty, or if you press the Stop button. When the pump<br />
automatically stops keep vein open infusion, it sounds a “syringe empty” alarm.<br />
Stop KVO<br />
Infusion<br />
Silence KVO<br />
Alarm<br />
You can stop a KVO infusion at any time by pressing the Stop button.<br />
You can silence the alarm by pressing the Alarm Silence button.<br />
Medex Part # G6000608 Revision 3 – Operation <strong>Manual</strong> Page 43
MEDEX <strong>Medfusion</strong> <strong>3500</strong><br />
15. STANDBY<br />
STANDBY is an Option that allows setting the pump for an infusion, then delaying advisory alarms for a programmed<br />
interval of time.<br />
• The pump does not automatically start an infusion at the end of the standby.<br />
• Instead, the pump triggers an alarm at the end of the standby period to tell you to either Start or Cancel the<br />
infusion.<br />
Enable /<br />
Disable<br />
Standby<br />
The STANDBY option can be enabled / disabled through custom configuration<br />
Programming Standby<br />
1. When the pump is paused at the BEGIN INFUSION screen, press the Options button to find the STANDBY<br />
utility.<br />
2. Select Standby mode by pressing its number button.<br />
3. Set standby time in hours & minutes. The maximum Standby setting is 24 hours. The default standby time<br />
is 1:00 Hr.<br />
4. When ready, press the Enter button to accept the standby setting and go to the BEGIN INFUSION screen.<br />
5. The standby timer then appears in the upper left corner onscreen “counting down”. The Distracted user<br />
alarm is disabled for this interval. Standby continues until timer has counted to zero. You can discontinue<br />
standby mode at any time, by pressing the Start button, or by setting standby to zero.<br />
6. When the counter reaches zero, the pump sounds an alarm reminding you to begin the infusion.<br />
Medex Part # G6000608 Revision 3 – Operation <strong>Manual</strong> Page 44
MEDEX <strong>Medfusion</strong> <strong>3500</strong><br />
16. DELAYED START<br />
DELAYED START is an Option that allows setting the pump for an infusion, then delaying the start for a programmed<br />
interval of time.<br />
• The pump will automatically start an infusion at the end of the standby.<br />
Enable /<br />
Disable<br />
Delayed Start<br />
The DELAYED START option can be enabled / disabled through custom configuration<br />
Programming Delayed Start<br />
1. When the pump is paused at the BEGIN INFUSION screen, pres the Options button to find the DELAYED<br />
START utility.<br />
2. Select Delayed Start mode by pressing its number button.<br />
3. Set Delayed Start time in hours & minutes. The maximum delayed start setting is 6 hours. The default<br />
delayed start time is 1:00 Hr.<br />
4. When ready, press the Enter button to accept the Delayed Start setting and go to the BEGIN INFUSION<br />
screen.<br />
5. The Delayed Start timer then appears in the upper right corner onscreen “counting down”. The Distracted<br />
user alarm is disabled for this interval. Delayed Start continues until timer has counted to zero. You can<br />
discontinue Delayed Start mode at any time, by pressing the Start button, or by setting Delayed Start to<br />
zero.<br />
6. When the counter reaches zero, the pump begins the infusion.<br />
Medex Part # G6000608 Revision 3 – Operation <strong>Manual</strong> Page 45
MEDEX <strong>Medfusion</strong> <strong>3500</strong><br />
17. OVERRIDE AND TOGGLE FEATURES IN THE INFUSION PROGRAM<br />
OPTIONS<br />
The OPTIONS key, when the pump is paused at the BEGIN INFUSION screen, will give access to override and toggle<br />
options that will effect the current infusion only. The Option key will return to the default selection whenever the<br />
pump is turned off, or whenever the program is returned to the main menu prior to beginning the next infusion. The<br />
override and toggle features that will automatically return to their default settings at the conclusion of the current<br />
infusion are;<br />
• Override Occlusion Limit<br />
• Override Alarm Loudness<br />
• Disable/Enable Rapid Occlusion Detection<br />
• Disable/Enable Near Empty Alarm Tone<br />
• Disable/Enable Empty Alarm Tone<br />
Medex Part # G6000608 Revision 3 – Operation <strong>Manual</strong> Page 46
MEDEX <strong>Medfusion</strong> <strong>3500</strong><br />
18. DELIVERY<br />
In DELIVERY, the pump infuses at the rate setting for the pump. The infusing indicators are illuminated, and the total<br />
volume delivered (or total dose delivered) accumulates.<br />
Starting Delivery<br />
You can start the infusion at any time when the pump is on STANDBY or paused at BEGIN INFUSION screen.<br />
1. To start infusion from standby or pause, press the Start button.<br />
2. While you are running an infusion, you may:<br />
a) Lock the keypad.<br />
b) Change the Dosage Rate.<br />
c) Titrate the Rate<br />
d) Clear TVD.<br />
Volume / Time<br />
or<br />
Intermittent<br />
Volume / Time<br />
In Volume / Time Delivery (and Intermittent Volume / Time), the screen indicates the<br />
effective delivery rate and time remaining to complete the infusion. Bolus, changing<br />
rate, and titrating rate, are not allowed in this delivery mode<br />
Stopping Delivery<br />
You can stop infusion delivery at any time.<br />
1. Press the Stop button.<br />
2. The infusing indicators turn OFF and the pump pauses. You may:<br />
a) Restart infusion at any time<br />
b) Change settings and restart infusion.<br />
c) Cancel the infusion by returning to the Main menu screen.<br />
d) Turn off the pump.<br />
Occlusion Trend Graph During Delivery<br />
The pump automatically monitors occlusion or syringe backpressure during any infusion. This trend appears in a bar<br />
graph on the right side of the display during delivery. The letter at the top of the graph indicates the configured<br />
occlusion alarm level:<br />
Code Meaning Relative Pressure<br />
VH Fixed for 1ml syringe at very high 35 psi (248 kPa)<br />
H high 16 psi (110 kPa)<br />
N normal 12 psi (83 kPa)<br />
L low 8 psi (55 kPa)<br />
VL very low 4 psi (28 kPa)<br />
Pressures in above table are only approximations. This is because syringe friction affects the actual pressure level.<br />
Occlusion limit default is set in the custom configurations (see Configuration <strong>Manual</strong>).<br />
Medex Part # G6000608 Revision 3 – Operation <strong>Manual</strong> Page 47
MEDEX <strong>Medfusion</strong> <strong>3500</strong><br />
The operator may override the default Occlusion limit for a particular infusion from the menu if that<br />
option is enabled.<br />
This bar graph indicates three pressure-reading values:<br />
1. The right side of the bar is the current reading.<br />
2. The left side of the bar is the oldest reading.<br />
3. The update rate to the graphical readings depends on the flow delivery rate.<br />
Therefore:<br />
• If the graph slopes upward from left to right, then the pump is headed toward occlusion.<br />
• If the graph is level, then backpressure is steady.<br />
FlowSentry (Rapid Occlusion Detection)<br />
FlowSentry is an internal program unique to the <strong>3500</strong> that monitors and analyzes delivery pressure. When activated,<br />
FlowSentry will alert the clinician to the existence of an occlusion much more rapidly than conventional occlusion<br />
alert systems.<br />
How do you know if FlowSentry has been activated<br />
1. During startup and during the stabilization period following a rate change a pound sign (#) will appear to the<br />
left of the pressure trend graph. The presence of the # indicates that FlowSentry is active, and that the<br />
delivery pressure is stabilizing.<br />
2. Once the delivery pressure has reached a stabile level the # sign will be replaced by a horizontal arrow (→).<br />
Medex Part # G6000608 Revision 3 – Operation <strong>Manual</strong> Page 48
MEDEX <strong>Medfusion</strong> <strong>3500</strong><br />
If there is an increase in the delivery pressure the horizontal arrow will be replaced by a vertical arrow (↑).<br />
In this way the clinician can easily see a) that FlowSentry is activated, and b) whether the delivery pressure is<br />
stabilizing, steady, or increasing. In the event that the FlowSentry has not been activated there will be no # or arrow<br />
signs to the left of the pressure trend graph.<br />
Post Occlusion Bolus Reduction<br />
With large syringes, Bolus can accumulate or be “stored” in the syringe tip when an occlusion happens. This pump<br />
contains an algorithm for post occlusion bolus reduction.<br />
Using post occlusion bolus reduction, the pump withdraws the plunger a predetermined amount to reduce “stored”<br />
bolus in the syringe. However, this feature does not totally eliminate the occlusion bolus. Occlusion bolus will vary<br />
greatly with infusion setup and the fluid infused.<br />
The table below shows typical occlusion bolus volumes − after bolus reduction − for several syringes at different<br />
occlusion pressure settings. (Note: for syringes smaller than 10 ml, the occlusion bolus is very small.)<br />
VL L N H<br />
<strong>Syringe</strong><br />
Size<br />
Volume of Bolus (ml)<br />
BD10 0.01 0.05 0.08 0.08<br />
BD20 0.08 0.23 0.25 0.28<br />
BD30 0.05 0.19 0.28 0.28<br />
BD60 0.19 0.24 0.16 0.14<br />
Time to Occlusion<br />
Typical occlusion bolus volumes for Becton-Dickinson 10, 20, 30, and 60 ml syringes.<br />
The time for the pump to detect an occlusion is affected by three factors:<br />
1. Occlusion Pressure Setting – High (H), Normal (N), Low (L), or Very Low (VL).<br />
2. Flow Rate Setting.<br />
3. <strong>Syringe</strong> & Tubing Compliance, (i.e., softness of syringe plunger tip or tubing).<br />
Below are typical time-to-occlusion graphs for several syringes. See guidelines for pump performance on time to<br />
occlusion. At lower rates smaller syringes have shorter occlusion times.<br />
Medex Part # G6000608 Revision 3 – Operation <strong>Manual</strong> Page 49
MEDEX <strong>Medfusion</strong> <strong>3500</strong><br />
Medex Part # G6000608 Revision 3 – Operation <strong>Manual</strong> Page 50
MEDEX <strong>Medfusion</strong> <strong>3500</strong><br />
Flow Delivery Graphs<br />
This section contains the flow delivery graphs for selected B-D syringes.<br />
Startup graph for B-D 60 ml.<br />
Trumpet curve for B-D 60ml.<br />
Startup graph for B-D 30 ml.<br />
Trumpet curve for B-D 30 ml.<br />
Startup graph for B-D 5 ml.<br />
Trumpet curve for B-D 5 ml.<br />
Medex Part # G6000608 Revision 3 – Operation <strong>Manual</strong> Page 51
MEDEX <strong>Medfusion</strong> <strong>3500</strong><br />
19. CHANGING DELIVERY RATE<br />
The <strong>Medfusion</strong> <strong>3500</strong> infusion pumps offer different ways of changing delivery rate, either before beginning infusion,<br />
during delivery, or when paused.<br />
Titrate Rate During Delivery<br />
You can change the infusion rate by titrating the dosage Up or Down during infusion. Titration changes infusion rate<br />
by increasing or decreasing the current setting. The increments of change depend on syringe size & fluid<br />
concentration.<br />
1. Press TITRATE button at DELIVERY screen. This calls the ADJUST THE RATE screen. Infusion does not<br />
stop.<br />
2. Press the “↑ or ↓” menu buttons to increase or decrease the setting. Or use the Back button to escape<br />
without titrating.<br />
Increments of<br />
Change<br />
Increments of change are based on syringe size. The smaller the syringe installed on<br />
the pump, the smaller the available increments. The larger the installed syringe, the<br />
larger the increments.<br />
3. The delivery rate does not change until you press the Enter button. If you change your mind, press Back to<br />
return to DELIVERY screen without making a change. Rate is limited by the maximum and minimum<br />
delivery rate for the syringe size.<br />
4. When ready press the Enter button to accept the new setting. The new rate is not effective until you press<br />
the Enter button.<br />
Titration<br />
Titration is unavailable for either VOLUME / TIME or INTERMITTENT modes.<br />
Unavailable<br />
Medex Part # G6000608 Revision 3 – Operation <strong>Manual</strong> Page 52
MEDEX <strong>Medfusion</strong> <strong>3500</strong><br />
Changing Rate During Delivery<br />
You can change the infusion rate during any delivery session, except Volume/Time or Intermittent modes.<br />
1. To change the rate during delivery, press the Chg Rate (or Chg Dose) button.<br />
2. Use the number buttons to set the dose rate. Rate is limited by the maximum and minimum delivery rate for<br />
syringe size.<br />
3. When ready press the Enter button to accept the new setting. The pump delivery rate does not change until<br />
you press the Enter button. If you change your mind, press Back to return to DELIVERY screen without<br />
making a change.<br />
Changing Rate When Paused<br />
You can change the dosage rate at any time the pump is paused:<br />
1. If the pump isn’t already paused, then press the Stop button to pause the infusion.<br />
2. To change the rate during any pause, press the Chg Rate (or Chg Dose) button.<br />
3. Use the number buttons to change the delivery rate. Rate is limited by the maximum and minimum delivery<br />
rate for syringe size.<br />
4. When ready press the Enter button to accept the new setting.<br />
a) The delivery rate entry does not change until you press the Enter button.<br />
b) You may exit without changing the rate by pressing the Back button.<br />
5. The pump is paused at the BEGIN INFUSION screen. When ready, press the Start button to begin delivery.<br />
Medex Part # G6000608 Revision 3 – Operation <strong>Manual</strong> Page 53
MEDEX <strong>Medfusion</strong> <strong>3500</strong><br />
20. TOTAL VOLUME, PROGRAM VOLUME / DOSE DELIVERED<br />
The <strong>Medfusion</strong> <strong>3500</strong> infusion pumps monitor and maintain the total quantity of fluids being delivered during any<br />
given session of infusions. Total Volume Delivered (TVD) is displayed at the top of the screen directly above the<br />
Program Volume Delivered (PVD) or Program Dose Delivered (PDD). The TVD is the total volume delivered to the<br />
patient and it will continue to accumulate until the Clear Totals program key is pressed or the pump is turned off.<br />
Displaying Program Volume Delivered / Program Dose Delivered<br />
In most delivery modes, you have the option of viewing either “Program Volume Delivered” or “Program Dosage<br />
Delivered”.<br />
On the display, PVD or PDD accumulates as the volume or dose delivered to the patient while in the current<br />
programmed delivery. This display totals the boluses, loading dose, and normal delivery volumes.<br />
• Priming volume – which should never be delivered to the patient – does not accumulate on this display.<br />
• Program volume or dose delivered – Appears on screen during DELIVERY and while the pump pauses<br />
• Toggle between PVD or PDD – Available through Options menu when paused (provided this has been set).<br />
• Program Dose Delivered − Only available when concentration has been programmed.<br />
Medex Part # G6000608 Revision 3 – Operation <strong>Manual</strong> Page 54
MEDEX <strong>Medfusion</strong> <strong>3500</strong><br />
Clearing Total Volume, Program Volume, or Program Dose Delivered Display<br />
Use the following steps to clear the total volume, and program volume or dosage and reset the counter to zero:<br />
1. From the pause screen, press the Clear Totals program key.<br />
• Confirmation is required to clear totals delivered.<br />
• Press Yes to clear total volume delivered and program volume (or dose) delivered. Or press NO to exit<br />
without clearing.<br />
• The program volume (or dose) delivered is cleared automatically whenever the pump’s delivery mode or<br />
syringe size is changed. The Total Volume Delivered does not clear automatically.<br />
2. From any run screen, press the Clear TVD program key.<br />
• Confirmation is required to clear the Total Volume delivered.<br />
• Press Yes to clear total volume delivered only. Or press NO to exit without clearing.<br />
• The program volume (or dose) delivered is cleared automatically whenever the pump’s delivery mode or<br />
syringe size is changed. The Total Volume Delivered does not clear automatically.<br />
Recovering<br />
TVD / TDD<br />
Information<br />
You can restore total volume delivered display after turning OFF the pump by using the<br />
Recall Settings selection from the Main menu. If you have cleared the TVD, then only<br />
the quantity infused since clearing will be stored in memory.<br />
Medex Part # G6000608 Revision 3 – Operation <strong>Manual</strong> Page 55
MEDEX <strong>Medfusion</strong> <strong>3500</strong><br />
21. KEYPAD LOCK<br />
The keypad can be locked during delivery. The lock feature is provided to make the delivery settings tamper resistant.<br />
Once the system is locked, a setting cannot be modified until the system is unlocked. The <strong>Medfusion</strong> <strong>3500</strong> offers a<br />
programmable unlock code option. To set an unlock code, refer to the Configuration <strong>Manual</strong>.<br />
1. Press the LOCK button to lock the front panel controls. The LOCK indicator lights.<br />
2. If you press any front panel buttons other than the UNLOCK button, a “PUMP IS LOCKED” message appears<br />
onscreen.<br />
3. Press the Unlock menu button to unlock the front panel. If an Unlock Passcode has been set, you will be<br />
instructed to supply the passcode before the front panel will unlock.<br />
4. Any high-priority alarm automatically unlocks the front panel.<br />
Medex Part # G6000608 Revision 3 – Operation <strong>Manual</strong> Page 56
MEDEX <strong>Medfusion</strong> <strong>3500</strong><br />
22. USER DEFINED LIBRARIES<br />
This chapter describes the <strong>Medfusion</strong> <strong>3500</strong> infusion pump “user defined libraries”, tells you how to use them, create<br />
and save them, and enable or disable their availability.<br />
What Are Libraries<br />
The pumps have 4 libraries containing as many as 16 entries per library. Each library is here defined as an electronic<br />
storage place for a group of preset infusion delivery values. Each group of preset values is a user-programmable<br />
“template”. A template is defined here as a stored record of infusion settings that load from memory. These<br />
templates are stored in memory indefinitely (over 10 years) or until overwritten.<br />
FOR WHAT ARE LIBRARIES AND TEMPLATES USED<br />
Every unit, department, organization, or hospital has standard ways of delivering medications or fluids. If you use the<br />
pump on a regular basis, you will find yourself typing the same values again and again when preparing the pump for<br />
delivery. By using the libraries and templates feature, you can make these settings once and then save those settings<br />
to a permanent file or template.<br />
These templates of stored presets are used for administering fluids or medications in standard infusions – without your<br />
having to setup individual dosage values each time you need to begin an infusion. So they are a means of automating<br />
the pump setup process.<br />
WHO CAN USE THESE LIBRARIES OF TEMPLATES<br />
Anyone who is authorized to use the infusion pump can use templates in any of the 4 available libraries. Your facility<br />
should establish a policy for controlling setup, modification, and recording of libraries.<br />
TYPES OF PROGRAMMABLE LIBRARIES<br />
There are two types of libraries in the <strong>Medfusion</strong> <strong>3500</strong> infusion pumps:<br />
Type of Library<br />
E-Plates Library/ Library D<br />
Standard Libraries<br />
What it Does<br />
The 1 st is the E-Plates Library. Like the standard libraries, they contain templates with<br />
presets necessary for programming an infusion. But they do not pause at each level for<br />
you to verify the settings. Instead, the entire set of values is programmed at one step<br />
including syringe manufacturer and size. Then the pump pauses at the BEGIN DELIVERY<br />
screen and displays all the infusion values. At that point, you merely have to press the<br />
Start button to begin delivery. If the E-Plates library is not desired it can be converted to<br />
the 4 th Standard Library (Library D) by simply disabling E-Plates and enabling library D<br />
in the custom program.<br />
The last 3 are Standard Libraries and contain templates with presets necessary for<br />
programming an infusion. These libraries require you to step through and review each<br />
setting. This allows modifying standard settings while stepping through preset values.<br />
Medex Part # G6000608 Revision 3 – Operation <strong>Manual</strong> Page 57
MEDEX <strong>Medfusion</strong> <strong>3500</strong><br />
LIBRARY AND TEMPLATE WARNINGS & CAUTIONS<br />
Warning!<br />
Confirm All<br />
Settings<br />
Displaying<br />
E-Plate Options<br />
Before starting ANY delivery, ALWAYS confirm correctness of ALL infusion values you<br />
just set.<br />
When using E-Plates, preset values are automatically inserted without pausing to verify<br />
each setting. You go directly to the BEGIN INFUSION screen where all the infusion values<br />
are displayed at once. Be sure to verify their correctness before starting the delivery.<br />
Certain data fields may be programmed blank (eg. patient weight) and require data<br />
entry before the infusion will proceed<br />
Extra caution should be exercised when using E-Plates. It is recommended each<br />
organization, unit, or department maintain a written logbook of the contents of every E-<br />
Plate, and have this logbook available as a reference resource for personnel using E-<br />
Plates in their daily operations.<br />
The steps in this section are hypothetical. The <strong>Medfusion</strong> <strong>3500</strong> infusion pumps are<br />
shipped with all the libraries both blank and disabled. So the actual E-Plates you have<br />
available depend entirely on whatever E-Plates and standard library entries your<br />
system operator has programmed into your pump.<br />
Using “Standard” Libraries<br />
If a standard library enabled, the pump displays this library selection under the Main menu.<br />
1. If you don’t see a library listing on the SELECT THE MODE screen, press the More button to find it on<br />
another screen; otherwise it is necessary to enable that library using the custom configuration.<br />
2. Select a library from the menu. For example: If “3” below is selected, then the LIBRARY C screen appears.<br />
Libraries may be specifically named per facility preference such as NICU, or Anesthesia, or Antibiotics, etc.<br />
Select a LIBRARY ENTRY (template) by pressing its number.<br />
For example: If you select template “1” you get the presets for infusing URDRUG-1.<br />
3. You are next prompted to load a syringe, then confirm & accept each level of settings by pressing the Enter<br />
button. Some data fields may require data input prior to proceeding (eg. Patient Weight).<br />
4. When all settings are confirmed, you go to the BEGIN INFUSION screen. Press Start to begin the infusion.<br />
Medex Part # G6000608 Revision 3 – Operation <strong>Manual</strong> Page 58
MEDEX <strong>Medfusion</strong> <strong>3500</strong><br />
Warning!<br />
Confirm All<br />
Settings<br />
Before starting ANY delivery, ALWAYS confirm correctness of ALL infusion values you<br />
just set.<br />
How to Tell Whether E-Plates Are Enabled For Use<br />
Medex ships the infusion pump with all the libraries disabled. Whether they are enabled on the pump you are using<br />
depends entirely on its custom configuration.<br />
What actual E-Plates presets you have available depend on the configuration setup by the person responsible for<br />
custom configuration before the pumps were delivered to your work area.<br />
You can tell whether E-Plates is enabled for use by what you see onscreen when you start the pump, or when you<br />
progress to the BEGIN INFUSION screen, or when you return to the beginning screen.<br />
E-PLATES IS DISABLED<br />
Below is the rule of thumb for determining whether the E-Plates library is disabled and not available for you to use:<br />
When E-PLATES is disabled, or there is no stored template in the library, the SELECT THE MODE menu is what you<br />
see onscreen after you turn on the pump and it completes its startup self-check. It will look something like the<br />
screen below:<br />
E-PLATES IS ENABLED<br />
The infusion pump gives you visual cues when the E-Plates library is enabled. Below are some rules for determining<br />
whether the E-Plates library is enabled and ready for you to use:<br />
Normally … the SELECT THE MODE screen is the first thing you see on screen after you turn on the pump and it<br />
completes it startup self-checks.<br />
But when E-PLATES is enabled, and there is a stored template in the E-Plates library, the SELECT THE LIBRARY<br />
ENTRY menu is the first thing you see on screen after you turn on the pump and it completes its startup selfchecks.<br />
If you then press the Main Menu button from the above SELECT THE LIBRARY screen, this toggles the SELECT<br />
THE MODE screen or menu. Notice how E-PLATES now appears in the bottom left menu button. If you press the<br />
E-Plates button, you return to the SELECT THE LIBRARY screen.<br />
If you press the E-Plates button on the above screen, you return to the SELECT THE LIBRARY ENTRY screen.<br />
Using E-Plates<br />
E-Plates are much easier to use, in fact, than to describe how to use them. If E-Plates are enabled, and there is at least<br />
one saved template in the library, you just press a button to select it.<br />
Medex Part # G6000608 Revision 3 – Operation <strong>Manual</strong> Page 59
MEDEX <strong>Medfusion</strong> <strong>3500</strong><br />
The E-Plate’s preset values are loaded automatically into the pump provided that you have loaded a syringe of the<br />
manufacturer and size programmed for this library entry. All you have to do then is press the Start button to begin<br />
the preset infusion after verifying infusion settings. Some Data fields may be preset as blank and require data entry to<br />
proceed.<br />
To determine enabled or disabled status, see the previous section titled “How to Tell Whether E-Plates Are Enabled<br />
For Use”.<br />
1. To use E-PLATES from the SELECT THE LIBRARY screen.<br />
2. Use the number buttons to select the template you wish to use.<br />
FOR EXAMPLE: If you select “1” above, the pump loads the stored settings for<br />
URDRUG-1 infusion and pauses at the BEGIN INFUSION screen.<br />
3. All the infusion settings display on the BEGIN INFUSION screen. Always check and verify their correctness.<br />
You are responsible for ensuring the safety of any infusion you tell the pump to deliver.<br />
4. When ready, press the Start button to begin the infusion.<br />
Enabling E-Plates & Standard Libraries<br />
Depending on the configuration of your pump, E-Plates and libraries may or may not be readily available. If you<br />
cannot find them as an option in your pump, then they must be enabled through custom configuration.<br />
• Refer to the <strong>Medfusion</strong> <strong>3500</strong> <strong>Syringe</strong> Infusion <strong>Pump</strong> Configuration <strong>Manual</strong> for setting E-Plate libraries and<br />
templates.<br />
• If you have authorization, you may use custom configuration to enable the E-Plates and/or standard libraries. If<br />
not, ask the person responsible for custom configuration to make library changes for you.<br />
All such standard dosage templates shall be setup according to the standards & practices of your hospital, unit, or<br />
organization.<br />
Displaying<br />
E-Plate Options<br />
Even though you may select to enable the E-Plates and standard libraries, the pump<br />
display will not offer E-Plates and/or libraries until you actually create and save a<br />
template inside a library.<br />
Creating Library Templates<br />
The infusion pump comes with 4 blank libraries built into it. There are 3 Standard Libraries, and 1 E-Plates/Standard<br />
library. Each library comes with 16 blank entries or templates. These may be filled with presets through custom<br />
configuration.<br />
• You are limited to creating 64 templates. This is 16 templates each, for the 4 libraries.<br />
• If you have authorization to reconfigure the pump settings, you can delete the contents of library templates, name<br />
& rename the templates, and save infusion presets in the templates.<br />
All such standard dosage templates shall be setup according to standards & practices of your hospital, unit, or<br />
organization.<br />
Medex Part # G6000608 Revision 3 – Operation <strong>Manual</strong> Page 60
MEDEX <strong>Medfusion</strong> <strong>3500</strong><br />
Saving a New Template to a Library<br />
Any trained user of the <strong>Medfusion</strong> <strong>3500</strong> infusion pumps can save a group of presets to any library and template in the<br />
pump. You can save presets to any library whether or not the library is enabled. It is very easy. In fact, it is easier to<br />
do than to describe. The steps are given below:<br />
1. Select and setup any infusion you want used as a standard delivery method. Any group of settings can be<br />
saved to a template.<br />
2. Progress all the way to the BEGIN INFUSION screen.<br />
3. Press the Options button. This calls the SELECT THE PROGRAM OPTION screen.<br />
4. You need to find the SAVE TO LIBRARY option. You may have to press the More button until it appears<br />
onscreen.<br />
5. When you find it, press the number button for SAVE TO LIBRARY and call the SELECT THE LIBRARY screen.<br />
6. Press the number button for the library you want to use. This calls the SELECT THE LIBRARY ENTRY screen.<br />
7. You may save to either a used or unused template. Make your choice and press its number button.<br />
8. You are now at the CHOOSE A CHARACTER screen. This is where you name the template.<br />
9. Use the “” and “” keys to put the highlight on the character or symbol you wish to use. Then press the<br />
Enter button to type the character onto the screen.<br />
10. Repeat step 9 until you have named the new template. Use the Backspace key to make corrections.<br />
11. When finished naming the new template, press the Stop button to save and exit. The new template is now<br />
stored permanently in the designated library. And it now appears on the SELECT THE LIBRARY menu.<br />
Medex Part # G6000608 Revision 3 – Operation <strong>Manual</strong> Page 61
MEDEX <strong>Medfusion</strong> <strong>3500</strong><br />
TEMPLATE NAMING CONVENTIONS<br />
Basically, you can give any template any name you wish. The name serves only to identify the template for future<br />
use. Name the template following the naming convention established by your unit, department, organization, or<br />
hospital. If there is no naming convention, Medex recommends you establish one. The best approach is to name<br />
templates so you can readily identify its contents and function. You should also create and maintain a logbook of all<br />
libraries and templates, with a sheet for each template to describe its contents and function.<br />
• There is a 15 character limit on naming templates.<br />
• Use any combination of letters, spaces, symbols, and numbers you see on the naming screen.<br />
• It is possible to give the same name to two or more templates within any library. Avoid confusion by not<br />
doing this.<br />
• With E-plates it would be helpful to include syringe size, like “30ml” as part of the library name.<br />
LIBRARIES MUST BE ENABLED TO USE<br />
It is possible to save a template to any of the 4 libraries whether they enabled or disabled. But the library containing<br />
the template must be enabled before you use them to setup an infusion.<br />
Medex Part # G6000608 Revision 3 – Operation <strong>Manual</strong> Page 62
MEDEX <strong>Medfusion</strong> <strong>3500</strong><br />
Transferring Libraries from <strong>Pump</strong> to <strong>Pump</strong><br />
Libraries and their stored presets can be copied electronically from one pump to another through the serial<br />
communications interface. The process is called “Library Cloning” and involves one pump “Teaching” and the other<br />
pump “Learning”.<br />
To learn how to do this, refer to the <strong>Medfusion</strong> <strong>3500</strong> <strong>Syringe</strong> Infusion <strong>Pump</strong> Configuration <strong>Manual</strong>.<br />
If you have authorization, you may use custom configuration to clone libraries. If not, ask the person responsible for<br />
custom configuration to make library changes for you.<br />
Reusing<br />
Templates<br />
If you save to an existing template, you write over its contents, and the new template<br />
replaces the old. If you reuse a template, be sure to change its name to avoid<br />
confusion.<br />
PharmGuard: Dosage Protocol Protection<br />
1. PharmGuard provides programmable upper and lower limits for library dose/rate parameters.<br />
2. When attempting to enter or change a dose/rate of a library selection the PharmGuard limits will be<br />
displayed on the screen between the “MAX:” and “MIN:” values as “HIGH” and “LOW”.<br />
3. If a value is entered that is outside the PharmGuard range an audible alarm will sound and the message<br />
“OUTSIDE RANGE LIMIT – SILENCE ALARM TO CONTINUE” will appear.<br />
4. Once the alarm is silenced, the message “CONFIRM LIMIT OVERRIDE” will appear.<br />
5. If this message is answered in the affirmative, the rate will be accepted. If the message is answered in the<br />
negative, the rate entry screen will re-appear.<br />
Medex Part # G6000608 Revision 3 – Operation <strong>Manual</strong> Page 63
MEDEX <strong>Medfusion</strong> <strong>3500</strong><br />
23. BATTERY, AC & EXTERNAL DC POWER OPERATION<br />
The infusion pump is normally operated by an AC power supply. This pump may also be operated by an external DC<br />
power supply.<br />
Each pump contains a rechargeable battery that is continually charged by the power supply – as long as the pump is<br />
connected to AC or external DC power.<br />
If the AC or external DC power is disconnected − while the pump is turned ON − the pump automatically begins<br />
drawing power from the internal battery.<br />
Onscreen Display of Internal Battery Power Level Gauge<br />
Whenever you turn ON the power, the internal battery charge level briefly appears on the “battery shaped” gauge in<br />
the bottom left corner of the display.<br />
When you begin running an infusion on internal battery, this “battery shaped” gauge also appears briefly in the upper<br />
right corner of the display at the start of delivery.<br />
And you can briefly display this “battery shaped” gauge at any time while the pump is infusing on battery by pressing<br />
any number button.<br />
BATTERY GUIDELINES<br />
When To Charge The Battery<br />
When You Can Run On Battery<br />
Alone<br />
When You Cannot Run On<br />
Battery<br />
Power & Battery Limits<br />
When you see the “Battery Low” message, you should plug the pump into a power<br />
outlet for recharging. The battery indicator remains on continuously when<br />
charging. If the pump IS plugged into an outlet and fails to charge the battery,<br />
withdraw the pump from service for testing by trained biomedical service<br />
personnel.<br />
The internal battery in intended for allowing you to infuse medications and fluids<br />
when an external power outlet is not conveniently available or when the patient is<br />
being moved.<br />
When battery becomes fully depleted, all infusion stops, and a “Battery Depleted”<br />
alarm begins sounding. For a fully depleted battery, you must plug in the AC power<br />
cord, turn OFF the pump to clear the alarm, and then turn ON the pump.<br />
See “Alarm Priorities & Messages” table to identify battery message status.<br />
Medex Part # G6000608 Revision 3 – Operation <strong>Manual</strong> Page 64
MEDEX <strong>Medfusion</strong> <strong>3500</strong><br />
External DC Power Option<br />
The infusion pump can also be run by an optional external DC power supply.<br />
The external DC power supply must supply Input 6 – 14 VDC, 7 Watts.<br />
This optional DC power supply is connected through a terminal on the rear of the pump.<br />
The connection can be used for either an external battery or other low voltage DC input.<br />
Use only Medex approved cabling and power supplies. Refer to Service <strong>Manual</strong> and pump labeling for this<br />
information.<br />
Warning!<br />
External Power<br />
must be<br />
IEC 601-1<br />
Certified<br />
Any external power source connected to the DC jack must be IEC 601-1 certified for<br />
medical equipment Type CF and meet Safety Class II requirements. Connecting any<br />
external power source to the <strong>Medfusion</strong> <strong>3500</strong> pumps creates a medical system.<br />
Therefore, the user is responsible for compliance with IEC 601-1 standards. Refer all<br />
questions to the Medex Technical Service Department.<br />
Medex Part # G6000608 Revision 3 – Operation <strong>Manual</strong> Page 65
MEDEX <strong>Medfusion</strong> <strong>3500</strong><br />
24. CLEANING AND CARE<br />
Below are common methods and cautions relating to cleaning and caring for the infusion pump:<br />
Power Source<br />
Standard Cleaning<br />
of the <strong>Medfusion</strong> <strong>3500</strong><br />
Avoid Using Solvents<br />
Spray Resistant<br />
Not Waterproof<br />
Avoid Oil Sprays<br />
Never Autoclave<br />
Before cleaning, always switch electrically operated equipment off and disconnect<br />
from AC power source.<br />
1. Follow your institution’s guidelines for cleaning and disinfecting of devices.<br />
The syringe pump can be safely cleaned with the following agents:<br />
• Common bleach 10% solution diluted with water.<br />
• Mild detergent mixed with water.<br />
• Isopropyl alcohol 70% solution.<br />
• Surface disinfectants compatible with plastic materials.<br />
2. For best results: Clean by spraying cleanser directly onto a soft cloth and then<br />
wiping surfaces dry.<br />
Never use organic solvents (e.g., acetone), quarternary ammonia compounds, strong acids, or<br />
bases to clean any portion of the pump.<br />
The pump is “spray resistant” from the top and sides but not “water proof”.<br />
NEVER spray cleaning or other fluids directly into openings on the bottom of the pump.<br />
The pump is not certified “water proof”. Never immerse the pump in water or other fluids.<br />
Never use light oil sprays (e.g., WD40 tm ) to clean or lubricate pump. These oils contain<br />
chemicals that can damage the plastic of the pump. No user-added lubrication is necessary.<br />
Never sterilize the pump in a steam autoclave or gas. Using autoclave or gas sterilization can<br />
seriously damage the infusion pump and void the warranty.<br />
Medex Part # G6000608 Revision 3 – Operation <strong>Manual</strong> Page 66
MEDEX <strong>Medfusion</strong> <strong>3500</strong><br />
25. MAINTENANCE & SERVICE<br />
This chapter includes information relating to both standard maintenance and service.<br />
Periodic Maintenance<br />
Trained biomedical service personnel should test the pump periodically to ensure continued safe operation.<br />
• This testing should be performed at least yearly, or whenever the pump has been damaged or dropped.<br />
• The occlusion and other sensors must be checked annually to ensure safe operation of the pump.<br />
• Refer to the Service <strong>Manual</strong> for specific details.<br />
The <strong>Medfusion</strong> <strong>3500</strong> Configuration <strong>Manual</strong>, (PN G6000609) provides information on customizing the settings and<br />
features of the pump, which in turn affect the use and operation of the pump on a daily basis.<br />
The 3000 Series Service <strong>Manual</strong>, (PN G6000278) provides technical information on this pump, including:<br />
• Circuit Diagrams<br />
• Functional Descriptions<br />
• Theory of Operation<br />
• Diagnosis and Testing<br />
• Calibration<br />
• Service Parts<br />
<strong>Pump</strong> Maintenance<br />
AC Power<br />
Manufacturer<br />
Recommended<br />
Maintenance<br />
Never open pump case<br />
Dropped or Damaged<br />
<strong>Pump</strong>s<br />
Service Warnings<br />
Only trained biomedical service personnel may service this pump. Service personnel<br />
should disconnect the AC power cord before servicing the pump.<br />
The only means of removing AC power is to disconnect the AC power cord. While<br />
the AC power cord is attached to the pump and plugged into an AC outlet, live main<br />
voltage is present within the pump.<br />
Always maintain this pump following manufacturer recommended instructions in the<br />
Service <strong>Manual</strong>. Improperly maintained pumps may cause either under-infusion or<br />
over-infusion to patient.<br />
<strong>User</strong>s should never open the pump case or battery compartment for any reason.<br />
Service personnel should always disconnect the AC power cord before servicing the<br />
pump.<br />
Never use a dropped or obviously damaged pump. Withdraw it service until a trained<br />
biomedical technician can test it.<br />
Medex Part # G6000608 Revision 3 – Operation <strong>Manual</strong> Page 67
MEDEX <strong>Medfusion</strong> <strong>3500</strong><br />
Using Medex Service Assistance<br />
Use the following steps to make use of Medex technical service assistance:<br />
1. Contact Medex Technical Service Department at one of the following telephone numbers:<br />
Toll free in continental United States<br />
800-848-1757<br />
Contact via Fax in United States<br />
770-497-0736<br />
Outside continental United States<br />
614-889-2220<br />
In Europe contact Medex Medical Ltd., England<br />
+44 (0) 1706-233826<br />
2. When calling any of these numbers, please have the following ready:<br />
• Model name / number of pump<br />
• <strong>Pump</strong> serial number<br />
• Purchase date if pump is within warranty period<br />
• Description of problem in as much detail as possible<br />
3. The service representative will “talk you through” to a solution if possible.<br />
Returning a <strong>Medfusion</strong> <strong>3500</strong> <strong>Pump</strong> for Repair<br />
When the service representative cannot solve your problem by talking you through it, then it becomes necessary to<br />
return the infusion pump for service.<br />
1. If the problem cannot be resolved through the assistance of the Technical Service Department, then you will<br />
be assigned a Return Authorization (RA) number.<br />
2. Clean and decontaminate the pump and accessories prior to returning items to Medex. This is required<br />
before shipment by United States Occupational Safety & Health Administration (OSHA).<br />
3. Package the infusion pump carefully for shipment.<br />
4. Medex will not accept returns for service without the assigned RA number clearly printed on the shipping<br />
package. Mark the Return Authorization (RA) number clearly on the outside of the shipping package used<br />
to return the pump.<br />
5. Ship the carefully packaged infusion pump to either of the addresses listed below:<br />
United States Service<br />
Medex<br />
4350 River Green Parkway, Suite 200<br />
Duluth, Georgia 30096 USA<br />
770-623-9809 or<br />
800-848-1757<br />
European Service<br />
Medex Medical Ltd.<br />
St. Crispin Way<br />
Haslingden, Rossendale, Lancashire<br />
BB4 4PW Great Britain<br />
+44 (0) 1706-233826<br />
Medex Part # G6000608 Revision 3 – Operation <strong>Manual</strong> Page 68
MEDEX <strong>Medfusion</strong> <strong>3500</strong><br />
Medex Limited Warranty<br />
THIS WARRANTY IS GIVEN IN LIEU OF ANY EXPRESS OR IMPLIED WARRANTIES, INCLUDING WARRANTY OF<br />
MERCHANTABILITY, OR FITNESS FOR A PARTICULAR PURPOSE.<br />
Medex warrants to the purchaser that the <strong>Medfusion</strong> <strong>3500</strong> <strong>Syringe</strong> Infusion <strong>Pump</strong> shall be free from defects<br />
in material and workmanship for the period of one (1) year from the date of purchase. Medex’ sole<br />
obligation with respect to any such defect is limited to the repair, or at Medex’ option, replacement of the<br />
<strong>Syringe</strong> Infusion <strong>Pump</strong>. The Purchaser shall pay return freight charges.<br />
This limited warranty is made on the condition that prompt notification of a defect is given to Medex, within<br />
the warranty period, and that Medex shall have the sole right to determine whether a defect exists.<br />
This limited warranty does not apply to <strong>Syringe</strong> Infusion <strong>Pump</strong>s that have been partially or completely<br />
disassembled, altered, subjected to misuse, negligence, or accident; or operated other than in accordance to<br />
the instructions provided within this manual.<br />
While under this limited warranty, Medex recommends that personnel other than Medex service personnel<br />
shall not open the pump. Service by unauthorized personnel shall void this limited warranty.<br />
This limited warranty represents the exclusive obligation of Medex, and the exclusive remedy of the<br />
purchaser regarding defects in a <strong>Syringe</strong> Infusion <strong>Pump</strong>.<br />
No person is authorized to modify, in any manner, Medex’ obligation as described above.<br />
Medex reserves the right to make changes in or additions to pumps manufactured and/or sold by Medex at<br />
any time, without incurring any obligation to make the same or similar changes on pumps previously<br />
manufactured or sold by Medex.<br />
Medex Part # G6000608 Revision 3 – Operation <strong>Manual</strong> Page 69
MEDEX <strong>Medfusion</strong> <strong>3500</strong><br />
26. APPENDIX 1: SYRINGE FLOW RATE BY MANUFACTURER & SIZE<br />
Manufacturer Size Min. Rate Max. Rate Manufacturer Size Min. Rate Max. Rate<br />
ml ml/hr ml/hr ml ml/hr ml/hr<br />
B. Braun: Luer Lock Sherwood Medical: Luer Lock<br />
Monoject 1ml 0.01 35.0<br />
Perfusor 20 ml 0.10 481.0 3ml 0.020 105.0<br />
50 ml 0.10 1042 6 ml 0.030 213.0<br />
Omnifix 5 ml 0.030 207.0 12 ml 0.07 325.0<br />
10 ml 0.07 338.0 20 ml 0.10 536.0<br />
20 ml 0.10 537.0 35 ml 0.10 735.0<br />
50 ml 0.10 1042 60 ml 0.10 944.0<br />
Becton-Dickinson: Luer Lock<br />
Terumo Medical: Luer Lock<br />
WWD 1 ml 0.01 35.0 Luer Lock 1 ml 0.01 35.0<br />
3 ml 0.020 98.00 3 ml 0.020 106.0<br />
5 ml 0.030 192.0 5 ml 0.030 225.0<br />
10 ml 0.07 278.0 10 ml 0.07 333.0<br />
20 ml 0.10 484.0 20 ml 0.10 541.0<br />
30 ml 0.10 622.0 30 ml 0.10 712.0<br />
60 ml 0.10 944.0 60 ml 0.11 1130<br />
Becton-Dickinson: Glass<br />
AstraZeneca: Diprivan<br />
Glass Slip 1 ml 0.01 35.0<br />
2.5 ml 0.020 100.0 Prefilled Glass 50 ml 0.40 952.0<br />
5 ml 0.030 187.0<br />
10 ml 0.07 271.0<br />
Medex Part # G6000608 Revision 3 – Operation <strong>Manual</strong> Page 70
MEDEX <strong>Medfusion</strong> <strong>3500</strong><br />
27. APPENDIX 2: FLOW DELIVERY CALCULATIONS<br />
Rate calculations used by different delivery modes in the syringe infusion pump. Here, the maximum rate is limited by syringe<br />
size or the custom configured maximum rate limit. The minimum rate is limited by the syringe size.<br />
Mass modes<br />
Below is a table of mass modes and the formulae used to calculate them:<br />
Type of Mode<br />
How it is Figured<br />
mcg/min<br />
mcg/hr<br />
mg/min<br />
mg/hr<br />
mU/min<br />
mU/hr<br />
U/min<br />
U/hr<br />
Rate is calculated as mass delivery rate (microgram/min) times 60 min/hr divided by<br />
concentration (mg/ml) divided by 1000.<br />
Rate is calculated as mass delivery rate (microgram/hr) divided by concentration (mg/ml)<br />
divide by 1000.<br />
Rate is calculated as mass delivery rate (milligram/min) times 60 min/hr divided by<br />
concentration (mg/ml).<br />
Rate is calculated as mass delivery rate (milligram/hr) divided by concentration (mg/ml).<br />
Rate is calculated as mass delivery rate (milliUnits/min) times 60 min/hr divided by<br />
concentration (U/ml) divided by 1000.<br />
Rate is calculated as mass delivery rate (milliUnits/hr) divided by concentration (U/ml)<br />
divided by 1000.<br />
Rate is calculated as mass delivery rate (Units/min) times 60 min/hr divided by<br />
concentration (U/ml).<br />
Rate is calculated as mass delivery rate (Units/hr) divided by concentration (U/ml).<br />
Body Weight modes<br />
Below is a table of body weight modes and the formulae used to calculate them:<br />
Type of Mode<br />
How it is Figured<br />
mg/kg/min<br />
mg/kg/hr<br />
mcg/kg/min<br />
mcg/kg/hr<br />
Units/Kg/min<br />
Rate is calculated as patient weight (kg) times dose delivery rate (milligram/kg/min) times<br />
60 min/hr divided by concentration (mg/ml).<br />
Rate is calculated as patient weight (kg) times dose delivery rate (milligram/kg/hr) divided<br />
by concentration (mg/ml).<br />
Rate is calculated as patient weight (kg) times dose delivery rate (microgram/kg/min)<br />
times 60 min/hr divided by concentration (mg/ml) divided by 1000.<br />
Rate is calculated as patient weight (kg) times dose delivery rate (microgram/kg/hr) divide<br />
by concentration (mg/ml) divided by 1000.<br />
Rate is calculated as patient weight (kg) times dose delivery rate (Units/kg/hr) divide by<br />
concentration (Units/ml).<br />
Medex Part # G6000608 Revision 3 – Operation <strong>Manual</strong> Page 71
MEDEX <strong>Medfusion</strong> <strong>3500</strong><br />
Volume / Time & Intermittent modes<br />
Below is a table of volume / time and intermittent modes and the formulae used to calculate them:<br />
Type of Mode<br />
volume / time<br />
intermittent mode<br />
How it is Figured<br />
Rate is calculated as volume (ml) divided by time (hours:minutes) where time is rationalized<br />
as hours plus minutes divided by 60.<br />
Rate is calculated as volume (ml) divided by time (hours:minutes) where time is rationalized<br />
as hours plus minutes divided by 60; here, there is a time between deliveries with no flow.<br />
Custom Dilution Algorithm<br />
Below is a table of parameters needed to generate the custom dilution formula:<br />
Parameter Units Abbreviation<br />
initial drug concentration mg/ml IC<br />
target (volumetric) rate ml/hr TVR<br />
patient weight kg W<br />
target dose rate mcg/kg/min* TDR<br />
final (diluted) volume ml FV<br />
* Dose rate is chosen from list of: mg/kg/min, mg/kg/hr, mcg/kg/min, mcg/kg/hr.<br />
THE RESULTS FROM THE DILUTION CALCULATION<br />
Result Unit Type<br />
Volume of drug ml VDR<br />
Volume of diluent ml VDL<br />
Final (delivery) concentration mg/ml C<br />
Final (delivery) volumetric rate ml/hr R<br />
Medex Part # G6000608 Revision 3 – Operation <strong>Manual</strong> Page 72
MEDEX <strong>Medfusion</strong> <strong>3500</strong><br />
HOW THE CALCULATION IS PERFORMED<br />
The custom dilution calculation performed is as follows:<br />
1. Find target mass delivery rate = TDR times W times 60 min/hr; result is in mg/hr units.<br />
2. [Note: for body weight modes in “/hr”, the “times 60 min/hr” is omitted in the equation].<br />
3. Find target concentration = target mass delivery rate / TVR; result is in mg/ml units.<br />
4. Calculate dilution ratio = target concentration / IC. Result is ratio, unitless.<br />
5. Calculate Volume of Drug: VDR = Dilution ratio * FV. Round result to nearest ml.<br />
6. Calculate Volume of Diluent: VDL = FV − VDR. Result is in ml.<br />
7. Calculate Final Concentration: C = VDR / FV * IC. Result is in mg/ml.<br />
8. Given that Target Dose Rate = Final Delivery Dose Rate.<br />
9. Calculate Final Volumetric Rate: R = Final Dose Rate * W / C. Result is in ml/hr.<br />
GOAL OF THIS DILUTION CALCULATION<br />
The goal of this calculation is providing a dilution which makes the target dose rate = the final dose rate, while trying<br />
to stay as close as possible to the target (volumetric) rate.<br />
In the result of the dilution calculation, the final volumetric rate may be different from the target (volumetric) rate.<br />
This is caused by the “round to nearest ml” occurring in step 4 above.<br />
Medex Part # G6000608 Revision 3 – Operation <strong>Manual</strong> Page 73
MEDEX <strong>Medfusion</strong> <strong>3500</strong><br />
28. APPENDIX 3: SERIAL COMMUNICATIONS<br />
This pump contains an optically isolated (Infrared) serial communications interface. With an optional Medex conversion box,<br />
this pump can be connected to a standard computer RS-232 serial interface.<br />
This process is called Configuration Cloning, and it allows pump setting information to be copied from one pump to another<br />
(see Configuration <strong>Manual</strong>). The interface provides capability for a remote computer to collect:<br />
• <strong>Pump</strong> Settings<br />
• <strong>Pump</strong> Libraries<br />
• Current Delivery Information<br />
Serial Conversion Box<br />
Another option is the Medex Serial Conversion Box, which allows direct connection between the Series 3000 pumps<br />
and a PC running the PC Cloning software. This software provides a full-featured simulation of the functioning of the<br />
Series 3000 pumps. This can be used as both a training tool and a configuration utility.<br />
As a configuration utility, the simulated pump can be setup exactly as a unit or department needs to use it. Then these<br />
configuration settings may be transferred en masse from the PC to actual pumps.<br />
Specific details on the serial interface protocol are provided with the conversion box, (P/N 3000RS232).<br />
Medex Cloning Block<br />
Two pumps can be interfaced without the use of the conversion box. Depending on your working surface, it may be<br />
difficult to perfectly align the infrared serial ports by hand.<br />
Instead use an optional, Medex Cloning Block, (P/N G6000200) to physically align the two pumps. This is a specially<br />
designed plastic plug which fits into the serial port notches on the backs of both pumps − providing simple alignment<br />
for both pumps every time.<br />
Medex Part # G6000608 Revision 3 – Operation <strong>Manual</strong> Page 74
MEDEX <strong>Medfusion</strong> <strong>3500</strong><br />
29. APPENDIX 4: POLE CLAMP ASSEMBLY & USE<br />
This appendix contains the instructions for assembling and using the Pole Clamp options available for the 3000 Series<br />
infusion pumps.<br />
3000 Series <strong>Pump</strong> Rotating/Detachable Pole Clamp (standard)<br />
With the Rotating Clamp, you can align the pole clamp for mounting on any vertical or horizontal pole, bed rail, or<br />
similar solid structure small enough to fit within the clamp’s jaws. The light weight of the pump makes this<br />
convenient.<br />
1. Open the clamp jaws wide enough to easily slip around the pole.<br />
2. Tighten the clamp until it is securely fastened so the pump cannot be moved.<br />
The 3000 Series rotating/detachable pole clamp is packaged in two pieces that must be clipped together before it can<br />
be used:<br />
• The "L" Bracket and clamp anchor with release lever - is pre-attached to the pump base with 2 "flathead"<br />
screws<br />
• The Rotating pole clamp - which must be slid onto the clamp anchor at the back of the pump<br />
Assembling the 3000 Series <strong>Pump</strong> Rotating/Detachable Pole Clamp<br />
1. Unpack the pump and pole clamp assembly from the shipping container<br />
2. Slide the rotating pole clamp onto the pole clamp anchor at the rear of the pump until the retainer lock<br />
button audibly clicks into place<br />
3. Pull the round lock button at the top of the clamp assembly up and rotate the clamp to fit either a vertical or<br />
horizontal pole<br />
4. To remove the pump from the pole clamp, pull the release lever toward the pump and slide the pump off the<br />
pole clamp Using the 3000 Series <strong>Pump</strong> Rotating/Detachable Pole Clamp Pole Clamp<br />
Medex Part # G6000608 Revision 3 – Operation <strong>Manual</strong> Page 75
MEDEX <strong>Medfusion</strong> <strong>3500</strong><br />
3000 Series <strong>Pump</strong> Stationary Pole Clamp<br />
With the “L” bracket, you can align the pole clamp for mounting on any vertical or horizontal pole, bed rail, or similar<br />
solid structure small enough to fit within the clamp’s jaws. The light weight of the pump makes this convenient.<br />
1. Open the clamp jaws wide enough to easily slip around the pole.<br />
2. Tighten the clamp until it is securely fastened so the pump cannot be moved.<br />
Clamp with “L” bracket aligned for vertical pole mounting.<br />
Clamp with “L” bracket aligned for horizontal pole mounting.<br />
The 3000 Series stationary pole clamp is packed in a bag in pieces, which must be assembled before it, can be used:<br />
• The Pole Clamp assembly − with 4 “pan head” screws & 4 lock washers already inserted.<br />
• The “L” Bracket − which must be attached for mounting on either a vertical or horizontal pole.<br />
• 2 “flathead” screws and 2 “conical” lock washers − in a small plastic bag.<br />
Medex Part # G6000608 Revision 3 – Operation <strong>Manual</strong> Page 76
MEDEX <strong>Medfusion</strong> <strong>3500</strong><br />
Assembling the 3000 Series <strong>Pump</strong> Stationary Pole Clamp<br />
You need a “Philips” head screwdriver. The steps for assembling the pole clamp are given below:<br />
1. Unpack the pole clamp assembly from the shipping container.<br />
2. The “L” bracket attaches the pole clamp to the pump. When you receive the pole clamp assembly, it is<br />
configured for use with a vertical pole. If you wish to change this assembly for use with a horizontal pole<br />
(e.g. bed rail), then you must reconfigure the “L” bracket using the following steps:<br />
• Remove the 4 “pan head” screws and their lock washers from the rear of the pole clamp.<br />
• Align the “L” bracket for horizontal mounting (see previous page). Install the 4 washers and pan<br />
head screws to mount the “L” bracket to the clamp. Tighten them to at least 10 in-lb (1.1 Nm)<br />
torque.<br />
3. Use the small “flathead” screws and “star” lock washers to attach the pole clamp to the bottom of the pump.<br />
Tighten them to at least 10 in-lb (1.1 Nm) torque.<br />
Medex Part # G6000608 Revision 3 – Operation <strong>Manual</strong> Page 77
MEDEX <strong>Medfusion</strong> <strong>3500</strong><br />
30. APPENDIX 5: MRI ROOM USAGE<br />
MRI Room Usage for the <strong>Medfusion</strong> <strong>3500</strong><br />
The magnetic resonance imaging (MRI) room usage information for MRI procedures (i.e., imaging, angiography,<br />
functional imaging, and spectroscopy) refers to the use of a shielded MRI system operating at a static magnetic field<br />
of 1.5 Tesla with radio frequency transmission and reception at 64 MHz. The effects of using other MRI systems<br />
have not been determined for this infusion pump.<br />
The <strong>Medfusion</strong> <strong>3500</strong> syringe infusion pumps have been determined to be acceptable for use in MRI rooms based upon<br />
the specific operating criteria indicated below. The pump, when correctly placed and operated within this 1.5 T/64<br />
MHz MR environment, will not present an additional hazard or risk to the patient or MR user, or affect the image<br />
quality of the MRI examination.<br />
MRI procedures using the pumps must only be performed according to the specific operating guidelines as follows:<br />
♦<br />
Proper Placement of <strong>Pump</strong><br />
The pump must be positioned in the MR environment of a 1.5 Tesla MRI system in a magnetic fringe field that does<br />
not to exceed 150 gauss.<br />
Warning!<br />
Placement of the pump in a magnetic fringe field greater than 150 gauss may present a<br />
projectile hazard to the patient or MRI user because of magnetic field interactions. In<br />
addition, the operation of the pump may be affected and/or degrade or alter the quality<br />
of the MR images that are obtained.<br />
Warning!<br />
The pump must be securely fastened to a non-moveable object while positioned in the<br />
MR environment.<br />
♦ Pulse Sequences for MRI when using the <strong>Medfusion</strong> <strong>3500</strong><br />
With the pump operating in a proper position relative to the 1.5 Tesla MRI system (i.e. a magnetic fringe field of 150<br />
gauss or less), the use of standard spin echo, fast spin echo, and gradient echo pulse sequences for MRI examinations<br />
has been determined to produce no substantial alteration in image quality. The use of unconventional or non-standard<br />
MRI techniques has not been assessed and must be avoided.<br />
Note: Since the interface between the pump and the patient does not involve any thermally conductive material, there<br />
is no concern with respect to possible heating of this device during an MRI procedure.<br />
Medex Part # G6000608 Revision 3 – Operation <strong>Manual</strong> Page 78


