
You also want an ePaper? Increase the reach of your titles
YUMPU automatically turns print PDFs into web optimized ePapers that Google loves.
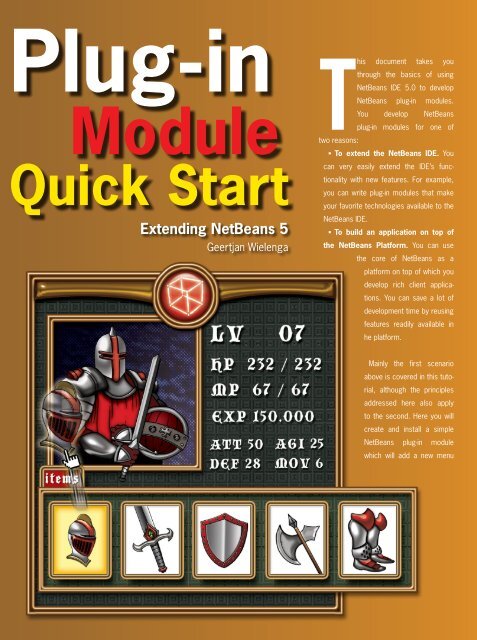
<strong>Plug</strong>-<strong>in</strong><br />
Module<br />
Quick Start<br />
Extend<strong>in</strong>g <strong>NetBeans</strong> 5<br />
Geertjan Wielenga<br />
This document takes you<br />
through the basics of us<strong>in</strong>g<br />
<strong>NetBeans</strong> IDE 5.0 to develop<br />
<strong>NetBeans</strong> plug-<strong>in</strong> modules.<br />
You develop <strong>NetBeans</strong><br />
plug-<strong>in</strong> modules for one of<br />
two reasons:<br />
• To extend the <strong>NetBeans</strong> IDE. You<br />
can very easily extend the IDE’s functionality<br />
with new features. For example,<br />
you can write plug-<strong>in</strong> modules that make<br />
your favorite technologies available to the<br />
<strong>NetBeans</strong> IDE.<br />
• To build an application on top of<br />
the <strong>NetBeans</strong> Platform. You can use<br />
the core of <strong>NetBeans</strong> as a<br />
platform on top of which you<br />
develop rich client applications.<br />
You can save a lot of<br />
development time by reus<strong>in</strong>g<br />
features readily available <strong>in</strong><br />
he platform.<br />
Ma<strong>in</strong>ly the first scenario<br />
above is covered <strong>in</strong> this tutorial,<br />
although the pr<strong>in</strong>ciples<br />
addressed here also apply<br />
to the second. Here you will<br />
create and <strong>in</strong>stall a simple<br />
<strong>NetBeans</strong> plug-<strong>in</strong> module<br />
which will add a new menu
<strong>Plug</strong>-<strong>in</strong> Module Quick Start<br />
item and a toolbar button to the IDE.<br />
When you select the menu item or toolbar<br />
button, a DialogDisplayer, provided by the<br />
<strong>NetBeans</strong> APIs, with the text “I’m plugged<br />
<strong>in</strong>!” will be shown.<br />
Sett<strong>in</strong>g Up a <strong>Plug</strong>-<strong>in</strong><br />
Module Project<br />
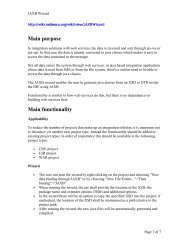
<strong>NetBeans</strong> provides a wizard that sets<br />
up all the basic files needed for a plug-<strong>in</strong><br />
module.<br />
Creat<strong>in</strong>g a <strong>NetBeans</strong><br />
<strong>Plug</strong>-<strong>in</strong> Module Project<br />
In <strong>NetBeans</strong>, choose File|New Project,<br />
and under Categories select <strong>NetBeans</strong><br />
<strong>Plug</strong>-<strong>in</strong> Modules. <strong>NetBeans</strong> plug-<strong>in</strong> module<br />
support provides three project types:<br />
• Module Project. Creates a template<br />
for a standalone plug-<strong>in</strong> module.<br />
• Library Wrapper Module Project.<br />
Creates a plug-<strong>in</strong> module for an external<br />
JAR file required by one or more plug-<strong>in</strong><br />
modules.<br />
• Module Suite Project. Creates a<br />
template for a set of <strong>in</strong>terdependent plug<strong>in</strong><br />
modules and library wrapper modules,<br />
which you want to deploy together.<br />
Select Module Project and click Next.<br />
In the Name and Location panel, type<br />
“MyFirstModule” <strong>in</strong> Project Name. Change<br />
the Project Location to any directory on<br />
your computer, such as c:\mymodules.<br />
Leave the Standalone Module radio button<br />
and the Set as Ma<strong>in</strong> Project checkbox<br />
selected. Click Next.<br />
In the Basic Module Configuration panel,<br />
replace “yourorghere” <strong>in</strong> Code Name Base<br />
with “myorg”, so that the whole code name<br />
base is “org.myorg.myfirstmodule”. Notice<br />
that the localiz<strong>in</strong>g bundle and the XML layer will be stored <strong>in</strong> the<br />
package org.myorg.myfirstmodule. These files do the follow<strong>in</strong>g:<br />
• Localiz<strong>in</strong>g Bundle. Specifies language-specific str<strong>in</strong>gs for<br />
<strong>in</strong>ternationalization.<br />
• XML Layer. Registers items such as menus and toolbar<br />
buttons <strong>in</strong> the <strong>NetBeans</strong> System Filesystem (see the sidebar<br />
“<strong>Plug</strong>-<strong>in</strong> Module Terms”).<br />
Click F<strong>in</strong>ish. The IDE creates the MyFirstModule project,<br />
conta<strong>in</strong><strong>in</strong>g all of your sources and project metadata,<br />
such as the project’s Ant build script.<br />
The project opens <strong>in</strong> the IDE. You<br />
can view its logical structure <strong>in</strong> the<br />
Projects w<strong>in</strong>dow (Ctrl-1) and its file<br />
structure <strong>in</strong> the Files w<strong>in</strong>dow (Ctrl-2).<br />
See Figure 1.<br />
In addition to the localiz<strong>in</strong>g bundle<br />
and the XML layer, the project also<br />
<strong>in</strong>cludes the follow<strong>in</strong>g important files:<br />
• Module Manifest. Declares that the<br />
project is a plug-<strong>in</strong> module. In addition, it<br />
sets some module-specific sett<strong>in</strong>gs, such<br />
as the location of the XML layer, the location<br />
of the localiz<strong>in</strong>g bundle, and the module<br />
version.<br />
• Build Script. Provides a place where you can create<br />
your own Ant targets and override those that are specified <strong>in</strong> nbproject/build-impl.xml.<br />
• Project Metadata. Conta<strong>in</strong>s <strong>in</strong>formation such as the<br />
project’s type, contents, platform, classpath, dependencies,<br />
and mapp<strong>in</strong>gs between project commands and targets<br />
<strong>in</strong> Ant scripts.<br />
A 1<br />
• <strong>NetBeans</strong> Platform<br />
Config. Conta<strong>in</strong>s properties<br />
used by the IDE or<br />
Platform.<br />
• Per-user <strong>NetBeans</strong><br />
P l a t f o r m C o n f i g<br />
Conta<strong>in</strong>s properties<br />
specific to your <strong>in</strong>stallation<br />
of the IDE.<br />
A<br />
Figure 1<br />
Logical<br />
structure of the<br />
new plug-<strong>in</strong><br />
module<br />
First Edition N 53
<strong>Plug</strong>-<strong>in</strong> Development<br />
G<br />
<strong>NetBeans</strong><br />
Platform<br />
netbeans.org/products/platform<br />
For example, if you are shar<strong>in</strong>g the project over VCS, any properties<br />
you set <strong>in</strong> this file are not checked <strong>in</strong>to the repository. You<br />
can copy a property from <strong>NetBeans</strong> Platform Config <strong>in</strong>to this<br />
file and give the property different def<strong>in</strong>itions <strong>in</strong> each file. The<br />
def<strong>in</strong>itions <strong>in</strong> this file take precedence over those <strong>in</strong> <strong>NetBeans</strong><br />
Platform Config.<br />
You will not need to modify any of these files dur<strong>in</strong>g this tutorial.<br />
Note that the important files shown before are the logical views of the<br />
follow<strong>in</strong>g files <strong>in</strong> the Files w<strong>in</strong>dow: manifest.mf, build.xml, nbproject/<br />
project.xml, nbproject/platform.properties, and nbproject/private/<br />
platform-private.properties, respectively.<br />
Creat<strong>in</strong>g a Menu Item and<br />
Toolbar Button<br />
You use the <strong>NetBeans</strong> plug-<strong>in</strong> module file<br />
templates to create the basis of the module’s<br />
functionality. When you use a file template,<br />
the IDE registers the item<br />
that you create <strong>in</strong> the<br />
layer.xml file. After<br />
us<strong>in</strong>g a wizard<br />
to create the<br />
file<br />
template,<br />
you use the<br />
<strong>Plug</strong>-<strong>in</strong> module terms<br />
The basic terms used <strong>in</strong> plug-<strong>in</strong> module<br />
development are as follows:<br />
<strong>NetBeans</strong> Platform. The skeleton application<br />
that provides everyth<strong>in</strong>g most applications need<br />
and little of what they don’t. The <strong>NetBeans</strong> Platform<br />
provides an application’s common requirements<br />
– such as menus, document management,<br />
and sett<strong>in</strong>gs – right out of-the-box. Build<strong>in</strong>g an<br />
application “on top of <strong>NetBeans</strong>” means that,<br />
<strong>in</strong>stead of writ<strong>in</strong>g applications from scratch, you<br />
only provide the parts of your application that the<br />
<strong>NetBeans</strong> Platform doesn’t already have. At the<br />
end of the development cycle, you bundle your<br />
application with the <strong>NetBeans</strong> Platform, sav<strong>in</strong>g you<br />
time and energy and result<strong>in</strong>g <strong>in</strong> a solid, reliable<br />
application.<br />
System Filesystem. The general registry that<br />
conta<strong>in</strong>s <strong>NetBeans</strong> configuration <strong>in</strong>formation,<br />
built from the layer.xml configuration files of the<br />
registered modules. <strong>NetBeans</strong> stores a wide<br />
variety of configuration <strong>in</strong>formation <strong>in</strong> the System<br />
Filesystem. For example, the System Filesystem<br />
conta<strong>in</strong>s a folder called Menu, which conta<strong>in</strong>s<br />
subfolders with names such as File and Edit. These<br />
subfolders conta<strong>in</strong> files that represent Java classes<br />
which implement the actions that appear <strong>in</strong> the File<br />
and Edit menus <strong>in</strong> the IDE.<br />
<strong>Plug</strong>-<strong>in</strong> Module. A group of Java classes that<br />
provides an application with a specific feature.<br />
The Java classes use the manifest.mf file to<br />
declare the module and the layer.xml configuration<br />
file to register their functionality <strong>in</strong> the System<br />
Filesystem. In <strong>NetBeans</strong> term<strong>in</strong>ology, “plug<strong>in</strong>”<br />
is an adjective while “module” is a noun.<br />
There is no discernible difference <strong>in</strong> mean<strong>in</strong>g<br />
between them.<br />
<strong>NetBeans</strong> APIs. The public <strong>in</strong>terfaces and classes<br />
which are available to module writers. They are<br />
divided <strong>in</strong>to specific APIs for deal<strong>in</strong>g with different<br />
types of functionality. The contents and behavior of<br />
the Java source packages and its subpackages, as<br />
specified <strong>in</strong> the API reference documentation, are<br />
the APIs.<br />
Module Suite. A group of <strong>in</strong>terdependent<br />
modules that are deployed together. The IDE helps<br />
you to brand the suite – for example, you can<br />
add a splash screen, and also specify the parts<br />
of the <strong>NetBeans</strong> Platform that you don’t want your<br />
application to provide.<br />
54 N <strong>NetBeans</strong> Magaz<strong>in</strong>e
<strong>Plug</strong>-<strong>in</strong> Module Quick Start<br />
<strong>NetBeans</strong> API List (see l<strong>in</strong>ks) to cont<strong>in</strong>ue<br />
develop<strong>in</strong>g the module.<br />
Us<strong>in</strong>g the Action Wizard<br />
In the Projects w<strong>in</strong>dow, right-click the<br />
project node and choose New>File/Folder.<br />
In the New File wizard, choose <strong>NetBeans</strong><br />
Module Development under Categories,<br />
and Action under File Types. Click Next.<br />
In the Action Type panel, accept the<br />
defaults and aga<strong>in</strong> click Next. In the GUI<br />
Registration panel, select Global Menu<br />
Item, and then Global Toolbar Button. Set<br />
the follow<strong>in</strong>g values:<br />
• Category: Tools<br />
• Menu: Tools<br />
• Position: Tools - HERE - <br />
• Toolbar: Build<br />
• Position: Run Ma<strong>in</strong> Project - HERE<br />
- Debug Ma<strong>in</strong> Project<br />
Select Separator Before and Separator<br />
After <strong>in</strong> the Global Menu Item section. You<br />
should now see Figure 2.<br />
Note the follow<strong>in</strong>g about the sections <strong>in</strong><br />
the GUI Registration panel:<br />
A 2<br />
• Category. Specifies where the action will be<br />
located <strong>in</strong> the Keymap section of the Options<br />
w<strong>in</strong>dow.<br />
• Global Menu Item. Specifies the menu where<br />
the action will be registered as a menu item. The<br />
position of the menu item with<strong>in</strong> the exist<strong>in</strong>g items<br />
<strong>in</strong> the menu can also be set here.<br />
• Global Toolbar Button. Specifies the toolbar<br />
where the action will be registered as a button.<br />
The position of the toolbar button with<strong>in</strong> the exist<strong>in</strong>g<br />
buttons <strong>in</strong> the toolbar can also be set <strong>in</strong> this<br />
section.<br />
• Global Keyboard Shortcut. Specifies a key<br />
stroke that will <strong>in</strong>voke the action.<br />
• File Type Context Menu Item. Specifies the<br />
MIME type of the file type where the menu item will appear.<br />
The position of the menu item with<strong>in</strong> the exist<strong>in</strong>g menu items and its<br />
separators can also be set here.<br />
• Editor Context Menu Item. Specifies the MIME type for the<br />
editor where the menu item will appear. You can also set here the<br />
position of the menu item with<strong>in</strong> the exist<strong>in</strong>g menu items and<br />
its separators.<br />
Click Next. In the Name, Icon, and Location panel,<br />
type “MyFirstAction” <strong>in</strong> Class Name and type “My<br />
First Action” <strong>in</strong> Display Name. In Icon, browse to<br />
a 16x16 pixel icon <strong>in</strong> your filesystem. For<br />
example, you can f<strong>in</strong>d some<br />
16x16 pixel icons at the follow<strong>in</strong>g<br />
location with<strong>in</strong> your<br />
<strong>NetBeans</strong> IDE 5.0 <strong>in</strong>stallation<br />
directory:<br />
enterprise2\jakarta-tomcat-5.5.9\<br />
server\webapps\adm<strong>in</strong>\images<br />
Click F<strong>in</strong>ish. The IDE<br />
creates MyFirstAction.java <strong>in</strong><br />
org.myorg.myfirstmodule and<br />
opens it <strong>in</strong> the Source Editor.<br />
List<strong>in</strong>g 1 shows what you<br />
should see.<br />
A<br />
Figure 2<br />
<strong>Plug</strong>-<strong>in</strong><br />
module GUI<br />
Registration<br />
First Edition N 55
<strong>Plug</strong>-<strong>in</strong> Development<br />
B List<strong>in</strong>g 1. Action class registration <strong>in</strong> layer.xml<br />
<br />
<br />
<br />
<br />
<br />
<br />
<br />
<br />
G<br />
<strong>NetBeans</strong><br />
API List and<br />
documentation<br />
netbeans.org/download/dev/javadoc<br />
<br />
<br />
<br />
<br />
<br />
<br />
<br />
<br />
<br />
<br />
<br />
<br />
<br />
<br />
<br />
<br />
<br />
<br />
<br />
A<br />
Figure 3<br />
Add<strong>in</strong>g a<br />
module<br />
dependency<br />
As specified <strong>in</strong> the GUI Registration panel, the IDE registers the<br />
action class as a menu item and as a toolbar button <strong>in</strong> the layer.xml<br />
file. See List<strong>in</strong>g 2.<br />
A 3<br />
In the Source Editor, fill out the<br />
performAction() method as follows:<br />
public void performAction() {<br />
Str<strong>in</strong>g msg = “I’m plugged <strong>in</strong>!”;<br />
NotifyDescriptor d = new NotifyDescriptor.Message(<br />
msg, NotifyDescriptor.INFORMATION_MESSAGE);<br />
DialogDisplayer.getDefault().notify(d);<br />
}<br />
56 N <strong>NetBeans</strong> Magaz<strong>in</strong>e
<strong>Plug</strong>-<strong>in</strong> Module Quick Start<br />
The l<strong>in</strong>e with the calls to<br />
NotifyDescriptor and Dialog<br />
Displayer are underl<strong>in</strong>ed and<br />
marked as an error. This is<br />
because the related packages<br />
have not been declared yet. In<br />
the Projects w<strong>in</strong>dow, right-click<br />
the MyFirstModule project node and choose<br />
Properties. In the Libraries pane, click Add.<br />
Type “notifyd” and notice that the returned<br />
list narrows until the package that conta<strong>in</strong>s<br />
“NotifyDescriptor” is displayed (see Figure 3). Click OK. The<br />
Dialogs API is added to the Module Dependencies list. Click<br />
OK to confirm and exit the Project Properties dialog box.<br />
In the Source Editor, click Alt-Shift-F. Two new import statements<br />
are added to the top of the source file and the red<br />
underl<strong>in</strong><strong>in</strong>g disappears:<br />
import org.openide.DialogDisplayer;<br />
import org.openide.NotifyDescriptor;<br />
The plug-<strong>in</strong> module is now complete. Next, you need to<br />
<strong>in</strong>stall and use it.<br />
A 4<br />
Install<strong>in</strong>g and Us<strong>in</strong>g<br />
the <strong>Plug</strong>-<strong>in</strong> Module<br />
The IDE uses an Ant build script to build and <strong>in</strong>stall your plug-<strong>in</strong><br />
module. The build script is created for you when you create the<br />
plug-<strong>in</strong> module project.<br />
A<br />
Figure 4<br />
The new menu item for<br />
the plug-<strong>in</strong> module<br />
Install<strong>in</strong>g the <strong>Plug</strong>-<strong>in</strong> Module<br />
In the Projects w<strong>in</strong>dow, right-click the MyFirstModule project and<br />
choose Install/Reload <strong>in</strong> Target Platform.<br />
The plug-<strong>in</strong> module is built and <strong>in</strong>stalled <strong>in</strong> the target platform.<br />
The target platform is set <strong>in</strong> Tools><strong>NetBeans</strong> Platform Manager.<br />
The target platform opens so that you can try out your new plug-<strong>in</strong><br />
module. The default target IDE or Platform is the <strong>in</strong>stallation used by<br />
the current <strong>in</strong>stance of the development IDE.<br />
A 5<br />
A 6<br />
Us<strong>in</strong>g the <strong>Plug</strong>-<strong>in</strong> Module<br />
In the newly opened IDE’s menu bar, you should see the new menu<br />
and menu item, together with the icon you specified <strong>in</strong> the Action<br />
wizard; see Figure 4.<br />
Choose the menu item to <strong>in</strong>voke the performAction() method <strong>in</strong><br />
MyFirstAction.java. You should see the JOptionPane with its message,<br />
as shown <strong>in</strong> Figure 5. Click the toolbar button. It calls the same<br />
action and so has the same result. It should look someth<strong>in</strong>g like<br />
Figure 6.<br />
Summary<br />
This tutorial showed how to create a simple plug-<strong>in</strong> module project,<br />
<strong>in</strong>clud<strong>in</strong>g a new menu item and a toolbar button. You also saw how<br />
to <strong>in</strong>stall and use the new module. N<br />
A<br />
Figure 5<br />
The plug-<strong>in</strong><br />
module <strong>in</strong> action<br />
A<br />
Figure 6<br />
New toolbar<br />
button for t<br />
First Edition N 57