Quick Start Guide - Windows and Daylighting Group - Lawrence ...
Quick Start Guide - Windows and Daylighting Group - Lawrence ...
Quick Start Guide - Windows and Daylighting Group - Lawrence ...

Create successful ePaper yourself
Turn your PDF publications into a flip-book with our unique Google optimized e-Paper software.
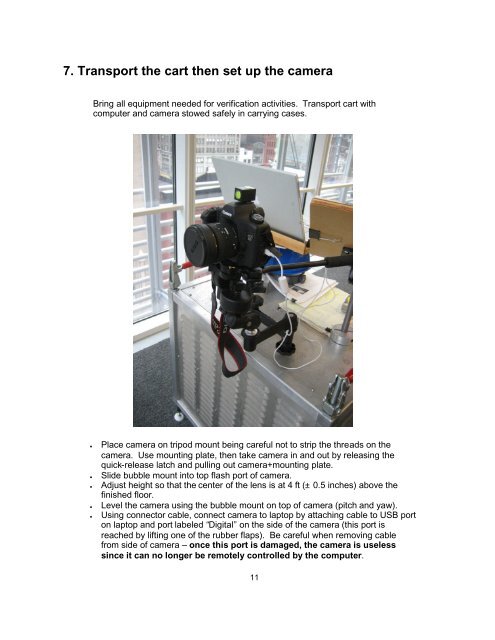
7. Transport the cart then set up the camera<br />
Bring all equipment needed for verification activities. Transport cart with<br />
computer <strong>and</strong> camera stowed safely in carrying cases.<br />
●<br />
●<br />
●<br />
●<br />
●<br />
Place camera on tripod mount being careful not to strip the threads on the<br />
camera. Use mounting plate, then take camera in <strong>and</strong> out by releasing the<br />
quick-release latch <strong>and</strong> pulling out camera+mounting plate.<br />
Slide bubble mount into top flash port of camera.<br />
Adjust height so that the center of the lens is at 4 ft (± 0.5 inches) above the<br />
finished floor.<br />
Level the camera using the bubble mount on top of camera (pitch <strong>and</strong> yaw).<br />
Using connector cable, connect camera to laptop by attaching cable to USB port<br />
on laptop <strong>and</strong> port labeled “Digital” on the side of the camera (this port is<br />
reached by lifting one of the rubber flaps). Be careful when removing cable<br />
from side of camera – once this port is damaged, the camera is useless<br />
since it can no longer be remotely controlled by the computer.<br />
11