Installation Instructions - Vivid Racing
Installation Instructions - Vivid Racing
Installation Instructions - Vivid Racing

Create successful ePaper yourself
Turn your PDF publications into a flip-book with our unique Google optimized e-Paper software.
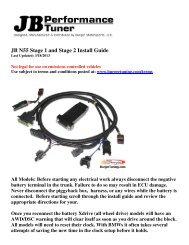
<strong>Installation</strong> <strong>Instructions</strong><br />
7” Performance Suspension System<br />
1988-1998 Chevy/GMC 2WD C1500 P/U<br />
Ext. Cab V8 Only<br />
FABTECH MOTORSPORTS<br />
4331 Eucalyptus Ave. Chino, Ca. 91710<br />
Tech Line 909-597-7800 FAX 909-597-7185 Web www.fabtechmotorsports.com
7” Performance Suspension System<br />
FTS21024 & FTS21025<br />
Parts List / Hardware List<br />
FTS21024<br />
Qua Part # Description<br />
1 FTS20184D Spindle Drv.<br />
1 FTS20184P Spindle Pass<br />
2 FT41000BK Coil Springs EXT CAB V8<br />
1 FT21024i Instruction Sheet<br />
1 FTREGCARD Registration Card<br />
1 FTAS12 Sticker<br />
1 FTAS16 Driver Warning Sticker<br />
Hardware FT20185<br />
Qua Description<br />
2 5/8"-11 x 5" Bolt<br />
2 5/8"-11 x 4 1/2" Bolt<br />
4 5/8"-11 C-lock Nut<br />
8 5/8"SAE Flat washer<br />
4 7/16"-14 x 2 1/2" Bolts<br />
4 7/16"-14 x 1 1/4" Bolt<br />
8 7/16"-14 C-lock Nut<br />
16 7/16" SAE Flat Washer<br />
6 3/8"-16 Nyloc Nut<br />
6 3/8" SAE Flat Washer<br />
2 1/2"-13 x 2 3/4" Bolt<br />
2 1/2"-13 Nyloc Nut<br />
4 1/2" SAE Flat washer<br />
5 5/16"-18 x 1" Bolt<br />
5 5/16"-18 C-lock Nut<br />
10 5/16" SAE Flat Washer<br />
4 1/4"-20 x 3/4" Bolt<br />
2 1/4"-20 C-Lock Nut<br />
6 1/4" SAE Flat Washer<br />
2 1/4" Split Washer<br />
2 Adel Clamp<br />
8 1/8" Cotter Pin<br />
1 Thread Locking Compound<br />
FTS21025<br />
Qua Part # Description<br />
1 FT20182BK Crossmember Frt.<br />
1 FT20183BK Crossmember RR<br />
1 FTS1500-9 Frt. Brake Lines<br />
1 FT20185 Hardware Kit<br />
1 FT20196 Frt. Sway Bar End Link (pair)<br />
1 FTS1500GK A-Arm Gusset<br />
2 FT20072BK Rear Bump Stop Drop<br />
1 FT1599-1-5 Rear Brake Line Tab<br />
4 FTS60235 Low Profile Bump Stop<br />
2 FT20213 Carrier Bearing Drop<br />
2 FTBK5 Block<br />
4 FT3400U U-Bolt<br />
1 FT916H U-Bolt Hardware<br />
2 FT20194 Steering Stops<br />
2 FT50089 1/2" Shock Sleeve<br />
2 FT20188 Frt Shock Mount LCA Bracket<br />
2 FT50013 Frt Shock Mount U-Bracket
7” Performance Suspension System<br />
FTS21024 & FTS21025<br />
Warnings<br />
THIS KIT IS DESIGNED TO BE INSTALLED ON STOCK VEHICLES ONLY. DO NOT INSTALL<br />
THIS KIT ON A VEHICLE UNLESS THE SUSPENSION IS STOCK.<br />
DO NOT ALTER THE FINISH OF THESE COMPONENTS, EXAMPLE- CHROMING, ZINC<br />
PLATING OR PAINTING. CHANGING THE FINISH CAN CAUSE STRUCTURAL FATIGUE<br />
OF COMPONENTS.<br />
THIS SUSPENSION SYSTEM MUST BE INSTALLED WITH FABTECH SHOCK ASBORBERS.<br />
VEHICLES THAT WILL RECEIVE OVERSIZED TIRES SHOULD CHECK BALL JOINTS, TIE<br />
RODS ENDS AND IDLER ARM EVERY 2500-5000 MILES FOR WEAR AND REPLACE AS<br />
NEEDED.<br />
CHECK ALL PARTS INCLUDED IN THIS KIT TO THE PARTS LIST ABOVE BEFORE<br />
BEGINNING THE INSTALLATION OF THIS KIT. IF ANY PARTS ARE MISSING, CONTACT<br />
FABTECH AT 909-597-7800.<br />
READ ALL INSTRUCTIONS THOROUGHLY FROM START TO FINISH BEFORE BEGINNING<br />
INSTALLATION! IF THESE INSTRUCTIONS ARE NOT PROPERLY FOLLOWED, SEVERE<br />
FRAME OR UPPER CONTROL ARM DAMAGE MAY RESULT TO THE VEHICLE.<br />
WARNING: FABTECH RECOMMENDS THAT YOU EXERCISE EXTREME CAUTION WHEN<br />
WORKING WITH COIL SPRINGS TO AVOID ANY POSSIBILITY OF INJURY.<br />
THIS KIT IS NOT COMPATABLE WITH AUTO RIDE OR ELECTRONIC CONTROL RIDE<br />
SHOCK SYSTEMS.<br />
FABTECH RECOMMENDS AFTER MARKET 15 X 8 WHEELS WITH A MAXIMUM<br />
BACKSPACING OF 3 3/4” WITH A 35X12.50R15 TIRE BE USED WITH THIS KIT.<br />
TOOL LIST: (NOT INCLUDED)<br />
o Floor Jack<br />
o Jack Stands<br />
o Assorted Metric & S.A.E Sockets, & Allen Wrenches<br />
o Die Grinder With A Cut Off Wheel Or Sawzall<br />
o Mig Welder<br />
o Drill With Assorted Drill Bits<br />
o Wheel Bearing Grease
INSTRUCTIONS:<br />
1. Jack up the front end of the truck and support the frame<br />
rails with jack stands. NEVER WORK UNDER AN<br />
UNSUPPORTED VEHICLE! Remove the front tires.<br />
2. Working from both sides of the truck, remove and discard<br />
the factory sway bar end links from the truck. Remove the<br />
sway bar from the truck and save with hardware.<br />
3. Remove the bolts attaching the brake caliper to the spindle,<br />
save the hardware. Remove the caliper and tie it up and out<br />
of the way. DO NOT ALLOW THE CALIPER TO<br />
HANG BY THE BRAKE LINE! Remove the brake rotor<br />
and save. Remove the ABS / Dust Shield from the spindle<br />
and set them aside and save along with the hardware.<br />
6. Slowly lower the floor jack supporting the lower control<br />
arm to release the coil spring. EXERCISE EXTREME<br />
CAUTION WHEN WORKING WITH COIL SPRINGS<br />
UNDER LOAD! Set the coil spring aside and remove the<br />
upper spring isolator and save them. DO NOT DISCARD<br />
THE COIL ISOLATOR, THEY WILL BE<br />
REINSTALLED ON THE NEW COILS.<br />
7. Locate the factory bump stops on the factory lower control<br />
arms and remove them. Discard the bump stops and the<br />
hardware.<br />
8. Remove the factory lower control arms from the truck and<br />
save the factory hardware. SEE PHOTO BELOW.<br />
4. On the driver side of the vehicle, support the lower control<br />
arm (LCA) with a jack and remove the front shock and<br />
discard, save the hardware from lower shock mount and<br />
discard the upper shock hardware. Remove the nut from<br />
the end of the tie rod and separate the tie rod from the<br />
spindle by hitting the end of the steering knuckle with a<br />
hammer. DO NOT HIT THE THREADS ON THE TIE<br />
ROD END. Save the hardware. SEE PHOTO BELOW.<br />
9. Remove the upper control arm from the truck and save the<br />
hardware. Inspect the control arm pockets to see if the<br />
alignment cam knock-outs have been removed out of the<br />
pockets. If they have not been removed, do so at this time.<br />
If they have been removed the pivot holes will be slotted.<br />
5. With the lower control arm still supported by the jack<br />
remove the cotter pins and loosen the nuts holding the<br />
upper and lower ball joints to the spindle, do not remove<br />
the nuts completely at this time. Separate the ball joints<br />
from the spindle by hitting the side of the spindle near each<br />
ball joint with a hammer. DO NOT HIT THE THREADS<br />
ON THE BALL JOINTS. Remove the ball joint nuts<br />
from ball joints then remove the spindle from the truck and<br />
discard, save the ball joint castle nuts and discard the<br />
original cotter pins. SEE PHOTO BELOW.<br />
10. Using a solvent like acetone, remove the black wax off the<br />
frame on the UCA mounts. Locate FTS1500GK and tack<br />
weld the UCA gussets into place as shown on the supplied<br />
drawing. Slide the UCA back into the frame mount and be<br />
sure there is adequate clearance between the UCA and the<br />
new gussets. Remove the arm once you have checked for<br />
proper clearance. Completely weld both sides of the gusset<br />
onto the frame and UCA mount. Inspect the factory UCA<br />
pocket for proper factory weld size and penetration. Many<br />
factory welds are undersized and do not have good<br />
penetration due to automation assembly process at GM.<br />
Should the factory weld on the UCA pocket appear to lack<br />
proper penetration and structure re-weld at this time. When<br />
all the welded areas have cooled, paint all exposed areas.<br />
Reinstall the upper control arm using the original hardware.<br />
When reinstalling the cam bolts in the upper control arm,<br />
set the cam in the middle of its adjustment. SEE THE<br />
DRAWING 1-1 ON THE LAST PAGE.<br />
11. Repeat steps four through ten on the passenger side of the<br />
vehicle at this time.<br />
12. Following the diagram on the last page of this instruction<br />
sheet, mark and cut the factory front lower control arm<br />
pockets. SEE DIAGRAM 1-2 ON THE LAST PAGE OF<br />
THE INSTRUCTION SHEET.
13. Locate the front crossmember FT20182. Install the<br />
crossmember into the two front lower control arm pockets.<br />
Use the factory hardware, leave loose at this time.<br />
14. Locate the rear crossmember FT20183. Install the rear<br />
crossmember into the two rear lower control arm pockets.<br />
Use the factory hardware, and leave loose at this time.<br />
15. Locate the four supplied low profile bump stops,<br />
FTS60235, attach the bump stops to the bump stop mounts<br />
on the front and rear crossmembers previously installed<br />
with the supplied 3/8 nuts and washers, torque to 15 lbs.<br />
SEE PHOTO BELOW.<br />
18. Locate one of the lift coil springs, FT41000BK and attach<br />
the original upper coil insulator onto the top of the coil<br />
spring using electrical tape.<br />
19. Lower the factory lower control arm as far as possible and<br />
position the top of the coil spring into the upper coil mount.<br />
Rotate the coil spring aligning the bottom of the coil spring<br />
with the timing pocket in the Lower Control Arm. Using a<br />
floor jack raise the lower control arm to hold the coil spring<br />
in place. EXERCISE EXTREME CAUTION WHEN<br />
WORKING WITH COIL SPRINGS UNDER LOAD!<br />
16. Locate the factory lower control arms. Install them into the<br />
new crossmembers. Use the supplied 5/8” x 5” bolt, nut and<br />
washer on the front pivot and the supplied 5/8” x 4 ½” bolt,<br />
nut and washer on the rear pivot, leave loose at this time.<br />
17. Working from the driver side of the truck, locate the factory<br />
steering stop on the lower control arm. Using a die grinder<br />
with a cut off wheel, cut the rivets attaching the steering<br />
stop to the arm and remove the steering stop and discard.<br />
Locate FT20194 steering stop, using the supplied 5/16” x<br />
1”bolt, nut, and washer attach to the existing holes from the<br />
factory steering stop. Torque the bolts to 18 ft lbs. SEE<br />
PHOTOS BELOW AND NEXT COLUMN.<br />
20. Locate the new lift spindle FT20184D. Attach the new lift<br />
spindle onto the lower ball joint using the original castle<br />
nut. Torque the lower ball joint nut to 90 ft/lbs. MAKE<br />
SURE THE BRAKE CALIPER IS TO THE REAR OF<br />
THE FENDER WELL AT THIS TIME, AS IT WILL<br />
BE REINSTALLED LATER. Holding the top of the<br />
spindle inboard slowly raise the floor jack to set the upper<br />
ball joint into the spindle. You may have to move the floor<br />
jack as far out as possible on the Lower Control Arm to<br />
raise the Lower Control Arm high enough. When the upper<br />
ball joint is fully seated in the spindle install the factory<br />
castle nut. Torque to 17 ft/lbs. Insert one of the supplied<br />
cotter pins into the upper and lower ball joint castle nuts.<br />
Lower the floor jack supporting the LCA. DO NOT<br />
RAISE THE JACK HIGH ENOUGH TO LIFT THE<br />
TRUCK OFF THE JACK STANDS. USE EXTREME<br />
CAUTION WHEN WORKING WITH COIL SPRINGS<br />
TO AVOID ANY POSSIBILITY OF INJURY.
21. Torque the factory pivot bolts to the crossmember to 96 ft<br />
lbs on 1988-1990 and 120 ft lbs on 1991-1998 models.<br />
Toque the LCA pivot bolt to 125 ft lbs.<br />
22. Locate the new extended brake line kit FTS1500-9.<br />
Remove the banjo bolt securing the brake line to the<br />
caliper. Separate the hard line section from the rubber<br />
brake line at the frame. Remove the clip holding the rubber<br />
brake line to the frame tab and set aside. Insert the new<br />
brake line into the frame mount tab and reinstall the clip.<br />
Using the supplied crush washers attach the end of the<br />
brake line with the banjo fitting to the caliper. Be sure<br />
there is a crush washer on each side of the banjo fitting and<br />
the old washer is not still attached to the bolt or caliper. Do<br />
not over tighten the banjo bolt. Attach the factory hard line<br />
to the upper fitting on the new brake line. Tighten the<br />
upper fitting on the new brake line. You will now need to<br />
bleed the brakes per the factory shop manual.<br />
23. Reinstall the factory ABS / Dust Shield to the lift spindle<br />
using the factory hardware. The ABS wire will be<br />
positioned under the tie rod end routed up the backside of<br />
the control arm. Reinstall the brake rotor onto the lift<br />
spindle using the factory hardware. REPACK THE<br />
WHEEL BEARINGS WITH HEAVY DUTY WHEEL<br />
BEARING GREASE AT THIS TIME. Reinstall the<br />
brake caliper onto the spindle, use thread locking<br />
compound on the caliper bracket bolts and torque 1988-<br />
1991 models to 28ft/lbs and 1992-1998 models to 38 ft. lbs.<br />
Using two of the supplied adel clamps attach the brake line<br />
and the ABS line to the back side of the spindle. SEE<br />
PHOTO BELOW.<br />
25. Install the previously assembled shock assembly into the<br />
truck. Attach the upper mount of the shock using the<br />
supplied bushing kit with the shock. Place a floor jack<br />
under the lower control arm and raise the lower control arm<br />
approximately two inches. Locate FT20188 lower control<br />
arm shock mount and attach to the lower control arm in the<br />
original mounting holes of the factory shock using the<br />
original hardware. With the shock installed inside the coil<br />
spring extend the shock so the stud on the new lower mount<br />
can be attach to the new bracket on the lower control arm.<br />
Attach the shock bracket to the bracket on the lower control<br />
arm using the supplied 3/8” nut and flat washer. SEE<br />
PHOTO BELOW.<br />
26. Reinstall the tie rod onto the spindle using the factory nut.<br />
Torque to 45 ft/lbs.<br />
24. Locate the Fabtech FTS9330 front shocks (not supplied<br />
with the kit) along with the FT50013 shock mount. Press<br />
one of the supplied ½” shock sleeves into the lower shock<br />
bushing on the shock. Attach the shock mount to the shock<br />
using the supplied ½” x 2 ¾” bolt, nut, and washer. SEE<br />
PHOTO NEXT COLUMN.<br />
27. Repeat steps 17 through 26 on the passenger side of the<br />
truck.
28. Locate the previously removed factory sway bar. Install the<br />
sway bar back onto the truck flipped upside down using<br />
factory hardware and torque to 24 lbs. Locate the new<br />
Fabtech sway bar end links (FT20071) and reconnect sway<br />
bar to lower control arm. IT MAY BE EASIER TO<br />
RECONNECT THE SWAY BAR END LINKS WHEN<br />
THE TRUCK IS BACK ON THE GROUND. SEE<br />
PHOTO BELOW.<br />
the Fabtech bracket to the differential. SEE PHOTO<br />
BELOW.<br />
REAR INSTRUCTIONS<br />
32. Remove and discard the rear shocks and u-bolts. Lower the<br />
axle down slowly. Use care, not to over extend the brake<br />
hose. Locate and install the rear lift blocks with the<br />
provided short center pin on the bottom of the block to the<br />
axle. The short end of the block should face to the front of<br />
the vehicle. Using the provided U-bolts, nuts, and washers<br />
align axle, lift blocks, and springs and torque to U Bolts to<br />
90lbs. SEE PHOTO BELOW.<br />
29. Jack up the rear end of the vehicle and support the frame<br />
rails with jack stands. Do not allow the rear differential to<br />
hang freely, supporting the rear differential with a floor<br />
jack. Use care, not to over extend the brake hose.<br />
STEP 30 IS FOR TWO PIECE DRIVESHAFT<br />
MODEL TRUCKS ONLY<br />
30. Locate the factory carrier bearing crossmember. Using a<br />
drill, drill out the four rivets attaching it to the frame. Once<br />
the rivets are removed, drill the factory crossmember and<br />
the frame holes to 7/16”. Locate the supplied FT20213<br />
carrier bearing drop brackets and place the bracket between<br />
the frame and the crossmember. Attach the crossmember<br />
using the supplied 7/16”x 2 ½” bolt, nuts, and washer. SEE<br />
PHOTO BELOW.<br />
33. Remove the factory rear bump stops and save the hardware.<br />
Install the new Fabtech bump stop extension bracket using<br />
the supplied 7/16” x 1 ¼” bolts, nuts, and washer. Reinstall<br />
factory bump stop to the bottom of the new bracket. Torque<br />
all of the bump stop hardware to 40 ft lbs. SEE PHOTO<br />
BELOW.<br />
31. Locate the brake hose bracket and attached to the center of<br />
the rear differential. Remove the factory bracket and save<br />
the hardware. Locate the FT1599-1-5 brake line bracket<br />
and attach it to the factory bracket using the supplied 5/16”<br />
bolt, nut, and washers. Using the original hardware attach
34. Install the new Fabtech FTS7333 shocks (not included in<br />
the kit) and Torque to 65 lbs using factory hardware on<br />
both upper and lower mounts.<br />
35. Reinstall the wheels and tires and torque the lugs nuts to<br />
wheel manufacture specifications. Set the truck back onto<br />
the ground and set the toe to factory specifications.<br />
WHILE TURNING THE STEERING WHEEL FULLY<br />
IN EACH DIRECTION, MAKE SURE THERE IS<br />
AMPLE CLEARANCE BETWEEN THE WHEELS,<br />
TIRES, CONTROL ARMS, BRAKE LINES AND ABS<br />
WIRES. TRIM FENDERS AS REQIURED.<br />
36. Recheck all nuts and bolts for proper torque tightness<br />
before driving. Drive the truck for 50 miles and have it<br />
aligned to factory specifications.<br />
DRAWING 1-1
DRAWING 1-2
RETORQUE ALL NUTS, BOLTS AND LUGS AFTER 50 MILES AND PERIODICALLY THEREAFTER.<br />
For technical assistance call: 909-597-7800<br />
Product Warranty and Warnings-<br />
Fabtech provides a Limited Lifetime Warranty to the original retail purchaser who owns the vehicle, on which the product was originally installed, for<br />
defects in workmanship and materials.<br />
The Limited Lifetime Warranty excludes the following Fabtech items; bushings, bump stops, ball joints, tie rod ends, limiting straps, cross shafts, heim<br />
joints. These parts are subject to wear and are not considered defective when worn. They are warranted for 60 days from the date of purchase for<br />
defects in workmanship.<br />
Coil over take apart shocks are considered a serviceable shock with a one year warranty on leakage only. Service seal kits are available separately for<br />
future maintenance. All other shocks are covered under our Limited Lifetime Warranty.<br />
Fabtech does not warrant any product for finish, alterations, modifications and/or installation contrary to Fabtech’s instructions. Alterations to the finish<br />
of the parts including but not limited to painting, powdercoating, plating and/or welding will void all warranties. Some finish damage may occur to<br />
parts during shipping which is considered normal and is not covered under warranty.<br />
Fabtech products are not designed nor intended to be installed on vehicles used in race applications or for racing purposes or for similar activities. (A<br />
“RACE” is defined as any contest between two or more vehicles, or any contest of one or more vehicle against the clock, whether or not such contest is<br />
for a prize). This warranty does not include coverage for police or taxi vehicles, race vehicles, or vehicles used for government or commercial purposes.<br />
Also excluded from this warranty are sales outside of the United States of America.<br />
<strong>Installation</strong> of most suspension products will raise the center of gravity of the vehicle and will cause the vehicle to handle differently than stock. It may<br />
increase the vehicle’s susceptibility to a rollover, on road and off road, at all speeds. Extreme care should be taken to operate the vehicle safely at all<br />
times to prevent rollover or loss of control resulting in serious injury or death. Fabtech front end Desert Guards may impair the deployment or operation<br />
of vehicles equipped with supplemental restraining systems/air bag systems and should not be installed if the vehicle is equipped as so.<br />
Fabtech makes every effort to ensure suspension product compatibility with all vehicles listed in the catalog, but due to unknown auto manufacturers<br />
production changes and/or inconstancies by the auto manufacturer, Fabtech cannot be responsible for 100% compatibility, including the fitment of tire<br />
and wheel sizes listed. The Tire and Wheel sizes listed in Fabtech’s catalog are only a guideline for street driving with noted fender trimming. Fabtech is<br />
not responsible for damages to the vehicle’s body or tires.<br />
Fabtech’s obligation under this warranty is limited to the repair or replacement, at Fabtech option, of the defective product only. All costs of removal,<br />
installation or re-installation, freight charges, incidental or consequential damages are expressly excluded from this warranty. Fabtech is not responsible<br />
for damages and/or warranty of other vehicle parts related or non related to the installed Fabtech product. This warranty is expressly in lieu of all other<br />
warranties expressed or implied. This warranty shall not apply to any product that has been subject to accident, negligence, alteration, abuse or misuse<br />
as determined by Fabtech.<br />
Fabtech suspension components must be installed as a complete system including shocks as shown in our current catalog. All warranties will become<br />
void if Fabtech parts are combined and/or substituted with other aftermarket suspension products. Combination and/or substitution of other aftermarket<br />
suspension parts may cause premature wear and/or product failure resulting in an accident causing injury or death. Fabtech does not warrant products not<br />
manufactured by Fabtech.<br />
<strong>Installation</strong> of Fabtech product may void the vehicles factory warranty; it is the consumer’s responsibility to check with their local vehicle’s dealer for<br />
warranty disposition before the installation of the product.<br />
It is the responsibility of the distributor and/or the retailer to review all warranties and warnings of Fabtech products with the consumer prior to<br />
purchase.<br />
Fabtech reserves the right to supercede, discontinue, change the design, finish, part number and, or application of parts when deemed necessary without<br />
written notice. Fabtech is not responsible for misprints or typographical errors within the catalog or price sheet.<br />
Instruction Sheet Part #- FT21024&21025i<br />
04/20/04jj