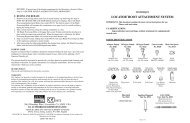
LOCATOR® BAR ATTACHMENT SYSTEM - Proscan
LOCATOR® BAR ATTACHMENT SYSTEM - Proscan
LOCATOR® BAR ATTACHMENT SYSTEM - Proscan

You also want an ePaper? Increase the reach of your titles
YUMPU automatically turns print PDFs into web optimized ePapers that Google loves.
(8016) Drill & Tap Holder<br />
B) Parts needed – Replace TSB Ball Attachment:<br />
(8587) Locator Bar Female (2-56 Thread)<br />
(9103) 1.8mm Bar Drill (2-56 Thread)<br />
(9105) 2-56 Bar Tap (2-56 Thread)<br />
(8016) Drill & Tap Holder<br />
2. The 1.7mm Bar Drill (Zest order #9102) and a 2.0mm Bar Tap (Zest order #9104) are used for creating<br />
the threaded site in a titanium bar or cast alloy bar. First use a round carbide bur to create a dimple into<br />
the top of the bar at the exact site of the planned preparation.<br />
3. Insert and tighten the 1.7mm Bar Drill into the Drill & Tap Holder (Zest order #8016) and position<br />
it into the handpiece of a precision drilling device. Use the 1.7mm Bar Drill to create the exact size<br />
diameter hole to a depth of 2.8mm that is needed for tapping the site.<br />
4. Place the 2.0mm Bar Tap into the Drill & Tap Holder and position it into the handpiece of a precision<br />
drilling device to create internal threads within the drilled site. The use of tapping fluid while cutting<br />
the threads is required to reduce the chance of breaking the tap off in the preparation.<br />
5. A special Locator Gold-Plated Abutment Driver (contained in the Locator Core Tool, Zest order #8393)<br />
is designed to engage the inside diameter of the threaded Locator Bar Female and thread it into the bar.<br />
6. Final torque tightening of the Locator Bar Female to prevent screw loosening is achieved using the<br />
20Ncm Torque Wrench (Zest order #4391 Kit). In addition, Locator Torque Wrench Drivers that fit<br />
directly into the Locator Bar Female are available for most brands of torque wrenches.<br />
Technique to laser weld a Locator Laser Bar Female on top of a bar<br />
1. A) Parts needed – Laser welding to a titanium bar:<br />
(8588) Locator Laser Bar Female (Titanium)<br />
(9107) Locator Paralleling Mandrel<br />
B) Parts needed – Laser welding to a cast gold alloy bar:<br />
(8590) Locator Laser Bar Female (Stainless Steel)<br />
(9107) Locator Paralleling Mandrel<br />
2. Use the Locator Paralleling Mandrel (Zest order #9107) in a surveyor to place the Laser Bar Female<br />
into position. Insert the split end of the Paralleling Mandrel into the socket of the Laser Bar Female and<br />
tighten the knurled set screw to spread the split portion of the mandrel that will secure the Laser Bar<br />
Female to the mandrel.<br />
3. Tack the Laser Bar Female into place on top of the bar by placing a spot of laser weld on opposite sides<br />
of the female.<br />
4. Remove the Paralleling Mandrel by loosening the knurled set screw. Form a bead of weld around the<br />
entire base circumference of the Laser Bar Female, welding the attachment to the top of the bar.<br />
5. Snap a Locator Yellow Bar Processing Cap Male (Zest order #8028 package) onto the welded Laser Bar<br />
Female to make sure the laser weld does not interfere with the seating of the Locator Denture Cap Male.<br />
Technique for casting-to a Locator Cast-To Bar Female into a gold alloy bar<br />
1. Parts needed – New Case:<br />
(8586) Locator Cast-To Bar Female<br />
(9107) Locator Paralleling Mandrel<br />
2. Use the Locator Paralleling Mandrel (Zest order #9107) in a surveyor to place the Cast-To Bar Female<br />
into the waxed bar in a position that is parallel with other Locator Bar attachments. Insert the split end<br />
of the Paralleling Mandrel into the socket of the Cast-To Bar Female and tighten the knurled set screw to<br />
spread the split portion of the mandrel that will secure the Cast-To Bar Female to the mandrel.<br />
Note: For accurate positioning of the Cast-To Bar Female the Locator Paralleling Mandrel is preferred<br />
to be used in place of the plastic Parallel Post that comes with the attachment, and is removed to use the<br />
Paralleling Mandrel instead.<br />
Page of 8