
You also want an ePaper? Increase the reach of your titles
YUMPU automatically turns print PDFs into web optimized ePapers that Google loves.
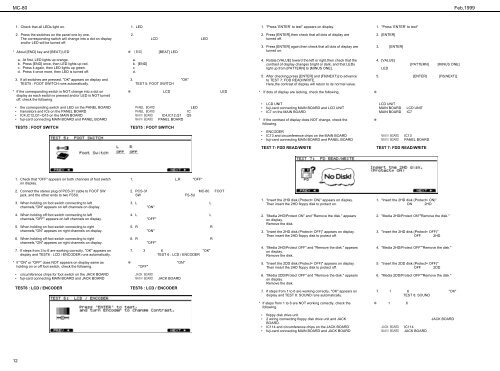
MC-80<br />
Feb,1999<br />
1. Check that all LEDs light on.<br />
1. LED <br />
1. "Press ’ENTER’ to test" appears on display.<br />
1. "Press ’ENTER’ to test" <br />
2. Press the switches on the panel one <strong>by</strong> one.<br />
The corresponding switch will change into a dot on display<br />
and/or LED will be turned off.<br />
* About [END] key and [BEAT] LED<br />
<br />
2. <br />
LCD LED <br />
<br />
[BEAT] LED <br />
2. Press [ENTER],then check that all dots of display are<br />
turned off.<br />
3. Press [ENTER] again,then check that all dots of display are<br />
turned on.<br />
2. [ENTER] <br />
<br />
3. [ENTER] <br />
<br />
a. At first, LED lights up orange.<br />
b. Press [END] once, then LED lights up red.<br />
c. Press it again, then LED lights up green.<br />
d. Press it once more, then LED is turned off.<br />
3. If all switches are pressed, "OK" appears on display and<br />
TEST5 : FOOT SWITCH runs automatically.<br />
a. <br />
b. [END] <br />
c. <br />
d. <br />
3. "OK" <br />
TEST 5: FOOT SWITCH <br />
4. Rotate [VALUE] toward the left or right,then check that the<br />
contrast of display changes bright or dark, and that LEDs<br />
light up from [PATTERN] to [MINUS ONE].<br />
5. After checking,press [ENTER] and [F6(NEXT)] to advance<br />
to TEST 7: FDD READ/WRITE.<br />
Here,the contrast of display will return to its normal value.<br />
4. [VALUE] <br />
[PATTERN] [MINUS ONE] <br />
LED <br />
5. [ENTER] [F6(NEXT)] <br />
<br />
<br />
* If the corresponding switch is NOT change into a dot on<br />
display as each switch is pressed and/or LED is NOT turned<br />
off, check the following.<br />
• the corresponding switch and LED on the PANEL BOARD<br />
• transistors and ICs on the PANEL BOARD<br />
• IC4,IC12,Q1~Q15 on the MAIN BOARD<br />
• fuji-card connecting MAIN BOARD and PANEL BOARD<br />
TEST5 : FOOT SWITCH<br />
<br />
LCD LED<br />
<br />
LED<br />
IC<br />
IC4,IC12,Q1 Q5<br />
PANEL BOARD <br />
TEST5 : FOOT SWITCH<br />
* If dots of display are lacking, check the following.<br />
• LCD UNIT<br />
• fuji-card connecting MAIN BOARD and LCD UNIT<br />
• IC7 on the MAIN BOARD<br />
* If the contrast of display does NOT change, check the<br />
following.<br />
• ENCODER<br />
• IC13 and circumference chips on the MAIN BOARD<br />
• fuji-card connecting MAIN BOARD and PANEL BOARD<br />
<br />
<br />
<br />
LCD UNIT<br />
MAIN BOARD LCD UNIT <br />
MAIN BOARD IC7<br />
<br />
<br />
<br />
<br />
IC13 <br />
PANEL BOARD <br />
TEST 7: FDD READ/WRITE<br />
TEST 7: FDD READ/WRITE<br />
1. Check that "OFF" appears on both channels of foot switch<br />
on display.<br />
1. L,R "OFF" <br />
<br />
2. Connect the stereo plug of PCS-31 cable to FOOT SW<br />
jack, and the other ends to two FS5U.<br />
3. When holding on foot switch connecting to left<br />
channels,"ON" appears on left channels on display.<br />
2. PCS-31 MC-80 FOOT<br />
SW FS-5U <br />
3. L L <br />
"ON" <br />
1. "Insert the 2HD disk.(Protect= ON)" appears on display.<br />
Then insert the 2HD floppy disk to protect on.<br />
1. "Insert the 2HD disk.(Protect= ON)" <br />
ON 2HD <br />
<br />
4. When holding off foot switch connecting to left<br />
channels,"OFF" appears on left channels on display.<br />
5. When holding on foot switch connecting to right<br />
channels,"ON" appears on right channels on display.<br />
6. When holding off foot switch connecting to right<br />
channels,"ON" appears on right channels on display.<br />
7. If steps from 3 to 6 are working correctly, "OK" appears on<br />
display and TEST6 : LCD / ENCODER runs automatically.<br />
4. L L <br />
"OFF" <br />
5. R R <br />
"ON" <br />
6. R R <br />
"OFF" <br />
7. 3 6 "OK" <br />
TEST 6 : LCD / ENCODER <br />
2. "Media 2HD/Protect ON" and "Remove the disk." appears<br />
on display.<br />
Remove the disk.<br />
3. "Insert the 2HD disk.(Protect= OFF)" appears on display.<br />
Then insert the 2HD floppy disk to protect off.<br />
4. "Media 2HD/Protect OFF" and "Remove the disk." appears<br />
on display.<br />
Remove the disk.<br />
2. "Media 2HD/Protect ON""Remove the disk." <br />
<br />
<br />
3. "Insert the 2HD disk.(Protect= OFF)" <br />
OFF 2HD <br />
<br />
4. "Media 2HD/Protect OFF""Remove the disk." <br />
<br />
<br />
* If "ON" or "OFF" does NOT appears on display same as<br />
holding on or off foot switch, check the following.<br />
• circumference chips for foot switch on the JACK BOARD<br />
• fuji-card connecting MAIN BOARD and JACK BOARD<br />
TEST6 : LCD / ENCODER<br />
<br />
"ON" <br />
"OFF" <br />
<br />
JACK BOARD <br />
TEST6 : LCD / ENCODER<br />
5. "Insert the 2DD disk.(Protect= OFF)" appears on display.<br />
Then insert the 2HD floppy disk to protect off.<br />
6. "Media 2DD/Protect OFF" and "Remove the disk." appears<br />
on display.<br />
Remove the disk.<br />
7. If steps from 1 to 6 are working correctly, "OK" appears on<br />
display and TEST 8: SOUND runs automatically.<br />
5. "Insert the 2DD disk.(Protect= OFF)" <br />
OFF 2DD <br />
<br />
6. "Media 2DD/Protect OFF""Remove the disk." <br />
<br />
<br />
7. 1 6 "OK" <br />
TEST 8: SOUND <br />
* If steps from 1 to 6 are NOT working correctly, check the<br />
following.<br />
<br />
1 6 <br />
<br />
• floppy disk drive unit<br />
• 2 wiring connecting floppy disk drive unit and JACK<br />
BOARD<br />
• IC114 and circumference chips on the JACK BOARD<br />
• fuji-card connecting MAIN BOARD and JACK BOARD<br />
<br />
JACK BOARD <br />
<br />
IC114 <br />
JACK BOARD <br />
12