Attaching a Scanned Document for "Online Payment Request"
Attaching a Scanned Document for "Online Payment Request"
Attaching a Scanned Document for "Online Payment Request"

You also want an ePaper? Increase the reach of your titles
YUMPU automatically turns print PDFs into web optimized ePapers that Google loves.
<strong>Attaching</strong> a <strong>Scanned</strong> <strong>Document</strong><br />
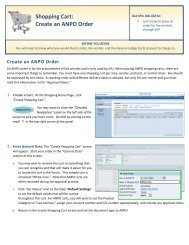
Attach a <strong>Scanned</strong> <strong>Document</strong><br />
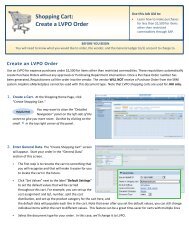
• Save the <strong>Online</strong> <strong>Payment</strong> Request.<br />
•Retrieve the saved (parked) document<br />
1. Click <strong>Document</strong><br />
2. Click Select Parked <strong>Document</strong>
<strong>Attaching</strong> a <strong>Scanned</strong> <strong>Document</strong><br />
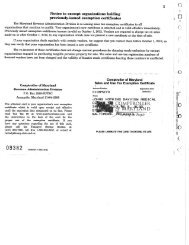
Retrieving the <strong>Document</strong><br />
• 1. The last document number accessed<br />
or created under your login will be<br />
displayed in Doc. Number.<br />
• Overwrite document id, if needed,<br />
with the appropriate document id<br />
that the scanned file is to be<br />
attached to.<br />
• 2. Click to edit the parked<br />
document
<strong>Attaching</strong> a <strong>Scanned</strong> <strong>Document</strong><br />
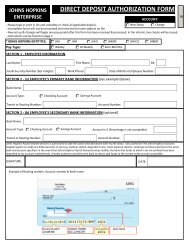
Click the right side icon<br />
R/3 WinGUI only
<strong>Attaching</strong> a <strong>Scanned</strong> <strong>Document</strong><br />
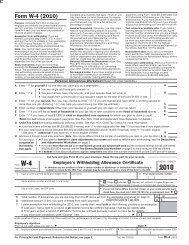
R/3 WinGUI only<br />
1. Click Create<br />
2. Click Store business document
<strong>Attaching</strong> a <strong>Scanned</strong> <strong>Document</strong><br />
1<br />
2<br />
R/3 Win GUI only<br />
1. Double click AP Parked documents - PDF <strong>for</strong>mat<br />
2. Locate your scanned PDF file and double click<br />
Click the continue icon
<strong>Attaching</strong> a <strong>Scanned</strong> <strong>Document</strong> - WIN GUI View<br />
R/3 WinGUI only<br />
Submit <strong>Document</strong> to Workflow<br />
1. Click to submit the document to workflow <strong>for</strong><br />
approval.
<strong>Attaching</strong> a <strong>Scanned</strong> <strong>Document</strong> - WIN GUI View<br />
1. Click the right side icon<br />
2. Click Attachment list<br />
R/3 Win GUI only
<strong>Attaching</strong> a <strong>Scanned</strong> <strong>Document</strong><br />
To display the attached document, double click the icon to the left.
<strong>Attaching</strong> a <strong>Scanned</strong> <strong>Document</strong><br />
• To display the next page.<br />
• To display the previous page.<br />
• To display a list of all pages. The * indicates the current page displayed.
<strong>Attaching</strong> a <strong>Scanned</strong> <strong>Document</strong><br />
• Click exit icon to return to the document.