instructions for installation, use and maintenance rais 2:1 - Robeys Ltd
instructions for installation, use and maintenance rais 2:1 - Robeys Ltd
instructions for installation, use and maintenance rais 2:1 - Robeys Ltd
- No tags were found...

Create successful ePaper yourself
Turn your PDF publications into a flip-book with our unique Google optimized e-Paper software.
ENGLISH RAIS manual <strong>for</strong> Rais 2:1<br />
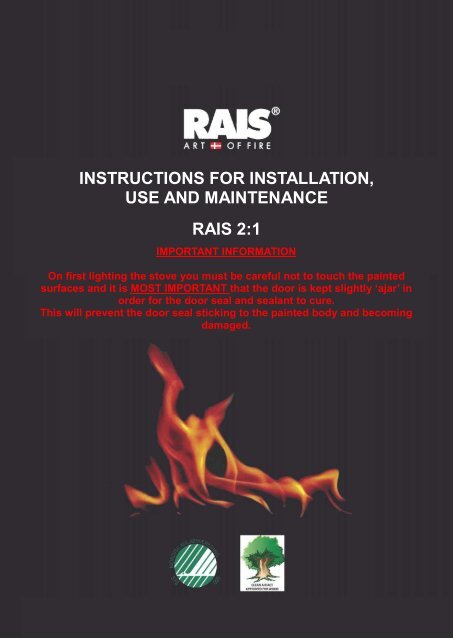
INSTRUCTIONS FOR INSTALLATION,<br />
USE AND MAINTENANCE<br />
RAIS 2:1<br />
IMPORTANT INFORMATION<br />
On first lighting the stove you must be careful not to touch the painted<br />
surfaces <strong>and</strong> it is MOST IMPORTANT that the door is kept slightly ‘ajar’ in<br />
order <strong>for</strong> the door seal <strong>and</strong> sealant to cure.<br />
This will prevent the door seal sticking to the painted body <strong>and</strong> becoming<br />
damaged.<br />
1
ENGLISH RAIS manual <strong>for</strong> Rais 2:1<br />
2
ENGLISH RAIS manual <strong>for</strong> Rais 2:1<br />
Revision :<br />
Date : 2011<br />
INTRODUCTION ………………………………………………………….. 4<br />
WARRANTY …………………………………………………….………….. 4<br />
SPECIFICATIONS ………………………………………………………….. 5<br />
CONVECTION ………………………………………………………………. 6<br />
INSTALLATION INSTRUCTIONS ………………………………….……… 7<br />
CHIMNEY …………………………………………………….…………. 89<br />
INSTALLATION ………………………………………………..……... 10<br />
INSTALLATION OF STOVE ………………………………………... 11<br />
QUICK GUIDES ……………………………………………………… 1213<br />
INSTALLATION DISTANCE TO NONCOMBUSTIBLE WALL ……….. 1415<br />
INSTALLATION DISTANCE TO COMBUSTIBLE WALL ……………… 1617<br />
GENERAL INSTALLATION ……………………………………………….. 18<br />
FOR THE INSTALLER ……………………………………………………… 19<br />
OPERATING INSTRUCTIONS …………………………………………….. 20<br />
FUEL …………………………………………………………………………... 20<br />
DRYING AND STORAGE …………………………………………………… 21<br />
REGULATION OF COMBUSTION AIR …………………………………… 21<br />
USING THE WOOD BURNING STOVE …………………………………… 22<br />
FIRST USAGE ………………………………………………………………… 23<br />
LIGHTING AND FUELLING ………………………………………………… 2425<br />
CLEANING AND CARE …………………………………………………….. 26<br />
CLEANING OF THE FLUE WAYS ………………………………………… 27<br />
PROBLEM SOLVING ……………………………………………………….. 28<br />
ACCESSORIES AND SPARE PARTS ……………………………………. 29<br />
SPARE PART DIAGRAM …….………..……………………………………. 3031<br />
3
ENGLISH RAIS manual <strong>for</strong> Rais 2:1<br />
Introduction<br />
Thank you <strong>for</strong> purchasing a Rais wood burning stove.<br />
These appliances have been approved by HETAS as<br />
intermittent operating appliances <strong>for</strong> burning wood logs only.<br />
These appliances have been approved <strong>for</strong> <strong>use</strong> in Smokeless Zones<br />
A Rais wood burning stove is more than just a heat source: it also shows that you<br />
care about design <strong>and</strong> quality in your home.<br />
To make the most of your wood burning stove it is important that you read the manual<br />
thoroughly be<strong>for</strong>e installing <strong>and</strong> using it.<br />
In the case of warranty coverage, <strong>and</strong> <strong>for</strong> general queries regarding your wood<br />
burning stove, it is important that you know the stove’s production number.<br />
We there<strong>for</strong>e recommend that you note down the number in the table below.<br />
The production number is located at the back of the stove at the bottom.<br />
Warranty<br />
Your Rais wood burning stove comes with a 5 year warranty.<br />
The warranty, however, does not cover heatinsulating materials, glass <strong>and</strong> seals.<br />
These are available to order from your local Rais dealer / stockist.<br />
Any alterations made to the stove will void the warranty.<br />
4
ENGLISH RAIS manual <strong>for</strong> Rais 2:1<br />
Specifications<br />
Nominal output (kW): 6<br />
2:1<br />
Min. / Max. output (kW): 39<br />
Heating area (m 2 ): Ca. 60135<br />
Size, width/depth/height (mm): 807 / 474 / 909<br />
without socket<br />
Combustion chamber width/depth/height (mm). 500 / 244 / 374<br />
Recommended amount of wood when fuelling (kg)<br />
(Based on 2 3 logs of wood approx. 25cm)<br />
Min. uptake / Min. draught (Pascal): 12<br />
Weight (kg): 140<br />
Efficiency ( % ) 79<br />
Particles after NS3058/3059 (g/kg) 3.6<br />
Dust measured according to Din+ (mg/Nm 3 )<br />
Smoke gas mass flow (g/s): 5.1<br />
Smoke gas temperature (°C): 297<br />
2.1<br />
Intermittent operation:<br />
Fuelling should<br />
be undertaken<br />
within 3 hours<br />
5
ENGLISH RAIS manual <strong>for</strong> Rais 2:1<br />
Convection<br />
Rais stoves are convection stoves. This means that the stove’s back <strong>and</strong> side panels are<br />
not overheated. Convection means that there is a circulation of air, which ensures that<br />
the heat is distributed more evenly throughout the entire room. The cold air is sucked in<br />
at the base of the stove <strong>and</strong> up through the convection channel, which runs along the<br />
stove’s combustion chamber. The heated air comes out at the top of the stove, which<br />
ensures a circulation of warm air throughout the room.<br />
The stoves are equipped with cool door h<strong>and</strong>les a Rais special feature which<br />
means you could almost do away with gloves. Be aware, however, that all exterior<br />
surfaces become hot during <strong>use</strong> so take extreme care.<br />
6
ENGLISH RAIS manual <strong>for</strong> Rais 2:1<br />
Installation Instructions<br />
The following pages give <strong>instructions</strong> <strong>for</strong> the safe <strong>and</strong> proper <strong>installation</strong> of this heating<br />
appliance in the UK. These <strong>instructions</strong> cover the basic principles of <strong>installation</strong>,<br />
although some details may need slight modification to suit particular local site<br />
conditions.<br />
In all cases the <strong>installation</strong> must comply with current UK Building Regulations, Local<br />
Authority Byelaws <strong>and</strong> other specifications or regulations as they affect the <strong>installation</strong><br />
of the stove.<br />
Please note that it is a legal requirement under Engl<strong>and</strong> <strong>and</strong> Wales Building<br />
Regulations that the <strong>installation</strong> of the stove is either carried out under local Authority<br />
Building Control approval or is installed by a Competent Person registered with a<br />
Government approved Competent Persons Scheme. HETAS operate such a scheme<br />
<strong>and</strong> a listing of their registered Competent Persons can be found on their website at<br />
www.hetas.co.uk.<br />
It should be noted that the current Building Regulations requirements are given in<br />
Approved Document J. These requirements may also be met by adopting the relevant<br />
recommendations given in British St<strong>and</strong>ards BS 8303, BS 6461 <strong>and</strong> BS 7566.<br />
WARNING. Health <strong>and</strong> Safety Advice Notice.<br />
The <strong>installation</strong> of this heating appliance is governed by the Health <strong>and</strong> Safety at Work<br />
Act 1974. it is the responsibility of the installer to ensure that all requirements of this Act<br />
are met during the <strong>installation</strong> works. Attention is drawn in particular to the following:<br />
H<strong>and</strong>ling:<br />
The appliance is a heavy item <strong>and</strong> adequate facilities must be available<br />
or loading, unloading <strong>and</strong> site h<strong>and</strong>ling.<br />
Fire Cement: Some types of fire cement are caustic <strong>and</strong> should not be allowed to<br />
come into contact with the skin. Protective gloves should be worn when<br />
h<strong>and</strong>ling fire cement. In case of contact with the skin, wash immediately<br />
with plenty of water.<br />
Asbestos:<br />
Metal Parts:<br />
This stove contains no asbestos. If there is a possibility of disturbing any<br />
asbestos in the course of the <strong>installation</strong>, then please seek specialist<br />
guidance <strong>and</strong> <strong>use</strong> appropriate protective equipment.<br />
When installing or servicing this stove care should be taken to avoid the<br />
possibility of personal injury.<br />
Important Warning Preparatory Work <strong>and</strong> safety Checks:<br />
· This stove must not be installed into a chimney which serves any other heating<br />
appliance.<br />
· There must not be an extractor fan fitted in the same room as the stove, as this<br />
can ca<strong>use</strong> the stove to emit fumes into the room.<br />
· If this appliance is installed into an existing chimney, the chimney must first be<br />
swept <strong>and</strong> examined <strong>for</strong> soundness <strong>and</strong> suitability, be<strong>for</strong>e the appliance is<br />
· installed (see also section headed ‘Chimney’).<br />
7
ENGLISH RAIS manual <strong>for</strong> Rais 2:1<br />
Chimney<br />
The chimney is the driving <strong>for</strong>ce which makes the stove function. In order <strong>for</strong> the stove to<br />
per<strong>for</strong>m satisfactorily the chimney height must be sufficient to ensure the correct draught<br />
of 14 to 18 Pa, so as to clear the products of combustion <strong>and</strong> prevent problems of smoke<br />
leaking into the room when the stove is lit.<br />
Note: A chimney height of not less than 4.5 metres, measured vertically from the outlet of<br />
the stove to the top of the chimney, should be satisfactory.<br />
Alternatively the calculation procedure given in BS 5854:1980 may be <strong>use</strong>d as the basis<br />
<strong>for</strong> deciding whether a particular chimney design will provide sufficient draught.<br />
The outlet from the chimney should be above the roof of the building in accordance with<br />
the provisions of the Building Regulations Approved Document J.<br />
If the <strong>installation</strong> is into an existing chimney, then it must be sound <strong>and</strong> have no cracks or<br />
other faults which may allow fumes into the ho<strong>use</strong>. Older properties, especially, may have<br />
chimney faults or the cross section may be too large i.e. more than 230 x 230mm.<br />
Remedial action should be taken if required, expert advice should be sought where<br />
required.<br />
If the chimney requires lining, then a suitable solid fuel flue liner must be <strong>use</strong>d, in<br />
accordance with Building Regulations Approved Document J.<br />
Any existing chimney must be clear of obstruction <strong>and</strong> should have been swept clean<br />
immediately be<strong>for</strong>e the <strong>installation</strong> of the stove. If the stove is fitted in place of an open<br />
fire, then the chimney should be swept one month after <strong>installation</strong> to clear any soot falls<br />
which may have occurred due to the difference in combustion between the stove <strong>and</strong> the<br />
open fire.<br />
If there is no existing chimney then either a prefabricated block chimney, in accordance<br />
with Building Regulations Approved Document J or a twin wall insulated stainless steel<br />
flue to BS 4543 can be <strong>use</strong>d. These chimneys must be fitted in accordance with the<br />
manufacturer’s <strong>instructions</strong> <strong>and</strong> the Building Regulations.<br />
A single wall metal fluepipe is suitable <strong>for</strong> connecting the stove to the chimney but is<br />
not suitable <strong>for</strong> using <strong>for</strong> the complete chimney. The chimney <strong>and</strong><br />
connecting fluepipe must have a minimum diameter of 150mm <strong>and</strong> it’s<br />
dimension should be not less than the size of the outlet socket of the stove which is<br />
150mm. Any bend in the chimney or connecting fluepipe should not exceed 45°. 90°<br />
bends should not be <strong>use</strong>d.<br />
Combustible material should not be located where the heat dissipating through the<br />
walls of fireplaces or flues could ignite it. There<strong>for</strong>e when installing the stove in the<br />
presence of combustible materials due account must be taken of the guidance on the<br />
separation of combustible material given in Building Regulations Approved Document<br />
J <strong>and</strong> also in these stove <strong>instructions</strong>.<br />
8
ENGLISH RAIS manual <strong>for</strong> Rais 2:1<br />
If it is found that there is excessive draught in the chimney then either an adjustable<br />
flue damper or alternatively a draught stabiliser should be fitted. The adjustable flue<br />
damper should not close off the flue entirely, but should in its closed position leave a<br />
minimum continuous opening free area of at least 20 % of the total cross sectional<br />
area of the flue or fluepipe.<br />
Adequate provision e.g. easily accessible soot door or doors must be provided <strong>for</strong><br />
sweeping the chimney <strong>and</strong> connecting fluepipe.<br />
You should also familiarise yourself with the draught conditions <strong>for</strong> chimneys with 2<br />
flues.<br />
For strong draughts, the chimney or flue should be fitted with a draught stabiliser. In<br />
which case, it is important to ensure that there is a free flowthrough area of minimum<br />
20 cm 2 when the regulating gate is shut. Otherwise, the fuel energy may not be <strong>use</strong>d<br />
optimally.<br />
If, at any time, you are unsure about the condition of the chimney, you should contact<br />
a chimney sweep.<br />
Remember that access to the soot door should be kept clear.<br />
9
ENGLISH RAIS manual <strong>for</strong> Rais 2:1<br />
Installation<br />
It is prohibited to carry out unauthorised alterations to the stove.<br />
There must be plenty of fresh air in the room where the stove is being installed, in order to<br />
ensure proper combustion. Note that any mechanical exhaust ventilation e.g. an<br />
extraction hood may reduce the air supply. Any air grilles must be placed in such a<br />
manner, that the air supply is not blocked.<br />
Building Regulations Approved Document J gives specific guidance on the required<br />
permanent ventilation into the room <strong>for</strong> combustion air of solid fuel appliances.<br />
The floor structure must be able to carry the weight of the wood burning stove, as well as<br />
the weight of a chimney, if necessary.<br />
When you choose where to set up your RAIS wood burning stove, you should consider the<br />
heat distribution to the other rooms. This will enable you to get the best <strong>use</strong> out of your<br />
stove.<br />
The stove should be set up at a safe distance from inflammable materials.<br />
See the manufacturer's plate on the wood burning stove.<br />
10
ENGLISH RAIS manual <strong>for</strong> Rais 2:1<br />
Installation of stove:<br />
NOTE !<br />
A decision must be made concerning the positioning of the inlets <strong>and</strong> outlets of<br />
the convection system. Discolouration of the wall above the doors <strong>and</strong> the<br />
convection air outlets may occur due to convected hot air.<br />
RAIS cannot take responsibility <strong>for</strong> any building work or consequential damage.<br />
The stove should be inspected <strong>for</strong> defects at receipt.<br />
Lift the stove from the pallet to the place of <strong>installation</strong> on to a suitably protected floor. The<br />
socket delivered with the stove corresponds with the minimum <strong>installation</strong> height.<br />
If the stove is installed in a higher position, adjustable extensions can be <strong>use</strong>d.<br />
Accessories are available to order from your Rais dealer / stockist.<br />
Using a spirit level against the door <strong>and</strong> body of the stove, ensure that the stove is<br />
perfectly level <strong>and</strong> make adjustments using the levelling bolts in the base.<br />
Remove the frame <strong>and</strong> door from the stove. Be careful not to damage the glass or paint.<br />
Leave the protective tape <strong>and</strong> plastic on the h<strong>and</strong>les during <strong>installation</strong>.<br />
Seal the flue pipe on to the flue outlet using fire cement <strong>and</strong> self tapping screws <strong>and</strong><br />
connect to the chimney.<br />
Connect the convection air ducts, if required.<br />
The stove is now ready to be built in using either stud walls or solid walls.<br />
When the walls have been finished <strong>and</strong> decorated, the frame <strong>and</strong> door can be refitted.<br />
Remove all protective plastic <strong>and</strong> tape prior to commissioning.<br />
The frames are adjusted to the maximum wall thickness at the factory.<br />
The frames can be adjusted from 466mm minimum to 480mm maximum.<br />
Open the door <strong>and</strong> loosen the bolts at the top <strong>and</strong> bottom, then gently push the frame<br />
back towards the wall.<br />
Check that the frames are parallel to the walls <strong>and</strong> the doors in the closed position, adjust<br />
if necessary.<br />
Retighten the bolts at the top <strong>and</strong> bottom.<br />
Made to measure frames are available to order with the stove from your Rais dealer /<br />
stockist.<br />
11
ENGLISH RAIS manual <strong>for</strong> Rais 2:1<br />
12
ENGLISH RAIS manual <strong>for</strong> Rais 2:1<br />
13
ENGLISH RAIS manual <strong>for</strong> Rais 2:1<br />
Insulation ability such as Aqua panel ( coefficient of thermal conductivity 0.36 W/mk )<br />
or better. Please <strong>use</strong> metal stud.<br />
14
ENGLISH RAIS manual <strong>for</strong> Rais 2:1<br />
15
ENGLISH RAIS manual <strong>for</strong> Rais 2:1<br />
The two rows of bricks<br />
beneath the stove is limited<br />
to a max depth of 75mm<br />
16
ENGLISH RAIS manual <strong>for</strong> Rais 2:1<br />
17
ENGLISH RAIS manual <strong>for</strong> Rais 2:1<br />
Installation distances <strong>for</strong> non combustible wall<br />
We recommend a minimum distance to non combustible material of 50mm ( F ) <strong>for</strong> cleaning<br />
considerations.<br />
Using uninsulated flue pipe, the minimum distance to a combustible wall must be 450mm or<br />
225mm if the wall is heatshielded ( see Section J of the Building Regulations ) from the flue<br />
pipe.<br />
Installation distance to combustible wall<br />
To find out whether the wall next to where the stove is going to be installed is flammable,<br />
you should contact your building contractor or the local building authorities.<br />
The hearth should be able to accommodate the weight of the stove. The chimney must be<br />
independently supported by wall brackets or a ceiling support plate. The weight of the stove<br />
is indicated in the brochure.<br />
The stove should always be installed on a noncombustible hearth of a size <strong>and</strong> construction<br />
that is in accordance with the provisions of the current UK Building Regulations Approved<br />
Document J.<br />
If the stove is to be installed on a wooden floor, it must be covered with a noncombustible<br />
material at least 12mm thick, in accordance with UK Building Regulations Approved<br />
Document J, to a distance of 300 mm in front of the stove <strong>and</strong> 150 mm to each side<br />
measuring from the door of the combustion chamber.<br />
The clearance distances to combustible material beneath, surrounding or upon the hearth<br />
<strong>and</strong> walls adjacent to the hearth should comply with the guidance on the separation of<br />
combustible material given in UK Building Regulations Approved Document J <strong>and</strong> also in<br />
these stove <strong>instructions</strong>.<br />
In<strong>for</strong>m the <strong>use</strong>r that the appliance has been commissioned <strong>and</strong> ready to <strong>use</strong> <strong>and</strong> give<br />
instruction on the safe operation of the stove.<br />
These Instructions must be left with the <strong>use</strong>r <strong>and</strong> the <strong>use</strong>r should be instructed to keep them<br />
in a safe place.<br />
18
ENGLISH RAIS manual <strong>for</strong> Rais 2:1<br />
For the Installer<br />
Finally be<strong>for</strong>e firing the stove <strong>for</strong> the first time a check should be made to ensure that the<br />
assembly <strong>and</strong> stove <strong>installation</strong> has been satisfactory <strong>and</strong> that there are no leaks in any<br />
seals in the appliance <strong>and</strong> appliance connections to the chimney.<br />
Ensure that the appliance <strong>and</strong> chimney flue are functioning correctly be<strong>for</strong>e finally<br />
h<strong>and</strong>ing over to the <strong>use</strong>r. Read the later parts of this manual <strong>for</strong> guidance on care<br />
required when first lighting.<br />
In<strong>for</strong>m the <strong>use</strong>r that the appliance has been commissioned <strong>and</strong> ready to <strong>use</strong> <strong>and</strong> give<br />
instruction on the safe operation of the stove.<br />
These Instructions must be left with the <strong>use</strong>r <strong>and</strong> the <strong>use</strong>r should be instructed to keep<br />
them in a safe place.<br />
19
ENGLISH RAIS manual <strong>for</strong> Rais 2:1<br />
Operating <strong>instructions</strong><br />
Please note that HETAS Appliance Approval only covers the <strong>use</strong> of dry seasoned wood<br />
logs on this appliance. HETAS Approval does not cover the <strong>use</strong> of other fuels either<br />
alone or mixed with the wood logs, nor does it cover <strong>instructions</strong> <strong>for</strong> the <strong>use</strong> of other<br />
fuels.<br />
Fuel<br />
The stove is designed <strong>and</strong> approved in accordance with EN 13240 <strong>and</strong> NS 3058 <strong>for</strong><br />
stoking split, dried firewood. The firewood must have a water content of 1522% <strong>and</strong> its<br />
max. length should be the length of the combustion chamber minus 5060 mm.<br />
Stoking with wet firewood ca<strong>use</strong>s both soot, environmental pollution <strong>and</strong> bad fuel<br />
economy. Freshly cut wood contains approx. 5070% water <strong>and</strong> is thoroughly unsuitable<br />
<strong>for</strong> stoking. Allow at least 1 year of storage time <strong>for</strong> newly cut wood be<strong>for</strong>e using. Wood<br />
with a diameter of more than 100 mm should be split. Regardless of wood size, it should<br />
always have at least one surface area free of bark.<br />
We do not recommend stoking with painted, laminated or impregnated wood, wood with<br />
a synthetic surface, painted ref<strong>use</strong> wood, chipboard, plywood, domestic waste, paper<br />
briquettes <strong>and</strong> pit coal, as this will produce malodorous smoke, which could be<br />
poisonous.<br />
When firing with the abovementioned items <strong>and</strong> amounts larger than those<br />
recommended, the stove is subjected to a larger amount of heat, which results in a<br />
higher chimney temperature <strong>and</strong> lower efficiency. This can result in the stove <strong>and</strong><br />
chimney becoming damaged <strong>and</strong> would void the warranty.<br />
The calorific value of the firewood is closely connected to the moisture level.<br />
Moist firewood has a low heat value. The more water the wood contains, the more<br />
energy it takes <strong>for</strong> this water to vaporise, resulting in this energy being lost.<br />
ONLY USE RECOMMENDED FUELS<br />
The following table shows the calorific value of different types of wood, which have been<br />
stored <strong>for</strong> 2 years <strong>and</strong> which have a residual moisture of 15 17%.<br />
Wood Kg dry wood pr m 3 compared to beech/oak<br />
Hornbeam 640 110%<br />
Beech <strong>and</strong> oak 580 100%<br />
Ash 570 98%<br />
Maple 540 93%<br />
Birch 510 88%<br />
Mountain pine 480 83%<br />
Fir 390 67%<br />
Poplar 380 65%<br />
1kg of wood yields the same heat energy irrespective of wood type.<br />
1kg of beech merely takes up less space than 1kg of fir.<br />
20
ENGLISH RAIS manual <strong>for</strong> Rais 2:1<br />
Drying <strong>and</strong> storage<br />
Drying wood takes time: proper air drying takes approximately 2 years.<br />
Here are some tips:<br />
Store the wood sawn, split <strong>and</strong> stacked in an airy, sunny place, which is protected against<br />
rain (the south side of the ho<strong>use</strong> is particularly suitable).<br />
Store the firewood stacks at a h<strong>and</strong>'s breadth apart, as this ensures that the air flowing<br />
through takes the moisture with it. Avoid covering the firewood stacks with plastic, as this<br />
prevents the moisture from escaping. It is a good idea to bring the firewood into the ho<strong>use</strong><br />
23 days be<strong>for</strong>e you need it.<br />
Regulating the combustion air<br />
All RAIS stoves are equipped with a oneh<strong>and</strong>ed operating lever <strong>for</strong> regulating the damper.<br />
The stovespecific regulating mechanisms can be seen on the diagrams.<br />
Primary air is the combustion air added to the primary combustion zone, i.e. the bed of<br />
glowing embers. This air, which is cold, is only <strong>use</strong>d in the lighting stage. Secondary air is<br />
the air which is added in the gas combustion zone, i.e. air which contributes to the<br />
combustion of the pyrolysis gasses (preheated air, which is <strong>use</strong>d <strong>for</strong> the cleaner glass<br />
system <strong>and</strong> combustion). This air is sucked through the damper under the combustion<br />
chamber <strong>and</strong> is preheated through the side channels <strong>and</strong> then emitted as hot scavenging<br />
air onto the glass. The hot air rinses the glass <strong>and</strong> keeps it sootfree.<br />
The tertiary channel, which can be seen at the top of the combustion chamber towards the<br />
back, serves to combust the final gas residues.<br />
By setting the interval between position 1 <strong>and</strong> 2, the energy content in the firewood is <strong>use</strong>d<br />
optimally, as there is oxygen <strong>for</strong> combustion <strong>and</strong> <strong>for</strong> the burning of the pyrolysis gasses.<br />
When the flames are a clear yellow the damper has been set correctly. Finding the correct<br />
position comes with time after you have <strong>use</strong>d <strong>for</strong> stove <strong>for</strong> a while.<br />
It is not recommended that you turn it down completely. A mistake commonly made is<br />
shutting the damper too early beca<strong>use</strong> it feels too hot. This results in dark smoke emanating<br />
from the chimney <strong>and</strong> in the calorific value of the firewood not being <strong>use</strong>d to its fullest.<br />
Room ventilation <strong>and</strong> stoves<br />
There must not be an extractor fan fitted in the same room as the stove as this can ca<strong>use</strong><br />
the stove to emit smoke <strong>and</strong> fumes into the room.<br />
The stove requires a permanent <strong>and</strong> adequate air supply in order <strong>for</strong> it to operate safely <strong>and</strong><br />
efficiently.<br />
In accordance with current Building Regulations the installer may have fitted a permanent air<br />
supply vent into the room in which the stove is installed to provide combustion air. This air<br />
vent should not under any circumstances be shut off or sealed.<br />
21
ENGLISH RAIS manual <strong>for</strong> Rais 2:1<br />
Using the wood burning stove<br />
When using the Rais 2:1, it is important that the amount of wood does not exceed the<br />
“MAX LOAD” marking pressed into the vermiculite sides of the fire chamber, approximately<br />
19cm height.<br />
Adjusting the air damper.<br />
The damper has 3 settings.<br />
Position 1<br />
The damper is almost closed meaning that there is a<br />
minimal air intake.<br />
Position 2<br />
Pull / push the lever until the first click. This position<br />
gives full secondary air.<br />
During normal <strong>use</strong> the lever is set between position 1<br />
<strong>and</strong> 2.<br />
When the flames are clear <strong>and</strong> yellow, the damper is<br />
set correctly, i.e. resulting in a slow/optimal burning.<br />
Position 3<br />
Pull / push the lever until the next click.<br />
The air damper is completely open <strong>and</strong> gives full<br />
primary <strong>and</strong> secondary air. This position is <strong>for</strong> the lighting<br />
stage <strong>and</strong> is not <strong>use</strong>d under normal operation.<br />
Control<br />
If the ash is white <strong>and</strong> the walls in the combustion chamber are soot free after the stove<br />
has been <strong>use</strong>d, the air regulation was set correctly <strong>and</strong> the wood was sufficiently dry.<br />
22
ENGLISH RAIS manual <strong>for</strong> Rais 2:1<br />
First usage<br />
A careful start pays off. Start with a small fire, so that the wood burning stove can get<br />
accustomed to the high temperature. This gives the best start <strong>and</strong> any damage is<br />
avoided.<br />
Be aware that a strange but harmless odour <strong>and</strong> smoke concoction may emanate from<br />
the surface of the stove, the first time you fire up. This is beca<strong>use</strong> the paint <strong>and</strong><br />
materials need to harden. The odour disappears quickly, but you should check the<br />
ventilation <strong>and</strong> draught, if possible. See also, the IMPORTANT warning notice below<br />
about persistent fumes.<br />
During this process you must be careful not to touch the painted surfaces, <strong>and</strong> it is<br />
recommended that you regularly open <strong>and</strong> close the door to prevent the door seal from<br />
sticking.<br />
The stove may also produce "clicking noises" during heating <strong>and</strong> cooling, ca<strong>use</strong>d by the<br />
large temperature differences which the material is subjected to.<br />
Never <strong>use</strong> any type of liquid fuel <strong>for</strong> kindling or maintaining the fire. You could be at risk<br />
of explosion.<br />
The stove gets very hot when in <strong>use</strong>, always wear protective gloves when tending the<br />
stove.<br />
If the stove has not been <strong>use</strong>d <strong>for</strong> a while, follow the steps as if you were using it <strong>for</strong> the<br />
first time.<br />
IMPORTANT Warning Note!<br />
Properly installed, operated <strong>and</strong> maintained this appliance will not emit fumes into the<br />
dwelling. Occasional fumes from deashing <strong>and</strong> refuelling may occur.<br />
However, persistent fume emission is potentially dangerous <strong>and</strong> must not be tolerated.<br />
If fume emission does persist, the following immediate actions should be taken:<br />
(a) Open doors <strong>and</strong> windows to ventilate room.<br />
(b) Let the fire out or eject <strong>and</strong> safely dispose of fuel from the appliance.<br />
(c) Check <strong>for</strong> flue or chimney blockage, <strong>and</strong> clean if required.<br />
(d) Do not attempt to relight the fire until the ca<strong>use</strong> of the fume emission has been<br />
identified <strong>and</strong> corrected. If necessary seek expert advice.<br />
IMPORTANT Warning Note!<br />
Do not <strong>use</strong> an aerosol spray on or near the stove when it is alight.<br />
IMPORTANT Safety advice!<br />
When using the stove in situations where children, aged <strong>and</strong>/or infirm persons are<br />
present a fireguard must be <strong>use</strong>d to prevent accidental contact with the stove. The<br />
fireguard should be manufactured in accordance with BS 8423:2002<br />
(Replaces BS 6539).<br />
23
ENGLISH RAIS manual <strong>for</strong> Rais 2:1<br />
Lighting <strong>and</strong> fuelling<br />
To light the stove, <strong>use</strong> alcohol briquettes or<br />
similar, as well as approximately 2kg of<br />
firewood, split into kindling sticks. Set the air<br />
damper to the fully open position.<br />
It is important that the AirKit system<br />
airtight flap, located at the rear of the stove<br />
(if fitted), is always opened prior to lighting<br />
the stove.<br />
Tips be<strong>for</strong>e firing up:<br />
Open a door or window close to the wood<br />
burning stove.<br />
If there is ‘storm’ in the stove coming from the<br />
chimney it is advisable to place a screwed up<br />
piece of newspaper between the upper baffle<br />
plate <strong>and</strong> the chimney. Light the paper <strong>and</strong><br />
wait until you hear a ‘rumbling’ noise in the<br />
chimney. This means that there is definitely a<br />
draught in the chimney <strong>and</strong> you should avoid<br />
smoke coming back into the room.<br />
Light the fire <strong>and</strong> shut the<br />
door, leave the door ajar<br />
approximately 1015mm.<br />
24
ENGLISH RAIS manual <strong>for</strong> Rais 2:1<br />
When the flames are clear, after approximately 510<br />
minutes, close the door.<br />
Damper see adjustment of the damper.<br />
After approximately 1020 minutes, when you have a<br />
good bed of glowing embers, add 23 pieces of wood.<br />
Leave the door ajar until the fire has caught properly,<br />
then close the door.<br />
Damper see adjustment of the damper.<br />
After approximately 5 minutes, or when the flames are<br />
clear <strong>and</strong> stable, close the damper gradually.<br />
It is recommended to have a layer of approximately<br />
20mm, as it has an insulating effect.<br />
NOTE!<br />
During operation the<br />
door should always<br />
remain closed.<br />
25
ENGLISH RAIS manual <strong>for</strong> Rais 2:1<br />
Cleaning <strong>and</strong> care<br />
The wood burning stove <strong>and</strong> the chimney must be serviced by a chimney sweep twice a<br />
year.<br />
During cleaning <strong>and</strong> care, the stove must be cold.<br />
If the glass is sooty:<br />
Moisten a piece of paper or newspaper, dip it in the ash, <strong>and</strong> rub the sooty glass with it.<br />
Now rub with a dry piece of paper <strong>and</strong> the glass will become clean.<br />
As an alternative you can <strong>use</strong> glass cleaner, which you can buy from you RAIS<br />
distributor.<br />
Clean the exterior with a dry sponge or a soft brush.<br />
Cleaning the combustion chamber:<br />
Scrape/shovel the ash out <strong>and</strong> store it in a nonflammable container until it has cooled<br />
down. You can dispose of ash with your normal ho<strong>use</strong>hold waste or recycle on the<br />
garden.<br />
REMEMBER!!<br />
Never remove all the ashes from the combustion chamber the wood will burn at its best<br />
with a layer of ashes of approx. 20 mm.<br />
Prolonged periods of non<strong>use</strong>:<br />
If the stove is to be left un<strong>use</strong>d <strong>for</strong> a prolonged period of time then it should be given a<br />
thorough clean to remove ash <strong>and</strong> unburned fuel residues. To enable a good flow of air<br />
through the appliance to reduce condensation <strong>and</strong> subsequent damage, leave the air<br />
controls fully open.<br />
Prior to a new heating season, it should be checked that the chimney <strong>and</strong> flue pipe<br />
connector are not blocked.<br />
26
ENGLISH RAIS manual <strong>for</strong> Rais 2:1<br />
The flue ways consist of a baffle plate <strong>and</strong> a smoke<br />
conductor above. Both parts are made of Vermiculite.<br />
H<strong>and</strong>le these parts carefully.<br />
Lift the baffle plate a little <strong>and</strong> push towards one of the<br />
sides.<br />
Remove the baffle plate by lifting it upwards <strong>and</strong> tilting<br />
on it’s end. The other end is lowered <strong>and</strong> the baffle<br />
plate turned a little.<br />
Gently take out the baffle plate.<br />
Remove the smoke conductor, which is positioned<br />
above the baffle plate. Lift one side up <strong>and</strong> lower the<br />
other. Gently lower the smoke conductor <strong>and</strong> remove it.<br />
Now there is a clear view of the smoke exit.<br />
Remove any dirt / dust <strong>and</strong> put the parts back in, in<br />
reverse order.<br />
27
ENGLISH RAIS manual <strong>for</strong> Rais 2:1<br />
Problem solving<br />
Smoke spillage around door:<br />
could be due to too low draught in the chimney 22 Pa, draught control regulator should be installed.<br />
A stove burning too weakly could be ca<strong>use</strong>d by:<br />
too little firewood<br />
too little air supply <strong>for</strong> the room ventilation<br />
dirty smoke channels<br />
leaking chimney<br />
leakage between chimney <strong>and</strong> flue<br />
If your stove continues to malfunction, we recommend that you contact your RAIS<br />
distributor or chimney sweep.<br />
IMPORTANT!!<br />
To ensure safe burning there must be clear yellow flames or clear embers at all times. The<br />
firewood should not be smouldering. There<strong>for</strong>e you should never completely cut off the air<br />
supply.<br />
WARNING!!<br />
In case of chimney fire:<br />
shut off all air supply on the wood burning stove<br />
contact the fire services<br />
never attempt to put out fire with water!<br />
afterwards, you should ask your chimney sweep to check the stove <strong>and</strong> chimney<br />
28
ENGLISH RAIS manual <strong>for</strong> Rais 2:1<br />
Accessories <strong>and</strong> spare parts<br />
If spare parts other than those recommended by RAIS are <strong>use</strong>d, the warranty is voided.<br />
All replacement spare parts can be purchased from your RAIS distributor / stockist.<br />
See the following spare parts diagrams <strong>for</strong> the individual products.<br />
Accessories<br />
910050190 Telescopic legs<br />
910050290 Base frame<br />
29
ENGLISH RAIS manual <strong>for</strong> Rais 2:1<br />
Spare parts diagram Rais 2:1<br />
Position / Ref Quantity Item No Description<br />
1 2 9101401SORT Complete front<br />
2 2 9101090 Door left hinged<br />
2 9101090H Door right hinged<br />
9101090L Door left hinged locked<br />
9101090LH Door right hinged locked<br />
9101032 Tool <strong>for</strong> locked door<br />
3 1 9102200 Fire brick set<br />
4 1 9100990 Airsystem<br />
5 9105500 Seal set<br />
30
ENGLISH RAIS manual <strong>for</strong> Rais 2:1<br />
31
ENGLISH RAIS manual <strong>for</strong> Rais 2:1<br />
32
ENGLISH RAIS manual <strong>for</strong> Rais 2:1<br />
33
ENGLISH RAIS manual <strong>for</strong> Rais 2:1<br />
U K Distributor.<br />
<strong>Robeys</strong> <strong>Ltd</strong>.<br />
Riverside, Goods Road, Belper,<br />
Derbyshire, Engl<strong>and</strong>. DE56 1UU<br />
Tel: 01773 820940 Fax: 01773 820477<br />
E Mail: info@robeys.co.uk<br />
www.robeys.co.uk<br />
June 2011<br />
34