Working with Data in ASP.NET 2.0 :: Uploading Files Introduction
Working with Data in ASP.NET 2.0 :: Uploading Files Introduction
Working with Data in ASP.NET 2.0 :: Uploading Files Introduction

Create successful ePaper yourself
Turn your PDF publications into a flip-book with our unique Google optimized e-Paper software.
1 of 19<br />
This tutorial is part of a set. F<strong>in</strong>d out more about data access <strong>with</strong> <strong>ASP</strong>.<strong>NET</strong> <strong>in</strong> the <strong>Work<strong>in</strong>g</strong> <strong>with</strong> <strong>Data</strong><br />
<strong>in</strong> <strong>ASP</strong>.<strong>NET</strong> <strong>2.0</strong> section of the <strong>ASP</strong>.<strong>NET</strong> site at http://www.asp.net/learn/dataaccess/default.aspx.<br />
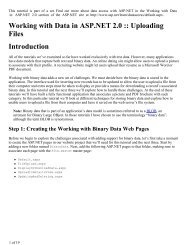
<strong>Work<strong>in</strong>g</strong> <strong>with</strong> <strong>Data</strong> <strong>in</strong> <strong>ASP</strong>.<strong>NET</strong> <strong>2.0</strong> :: Upload<strong>in</strong>g<br />
<strong>Files</strong><br />
<strong>Introduction</strong><br />
All of the tutorials we’ve exam<strong>in</strong>ed so far have worked exclusively <strong>with</strong> text data. However, many applications<br />
have data models that capture both text and b<strong>in</strong>ary data. An onl<strong>in</strong>e dat<strong>in</strong>g site might allow users to upload a picture<br />
to associate <strong>with</strong> their profile. A recruit<strong>in</strong>g website might let users upload their resume as a Microsoft Word or<br />
PDF document.<br />
<strong>Work<strong>in</strong>g</strong> <strong>with</strong> b<strong>in</strong>ary data adds a new set of challenges. We must decide how the b<strong>in</strong>ary data is stored <strong>in</strong> the<br />
application. The <strong>in</strong>terface used for <strong>in</strong>sert<strong>in</strong>g new records has to be updated to allow the user to upload a file from<br />
their computer and extra steps must be taken to display or provide a means for download<strong>in</strong>g a record’s associated<br />
b<strong>in</strong>ary data. In this tutorial and the next three we’ll explore how to hurdle these challenges. At the end of these<br />
tutorials we’ll have built a fully functional application that associates a picture and PDF brochure <strong>with</strong> each<br />
category. In this particular tutorial we’ll look at different techniques for stor<strong>in</strong>g b<strong>in</strong>ary data and explore how to<br />
enable users to upload a file from their computer and have it saved on the web server’s file system.<br />
Note: B<strong>in</strong>ary data that is part of an application’s data model is sometimes referred to as a BLOB, an<br />
acronym for B<strong>in</strong>ary Large OBject. In these tutorials I have chosen to use the term<strong>in</strong>ology “b<strong>in</strong>ary data”,<br />
although the term BLOB is synonymous.<br />
Step 1: Creat<strong>in</strong>g the <strong>Work<strong>in</strong>g</strong> <strong>with</strong> B<strong>in</strong>ary <strong>Data</strong> Web Pages<br />
Before we beg<strong>in</strong> to explore the challenges associated <strong>with</strong> add<strong>in</strong>g support for b<strong>in</strong>ary data, let’s first take a moment<br />
to create the <strong>ASP</strong>.<strong>NET</strong> pages <strong>in</strong> our website project that we’ll need for this tutorial and the next three. Start by<br />
add<strong>in</strong>g a new folder named B<strong>in</strong>ary<strong>Data</strong>. Next, add the follow<strong>in</strong>g <strong>ASP</strong>.<strong>NET</strong> pages to that folder, mak<strong>in</strong>g sure to<br />
associate each page <strong>with</strong> the Site.master master page:<br />
• Default.aspx<br />
• FileUpload.aspx<br />
• DisplayOrDownload<strong>Data</strong>.aspx<br />
• UploadInDetailsView.aspx<br />
• Updat<strong>in</strong>gAndDelet<strong>in</strong>g.aspx
2 of 19<br />
Figure 1: Add the <strong>ASP</strong>.<strong>NET</strong> Pages for the B<strong>in</strong>ary <strong>Data</strong>Related Tutorials<br />
Like <strong>in</strong> the other folders, Default.aspx <strong>in</strong> the B<strong>in</strong>ary<strong>Data</strong> folder will list the tutorials <strong>in</strong> its section. Recall that<br />
the SectionLevelTutorialList<strong>in</strong>g.ascx User Control provides this functionality. Therefore, add this User<br />
Control to Default.aspx by dragg<strong>in</strong>g it from the Solution Explorer onto the page’s Design view.
3 of 19<br />
Figure 2: Add the SectionLevelTutorialList<strong>in</strong>g.ascx User Control to Default.aspx<br />
Lastly, add these pages as entries to the Web.sitemap file. Specifically, add the follow<strong>in</strong>g markup after the<br />
“Enhanc<strong>in</strong>g the GridView” :<br />
<br />
<br />
<br />
4 of 19<br />
<br />
<br />
After updat<strong>in</strong>g Web.sitemap, take a moment to view the tutorials website through a browser. The menu on the left<br />
now <strong>in</strong>cludes items for the <strong>Work<strong>in</strong>g</strong> <strong>with</strong> B<strong>in</strong>ary <strong>Data</strong> tutorials.<br />
Figure 3: The Site Map Now Includes Entries for the <strong>Work<strong>in</strong>g</strong> <strong>with</strong> B<strong>in</strong>ary <strong>Data</strong> Tutorials<br />
Step 2: Decid<strong>in</strong>g Where to Store the B<strong>in</strong>ary <strong>Data</strong><br />
B<strong>in</strong>ary data that is associated <strong>with</strong> the application’s data model can be stored <strong>in</strong> one of two places: on the web<br />
server’s file system <strong>with</strong> a reference to the file stored <strong>in</strong> the database; or directly <strong>with</strong><strong>in</strong> the database itself (see<br />
Figure 4). Each approach has its own set of pros and cons and merits a more detailed discussion.
5 of 19<br />
Figure 4: B<strong>in</strong>ary <strong>Data</strong> Can Be Stored On the File System or Directly <strong>in</strong> the <strong>Data</strong>base<br />
Imag<strong>in</strong>e that we wanted to extend the Northw<strong>in</strong>d database to associate a picture <strong>with</strong> each product. One option<br />
would be to store these image files on the web server’s file system and record the path <strong>in</strong> the Products table. With<br />
this approach, we’d add an ImagePath column to the Products table of type varchar(200), perhaps. When a user<br />
uploaded a picture for Chai, that picture might be stored on the web server’s file system at ~/Images/Tea.jpg,<br />
where ~ represents the application’s physical path. That is, if the web site is rooted at the physical path<br />
C:\Websites\Northw<strong>in</strong>d\, ~/Images/Tea.jpg would be equivalent to<br />
C:\Websites\Northw<strong>in</strong>d\Images\Tea.jpg. After upload<strong>in</strong>g the image file, we’d update the Chai record <strong>in</strong> the<br />
Products table so that its ImagePath column referenced the path of the new image. We could use<br />
“~/Images/Tea.jpg” or just “Tea.jpg” if we decided that all product images would be placed <strong>in</strong> the application’s<br />
Images folder.<br />
The ma<strong>in</strong> advantages of stor<strong>in</strong>g the b<strong>in</strong>ary data on the file system are:<br />
• Ease of implementation – as we’ll see shortly, stor<strong>in</strong>g and retriev<strong>in</strong>g b<strong>in</strong>ary data stored directly <strong>with</strong><strong>in</strong> the<br />
database <strong>in</strong>volves a bit more code than when work<strong>in</strong>g <strong>with</strong> data through the file system. Additionally, <strong>in</strong><br />
order for a user to view or download b<strong>in</strong>ary data they must be presented <strong>with</strong> a URL to that data. If the data<br />
resides on the web server’s file system, the URL is straightforward. If the data is stored <strong>in</strong> the database,<br />
however, a web page needs to be created that will retrieve and return the data from the database.<br />
• Wider access to the b<strong>in</strong>ary data –the b<strong>in</strong>ary data may need to be accessible to other services or<br />
applications, ones that cannot pull the data from the database. For example, the images associated <strong>with</strong> each<br />
product might also need to be available to users through FTP, <strong>in</strong> which case we’d want to store the b<strong>in</strong>ary
6 of 19<br />
data on the file system.<br />
• Performance – if the b<strong>in</strong>ary data is stored on the file system, the demand and network congestion between<br />
the database server and web server will be less than if the b<strong>in</strong>ary data is stored directly <strong>with</strong><strong>in</strong> the database.<br />
The ma<strong>in</strong> disadvantage of stor<strong>in</strong>g b<strong>in</strong>ary data on the file system is that it decouples the data from the database. If a<br />
record is deleted from the Products table, the associated file on the web server’s file system is not automatically<br />
deleted. We must write extra code to delete the file or the file system will become cluttered <strong>with</strong> unused, orphaned<br />
files. Furthermore, when back<strong>in</strong>g up the database, we must make sure to make backups of the associated b<strong>in</strong>ary<br />
data on the file system, as well. Mov<strong>in</strong>g the database to another site or server poses similar challenges.<br />
Alternatively, b<strong>in</strong>ary data can be stored directly <strong>in</strong> a Microsoft SQL Server 2005 database by creat<strong>in</strong>g a column of<br />
type varb<strong>in</strong>ary. Like <strong>with</strong> other variable length data types, you can specify a maximum length of the b<strong>in</strong>ary data<br />
that can be held <strong>in</strong> this column. For example, to reserve at most 5,000 bytes use varb<strong>in</strong>ary(5000); varb<strong>in</strong>ary<br />
(MAX) allows for the maximum storage size, about 2 GB.<br />
The ma<strong>in</strong> advantage of stor<strong>in</strong>g b<strong>in</strong>ary data directly <strong>in</strong> the database is the tight coupl<strong>in</strong>g between the b<strong>in</strong>ary data and<br />
the database record. This greatly simplifies database adm<strong>in</strong>istration tasks, like backups or mov<strong>in</strong>g the database to a<br />
different site or server. Also, delet<strong>in</strong>g a record automatically deletes the correspond<strong>in</strong>g b<strong>in</strong>ary data. There are also<br />
more subtle benefits of stor<strong>in</strong>g the b<strong>in</strong>ary data <strong>in</strong> the database. See Stor<strong>in</strong>g B<strong>in</strong>ary <strong>Files</strong> Directly <strong>in</strong> the <strong>Data</strong>base<br />
Us<strong>in</strong>g <strong>ASP</strong>.<strong>NET</strong> <strong>2.0</strong> for a more <strong>in</strong>depth discussion.<br />
Note: In Microsoft SQL Server 2000 and earlier versions, the varb<strong>in</strong>ary data type had a maximum limit of<br />
8,000 bytes. To store up to 2 GB of b<strong>in</strong>ary data the image data type needs to be used <strong>in</strong>stead. With the<br />
addition of MAX <strong>in</strong> SQL Server 2005, however, the image data type has been deprecated. It’s still supported<br />
for backwards compatibility, but Microsoft has announced that the image data type will be removed <strong>in</strong> a<br />
future version of SQL Server.<br />
If you are work<strong>in</strong>g <strong>with</strong> an older data model you may see the image data type. The Northw<strong>in</strong>d database’s<br />
Categories table has a Picture column that can be used to store the b<strong>in</strong>ary data of an image file for the<br />
category. S<strong>in</strong>ce the Northw<strong>in</strong>d database has its roots <strong>in</strong> Microsoft Access and earlier versions of SQL Server,<br />
this column is of type image.<br />
For this tutorial and the next three, we’ll use both approaches. The Categories table already has a Picture<br />
column for stor<strong>in</strong>g the b<strong>in</strong>ary content of an image for the category. We’ll add an additional column,<br />
BrochurePath, to store a path to a PDF on the web server’s file system that can be used to provide a pr<strong>in</strong>tquality,<br />
polished overview of the category.<br />
Step 3: Add<strong>in</strong>g the BrochurePath Column to the Categories Table<br />
Currently the Categories table has only four columns: CategoryID, CategoryName, Description, and Picture. In<br />
addition to these fields, we need to add a new one that will po<strong>in</strong>t to the category’s brochure (if one exists). To add<br />
this column, go to the Server Explorer, drill down <strong>in</strong>to the Tables, rightclick on the Categories table and choose<br />
“Open Table Def<strong>in</strong>ition” (see Figure 5). If you do not see the Server Explorer, br<strong>in</strong>g it up by select<strong>in</strong>g the Server<br />
Explorer option from the View menu, or hit Ctrl+Alt+S.<br />
Add a new varchar(200) column to the Categories table that is named BrochurePath and allows NULLs and<br />
click the Save icon (or hit Ctrl+S).
7 of 19<br />
Figure 5: Add a BrochurePath Column to the Categories Table<br />
Step 4: Updat<strong>in</strong>g the Architecture to Use the Picture and BrochurePath<br />
Columns<br />
The Categories<strong>Data</strong>Table <strong>in</strong> the <strong>Data</strong> Access Layer (DAL) currently has four <strong>Data</strong>Columns def<strong>in</strong>ed:<br />
CategoryID, CategoryName, Description, and NumberOfProducts. When we orig<strong>in</strong>ally designed this <strong>Data</strong>Table<br />
<strong>in</strong> the Creat<strong>in</strong>g a <strong>Data</strong> Access Layer tutorial, the Categories<strong>Data</strong>Table only had the first three columns; the<br />
NumberOfProducts column was added <strong>in</strong> the Master/Detail Us<strong>in</strong>g a Bulleted List of Master Records <strong>with</strong> a Details<br />
<strong>Data</strong>List tutorial.<br />
As discussed <strong>in</strong> Creat<strong>in</strong>g a <strong>Data</strong> Access Layer, the <strong>Data</strong>Tables <strong>in</strong> the Typed <strong>Data</strong>Set make up the bus<strong>in</strong>ess objects.<br />
The TableAdapters are responsible for communicat<strong>in</strong>g <strong>with</strong> the database and populat<strong>in</strong>g the bus<strong>in</strong>ess objects <strong>with</strong><br />
the query results. The Categories<strong>Data</strong>Table is populated by the CategoriesTableAdapter, which has three data<br />
retrieval methods:<br />
• GetCategories() – executes the TableAdapter’s ma<strong>in</strong> query and returns the CategoryID, CategoryName,<br />
and Description fields of all records <strong>in</strong> the Categories table. The ma<strong>in</strong> query is what is used by the autogenerated<br />
Insert and Update methods.<br />
• GetCategoryByCategoryID(categoryID) – returns the CategoryID, CategoryName, and Description<br />
fields of the category whose CategoryID equals categoryID.<br />
• GetCategoriesAndNumberOfProducts() returns the CategoryID, CategoryName, and Description<br />
fields for all records <strong>in</strong> the Categories table. Also uses a subquery to return the number of products
8 of 19<br />
associated <strong>with</strong> each category.<br />
Notice that none of these queries return the Categories table’s Picture or BrochurePath columns; nor does the<br />
Categories<strong>Data</strong>Table provide <strong>Data</strong>Columns for these fields. In order to work <strong>with</strong> the Picture and BrochurePath<br />
properties, we need to first add them to the Categories<strong>Data</strong>Table and then update the CategoriesTableAdapter<br />
class to return these columns.<br />
Add<strong>in</strong>g the Picture and BrochurePath <strong>Data</strong>Columns<br />
Start by add<strong>in</strong>g these two columns to the Categories<strong>Data</strong>Table. Rightclick on the Categories<strong>Data</strong>Table’s<br />
header, select Add from the context menu and then choose the Column option. This will create a new <strong>Data</strong>Column<br />
<strong>in</strong> the <strong>Data</strong>Table named Column1. Rename this column to Picture. From the Properties w<strong>in</strong>dow, set the<br />
<strong>Data</strong>Column’s <strong>Data</strong>Type property to “System.Byte[]” (this is not an option <strong>in</strong> the dropdown list; you need to<br />
type it <strong>in</strong>).<br />
Figure 6: Create a <strong>Data</strong>Column Named Picture whose <strong>Data</strong>Type is System.Byte[]<br />
Add another <strong>Data</strong>Column to the <strong>Data</strong>Table, nam<strong>in</strong>g it BrochurePath us<strong>in</strong>g the default <strong>Data</strong>Type value<br />
(System.Str<strong>in</strong>g).<br />
Return<strong>in</strong>g the Picture and BrochurePath Values from the TableAdapter
9 of 19<br />
With these two <strong>Data</strong>Columns added to the Categories<strong>Data</strong>Table, we’re ready to update the<br />
CategoriesTableAdapter. We could have both of these column values returned <strong>in</strong> the ma<strong>in</strong> TableAdapter query,<br />
but this would br<strong>in</strong>g back the b<strong>in</strong>ary data every time the GetCategories() method was <strong>in</strong>voked. Instead, let’s<br />
update the ma<strong>in</strong> TableAdapter query to br<strong>in</strong>g back BrochurePath and create an additional data retrieval method<br />
that returns a particular category’s Picture column.<br />
To update the ma<strong>in</strong> TableAdapter query, rightclick on the CategoriesTableAdapter’s header and choose the<br />
Configure option from the context menu. This br<strong>in</strong>gs up the Table Adapter Configuration Wizard, which we’ve<br />
seen <strong>in</strong> a number of past tutorials. Update the query to br<strong>in</strong>g back the BrochurePath and click F<strong>in</strong>ish.<br />
Figure 7: Update the Column List <strong>in</strong> the SELECT Statement to Also Return BrochurePath<br />
When us<strong>in</strong>g adhoc SQL statements for the TableAdapter, updat<strong>in</strong>g the column list <strong>in</strong> the ma<strong>in</strong> query updates the<br />
column list for all of the SELECT query methods <strong>in</strong> the TableAdapter. That means the GetCategoryByCategoryID<br />
(categoryID) method has been updated to return the BrochurePath column, which might be what we <strong>in</strong>tended.<br />
However, it also updated the column list <strong>in</strong> the GetCategoriesAndNumberOfProducts() method, remov<strong>in</strong>g the<br />
subquery that returns the number of products for each category! Therefore, we need to update this method’s<br />
SELECT query. Rightclick on the GetCategoriesAndNumberOfProducts() method, choose Configure, and revert<br />
the SELECT query back to its orig<strong>in</strong>al value:<br />
SELECT CategoryID, CategoryName, Description,<br />
(SELECT COUNT(*)<br />
FROM Products p<br />
WHERE p.CategoryID = c.CategoryID)<br />
as NumberOfProducts<br />
FROM Categories c
10 of 19<br />
Next, create a new TableAdapter method that returns a particular category’s Picture column value. Rightclick on<br />
the CategoriesTableAdapter’s header and choose the Add Query option to launch the TableAdapter Query<br />
Configuration Wizard. The first step of this wizard asks us if we want to query data us<strong>in</strong>g an adhoc SQL<br />
statement, a new stored procedure, or an exist<strong>in</strong>g one. Select “Use SQL statements” and click Next. S<strong>in</strong>ce we will<br />
be return<strong>in</strong>g a row, choose the “SELECT which returns rows” option from the second step.<br />
Figure 8: Select the “Use SQL statements” Option
11 of 19<br />
Figure 9: S<strong>in</strong>ce the Query Will Return a Record from the Categories Table, Choose “SELECT which<br />
returns rows”<br />
In the third step, enter the follow<strong>in</strong>g SQL query and click Next:<br />
SELECT<br />
FROM<br />
WHERE<br />
CategoryID, CategoryName, Description, BrochurePath, Picture<br />
Categories<br />
CategoryID = @CategoryID<br />
The last step is to choose the name for the new method. Use FillCategoryWithB<strong>in</strong>ary<strong>Data</strong>ByCategoryID and<br />
GetCategoryWithB<strong>in</strong>ary<strong>Data</strong>ByCategoryID for the Fill a <strong>Data</strong>Table and Return a <strong>Data</strong>Table patterns,<br />
respectively. Click F<strong>in</strong>ish to complete the wizard.
12 of 19<br />
Figure 10: Choose the Names for the TableAdapter’s Methods<br />
Note: After complet<strong>in</strong>g the Table Adapter Query Configuration Wizard you may see a dialog box <strong>in</strong>form<strong>in</strong>g<br />
you that “the new command text returns data <strong>with</strong> schema different from the schema of the ma<strong>in</strong> query.” In<br />
short, the wizard is not<strong>in</strong>g that the TableAdapter’s ma<strong>in</strong> query – GetCategories() – returns a different<br />
schema than the one we just created. But this is what we want, so you can disregard this message.<br />
Also, keep <strong>in</strong> m<strong>in</strong>d that if you are us<strong>in</strong>g adhoc SQL statements and use the wizard to change the<br />
TableAdapter’s ma<strong>in</strong> query at some later po<strong>in</strong>t <strong>in</strong> time, it will modify the<br />
GetCategoryWithB<strong>in</strong>ary<strong>Data</strong>ByCategoryID method’s SELECT statement’s column list to <strong>in</strong>clude just those<br />
columns from the ma<strong>in</strong> query (that is, it will remove the Picture column from the query). You will have to<br />
manually update the column list to return the Picture column, similar to what we did <strong>with</strong> the<br />
GetCategoriesAndNumberOfProducts() method earlier <strong>in</strong> this step.<br />
After add<strong>in</strong>g the two <strong>Data</strong>Columns to the Categories<strong>Data</strong>Table and the<br />
GetCategoryWithB<strong>in</strong>ary<strong>Data</strong>ByCategoryID method to the CategoriesTableAdapter, these classes <strong>in</strong> the<br />
Typed <strong>Data</strong>Set Designer should look like the screenshot <strong>in</strong> Figure 11.
13 of 19<br />
Figure 11: The <strong>Data</strong>Set Designer Includes the New Columns and Method<br />
Updat<strong>in</strong>g the Bus<strong>in</strong>ess Logic Layer (BLL)<br />
With the DAL updated, all that rema<strong>in</strong>s is to augment the Bus<strong>in</strong>ess Logic Layer (BLL) to <strong>in</strong>clude a method for the<br />
new CategoriesTableAdapter method. Add the follow<strong>in</strong>g method to the CategoriesBLL class:<br />
_<br />
Public Function GetCategoryWithB<strong>in</strong>ary<strong>Data</strong>ByCategoryID(categoryID As Integer) _<br />
As Northw<strong>in</strong>d.Categories<strong>Data</strong>Table<br />
Return Adapter.GetCategoryWithB<strong>in</strong>ary<strong>Data</strong>ByCategoryID(categoryID)<br />
End Function<br />
Step 5: Upload<strong>in</strong>g a File From the Client to the Web Server<br />
When collect<strong>in</strong>g b<strong>in</strong>ary data, oftentimes this data is supplied by an end user. To capture this <strong>in</strong>formation, the user<br />
needs to be able to upload a file from their computer to the web server. The uploaded data then needs to be<br />
<strong>in</strong>tegrated <strong>with</strong> the data model, which may mean sav<strong>in</strong>g the file to the web server’s file system and add<strong>in</strong>g a path to<br />
the file <strong>in</strong> the database, or writ<strong>in</strong>g the b<strong>in</strong>ary contents directly <strong>in</strong>to the database. In this step we’ll look at how to<br />
allow a user to upload files from their computer to the server. In the next tutorial we’ll turn our attention to<br />
<strong>in</strong>tegrat<strong>in</strong>g the uploaded file <strong>with</strong> data model.<br />
<strong>ASP</strong>.<strong>NET</strong> <strong>2.0</strong>’s new FileUpload Web control provides a mechanism for users to send a file from their computer to<br />
the web server. The FileUpload control renders as an element whose type attribute is set to “file”, which<br />
browsers display as a textbox <strong>with</strong> a Browse button. Click<strong>in</strong>g the Browse button br<strong>in</strong>gs up a dialog box from which<br />
the user can select a file. When the form is posted back, the selected file’s contents are sent along <strong>with</strong> the<br />
postback. On the serverside, <strong>in</strong>formation about the uploaded file is accessible through the FileUpload control’s<br />
properties.<br />
To demonstrate upload<strong>in</strong>g files, open the FileUpload.aspx page <strong>in</strong> the B<strong>in</strong>ary<strong>Data</strong> folder, drag a FileUpload<br />
control from the Toolbox onto the Designer, and set the control’s ID property to UploadTest. Next, add a Button<br />
Web control sett<strong>in</strong>g its ID and Text properties to UploadButton and “Upload Selected File”, respectively. F<strong>in</strong>ally,<br />
place a Label Web control beneath the Button, clear out its Text property and set its ID property to<br />
UploadDetails.
14 of 19<br />
Figure 12: Add a FileUpload Control to the <strong>ASP</strong>.<strong>NET</strong> Page<br />
Figure 13 shows this page when viewed through a browser. Note that click<strong>in</strong>g the Browse button br<strong>in</strong>gs up a file<br />
selection dialog box, allow<strong>in</strong>g the user to pick a file from their computer. Once a file has been selected, click<strong>in</strong>g the<br />
“Upload Selected File” button causes a postback that sends the selected file’s b<strong>in</strong>ary content to the web server.
15 of 19<br />
Figure 13: The User Can Select a File to Upload from their Computer to the Server<br />
On postback, the uploaded file can be saved to the file system or its b<strong>in</strong>ary data can be worked <strong>with</strong> directly<br />
through a Stream. For this example, let’s create a ~/Brochures folder and save the uploaded file there. Start by<br />
add<strong>in</strong>g the Brochures folder to the site as a subfolder of the root directory. Next, create an event handler for the<br />
UploadButton’s Click event and add the follow<strong>in</strong>g code:<br />
Protected Sub UploadButton_Click(sender As Object, e As EventArgs) _<br />
Handles UploadButton.Click<br />
If UploadTest.HasFile = False Then<br />
' No file uploaded!<br />
UploadDetails.Text = "Please first select a file to upload..."<br />
Else<br />
' Display the uploaded file's details<br />
UploadDetails.Text = Str<strong>in</strong>g.Format( _<br />
"Uploaded file: {0}" & _<br />
"File size (<strong>in</strong> bytes): {1:N0}" & _<br />
"Contenttype: {2}", _<br />
UploadTest.FileName, _<br />
UploadTest.FileBytes.Length, _<br />
UploadTest.PostedFile.ContentType)<br />
' Save the file<br />
Dim filePath As Str<strong>in</strong>g = _<br />
Server.MapPath("~/Brochures/" & UploadTest.FileName)<br />
UploadTest.SaveAs(filePath)<br />
End If
16 of 19<br />
End Sub<br />
The FileUpload control provides a variety of properties for work<strong>in</strong>g <strong>with</strong> the uploaded data. For <strong>in</strong>stance, the<br />
HasFile property <strong>in</strong>dicates whether a file was uploaded by the user, while the FileBytes property provides access<br />
to the uploaded b<strong>in</strong>ary data as an array of bytes. The Click event handler starts by ensur<strong>in</strong>g that a file has been<br />
uploaded. If a file has been uploaded, the Label shows the name of the uploaded file, its size <strong>in</strong> bytes, and its<br />
contenttype.<br />
Note: To ensure that the user uploads a file you can check the HasFile property and display a warn<strong>in</strong>g if it’s<br />
False, or you may use the RequiredFieldValidator control <strong>in</strong>stead.<br />
The FileUpload’s SaveAs(filePath) saves the uploaded file to the specified filePath. filePath must be a physical<br />
path (C:\Websites\Brochures\SomeFile.pdf) rather than a virtual path (/Brochures/SomeFile.pdf). The<br />
Server.MapPath(virtPath) method takes a virtual path and returns its correspond<strong>in</strong>g physical path. Here, the<br />
virtual path is ~/Brochures/fileName, where fileName is the name of the uploaded file. See Us<strong>in</strong>g<br />
Server.MapPath for more <strong>in</strong>formation on virtual and physical paths and us<strong>in</strong>g Server.MapPath.<br />
After complet<strong>in</strong>g the Click event handler, take a moment to test out the page <strong>in</strong> a browser. Click the Browse<br />
button and select a file from your hard drive and then click the “Upload Selected File” button. The postback will<br />
send the contents of the selected file to the web server, which will then display <strong>in</strong>formation about the file before<br />
sav<strong>in</strong>g it to the ~/Brochures folder. After upload<strong>in</strong>g the file, return to Visual Studio and click the Refresh button<br />
<strong>in</strong> the Solution Explorer. You should see the file you just uploaded <strong>in</strong> the ~/Brochures folder!<br />
Figure 14: The File EvolutionValley.jpg Has Been Uploaded to the Web Server
17 of 19<br />
Figure 15: EvolutionValley.jpg Was Saved to the ~/Brochures Folder<br />
Subtleties <strong>with</strong> Sav<strong>in</strong>g Uploaded <strong>Files</strong> to the File System<br />
There are several subtleties that must be addressed when sav<strong>in</strong>g upload<strong>in</strong>g files to the web server’s file system.<br />
First, there’s the issue of security. To save a file to the file system, the security context under which the <strong>ASP</strong>.<strong>NET</strong><br />
page is execut<strong>in</strong>g must have Write permissions. The <strong>ASP</strong>.<strong>NET</strong> Development Web Server runs under the context of<br />
your current user account. If you are us<strong>in</strong>g Microsoft’s Internet Information Services (IIS) as the web server, the<br />
security context depends on the version of IIS and its configuration.<br />
Another challenge of sav<strong>in</strong>g files to the file system revolves around nam<strong>in</strong>g the files. Currently, our page saves all<br />
of the uploaded files to the ~/Brochures directory us<strong>in</strong>g the same name as the file on the client’s computer. If User<br />
A uploads a brochure <strong>with</strong> the name Brochure.pdf, the file will be saved as ~/Brochure/Brochure.pdf. But<br />
what if sometime later User B uploads a different brochure file that happens to have the same filename<br />
(Brochure.pdf) With the code we have now, User A’s file will be overwritten <strong>with</strong> User B’s upload.
18 of 19<br />
There are a number of techniques for resolv<strong>in</strong>g file name conflicts. One option is to prohibit upload<strong>in</strong>g a file if<br />
there already exists one <strong>with</strong> the same name. With this approach, when User B attempts to upload a file named<br />
Brochure.pdf, the system would not save their file and <strong>in</strong>stead display a message <strong>in</strong>form<strong>in</strong>g User B to rename the<br />
file and try aga<strong>in</strong>. Another approach is to save the file us<strong>in</strong>g a unique file name, which could be a globally unique<br />
identifier (GUID) or the value from the correspond<strong>in</strong>g database record’s primary key column(s) (assum<strong>in</strong>g that the<br />
upload is associated <strong>with</strong> a particular row <strong>in</strong> the data model). In the next tutorial we’ll explore these options <strong>in</strong><br />
more detail.<br />
Challenges Involved <strong>with</strong> Very Large Amounts of B<strong>in</strong>ary <strong>Data</strong><br />
These tutorials assume that the b<strong>in</strong>ary data captured is modest <strong>in</strong> size. <strong>Work<strong>in</strong>g</strong> <strong>with</strong> very large amounts of b<strong>in</strong>ary<br />
data – files that are several megabytes or larger – <strong>in</strong>troduces new challenges that are beyond the scope of these<br />
tutorials. For example, by default <strong>ASP</strong>.<strong>NET</strong> will reject uploads of more than 4 MB, although this can be configured<br />
through the element <strong>in</strong> Web.config. IIS imposes its own file upload size limitations, too. See IIS<br />
Upload File Size for more <strong>in</strong>formation. Furthermore, the time taken to upload large files might exceed the default<br />
110 seconds <strong>ASP</strong>.<strong>NET</strong> will wait for a request. There are also memory and performance issues that arise when<br />
work<strong>in</strong>g <strong>with</strong> large files.<br />
The FileUpload control is impractical for large file uploads. As the file’s contents are be<strong>in</strong>g posted to the server,<br />
the end user must patiently wait <strong>with</strong>out any confirmation that their upload is progress<strong>in</strong>g. This is not so much an<br />
issue when deal<strong>in</strong>g <strong>with</strong> smaller files that can be uploaded <strong>in</strong> a few seconds, but can be an issue when deal<strong>in</strong>g <strong>with</strong><br />
larger files that may take m<strong>in</strong>utes to upload. There are a variety of thirdparty file upload controls that are better<br />
suited for handl<strong>in</strong>g large uploads and many of these vendors provide progress <strong>in</strong>dicators and ActiveX upload<br />
managers that present a much more polished user experience.<br />
If your application needs to handle large files, you’ll need to carefully <strong>in</strong>vestigate the challenges and f<strong>in</strong>d suitable<br />
solutions for your particular needs.<br />
Summary<br />
Build<strong>in</strong>g an application that needs to capture b<strong>in</strong>ary data <strong>in</strong>troduces a number of challenges. In this tutorial we<br />
explored the first two: decid<strong>in</strong>g where to store the b<strong>in</strong>ary data and allow<strong>in</strong>g a user to upload b<strong>in</strong>ary content through<br />
a web page. Over the next three tutorials, we’ll see how to associate the uploaded data <strong>with</strong> a record <strong>in</strong> the database<br />
as well as how to display the b<strong>in</strong>ary data alongside its text data fields.<br />
Happy Programm<strong>in</strong>g!<br />
Further Read<strong>in</strong>g<br />
For more <strong>in</strong>formation on the topics discussed <strong>in</strong> this tutorial, refer to the follow<strong>in</strong>g resources:<br />
• Us<strong>in</strong>g LargeValue <strong>Data</strong> Types<br />
• FileUpload Control QuickStarts<br />
• The <strong>ASP</strong>.<strong>NET</strong> <strong>2.0</strong> FileUpload Server Control<br />
• The Dark Side of File Uploads<br />
About the Author<br />
Scott Mitchell, author of seven <strong>ASP</strong>/<strong>ASP</strong>.<strong>NET</strong> books and founder of 4GuysFromRolla.com, has been work<strong>in</strong>g <strong>with</strong><br />
Microsoft Web technologies s<strong>in</strong>ce 1998. Scott works as an <strong>in</strong>dependent consultant, tra<strong>in</strong>er, and writer. His latest<br />
book is Sams Teach Yourself <strong>ASP</strong>.<strong>NET</strong> <strong>2.0</strong> <strong>in</strong> 24 Hours. He can be reached at mitchell@4GuysFromRolla.com. or
19 of 19<br />
via his blog, which can be found at http://ScottOnWrit<strong>in</strong>g.<strong>NET</strong>.<br />
Special Thanks To…<br />
This tutorial series was reviewed by many helpful reviewers. Lead reviewers for this tutorial were Teresa Murphy<br />
and Bernadette Leigh. Interested <strong>in</strong> review<strong>in</strong>g my upcom<strong>in</strong>g MSDN articles If so, drop me a l<strong>in</strong>e at<br />
mitchell@4GuysFromRolla.com.