Using TemplateFields in the GridView Control - ASP.net
Using TemplateFields in the GridView Control - ASP.net
Using TemplateFields in the GridView Control - ASP.net

You also want an ePaper? Increase the reach of your titles
YUMPU automatically turns print PDFs into web optimized ePapers that Google loves.
1 of 17<br />
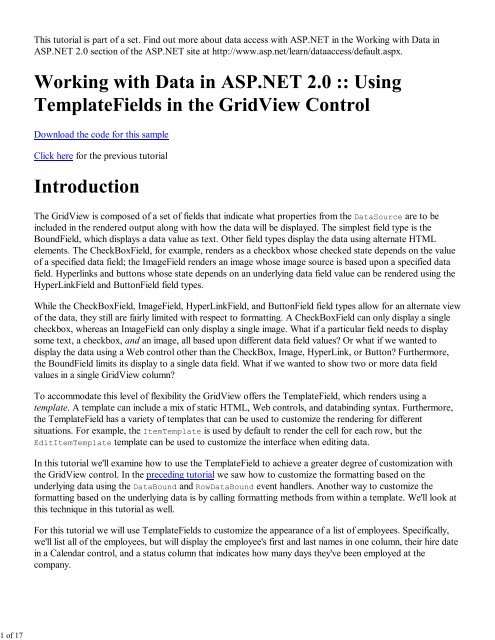
This tutorial is part of a set. F<strong>in</strong>d out more about data access with <strong>ASP</strong>.NET <strong>in</strong> <strong>the</strong> Work<strong>in</strong>g with Data <strong>in</strong><br />
<strong>ASP</strong>.NET 2.0 section of <strong>the</strong> <strong>ASP</strong>.NET site at http://www.asp.<strong>net</strong>/learn/dataaccess/default.aspx.<br />
Work<strong>in</strong>g with Data <strong>in</strong> <strong>ASP</strong>.NET 2.0 :: <strong>Us<strong>in</strong>g</strong><br />
<strong>TemplateFields</strong> <strong>in</strong> <strong>the</strong> <strong>GridView</strong> <strong>Control</strong><br />
Download <strong>the</strong> code for this sample<br />
Click here for <strong>the</strong> previous tutorial<br />
Introduction<br />
The <strong>GridView</strong> is composed of a set of fields that <strong>in</strong>dicate what properties from <strong>the</strong> DataSource are to be<br />
<strong>in</strong>cluded <strong>in</strong> <strong>the</strong> rendered output along with how <strong>the</strong> data will be displayed. The simplest field type is <strong>the</strong><br />
BoundField, which displays a data value as text. O<strong>the</strong>r field types display <strong>the</strong> data us<strong>in</strong>g alternate HTML<br />
elements. The CheckBoxField, for example, renders as a checkbox whose checked state depends on <strong>the</strong> value<br />
of a specified data field; <strong>the</strong> ImageField renders an image whose image source is based upon a specified data<br />
field. Hyperl<strong>in</strong>ks and buttons whose state depends on an underly<strong>in</strong>g data field value can be rendered us<strong>in</strong>g <strong>the</strong><br />
HyperL<strong>in</strong>kField and ButtonField field types.<br />
While <strong>the</strong> CheckBoxField, ImageField, HyperL<strong>in</strong>kField, and ButtonField field types allow for an alternate view<br />
of <strong>the</strong> data, <strong>the</strong>y still are fairly limited with respect to formatt<strong>in</strong>g. A CheckBoxField can only display a s<strong>in</strong>gle<br />
checkbox, whereas an ImageField can only display a s<strong>in</strong>gle image. What if a particular field needs to display<br />
some text, a checkbox, and an image, all based upon different data field values? Or what if we wanted to<br />
display <strong>the</strong> data us<strong>in</strong>g a Web control o<strong>the</strong>r than <strong>the</strong> CheckBox, Image, HyperL<strong>in</strong>k, or Button? Fur<strong>the</strong>rmore,<br />
<strong>the</strong> BoundField limits its display to a s<strong>in</strong>gle data field. What if we wanted to show two or more data field<br />
values <strong>in</strong> a s<strong>in</strong>gle <strong>GridView</strong> column?<br />
To accommodate this level of flexibility <strong>the</strong> <strong>GridView</strong> offers <strong>the</strong> TemplateField, which renders us<strong>in</strong>g a<br />
template. A template can <strong>in</strong>clude a mix of static HTML, Web controls, and datab<strong>in</strong>d<strong>in</strong>g syntax. Fur<strong>the</strong>rmore,<br />
<strong>the</strong> TemplateField has a variety of templates that can be used to customize <strong>the</strong> render<strong>in</strong>g for different<br />
situations. For example, <strong>the</strong> ItemTemplate is used by default to render <strong>the</strong> cell for each row, but <strong>the</strong><br />
EditItemTemplate template can be used to customize <strong>the</strong> <strong>in</strong>terface when edit<strong>in</strong>g data.<br />
In this tutorial we'll exam<strong>in</strong>e how to use <strong>the</strong> TemplateField to achieve a greater degree of customization with<br />
<strong>the</strong> <strong>GridView</strong> control. In <strong>the</strong> preced<strong>in</strong>g tutorial we saw how to customize <strong>the</strong> formatt<strong>in</strong>g based on <strong>the</strong><br />
underly<strong>in</strong>g data us<strong>in</strong>g <strong>the</strong> DataBound and RowDataBound event handlers. Ano<strong>the</strong>r way to customize <strong>the</strong><br />
formatt<strong>in</strong>g based on <strong>the</strong> underly<strong>in</strong>g data is by call<strong>in</strong>g formatt<strong>in</strong>g methods from with<strong>in</strong> a template. We'll look at<br />
this technique <strong>in</strong> this tutorial as well.<br />
For this tutorial we will use <strong>TemplateFields</strong> to customize <strong>the</strong> appearance of a list of employees. Specifically,<br />
we'll list all of <strong>the</strong> employees, but will display <strong>the</strong> employee's first and last names <strong>in</strong> one column, <strong>the</strong>ir hire date<br />
<strong>in</strong> a Calendar control, and a status column that <strong>in</strong>dicates how many days <strong>the</strong>y've been employed at <strong>the</strong><br />
company.
2 of 17<br />
Figure 1: Three <strong>TemplateFields</strong> are Used to Customize <strong>the</strong> Display<br />
Step 1: B<strong>in</strong>d<strong>in</strong>g <strong>the</strong> Data to <strong>the</strong> <strong>GridView</strong><br />
In report<strong>in</strong>g scenarios where you need to use <strong>TemplateFields</strong> to customize <strong>the</strong> appearance, I f<strong>in</strong>d it easiest to<br />
start by creat<strong>in</strong>g a <strong>GridView</strong> control that conta<strong>in</strong>s just BoundFields first and <strong>the</strong>n to add new <strong>TemplateFields</strong><br />
or convert <strong>the</strong> exist<strong>in</strong>g BoundFields to <strong>TemplateFields</strong> as needed. Therefore, let's start this tutorial by add<strong>in</strong>g a<br />
<strong>GridView</strong> to <strong>the</strong> page through <strong>the</strong> Designer and b<strong>in</strong>d<strong>in</strong>g it to an ObjectDataSource that returns <strong>the</strong> list of<br />
employees. These steps will create a <strong>GridView</strong> with BoundFields for each of <strong>the</strong> employee fields.<br />
Open <strong>the</strong> <strong>GridView</strong>TemplateField.aspx page and drag a <strong>GridView</strong> from <strong>the</strong> Toolbox onto <strong>the</strong> Designer.<br />
From <strong>the</strong> <strong>GridView</strong>'s smart tag choose to add a new ObjectDataSource control that <strong>in</strong>vokes <strong>the</strong><br />
EmployeesBLL class's GetEmployees() method.
3 of 17<br />
Figure 2: Add a New ObjectDataSource <strong>Control</strong> that Invokes <strong>the</strong> GetEmployees() Method<br />
B<strong>in</strong>d<strong>in</strong>g <strong>the</strong> <strong>GridView</strong> <strong>in</strong> this manner will automatically add a BoundField for each of <strong>the</strong> employee properties:<br />
EmployeeID, LastName, FirstName, Title, HireDate, ReportsTo, and Country. For this report let's not<br />
bo<strong>the</strong>r with display<strong>in</strong>g <strong>the</strong> EmployeeID, ReportsTo, or Country properties. To remove <strong>the</strong>se BoundFields<br />
you can:<br />
Use <strong>the</strong> Fields dialog box – click on <strong>the</strong> Edit Columns l<strong>in</strong>k from <strong>the</strong> <strong>GridView</strong>'s smart tag to br<strong>in</strong>g up<br />
this dialog box. Next, select <strong>the</strong> BoundFields from <strong>the</strong> lower left list and click <strong>the</strong> red X button to<br />
remove <strong>the</strong> BoundField.<br />
Edit <strong>the</strong> <strong>GridView</strong>'s declarative syntax by hand – from <strong>the</strong> Source view, delete <strong>the</strong> <br />
element for <strong>the</strong> BoundField you wish to remove.<br />
After you have removed <strong>the</strong> EmployeeID, ReportsTo, and Country BoundFields, your <strong>GridView</strong>'s markup<br />
should look like:<br />
<br />
<br />
<br />
<br />
<br />
<br />
<br />
<br />
Take a moment to view our progress <strong>in</strong> a browser. At this po<strong>in</strong>t you should see a table with a record for each<br />
employee and four columns: one for <strong>the</strong> employee's last name, one for <strong>the</strong>ir first name, one for <strong>the</strong>ir title, and<br />
one for <strong>the</strong>ir hire date.
4 of 17<br />
Figure 3: The LastName, FirstName, Title, and HireDate Fields are Displayed for Each Employee<br />
Step 2: Display<strong>in</strong>g <strong>the</strong> First and Last Names <strong>in</strong> a<br />
S<strong>in</strong>gle Column<br />
Currently, each employee's first and last names are displayed <strong>in</strong> a separate column. It might be nice to comb<strong>in</strong>e<br />
<strong>the</strong>m <strong>in</strong>to a s<strong>in</strong>gle column <strong>in</strong>stead. To accomplish this we need to use a TemplateField. We can ei<strong>the</strong>r add a<br />
new TemplateField, add to it <strong>the</strong> needed markup and datab<strong>in</strong>d<strong>in</strong>g syntax, and <strong>the</strong>n delete <strong>the</strong> FirstName and<br />
LastName BoundFields, or we can convert <strong>the</strong> FirstName BoundField <strong>in</strong>to a TemplateField, edit <strong>the</strong><br />
TemplateField to <strong>in</strong>clude <strong>the</strong> LastName value, and <strong>the</strong>n remove <strong>the</strong> LastName BoundField.<br />
Both approaches <strong>net</strong> <strong>the</strong> same result, but personally I like convert<strong>in</strong>g BoundFields to <strong>TemplateFields</strong> when<br />
possible because <strong>the</strong> conversion automatically adds an ItemTemplate and EditItemTemplate with Web<br />
controls and datab<strong>in</strong>d<strong>in</strong>g syntax to mimic <strong>the</strong> appearance and functionality of <strong>the</strong> BoundField. The benefit is<br />
that we'll need to do less work with <strong>the</strong> TemplateField as <strong>the</strong> conversion process will have performed some of<br />
<strong>the</strong> work for us.<br />
To convert an exist<strong>in</strong>g BoundField <strong>in</strong>to a TemplateField, click on <strong>the</strong> Edit Columns l<strong>in</strong>k from <strong>the</strong> <strong>GridView</strong>'s<br />
smart tag, br<strong>in</strong>g<strong>in</strong>g up <strong>the</strong> Fields dialog box. Select <strong>the</strong> BoundField to convert from <strong>the</strong> list <strong>in</strong> <strong>the</strong> lower left<br />
corner and <strong>the</strong>n click <strong>the</strong> "Convert this field <strong>in</strong>to a TemplateField" l<strong>in</strong>k <strong>in</strong> <strong>the</strong> bottom right corner.
5 of 17<br />
Figure 4: Convert a BoundField Into a TemplateField from <strong>the</strong> Fields Dialog Box<br />
Go ahead and convert <strong>the</strong> FirstName BoundField <strong>in</strong>to a TemplateField. After this change <strong>the</strong>re's no<br />
perceptive difference <strong>in</strong> <strong>the</strong> Designer. This is because convert<strong>in</strong>g <strong>the</strong> BoundField <strong>in</strong>to a TemplateField creates<br />
a TemplateField that ma<strong>in</strong>ta<strong>in</strong>s <strong>the</strong> look and feel of <strong>the</strong> BoundField. Despite <strong>the</strong>re be<strong>in</strong>g no visual difference at<br />
this po<strong>in</strong>t <strong>in</strong> <strong>the</strong> Designer, this conversion process has replaced <strong>the</strong> BoundField's declarative syntax <br />
with <strong>the</strong> follow<strong>in</strong>g TemplateField syntax:<br />
<br />
<br />
<br />
<br />
<br />
<br />
<br />
<br />
As you can see, <strong>the</strong> TemplateField consists of two templates – an ItemTemplate that has a Label whose Text<br />
property is set to <strong>the</strong> value of <strong>the</strong> FirstName data field, and an EditItemTemplate with a TextBox control<br />
whose Text property is also set to <strong>the</strong> FirstName data field. The datab<strong>in</strong>d<strong>in</strong>g syntax <strong>in</strong>dicates that <strong>the</strong> data field fieldName is bound to <strong>the</strong> specified Web control<br />
property.<br />
To add <strong>the</strong> LastName data field value to this TemplateField we need to add ano<strong>the</strong>r Label Web control <strong>in</strong> <strong>the</strong><br />
ItemTemplate and b<strong>in</strong>d its Text property to LastName. This can be accomplished ei<strong>the</strong>r by hand or through<br />
<strong>the</strong> Designer. To do it by hand, simply add <strong>the</strong> appropriate declarative syntax to <strong>the</strong> ItemTemplate:<br />
<br />
<br />
6 of 17<br />
<br />
<br />
<br />
<br />
<br />
<br />
To add it through <strong>the</strong> Designer, click on <strong>the</strong> Edit Templates l<strong>in</strong>k from <strong>the</strong> <strong>GridView</strong>'s smart tag. This will<br />
display <strong>the</strong> <strong>GridView</strong>'s template edit<strong>in</strong>g <strong>in</strong>terface. In this <strong>in</strong>terface's smart tag is a list of <strong>the</strong> templates <strong>in</strong> <strong>the</strong><br />
<strong>GridView</strong>. S<strong>in</strong>ce we only have one TemplateField at this po<strong>in</strong>t, <strong>the</strong> only templates listed <strong>in</strong> <strong>the</strong> dropdown list<br />
are those templates for <strong>the</strong> FirstName TemplateField along with <strong>the</strong> EmptyDataTemplate and<br />
PagerTemplate. The EmptyDataTemplate template, if specified, is used to render <strong>the</strong> <strong>GridView</strong>'s output if<br />
<strong>the</strong>re are no results <strong>in</strong> <strong>the</strong> data bound to <strong>the</strong> <strong>GridView</strong>; <strong>the</strong> PagerTemplate, if specified, is used to render <strong>the</strong><br />
pag<strong>in</strong>g <strong>in</strong>terface for a <strong>GridView</strong> that supports pag<strong>in</strong>g.<br />
Figure 5: The <strong>GridView</strong>'s Templates Can Be Edited Through <strong>the</strong> Designer<br />
To also display <strong>the</strong> LastName <strong>in</strong> <strong>the</strong> FirstName TemplateField drag <strong>the</strong> Label control from <strong>the</strong> Toolbox <strong>in</strong>to<br />
<strong>the</strong> FirstName TemplateField's ItemTemplate <strong>in</strong> <strong>the</strong> <strong>GridView</strong>'s template edit<strong>in</strong>g <strong>in</strong>terface.
7 of 17<br />
Figure 6: Add a Label Web <strong>Control</strong> to <strong>the</strong> FirstName TemplateField's ItemTemplate<br />
At this po<strong>in</strong>t <strong>the</strong> Label Web control added to <strong>the</strong> TemplateField has its Text property set to "Label". We need<br />
to change this so that this property is bound to <strong>the</strong> value of <strong>the</strong> LastName data field <strong>in</strong>stead. To accomplish<br />
this click on <strong>the</strong> Label control's smart tag and choose <strong>the</strong> Edit DataB<strong>in</strong>d<strong>in</strong>gs option.<br />
Figure 7: Choose <strong>the</strong> Edit DataB<strong>in</strong>d<strong>in</strong>gs Option from <strong>the</strong> Label's Smart Tag<br />
This will br<strong>in</strong>g up <strong>the</strong> DataB<strong>in</strong>d<strong>in</strong>gs dialog box. From here you can select <strong>the</strong> property to participate <strong>in</strong><br />
datab<strong>in</strong>d<strong>in</strong>g from <strong>the</strong> list on <strong>the</strong> left and choose <strong>the</strong> field to b<strong>in</strong>d <strong>the</strong> data to from <strong>the</strong> dropdown list on <strong>the</strong><br />
right. Choose <strong>the</strong> Text property from <strong>the</strong> left and <strong>the</strong> LastName field from <strong>the</strong> right and click OK.
8 of 17<br />
Figure 8: B<strong>in</strong>d <strong>the</strong> Text Property to <strong>the</strong> LastName Data Field<br />
Note: The DataB<strong>in</strong>d<strong>in</strong>gs dialog box allows you to <strong>in</strong>dicate whe<strong>the</strong>r to perform twoway datab<strong>in</strong>d<strong>in</strong>g. If you<br />
leave this unchecked, <strong>the</strong> datab<strong>in</strong>d<strong>in</strong>g syntax will be used <strong>in</strong>stead of . Ei<strong>the</strong>r approach is f<strong>in</strong>e for this tutorial. Twoway datab<strong>in</strong>d<strong>in</strong>g becomes important<br />
when <strong>in</strong>sert<strong>in</strong>g and edit<strong>in</strong>g data. For simply display<strong>in</strong>g data, however, ei<strong>the</strong>r approach will work equally well.<br />
We'll discuss twoway datab<strong>in</strong>d<strong>in</strong>g <strong>in</strong> detail <strong>in</strong> future tutorials.<br />
Take a moment to view this page through a browser. As you can see, <strong>the</strong> <strong>GridView</strong> still <strong>in</strong>cludes four<br />
columns; however, <strong>the</strong> FirstName column now lists both <strong>the</strong> FirstName and LastName data field values.<br />
Figure 9: Both <strong>the</strong> FirstName and LastName Values are Shown <strong>in</strong> a S<strong>in</strong>gle Column<br />
To complete this first step, remove <strong>the</strong> LastName BoundField and rename <strong>the</strong> FirstName TemplateField's<br />
HeaderText property to "Name". After <strong>the</strong>se changes <strong>the</strong> <strong>GridView</strong>'s declarative markup should look like <strong>the</strong><br />
follow<strong>in</strong>g:<br />
<br />
9 of 17<br />
<br />
<br />
<br />
<br />
<br />
<br />
<br />
<br />
<br />
<br />
<br />
<br />
<br />
Figure 10: Each Employee's First and Last Names are Displayed <strong>in</strong> One Column<br />
Step 3: <strong>Us<strong>in</strong>g</strong> <strong>the</strong> Calendar <strong>Control</strong> to Display <strong>the</strong> HiredDate Field<br />
Display<strong>in</strong>g a data field value as text <strong>in</strong> a <strong>GridView</strong> is as simple as us<strong>in</strong>g a BoundField. For certa<strong>in</strong> scenarios,<br />
however, <strong>the</strong> data is best expressed us<strong>in</strong>g a particular Web control <strong>in</strong>stead of just text. Such customization of<br />
<strong>the</strong> display of data is possible with <strong>TemplateFields</strong>. For example, ra<strong>the</strong>r than display <strong>the</strong> employee's hire date<br />
as text, we could show a calendar (us<strong>in</strong>g <strong>the</strong> Calendar control) with <strong>the</strong>ir hire date highlighted.<br />
To accomplish this, start by convert<strong>in</strong>g <strong>the</strong> HiredDate BoundField <strong>in</strong>to a TemplateField. Simply go to <strong>the</strong><br />
<strong>GridView</strong>'s smart tag and click <strong>the</strong> Edit Columns l<strong>in</strong>k, br<strong>in</strong>g<strong>in</strong>g up <strong>the</strong> Fields dialog box. Select <strong>the</strong> HiredDate<br />
BoundField and click "Convert this field <strong>in</strong>to a TemplateField."
10 of 17<br />
Figure 11: Convert <strong>the</strong> HiredDate BoundField Into a TemplateField<br />
As we saw <strong>in</strong> Step 2, this will replace <strong>the</strong> BoundField with a TemplateField that conta<strong>in</strong>s an ItemTemplate<br />
and EditItemTemplate with a Label and TextBox whose Text properties are bound to <strong>the</strong> HiredDate value<br />
us<strong>in</strong>g <strong>the</strong> datab<strong>in</strong>d<strong>in</strong>g syntax .<br />
To replace <strong>the</strong> text with a Calendar control, edit <strong>the</strong> template by remov<strong>in</strong>g <strong>the</strong> Label and add<strong>in</strong>g a Calendar<br />
control. From <strong>the</strong> Designer, select Edit Templates from <strong>the</strong> <strong>GridView</strong>'s smart tag and choose <strong>the</strong> HireDate<br />
TemplateField's ItemTemplate from <strong>the</strong> dropdown list. Next, delete <strong>the</strong> Label control and drag a Calendar<br />
control from <strong>the</strong> Toolbox <strong>in</strong>to <strong>the</strong> template edit<strong>in</strong>g <strong>in</strong>terface.
11 of 17<br />
Figure 12: Add a Calendar <strong>Control</strong> to <strong>the</strong> HireDate TemplateField's ItemTemplate<br />
At this po<strong>in</strong>t each row <strong>in</strong> <strong>the</strong> <strong>GridView</strong> will conta<strong>in</strong> a Calendar control <strong>in</strong> its HiredDate TemplateField.<br />
However, <strong>the</strong> employee's actual HiredDate value is not set anywhere <strong>in</strong> <strong>the</strong> Calendar control, caus<strong>in</strong>g each<br />
Calendar control to default to show<strong>in</strong>g <strong>the</strong> current month and date. To remedy this, we need to assign each<br />
employee's HiredDate to <strong>the</strong> Calendar control's SelectedDate and VisibleDate properties.<br />
From <strong>the</strong> Calendar control's smart tag, choose Edit DataB<strong>in</strong>d<strong>in</strong>gs. Next, b<strong>in</strong>d both SelectedDate and<br />
VisibleDate properties to <strong>the</strong> HiredDate data field.<br />
Figure 13: B<strong>in</strong>d <strong>the</strong> SelectedDate and VisibleDate Properties to <strong>the</strong> HiredDate Data Field
12 of 17<br />
Note: The Calendar control's selected date need not necessarily be visible. For example, a Calendar may have<br />
August 1 st , 1999 as <strong>the</strong> selected date, but be show<strong>in</strong>g <strong>the</strong> current month and year. The selected date and<br />
visible date are specified by <strong>the</strong> Calendar control's SelectedDate and VisibleDate properties. S<strong>in</strong>ce we<br />
want to both select <strong>the</strong> employee's HiredDate and make sure that it's shown we need to b<strong>in</strong>d both of <strong>the</strong>se<br />
properties to <strong>the</strong> HireDate data field.<br />
When view<strong>in</strong>g <strong>the</strong> page <strong>in</strong> a browser, <strong>the</strong> calendar now shows <strong>the</strong> month of <strong>the</strong> employee's hired date and<br />
selects that particular date.<br />
Figure 14: The Employee's HiredDate is Shown <strong>in</strong> <strong>the</strong> Calendar <strong>Control</strong><br />
Note: Contrary to all <strong>the</strong> examples we've seen thus far, for this tutorial we did not set EnableViewState<br />
property to false for this <strong>GridView</strong>. The reason for this decision is because click<strong>in</strong>g <strong>the</strong> dates of <strong>the</strong> Calendar<br />
control causes a postback, sett<strong>in</strong>g <strong>the</strong> Calendar's selected date to <strong>the</strong> date just clicked. If <strong>the</strong> <strong>GridView</strong>'s view<br />
state is disabled, however, on each postback <strong>the</strong> <strong>GridView</strong>'s data is rebound to its underly<strong>in</strong>g data source,<br />
which causes <strong>the</strong> Calendar's selected date to be set back to <strong>the</strong> employee's HireDate, overwrit<strong>in</strong>g <strong>the</strong> date<br />
chosen by <strong>the</strong> user.<br />
For this tutorial this is a moot discussion s<strong>in</strong>ce <strong>the</strong> user is not able to update <strong>the</strong> employee's HireDate. It<br />
would probably be best to configure <strong>the</strong> Calendar control so that its dates are not selectable. Regardless, this<br />
tutorial shows that <strong>in</strong> some circumstances view state must be enabled <strong>in</strong> order to provide certa<strong>in</strong> functionality.<br />
Step 4: Show<strong>in</strong>g <strong>the</strong> Number of Days <strong>the</strong> Employee<br />
Has Worked for <strong>the</strong> Company
13 of 17<br />
So far we have seen two applications of <strong>TemplateFields</strong>:<br />
Comb<strong>in</strong><strong>in</strong>g two or more data field values <strong>in</strong>to one column, and<br />
Express<strong>in</strong>g a data field value us<strong>in</strong>g a Web control <strong>in</strong>stead of text<br />
A third use of <strong>TemplateFields</strong> is <strong>in</strong> display<strong>in</strong>g metadata about <strong>the</strong> <strong>GridView</strong>'s underly<strong>in</strong>g data. In addition to<br />
show<strong>in</strong>g <strong>the</strong> employees' hire dates, for example, we might also want to have a column that displays how many<br />
total days <strong>the</strong>y've been on <strong>the</strong> job.<br />
Yet ano<strong>the</strong>r use of <strong>TemplateFields</strong> arises <strong>in</strong> scenarios when <strong>the</strong> underly<strong>in</strong>g data needs to be displayed<br />
differently <strong>in</strong> <strong>the</strong> web page report than <strong>in</strong> <strong>the</strong> format it's stored <strong>in</strong> <strong>the</strong> database. Imag<strong>in</strong>e that <strong>the</strong> Employees<br />
table had a Gender field that stored <strong>the</strong> character M or F to <strong>in</strong>dicate <strong>the</strong> sex of <strong>the</strong> employee. When display<strong>in</strong>g<br />
this <strong>in</strong>formation <strong>in</strong> a web page we might want to show <strong>the</strong> gender as ei<strong>the</strong>r "Male" or "Female", as opposed to<br />
just "M" or "F".<br />
Both of <strong>the</strong>se scenarios can be handled by creat<strong>in</strong>g a formatt<strong>in</strong>g method <strong>in</strong> <strong>the</strong> <strong>ASP</strong>.NET page's codebeh<strong>in</strong>d<br />
class (or <strong>in</strong> a separate class library, implemented as a static method) that is <strong>in</strong>voked from <strong>the</strong> template. Such<br />
a formatt<strong>in</strong>g method is <strong>in</strong>voked from <strong>the</strong> template us<strong>in</strong>g <strong>the</strong> same datab<strong>in</strong>d<strong>in</strong>g syntax seen earlier. The<br />
formatt<strong>in</strong>g method can take <strong>in</strong> any number of parameters, but must return a str<strong>in</strong>g. This returned str<strong>in</strong>g is <strong>the</strong><br />
HTML that is <strong>in</strong>jected <strong>in</strong>to <strong>the</strong> template.<br />
To illustrate this concept, let's augment our tutorial to show a column that lists <strong>the</strong> total number of days an<br />
employee has been on <strong>the</strong> job. This formatt<strong>in</strong>g method will take <strong>in</strong> a Northw<strong>in</strong>d.EmployeesRow object and<br />
return <strong>the</strong> number of days <strong>the</strong> employee has been employed as a str<strong>in</strong>g. This method can be added to <strong>the</strong><br />
<strong>ASP</strong>.NET page's codebeh<strong>in</strong>d class, but must be marked as protected or public <strong>in</strong> order to be accessible<br />
from <strong>the</strong> template.<br />
protected str<strong>in</strong>g DisplayDaysOnJob(Northw<strong>in</strong>d.EmployeesRow employee)<br />
{<br />
// Make sure HiredDate is not null... if so, return "Unknown"<br />
if (employee.IsHireDateNull())<br />
return "Unknown";<br />
else<br />
{<br />
// Returns <strong>the</strong> number of days between <strong>the</strong> current<br />
// date/time and HireDate<br />
TimeSpan ts = DateTime.Now.Subtract(employee.HireDate);<br />
return ts.Days.ToStr<strong>in</strong>g("#,##0");<br />
}<br />
}<br />
S<strong>in</strong>ce <strong>the</strong> HiredDate field can conta<strong>in</strong> NULL database values we must first ensure that <strong>the</strong> value is not NULL<br />
before proceed<strong>in</strong>g with <strong>the</strong> calculation. If <strong>the</strong> HiredDate value is NULL, we simply return <strong>the</strong> str<strong>in</strong>g<br />
"Unknown"; if it is not NULL, we compute <strong>the</strong> difference between <strong>the</strong> current time and <strong>the</strong> HiredDate value<br />
and return <strong>the</strong> number of days.<br />
To utilize this method we need to <strong>in</strong>voke it from a TemplateField <strong>in</strong> <strong>the</strong> <strong>GridView</strong> us<strong>in</strong>g <strong>the</strong> datab<strong>in</strong>d<strong>in</strong>g<br />
syntax. Start by add<strong>in</strong>g a new TemplateField to <strong>the</strong> <strong>GridView</strong> by click<strong>in</strong>g on <strong>the</strong> Edit Columns l<strong>in</strong>k <strong>in</strong> <strong>the</strong><br />
<strong>GridView</strong>'s smart tag and add<strong>in</strong>g a new TemplateField.
14 of 17<br />
Figure 15: Add a New TemplateField to <strong>the</strong> <strong>GridView</strong><br />
Set this new TemplateField's HeaderText property to "Days on <strong>the</strong> Job" and its ItemStyle's<br />
HorizontalAlign property to Center. To call <strong>the</strong> DisplayDaysOnJob method from <strong>the</strong> template, add an<br />
ItemTemplate and use <strong>the</strong> follow<strong>in</strong>g datab<strong>in</strong>d<strong>in</strong>g syntax:<br />
<br />
Conta<strong>in</strong>er.DataItem returns a DataRowView object correspond<strong>in</strong>g to <strong>the</strong> DataSource record bound to <strong>the</strong><br />
<strong>GridView</strong>Row. Its Row property returns <strong>the</strong> stronglytyped Northw<strong>in</strong>d.EmployeesRow, which is passed to <strong>the</strong><br />
DisplayDaysOnJob method. This datab<strong>in</strong>d<strong>in</strong>g syntax can appear directly <strong>in</strong> <strong>the</strong> ItemTemplate (as shown <strong>in</strong><br />
<strong>the</strong> declarative syntax below) or can be assigned to <strong>the</strong> Text property of a Label Web control.<br />
Note: Alternatively, <strong>in</strong>stead of pass<strong>in</strong>g <strong>in</strong> an EmployeesRow <strong>in</strong>stance, we could just pass <strong>in</strong> <strong>the</strong> HireDate value<br />
us<strong>in</strong>g . However, <strong>the</strong> Eval method returns an object, so<br />
we'd have to change our DisplayDaysOnJob method signature to accept an <strong>in</strong>put parameter of type object,<br />
<strong>in</strong>stead. We can't bl<strong>in</strong>dly cast <strong>the</strong> Eval("HireDate") call to a DateTime because <strong>the</strong> HireDate column <strong>in</strong> <strong>the</strong><br />
Employees table can conta<strong>in</strong> NULL values. Therefore, we'd need to accept an object as <strong>the</strong> <strong>in</strong>put parameter<br />
for <strong>the</strong> DisplayDaysOnJob method, check to see if it had a database NULL value (which can be accomplished<br />
us<strong>in</strong>g Convert.IsDBNull(objectToCheck)), and <strong>the</strong>n proceed accord<strong>in</strong>gly.<br />
Due to <strong>the</strong>se subtleties, I've opted to pass <strong>in</strong> <strong>the</strong> entire EmployeesRow <strong>in</strong>stance. In <strong>the</strong> next tutorial we'll see a<br />
more fitt<strong>in</strong>g example for us<strong>in</strong>g <strong>the</strong> Eval("columnName") syntax for pass<strong>in</strong>g an <strong>in</strong>put parameter <strong>in</strong>to a<br />
formatt<strong>in</strong>g method.<br />
The follow<strong>in</strong>g shows <strong>the</strong> declarative syntax for our <strong>GridView</strong> after <strong>the</strong> TemplateField has been added and <strong>the</strong><br />
DisplayDaysOnJob method called from <strong>the</strong> ItemTemplate:<br />
15 of 17<br />
<br />
<br />
<br />
<br />
<br />
<br />
<br />
<br />
<br />
<br />
<br />
<br />
<br />
<br />
<br />
<br />
<br />
<br />
<br />
<br />
<br />
<br />
<br />
<br />
<br />
<br />
<br />
<br />
Figure 16 shows <strong>the</strong> completed tutorial, when viewed through a browser.
16 of 17<br />
Figure 16: The Number of Days <strong>the</strong> Employee Has Been on <strong>the</strong> Job is Displayed<br />
Summary<br />
The TemplateField <strong>in</strong> <strong>the</strong> <strong>GridView</strong> control allows for a higher degree of flexibility <strong>in</strong> display<strong>in</strong>g data than is<br />
available with <strong>the</strong> o<strong>the</strong>r field controls. <strong>TemplateFields</strong> are ideal for situations where:<br />
Multiple data fields need to be displayed <strong>in</strong> one <strong>GridView</strong> column<br />
The data is best expressed us<strong>in</strong>g a Web control ra<strong>the</strong>r than pla<strong>in</strong> text<br />
The output depends on <strong>the</strong> underly<strong>in</strong>g data, such as display<strong>in</strong>g metadata or <strong>in</strong> reformatt<strong>in</strong>g <strong>the</strong> data<br />
In addition to customiz<strong>in</strong>g <strong>the</strong> display of data, <strong>TemplateFields</strong> are also used for customiz<strong>in</strong>g <strong>the</strong> user <strong>in</strong>terfaces<br />
used for edit<strong>in</strong>g and <strong>in</strong>sert<strong>in</strong>g data, as we'll see <strong>in</strong> future tutorials.<br />
The next two tutorials cont<strong>in</strong>ue explor<strong>in</strong>g templates, start<strong>in</strong>g with a look at us<strong>in</strong>g <strong>TemplateFields</strong> <strong>in</strong> a<br />
DetailsView. Follow<strong>in</strong>g that, we'll turn to <strong>the</strong> FormView, which uses templates <strong>in</strong> lieu of fields to provide<br />
greater flexibility <strong>in</strong> <strong>the</strong> layout and structure of <strong>the</strong> data.<br />
Happy Programm<strong>in</strong>g!<br />
Click here for <strong>the</strong> next tutorial<br />
About <strong>the</strong> Author<br />
Scott Mitchell, author of six <strong>ASP</strong>/<strong>ASP</strong>.NET books and founder of 4GuysFromRolla.com, has been work<strong>in</strong>g
17 of 17<br />
with Microsoft Web technologies s<strong>in</strong>ce 1998. Scott works as an <strong>in</strong>dependent consultant, tra<strong>in</strong>er, and writer,<br />
recently complet<strong>in</strong>g his latest book, Sams Teach Yourself <strong>ASP</strong>.NET 2.0 <strong>in</strong> 24 Hours. He can be reached at<br />
mitchell@4guysfromrolla.com or via his blog, which can be found at http://ScottOnWrit<strong>in</strong>g.NET.<br />
Special Thanks To…<br />
This tutorial series was reviewed by many helpful reviewers. Lead reviewer for this tutorial was Dan Jagers.<br />
Interested <strong>in</strong> review<strong>in</strong>g my upcom<strong>in</strong>g MSDN articles? If so, drop me a l<strong>in</strong>e at mitchell@4GuysFromRolla.com.