An Overview of Inserting,Updating and Deleting Data with ... - ASP.net
An Overview of Inserting,Updating and Deleting Data with ... - ASP.net
An Overview of Inserting,Updating and Deleting Data with ... - ASP.net

Create successful ePaper yourself
Turn your PDF publications into a flip-book with our unique Google optimized e-Paper software.
1 <strong>of</strong> 12<br />
This tutorial is part <strong>of</strong> a set. Find out more about data access <strong>with</strong> <strong>ASP</strong>.NET in the Working <strong>with</strong> <strong>Data</strong><br />
in <strong>ASP</strong>.NET 2.0 section <strong>of</strong> the <strong>ASP</strong>.NET site at http://www.asp.<strong>net</strong>/learn/dataaccess/default.aspx.<br />
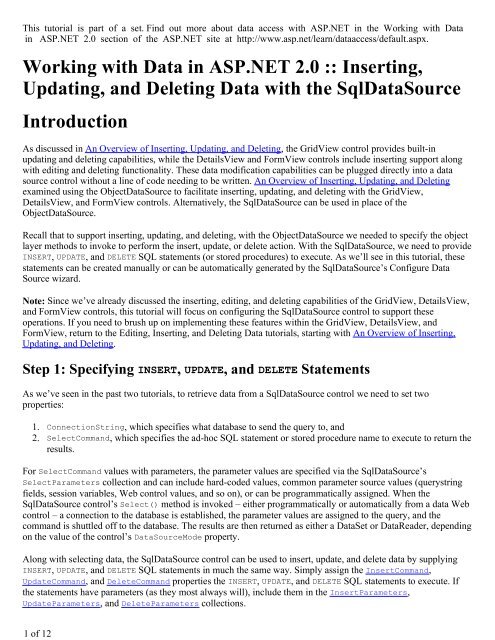
Working <strong>with</strong> <strong>Data</strong> in <strong>ASP</strong>.NET 2.0 :: <strong>Inserting</strong>,<br />
<strong>Updating</strong>, <strong>and</strong> <strong>Deleting</strong> <strong>Data</strong> <strong>with</strong> the Sql<strong>Data</strong>Source<br />
Introduction<br />
As discussed in <strong>An</strong> <strong>Overview</strong> <strong>of</strong> <strong>Inserting</strong>, <strong>Updating</strong>, <strong>and</strong> <strong>Deleting</strong>, the GridView control provides builtin<br />
updating <strong>and</strong> deleting capabilities, while the DetailsView <strong>and</strong> FormView controls include inserting support along<br />
<strong>with</strong> editing <strong>and</strong> deleting functionality. These data modification capabilities can be plugged directly into a data<br />
source control <strong>with</strong>out a line <strong>of</strong> code needing to be written. <strong>An</strong> <strong>Overview</strong> <strong>of</strong> <strong>Inserting</strong>, <strong>Updating</strong>, <strong>and</strong> <strong>Deleting</strong><br />
examined using the Object<strong>Data</strong>Source to facilitate inserting, updating, <strong>and</strong> deleting <strong>with</strong> the GridView,<br />
DetailsView, <strong>and</strong> FormView controls. Alternatively, the Sql<strong>Data</strong>Source can be used in place <strong>of</strong> the<br />
Object<strong>Data</strong>Source.<br />
Recall that to support inserting, updating, <strong>and</strong> deleting, <strong>with</strong> the Object<strong>Data</strong>Source we needed to specify the object<br />
layer methods to invoke to perform the insert, update, or delete action. With the Sql<strong>Data</strong>Source, we need to provide<br />
INSERT, UPDATE, <strong>and</strong> DELETE SQL statements (or stored procedures) to execute. As we’ll see in this tutorial, these<br />
statements can be created manually or can be automatically generated by the Sql<strong>Data</strong>Source’s Configure <strong>Data</strong><br />
Source wizard.<br />
Note: Since we’ve already discussed the inserting, editing, <strong>and</strong> deleting capabilities <strong>of</strong> the GridView, DetailsView,<br />
<strong>and</strong> FormView controls, this tutorial will focus on configuring the Sql<strong>Data</strong>Source control to support these<br />
operations. If you need to brush up on implementing these features <strong>with</strong>in the GridView, DetailsView, <strong>and</strong><br />
FormView, return to the Editing, <strong>Inserting</strong>, <strong>and</strong> <strong>Deleting</strong> <strong>Data</strong> tutorials, starting <strong>with</strong> <strong>An</strong> <strong>Overview</strong> <strong>of</strong> <strong>Inserting</strong>,<br />
<strong>Updating</strong>, <strong>and</strong> <strong>Deleting</strong>.<br />
Step 1: Specifying INSERT, UPDATE, <strong>and</strong> DELETE Statements<br />
As we’ve seen in the past two tutorials, to retrieve data from a Sql<strong>Data</strong>Source control we need to set two<br />
properties:<br />
1. ConnectionString, which specifies what database to send the query to, <strong>and</strong><br />
2. SelectComm<strong>and</strong>, which specifies the adhoc SQL statement or stored procedure name to execute to return the<br />
results.<br />
For SelectComm<strong>and</strong> values <strong>with</strong> parameters, the parameter values are specified via the Sql<strong>Data</strong>Source’s<br />
SelectParameters collection <strong>and</strong> can include hardcoded values, common parameter source values (querystring<br />
fields, session variables, Web control values, <strong>and</strong> so on), or can be programmatically assigned. When the<br />
Sql<strong>Data</strong>Source control’s Select() method is invoked – either programmatically or automatically from a data Web<br />
control – a connection to the database is established, the parameter values are assigned to the query, <strong>and</strong> the<br />
comm<strong>and</strong> is shuttled <strong>of</strong>f to the database. The results are then returned as either a <strong>Data</strong>Set or <strong>Data</strong>Reader, depending<br />
on the value <strong>of</strong> the control’s <strong>Data</strong>SourceMode property.<br />
Along <strong>with</strong> selecting data, the Sql<strong>Data</strong>Source control can be used to insert, update, <strong>and</strong> delete data by supplying<br />
INSERT, UPDATE, <strong>and</strong> DELETE SQL statements in much the same way. Simply assign the InsertComm<strong>and</strong>,<br />
UpdateComm<strong>and</strong>, <strong>and</strong> DeleteComm<strong>and</strong> properties the INSERT, UPDATE, <strong>and</strong> DELETE SQL statements to execute. If<br />
the statements have parameters (as they most always will), include them in the InsertParameters,<br />
UpdateParameters, <strong>and</strong> DeleteParameters collections.
2 <strong>of</strong> 12<br />
Once an InsertComm<strong>and</strong>, UpdateComm<strong>and</strong>, or DeleteComm<strong>and</strong> value has been specified, the “Enable <strong>Inserting</strong>”,<br />
“Enable Editing”, or “Enable <strong>Deleting</strong>” option in the corresponding data Web control’s smart tag will become<br />
available. To illustrate this, let’s take an example from the Querying.aspx page we created in the Querying <strong>Data</strong><br />
<strong>with</strong> the Sql<strong>Data</strong>Source Control tutorial <strong>and</strong> augment it to include delete capabilities.<br />
Start by opening the InsertUpdateDelete.aspx <strong>and</strong> Querying.aspx pages from the Sql<strong>Data</strong>Source folder.<br />
From the Designer on the Querying.aspx page, select the Sql<strong>Data</strong>Source <strong>and</strong> GridView from the first example<br />
(the Products<strong>Data</strong>Source <strong>and</strong> GridView1 controls). After selecting the two controls, go to the Edit menu <strong>and</strong><br />
choose Copy (or just hit Ctrl+C). Next, go to the Designer <strong>of</strong> InsertUpdateDelete.aspx <strong>and</strong> paste in the<br />
controls. After you have moved the two controls over to InsertUpdateDelete.aspx, test out the page in a<br />
browser. You should see the values <strong>of</strong> the ProductID, ProductName, <strong>and</strong> UnitPrice columns for all <strong>of</strong> the records<br />
in the Products database table.<br />
Figure 1: All <strong>of</strong> the Products are Listed, Ordered by ProductID<br />
Adding the Sql<strong>Data</strong>Source’s DeleteComm<strong>and</strong> <strong>and</strong> DeleteParameters<br />
Properties<br />
At this point we have a Sql<strong>Data</strong>Source that simply returns all <strong>of</strong> the records from the Products table <strong>and</strong> a<br />
GridView that renders this data. Our goal is to extend this example to allow for the user to delete products via the<br />
GridView. To accomplish this we need to specify values for the Sql<strong>Data</strong>Source control’s DeleteComm<strong>and</strong> <strong>and</strong><br />
DeleteParameters properties <strong>and</strong> then configure the GridView to support deleting.
3 <strong>of</strong> 12<br />
The DeleteComm<strong>and</strong> <strong>and</strong> DeleteParameters properties can be specified in a number <strong>of</strong> ways:<br />
• Through the declarative syntax<br />
• From the Properties window in the Designer<br />
• From the “Specify a custom SQL statement or stored procedure” screen in the Configure <strong>Data</strong> Source wizard<br />
• Via the Advanced button in the “Specify columns from a table <strong>of</strong> view” screen in the Configure <strong>Data</strong> Source<br />
wizard, which will actually automatically generate the DELETE SQL statement <strong>and</strong> parameter collection used<br />
in the DeleteComm<strong>and</strong> <strong>and</strong> DeleteParameters properties<br />
We’ll examine how to automatically have the DELETE statement created in Step 2. For now, let’s use the Properties<br />
window in the Designer, although the Configure <strong>Data</strong> Source wizard or declarative syntax option would work just<br />
as well.<br />
From the Designer in InsertUpdateDelete.aspx, click on the Products<strong>Data</strong>Source Sql<strong>Data</strong>Source <strong>and</strong> then<br />
bring up the Properties window (from the View menu, choose Properties window, or simply hit F4). Select the<br />
DeleteQuery property, which will bring up a set <strong>of</strong> ellipses.<br />
Figure 2: Select the DeleteQuery Property from the Properties Window
4 <strong>of</strong> 12<br />
Note: The Sql<strong>Data</strong>Source doesn’t have a DeleteQuery property. Rather, DeleteQuery is a combination <strong>of</strong> the<br />
DeleteComm<strong>and</strong> <strong>and</strong> DeleteParameters properties <strong>and</strong> is only listed in the Properties window when viewing the<br />
window through the Designer. If you are looking at the Properties window in the Source view, you’ll find the<br />
DeleteComm<strong>and</strong> property instead.<br />
Click the ellipses in the DeleteQuery property to bring up the Comm<strong>and</strong> <strong>and</strong> Parameter Editor dialog box (see<br />
Figure 3). From this dialog box you can specify the DELETE SQL statement <strong>and</strong> specify the parameters. Enter the<br />
following query into the DELETE comm<strong>and</strong> textbox (either manually or using the Query Builder, if you prefer):<br />
DELETE FROM Products<br />
WHERE ProductID = @ProductID<br />
Next, click the Refresh Parameters button to add the @ProductID parameter to the list <strong>of</strong> parameters below.<br />
Figure 3: Select the DeleteQuery Property from the Properties Window<br />
Do not provide a value for this parameter (leave its Parameter source at “None”). Once we add deleting support to<br />
the GridView, the GridView will automatically supply this parameter value, using the value <strong>of</strong> its <strong>Data</strong>Keys<br />
collection for the row whose Delete button was clicked.<br />
Note: The parameter name used in the DELETE query must be the same as the name <strong>of</strong> the <strong>Data</strong>KeyNames value in<br />
the GridView, DetailsView, or FormView. That is, the parameter in the DELETE statement is purposefully named<br />
@ProductID (instead <strong>of</strong>, say, @ID), because the primary key column name in the Products table (<strong>and</strong> therefore the<br />
<strong>Data</strong>KeyNames value in the GridView) is ProductID.<br />
If the parameter name <strong>and</strong> <strong>Data</strong>KeyNames value doesn’t match, the GridView cannot automatically assign the<br />
parameter the value from the <strong>Data</strong>Keys collection.
5 <strong>of</strong> 12<br />
After entering the deleterelated information into the Comm<strong>and</strong> <strong>and</strong> Parameter Editor dialog box click OK <strong>and</strong> go<br />
to the Source view to examine the resulting declarative markup:<br />
<br />
<br />
<br />
<br />
<br />
Note the addition <strong>of</strong> the DeleteComm<strong>and</strong> property as well as the section <strong>and</strong> the Parameter<br />
object named productID.<br />
Configuring the GridView for <strong>Deleting</strong><br />
With the DeleteComm<strong>and</strong> property added, the GridView’s smart tag now contains the “Enable <strong>Deleting</strong>” option. Go<br />
ahead <strong>and</strong> check this checkbox. As discussed in <strong>An</strong> <strong>Overview</strong> <strong>of</strong> <strong>Inserting</strong>, <strong>Updating</strong>, <strong>and</strong> <strong>Deleting</strong>, this causes the<br />
GridView to add a Comm<strong>and</strong>Field <strong>with</strong> its ShowDeleteButton property set to true. As Figure 4 shows, when the<br />
page is visited through a browser a Delete button is included. Test this page out by deleting some products.<br />
Figure 4: Each GridView Row Now Includes a Delete Button
6 <strong>of</strong> 12<br />
Upon clicking a Delete button, a postback occurs, the GridView assigns the ProductID parameter the value <strong>of</strong> the<br />
<strong>Data</strong>Keys collection value for the row whose Delete button was clicked, <strong>and</strong> invokes the Sql<strong>Data</strong>Source’s Delete<br />
() method. The Sql<strong>Data</strong>Source control then connects to the database <strong>and</strong> executes the DELETE statement. The<br />
GridView then rebinds to the Sql<strong>Data</strong>Source, getting back <strong>and</strong> displaying the current set <strong>of</strong> products (which no<br />
longer includes the justdeleted record).<br />
Note: Since the GridView uses its <strong>Data</strong>Keys collection to populate the Sql<strong>Data</strong>Source parameters, it’s vital that the<br />
GridView’s <strong>Data</strong>KeyNames property be set to the column(s) that constitute the primary key <strong>and</strong> that the<br />
Sql<strong>Data</strong>Source’s SelectComm<strong>and</strong> returns these columns. Moreover, it’s important that the parameter name in the<br />
Sql<strong>Data</strong>Source’s DeleteComm<strong>and</strong> is set to @ProductID. If the <strong>Data</strong>KeyNames property is not set or the parameter is<br />
not named @ProductsID, clicking the Delete button will cause a postback, but won’t actually delete any record.<br />
Figure 5 depicts this interaction graphically. Refer back to the Examining the Events Associated <strong>with</strong> <strong>Inserting</strong>,<br />
<strong>Updating</strong>, <strong>and</strong> <strong>Deleting</strong> tutorial for a more detailed discussion on the chain <strong>of</strong> events associated <strong>with</strong> inserting,<br />
updating, <strong>and</strong> deleting from a data Web control.<br />
Figure 5: Clicking the Delete Button in the GridView Invokes the Sql<strong>Data</strong>Source’s Delete() Method<br />
Step 2: Automatically Generating the INSERT, UPDATE, <strong>and</strong> DELETE<br />
Statements<br />
As Step 1 examined, INSERT, UPDATE, <strong>and</strong> DELETE SQL statements can be specified through the Properties window<br />
or the control’s declarative syntax. However, this approach requires that we manually write out the SQL statements<br />
by h<strong>and</strong>, which can be monotonous <strong>and</strong> errorprone. Fortunately, the Configure <strong>Data</strong> Source wizard provides an<br />
option to have the INSERT, UPDATE, <strong>and</strong> DELETE statements automatically generated when using the “Specify
7 <strong>of</strong> 12<br />
columns from a table <strong>of</strong> view” screen.<br />
Let’s explore this automatic generation option. Add a DetailsView to the Designer in InsertUpdateDelete.aspx<br />
<strong>and</strong> set its ID property to ManageProducts. Next, from the DetailsView’s smart tag, choose to create a new data<br />
source <strong>and</strong> create a Sql<strong>Data</strong>Source named ManageProducts<strong>Data</strong>Source.<br />
Figure 6: Create a New Sql<strong>Data</strong>Source Named ManageProducts<strong>Data</strong>Source<br />
From the Configure <strong>Data</strong> Source wizard, opt to use the NORTHWINDConnectionString connection string <strong>and</strong> click<br />
Next. From the “Configure the Select Statement” screen, leave the “Specify columns from a table or view” radio<br />
button selected <strong>and</strong> pick the Products table from the dropdown list. Select the ProductID, ProductName,<br />
UnitPrice, <strong>and</strong> Discontinued columns from the checkbox list.
8 <strong>of</strong> 12<br />
Figure 7: Using the Products Table, Return the ProductID, ProductName, UnitPrice, <strong>and</strong> Discontinued<br />
Columns<br />
To automatically generate INSERT, UPDATE, <strong>and</strong> DELETE statements based on the selected table <strong>and</strong> columns, click<br />
the Advanced button <strong>and</strong> check the “Generate INSERT, UPDATE, <strong>and</strong> DELETE statements” checkbox.<br />
Figure 8: Check the “Generate INSERT, UPDATE, <strong>and</strong> DELETE statements” Checkbox<br />
The “Generate INSERT, UPDATE, <strong>and</strong> DELETE statements” checkbox will only be checkable if the table selected has<br />
a primary key <strong>and</strong> the primary key column (or columns) are included in the list <strong>of</strong> returned columns. The “Use<br />
optimistic concurrency” checkbox, which becomes selectable once the “Generate INSERT, UPDATE, <strong>and</strong> DELETE<br />
statements” checkbox has been checked, will augment the WHERE clauses in the resulting UPDATE <strong>and</strong> DELETE
9 <strong>of</strong> 12<br />
statements to provide optimistic concurrency control. For now, leave this checkbox unchecked; we’ll examine<br />
optimistic concurrency <strong>with</strong> the Sql<strong>Data</strong>Source control in the next tutorial.<br />
After checking the “Generate INSERT, UPDATE, <strong>and</strong> DELETE statements” checkbox, click OK to return to the<br />
“Configure Select Statement” screen, then click Next, <strong>and</strong> then Finish, to complete the Configure <strong>Data</strong> Source<br />
wizard. Upon completing the wizard, Visual Studio will add BoundFields to the DetailsView for the ProductID,<br />
ProductName, <strong>and</strong> UnitPrice columns <strong>and</strong> a CheckBoxField for the Discontinued column. From the<br />
DetailsView’s smart tag, check the “Enable Paging” option so that the user visiting this page can step through the<br />
products. Also clear out the DetailsView’s Width <strong>and</strong> Height properties.<br />
Notice that the smart tag has the “Enable <strong>Inserting</strong>”, “Enable Editing”, <strong>and</strong> “Enable <strong>Deleting</strong>” options available.<br />
This is because the Sql<strong>Data</strong>Source contains values for its InsertComm<strong>and</strong>, UpdateComm<strong>and</strong>, <strong>and</strong> DeleteComm<strong>and</strong>,<br />
as the following declarative syntax shows:<br />
<br />
<br />
<br />
<br />
<br />
<br />
<br />
<br />
<br />
<br />
<br />
<br />
<br />
<br />
<br />
<br />
<br />
<br />
<br />
<br />
<br />
<br />
<br />
<br />
Note how the Sql<strong>Data</strong>Source control has had values automatically set for its InsertComm<strong>and</strong>, UpdateComm<strong>and</strong>, <strong>and</strong>
10 <strong>of</strong> 12<br />
DeleteComm<strong>and</strong> properties. The set <strong>of</strong> columns referenced in the InsertComm<strong>and</strong> <strong>and</strong> UpdateComm<strong>and</strong> properties<br />
are based on those in the SELECT statement. That is, rather than having every Products column in the<br />
InsertComm<strong>and</strong> <strong>and</strong> UpdateComm<strong>and</strong>, there are only those columns specified in the SelectComm<strong>and</strong> (less<br />
ProductID, which is omitted because it’s an IDENTITY column, whose value cannot be changed when edited <strong>and</strong><br />
which is automatically assigned when inserting). Moreover, for each parameter in the InsertComm<strong>and</strong>,<br />
UpdateComm<strong>and</strong>, <strong>and</strong> DeleteComm<strong>and</strong> properties there are corresponding parameters in the InsertParameters,<br />
UpdateParameters, <strong>and</strong> DeleteParameters collections.<br />
To turn on the DetailsView’s data modification features, check the “Enable <strong>Inserting</strong>”, “Enable Editing”, <strong>and</strong><br />
“Enable <strong>Deleting</strong>” options in its smart tag. This adds a Comm<strong>and</strong>Field <strong>with</strong> its ShowInsertButton,<br />
ShowEditButton, <strong>and</strong> ShowDeleteButton properties set to true.<br />
Visit the page in a browser <strong>and</strong> note the Edit, Delete, <strong>and</strong> New buttons included in the DetailsView. Clicking the<br />
Edit button turns the DetailsView into edit mode, which displays each BoundField whose ReadOnly property is set<br />
to false (the default) as a TextBox, <strong>and</strong> the CheckBoxField as a checkbox.<br />
Figure 9: The DetailsView’s Default Editing Interface<br />
Similarly, you can delete the currently selected product or add a new product to the system. Since the<br />
InsertComm<strong>and</strong> statement only works <strong>with</strong> the ProductName, UnitPrice, <strong>and</strong> Discontinued columns, the other<br />
columns have either NULL or their default value assigned by the database upon insert. Just like <strong>with</strong> the<br />
Object<strong>Data</strong>Source, if the InsertComm<strong>and</strong> is missing any database table columns that don’t allow NULLs <strong>and</strong> don’t<br />
have a default value, a SQL error will occur when attempting to execute the INSERT statement.<br />
Note: The DetailsView’s inserting <strong>and</strong> editing interfaces lack any sort <strong>of</strong> customization or validation. To add<br />
validation controls or to customize the interfaces, you need to convert the BoundFields to TemplateFields. Refer to<br />
the Adding Validation Controls to the Editing <strong>and</strong> <strong>Inserting</strong> Interfaces <strong>and</strong> Customizing the <strong>Data</strong> Modification<br />
Interface tutorials for more information.<br />
Also, keep in mind that for updating <strong>and</strong> deleting, the DetailsView uses the current product’s <strong>Data</strong>Key value,<br />
which is only present if the <strong>Data</strong>KeyNames property is configured. If editing or deleting appears to have no effect,<br />
ensure that the <strong>Data</strong>KeyNames property is set.
11 <strong>of</strong> 12<br />
Limitations <strong>of</strong> Automatically Generating SQL Statements<br />
Since the “Generate INSERT, UPDATE, <strong>and</strong> DELETE statements” option is only available when picking columns from<br />
a table, for more complex queries you will have to write your own INSERT, UPDATE, <strong>and</strong> DELETE statements like we<br />
did in Step 1. Commonly, SQL SELECT statements use JOINs to bring back data from one or more lookup tables for<br />
display purposes (such as bringing back the Categories table’s CategoryName field when displaying product<br />
information). At the same time, we might want to allow the user to edit, update, or insert data into the “core” table<br />
(Products, in this case).<br />
While the INSERT, UPDATE, <strong>and</strong> DELETE statements can be entered manually, consider the following timesaving<br />
tip. Initially setup the Sql<strong>Data</strong>Source so that it pulls back data just from the Products table. Use the Configure<br />
<strong>Data</strong> Source wizard’s “Specify columns from a table or view” screen so that you can automatically generate the<br />
INSERT, UPDATE, <strong>and</strong> DELETE statements. Then, after completing the wizard, choose to configure the SelectQuery<br />
from the Properties window (or, alternatively, go back to the Configure <strong>Data</strong> Source wizard, but use the “Specify a<br />
custom SQL statement or stored procedure” option). Then update the SELECT statement to include the JOIN syntax.<br />
This technique <strong>of</strong>fers the timesaving benefits <strong>of</strong> the automatically generated SQL statements <strong>and</strong> allows for a<br />
more customized SELECT statement.<br />
<strong>An</strong>other limitation <strong>of</strong> automatically generating the INSERT, UPDATE, <strong>and</strong> DELETE statements is that the columns in<br />
the INSERT <strong>and</strong> UPDATE statements are based on the columns returned by the SELECT statement. We may need to<br />
update or insert more or fewer fields, however. For example, in the example from Step 2, maybe we want to have<br />
the UnitPrice BoundField be readonly. In that case, it shouldn’t appear in the UpdateComm<strong>and</strong>. Or we may want<br />
to set the value <strong>of</strong> a table field that does not appear in the GridView. For example, when adding a new record we<br />
may want the QuantityPerUnit value set to “TODO”.<br />
If such customizations are required, you need to make them manually, either through the Properties window, the<br />
“Specify a custom SQL statement or stored procedure” option in the wizard, or via the declarative syntax.<br />
Note: When adding parameters that do not have corresponding fields in the data Web control, keep in mind that<br />
these parameters values will need to be assigned values in some manner. These values can be: hardcoded directly<br />
in the InsertComm<strong>and</strong> or UpdateComm<strong>and</strong>; can come from some predefined source (the querystring, session state,<br />
Web controls on the page, <strong>and</strong> so on); or can be assigned programmatically, as we saw in the preceding tutorial.<br />
Summary<br />
In order for the data Web controls to utilize their builtin inserting, editing, <strong>and</strong> deleting capabilities, the data<br />
source control they are bound to must <strong>of</strong>fer such functionality. For the Sql<strong>Data</strong>Source, this means that INSERT,<br />
UPDATE, <strong>and</strong> DELETE SQL statements must be assigned to the InsertComm<strong>and</strong>, UpdateComm<strong>and</strong>, <strong>and</strong><br />
DeleteComm<strong>and</strong> properties. These properties, <strong>and</strong> the corresponding parameters collections, can be added manually<br />
or generated automatically through the Configure <strong>Data</strong> Source wizard. In this tutorial we examined both<br />
techniques.<br />
We examined using optimistic concurrency <strong>with</strong> the Object<strong>Data</strong>Source in the Implementing Optimistic<br />
Concurrency tutorial. The Sql<strong>Data</strong>Source control also provides optimistic concurrency support. As noted in Step 2,<br />
when automatically generating the INSERT, UPDATE, <strong>and</strong> DELETE statements, the wizard <strong>of</strong>fers a “Use optimistic<br />
concurrency” option. As we’ll see in the next tutorial, using optimistic concurrency <strong>with</strong> the Sql<strong>Data</strong>Source<br />
modifies the WHERE clauses in the UPDATE <strong>and</strong> DELETE statements to ensure that the values for the other columns<br />
haven’t changed since the data was last displayed on the page.<br />
Happy Programming!
12 <strong>of</strong> 12<br />
About the Author<br />
Scott Mitchell, author <strong>of</strong> seven <strong>ASP</strong>/<strong>ASP</strong>.NET books <strong>and</strong> founder <strong>of</strong> 4GuysFromRolla.com, has been working <strong>with</strong><br />
Micros<strong>of</strong>t Web technologies since 1998. Scott works as an independent consultant, trainer, <strong>and</strong> writer. His latest<br />
book is Sams Teach Yourself <strong>ASP</strong>.NET 2.0 in 24 Hours. He can be reached at mitchell@4GuysFromRolla.com. or<br />
via his blog, which can be found at http://ScottOnWriting.NET.