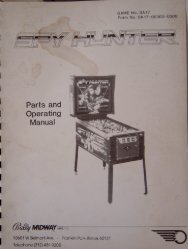
Operations Manual
Operations Manual
Operations Manual
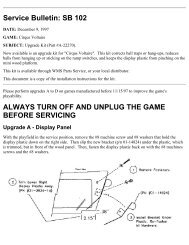
- No tags were found...

You also want an ePaper? Increase the reach of your titles
YUMPU automatically turns print PDFs into web optimized ePapers that Google loves.
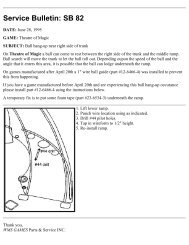
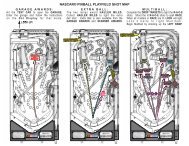
REMOVING THE GUN ASSEMBLY<br />
Before attempting to remove the gun (or any other) assembly, always turn off the<br />
game.<br />
1) Open coin doOr and remove the front molding and the playfield glass.<br />
2) Remove the four Phillips screws from the plastic gun cover. Lift the cover off of the kicker bracket.<br />
3) Using a 1/4" nut driver, remove the four hex head screws from the kicker bracket. Slightly lift the kicker<br />
bracket assembly and lay it on the playfield. Be careful not to pull the cable up to far.<br />
4) There is a piece of playfield plastic underthe kicker bracket assembly. Use a 5/16" nut driver to<br />
remove the three elastic stop nuts from the plastic. Carefully, slide the playfield plastic off.<br />
5) Lift the playfield all the way up. Follow the black tubing from the kicker bracket to the point where it<br />
branches into three plugs. Disconnect all three plugs. Lower the playfield until the support bars rest<br />
on the cabinet. Lift the kicker bracket assembly off of the playfield.<br />
6) Raise the playfield up all the way. Use a 1/4" nut driver to remove one hex head screw from the<br />
bottom of the shaft. Slide the triangle shaped plate, and the white plastic rod attached to it, to one<br />
side. Reach around to the top of the playfield and pull the shaft out of the bushing.<br />
7) Next, remove the bushing. Use a 11/32" nut driver to remove the four elastic stop nuts on the bottom<br />
of the bushing. At the same time, reach around to the top of the playfield and use a 1/4" nut driver to<br />
remove the four hex head screws on the top of the bushing. Slide the bushing out of its hole from the<br />
top of the playfield.<br />
8) The motor bracket assembly has two switches. Trace their wires, under the playfield, until you come to<br />
a plug. Unplug the switches. Unplug the motor from the EMI board.<br />
9) Use a 1/4" nut driver and remove the three hex head screws holding the motor bracket to the<br />
playfield.<br />
Note: On the right side motor bracket assembly, you need to remove one of the<br />
hex head screws from the playfield support bar and slide the bar to the side in<br />
order to reach one of the hex head screws on the motor bracket assembly.<br />
Be Sure To Immediately Reattach The Support Bar To The<br />
Playfleld. po Not Lower The playfleld Unless The Syppon Bar Is<br />
Securely In Place.<br />
1 0) Pull the entire motor bracket assembly off of the playfield.<br />
When Reattaching the gun assembly .....<br />
1) Be sure to match all wire color when connecting the plugs. Be aware that the motor switch plug<br />
substitutes green-white wires for violet-white wires.<br />
2) When reattaching the shaft to the triangle plate, be sure the square on the shaft fits into the<br />
square hole in the triangle plate.<br />
3) When the gun assembly is reattached properly, it should point toward the wire loading ramp .<br />
.S/Jiil TiiEi\<br />
THE REXT liEREIIilnDn 1-41