Maytag - Neptune Washer Webinar - MSAWorld.com
Maytag - Neptune Washer Webinar - MSAWorld.com
Maytag - Neptune Washer Webinar - MSAWorld.com
- No tags were found...
Create successful ePaper yourself
Turn your PDF publications into a flip-book with our unique Google optimized e-Paper software.
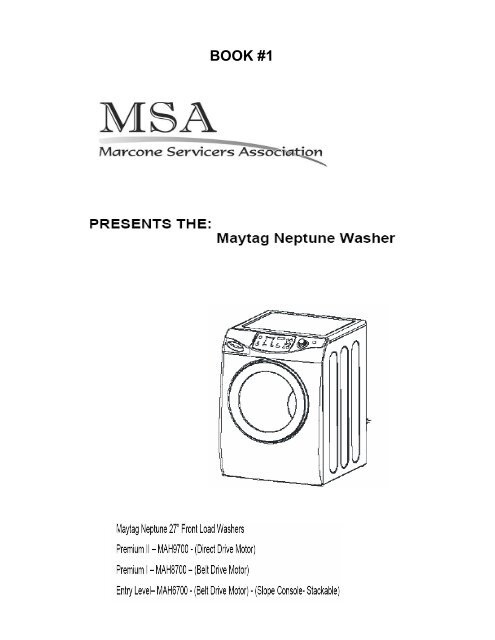
BOOK #1
Slide 1<br />
<strong>Maytag</strong> <strong>Neptune</strong> 27” Front Load <strong>Washer</strong>s<br />
Premium II – MAH9700 - (Direct Drive Motor)<br />
Premium I – MAH8700 – (Belt Drive Motor)<br />
Entry Level– MAH6700 - (Belt Drive Motor) - (Slope Console- Stackable)<br />
Slide 2<br />
Major Differences<br />
Top Spin Speed;<br />
9700–1200RPM<br />
8700–1100 RPM<br />
6700–1000 RPM<br />
Noise Reduction<br />
9700 Direct drive motor, 2 tuned absorbers<br />
8700 2 tuned absorbers<br />
6700 1 tuned absorber<br />
Weights<br />
9700 uses two weights attached to the front of outer tub<br />
6700 & 8700 use four weights. Two attached to the front of outer tub, one behind the spinner pulley<br />
and one mounted to the right rear side of the outer tub<br />
Slide 3<br />
<strong>Maytag</strong> <strong>Neptune</strong> 27” Front Load <strong>Washer</strong> MAH9700<br />
This training presentation is<br />
based on the MAH9700.<br />
Differences between the<br />
9700 and 8700 machines<br />
will be highlighted<br />
1
Slide 4<br />
<strong>Maytag</strong> <strong>Neptune</strong> <strong>Washer</strong> MAH9700<br />
Dimensions Base Cycles<br />
<strong>Washer</strong> Width 27” Sanitary 151 Degrees F<br />
<strong>Washer</strong> Depth 30.75” Super Wash<br />
<strong>Washer</strong> Height 38” Normal<br />
<strong>Washer</strong> Weight 191 LBS Whites<br />
Pedestal/Riser (MAL1800AX*) 13” Wrinkle Control<br />
Features Colors<br />
Capacity (cu.ft) 3.81 Delicates<br />
Controls LED Hand Wash<br />
Motor Type Direct Drive Quick Wash<br />
Spin Speeds 6 Enviro Plus<br />
Water level Control IntelliFill Options<br />
Water Temp Combinations 6 Prewash<br />
ATC Control Stain Treat<br />
Soil Level Selections Heavy, Med., Light Extra Rinse<br />
Spinner Stainless Extended Spin<br />
Self Clean Lint System Rinse & Spin<br />
Internal Heater 900 Watts Spin Only<br />
End of Cycle Chime High, Med., Off Spin Speeds Approximate RPM<br />
Delay Wash Up to 19 Hr. Max Extract Plus 1200 RPM<br />
Dispensers High 1000 RPM<br />
Detergent Dispenser Pre and Main Medium 800 RPM<br />
Bleach Dispenser 100ml Gentle 600 RPM<br />
Fabric Softener Dispenser Low 400 RPM<br />
Child Lock Out Control Lock Drain only 0 RPM<br />
Tumble Pattern<br />
Normal 35 Times per Minute<br />
Hand Wash 5 Times per Minute<br />
Energy Consumption 266 Kw/H per year<br />
Water Consumption 9.9 to 15.9 Gallons<br />
2
Slide 5<br />
Note: The Power Point Presentation and Participant’s Guide for this training session were developed<br />
using prototype machines. There might be slight cosmetic differences between the product pictured and<br />
the current production units. Always refer to the Technical Data Sheet for detailed information for the<br />
product you are servicing.<br />
Slide 6<br />
Always follow all safety<br />
and caution warnings<br />
found on the machine and<br />
in the installation and<br />
customer use manuals!<br />
Llocation for the Technical<br />
Data Sheet<br />
3
Slide 7<br />
The installation<br />
process for the<br />
27” is identical to<br />
the 24” product<br />
that preceded it.<br />
Slide 8<br />
The installation package<br />
contains the fill hoses, a<br />
<strong>com</strong>bination wrench for<br />
removing the shipping<br />
bolts and adjusting the<br />
leveling legs, filler plugs<br />
and a drain hose bracket.<br />
4
Slide 9<br />
Remove the four 10mm<br />
shipping bolts and spacers<br />
Slide 10<br />
Save the shipping bolts and spacers and<br />
installation instruction in case of a future move.<br />
5
Slide 11<br />
Install the filler plugs supplied in the installation kit.<br />
Slide 12<br />
Leg in Shipping Position<br />
Level the machine side<br />
to side and front to back<br />
Tighten Nut<br />
After leveling, make sure to<br />
tighten the locking nut against<br />
the base. Failure to do so will<br />
cause excessive vibration<br />
The washer must be installed on a sturdy floor and leveled.<br />
Make sure the locking nuts are tightened against base<br />
6
Slide 13<br />
MAH 8700 Timer<br />
The 9700 washer<br />
timer features two<br />
additional cycles<br />
not found on the<br />
8700; Sanitary and<br />
Enviro Plus<br />
MAH 9700 Timer<br />
The Sanitary cycle delays during the first wash to heat the wash water. A 900 Watt heating<br />
element located in the bottom of the outer tub is used to raise the water temperature to 151 degrees F.<br />
As soon as a 151 degree F. temperature is reached the cycle resumes. The machine will delay up to 69<br />
minutes if necessary to achieve SaniTemperature. The purpose of the 151 Degree water temperature is<br />
to help eliminate bacteria and improve cleaning performance.<br />
The Enviro Plus cycle uses less energy and less water than the Normal Cycle.<br />
7
Slide 14<br />
MAH 8700<br />
Slide 15<br />
MAH8700 Spin Speeds<br />
1000 RPM<br />
800 RPM<br />
600 RPM<br />
400 RPM<br />
0 RPM<br />
8
Slide 16<br />
The 9700 has additional options available not found on<br />
the 8700. It also uses a cycle progression bar to indicate<br />
cycle position, the 8700 uses LED’s<br />
MAH 9700<br />
Slide 17<br />
MAH9700 Spin Speeds<br />
1200 RPM<br />
1000 RPM<br />
800 RPM<br />
600 RPM<br />
400 RPM<br />
0 RPM<br />
9
Slide 18<br />
ATC Control<br />
When ATC cold wash is selected,<br />
Heater turns on if the water temperature in the tub is below 60 degrees F. Heater turns off if<br />
the water temperature is above 70 degrees F or the time runs out for wash time. The cycle<br />
time will not be extended to reach the desired temperature.<br />
When ATC warm wash is selected, Heater turns on if the water temperature in the tub is<br />
below 95 degrees F. Heater will turn off if the water temperature is above 105 degrees F or the<br />
time runs out for wash tumble. The cycle time will not be extended to reach the desired<br />
temperature.<br />
When hot wash is selected, Heater will turn on if the water temperature in the tub is below<br />
120 degrees F. Heater turns off if the water temperature is above 130 degrees F. or the time<br />
runs out for wash tumble. The cycle time will not be extended to reach the desired<br />
temperature.<br />
When the Sanitary Cycle is selected, Heater turns on if the water temperature in the tub is<br />
below 141 degrees F. Heater turns off if the water temperature is above 151 degrees F. The<br />
wash cycle will be extended to achieve the temperature of 151 degrees F.<br />
Note: The heater will not turn on more than once in a wash cycle (no reheating).<br />
10
Slide 19- <strong>Maytag</strong> <strong>Neptune</strong> MAH9700 Cycle Chart<br />
M aytag <strong>Neptune</strong> M AH9700 Cycle Sequence<br />
<strong>Maytag</strong> <strong>Neptune</strong> MAH9700 Cycle Chart<br />
T im e (m in u te )<br />
Course<br />
W ate r T e m p (U nit : D e g.C )<br />
C o o lin g<br />
W ate r F illin g<br />
Heating<br />
SPIN<br />
Water<br />
Setting heater<br />
/<br />
Drain<br />
w ith T u m b lin g<br />
F illin g<br />
W a sh /R in se on/off<br />
Soaking Washing U n tan g lin g<br />
Interm ittent 1 Interm ittent 2 F inal<br />
RINSE Total<br />
Sanitary EH/C (N) 141/151 2 3 69 (1) (1) (6) (6) (7) 2 4 110<br />
C/C(N) _ 2 3 24 1 (1) (6) (6) (7) 2 4<br />
C/C 61/70 2 3 24 1 (1) (6) (6) (7) 2 4<br />
Super<br />
W /C 95/106 2 3 24 1 (1) (6) (6) (7) 2 4<br />
W ash<br />
W /W 95/106 2 3 24 1 (1) (6) (6) (7) 2 4<br />
90<br />
H/C (N) 120/130 2 3 24 (1) (1) (6) (6) (7) 2 4<br />
C/C(N) _ 2 (3 ) (13) 1 (1) (6) (6) (7) 2 4<br />
C/C 61/70 2 3 13 1 (1) (6) (6) (7) 2 4<br />
Normal<br />
W /C 95/106 2 3 13 1 (1) (6) (6) (7) 2 4<br />
54<br />
W /W 95/106 2 3 13 1 (1) (6) (6) (7) 2 4<br />
H/C (N) 120/130 2 3 13 (1) (1) (6) (6) (7) 2 4<br />
C/C(N) _ 2 (3 ) (6) 1 (1) (6) (6) (7) 2 4<br />
C/C 61/70 2 3 6 1 (1) (6) (6) (7) 2 4<br />
Whites<br />
W /C 95/106 2 3 6 1 (1) (6) (6) (7) 2 4<br />
60<br />
W /W 95/106 2 3 6 1 (1) (6) (6) (7) 2 4<br />
H/C (N) 120/130 2 3 6 (1) (1) (6) (6) (7) 2 4<br />
C/C(N) _ 2 (3 ) (16) 1 (1) _ _ (7) 2 4<br />
C/C 61/70 2 3 16 1 (1) _ _ (7) 2 4<br />
W rinkle<br />
W /C 95/106 2 3 16 1 (1) _ _ (7) 2 4<br />
Control<br />
W /W 95/106 2 3 16 1 (1) _ _ (7) 2 4<br />
45<br />
H/C (N) 120/130 2 3 16 (1) (1) _ _ (7) 2 4<br />
C/C(N) _ 2 (3 ) (15) 1 (1) (6) (6) (7) 2 4<br />
C/C 61/70 2 3 15 1 (1) (6) (6) (7) 2 4<br />
Colors<br />
W /C 95/106 2 3 15 1 (1) (6) (6) (7) 2 4<br />
56<br />
W /W 95/106 2 3 15 1 (1) (6) (6) (7) 2 4<br />
H/C (N) 120/130 2 3 15 (1) (1) (6) (6) (7) 2 4<br />
C/C(N) _ (2) _ (6) _ (1) (6) (6) (7) (2) (5)<br />
C/C 61/70 (2) _ 6 _ (1) (6) (6) (7) (2) (5)<br />
Delicate<br />
W /C 95/106 (2) _ 6 _ (1) (6) (6) (7) (2) (5)<br />
45<br />
W /W 95/106 (2) _ 6 _ (1) (6) (6) (7) (2) (5)<br />
H/C (N) 120/130 (2) _ 6 _ (1) (6) (6) (7) (2) (5)<br />
C/C(N) _ (2) _ (8) _ (1) (6) (6) (7) (2) (4)<br />
C/C 61/70 (2) _ 8 _ (1) (6) (6) (7) (2) (4)<br />
Hand<br />
W /C 95/106 (2) _ 8 _ (1) (6) (6) (7) (2) (4)<br />
W ash<br />
W /W 95/106 (2) _ 8 _ (1) (6) (6) (7) (2) (4)<br />
45<br />
H/C (N) 120/130 (2) _ 8 _ (1) (6) (6) (7) (2) (4)<br />
C/C(N) _ 2 (3 ) (4) 1 (1) _ _ (7) 2 2<br />
C/C 61/70 2 3 4 1 (1) _ _ (7) 2 2<br />
Quick<br />
W /C 95/106 2 3 4 1 (1) _ _ (7) 2 2<br />
W ash<br />
W /W 95/105.8 2 3 4 1 (1) _ _ (7) 2 2<br />
29<br />
H/C (N) 120.2/129.2 2 3 4 (1) (1) _ _ (7) 2 2<br />
C/C(N) _ 2 (3 ) (10) 1 (1) (3) (3) (7) 2 4<br />
C/C 61/70 2 3 10 1 (1) (3) (3) (7) 2 4<br />
Enviro<br />
W /C 95/106 2 3 10 1 (1) (3) (3) (7) 2 4<br />
Plus<br />
W /W 95/106 2 3 10 1 (1) (3) (3) (7) 2 4<br />
45<br />
H/C (N) 120/130 2 3 10 (1) (1) (3) (3) (7) 2 4<br />
Presoak C/_ 2 3 12 1 (1) _ _ (6) _ _ 25<br />
11
Slide 20<br />
Removing the Top<br />
Slide 21<br />
Remove two 10mm screws<br />
Remove two 10mm screws<br />
Slide 22<br />
The slot in the top panel slides<br />
around the base of the screw head<br />
securing the top to the cabinet<br />
12
Slide 23 - Component Identification<br />
Slide 24<br />
Component Identification<br />
Reactor<br />
Vent hoses<br />
Harmonic Balance Assembly<br />
Dispenser<br />
Assembly<br />
Suspension Spring<br />
Water Level Switch<br />
Slide 25<br />
Two hoses attached to the tub vent out the back.<br />
The vents are at different heights to promote air<br />
circulation through the tub and spinner. Dampers<br />
in the vent outlets close in event of oversudsing<br />
To remove vent flange release the two locking tabs and twist off the vent<br />
13
Slide 51<br />
The “power on” actuating lever and push button are<br />
replaceable items. To remove the lever, slide the shaft in<br />
either direction and lift out the opposite side. Release the<br />
locking tabs on the push button and remove<br />
Slide 52 - Removing Front Panel<br />
Slide 53<br />
Locate the boot retainer spring<br />
(six o’clock position).<br />
Expand the spring as you work<br />
the wire off the gasket<br />
26
Slide 54<br />
Start at the two o’clock position and<br />
pull the gasket off the front panel<br />
lip. Push the gasket into the tub<br />
Slide 55<br />
Remove 4 screws across the top of front panel<br />
Disconnect the wire<br />
connectors on the door switch<br />
Lift off the front panel<br />
27
Slide56<br />
Counter Weights<br />
Fill Hose<br />
Heater<br />
Front Struts<br />
Slide 57 - Removing the Boot Gasket<br />
Slide58<br />
Begin by removing the front panel.<br />
Locate the retainer clamp at the 12:00 o’clock position<br />
Loosen the retainer screw<br />
Remove the gasket retainer<br />
28
Slide 59<br />
Pull off the old gasket<br />
Slide 60<br />
Remove the tub weights to ease installation of the gasket<br />
Align the two index<br />
tabs on the gasket<br />
with the screws below<br />
the fill tube<br />
Work gasket onto tub lip<br />
Install retainer and tighten clamp<br />
29
Slide 61 - Heating Element<br />
Slide 62<br />
900 Watt heating Element<br />
Thermistor leads<br />
Ground<br />
Heater Leads<br />
Slide 63<br />
Loosen 10mm nut<br />
Remove element<br />
Thermistor<br />
Element is installed<br />
on top of the bracket<br />
Tightening the 10 mm<br />
nut expands the gasket<br />
30
Slide 64<br />
Index Mark<br />
Fill Tube<br />
Slide 65 - Motor Removal<br />
Slide 66<br />
Lift panel and pull<br />
bottom out and down<br />
Remove 2 screws<br />
31
Slide 67<br />
Direct Drive Motor<br />
Slide 68<br />
Loosen screw on vent<br />
hose clamp and remove<br />
Insert stop<br />
Use a tool with a rubber coated<br />
handle to prevent damage<br />
Remove the vent tube and<br />
rotate the spinner. Locate one of<br />
the three slots in the spinner.<br />
Insert a suitable tool to use as a<br />
stop. Rotate the spinner in the<br />
direction you will be turning the<br />
rotor nut until it locks in place<br />
Rotate spinner until spinner<br />
is locked in position<br />
32
Slide 69<br />
Remove 19mm nut<br />
Torque Spec. 32-47 ft. lb.<br />
Slide 70<br />
Grasp the rotor at the<br />
9 and 3 o’clock<br />
position and pull<br />
The magnets make the removal<br />
of the rotor difficult<br />
33
Slide 71<br />
Warning: Do not place fingers between rotor and tub<br />
when removing or installing rotor<br />
Warning: Do not place fingers between rotor and tub when removing or installing<br />
rotor<br />
Slide 72<br />
Depress the release and<br />
remove connectors<br />
34
Slide 73<br />
Remove the six 10mm<br />
bolts securing stator coil<br />
to the tub<br />
Slide 74<br />
Stator Locating Pegs<br />
Rear Bearing and Spinner Shaft<br />
35
Slide 75 – Drain Pump Removal<br />
Slide 76<br />
Remove hose clamp and drain<br />
hose from drain pump<br />
Remove tub hose from drain pump<br />
Slide 77<br />
Unplug connector and remove 3<br />
13mm bolts securing drain pump<br />
assembly to base and remove<br />
36
Slide 78<br />
120 VAC 80 Watt motor<br />
Remove screw from bottom side<br />
of bracket. Twist the pump counter<br />
clockwise to remove from bracket<br />
Slide 79 - Removing the tub<br />
Slide 80<br />
Loosen hose clamp screw<br />
and remove the tub hose<br />
37
Slide 81<br />
Remove the 13mm bolts securing the rear struts<br />
Left rear strut<br />
Torque Spec. 18-25 ft-lb.<br />
Right rear strut<br />
Slide 82<br />
Rotate the struts up against<br />
the bottom of the tub to ease<br />
removal of the tub assembly<br />
The rear struts can be identified<br />
by the green sleeve<br />
38
Slide 83<br />
Remove two 13mm bolts and<br />
roll weights off index posts<br />
Torque Spec. 11-22 ft. lb.<br />
Warning: Weights are heavy use<br />
caution when removing or installing<br />
Slide 84<br />
Remove the wires from the heater<br />
element, thermistor and ground<br />
39
Slide 85<br />
Remove the front struts and fold the<br />
struts up against the bottom of the tub<br />
Slide 86<br />
1x12 - 32” long<br />
Insert a board or boards across<br />
the bottom of the washer frame to<br />
use as a support when removing<br />
the tub assembly<br />
Note: any dimension lumber can be<br />
used if it’s long and wide enough to<br />
support the tub<br />
40
Slide 87<br />
Remove fill hose<br />
Slide 88<br />
With the struts folded<br />
up against the tub and<br />
the support in place<br />
the tub assembly can<br />
be removed from the<br />
suspension springs<br />
The front Struts have a gray sleeve<br />
Slide 89<br />
41
Prepare console back guard for removal<br />
Cut wire tie<br />
Remove pressure hose<br />
Unplug connector<br />
Remove ground wire<br />
Slide 90<br />
Remove the left and right side vent hoses<br />
42
Slide 91<br />
Begin with the suspension spring under the Dynamic Balance.<br />
Grasp the tub with one hand and the spring with the other. Lift<br />
and remove the spring from the slot in the frame<br />
Slide 92<br />
Remove the spring on the<br />
opposite side and let tub<br />
rest on board support<br />
43
Slide 93<br />
Remove screws on back guard and cross member<br />
Lift support<br />
Remove back guard<br />
Slide 94<br />
Grasp the front and rear<br />
of the tub and slide out.<br />
Use a blanket or rug to<br />
protect the floor<br />
44
Slide 103<br />
The belt drive motor uses<br />
basically the same drive circuit<br />
used on the 9700 and the 24” FL<br />
product introduced earlier<br />
Belt Drive Motor<br />
Additional Weights<br />
Slide 104- Belt and motor service<br />
Slide 105<br />
Belt Removal<br />
To remove, pull belt while<br />
rotating the pulley CCW and<br />
roll the belt off the drum pulley<br />
49
Slide 106<br />
There is no belt adjustment. The belt must be<br />
stretched over the drum pulley during installation.<br />
Install belt on the motor pulley and using both<br />
hands roll the belt onto the drum pulley<br />
Slide 107<br />
Remove two 13mm bolts. The bolts have thread adhesive<br />
applied and require considerable force to loosen. To ease<br />
motor installation you can remove the right hand strut.<br />
50
Slide108<br />
Release the catch on the motor harness and remove.<br />
Depress the lock on the ground wire and disconnect<br />
Slide109<br />
Slide the motor off the four mounting studs and lift out.<br />
51
T ROUBLESHOOTING<br />
INFORM ATION<br />
CODES<br />
Information codes may bedisplayed t o help you better understand what is occurring with the washer.<br />
Code<br />
Sy mbol M eaning Sol ut io n<br />
Unbalanced load prevented the washer from<br />
spinning.<br />
Door is unlocked when washer is running.<br />
Door is openwhen washer is running.<br />
The washer failed to lock the door.<br />
Water temperatur e control pro blem.<br />
(Heater Control problem)<br />
The washer has tr ied to fill but has not r eached<br />
the proper water level.<br />
The door will not unlock.<br />
Motor not running properly.<br />
The washer is not dr aining.<br />
The washer has tr ied to fill but was unsuccessful.<br />
Problemwith control.<br />
Redistr ibutethe load,press the Cycle S elector<br />
dial.<br />
Pr ess Powe r Of f pad then r estart the cycle.If the<br />
code r eappear s, call for ser vi ce,s ee below.<br />
Close the door tightly and restart the cycle.<br />
If the code r eappear s, call for s er vi ce,s eebelow.<br />
Close the door tightly and restart the cycle.<br />
If the code r eappear s, call for s er vi ce,s eebelow.<br />
Call for service,seebelow.<br />
Call for ser vice,seebelow.<br />
Make sur e the door is firmly closed.<br />
Push the Power Of f pad to turn off the washer, and<br />
then turn it on using any pad.If the code r eappear s,<br />
call for ser vice,s eebelow.<br />
Restar t the cycle pressing the Cy cl e S elector dial.<br />
If the code r eappear s, call for s er vi ce,s eebelow.<br />
SeeTro ubleshooting “The washer does not dr ain<br />
and/or s pi n”, page 13. If pro blemcontinues, call for<br />
ser vice,seebelow.<br />
Make sur e the water faucets are openall the way.<br />
Checkfor kinked hoses.<br />
Checkinlet screens on fill hoses.<br />
Call for service,seebelow.<br />
Electric ser vicewas lost when washer was<br />
running.<br />
Restar t the cycle by pressing the Cy cle S elector<br />
dial.<br />
For any codes not lis ted above,call <strong>Maytag</strong> Customer Ser viceat 1-800-688-9900USA or 1-800-688-2002Canada.<br />
64 16025909 Rev. 0 ©2005 <strong>Maytag</strong> Services


