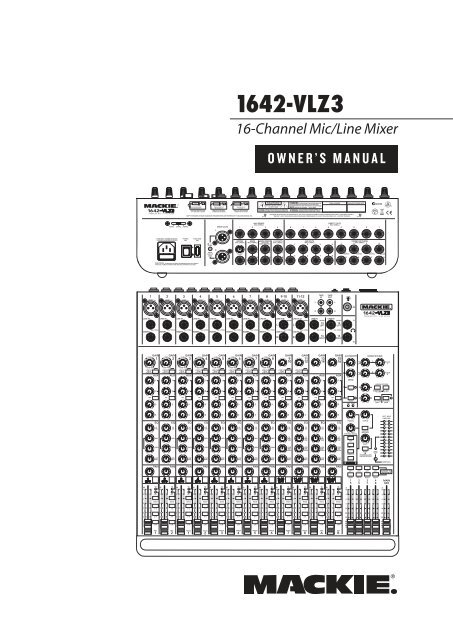
1642-VLZ3 16-Channel Mic/Line Mixer Owner's Manual
1642-VLZ3 16-Channel Mic/Line Mixer Owner's Manual
1642-VLZ3 16-Channel Mic/Line Mixer Owner's Manual

You also want an ePaper? Increase the reach of your titles
YUMPU automatically turns print PDFs into web optimized ePapers that Google loves.
<strong><strong>16</strong>42</strong>-<strong>VLZ3</strong><br />
<strong>16</strong>-<strong>Channel</strong> <strong>Mic</strong>/<strong>Line</strong> <strong>Mixer</strong><br />
OWNER’S MANUAL
<strong><strong>16</strong>42</strong>-<strong>VLZ3</strong><br />
Important Safety Instructions<br />
1. Read these instructions.<br />
2. Keep these instructions.<br />
3. Heed all warnings.<br />
4. Follow all instructions.<br />
5. Do not use this apparatus near water.<br />
6. Clean only with dry cloth.<br />
7. Do not block any ventilation openings. Install in accordance with the<br />
manufacturer’s instructions.<br />
8. Do not install near any heat sources such as radiators, heat registers,<br />
stoves, or other apparatus (including amplifi ers) that produce heat.<br />
9. Do not defeat the safety purpose of the polarized or grounding-type<br />
plug. A polarized plug has two blades with one wider than the other.<br />
A grounding-type plug has two blades and a third grounding prong.<br />
The wide blade or the third prong are provided for your safety. If the<br />
provided plug does not fi t into your outlet, consult an electrician for<br />
replacement of the obsolete outlet.<br />
10. Protect the power cord from being walked on or pinched particularly at<br />
plugs, convenience receptacles, and the point where they exit from the<br />
apparatus.<br />
11. Only use attachments/accessories specifi ed by the manufacturer.<br />
12. Use only with a cart, stand, tripod, bracket, or table specifi ed by the<br />
manufacturer, or sold with the apparatus. When a cart is used, use<br />
caution when moving the cart/apparatus combination to avoid injury<br />
from tip-over.<br />
PORTABLE CART WARNING<br />
CAUTION AVIS<br />
RISK OF ELECTRIC SHOCK<br />
DO NOT OPEN<br />
RISQUE DE CHOC ELECTRIQUE<br />
NE PAS OUVRIR<br />
Carts and stands - The<br />
Component should be used<br />
only with a cart or stand<br />
that is recommended by<br />
the manufacturer.<br />
A Component and cart<br />
combination should be<br />
moved with care. Quick<br />
stops, excessive force, and<br />
uneven surfaces may cause<br />
the Component and cart<br />
combination to overturn.<br />
CAUTION: TO REDUCE THE RISK OF ELECTRIC SHOCK<br />
DO NOT REMOVE COVER (OR BACK)<br />
NO USER-SERVICEABLE PARTS INSIDE<br />
REFER SERVICING TO QUALIFIED PERSONNEL<br />
ATTENTION: POUR EVITER LES RISQUES DE CHOC<br />
ELECTRIQUE, NE PAS ENLEVER LE COUVERCLE. AUCUN<br />
ENTRETIEN DE PIECES INTERIEURES PAR L'USAGER. CONFIER<br />
L'ENTRETIEN AU PERSONNEL QUALIFIE.<br />
AVIS: POUR EVITER LES RISQUES D'INCENDIE OU<br />
D'ELECTROCUTION, N'EXPOSEZ PAS CET ARTICLE<br />
A LA PLUIE OU A L'HUMIDITE<br />
The lightning flash with arrowhead symbol within an equilateral<br />
triangle is intended to alert the user to the presence of uninsulated<br />
"dangerous voltage" within the product's enclosure, that may be<br />
of sufficient magnitude to constitute a risk of electric shock to persons.<br />
Le symbole éclair avec point de flèche à l'intérieur d'un triangle<br />
équilatéral est utilisé pour alerter l'utilisateur de la présence à<br />
l'intérieur du coffret de "voltage dangereux" non isolé d'ampleur<br />
suffisante pour constituer un risque d'éléctrocution.<br />
13. Unplug this apparatus during lightning storms or when unused for long<br />
periods of time.<br />
14. Refer all servicing to qualifi ed service personnel. Servicing is required<br />
when the apparatus has been damaged in any way, such as powersupply<br />
cord or plug is damaged, liquid has been spilled or objects have<br />
fallen into the apparatus, the apparatus has been exposed to rain or<br />
moisture, does not operate normally, or has been dropped.<br />
15. This apparatus shall not be exposed to dripping or splashing, and no<br />
object fi lled with liquids, such as vases or beer glasses, shall be placed<br />
on the apparatus.<br />
<strong>16</strong>. This apparatus has been designed with Class-I construction and must<br />
be connected to a mains socket outlet with a protective earthing connection<br />
(the third grounding prong).<br />
17. This apparatus has been equipped with an all-pole, rocker-style AC<br />
mains power switch. This switch is located on the rear panel and<br />
should remain readily accessible to the user.<br />
18. This apparatus does not exceed the Class A/Class B (whichever is<br />
applicable) limits for radio noise emissions from digital apparatus as<br />
set out in the radio interference regulations of the Canadian Department<br />
of Com mu ni ca tions.<br />
ATTENTION — Le présent appareil numérique n’émet pas de bruits<br />
radioélectriques dépassant las limites applicables aux appareils numériques de<br />
class A/de class B (selon le cas) prescrites dans le réglement sur le brouillage<br />
radioélectrique édicté par les ministere des com mu ni ca tions du Canada.<br />
19. Exposure to extremely high noise levels may cause permanent hearing<br />
loss. Individuals vary considerably in susceptibility to noise-induced<br />
hearing loss, but nearly everyone will lose some hearing if exposed to<br />
suffi ciently intense noise for a period of time. The U.S. Government’s<br />
Occupational Safety and Health Administration (OSHA) has specifi ed<br />
the permissible noise level exposures shown in the following chart.<br />
According to OSHA, any exposure in excess of these permissible limits<br />
could result in some hearing loss. To ensure against potentially dangerous<br />
exposure to high sound pressure levels, it is recommended that all<br />
persons exposed to equipment capable of producing high sound pressure<br />
levels use hearing protectors while the equipment is in operation.<br />
Ear plugs or protectors in the ear canals or over the ears must be worn<br />
when operating the equipment in order to prevent permanent hearing<br />
loss if exposure is in excess of the limits set forth here.<br />
Duration Per Day Sound Level dBA, Typical<br />
In Hours Slow Response Example<br />
8 90 Duo in small club<br />
6 92<br />
4 95 Subway Train<br />
3 97<br />
2 100 Very loud classical music<br />
1.5 102<br />
1 105 Dave screaming at Steve about deadlines<br />
0.5 110<br />
0.25 or less 115 Loudest parts at a rock concert<br />
WARNING — To reduce the risk of fi re or<br />
electric shock, do not expose this apparatus<br />
to rain or moisture.<br />
2 <strong><strong>16</strong>42</strong>-<strong>VLZ3</strong><br />
The exclamation point within an equilateral triangle is intended to<br />
alert the user of the presence of important operating and maintenance<br />
(servicing) instructions in the literature accompanying the appliance.<br />
Le point d'exclamation à l'intérieur d'un triangle équilatéral est<br />
employé pour alerter les utilisateurs de la présence d'instructions<br />
importantes pour le fonctionnement et l'entretien (service) dans le<br />
livret d'instruction accompagnant l'appareil.
Read This Page!<br />
We realize that you must have a powerful<br />
hankerin’ to try out your new <strong><strong>16</strong>42</strong>-<strong>VLZ3</strong>. Or<br />
you might be one of those people who never<br />
reads manuals. All we ask is that you read<br />
this page NOW, and read the rest later— you’ll be glad<br />
you did.<br />
WARNING: Before you plug the AC power<br />
cord into the mixer, make sure the VOLTAGE<br />
SELECTOR switch is set to the same voltage<br />
as your local AC mains supply (see page 13).<br />
Level-Setting Procedure<br />
Message to seasoned pros: do NOT set levels using the<br />
old “Turn the trim up until the clip light comes on, then<br />
back off a hair” trick. When a Mackie mixer clip light<br />
comes on, you really are about to clip.<br />
This procedure really works — it assures low noise<br />
and high headroom. Please read on.<br />
It’s not even necessary to hear what you’re doing to<br />
set optimal levels. But if you’d like to: Plug headphones<br />
into the PHONES output jack, then set the PHONES<br />
knob about one-quarter of the way up.<br />
The following steps must be performed one channel at<br />
a time:<br />
1. Turn the GAIN, AUX send and fader controls<br />
fully down.<br />
2. Be sure the 1–2, 3–4 and L/R channel assignment<br />
switches are all disengaged.<br />
3. Set the EQ knobs at the center detents.<br />
4. Connect the signal source to the MIC or LINE<br />
channel input.<br />
5. Engage (push in) the channel’s SOLO switch.<br />
6. Push in the MODE switch in the output section<br />
(LEVEL SET (PFL) mode) — the LEVEL SET<br />
LED will light.<br />
7. Play something into the selected input, at realworld<br />
levels.<br />
8. Adjust the GAIN control so that the display on<br />
the meter stays around “0.” (Only the left meter<br />
is active in the Level-Setting Procedure.)<br />
9. If you’d like to apply some EQ, do so now and<br />
return to the previous step.<br />
10. Disengage that channel’s SOLO switch.<br />
11. Repeat for each channel.<br />
Other Nuggets of Wisdom<br />
For optimum sonic performance, the channel faders<br />
and the MAIN MIX fader should be set near the “U”<br />
(unity gain) markings.<br />
Always turn down the MAIN MIX fader and CONTROL<br />
ROOM and PHONES knobs before making connections<br />
to your <strong><strong>16</strong>42</strong>-<strong>VLZ3</strong>, or turning PHANTOM POWER on.<br />
If you shut down your equipment, turn off your amplifiers<br />
first. When powering up, turn them on last.<br />
Save the shipping box! You may need it someday.<br />
Instant Mixing<br />
Here’s how to get going right away, assuming you own<br />
a microphone and a keyboard:<br />
1. Plug your microphone into <strong>Channel</strong> 1’s MIC<br />
input.<br />
2. Turn on the <strong><strong>16</strong>42</strong>-<strong>VLZ3</strong>.<br />
3. Perform the Level-Setting Procedure.<br />
4. Connect cords from the MAIN OUT jacks to<br />
your amplifier.<br />
5. Hook up speakers to the amp and turn it on.<br />
6. Set channel 1’s fader to the “U” mark.<br />
7. Engage (push in) <strong>Channel</strong> 1’s L/R switch.<br />
8. Set the MAIN MIX fader one-quarter of the way<br />
up.<br />
9. Sing like a canary!<br />
10. Plug your keyboard into channels 3 and 4.<br />
11. Turn channel 3’s PAN knob fully left and channel<br />
4’s PAN knob fully right.<br />
12. Set those faders to the “U” mark.<br />
13. Perform the Level-Setting Procedure.<br />
14. Engage the L/R switch on these channels.<br />
15. Play like a madman and sing like a canary!<br />
Please write your serial number here for future<br />
reference (i.e., insurance claims, tech support,<br />
return authorization, make dad proud, etc.)<br />
Purchased at:<br />
Owner’s <strong>Manual</strong><br />
Part No. 0019817 Rev. B<br />
©2006 LOUD Technologies Inc. All Rights Reserved.<br />
Are your teeth really so-brilliantly-white that you can't stand it Do the popular<br />
kids all giggle as you walk past on the beach Me too. Ever thought about<br />
a career as a technical writer<br />
Date of purchase:<br />
Owner’s <strong>Manual</strong><br />
3
<strong><strong>16</strong>42</strong>-<strong>VLZ3</strong><br />
Introduction<br />
Thank you for choosing a Mackie professional compact<br />
mixer. The <strong><strong>16</strong>42</strong>-<strong>VLZ3</strong> is equipped with our<br />
precision-engineered XDR TM Extended Dynamic Range<br />
premium studio-grade mic preamps<br />
Now that you have your <strong><strong>16</strong>42</strong>-<strong>VLZ3</strong>, find out how to get<br />
the most from it. That’s where this manual comes in.<br />
How To Use This <strong>Manual</strong><br />
Since many of you folks will want to hook up your<br />
<strong><strong>16</strong>42</strong>-<strong>VLZ3</strong> immediately, the first pages you will encounter<br />
after the table of contents are the ever-popular<br />
hookup diagrams. These show typical mixer setups for<br />
Recording and Stereo PA. After this section is a detailed<br />
tour of the entire mixer.<br />
Every feature of the <strong><strong>16</strong>42</strong>-<strong>VLZ3</strong> is described “geographically;”<br />
in other words, in order of where it is<br />
physically placed on the mixer’s top or rear panel. These<br />
descriptions are divided into the first three sections,<br />
just as your mixer is organized into three distinct zones:<br />
This icon marks infor mation that is critically<br />
important or unique to the <strong><strong>16</strong>42</strong>-<strong>VLZ3</strong>. For your<br />
own good, read them and remember them. They<br />
will be on the final test.<br />
This icon will lead you to in-depth explanations<br />
of features and practical tips. While not<br />
mandatory, they usually have some valuable<br />
nuggets of information.<br />
Appendix A is a section on troubleshooting and repair<br />
information.<br />
Appendix B is a section on connectors: XLR connectors,<br />
TRS balanced connectors, TS unbalanced connectors,<br />
and Insert connectors.<br />
Appendix C shows the technical specifications, and<br />
a block diagram showing the internal signal path and<br />
general goings-on within the mixer.<br />
Patchbay: The patchbay along the top and back,<br />
where you connect things.<br />
<strong>Channel</strong> Strip: The channel strips on the left where<br />
you adjust each channel.<br />
Output Section: The output section on the right.<br />
Throughout these chapters you’ll find illustrations,<br />
with each feature numbered. If you’re curious about a<br />
feature, simply locate it on the appropriate illustration,<br />
notice the number attached to it, and find that number<br />
in the nearby paragraphs.<br />
Need help with your new mixer<br />
• Visit www.mackie.com and click Support to find:<br />
FAQs (Frequently Asked Questions), manuals, addendums, and<br />
user forums.<br />
• Email us at: techmail@mackie.com.<br />
• Telephone 1-800-898-3211 to speak with one of our splendid<br />
technical support representatives, (Monday through Friday,<br />
from 7 a.m. to 5 p.m. PST).<br />
4 <strong><strong>16</strong>42</strong>-<strong>VLZ3</strong>
Contents<br />
IMPORTANT SAFETY INSTRUCTIONS ........................ 2<br />
INTRODUCTION ...................................................... 4<br />
HOOKUP DIAGRAMS............................................... 6<br />
PATCHBAY DESCRIPTION<br />
E-Z INTERFACING ..................................... 8<br />
MIC AND LINE INPUT FLEXIBILITY ............. 8<br />
1. MIC INPUTS ............................................ 8<br />
PHANTOM POWER .................................. 8<br />
2. LINE INPUTS ............................................ 9<br />
3. GAIN ...................................................... 9<br />
4. INSERT .................................................... 9<br />
5. DIRECT OUT (ON REAR PANEL) ............... 10<br />
RECORDING ........................................... 10<br />
DOUBLE BUSING .................................... 10<br />
6. AUX SEND OUTPUTS ............................. 11<br />
EFFECTS: SERIAL OR PARALLEL .............. 11<br />
7. STEREO RETURN INPUTS ........................ 11<br />
8. SUB OUTS ............................................. 11<br />
9. CONTROL ROOM OUTPUTS ..................... 11<br />
10. PHONES OUTPUTS.................................. 11<br />
11. TAPE OUTPUT ........................................ 12<br />
12. TAPE INPUT ........................................... 12<br />
13. MAIN INSERT ......................................... 12<br />
14. MAIN OUTS .......................................... 12<br />
15. MONO OUTPUT ...................................... 12<br />
<strong>16</strong>. MONO LEVEL ......................................... 13<br />
17. VOLTAGE SELECTOR ................................ 13<br />
18. POWER CONNECTION ............................. 13<br />
19. FUSE ...................................................... 13<br />
20. POWER SWITCH ..................................... 13<br />
21. POWER LED ........................................... 13<br />
22. PHANTOM SWITCH ................................ 13<br />
23. 48V LED ................................................ 13<br />
24. BNC LAMP SOCKET ................................. 13<br />
CHANNEL STRIP DESCRIPTION<br />
25. CHANNEL FADER .................................... 14<br />
26. ASSIGN (1–2, 3–4, L/R) ........................ 14<br />
27. SOLO ..................................................... 14<br />
28. –20 (SOLO) LED ..................................... 15<br />
29. OL (MUTE) LED ....................................... 15<br />
30. MUTE .................................................... 15<br />
31. PAN....................................................... 15<br />
STEREO SOURCES ................................... 15<br />
CONSTANT LOUDNESS ! ! !...................... <strong>16</strong><br />
32. 3-BAND MID-SWEEP EQ ......................... <strong>16</strong><br />
33. 4-BAND FIXED-FREQUENCY EQ ............... 17<br />
34. LOW CUT .............................................. 17<br />
35. AUX 1, 2, 3, & 4 .................................... 17<br />
36. PRE ....................................................... 17<br />
OUTPUT SECTION DESCRIPTION<br />
37. MAIN MIX FADER .................................... 18<br />
38. SUBGROUP FADERS ............................... 18<br />
39. ASSIGN TO MAIN MIX ............................ 18<br />
40. TAPE IN (LEVEL) ..................................... 19<br />
41. TAPE TO MAIN MIX ................................ 19<br />
42. CONTROL ROOM SOURCE ...................... 19<br />
43. CONTROL ROOM AND PHONES ............... 19<br />
44. MODE (SOLO AFL/PFL) ........................... 20<br />
45. LEVEL SET LED ........................................ 20<br />
46. SOLO (LEVEL)......................................... 20<br />
47. RUDE SOLO LIGHT .................................. 20<br />
48. METERS ................................................. 20<br />
METERS VS. REALITY .............................. 21<br />
AUX DISCUSSION ................................... 21<br />
49. AUX SENDS (MASTER)............................ 21<br />
50. AUX SENDS SOLO AND LED..................... 22<br />
51. STEREO RETURNS (LEVEL)....................... 22<br />
52. TO AUX 1 AND TO AUX 2 ....................... 22<br />
53. MAIN MIX TO SUBS (FOR RETURN 3) ...... 22<br />
54. 1–2/3–4 (FOR RETURN 3) ..................... 22<br />
55. C-R/PHNS ONLY (FOR RETURN 4) .......... 23<br />
56. RETURNS SOLO ...................................... 23<br />
Owner’s <strong>Manual</strong><br />
APPENDIX A: SERVICE INFORMATION .................... 24<br />
APPENDIX B: CONNECTIONS.................................. 25<br />
APPENDIX C: TECHNICAL INFORMATION ................ 28<br />
SPECIFICATIONS ............................................. 28<br />
BLOCK DIAGRAM ............................................ 29<br />
TRACK SHEET.................................................. 30<br />
<strong><strong>16</strong>42</strong>-<strong>VLZ3</strong> LIMITED WARRANTY ........................... 31<br />
Owner’s <strong>Manual</strong><br />
5
<strong><strong>16</strong>42</strong>-<strong>VLZ3</strong><br />
HOOKUP DIAGRAMS<br />
In<br />
Out<br />
8 Track Recorder<br />
From <strong>Mic</strong>s, Keys,<br />
Drum machines<br />
etc.<br />
CHANNEL INPUTS<br />
CHANNEL INSERTS<br />
Stereo Compressor<br />
Stereo Processor<br />
Cassette Recorder<br />
L R L R<br />
MONO<br />
MAIN OUT<br />
BAL/UNBAL<br />
MAIN<br />
INSERT<br />
TAPE<br />
TAPE<br />
OUT TAPE<br />
IN<br />
STEREO RETURNS AUX SENDS<br />
DIRECT OUT<br />
BAL/UNBAL<br />
BAL/UNBAL<br />
EFX A<br />
EFX B<br />
Powered Monitors<br />
SUB OUTS<br />
BAL/UNBAL<br />
C/R OUT<br />
BAL/UNBAL<br />
Headphones<br />
PHONES<br />
OUT<br />
Recording System<br />
6 <strong><strong>16</strong>42</strong>-<strong>VLZ3</strong>
Guitar<br />
Keyboard<br />
Bass<br />
Guitar<br />
Mono Effects<br />
<strong>Mic</strong> 1-5<br />
CHANNEL INPUTS<br />
CHANNEL INSERTS<br />
Stereo Compressors<br />
Owner’s <strong>Manual</strong><br />
Turntable<br />
Drum<br />
Machine<br />
Active<br />
PA Speaker/<br />
Subwoofer<br />
combination<br />
(Pole-mounted<br />
SRM450s and<br />
SRS1500 active<br />
Subwoofers<br />
pictured)<br />
Stereo Effects<br />
Phono preamp Additional<br />
stereo source<br />
Stereo Processor<br />
CD Player<br />
TAPE<br />
TAPE<br />
OUT TAPE<br />
IN<br />
Mono EQs, M-1400i Amps,<br />
and (C300) Passive Stage Monitors<br />
Processor<br />
Processor<br />
C/R OUT<br />
BAL/UNBAL<br />
L R L R<br />
MONO<br />
MAIN OUT<br />
BAL/UNBAL<br />
MAIN<br />
INSERT<br />
STEREO RETURNS AUX SENDS<br />
DIRECT OUT<br />
BAL/UNBAL<br />
BAL/UNBAL<br />
SUB OUTS<br />
Digital Multitrack<br />
Recorder<br />
Headphones<br />
PHONES<br />
OUT<br />
Live Stereo PA System<br />
Owner’s <strong>Manual</strong><br />
7
<strong><strong>16</strong>42</strong>-<strong>VLZ3</strong><br />
Patchbay Description<br />
1<br />
2<br />
4<br />
At the risk of stating the obvious, this is where you<br />
plug everything in: microphones, line-level instruments<br />
and effects, and the ultimate destination for your sound:<br />
a tape recorder, PA system, etc. Many of the features described<br />
in this section are on top of the mixer, but some<br />
are on the rear panel.<br />
See Appendix B for further details and drawings of<br />
the connectors you can use with the <strong><strong>16</strong>42</strong>-<strong>VLZ3</strong>. Also see<br />
the <strong>Channel</strong> Strip description on page 14 for details of<br />
the signal routing from the XLR and <strong>Line</strong> inputs.<br />
E-Z INTERFACING<br />
Concerned about levels, balancing, impedances,<br />
polarity, or other interface goblins<br />
Don’t be. On your <strong><strong>16</strong>42</strong>-<strong>VLZ3</strong>, you can patch anything<br />
almost anywhere, with nary a care. Here’s why:<br />
• Every input and output is balanced (except<br />
inserts, phones and RCA jacks).<br />
• Every input and output will also accept unbalanced<br />
lines (except XLR jacks).<br />
• Every input is designed to accept virtually any<br />
output impedance.<br />
• The main left and right mix outputs can deliver<br />
28 dBu into as low as a 600 ohm load.<br />
• All the other outputs can deliver 22 dBu into as<br />
low as a 600 ohm load.<br />
• All the outputs are in phase with the inputs.<br />
All we ask is that you perform the Level- Setting Procedure<br />
on page 3, every time you patch in a new sound<br />
source. So stop worrying and start mixing!<br />
MIC AND LINE INPUT FLEXIBILITY<br />
<strong>Channel</strong>s 1-8 are mono channels with MIC [1] and<br />
LINE [2] inputs, featuring our XDR Extended Dynamic<br />
Range mic preamp circuitry. <strong>Channel</strong>s 9-10 and 11-12<br />
are stereo pairs with left and right LINE inputs and a<br />
single MIC input feeding each pair. <strong>Channel</strong>s 13-14 and<br />
15-<strong>16</strong> are stereo pairs with LINE inputs only.<br />
1. MIC INPUTS<br />
We use phantom-powered, balanced microphone<br />
inputs just like the big studio mega- consoles, for<br />
exactly the same reason: This kind of circuit is excellent<br />
at rejecting hum and noise. You can plug in almost<br />
any kind of mic that has a standard XLR-type male mic<br />
connector. Always be sure to perform the Level-Setting<br />
Procedure. If you wire your own connectors, make them<br />
like this:<br />
Pin 1 = ground or shield<br />
Pin 2 = positive (+ or hot)<br />
Pin 3 = negative (– or cold)<br />
Professional ribbon, dynamic, and condenser mics will<br />
all sound excellent through these inputs. The <strong><strong>16</strong>42</strong>-<br />
<strong>VLZ3</strong>’s mic inputs will handle almost any kind of mic<br />
level you can toss at them, without overloading.<br />
Not every instrument is made to connect directly to a<br />
mixer. Guitars commonly need a Direct Injection (DI)<br />
box to connect to the mixer's MIC inputs. These boxes<br />
convert unbalanced line-level signals from your guitar,<br />
into balanced mic-level outputs, and provide signal and<br />
impedance matching. They also let you send your gifted<br />
guitar renditions over long cables or audio snakes, with<br />
minimum interference and high-frequency signal loss.<br />
Ask your dealer or guitar maker about their recommendations<br />
for a good DI box.<br />
PHANTOM POWER<br />
Most condenser mics require phantom power, where<br />
the mixer sends low-current DC voltage to the mic’s<br />
electronics through the same wires that carry audio.<br />
The <strong><strong>16</strong>42</strong>-<strong>VLZ3</strong>’s phantom power is globally controlled<br />
by the PHANTOM [22] switch on the rear panel.<br />
Semipro condenser mics often have batteries to accomplish<br />
the same thing. “Phantom” owes its name to an<br />
ability to be “unseen” by dynamic mics (Shure® SM57/<br />
SM58, for instance) that don’t need external power and<br />
aren’t affected by it.<br />
8 <strong><strong>16</strong>42</strong>-<strong>VLZ3</strong>
3<br />
Unless you know for certain it is safe to do<br />
so, never plug single-ended (un bal anced)<br />
microphones, instruments, ribbon mics, or<br />
electronic devices into the MIC [1] input jacks if the<br />
phantom power is on.<br />
2. LINE INPUTS<br />
These 1/4" jacks share circuitry (but not phantom<br />
power) with the mic preamps. You can use these inputs<br />
for virtually any signal you’ll come across, from instrument<br />
levels as low as –50 dB to operating levels of –10<br />
dBV to +4 dBu, as there is 45 dB of gain available via the<br />
GAIN [3] knob. Note that channels 1-8 line inputs are<br />
intially attenuated by 15 dB.<br />
Always be sure to perform the Level-Setting Procedure<br />
(page 3) when you connect a new input.<br />
To learn how signals are routed from these inputs,<br />
see the details lovingly described in the <strong>Channel</strong> Strip<br />
section.<br />
To connect balanced lines to these inputs, use a 1/4"<br />
tip-ring-sleeve (TRS) plug, the type found on some<br />
stereo headphones:<br />
Tip = positive (+ or hot)<br />
Ring = negative (– or cold)<br />
Sleeve = shield or ground<br />
To connect unbalanced lines to these inputs, use a<br />
1/4" mono (TS) phone plug or standard instrument<br />
cable:<br />
Tip = signal (+)<br />
Sleeve = ground<br />
3. GAIN<br />
These controls are not in the patchbay, but<br />
they are the top row of knobs in the channel<br />
strip section. (They are so vitally linked with<br />
the inputs, this seemed like a good place to<br />
describe them.)<br />
Every time you plug something into a<br />
MIC [1] or LINE [2] input jack, you should<br />
perform the Level-Setting Procedure, and that<br />
procedure is basically “how to use the GAIN<br />
knob.”<br />
GAIN adjusts the input sensitivity of the<br />
MIC and LINE inputs. This allows signals<br />
from the outside world to be adjusted to<br />
optimal internal operating levels.<br />
Through the XLR jack (MIC), there<br />
will be 0 dB of gain with the knob fully<br />
down, ramping to 60 dB of gain fully up.<br />
Through the 1/4" input (LINE), there<br />
is 15 dB of attenuation fully down and 45<br />
dB of gain fully up, with unity gain (U) at 10:00.<br />
This 15 dB of attenuation can be very handy when you<br />
are inserting a signal that is very hot, or you want to add<br />
a lot of EQ gain, or both. Without this “virtual pad,” a<br />
scenario like this might lead to channel clipping.<br />
The GAIN controls for stereo channels 9-10 and 11-12<br />
are only used to adjust the <strong>Mic</strong> inputs. The line inputs<br />
are set to unity gain.<br />
The GAIN controls for channels 13-14 and 15-<strong>16</strong> only<br />
adjust the line-level inputs, as they have no <strong>Mic</strong> inputs.<br />
4. INSERT<br />
Found only on channels 1–8, these 1/4" unbalanced<br />
jacks are for connecting serial effects processors such<br />
as compressors, equalizers, de-essers, or filters. The<br />
insert point is after the GAIN [3] control, but before the<br />
channel’s EQ [32], LOW CUT [34], FADER [25] and<br />
MUTE [30] controls.<br />
Insert cables must be wired thusly:<br />
tip ring sleeve<br />
(TRS plug)<br />
This plug connects to one of the<br />
mixer’s <strong>Channel</strong> Insert jacks.<br />
SEND to processor<br />
Tip = send (to effects device input)<br />
Ring = return (from effects device output)<br />
Sleeve = common ground<br />
Even though channels 1–8 already have DIRECT OUT<br />
[5] jacks, INSERT jacks can also be used as channel<br />
direct outputs (as they are post-GAIN, pre-EQ, pre-LOW<br />
CUT, pre-FADER, and pre-MUTE).<br />
“tip”<br />
“ring”<br />
RETURN from processor<br />
Appendix B, page 27 has a lovely diagram (Figure F)<br />
showing three ways you can use the INSERT jacks.<br />
Owner’s <strong>Manual</strong><br />
Owner’s <strong>Manual</strong><br />
9
<strong><strong>16</strong>42</strong>-<strong>VLZ3</strong><br />
6<br />
5<br />
9<br />
8<br />
7<br />
5. DIRECT OUT<br />
Only on channels 1–8, these 1/4" balanced jacks<br />
deliver the signal from the very end of the channel path;<br />
post-GAIN [3], post-EQ [32], post-LOW CUT [34], post-<br />
FADER [25], and post-MUTE [30]. Use these for recording,<br />
making the <strong><strong>16</strong>42</strong>-<strong>VLZ3</strong> perfect for an 8-track studio.<br />
RECORDING<br />
When recording, you use the first two channels for<br />
your sound sources: vocal mics, drum mics, keyboard/<br />
synth outputs, guitar effects outputs, that sort of thing.<br />
From there, the channels manipulate the sound, but<br />
are not assigned to the output section. Instead, they’re<br />
patched from the channel’s DIRECT OUT [5] jacks to<br />
any of your 8 multitrack inputs. This allows recording of<br />
two tracks at a time. By reconnecting the Direct Outs to<br />
the different tape inputs, you can record to all of the 8<br />
tracks.<br />
Once the tracking is completed, the outputs of the<br />
multitrack are then patched to channels 3-12 LINE<br />
[2] inputs on the <strong><strong>16</strong>42</strong>-<strong>VLZ3</strong> (multitrack out 1 to LINE<br />
input 3, 2 to 4, 3 to 5, etc.). Aha! That’s why it says<br />
“TRACK 1” next to channel 3’s fader, “TRACK 2” next to<br />
channel 4, and so forth. These channels (3–12) will be<br />
assigned to the mixer’s output section, delivering the<br />
signals to their ultimate destination, which may be your<br />
mixdown 2-track, your control room system, or your<br />
headphones.<br />
But let’s not forget that the <strong><strong>16</strong>42</strong>-<strong>VLZ3</strong> is a 4-bus<br />
mixer. These buses lead to the SUB OUTS [8], and are<br />
designed to accomplish the task of getting channels to<br />
the multitrack without using the direct outputs.<br />
For example, a channel is assigned to SUB OUT 1.<br />
SUB OUT 1’s output is patched to multitrack input 1.<br />
From there, the multitrack output goes to the mixer’s<br />
channel 3 LINE input, as we just discussed.<br />
Double Busing<br />
How on earth do you get four buses to feed<br />
eight tracks Double busing!<br />
• Bus 1 feeds SUB OUT 1 and SUB OUT 5, which<br />
in turn feed tracks 1 and 5<br />
• Bus 2 feeds SUB OUT 2 and SUB OUT 6, which<br />
in turn feed tracks 2 and 6<br />
• Bus 3 feeds SUB OUT 3 and SUB OUT 7, which<br />
in turn feed tracks 3 and 7<br />
• Bus 4 feeds SUB OUT 4 and SUB OUT 8, which<br />
in turn feed tracks 4 and 8<br />
Patch the 8 SUB OUTs to the inputs of the 8-track<br />
deck. Tracks in record mode will accept the signal, and<br />
tracks in safe mode will ignore the signal.<br />
The advantages: You can assign any channel to any<br />
track, without repatching. You can assign multiple channels<br />
to one track and control the overall level of that<br />
subgroup. You can’t bounce tracks without this feature.<br />
By returning the outputs of the effects processors to<br />
13/14 (EFX A) and 15/<strong>16</strong> (EFX B), you can choose to<br />
record or Monitor with effects.<br />
Perhaps the best recording method is a combination<br />
of both approaches: Use the SUB OUTS to feed multichannel<br />
submixes (like a drum kit) to some of the<br />
tracks, and the DIRECT OUT jacks to feed single-channel<br />
signals (like bass guitar) to the other tracks.<br />
The point is that you never listen directly to the<br />
source channels. You listen to the monitor channels<br />
(3–12) and they’re listening to the multitrack that is<br />
listening to the source channels. The main advantage<br />
is that you won’t be forced to constantly repatch your<br />
multitrack — just set it up and forget it. You’ll also<br />
know for certain that the signals are indeed getting to<br />
the multitrack, since you’re constantly listening to it.<br />
10 <strong><strong>16</strong>42</strong>-<strong>VLZ3</strong>
Another method of interfacing a multitrack is called<br />
in-line monitoring, and requires a mixing console<br />
dedicated to that, like the Mackie 8•Bus. Each of its<br />
channels is actually two channels: one carrying the mic/<br />
line sound source and the other carrying the multitrack<br />
output.<br />
6. AUX SEND OUTPUTS<br />
These 1/4" jacks usually patch to the inputs of your<br />
parallel effects devices or to the inputs of your stage<br />
monitor amps. To learn how signals are routed to these<br />
outputs, see the Aux discussion on page 21.<br />
8. SUB OUTS<br />
These 1/4" jacks are usually patched to the inputs of a<br />
multitrack deck, or to secondary amplifiers in a complex<br />
installation. See page 18 for details of the SUBGROUP<br />
FADERS [38]. (See also the discussion on double busing<br />
on the previous page.)<br />
9. C-R OUTS (CONTROL ROOM OUTPUTS)<br />
These 1/4" jacks are usually patched to the inputs of<br />
your control room amplifier or a headphone distribution<br />
amplifier. See page 19, CONTROL ROOM and PHONES<br />
[43] for details of the signal routing to these outputs.<br />
Owner’s <strong>Manual</strong><br />
EFFECTS: SERIAL OR PARALLEL<br />
You’ve heard us carelessly toss around the terms “serial”<br />
and “parallel.” Here’s what we mean by them:<br />
“Serial” means that the entire signal leaves the mixer<br />
(INSERT send), is routed through the effects device,<br />
and returns to the mixer (INSERT return). Examples:<br />
compressor, limiter, graphic equalizer. <strong>Line</strong>-level<br />
sources can also be patched through a serial effects<br />
device before or after the mixer.<br />
Dry Signal<br />
Dry Signal(s)<br />
Insert<br />
Send<br />
Aux<br />
Send<br />
Signal Processor<br />
(e.g., Compressor)<br />
Signal Processor<br />
(e.g., Reverb)<br />
<strong>Channel</strong> Path<br />
Insert<br />
Return<br />
Aux<br />
Return<br />
Wet Signal<br />
Dry Signal(s)<br />
Output<br />
Section<br />
Mix<br />
Stage<br />
Processed<br />
Signal<br />
“Parallel” means that a portion of the signal in the<br />
mixer is tapped off to the device (AUX SEND), processed,<br />
and returned to the mixer (STEREO RETURN)<br />
to be mixed with the original “dry” signal. This way,<br />
multiple channels can all make use of the same effects<br />
device. Examples: reverb, digital delay.<br />
Processed<br />
Signal<br />
7. STEREO RETURN INPUTS<br />
This is where you connect the outputs of your parallel<br />
effects devices (or extra audio sources). There are four<br />
stereo returns. They’ll accept just about any pro or semipro<br />
effects device on the market. See page 22 for details<br />
of the STEREO RETURN [51] level controls.<br />
Mono: If you have an effects device with a mono<br />
output (one cord), plug that into the left input of a<br />
STEREO RETURN and leave the right input unplugged.<br />
That way, the signal will be sent to both sides, magically<br />
appearing in the center as a mono signal.<br />
10. PHONES OUTPUTS<br />
These stereo 1/4" phones<br />
jacks will drive any standard<br />
headphone to very<br />
loud levels. Walkpersontype<br />
phones can also be<br />
used with an appropriate<br />
adapter. See page 19, CON-<br />
TROL ROOM and PHONES<br />
[43] for details of the<br />
signal routing to these outputs.<br />
10<br />
If you’re wiring your own cable for the PHONES output,<br />
follow standard conventions:<br />
Tip = left channel<br />
Ring = right channel<br />
Sleeve = common ground<br />
WARNING: When we say the headphone<br />
amp is loud, we’re not kidding. It can cause<br />
permanent ear damage. Even intermediate<br />
levels may be painfully loud with some earphones. BE<br />
CAREFUL!<br />
Always turn the PHONES knob all the way<br />
down before connecting headphones. Keep<br />
it down until you’ve put the phones on. Then<br />
turn it up slowly. Why “Engineers who fry their ears<br />
find themselves with short careers.”<br />
Owner’s <strong>Manual</strong><br />
11
<strong><strong>16</strong>42</strong>-<strong>VLZ3</strong><br />
18<br />
17<br />
<strong>16</strong><br />
13. MAIN INSERT<br />
These 1/4" jacks are for connecting serial effects such<br />
as compressors, equalizers, de-essers, or filters. The IN-<br />
SERT point is after the mix amps, but before the MAIN<br />
MIX fader. Insert cables must be wired thusly:<br />
tip ring sleeve<br />
(TRS plug)<br />
SEND to processor<br />
“tip”<br />
19<br />
11. TAPE OUTPUT<br />
20 22<br />
These unbalanced<br />
RCA jacks tap the main<br />
mix outputs to make<br />
simultaneous recording<br />
and PA work more<br />
convenient. Connect<br />
these to your 2-track<br />
recorder’s inputs.<br />
12<br />
See MAIN MIX<br />
FADER [37] on page<br />
18 for details of the<br />
signal routing to these outputs.<br />
14<br />
15<br />
11<br />
14<br />
Mono: If you want to feed a mono signal to your tape<br />
deck or other device, use the 1/4" MONO [15] output<br />
jack instead.<br />
13<br />
12. TAPE INPUT<br />
These unbalanced RCA jacks are designed to work<br />
with semipro as well as pro recorders. Connect your<br />
2-track tape recorder’s outputs here, using quality hi-fi<br />
RCA cables. To learn how signals are routed from these<br />
inputs see page 19, TAPE IN LEVEL [40].<br />
Use these jacks for convenient playback of your mixes.<br />
You’ll be able to review a mix, and then rewind and try<br />
another pass without repatching or disturbing the mixer<br />
levels. You can also use these jacks with a portable tape<br />
or CD player to feed music to a PA system between sets.<br />
NOTE: Pushing TAPE TO MAIN MIX [41]<br />
in the output section automatically disconnects<br />
the TAPE [11] OUTPUT from the main<br />
outputs. This prevents creating a feedback loop, which<br />
could create quite a howl in your system (and your audience!)<br />
This plug connects to one of the<br />
mixer’s <strong>Channel</strong> Insert jacks.<br />
Tip = send (to effects device inputs)<br />
Ring = return (from effects device outputs)<br />
Sleeve = common ground (connect shield to all<br />
three sleeves)<br />
14. MAIN OUTS<br />
Two sets of jacks are provided for the main outputs:<br />
1/4" TRS jacks and XLR jacks. These are usually<br />
patched to the inputs of your 2-track mixdown deck<br />
(unless you’ve chosen to use the TAPE OUTPUT [11]<br />
RCA jacks), or to the house amplifier during live sound<br />
sessions.<br />
In addition, the XLR MAIN OUTS have a switch to<br />
match the signal level to the input of the device you're<br />
connecting them to. Push the switch in to reduce<br />
the output by 40 dB, so you can feed the mic input of<br />
another mixer, for example. Leave the switch out to<br />
connect to professional +4 dBu devices. To learn how<br />
signals are routed to these outputs, see page 18, MAIN<br />
MIX FADER [37].<br />
To use the 1/4" outputs to drive balanced inputs, connect<br />
1/4" TRS (Tip-Ring-Sleeve) phone plugs like this:<br />
Tip = + (hot)<br />
Ring = – (cold)<br />
Sleeve = ground<br />
To use these outputs to drive unbalanced inputs, connect<br />
1/4" TS (Tip-Sleeve) phone plugs like this:<br />
Tip = signal<br />
Sleeve = ground<br />
“ring”<br />
RETURN from processor<br />
15. MONO OUTPUT<br />
It happens to everybody sooner or later: The forces<br />
that govern your world will demand a monaural output<br />
from your painstakingly- created stereo panorama. The<br />
last thing you want to do is start twirling all your carefully-placed<br />
PAN [31] settings to one side. What to do<br />
Stick a cord in this 1/4" jack, hand the other end to Mr.<br />
Mono, and you’re done. He’s got his mono mix and you’ve<br />
still got your stereo mix. The MONO output is nothing<br />
more than a sum of the left and right main mix.<br />
12 <strong><strong>16</strong>42</strong>-<strong>VLZ3</strong>
<strong>16</strong>. MONO LEVEL<br />
If Mr. Mono's main mono mix is maxed, just reach for<br />
this knob and turn it down a bit. Just the thing for sending<br />
mono signals to mic inputs like camcorders, telephone<br />
interface boxes, even answering machines. With<br />
the pot all the way up (fully clockwise), you’ll have 6 dB<br />
of extra gain, and unity gain is at the 12 o'clock position.<br />
17. VOLTAGE SELECTOR<br />
WARNING: Before you plug the AC power<br />
cord into the <strong><strong>16</strong>42</strong>-<strong>VLZ3</strong>, you must make sure<br />
that this slide switch is set to the same voltage<br />
as your local AC main supply. Only slide the voltage<br />
switch with the power cord unplugged.<br />
Use a flat headed screwdriver to slide the switch if<br />
needed. The switch allows you to use the mixer in different<br />
countries and voltages, meet interesting people<br />
from other cultures, and entertain them.<br />
18. POWER CONNECTION<br />
Just in case you lose the cord provided with the <strong><strong>16</strong>42</strong>-<br />
<strong>VLZ3</strong>, its power jack accepts a standard 3-prong IEC<br />
cord like those found on most professional recorders,<br />
musical instruments, and computers.<br />
WARNING: Before you plug the AC power<br />
cord into the <strong><strong>16</strong>42</strong>-<strong>VLZ3</strong>, you must make sure<br />
that the VOLTAGE SELECTOR [17] slide<br />
switch is set to the same voltage as your local AC mains<br />
supply.<br />
WARNING: Disconnecting the plug’s ground<br />
pin can be dangerous. Please don’t do it.<br />
19. FUSE<br />
The <strong><strong>16</strong>42</strong>-<strong>VLZ3</strong> is fused for your (and its own) protection.<br />
If you suspect a blown fuse, disconnect the power<br />
cord, pull the fuse drawer out (located just below the<br />
cord receptacle) and replace the fuse with a 1 A SLO<br />
BLO, 5x20mm, available at electronics stores or your<br />
dealer (or a 0.5 A SLO BLO 5x20mm if your <strong><strong>16</strong>42</strong>-<strong>VLZ3</strong> is<br />
set to 220V-240V).<br />
If two fuses blow in a row, something is very wrong.<br />
Please call our toll-free number 1-800-898-3211 from<br />
within the U.S. (or call the distributor in your country)<br />
and find out what to do.<br />
20. POWER SWITCH<br />
Press the top of this rocker switch inwards to turn<br />
on the mixer. The POWER LED [21] on the top surface<br />
of the mixer will glow with happiness, or at least it will<br />
if you have the mixer plugged in to a suitable live AC<br />
mains supply.<br />
Press the bottom of this switch to turn off the mixer,<br />
whenever you feel that this would be a safe thing to do.<br />
As a general guide, you should turn on your mixer<br />
first, before the power amplifier or powered speakers,<br />
and turn it off last. This will reduce the possibilities of<br />
any turn-on, or turn-off thumps in your speakers.<br />
21. POWER LED<br />
You’ve probably already<br />
figured this out, but if the<br />
POWER [20] switch is on, this<br />
LED (light-emitting do-hicky)<br />
will light. If the switch is off,<br />
well, you get the idea. If the<br />
POWER [20] switch is on and<br />
the LED does not glow, one of<br />
three things has happened:<br />
Somebody tripped over the<br />
power cord and yanked it from<br />
the outlet, your electricity has<br />
been turned off due to nonpayment,<br />
or the FUSE [19] has<br />
blown.<br />
24<br />
23 21<br />
22. PHANTOM SWITCH<br />
This switch controls the phantom power supply for<br />
condenser microphones as discussed on page 8. When<br />
turned on (or off), the phantom power circuitry takes a<br />
few moments for voltage to ramp up (or down). This is<br />
perfectly normal.<br />
23. 48V LED<br />
This is just to let you know which way you have the<br />
PHANTOM [22] switch set. If your dynamic mics work<br />
and your condensers don’t, chances are this LED is off,<br />
so turn the PHATOM switch on.<br />
You’ll notice that when you turn the phantom power<br />
off, the LED stays on for a while. This is a natural phenomenon<br />
— the LED is actually a voltmeter telling you<br />
that the phantom power takes time to ramp itself down<br />
to zero volts. So, if you’ve turned phantom power off to<br />
connect something to the mic inputs, wait until the LED<br />
stops glowing and then make your connections safely.<br />
24. BNC LAMP SOCKET<br />
Located in the top right corner of the output section,<br />
this 12V socket will drive any standard BNC-type<br />
lamp (a Littlite® #12G or #12G-HI (high-intensity), for<br />
instance).<br />
Owner’s <strong>Manual</strong><br />
Owner’s <strong>Manual</strong><br />
13
<strong><strong>16</strong>42</strong>-<strong>VLZ3</strong><br />
31<br />
30<br />
<strong>Channel</strong> Strip Description<br />
There are eight mono, and four stereo channel strips.<br />
Many of the functions are identical for the mono and<br />
stereo channels. We’ll start at the bottom and work our<br />
way up, pointing out the differences as we go along.<br />
“U” LIKE UNITY GAIN<br />
Mackie mixers have a “U” symbol on almost<br />
every level control. This “U” stands for “unity<br />
gain,” meaning no change in signal level. Once you have<br />
performed the Level-Setting Procedure, you can set<br />
every control at “U” and your signals will travel through<br />
the mixer at optimal levels. Also, the<br />
labels on our controls are measured<br />
in decibels (dB), so you’ll know what<br />
you’re doing level-wise if you choose to<br />
change a control’s settings.<br />
27<br />
25<br />
29<br />
28<br />
26<br />
25. CHANNEL FADER<br />
The fader is almost the last control in<br />
a channel’s signal path. It’s placed after<br />
the EQ [32] and MUTE [30] (post-EQ<br />
/post-MUTE), and before PAN [31]<br />
(pre-PAN). The “U” mark, about threequarters<br />
of the way up, indicates unity<br />
gain, meaning no increase or decrease<br />
of signal level. All the way up provides<br />
an additional 10 dB, should you need to<br />
boost a section of a song. If you find that<br />
the overall level is too quiet or too loud<br />
with a fader near unity, you’ll want to<br />
confirm the GAIN setting by performing<br />
the Level-Setting Procedure.<br />
A Clean Fade<br />
Faders are not rocket<br />
science — they operate by<br />
dragging a metal pin (the<br />
wiper) across a carbon-based strip (the<br />
track). It is possible for airborne crud<br />
to land on the track. Should that happen,<br />
you may hear scratchy noises or<br />
signal dropouts as the wiper stumbles<br />
over the crud. Do all you can to keep<br />
airborne crud out of your profession.<br />
Use air conditioned rooms whenever<br />
possible, avoid smoking near the mixer,<br />
keep food and drink away from the<br />
mixer, and for pity’s sake, never put the<br />
mixer in your kitchen! We also recommend<br />
“exercising” the faders — give<br />
them a walk up and down once a week<br />
or so, and that will help scare the crud<br />
away. We do not recommend spray<br />
cleaners.<br />
26. ASSIGN (1–2, 3–4, L/R)<br />
Alongside each channel fader are four buttons,<br />
labeled SOLO, 1–2, 3–4 and L/R. The bottom three are<br />
collectively referred to as channel assignment switches.<br />
1, 3 and L are the left sides of these stereo pairs, and<br />
2, 4 and R are the right sides. Used in conjunction with<br />
the channel’s PAN [31] knob, these switches determine<br />
the destination of a channel’s signal: With the PAN knob<br />
set at the center detent, the left and right sides receive<br />
equal signal levels. To feed only one side or the other,<br />
just turn the PAN knob accordingly.<br />
If you’re doing a mixdown to a 2-track, simply engage<br />
the L/R switch on each channel that you want to hear,<br />
and they’ll be sent to the main mix. If you want to create<br />
a subgroup of certain channels, engage either the 1–2<br />
or 3–4 switches instead of the L/R, and they’ll be sent<br />
to the appropriate subgroup faders. From there, the<br />
subgroups can be sent back to the main mix, allowing<br />
you to use the subgroup faders as a master control for<br />
those channels.<br />
If you’re printing new tracks or bouncing existing<br />
ones, you’ll also use the 1–2 and 3–4 switches, but not<br />
the L/R switch. Here, you don’t want the subgroups sent<br />
back into the main mix, but sent out, via the SUB OUT<br />
[8] jacks, to your multitrack inputs. However, if you’re<br />
printing tracks via the DIRECT OUT [5] jacks, all the<br />
channel assign switches should be disengaged (up).<br />
The <strong><strong>16</strong>42</strong>-<strong>VLZ3</strong> is what we call a “true 4-bus mixer.”<br />
Each channel can be assigned or unassigned to any of<br />
the subgroups without affecting the other subgroups or<br />
settings within the channel, and each subgroup has its<br />
own master fader and dedicated output. In fact, since<br />
there are 4 subgroups and the main L/R mix, it’s actually<br />
a true 6-bus mixer.<br />
27. SOLO<br />
This lovable switch allows you to check signals in your<br />
headphones and control room without having to assign<br />
them to the L/R, 1-2 or 3-4 mixes.<br />
You can solo as many channels as you like. SOLO does<br />
not interrupt any of the other channels, buses or outputs<br />
— that’s called nondestructive solo. When SOLO is<br />
pressed, that channel's -20 (SOLO) LED [28] will light<br />
constantly, so you can easily catch any channels which<br />
have been soloed by those naughty SOLO pixies.<br />
Using the MODE [44] switch, the <strong><strong>16</strong>42</strong>-<strong>VLZ3</strong>’s solo<br />
system comes in two flavors: NORMAL (AFL) (sometimes<br />
called SIP, or solo-in-place) and LEVEL SET<br />
(PFL) (sometimes called PFL, or pre-fader-listen). The<br />
MODE switch is described on page 20.<br />
14 <strong><strong>16</strong>42</strong>-<strong>VLZ3</strong>
LEVEL SET (PFL) taps the channel signal<br />
before the fader. If you have a channel’s fader<br />
set way below “U” (unity gain), SOLO won’t<br />
know that and will send a unity gain signal to the control<br />
room, headphones, and meters. That may result in a<br />
startling level boost at these outputs, depending on the<br />
position of the SOLO [46] level knob.<br />
In a nutshell, soloed channels are sent to the SOURCE<br />
[42] mix, that ultimately feeds your control room,<br />
headphones, and meters. Whenever SOLO is engaged,<br />
all SOURCE selections (MAIN MIX, 1–2, 3–4 and TAPE)<br />
are defeated, to allow the soloed channel to do just that<br />
— SOLO!<br />
28. –20 (SOLO) LED<br />
An LED that does two completely different things!<br />
This saves space, but requires some explanation.<br />
First, the “–20” part: Often referred to as “signal activity,”<br />
this LED will flicker in time with the signal present<br />
in that channel. It’s handy for confirming that a channel<br />
is indeed active, and may also lend a clue as to what the<br />
signal is. For instance, a kick drum will cause the LED<br />
to pulse in time with the drum, and a synth pad will<br />
cause it to glow a bit more steadily.<br />
Now for the “SOLO” part: When a channel’s SOLO [27]<br />
switch is engaged, this LED will glow steadily. It will<br />
also be brighter than it would be as a –20 indicator. In<br />
conjunction with the RUDE SOLO LIGHT [47], you can<br />
find a rogue SOLO switch very quickly.<br />
29. OL (MUTE) LED<br />
Another LED that does two different things!<br />
First, the “OL” part: “OL” means overload, or clip. You<br />
don’t want that to happen. Ever. Clipping can happen<br />
to any mixer — it’s the point where the signal’s voltage<br />
tries to exceed the supply voltages that power the<br />
circuitry. This OL LED will come on just before clipping,<br />
so if you see it, take immediate action: Perform the<br />
Level-Setting Procedure. If that doesn’t help, check for<br />
excessive use of EQ boost or fader gain. Like the –20<br />
LED, it will flicker in time with that channel’s signal.<br />
Now for the “MUTE” part. Assuming your levels are<br />
set correctly, the OL LED will never come on as a result<br />
of clipping. That’s pretty boring. So, to liven things up,<br />
this LED will glow steadily when that channel’s MUTE<br />
switch is engaged.<br />
Here is a quick reference to these LEDs:<br />
Name Color Flickering Glowing<br />
–20 (SOLO) green signal present channel soloed<br />
OL (MUTE) red channel clipping channel muted<br />
30. MUTE<br />
Engaging a channel’s MUTE switch provides the same<br />
results as turning the fader all the way down: Any channel<br />
assignment to L/R, 1-2 or 3-4 will be interrupted. All<br />
the post AUX sends will be silenced, as will the DIRECT<br />
OUT [5] signals on channels 1 through 8. And of course,<br />
that fun-loving OL (MUTE) LED [29] will commence<br />
to glow. The PRE AUX sends, channel INSERT [4]<br />
send and SOLO [27] (in LEVEL SET (PFL) mode) will<br />
continue to function during MUTE.<br />
Depending on the audio content in a channel, engaging<br />
its MUTE switch may cause a slight popping sound.<br />
This is not a problem within the mixer, and it can be<br />
avoided: Simply engage the LOW CUT [34] switch on<br />
each channel (unless its low frequency content is vitally<br />
important, such as a kick drum or bass guitar). LOW<br />
CUT eliminates subsonic debris, which causes the pop,<br />
and its effect is usually transparent.<br />
31. PAN<br />
PAN adjusts the amount of channel signal sent to the<br />
left versus the right outputs. PAN determines the fate<br />
of the L/R assignment, subgroups 1–2 and 3–4, and the<br />
SOLO [27] (in NORMAL (AFL) mode).<br />
With the PAN knob hard left, the channel signal will<br />
feed the left main mix, subgroup 1, subgroup 3 and left<br />
NORMAL (AFL) solo mode (assuming their assignment<br />
switches are engaged).<br />
With the knob hard right, the channel signal feeds<br />
the right main mix, subgroup 2, subgroup 4 and right<br />
NORMAL (AFL) solo mode.<br />
With the PAN knob set somewhere in-between left<br />
and right, the signal will be divided between the left and<br />
right buses.<br />
The PAN knob behaves a little differently for the stereo<br />
channel strips. Since there is a left and right input<br />
on these channels, the PAN knob controls the relative<br />
balance between the left and right sides, just like the<br />
balance control on your stereo system at home.<br />
Stereo Sources<br />
Use channels 9-<strong>16</strong> to connect stereo sound sources. If<br />
you must use the mono channel strips (1-8) for stereo<br />
sources, follow this standard convention: Always plug<br />
the left signal into an “odd” channel (1, 3, 5, etc.) and<br />
the right signal into the adjacent “even” channel (2, 4, 6,<br />
etc.). Then pan the odd channel hard left and the even<br />
channel hard right.<br />
Owner’s <strong>Manual</strong><br />
Owner’s <strong>Manual</strong><br />
15
<strong><strong>16</strong>42</strong>-<strong>VLZ3</strong><br />
34<br />
CONSTANT LOUDNESS ! ! !<br />
The <strong><strong>16</strong>42</strong>-<strong>VLZ3</strong>’s PAN [31]<br />
controls employ a design<br />
called “Constant Loudness.”<br />
It has nothing to do with living next to<br />
a freeway. As you turn the PAN knob<br />
from left to right (thereby causing<br />
the sound to move from the left to the<br />
center to the right), the sound will appear<br />
to remain at the same volume (or<br />
loudness).<br />
The MID EQ , or “midrange,” has a fixed bandwidth of<br />
1 octave. The MID knob sets the amount of boost or cut,<br />
up to 15 dB, and is effectively bypassed at the center<br />
detent. The frequency knob sets the center frequency,<br />
sweepable from 100 Hz to 8 kHz.<br />
+15<br />
+10<br />
+5<br />
0<br />
–5<br />
–10<br />
–15<br />
20Hz 100Hz 1kHz 10kHz 20kHz<br />
+15<br />
+10<br />
+5<br />
0<br />
–5<br />
–10<br />
–15<br />
20Hz 100Hz 1kHz 10kHz 20kHz<br />
32<br />
If you have a channel panned hard<br />
left (or right) and reading 0 dB, it<br />
must dip down about 4 dB on the left<br />
(or right) when panned center. To do<br />
otherwise, like those Brand X mixers,<br />
would make the sound appear much<br />
louder when panned center.<br />
32. 3-BAND MID-SWEEP EQ<br />
The eight mono channels have a<br />
3-band, mid-sweep equalization: LOW<br />
shelving at 80 Hz, MID sweep peaking<br />
from 100 Hz to 8 kHz, and HI shelving<br />
at 12 kHz. It’s probably all the EQ you’ll<br />
ever need! (Shelving means that the<br />
circuitry boosts or cuts all frequencies<br />
past the specified frequency. For<br />
example, the <strong><strong>16</strong>42</strong>-<strong>VLZ3</strong>’s LOW EQ<br />
boosts bass frequencies starting at 80<br />
Hz and continuing down to the lowest<br />
note you never heard. Peaking means<br />
that certain frequencies form a “hill”<br />
around the center frequency.)<br />
The LOW EQ provides up to 15 dB<br />
boost or cut below 80 Hz. The circuit<br />
is flat (no boost or cut) at the center<br />
detent position. This frequency represents<br />
the punch in bass drums, bass<br />
guitar, fat synth patches, and some<br />
really serious male singers.<br />
+15<br />
+10<br />
+5<br />
Most of the root and lower harmonics that define a<br />
sound are located in the 100 Hz–8 kHz frequency range,<br />
and you can create drastic changes with these two<br />
knobs. Many engineers use MID EQ to cut midrange<br />
frequencies, not boost them. One popular trick is to set<br />
the MID fully up, turn the frequency knob until you find<br />
a point where it sounds just terrible, then back the MID<br />
down into the cut range, causing those terrible frequencies<br />
to disappear. Sounds silly, but it works. Sometimes.<br />
The HI EQ provides you up to 15 dB boost or cut<br />
above 12 kHz, and it is also flat at the detent. Use it to<br />
add sizzle to cymbals, an overall sense of transparency,<br />
or an edge to keyboards, vocals, guitar and bacon frying.<br />
Turn it down a little to reduce sibilance or to mask tape<br />
hiss.<br />
+15<br />
+10<br />
+5<br />
0<br />
–5<br />
–10<br />
–15<br />
20Hz 100Hz 1kHz 10kHz 20kHz<br />
With too much EQ, you can screw things up royally.<br />
We’ve designed a lot of boost and cut into each equalizer<br />
circuit because we know everyone will occasionally<br />
need that. But if you max the EQ on every channel,<br />
you’ll get mix mush. Equalize subtly and use the left<br />
sides of the knobs (cut), as well as the right (boost).<br />
If you find yourself repeatedly using full boost or cut,<br />
consider altering the sound source, such as placing a<br />
mic differently, trying a different kind of mic, changing<br />
the strings, or gargling.<br />
0<br />
–5<br />
–10<br />
–15<br />
20Hz 100Hz 1kHz 10kHz 20kHz<br />
Used in conjunction with the LOW CUT [34] switch,<br />
you can boost the LOW EQ without injecting a ton of<br />
subsonic debris into the mix. We recommend using the<br />
LOW CUT feature on all channels, except low frequency<br />
signals, like kick drums and bass guitars.<br />
<strong>16</strong> <strong><strong>16</strong>42</strong>-<strong>VLZ3</strong>
33. 4-BAND FIXED-FREQUENCY EQ<br />
The stereo channels (9-<strong>16</strong>) have a 4-band, fixed-frequency<br />
equalization: LOW shelving at 80 Hz, LOW MID<br />
peaking at 400 Hz, HI MID peaking at 2.5 kHz, and HI<br />
shelving at 12 kHz.<br />
Each of these filters provides up to 15 dB of boost or<br />
cut. As with the mono channels, the circuit is flat (no<br />
boost or cut) at the center detent positions.<br />
34. LOW CUT<br />
The LOW CUT switch (not present on channels<br />
13-<strong>16</strong>), often referred to as a high pass filter, cuts bass<br />
frequencies below 75 Hz at a rate of 18 dB per octave.<br />
This ain’t no thrown-in dime-store filter — an 18 dB per<br />
octave curve requires an elaborate circuit. Nothing but<br />
the best for you.<br />
We recommend that you use this on every sound<br />
source except kick drum, bass guitar, bassy synth patches,<br />
or recordings of earthquakes. These aside, there isn’t<br />
much down there that you want to hear, and filtering it<br />
out makes the low stuff you do want much more crisp<br />
and tasty. Not only that, but low cut can help reduce the<br />
possibility of feedback in live situations, and it helps to<br />
conserve amplifier power.<br />
With LOW CUT, you can safely boost LOW EQ. Many<br />
times, bass shelving eq can really benefit voices. Trouble<br />
is, adding LOW EQ also boosts the subsonic debris:<br />
Stage rumble, mic handling clunks, wind noise and<br />
breath pops. LOW CUT removes all that debris so you<br />
can boost the LOW EQ without frying your woofer. Here’s<br />
a frequency curve of LOW EQ combined with LOW CUT:<br />
+15<br />
+10<br />
using AUX 1 or 2 in the PRE [36] mode,<br />
these mix levels can be obtained independently<br />
of a channel’s fader settings.<br />
We recommend going into<br />
a stereo reverb in mono and<br />
returning in stereo. We have<br />
found that on most “stereo”<br />
reverbs, the second input just ties up an<br />
extra aux send and adds nothing to the<br />
sound. There are exceptions, so feel free<br />
to try it both ways. Should you choose to<br />
use two aux sends, use the “odd” AUX (1<br />
or 3) to feed its left input and the “even”<br />
AUX (2 or 4) to feed the right input. Remember,<br />
if you’re also dealing with a stereo<br />
source signal, you’ll want to follow the<br />
sides — use the odd AUX on the channel<br />
carrying the left side and the even AUX<br />
on the channel carrying the right.<br />
36. PRE<br />
This switch determines the tap point<br />
of AUX 1 and 2. Generally, “post” sends<br />
are used to feed effects devices, and “pre”<br />
sends are used to feed your stage monitors.<br />
See the “Pre vs. Post” diagram below.<br />
AUX 3 and 4 are always in post mode.<br />
In post mode (switch up), AUX 1 and 2<br />
will follow the EQ [32], LOW CUT [34],<br />
FADER [25] and MUTE [30] settings. If<br />
you fade the channel, you fade the send.<br />
This is a must for effects sends, since you<br />
want the levels of your “wet” signals to<br />
follow the level of the “dry.”<br />
34<br />
35<br />
36<br />
33<br />
Owner’s <strong>Manual</strong><br />
+5<br />
0<br />
–5<br />
–10<br />
–15<br />
20Hz 100Hz 1kHz 10kHz 20kHz<br />
35. AUX 1, 2, 3, & 4<br />
These four knobs tap a portion of each channel’s<br />
signal, mix them together and send them to the AUX<br />
SEND [6] outputs. They are off when turned fully down,<br />
deliver unity gain at the center detent, and can provide<br />
up to 15 dB of gain turned fully up. Chances are you’ll<br />
never need this extra gain, but it’s nice to know it’s<br />
there if you do.<br />
In PRE mode (switch down), AUX 1<br />
and 2 follow the GAIN [3] and LOW CUT<br />
settings only. EQ, PAN [31], FADER and<br />
MUTE settings have no effect on the PRE<br />
sends. This is the preferred method for<br />
setting up stage monitor feeds — they’ll<br />
be controlled independently of the fader<br />
and mute moves.<br />
INPUT GAIN INSERT<br />
LOW<br />
CUT<br />
'PRE' SIGNAL<br />
EQ<br />
MUTE<br />
FADER<br />
'POST' SIGNAL<br />
PAN<br />
ASSIGN<br />
AUX 1<br />
The AUX SEND outputs can then be patched to parallel<br />
effects processor inputs or stage monitor amp inputs.<br />
AUX SENDS 1 and 2 levels are controlled not only by the<br />
channel’s AUX knobs, but also by the AUX SEND [49]<br />
master knobs.<br />
PRE SWITCH<br />
AUX 2<br />
AUX SENDS can also be used to generate separate<br />
mixes for recording or “mix-minuses” for broadcast. By<br />
Owner’s <strong>Manual</strong><br />
17
<strong><strong>16</strong>42</strong>-<strong>VLZ3</strong><br />
Output Section Description<br />
The main mix signals are off with the fader fully down,<br />
the “U” marking is unity gain, and fully up provides 10<br />
dB of additional gain. This additional gain will typically<br />
never be needed, but it’s nice to know it’s there. The<br />
fader itself is a stereo version of the channel and subgroup<br />
faders — same supersmooth custom taper, same<br />
dead silence when turned fully down. This is the fader<br />
to pull down at the end of the song when you want “The<br />
Great Fade-Out.”<br />
39<br />
40<br />
41<br />
38. SUBGROUP FADERS<br />
As you might expect, these faders control the levels<br />
of signals sent to the SUB OUT [8] jacks. All channels<br />
that are assigned to subgroups, not muted and not<br />
turned fully down, will appear at the SUB OUTS. Unlike<br />
the MAIN OUTS [14], the subgroup signals do not pass<br />
through an insert jack on their way to the subgroup<br />
faders. That’s no problem — should you want to send<br />
these signals through a serial effects processor, simply<br />
patch from the SUB OUTS to the effect’s input, and from<br />
the effect’s output to whatever the final destination is,<br />
usually a multitrack recorder.<br />
The subgroup signal is off when its fader is fully down,<br />
the “U” marking is unity gain, and fully up provides 10<br />
dB additional gain. Remember that if you’re treating<br />
two subgroups as a stereo pair, subgroup 1 and 2 for<br />
example, make sure that both subgroup faders “ride”<br />
together, to maintain the left/right balance.<br />
38<br />
37<br />
You’ve just learned about the input channels and how<br />
the signals get in and out. The signals come in via MIC<br />
[1] and LINE [2] input jacks, are manipulated by the<br />
channels, and then sent to the output section. In the<br />
output section, things get a bit more complicated, so put<br />
on your thinking caps.<br />
37. MAIN MIX FADER<br />
This controls the levels of signals sent to the MAIN<br />
OUTS [14] and TAPE [11] OUTPUT jacks. All channels<br />
and stereo returns that are assigned to the main mix,<br />
that are not muted or turned fully down, will appear at<br />
the MAIN OUTS. Before the main mix gets to this fader,<br />
the signals pass through the MAIN INSERT [13].<br />
39. ASSIGN TO MAIN MIX<br />
One popular use of the subgroups is to use them as<br />
master faders for a group of channels on their way to<br />
the main mix. Let’s say you’ve got a drum kit hogging up<br />
seven channels and you’re going to want to fade them<br />
out at a different rate than the other channels. You don’t<br />
want to try that with seven hands or seven fingers, so<br />
just un-assign these channels from L/R, reassign them<br />
to subgroup 1–2, engage the ASSIGN TO MAIN MIX,<br />
LEFT on subgroup 1 and RIGHT on subgroup 2. Now you<br />
can ride the entire stereo drum mix with two faders — 1<br />
and 2.<br />
If you engage just one of these switches per subgroup<br />
(left or right), the signal sent to the main mix will be<br />
the same level as the SUB OUTs [8]. If you want a subgroup<br />
to appear in the center of the main mix, engage<br />
both left and right switches for that subgroup. The<br />
signal will be sent to both sides, and will be attenuated<br />
just enough to preserve constant loudness, just like the<br />
channel PAN [31] knobs when set in the center.<br />
18 <strong><strong>16</strong>42</strong>-<strong>VLZ3</strong>
43<br />
40<br />
41<br />
42. CONTROL ROOM SOURCE<br />
Typically, the engineer sends the main mix to a live<br />
audience or to a mixdown deck (if recording). But what<br />
if the engineer needs to hear something other than the<br />
main mix With the <strong><strong>16</strong>42</strong>-<strong>VLZ3</strong>, the engineer has several<br />
choices of what to listen to.<br />
Via these switches, you can choose to listen to any<br />
combination of MAIN MIX, SUBS 1-2, SUBS 3-4 and<br />
TAPE. Selections made here deliver stereo signals to the<br />
control room, headphones, and meters. These signals<br />
are tapped after their respective level controls — post-<br />
MAIN MIX [37] fader, post SUBGROUP [38] faders and<br />
post-TAPE IN [40] knob. With no switches engaged,<br />
there will be no signal at these outputs and no meter<br />
indication, with two exceptions (SOLO and STEREO<br />
RETURN 4).<br />
One of those exceptions is the SOLO function. Regardless<br />
of the SOURCE selection, engaging a SOLO [27]<br />
switch will replace that selection with the SOLO signal,<br />
also sent to the control room, headphones, and meters.<br />
This is what makes the Level-Setting Procedure so easy<br />
to do.<br />
Now you know how to select the signals you want<br />
to send to the engineer’s control room and/or phones.<br />
From there, these signals all pass through two level<br />
controls:<br />
Owner’s <strong>Manual</strong><br />
42<br />
40. TAPE IN (LEVEL)<br />
This knob controls the level of the stereo signal coming<br />
from the TAPE [12] INPUT RCA jacks. Its range is<br />
off when fully down, unity at the center detent, with 20<br />
dB additional gain turned fully up, which may come in<br />
handy if you’ve patched in a “walkperson” type device<br />
with wimpy output levels. After the TAPE IN level is determined,<br />
the stereo tape signal can be sent to either of<br />
two places — the main mix or the SOURCE [42] matrix.<br />
41. TAPE TO MAIN MIX<br />
Engaging this switch is just like engaging the L/R<br />
switch on a channel — the signal, stereo in this case, is<br />
sent to the main mix. It does not interrupt other signals,<br />
just adds itself to them. This switch can be very handy<br />
in a live sound situation when you want to play soothing<br />
elevator music to an anxious crowd.<br />
43. CONTROL ROOM AND PHONES<br />
These knobs control the level of the stereo C-R OUTS<br />
[9] and PHONES [10] outputs.<br />
When MAIN MIX is your SOURCE [42] selection,<br />
those signals will now pass through two level controls<br />
on the way to your control room amp and headphones<br />
— the MAIN MIX [37] fader and these CONTROL<br />
ROOM and PHONES controls. This way, you can send a<br />
nice healthy level to the MAIN OUT [14] jacks (MAIN<br />
MIX fader at “U”), and a quieter level to the control<br />
room or headphones (CONTROL ROOM or PHONES<br />
knobs wherever you like).<br />
Whatever your selection, you can also use the control<br />
room outputs for other applications. It can be used as<br />
an additional main mix output and this one will have its<br />
own level control. However, should you do this, be aware<br />
that if you engage a SOLO switch, it will interrupt the<br />
mix, as we’ve already covered.<br />
Once again, engaging a SOLO switch will cause this<br />
dramatic turn of events: Any existing SOURCE matrix<br />
selections will be replaced by the SOLO signals, appearing<br />
in the control room, headphones, and meters. The<br />
audible solo levels are controlled by the SOLO [46] level<br />
knob. The SOLO levels appearing on the meter display<br />
are not controlled by anything — you wouldn’t want<br />
that. You want to see the actual channel level on the<br />
meter display, regardless of how loud you’re listening.<br />
Owner’s <strong>Manual</strong><br />
19
<strong><strong>16</strong>42</strong>-<strong>VLZ3</strong><br />
44. MODE (NORMAL (AFL)/LEVEL SET (PFL))<br />
You may have already seen some of this in the SOLO<br />
discussion, but in case you missed it: The <strong><strong>16</strong>42</strong>-<strong>VLZ3</strong>’s<br />
solo system comes in two flavors:<br />
• NORMAL (AFL) (sometimes called SIP, or soloin-place)<br />
• LEVEL SET (PFL) (sometimes called PFL, or<br />
pre-fader-listen)<br />
In NORMAL (AFL), the soloed channel’s signal is<br />
sent directly to the control room, headphones, and meters,<br />
just as it would sound to the channel’s assignment<br />
switches: post-EQ [32], post-FADER [25] and post-PAN<br />
[31]. The only difference is that SOLO works regardless<br />
of the channel’s assignment positions, and that makes it<br />
really handy — you can check out a channel before you<br />
assign it.<br />
NORMAL (AFL) is the preferred mode during mixdown.<br />
For example, if the channel has some midrange<br />
boost at 4.2 kHz, is panned a smidgen to the left, and its<br />
fader is at –5 dB, that’s exactly what you’ll hear if you<br />
SOLO during NORMAL (AFL) mode. It’s just as if you<br />
took the time to MUTE all the other channels.<br />
LEVEL SET (PFL) solo is the key player in the all-important<br />
Level-Setting Procedure. It’ll send the channel’s<br />
actual internal levels to the meters so you’ll know just<br />
what’s going on, level-wise. This procedure should be<br />
performed every time a new sound source is patched<br />
into a channel’s MIC [1] or LINE [2] input jacks.<br />
LEVEL SET (PFL) is also the preferred mode for SR<br />
(sound reinforcement, or live sound), to preview channels<br />
before they are let into the mix. It won’t give you<br />
stereo placement, but will give you signal even if the<br />
fader is turned down.<br />
Remember, LEVEL SET (PFL) taps the<br />
channel signal before the fader. If you have<br />
a channel’s fader set way below “U” (unity<br />
gain), SOLO won’t know that and will send a unity gain<br />
signal to the control room, headphones, and meters.<br />
That may result in a startling level boost at these outputs,<br />
depending on the position of the SOLO level knob.<br />
45. LEVEL SET LED<br />
To quote step 6 of the Level-Setting Procedure, “Push<br />
in the MODE [44] switch in the output section (LEVEL<br />
SET (PFL) mode) — the LEVEL SET LED will light.”<br />
When the solo MODE switch is engaged, it’s in LEVEL<br />
SET (PFL) mode, the mode you must be in to set levels.<br />
Now, when you engage any solo switch, this LED will<br />
be a “green light” to set levels. If you tried to set levels<br />
during NORMAL (AFL) mode, the meter display would<br />
be at the mercy of the channel fader, and that would be<br />
a big problem.<br />
46. SOLO (LEVEL)<br />
This knob controls the level of the signals coming<br />
from the SOLO system. It’s range is off when fully down,<br />
unity at the center detent, with 10 dB additional gain<br />
turned fully up. After the SOLO level is determined, the<br />
SOLO signals will proceed to take over the control room,<br />
headphones, and meters.<br />
Once again, LEVEL SET (PFL) SOLO taps<br />
the channel signal before the fader. If you<br />
have a channel’s fader set way below “U”<br />
(unity gain), LEVEL SET (PFL) SOLO won’t know that<br />
and will send a unity gain signal to the control room,<br />
headphones, and meters. That may result in a startling<br />
level boost at these outputs, depending on the position<br />
of the SOLO level knob.<br />
47. RUDE SOLO LIGHT<br />
This flashing LED (light emitting diode) serves two<br />
purposes — to remind you that you’re in SOLO, and to<br />
let you know that you’re mixing on a Mackie. No other<br />
company is so concerned about your level of SOLO<br />
awareness. We even force the soloed chan nel’s –20 LED<br />
to play along, so you can find that rogue switch fast.<br />
If you work on a mixer that has a SOLO function with<br />
no indicator lights, and you happen to forget you’re in<br />
SOLO, you can easily be tricked into thinking that something<br />
is wrong with your mixer. Hence the RUDE SOLO<br />
LIGHT. It’s especially handy at about 3:00 in the morning,<br />
when no sound is coming out of your monitors, even<br />
though your multitrack is playing back like mad.<br />
48. METERS<br />
The <strong><strong>16</strong>42</strong>-<strong>VLZ3</strong>’s peak metering system is made up<br />
of two columns of twelve lobster-hypnotizing LEDs.<br />
Deceptively simple, considering the multitude of signals<br />
that can be monitored by it. If nothing is selected in<br />
the SOURCE [42] matrix, and no channels are in SOLO<br />
[27], the meter display will just sit there. To put them<br />
to work, you must make a selection in the SOURCE<br />
matrix (or engage a SOLO switch).<br />
Why You want the meter display to reflect what the<br />
engineer is listening to, and the engineer is listening<br />
either to the C-R OUTS [9] or the PHONES [10] output.<br />
The only difference is that while the listening levels are<br />
controlled by the CTL ROOM and PHONES [43] knobs,<br />
the meter display reads the SOURCE mix before the<br />
controls, giving you the real facts at all times, even if<br />
you’re not listening at all.<br />
When the solo MODE [44] switch is set to LEVEL SET<br />
(PFL) (down), all soloed signals will be sent to the left<br />
meter only. That, combined with LEVEL SET LED [45],<br />
are along the path of enlightenment known as the Level-<br />
Setting Procedure. During NORMAL (AFL) mode, the<br />
meters will behave normally.<br />
20 <strong><strong>16</strong>42</strong>-<strong>VLZ3</strong>
49<br />
49<br />
50<br />
50<br />
51<br />
51<br />
Thanks to the <strong><strong>16</strong>42</strong>-<strong>VLZ3</strong>’s wide dynamic range, you<br />
can get a good mix with peaks flashing anywhere between<br />
–20 and +10 dB on the meter display. Most amplifiers<br />
clip at about +10 dB, and some recorders aren’t so<br />
forgiving either. For best real-world results, try to keep<br />
your peaks between “0” and “+7.”<br />
Please remember: Audio meter displays are just tools<br />
to help assure you that your levels are “in the ballpark.”<br />
You don’t have to stare at them (unless you want to).<br />
AUX DISCUSSION<br />
SENDS are outputs, RETURNS are inputs. The AUX<br />
[35] knobs tap the signal off the channel and sends it to<br />
the AUX SEND [6] outputs: AUX 1 and 2 are sent to the<br />
AUX SENDS 1 and 2 [49] master knobs before the AUX<br />
SEND outputs, and AUX 3 through 6 are sent directly.<br />
Owner’s <strong>Manual</strong><br />
These outputs are fed to the inputs of a reverb or<br />
other device. From there, the outputs of the external<br />
device are fed back to the mixer’s STEREO RETURN [7]<br />
inputs. Then these signals are sent through the STEREO<br />
RETURN [51] level controls, and finally delivered to the<br />
main mix.<br />
44<br />
46<br />
45<br />
48<br />
So, the original “dry” signals come from the channels<br />
to the main mix and the affected “wet” signals come<br />
from the STEREO RETURNS to the main mix, and once<br />
mixed together, the dry and wet signals combine to create<br />
a glorious sound. Armed with this knowledge, let’s<br />
visit the Auxiliary World:<br />
Meters vs. Reality<br />
47<br />
You may already be an expert at the world of “+4” (+4<br />
dBu=1.23 V) and “–10” (–10 dBV=0.32 V) operating<br />
levels. Basically, what makes a mixer one or the other<br />
is the relative 0 dB VU (or 0 VU) chosen for the meter<br />
display. A “+4” mixer, with a +4 dBu signal pouring out<br />
the back will actually read 0 VU on its meter display.<br />
A “–10” mixer, with a –10 dBV signal trickling out, will<br />
read, you guessed it, 0 VU on its meter display. So when<br />
is 0 VU actually 0 dBu Right now!<br />
At the risk of creating another standard, Mackie’s<br />
compact mixers address the need of both crowds by<br />
calling things as they are: 0 dBu (0.775 V) at the output<br />
shows as 0 VU on the meter display. What could be<br />
easier By the way, the most wonderful thing about standards<br />
is that there are so many to choose from.<br />
49. AUX SENDS (MASTER)<br />
These knobs provide overall level control of AUX<br />
SENDS 1 and 2, just before they’re delivered to their<br />
AUX SEND [6] outputs. This is perfect for controlling<br />
the level of stage monitors, since you’ll be using AUX 1<br />
and 2 for this, with their PRE [36] switches engaged.<br />
AUX SENDS 3 and 4 have no such control — they just<br />
send their mixes directly to their AUX SEND outputs at<br />
unity gain.<br />
These knobs go from off (turned fully down), to unity<br />
gain at the center detent, with 10 dB of extra gain<br />
(turned fully up). As with some other level controls, you<br />
may never need the additional gain, but if you ever do,<br />
you’ll be glad you bought a Mackie.<br />
These are usually the knobs you turn up when the<br />
lead singer glares at you, points at his stage monitor,<br />
and sticks his thumb in the air. (It would follow suit<br />
that if the singer stuck his thumb down, you’d turn the<br />
knobs down, but that never happens.)<br />
Owner’s <strong>Manual</strong><br />
21
<strong><strong>16</strong>42</strong>-<strong>VLZ3</strong><br />
50. AUX SENDS SOLO and LED<br />
In live sound situations, AUX SEND [6] outputs 1<br />
and 2 are likely to feed your stage monitors. You’ll want<br />
to check the mix you’re sending them, and that’s what<br />
these two buttons are for. (AUX 3 and 4 have no such<br />
switch.) Beside each switch is a green LED that, just<br />
like the channel’s –20 LED, helps you find the rogue<br />
SOLO switch.<br />
The only thing different about AUX SENDS SOLO is<br />
that it’s not really PFL (pre-fader listen), and it’s not<br />
really SIP (solo-in-place), it’s actually AFL (after-fader<br />
listen.) Read on:<br />
In the NORMAL (AFL) position of the MODE [44]<br />
switch, you’ll get AUX SEND 1’s solo signal, post-AUX<br />
SENDS [49] master level, in the left side of the control<br />
room, headphones, and meters, and AUX SEND 2 on<br />
the right side. (If you ever use AUX 1 and 2 to create a<br />
stereo monitor mix, you’ll understand why.)<br />
In the LEVEL SET (PFL) position of the MODE<br />
switch, you’ll get the signal dead-center, but still post-<br />
AUX SENDS master level.<br />
51. STEREO RETURNS (LEVEL)<br />
These four controls set the overall level of effects<br />
received from the STEREO RETURN [7] input jacks.<br />
These controls are designed to handle a wide range of<br />
signal levels — each knob goes from off, to unity gain at<br />
the detent, to 20 dB gain fully clockwise, to compensate<br />
for low-level effects. Signals passing through these controls<br />
proceed directly to the MAIN MIX [37] fader, with<br />
exceptions that we’ll discuss in a moment.<br />
Typically, these knobs can just live at the center<br />
detent, and the effects device’s output control should<br />
be set at whatever they call unity gain (check their<br />
manual). If that turns out to be too loud or too quiet,<br />
adjust the effects device’s outputs, not the mixer. That<br />
way, the mixer’s knobs are easy to relocate at the center<br />
detent.<br />
52. TO AUX 1 and TO AUX 2<br />
If you want to add reverb or delay to the stage monitor<br />
mixes, these are the knobs for you. Operating independently<br />
of their respectively numbered STEREO RE-<br />
TURNS [51] level controls, these knobs are the same as<br />
the AUX 1 [35] and 2 knobs in the channel strip.<br />
These two knobs feed STEREO RETURN signals to<br />
their respective AUX SEND [6] outputs: TO AUX 1 feeds<br />
STEREO RETURN 1 to AUX SEND 1 [49] master, and<br />
TO AUX 2 feeds STEREO RETURN 2 to AUX SEND 2<br />
master. They are off when turned fully down, deliver<br />
unity gain at the center detent, and provide up to 15 dB<br />
of gain turned fully up. STEREO RETURN 3 and 4 have<br />
no such knobs.<br />
53. MAIN MIX TO SUBS (for RETURN 3)<br />
With this switch up, STEREO RETURN 3 behaves like<br />
all the others — it delivers a stereo signal, regulated<br />
by its level knob, to the main mix. When you engage<br />
this switch, the signals are removed from the main mix<br />
buses and sent to the 1-2/3-4 switch [54], which diverts<br />
the signal once more. We’re not finished. Please read on:<br />
54. 1–2/3–4 (for RETURN 3)<br />
If the MAIN MIX TO SUBS [53] switch is disengaged,<br />
the 1–2/3–4 switch does absolutely nothing. Let’s now<br />
assume it’s engaged. STEREO RETURN 3’s stereo signal<br />
will not be sent to the main mix, but to SUBGROUP<br />
FADERS [38] 1 and 2 (this switch up) or 3 and 4 (this<br />
switch down).<br />
Let’s say you’ve made a stereo drum submix on SUB-<br />
GROUP FADERS 1 and 2, so you can ride those two faders<br />
instead of the seven channels that the drums came<br />
from. SUBGROUP FADER 1 has its ASSIGN TO MAIN<br />
MIX [39], left button engaged and SUBGROUP FADER<br />
2 has its ASSIGN TO MAIN MIX, right button engaged,<br />
blending the drum submix back into the main mix. The<br />
drum channels are also sending signals to your reverb<br />
via the AUX SENDS [6], and the reverb outputs are<br />
patched into STEREO RETURN 3 [7]. So far so good.<br />
Even though you could send STEREO RETURN 3 directly<br />
to the main mix (MAIN MIX TO SUBS [53] switch<br />
up), you don’t want to. Instead, engage the MAIN MIX<br />
TO SUBS switch and make sure the 1–2/3–4 switch is<br />
up. Now the reverb return will be blended into the drum<br />
submix, and as you ride those two faders, the reverb<br />
level will follow.<br />
Why do we want that Because if you had just sent the<br />
reverb directly to the main mix (MAIN MIX TO SUBS<br />
switch up) and you did a drum fade-out using SUB-<br />
GROUP FADERS 1 and 2, the “dry” signals would fade<br />
out, but the “wet” signals would keep on singing. All you<br />
would hear is the drum reverb (the “wet”), and none of<br />
the original drum signals (the “dry”). That’s because the<br />
reverb is being fed by the channel’s AUX sends, and they<br />
have no idea that you’ve pulled down the SUBGROUP<br />
FADERS. That’s why we threw in these switches.<br />
22 <strong><strong>16</strong>42</strong>-<strong>VLZ3</strong>
50<br />
50<br />
51<br />
51<br />
52<br />
53 54<br />
55 56<br />
56. RETURNS SOLO<br />
This switch operates just like the channel SOLO [27]<br />
switches — engaging it sends signals to the control<br />
room, headphones, and meters, and interrupts whatever<br />
happened to be there before you soloed. It follows the<br />
MODE [44] switch setting as well. The only difference<br />
is that when you engage this RETURNS SOLO switch, it<br />
sends all four STEREO RETURNS signals to the SOLO<br />
circuit.<br />
Assume you want to solo the snare drum. Hit that<br />
channel’s SOLO switch, and you get the “dry” (no<br />
effects) snare only. That helps, but you want to hear<br />
it with the reverb you have patched into a STEREO<br />
RETURN. Leaving that channel’s SOLO switch engaged,<br />
also engage the RETURNS SOLO switch, and now you’ll<br />
get the dry snare and its reverb.<br />
Since it is a global feature, you’ll also get the signals<br />
from all the other STEREO RETURNS, so there may be<br />
some sounds that you didn’t want to hear. If they offend<br />
your sensibilities, simply turn down the STEREO RE-<br />
TURNS LEVELS [51] you don’t want to hear, or MUTE<br />
[30] the channels feeding the unwanted signal to the<br />
effects device you do want to hear.<br />
Owner’s <strong>Manual</strong><br />
Congratulations! You’ve just read about all the features<br />
of your <strong><strong>16</strong>42</strong>-<strong>VLZ3</strong>. You’re probably ready for a nice<br />
cup of tea. Go ahead. The rest of the manual can wait.<br />
55. C-R/PHNS ONLY (for RETURN 4)<br />
Once again, the default for all the STEREO RETURNS<br />
[7] is to feed them directly into the main mix. You’ve<br />
just learned about the optional exceptions involving<br />
STEREO RETURN 3. Not wanting to be left out, STEREO<br />
RETURN 4 also has an optional exception: By engaging<br />
this C-R/PHNS switch, you will remove STEREO RE-<br />
TURN 4’s stereo signal from the main mix and send it directly<br />
to the CTL ROOM/PHONES SOURCE [42] matrix.<br />
It matters not if any of the SOURCE matrix switches are<br />
assigned, but it will be interrupted, as usual, if a SOLO<br />
switch is engaged.<br />
Let’s pretend you’re doing a live mix to a 2-track deck,<br />
a house PA, or both, and you want to play along to a<br />
click track. You could run the click track directly into<br />
the main mix, but you don’t want the mixdown deck<br />
and/or audience to hear it. By gum, this is the switch<br />
for you. Similarly, it can be used for voice-over tracks,<br />
narration, anything you want heard by the engineer and<br />
players but not by the audience and mixdown deck.<br />
Owner’s <strong>Manual</strong><br />
23
<strong><strong>16</strong>42</strong>-<strong>VLZ3</strong><br />
Appendix A: Service Information<br />
Warranty Service<br />
Details concerning the Limited Warranty are spelled<br />
out on page 31 of this manual.<br />
If you think your <strong><strong>16</strong>42</strong>-<strong>VLZ3</strong> has a problem, please<br />
check out the following troubleshooting tips and do your<br />
best to confirm the problem. Visit the Support section of<br />
our website (www.mackie.com) where you will find lots<br />
of useful information such as FAQs, documentation and<br />
user forums. You may find the answer to the problem<br />
without having to send your mixer away.<br />
Troubleshooting<br />
Bad <strong>Channel</strong><br />
• Are the channels assigned to the correct mix<br />
(1-2, 3-4, L-R )<br />
• Is the fader up<br />
• Try unplugging any insert devices from the<br />
INSERT [4) jacks.<br />
• Try the same source signal in another channel,<br />
set up exactly like the suspect channel.<br />
Bad Output<br />
• Is the level control (if any) turned up<br />
• If you’re listening to the C-R OUTS [9] or<br />
PHONES [10] outputs, has a SOURCE selection<br />
been made<br />
• If it’s one of the MAIN OUTS [14], try unplugging<br />
its companion. For example, if it’s the 1/4"<br />
output, unplug the RCA output. If the problem<br />
goes away, it’s not the mixer.<br />
• If it’s a stereo pair, try switching them around.<br />
For example, if a left output is presumed dead,<br />
switch the left and right cords, at the mixer<br />
end. If the left is still dead, it’s not the mixer.<br />
• Unplug everthing from the MAIN INSERT [13].<br />
Noise<br />
Power<br />
• Turn the channel faders and STEREO RETURN<br />
knobs down, one by one. If the sound disappears,<br />
it’s either that channel or whatever is<br />
plugged into it, so unplug whatever that is. If<br />
the noise disappears, it’s from your whatever.<br />
Repair<br />
Service for Mackie products is available at a factoryauthorized<br />
service center. Service for Mackie products<br />
living outside the United States can be obtained through<br />
local dealers or distributors.<br />
If your <strong><strong>16</strong>42</strong>-<strong>VLZ3</strong> needs service, follow these instructions:<br />
1. Review the preceding troubleshooting suggestions.<br />
Please.<br />
2. Call Tech Support at 1-800-898-3211, 7 am to 5 pm<br />
PST, to explain the problem and request a Service<br />
Request Number. Have your serial number ready.<br />
You must have an Service Request Number before<br />
you can obtain warranty service.<br />
3. Keep this owner’s manual and the detachable linecord.<br />
We don’t need them to repair the unit.<br />
4. Pack the unit in its original package, including endcaps<br />
and box. This is VERY IMPORTANT. Mackie is<br />
not responsible for any damage that occurs due to<br />
non-factory packaging.<br />
5. Include a legible note stating your name, shipping<br />
address (no P.O. boxes), daytime phone number, a<br />
copy of your receipt, Service Request Number, and a<br />
detailed description of the problem, including how<br />
we can duplicate it.<br />
6. Write the Service Request Number in BIG PRINT<br />
on top of the box. Units sent without the SR number<br />
will be refused.<br />
7. Tech Support will tell you where to ship the unit for<br />
repair. We suggest insurance for all forms of cartage.<br />
8. You will need to contact the authorized service<br />
center for their latest turn-around times. The unit<br />
should be packaged in its original packing box, and<br />
must have the Service Request Number on the box.<br />
Once it’s repaired, the authorized service center<br />
will ship it back by ground shipping, pre-paid (if it<br />
was a warranty repair).<br />
Note: Under the terms of the warranty, you must ship or<br />
drop-off the unit to an authorized service center.<br />
The return ground shipment is covered for those<br />
units deemed by us to be under warranty.<br />
Note: You must have a sales receipt from an authorized<br />
Mackie dealer for your unit to be considered for<br />
warranty repair.<br />
• Unplug the power cord and check the fuse.<br />
24 <strong><strong>16</strong>42</strong>-<strong>VLZ3</strong>
Appendix B: Connections<br />
“XLR” Connectors<br />
Mackie mixers use 3-pin female “XLR” connectors on<br />
all microphone inputs, with pin 1 wired to the grounded<br />
(earthed) shield, pin 2 wired to the “high” (”hot” or<br />
positive polarity) side of the audio signal and pin 3<br />
wired to the “low” (“cold” or negative polarity) side of<br />
the signal. See Figure A. This is all totally aboveboard<br />
and in full accord with the hallowed standards dictated<br />
by the AES (Audio Engineering Society).<br />
Use a male “XLR”-type connector, usually found on the<br />
nether end of what is called a “mic cable,” to connect to<br />
a female XLR jack.<br />
Figure A: XLR Connectors<br />
SHIELD<br />
HOT<br />
COLD<br />
SHIELD<br />
COLD 3<br />
HOT<br />
1<br />
3<br />
2<br />
1<br />
2<br />
3 1<br />
2<br />
SHIELD<br />
COLD<br />
HOT<br />
You can cook up your own adapter for a stereo<br />
microphone adapter. “Y” two cables out of a<br />
female 1⁄4" TRS jack to two male XLR plugs,<br />
one for the Right signal and one for the Left.<br />
• Balanced mono circuits. When wired as a balanced<br />
connector, a 1⁄4" TRS jack or plug is connected<br />
tip to signal high (hot), ring to signal<br />
low (cold), and sleeve to ground (earth).<br />
• Unbalanced Send/Return circuits. When wired<br />
as send/return “Y” connector, a 1⁄4" TRS jack<br />
or plug is connected tip to signal send (output<br />
from mixer), ring to signal return (input back<br />
into mixer), and sleeve to ground (earth).<br />
1⁄4" TS Phone Plugs and Jacks<br />
“TS” stands for Tip-Sleeve, the two connections available<br />
on a “mono” 1⁄4" phone jack or plug. See Figure C.<br />
TIP<br />
SLEEVE<br />
SLEEVE<br />
TIP<br />
TIP<br />
SLEEVE<br />
Owner’s <strong>Manual</strong><br />
1⁄4" TRS Phone Plugs and Jacks<br />
“TRS” stands for Tip-Ring-Sleeve, the three<br />
connections available on a “stereo” 1 ⁄4" or “balanced”<br />
phone jack or plug. See Figure B.<br />
Figure B: " TRS Plugs<br />
RING<br />
TIP<br />
SLEEVE<br />
SLEEVE RING<br />
RING<br />
TIP<br />
SLEEVE<br />
TRS jacks and plugs are used in several different applications:<br />
• Stereo Headphones, and rarely, stereo microphones<br />
and stereo line connections.<br />
When wired for stereo, a 1⁄4" TRS jack or plug<br />
is connected tip to left, ring to right and sleeve<br />
to ground (earth). Mackie mixers do not<br />
directly accept 1-plug-type stereo micro phones.<br />
They must be separated into a left cord and a<br />
right cord, which are plugged into the two mic<br />
preamps.<br />
TIP<br />
Figure C: TS Plug<br />
TS jacks and plugs are used in many different<br />
applications, always unbalanced. The tip is connected to<br />
the audio signal and the sleeve to ground (earth). Some<br />
examples:<br />
• Unbalanced microphones<br />
• Electric guitars and electronic instruments<br />
• Unbalanced line-level connections<br />
Switched 1 ⁄4" Phone Jacks<br />
Switches can be incorporated into 1⁄4" phone jacks,<br />
which are activated by inserting the plug. These switches<br />
may open an insert loop in a circuit, change the input<br />
routing of the signal or serve other functions. Mackie<br />
uses switches in the channel insert and bus insert jacks,<br />
input jacks and AUX returns. We also use these switches<br />
to ground the line-level inputs when nothing is plugged<br />
into them.<br />
In most cases, the plug must be inserted fully to<br />
activate the switch. Mackie takes advantage of this in<br />
some circuits, specifying circumstances where you are<br />
to insert the plug only partially. See Special Mackie<br />
Connections, on the next page.<br />
Owner’s <strong>Manual</strong><br />
25
<strong><strong>16</strong>42</strong>-<strong>VLZ3</strong><br />
RCA Plugs and Jacks<br />
RCA-type plugs (also known as phono plugs) and<br />
jacks are often used in home stereo and video equipment<br />
and in many other applications (Figure D). They<br />
are unbalanced and electrically identical to a 1⁄4" TS<br />
phone plug or jack. See Figure C. Connect the signal to<br />
the center post and the ground (earth) or shield to the<br />
surrounding “basket.”<br />
Special Mackie Connections<br />
The balanced-to-unbalanced connection has been<br />
anticipated in the wiring of Mackie jacks. A 1 ⁄4" TS plug<br />
inserted into a 1 ⁄4" TRS balanced input, for example,<br />
will automatically unbalance the input and make all the<br />
right connections. Conversely, a 1 ⁄4" TRS plug inserted<br />
into a 1 ⁄4" unbalanced input will automatically tie the<br />
ring (low or cold) to ground (earth).<br />
SLEEVE TIP SLEEVE<br />
TIP<br />
TRS Send/Receive Insert Jacks<br />
Figure D: RCA Plug<br />
Unbalancing a <strong>Line</strong><br />
In most studio, stage and sound reinforcement situations,<br />
there is a combination of balanced and unbalanced<br />
inputs and outputs on the various pieces of<br />
equipment. This usually will not be a problem in making<br />
connections.<br />
• When connecting a balanced output to an<br />
unbalanced input, be sure the signal high (hot)<br />
connections are wired to each other, and that<br />
the balanced signal low (cold) goes to the<br />
ground (earth) connection at the unbalanced<br />
input. In most cases, the balanced ground<br />
(earth) will also be connected to the ground<br />
(earth) at the unbalanced input. If there are<br />
ground-loop problems, this connection may be<br />
left disconnected at the balanced end.<br />
• When connecting an unbalanced output to a<br />
balanced input, be sure that the signal high<br />
(hot) connections are wired to each other. The<br />
unbalanced ground (earth) connection should<br />
be wired to the low (cold) and the ground<br />
(earth) connections of the balanced input. If<br />
there are ground-loop problems, try connecting<br />
the unbalanced ground (earth) connection only<br />
to the input low (cold) connection, and leaving<br />
the input ground (earth) connection disconnected.<br />
• In some cases, you will have to make up special<br />
adapters to interconnect your equipment. For<br />
example, you may need a balanced XLR female<br />
connected to an unbalanced 1⁄4" TS phone<br />
plug.<br />
Mackie’s single-jack inserts are the three- conductor,<br />
TRS-type 1⁄4" phone. They are unbalanced, but have<br />
both the mixer output (send) and the mixer input<br />
(return) signals in one connector. See Figure E.<br />
tip ring sleeve<br />
This plug connects to one of the<br />
mixer’s <strong>Channel</strong> Insert jacks.<br />
Figure E<br />
(TRS plug)<br />
SEND to processor<br />
The sleeve is the common ground (earth) for both<br />
signals. The send from the mixer to the external unit is<br />
carried on the tip, and the return from the unit to the<br />
mixer is on the ring.<br />
Using the Send Only on an Insert Jack<br />
If you insert a TS (mono) 1⁄4" plug only partially (to<br />
the first click) into a Mackie insert jack, the plug will<br />
not activate the jack switch and will not open the insert<br />
loop in the circuit (thereby allowing the channel signal<br />
to continue on its merry way through the mixer).<br />
This allows you to tap out the channel or bus signal<br />
without interrupting normal operation.<br />
If you push the 1⁄4" TS plug in to the second click, you<br />
will open the jack switch and create a direct out, which<br />
does interrupt the signal in that channel. See Figure F<br />
on the next page.<br />
NOTE: Do not overload or short-circuit the signal you<br />
are tapping from the mixer. That will affect the internal<br />
signal.<br />
“tip”<br />
“ring”<br />
RETURN from processor<br />
26 <strong><strong>16</strong>42</strong>-<strong>VLZ3</strong>
MONO PLUG<br />
Direct out with no signal interruption to master.<br />
Insert only to first “click.”<br />
MONO PLUG<br />
<strong>Channel</strong> Insert jack<br />
<strong>Channel</strong> Insert jack<br />
Direct out with signal interruption to master.<br />
Insert all the way in to the second “click.”<br />
STEREO<br />
PLUG<br />
<strong>Channel</strong> Insert jack<br />
For use as an effects loop.<br />
(TIP = SEND to effect, RING = RETURN from effect.)<br />
Figure F<br />
Mackie Stereo Inputs and Returns: Mono,<br />
Stereo, Whatever<br />
A stereo signal, having two plugs, should be patched<br />
into the LEFT (MONO) and the RIGHT input or return<br />
jacks. A jack switch in the RIGHT jack will disable the<br />
mono function, and the signals will show up in stereo.<br />
A mono signal connected to the RIGHT jack will show<br />
up in the right bus only. You probably will only want to<br />
use this sophisticated effect for special occasions.<br />
Mults and “Y”s<br />
A mult or “Y” connector allows you to route one output<br />
to two or more inputs by simply providing parallel wiring<br />
connections. You can make “Y”s and mults for the<br />
outputs of both unbalanced and balanced circuits.<br />
Remember: Only mult or “Y” one output into<br />
several inputs. If you need to combine several<br />
outputs into one input, you must use a mixer,<br />
not a mult or a “Y.”<br />
Owner’s <strong>Manual</strong><br />
Stereo line inputs and stereo returns are a fine<br />
example of the Mackie philosophy (which we just made<br />
up) of Maximum Flexibility with Minimum Headache.<br />
The inputs and returns will automatically be mono or<br />
stereo, depending upon how you use the jacks. Here’s<br />
how it works:<br />
A mono signal should be patched into the input or<br />
return jack labeled Left (MONO). The signal will be<br />
routed to both the left and right sides of the return<br />
circuit, and will show up in the center of the stereo pair<br />
of buses it’s assigned to, or it can be panned with the<br />
PAN control.<br />
RING (IN)<br />
RING (RETURN)<br />
TIP (OUT)<br />
RING<br />
(RETURN)<br />
TIP<br />
(SEND)<br />
FROM<br />
PROCESSOR<br />
OUTPUT<br />
TO MIXER<br />
CHANNEL INSERT<br />
TO<br />
PROCESSOR<br />
INPUT<br />
TIP (SEND)<br />
Y-cord insert cable<br />
Y-cord splitter cable<br />
Owner’s <strong>Manual</strong><br />
27
<strong><strong>16</strong>42</strong>-<strong>VLZ3</strong><br />
Appendix C: Technical Information<br />
Specifications<br />
Main Mix Noise<br />
(20 Hz–20 kHz bandwidth, 1/4" Main out, channel gains @<br />
unity gain, channel EQs flat, all channels assigned to Main Mix,<br />
odd channels panned left, even channels panned right.)<br />
Main Mix fader unity, channel faders down: –86.5 dBu<br />
(90 dB Signal to Noise Ratio, ref +4 dBu)<br />
Main Mix fader unity, channel faders @ unity: –86 dBu<br />
Total Harmonic Distortion (THD)<br />
(1 kHz 35 dB gain, 20 Hz–20 kHz bandwidth)<br />
<strong>Mic</strong> in to insert out:
Block Diagram<br />
Owner’s <strong>Manual</strong><br />
LOGIC<br />
PFL<br />
SIP R<br />
SIP L<br />
AUX 4<br />
AUX 3<br />
AUX 2<br />
AUX 1<br />
SUB 4<br />
SUB 3<br />
SUB 2<br />
SUB 1<br />
MAIN R<br />
MAIN L<br />
PHANTOM POWER<br />
(GLOBAL SWITCH)<br />
MIC IN<br />
LINE IN<br />
DIRECT OUT<br />
(CH'S 1 8 ONLY)<br />
MONO INPUT CHANNEL<br />
(1 OF 8)<br />
TRIM<br />
INSERT<br />
75Hz<br />
HPF<br />
LOW CUT<br />
AUX RETURN 1<br />
AUX RETURN 2<br />
AUX RETURN 3<br />
AUX RETURN 4<br />
–20 (FLICKER)<br />
OL (FLICKER)<br />
SOLO (GLOW)<br />
MUTE (GLOW)<br />
EQ<br />
FADER PAN ASSIGN<br />
LO MID HI<br />
MUTE<br />
L<br />
80 100 8K 12K<br />
GAIN<br />
FREQ<br />
3<br />
SIP L<br />
SIP R<br />
PFL SOLO<br />
AUX 1 TO SOLO LED<br />
PRE<br />
AUX 2<br />
AUX 3<br />
AUX 4<br />
EFX TO<br />
MON<br />
LEVEL<br />
EFX TO<br />
MON<br />
LEVEL<br />
MAIN/SUBS<br />
LEVEL<br />
1-2/3-4 <br />
LEVEL<br />
ASSIGN TO<br />
C-R/PHNS<br />
ONLY<br />
SIP L<br />
SIP R<br />
SOLO<br />
PFL<br />
R<br />
1<br />
2<br />
4<br />
CR/PHN R<br />
CR/PHN L<br />
MIC IN<br />
(Chs 9/10 & 11/12 only)<br />
MIC TRIM<br />
75Hz<br />
HPF<br />
LOW CUT<br />
MACKIE DESIGNS<br />
<strong><strong>16</strong>42</strong>-VLZ 2<br />
BLOCK DIAGRAM<br />
(#11052006CJM/DF)<br />
LINE IN L<br />
LINE IN R<br />
STEREO INPUT CHANNEL<br />
(1 OF 4)<br />
–20 (FLICKER)<br />
SOLO (GLOW) OL (FLICKER)<br />
MUTE (GLOW)<br />
STEREO TRIM<br />
(Chs 13/14 & 15/<strong>16</strong> only)<br />
LO<br />
MID MID HI<br />
80 800 3K 12K<br />
LO<br />
MID MID HI<br />
AUX 1<br />
PRE<br />
AUX 2<br />
AUX 3<br />
AUX 4<br />
ASSIGN<br />
3<br />
SIP L<br />
SIP R<br />
TO SOLO LED<br />
PFL<br />
SOLO<br />
MAIN INSERT<br />
MAIN MIX<br />
ASSIGN<br />
TO MIX<br />
SOLO<br />
RELAY<br />
MAIN MIX<br />
FADER<br />
MAIN MIX MONO OUT<br />
80 800<br />
1/4" BAL<br />
MAIN MIX LEFT OUT<br />
XLR BAL<br />
XLR BAL<br />
MAIN MIX RIGHT OUT<br />
1/4" BAL<br />
TAPE OUT<br />
PHONES OUT A<br />
METERS<br />
(0VU = 0dBu)<br />
3K 12K<br />
MAIN<br />
TAPE<br />
TAPE IN<br />
TAPE LEVEL<br />
12<br />
C-R/<br />
PHONES<br />
SOURCE<br />
C-R/PHONES MIX<br />
CONTROL ROOM OUT<br />
C-R LEVEL<br />
RUDE SOLO LED<br />
SUB 1 OUT<br />
SOLO LEVEL<br />
SIP/PFL<br />
LEVEL SET<br />
(PFL) LED<br />
SOLO MIX<br />
FADER<br />
SUB 1 MIX<br />
MONO LEVEL<br />
ASSIGN TO MAIN MIX<br />
FADER<br />
(SUBMIX 3/7 IDENTICAL)<br />
4-BAND STEREO EQ<br />
SUB 2 MIX<br />
ASSIGN TO MAIN MIX<br />
SUB 2 OUT<br />
(SUBMIX 4/8 IDENTICAL)<br />
LEVEL<br />
AUX MIX<br />
AUX SEND 1<br />
(AUX SEND 2 IDENTICAL)<br />
MUTE<br />
AUX SEND 3<br />
(AUX SEND 4 IDENTICAL)<br />
FADER<br />
BUS TO WOODINVILLE<br />
PHONES OUT B<br />
PAN<br />
(FROM SUB 3 OUT)<br />
(FROM SUB 4 OUT)<br />
3 4<br />
SOLO<br />
MACKIE<br />
EXPRESS<br />
1<br />
2<br />
3<br />
22<br />
10<br />
0<br />
1<br />
10<br />
20<br />
30<br />
+4/–10dB PAD<br />
(XLR only)<br />
PHONES<br />
LEVEL<br />
2<br />
3<br />
L<br />
SUB 5 OUT<br />
R<br />
L<br />
R<br />
L<br />
R<br />
L<br />
R<br />
L<br />
R<br />
SUB 6 OUT<br />
1<br />
2<br />
4<br />
L<br />
R<br />
L<br />
R<br />
L<br />
R<br />
7<br />
4<br />
2<br />
2<br />
4<br />
7<br />
2<br />
3<br />
2<br />
3<br />
L<br />
R<br />
1<br />
1<br />
L<br />
R<br />
Owner’s <strong>Manual</strong><br />
29
<strong><strong>16</strong>42</strong>-<strong>VLZ3</strong><br />
Track Sheet<br />
Session:<br />
Date:<br />
Notes:<br />
30 <strong><strong>16</strong>42</strong>-<strong>VLZ3</strong>
<strong><strong>16</strong>42</strong>-<strong>VLZ3</strong> Limited Warranty<br />
Please keep your sales receipt in a safe place.<br />
A. LOUD Technologies Inc. warrants all materials,<br />
workmanship and proper operation of this product for a period<br />
of three years from the original date of purchase. If any defects<br />
are found in the materials or workmanship or if the product<br />
fails to function properly during the applicable warranty<br />
period, LOUD Technologies, at its option, will repair or replace<br />
the product. This warranty applies only to equipment sold and<br />
delivered within the U.S. by LOUD Technologies Inc. or its<br />
authorized dealers.<br />
B. Failure to register online or return the product registration<br />
card will not void the three-year warranty.<br />
C. Service and repairs of Mackie products are to be<br />
performed only at a factory-authorized facility (see D below).<br />
Unauthorized service, repairs, or modification will void this<br />
warranty. To obtain repairs under warranty, you must have a<br />
copy of your sales receipt from the authorized Mackie dealer<br />
where you purchased the product. It is necessary to establish<br />
the purchase date and determine whether your Mackie<br />
product is within the warranty period.<br />
D. To obtain factory-authorized service:<br />
1. Call Mackie Technical Support at 800/898-3211, 7 AM to<br />
5 PM Monday through Friday (Pacific Time) to get a Service<br />
Request Number. Products returned without a Service Request<br />
Number will be refused.<br />
2. Pack the product in its original shipping carton. Also include<br />
a note explaining exactly how to duplicate the problem, a<br />
copy of the sales receipt with price and date showing, and<br />
your return street address (no P.O. boxes or route numbers,<br />
please!). If we cannot duplicate the problem or establish the<br />
starting date of your Limited Warranty, we may, at our option,<br />
charge for service time.<br />
3. Ship the product in its original shipping carton, freight<br />
prepaid to the authorized service center. The address of your<br />
closest authorized service center will be given to you by<br />
Technical Support.<br />
IMPORTANT: Make sure that the Service Request Number is<br />
plainly written on the shipping carton.<br />
No receipt: no warranty service.<br />
E. LOUD Technologies reserves the right to inspect any<br />
products that may be the subject of any warranty claims before<br />
repair or replacement is carried out. LOUD Technologies may,<br />
at our option, require proof of the original date of purchase in<br />
the form of a dated copy of the original dealer’s invoice or sales<br />
receipt. Final determination of warranty coverage lies solely<br />
with LOUD Technologies.<br />
F. Any products returned to one of the LOUD Technologies<br />
factory-authorized service centers, and deemed eligible for<br />
repair or replacement under the terms of this warranty will<br />
be repaired or replaced within thirty days of receipt. LOUD<br />
Technologies and its authorized service centers may use<br />
refurbished parts for repair or replacement of any product.<br />
Products returned to LOUD Technologies that do not meet<br />
the terms of this Warranty will not be repaired unless<br />
payment is received for labor, materials, return freight,<br />
and insurance. Products repaired under warranty will be<br />
returned freight prepaid by LOUD Technologies to any<br />
location within the boundaries of the USA.<br />
G. LOUD Technologies warrants all repairs performed<br />
for 90 days or for the remainder of the warranty period.<br />
This warranty does not extend to damage resulting from<br />
improper installation, misuse, neglect or abuse, or to<br />
exterior appearance. This warranty is recognized only if<br />
the inspection seals and serial number on the unit have not<br />
been defaced or removed.<br />
H. LOUD Technologies assumes no responsibility for the<br />
quality or timeliness of repairs performed by an authorized<br />
service center.<br />
I. This warranty is extended to the original purchaser and to<br />
anyone who may subsequently purchase this product within<br />
the applicable warranty period. A copy of the original sales<br />
receipt is required to obtain warranty repairs.<br />
J. This is your sole warranty. LOUD Technologies does<br />
not authorize any third party, including any dealer or<br />
sales representative, to assume any liability on behalf of<br />
LOUD Technologies or to make any warranty for LOUD<br />
Technologies Inc.<br />
K. THE WARRANTY GIVEN ON THIS PAGE IS THE SOLE<br />
WARRANTY GIVEN BY LOUD TECHNOLOGIES INC.<br />
AND IS IN LIEU OF ALL OTHER WARRANTIES, EXPRESS<br />
AND IMPLIED, INCLUDING THE WARRANTIES OF<br />
MERCHANTABILITY AND FITNESS FOR A PARTICULAR<br />
PURPOSE. THE WARRANTY GIVEN ON THIS PAGE<br />
SHALL BE STRICTLY LIMITED IN DURATION TO THREE<br />
YEARS FROM THE DATE OF ORIGINAL PURCHASE<br />
FROM AN AUTHORIZED MACKIE DEALER. UPON<br />
EXPIRATION OF THE APPLICABLE WARRANTY PERIOD,<br />
LOUD TECHNOLOGIES INC. SHALL HAVE NO FURTHER<br />
WARRANTY OBLIGATION OF ANY KIND. LOUD<br />
TECHNOLOGIES INC. SHALL NOT BE LIABLE FOR ANY<br />
INCIDENTAL, SPECIAL, OR CONSEQUENTIAL DAMAGES<br />
THAT MAY RESULT FROM ANY DEFECT IN THE MACKIE<br />
PRODUCT OR ANY WARRANTY CLAIM. Some states do<br />
not allow exclusion or limitation of incidental, special,<br />
or consequential damages or a limitation on how long<br />
warranties last, so some of the above limitations and<br />
exclusions may not apply to you. This warranty provides<br />
specific legal rights and you may have other rights which<br />
vary from state to state.<br />
Owner’s <strong>Manual</strong><br />
Owner’s <strong>Manual</strong><br />
31
<strong>16</strong>220 Wood-Red Road NE • Woodinville, WA 98072 • USA<br />
United States and Canada: 800.898.3211<br />
Europe, Asia, Central and South America: 425.487.4333<br />
Middle East and Africa: 31.20.654.4000<br />
Fax: 425.487.4337 • www.mackie.com<br />
E-mail: sales@mackie.com