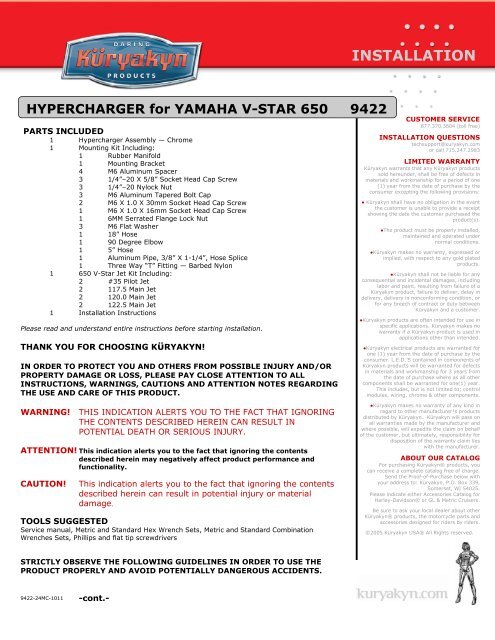
HYPERCHARGER for YAMAHA - CruiserCustomizing
HYPERCHARGER for YAMAHA - CruiserCustomizing
HYPERCHARGER for YAMAHA - CruiserCustomizing
Create successful ePaper yourself
Turn your PDF publications into a flip-book with our unique Google optimized e-Paper software.
INSTALLATION<br />
<strong>HYPERCHARGER</strong> <strong>for</strong> <strong>YAMAHA</strong> V-STAR 650 9422<br />
PARTS INCLUDED<br />
1 Hypercharger Assembly — Chrome<br />
1 Mounting Kit Including:<br />
1 Rubber Manifold<br />
1 Mounting Bracket<br />
4 M6 Aluminum Spacer<br />
3 1/4”–20 X 5/8” Socket Head Cap Screw<br />
3 1/4”–20 Nylock Nut<br />
3 M6 Aluminum Tapered Bolt Cap<br />
2 M6 X 1.0 X 30mm Socket Head Cap Screw<br />
1 M6 X 1.0 X 16mm Socket Head Cap Screw<br />
1 6MM Serrated Flange Lock Nut<br />
3 M6 Flat Washer<br />
1 18” Hose<br />
1 90 Degree Elbow<br />
1 5” Hose<br />
1 Aluminum Pipe, 3/8” X 1-1/4”, Hose Splice<br />
1 Three Way “T” Fitting — Barbed Nylon<br />
1 650 V-Star Jet Kit Including:<br />
2 #35 Pilot Jet<br />
2 117.5 Main Jet<br />
2 120.0 Main Jet<br />
2 122.5 Main Jet<br />
1 Installation Instructions<br />
Please read and understand entire instructions be<strong>for</strong>e starting installation.<br />
THANK YOU FOR CHOOSING KϋRYAKYN!<br />
IN ORDER TO PROTECT YOU AND OTHERS FROM POSSIBLE INJURY AND/OR<br />
PROPERTY DAMAGE OR LOSS, PLEASE PAY CLOSE ATTENTION TO ALL<br />
INSTRUCTIONS, WARNINGS, CAUTIONS AND ATTENTION NOTES REGARDING<br />
THE USE AND CARE OF THIS PRODUCT.<br />
CUSTOMER SERVICE<br />
877.370.3604 (toll free)<br />
INSTALLATION QUESTIONS<br />
techsupport@kuryakyn.com<br />
or call 715.247.2983<br />
LIMITED WARRANTY<br />
Küryakyn warrants that any Küryakyn products<br />
sold hereunder, shall be free of defects in<br />
materials and workmanship <strong>for</strong> a period of one<br />
(1) year from the date of purchase by the<br />
consumer excepting the following provisions:<br />
● Küryakyn shall have no obligation in the event<br />
the customer is unable to provide a receipt<br />
showing the date the customer purchased the<br />
product(s).<br />
●The product must be properly installed,<br />
maintained and operated under<br />
normal conditions.<br />
●Küryakyn makes no warranty, expressed or<br />
implied, with respect to any gold plated<br />
products.<br />
●Küryakyn shall not be liable <strong>for</strong> any<br />
consequential and incidental damages, including<br />
labor and paint, resulting from failure of a<br />
Küryakyn product, failure to deliver, delay in<br />
delivery, delivery in noncon<strong>for</strong>ming condition, or<br />
<strong>for</strong> any breech of contract or duty between<br />
Küryakyn and a customer.<br />
●Küryakyn products are often intended <strong>for</strong> use in<br />
specific applications. Küryakyn makes no<br />
warranty if a Küryakyn product is used in<br />
applications other than intended.<br />
●Küryakyn electrical products are warranted <strong>for</strong><br />
one (1) year from the date of purchase by the<br />
consumer. L.E.D.’S contained in components of<br />
Küryakyn products will be warranted <strong>for</strong> defects<br />
in materials and workmanship <strong>for</strong> 3 years from<br />
the date of purchase where as all other<br />
components shall be warranted <strong>for</strong> one(1) year.<br />
This includes, but is not limited to; control<br />
modules, wiring, chrome & other components.<br />
WARNING! THIS INDICATION ALERTS YOU TO THE FACT THAT IGNORING<br />
THE CONTENTS DESCRIBED HEREIN CAN RESULT IN<br />
POTENTIAL DEATH OR SERIOUS INJURY.<br />
ATTENTION! This indication alerts you to the fact that ignoring the contents<br />
described herein may negatively affect product per<strong>for</strong>mance and<br />
functionality.<br />
CAUTION!<br />
This indication alerts you to the fact that ignoring the contents<br />
described herein can result in potential injury or material<br />
damage.<br />
TOOLS SUGGESTED<br />
Service manual, Metric and Standard Hex Wrench Sets, Metric and Standard Combination<br />
Wrenches Sets, Phillips and flat tip screwdrivers<br />
●Küryakyn makes no warranty of any kind in<br />
regard to other manufacturer¹s products<br />
distributed by Küryakyn. Küryakyn will pass on<br />
all warranties made by the manufacturer and<br />
where possible, will expedite the claim on behalf<br />
of the customer, but ultimately, responsibility <strong>for</strong><br />
disposition of the warranty claim lies<br />
with the manufacturer.<br />
ABOUT OUR CATALOG<br />
For purchasing Küryakyn® products, you<br />
can receive a complete catalog free of charge.<br />
Send the Proof-of-Purchase below with<br />
your address to: Küryakyn, P.O. Box 339,<br />
Somerset, WI 54025.<br />
Please indicate either Accessories Catalog <strong>for</strong><br />
Harley-Davidson® or GL & Metric Cruisers.<br />
Be sure to ask your local dealer about other<br />
Küryakyn® products, the motorcycle parts and<br />
accessories designed <strong>for</strong> riders by riders.<br />
©2005 Küryakyn USA® All Rights reserved.<br />
STRICTLY OBSERVE THE FOLLOWING GUIDELINES IN ORDER TO USE THE<br />
PRODUCT PROPERLY AND AVOID POTENTIALLY DANGEROUS ACCIDENTS.<br />
9422-24MC-1011<br />
-cont.-
ATTENTION! Installation of this kit REQUIRES carb re-jetting over and above what may have already<br />
been per<strong>for</strong>med <strong>for</strong> pipe installation. This is a complex procedure and we strongly<br />
recommend that this be per<strong>for</strong>med by your dealer or a competent mechanic. If you<br />
choose to attempt this on your own, you will need the service manual <strong>for</strong> this model as<br />
carb removal and disassembly instructions are not provided in this literature. The<br />
following jetting recommendations are intended as a starting point. Optimal<br />
per<strong>for</strong>mance and driveability may require fine tuning. Adjustments may be needed <strong>for</strong><br />
higher altitudes. General rule of thumb is one jet size smaller <strong>for</strong> every 3000-4000 feet<br />
of elevation.<br />
CAUTION!<br />
Rejetting and tuning a motorcycle can be a complex task. Due to factors<br />
outside of our control, Küryakyn will not be held liable <strong>for</strong> any labor costs<br />
incurred from installation of this kit.<br />
Cobra/Stock Exhaust<br />
Main Jet 117.5<br />
Pilot Jet 35<br />
PMS Screw 1-1/2 Turns Out From Bottom<br />
V&H Style or Open Pipes<br />
Main Jet 120<br />
Pilot Jet 35<br />
PMS Screw 1-1/2 Turns Out From Bottom<br />
STEP 1<br />
Read and understand all steps in the instructions be<strong>for</strong>e starting the installation. Park the<br />
motorcycle on a hard, level surface and turn off the ignition. Let cool.<br />
WARNING! YOU WILL BE WORKING AROUND THE ENGINE AND EXHAUST SYSTEM<br />
DURING INSTALLATION. ENSURE THAT THE ENGINE AND EXHAUST SYSTEM<br />
HAVE FULLY COOLED TO PREVENT INJURY.<br />
ATTENTION! A factory service manual may be helpful in per<strong>for</strong>ming this installation. Do<br />
not attempt to per<strong>for</strong>m this installation if you are not confident in your<br />
ability to complete all of the steps in the procedure; consult a trained<br />
technician.<br />
PIC 1<br />
A<br />
CAUTION!<br />
The installation of any high per<strong>for</strong>mance exhaust system can<br />
cause a “lean” fuel/air mixture. A “lean” fuel/air mixture can<br />
cause engine overheating resulting in severe engine damage.<br />
Küryakyn recommends rejetting carbureted bikes.<br />
B<br />
B<br />
B<br />
STEP 2<br />
Remove the stock air cleaner and components to the point shown in<br />
PIC.1. The stock plastic airbox adapter “A” and stock mounting brackets<br />
“B” will remain in place.<br />
PIC 2<br />
D<br />
D<br />
STEP 3<br />
Insert both flanges of the rubber adapter through the mounting bracket<br />
as shown in PIC.2. The hardware components used <strong>for</strong> installation are<br />
placed near their respective mounting points:<br />
A<br />
B<br />
•”A” Socket head cap screw - 30mm long, tapered bolt cap, and<br />
two spacers. The spacers are placed between the chrome, and<br />
the stock mounting brackets.<br />
•”B” Socket head cap screw - 15mm long , tapered bolt cap<br />
STOCK INTAKE<br />
CLAMP<br />
C<br />
•”C” Socket head cap screw - 30mm long, tapered bolt cap, two spacers (place between<br />
chrome and stock brackets), and flange nut.<br />
•”D” Mounting holes.<br />
-cont.-<br />
PAGE<br />
2<br />
<strong>HYPERCHARGER</strong> <strong>for</strong> <strong>YAMAHA</strong><br />
INSTALLATION
STEP 4<br />
STEP 5<br />
STEP 6<br />
The opening in the adapter boot must be slipped over the flange of the stock airbox and secured<br />
with the stock clamp. Install the mounting bracket as shown in PIC.3. Secure this<br />
assembly to the bike with the hardware specified in the previous step.<br />
PIC 3<br />
See PIC.4. Plug the extension into the float bowl vent hose and add the short<br />
section of hose included. This will plug into the 90 degree fitting on the back side<br />
of the Hypercharger.<br />
See PIC.5. This step can be per<strong>for</strong>med without disassembling the air cleaner. The<br />
front half was removed here <strong>for</strong> a better picture. Only the round “trap door” need<br />
be removed. “Work” the radiused flange of the adapter into the inlet hole of the air<br />
cleaner.<br />
STEP 7<br />
See PIC.6. Fold the radiused flange back to expose the three mounting holes.<br />
Secure the air cleaner to the bracket using the three 1/4–20x1/2” Socket head cap<br />
screws and Nylock nuts.<br />
PIC 4<br />
STEP 8<br />
PIC.6<br />
STEP 9<br />
Replace the trap door on the Hypercharger. Connect the newly extended float<br />
bowl vent hose to the 90° fitting installed on the back of the air cleaner. On the<br />
left side of the engine, next to the front cylinder you’ll see the two chrome lines<br />
that go to the fresh air pump. The small rubber hose clamped to these lines is a<br />
vacuum hose. Find the splice in this vacuum hose. Remove the splice, and in its<br />
place insert the enclosed “T” fitting. Run the enclosed length of vacuum hose from<br />
this “T” fitting to the vacuum nipple on the bottom of the Hypercharger.<br />
Double check the tightness of all related fasteners, check <strong>for</strong> hose<br />
clearance and check throttle <strong>for</strong> correct operation, making sure it returns<br />
properly, be<strong>for</strong>e starting bike.<br />
HOSE EXTENSION<br />
PIC 5<br />
FLOAT BOWL<br />
VENT HOSE<br />
ATTENTION! It is the installer’s responsibility to ensure that all of the fasteners<br />
(including pre-assembled) are tightened be<strong>for</strong>e operation of the<br />
motorcycle. Küryakyn will not issue a warranty on components lost due to<br />
improper installation. Periodic maintenance may be required.<br />
FIG 1<br />
RADIUSED<br />
FLANGE<br />
PIC 6<br />
Ride On!<br />
PAGE<br />
3<br />
<strong>HYPERCHARGER</strong> <strong>for</strong> <strong>YAMAHA</strong><br />
INSTALLATION


