Professional Soil Management Kit (PDF) - Palintest
Professional Soil Management Kit (PDF) - Palintest
Professional Soil Management Kit (PDF) - Palintest

Create successful ePaper yourself
Turn your PDF publications into a flip-book with our unique Google optimized e-Paper software.
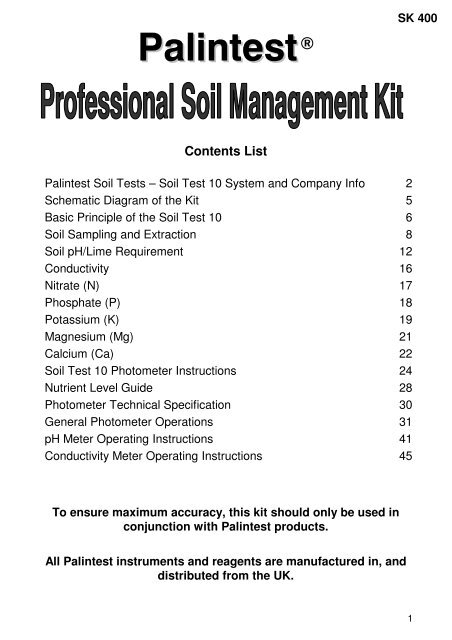
<strong>Palintest</strong><br />
®<br />
SK 400<br />
Contents List<br />
<strong>Palintest</strong> <strong>Soil</strong> Tests – <strong>Soil</strong> Test 10 System and Company Info 2<br />
Schematic Diagram of the <strong>Kit</strong> 5<br />
Basic Principle of the <strong>Soil</strong> Test 10 6<br />
<strong>Soil</strong> Sampling and Extraction 8<br />
<strong>Soil</strong> pH/Lime Requirement 12<br />
Conductivity 16<br />
Nitrate (N) 17<br />
Phosphate (P) 18<br />
Potassium (K) 19<br />
Magnesium (Mg) 21<br />
Calcium (Ca) 22<br />
<strong>Soil</strong> Test 10 Photometer Instructions 24<br />
Nutrient Level Guide 28<br />
Photometer Technical Specification 30<br />
General Photometer Operations 31<br />
pH Meter Operating Instructions 41<br />
Conductivity Meter Operating Instructions 45<br />
To ensure maximum accuracy, this kit should only be used in<br />
conjunction with <strong>Palintest</strong> products.<br />
All <strong>Palintest</strong> instruments and reagents are manufactured in, and<br />
distributed from the UK.<br />
1
PALINTEST SOIL TEST SYSTEM<br />
<strong>Soil</strong> testing plays a vital role in modern agricultural and horticultural<br />
management. Regular assessment of major nutrient levels in the soil is<br />
essential to make fertiliser recommendations and to ensure optimum<br />
growing conditions.<br />
The <strong>Palintest</strong> system of soil testing is unique. Simple to use test<br />
equipment, and reagents in stable tablet form, mean that reliable<br />
results can be obtained by all users - with or without formal training in<br />
soil analysis.<br />
This is why the <strong>Palintest</strong> system is used by farmers, growers and<br />
specialists throughout the world - you can rely on years of <strong>Palintest</strong><br />
experience for your soil testing needs.<br />
The <strong>Palintest</strong> Photometer system offers a precise modern means of soil<br />
analysis. The system features the <strong>Soil</strong> Test 10 - an advanced solid-state<br />
digital-readout colorimeter instrument.<br />
The <strong>Palintest</strong> <strong>Soil</strong> Test 10 is integrated with the <strong>Palintest</strong> range of soil<br />
extraction and reagent tablets. It therefore offers an instrumental<br />
method of analysis for an extensive range of soil tests.<br />
The tests are carried out by first extracting the nutrients or trace<br />
elements from the soil, and then testing the extracts by simple<br />
colorimetric test procedures. The <strong>Soil</strong> Test 10 accurately assesses the<br />
colour formed in the test sample and displays the reading as a digital<br />
readout, and in this way gives an accurate measure of the soil<br />
parameter under test<br />
The tests for soil pH and lime requirement are carried out without the<br />
need for separate extraction. Certain tests, for example, those for<br />
calcium, do not use the photometer. These tests are carried out on the<br />
appropriate soil extract using the <strong>Palintest</strong> tablet count method.<br />
2
SOIL ANALYSIS APPLICATIONS<br />
<strong>Soil</strong> analysis is a complex subject. The wide variation in soil types and<br />
crops under cultivation has promoted many different methods of soil<br />
analysis. Often the results obtained must be related to the method of<br />
analysis used.<br />
Whilst precise laboratory analysis undoubtedly has a vital role, simple<br />
methods of field testing can be immensely useful in soil management.<br />
In particular results can be obtained quickly and economically. Field<br />
tests can be conducted in order to make fertiliser recommendations, to<br />
check if further tests are needed or to determine if samples should be<br />
collected for specialist analysis.<br />
<strong>Palintest</strong> soil tests are equally suited for use in the field and in the<br />
laboratory. <strong>Palintest</strong> soil test kits are an important part of any agricultural<br />
or horticultural management programme.<br />
CORRELATION OF RESULTS<br />
Chemical elements are often strongly bonded or complexed within the<br />
soil structure. <strong>Soil</strong> analysis measures the nutrients or trace elements<br />
which are 'exchangeable' or 'extractable' under the conditions of the<br />
test. The amounts will depend on the nature of the extraction method<br />
and the time of contact. Thus whilst a general relationship exists<br />
between different methods of soil analysis, precise correlation can<br />
sometimes be difficult.<br />
In developing <strong>Palintest</strong> methods regard has been paid to standard<br />
laboratory methods of soil testing (Ref - 1, 2). Correlations have been<br />
established for the pH, Lime Requirement, Nitrate (N), Phosphate (P),<br />
Potassium (K) and Magnesium (Mg) methods (Ref - 3). These tests<br />
should give similar results to United Kingdom ADAS methods for<br />
normal agricultural soils. However, in view of the wide variation in soil<br />
types it is not possible to guarantee that precisely similar results will be<br />
obtained in all cases.<br />
Test results should always be considered in relation to the fertiliser<br />
programme applied and the conditions of cultivation. In the event of<br />
unexpected test results being obtained, such as very high or very low<br />
values, then it is recommended that samples are submitted for<br />
laboratory analysis. A guide level for each nutrient is provided on page<br />
28.<br />
3
FERTILISER RECOMMENDATIONS<br />
Fertiliser recommendations are outside the scope of these soil test<br />
instructions. It is suggested that users refer to standard fertiliser<br />
recommendations such as those published by ADAS (Ref - 4) in the<br />
United Kingdom and by government agencies in other countries.<br />
REFERENCES<br />
1 The Analysis of Agricultural Materials; Agricultural Development and<br />
Advisory Service; Ministry of Agriculture, Fisheries and Food;<br />
Reference Book RB 427.<br />
2 Methods of <strong>Soil</strong> Analysis; American Society of Agronomy, 1965, 5th<br />
printing 1979.<br />
3 Comparison of <strong>Palintest</strong> <strong>Soil</strong> Test Methods with Standard Laboratory<br />
Procedures, Colin Marks and Valerie Argent, <strong>Palintest</strong> Ltd.<br />
4 Fertiliser Recommendations; Agricultural Development and Advisory<br />
Service; Ministry of Agriculture, Fisheries and Food; Reference Book 209.<br />
<strong>Palintest</strong> Ltd<br />
<strong>Palintest</strong> House, Kingsway, Team Valley, Gateshead, Tyne & Wear, UK<br />
NE1 1 ONS<br />
Tel: +44 (0) 191 491 0808 Fax: +44 (0) 191 482 5372<br />
E-Mail: palintest@palintest.com<br />
<strong>Palintest</strong> Asia/Pacific<br />
Unit 1/53, Lorraine St, Peakhurst, NSW 2210, Australia<br />
Tel: +61 1300 13 15 16 Fax: +61 1300 13 19 86<br />
<strong>Palintest</strong> USA<br />
21 Kenton Lands Road, PO Box 18395, Erlanger, Kentucky, 41018, USA<br />
Tel: +01 (859) 341 7423 Fax: +01 (859) 341 2106<br />
<strong>Palintest</strong> China<br />
Room 1601, KunTai International Mansion, 12B ChaoYang District, Beijing,<br />
100020, PRC<br />
Tel: +86 10 5126 1868-809 Fax: +86 10 5126 1868-809<br />
4
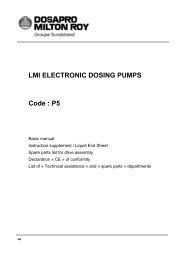
Schematic Diagram of the <strong>Kit</strong><br />
Case :-<br />
Reagent Bag :-<br />
5
BASIC PRINCIPLES OF THE SOIL TEST 10 PHOTOMETER<br />
Tests are carried out on the extract by adding the appropriate reagent<br />
tablet or tablets to a test tube containing the sample. A distinctive test<br />
colour is formed and this is indicative of the concentration of the<br />
parameter being tested.<br />
The <strong>Soil</strong> Test 10 is used to measure the colour formed in the test.<br />
Light is passed through the sample, then through an optical filter onto<br />
a photodetector.<br />
When a measurement is being carried out, a 'BLANK' tube is first inserted<br />
into the photometer. It is important to understand the meaning of the term<br />
'BLANK' tube. The 'BLANK' tube is a test tube containing the extracted<br />
sample only. This tube is used to compensate for any inherent colour in<br />
the sample and automatically sets the instrument for each test. This<br />
‘BLANK’ may not necessarily be a transparent solution.<br />
Once the photometer has been set, the 'SAMPLE' tube is then inserted<br />
into the instrument. The 'SAMPLE' tube is the test tube containing the<br />
coloured test solution prepared by adding the reagent tablets to the<br />
sample in accordance with the test instructions. After the sample tube<br />
has been inserted, the photometer will display the test result in the<br />
form of a digital readout.<br />
Different tests are carried out on the <strong>Soil</strong> Test 10 by selecting the<br />
appropriate program. The test instructions describe precisely how each of<br />
the tests should be carried out.<br />
Some of the instructions will indicate that the sample should be prepared in<br />
a certain way, or that the tablets should be added in a certain manner. It is<br />
important to observe these instructions in order to obtain accurate results.<br />
Note that certain of the tests are based on turbidity methods. In these<br />
tests the photometer is used to measure the degree of cloudiness<br />
which forms in the test solution.<br />
For further instructions on using your <strong>Soil</strong> Test 10 photometer, please see<br />
Page 24.<br />
6
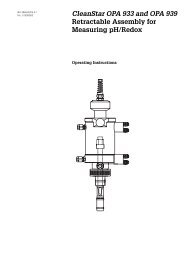
The <strong>Soil</strong> Test 10<br />
USB Interface<br />
Cell Holder<br />
<strong>Palintest</strong> ®<br />
Quick Menu<br />
1 2 3<br />
Al NH 3<br />
Cu<br />
4<br />
Fe Mg Mn<br />
N<br />
5<br />
P<br />
<strong>Soil</strong> Test 10<br />
S<br />
6<br />
7 8 9<br />
10<br />
K<br />
OK<br />
On/Off Key<br />
Scroll and<br />
Selection Keys<br />
OK (Enter) Key<br />
7
SOIL SAMPLING<br />
A soil sample should be collected from each plot or area to be examined.<br />
Separate samples should be collected from each area, which differs in<br />
soil type, previous cropping history or type of soil management.<br />
Preferably, samples of soil should be taken using a soil sampling auger<br />
which enables ‘cores’ of soil to be taken from below the surface.<br />
Alternatively, a piece of narrow rigid tubing may be used. Between 10<br />
and 25 individual cores should be taken from each area to make up the<br />
soil sample for analysis. It is customary when sampling large areas of<br />
agricultural land to take cores along the shape of an imaginary W<br />
covering the area being sampled. Cores should not be taken close to<br />
hedgerows, under trees or adjacent to buildings.<br />
To provide the sample for analysis, the individual cores should be<br />
thoroughly mixed in a bucket. Stones and foreign materials should be<br />
removed by hand. The soil can be passed through a 2 mm sieve or<br />
similar if this is available. The sample can then be transferred to a<br />
polythene sample bag (PT 301).<br />
For field analysis, the tests may be conducted directly on the moist<br />
sample. Where analysis is to be carried out at a later time, it is<br />
preferable to dry the sample by spreading it out on a tray or plastic<br />
sheet and allowing it to stand in air.<br />
Sampling Patterns<br />
Direction of Furrow<br />
8
SOIL EXTRACTION<br />
<strong>Soil</strong> extraction is the first stage in soil testing. The soil is shaken with<br />
an extracting solution in order to extract the nutrient or trace element<br />
from the soil.<br />
Certain groups of tests use the same extraction procedure. It is only<br />
necessary to prepare a single extract for each group of tests.<br />
NOTE THAT THE EXTRACTION PROCEDURES USE TWO DIFFERENT<br />
SIZES OF SOIL SAMPLE SCOOP - 2 ml AND 10 ml.<br />
An outline of the extraction scheme used for the various tests is shown<br />
in the following table :-<br />
Test<br />
Extract<br />
Extract<br />
Chemical<br />
Extraction Tablets Water <strong>Soil</strong><br />
<strong>Soil</strong> pH<br />
Lime<br />
Requirement<br />
Nitrate (N)<br />
Extract N<br />
N/A<br />
1M Ammonium<br />
Chloride<br />
No extraction required.<br />
Tests are carried out directly<br />
on the soil sample.<br />
One level blue<br />
extraction scoop<br />
Extraction N Powder<br />
plus one universal<br />
spoonful of Nitratest N<br />
Powder<br />
50 ml 2 ml<br />
Phosphate (P)<br />
Extract P<br />
0.5M Sodium<br />
Bicarbonate<br />
5 x Extraction P<br />
tablets<br />
50 ml 2 ml<br />
Potassium (K)<br />
Extract K<br />
0.1M<br />
Magnesium<br />
Acetate<br />
One level blue<br />
extraction scoop<br />
Extraction K Powder<br />
50 ml 2 ml<br />
Calcium (Ca)<br />
Magnesium (Mg) Extract A<br />
1M Potassium<br />
Chloride<br />
5 x Extraction A<br />
tablets<br />
50 ml 10 ml<br />
9
Equipment<br />
The equipment required to prepare the soil extracts, and included in<br />
<strong>Palintest</strong> soil test kits, is listed below :-<br />
<strong>Palintest</strong> Sample Containers,100/50 ml, plastic PT 510/PT 506<br />
<strong>Soil</strong> Scoop, 2 ml PT 302<br />
<strong>Soil</strong> Scoop, 10 ml PT 310<br />
Blue Extraction Scoop<br />
ZP0432<br />
Universal Spoon<br />
ZP0465<br />
Filter Funnel, 7 cm plastic PT 607<br />
Filter Papers, 11 cm diameter PT 618<br />
It is important to ensure that the sample containers and filter funnel are<br />
clean before the start of each extraction. It is particularly important to<br />
wash out all traces of the previous extracting solution as these can<br />
seriously contaminate subsequent tests. The sample containers and<br />
filter funnel must be thoroughly washed out and then rinsed with<br />
deionised water between each extraction. Syringes used to measure<br />
extract solutions must be thoroughly cleaned between each test.<br />
10
Filtering and Extract<br />
After the soil has been shaken with the extracting solution for the<br />
prescribed period, it must be filtered through filter paper to produce an<br />
extract. The filtration is carried out in the following manner.<br />
Take a filter paper circle, fold in half and then fold again into a quarter.<br />
Insert a finger between the folds and form the paper into the shape of<br />
a cone. Insert the filter paper cone into the filter funnel then place the<br />
funnel on the top of a clean sample container.<br />
It is not necessary to collect all of the extract solution. Most of the<br />
<strong>Palintest</strong> procedures have been based on a 10 ml sample of extract so<br />
as to minimise the filtration time. Just collect sufficient extract for the<br />
tests to be carried out then discard the rest of the soil slurry.<br />
Temperature<br />
Temperature affects the rate of soil extraction and the rate of chemical<br />
reactions. <strong>Palintest</strong> soil tests have been calibrated at a temperature of<br />
20°C. <strong>Palintest</strong> soil extraction procedures and chemical tests should be<br />
carried out with the solution as close to 20°C as possible for optimum<br />
results.<br />
Important<br />
The success of the soil tests will depend on following the test<br />
instructions carefully and on maintaining clean working conditions<br />
throughout the test procedures. Always wash and rinse equipment<br />
thoroughly before and after use.<br />
The correct method<br />
to<br />
take a level scoop<br />
of soil<br />
11
Test Instructions<br />
<strong>Soil</strong> pH<br />
<strong>Soil</strong> pH is a measure of the hydrogen ion activity and is important in<br />
determining the availability of plant nutrients. Agricultural soils generally<br />
lie within the pH range of 4 - 8.<br />
Neutral soils have a pH value close to 7.0. <strong>Soil</strong>s are considered alkaline<br />
if the pH is above 7, and acidic if the pH is below 7. <strong>Soil</strong>s below pH 5 are<br />
strongly acidic and will only support acid loving plants.<br />
Lime Requirement<br />
The ‘Lime Requirement’ of a soil is a measure of the quantity of liming<br />
material required to raise the pH of the soil to a specified value. The<br />
specified pH value is 6.5 for mineral soil, 6.2 for organic soil and 5.8 for<br />
peaty soil. It is not necessary to test soils where the existing pH is<br />
higher than these values since in such cases the lime requirement will<br />
be zero.<br />
In the <strong>Palintest</strong> Lime Requirement test, the soil is shaken with a pH<br />
buffer and the extent to which the soil modifies the buffer pH is used to<br />
determine the lime requirement. The test is carried out as an extension<br />
of the <strong>Soil</strong> pH test. The value given is the amount of calcium carbonate<br />
required to raise a 20 cm depth of soil to the pH value specified for the<br />
particular soil type.<br />
<strong>Soil</strong> pH and Lime Requirement can be determined using a <strong>Palintest</strong> pH<br />
Sensor. Use of the sensor offers a rapid and convenient method of<br />
measuring these parameters. Operating instructions for <strong>Palintest</strong> pH<br />
sensors are given in pocket tester instructions (page 41).<br />
Reagents and Equipment<br />
<strong>Palintest</strong> Lime Buffer Tablets ST-2210<br />
<strong>Palintest</strong> pH Sensor PT 151<br />
<strong>Soil</strong> Scoop, 2 ml PT 302<br />
Sample Container PT 506/ PT 510<br />
12
Test Procedure<br />
<strong>Soil</strong> pH<br />
1 Take two level 2 ml scoops of soil and place in the sample container.<br />
Add deionised water up to the 10 ml mark.<br />
2 Cap container and shake gently for one minute.<br />
3 Insert the pH electrode into the container and take the soil pH reading.<br />
Lime Requirement<br />
1 Take one level 2 ml scoop of soil and place in the sample container.<br />
Add deionised water up to the 10 ml mark.<br />
2 Add one Lime Buffer tablet, cap container and shake gently for two<br />
minutes.<br />
3 Insert the pH electrode into the container and take the modified pH<br />
reading of the buffer.<br />
4 Refer to the Lime Requirement table appropriate to the type of soil<br />
under test. The tables show the Lime Requirement expressed in<br />
terms of Calcium Carbonate (CaCO 3 ). Quantities are given in<br />
various units commonly used in agriculture.<br />
Mineral <strong>Soil</strong>s<br />
Mineral soils contain less than 10% organic material :-<br />
<strong>Soil</strong>tester<br />
Reading<br />
(Modified pH)<br />
Lime Requirement (CaCO 3 )<br />
tonne/ha gram/m2 cwt/acre<br />
oz/sq yard<br />
4.0 30 3000 240 90<br />
4.5 25 2500 200 75<br />
5.0 20 2000 160 60<br />
5.5 15 1500 120 45<br />
6.0 10 1000 80 30<br />
6.5 4 400 30 12<br />
7.0 0 0 0 0<br />
7.5 0 0 0 0<br />
8.0 0 0 0 0<br />
13
Organic <strong>Soil</strong>s<br />
Organic soils contain 10 - 25% organic material :-<br />
<strong>Soil</strong>tester<br />
Reading<br />
(Modified pH)<br />
Lime Requirement (CaCO 3 )<br />
tonne/ha gram/m2 cwt/acre<br />
oz/sq yard<br />
4.0 32 3200 225 95<br />
4.5 26 2600 210 78<br />
5.0 21 2100 165 61<br />
5.5 15 1500 120 45<br />
6.0 10 1000 75 28<br />
6.5 4 400 30 12<br />
7.0 0 0 0 0<br />
7.5 0 0 0 0<br />
8.0 0 0 0 0<br />
Peaty <strong>Soil</strong>s<br />
Peaty <strong>Soil</strong>s contain greater than 25% organic material :-<br />
<strong>Soil</strong>tester<br />
Reading<br />
(Modified pH)<br />
Lime Requirement (CaCO 3 )<br />
tonne/ha gram/m2 cwt/acre<br />
oz/sq yard<br />
4.0 34 3400 270 100<br />
4.5 28 2800 225 85<br />
5.0 22 2200 180 65<br />
5.5 17 1700 135 50<br />
6.0 11 1100 85 32<br />
6.5 5 500 40 15<br />
7.0 0 0 0 0<br />
7.5 0 0 0 0<br />
8.0 0 0 0 0<br />
The lime requirement values given in the foregoing tables should be<br />
regarded as maximum values. Over-liming should be avoided as this<br />
may give rise to trace element deficiencies.<br />
14
Liming Materials<br />
The results of the <strong>Palintest</strong> Lime Requirement test are given in terms of<br />
calcium carbonate (ground limestone or chalk). In practice a variety of<br />
liming materials are used and regard must be paid to the neutralising<br />
value of these materials in order to determine the amounts required from<br />
the results given as calcium carbonate.<br />
15
CONDUCTIVITY<br />
Electrical conductivity provides a means of assessing the level of soluble<br />
salts in soil. The test is particularly useful for saline soils, or for glasshouse<br />
or other soils which have been subject to prolonged irrigation.<br />
There are various different techniques for measuring soil conductivity. In<br />
the method given below the soil is extracted with water at a soil: water ratio<br />
of 1:5, and the filtered extract is tested using a <strong>Palintest</strong> Conductivity<br />
Meter. This method provides a quick and simple means of comparing the<br />
conductivity or soluble salt content of different soil samples.<br />
Equipment<br />
<strong>Palintest</strong> Conductivity Meter PT 159<br />
Sample Container PT 506/PT 510<br />
Operating instructions for the conductivity meter are given in the a<br />
pocket tester instructions.<br />
Conductivity Procedure<br />
1 Fill the sample container to the 50 ml mark with deionised water.<br />
2 Add one 10 ml scoop of soil, cap tube and shake for two minutes.<br />
3 Allow the soil to settle before taking a reading<br />
Conductivity Measurement Test Procedure<br />
1 Take the sample container containing the extract and dip in the<br />
Conductivity Meter Probe.<br />
2 Take the conductivity reading on the meter. The result is displayed<br />
in either µS (microsiemens) or mS (millisiemens).<br />
16
NITRATE (0 – 25 mg/l N)<br />
Nitrate nitrogen (N) is an important plant nutrient which promotes foliar<br />
growth and increased yield.<br />
In the <strong>Palintest</strong> Nitrate test the soil is extracted using 1M ammonium<br />
chloride at a soil:water ratio of 1:25. The extracted nitrate is reduced to<br />
nitrite during the extraction stage and then reacted to form a red azo-dye.<br />
The intensity of the red colour produced is proportional to the nitrate level<br />
in the soil sample and is determined by using a <strong>Palintest</strong> <strong>Soil</strong> Test 10.<br />
Reagents and Equipment<br />
<strong>Palintest</strong> Nitricol N Tablets ST-2240<br />
Nitratest N Powder<br />
ST-2237<br />
Extraction N Powder<br />
ST-2106<br />
<strong>Palintest</strong> Photometer<br />
PT 751 SOIL<br />
<strong>Soil</strong> Scoop, 2 ml PT 302<br />
Blue Extraction Scoop<br />
ZP0432<br />
Universal Spoon<br />
ZP0465<br />
Sample Container PT 506/PT 510<br />
<strong>Palintest</strong> Test Tubes, 10 ml PT 595/5<br />
Filter Funnel PT 607<br />
Filter Paper PT 618<br />
Extract N Procedure<br />
A blue extraction scoop is included in the kit for this procedure, however,<br />
it is important that this scoop should NOT be used for measuring soil.<br />
1 Fill the sample container to the 50 ml mark with deionised water.<br />
2 Add one level blue extraction scoop of Extraction N powder, cap<br />
tube and shake to disperse.<br />
3 Add one level 2 ml scoop of soil, cap tube and shake for one minute.<br />
4 Add one level universal spoonful of Nitratest N Powder, cap tube<br />
and shake for one minute.<br />
Filter and collect Extract N in a clean sample container. For optimum<br />
results carry out the test as soon as sufficient extract has been collected.<br />
Test Procedure<br />
1 Fill a round glass test tube to the 10 ml mark with Extract N.<br />
2 Add one Nitricol N tablet, crush and mix to dissolve.<br />
3 Stand for 10 minutes to allow full colour development.<br />
4 Select Test N and take photometer reading in usual manner.<br />
5 The soil Nitrate result is displayed as mg/l N.<br />
17
PHOSPHATE (0 – 150 mg/l P)<br />
Phosphate (P) is a major plant nutrient. It is particularly beneficial in<br />
stimulating root growth.<br />
In the <strong>Palintest</strong> Phosphate test the soil is extracted using 0.5M sodium<br />
bicarbonate at a soil:water ratio of 1:25. The extracted phosphate is then<br />
reacted with ammonium molybdate under reducing conditions in acidic<br />
solution to form a blue coloured complex. The intensity of the blue<br />
coloration is proportional to the phosphate level in the soil sample and is<br />
determined by using a <strong>Palintest</strong> <strong>Soil</strong> Test 10.<br />
Reagents and Equipment<br />
<strong>Palintest</strong> Acidifying S Tablets ST-2275<br />
<strong>Palintest</strong> Phosphate P Tablets ST-2260<br />
<strong>Palintest</strong> Extraction P Tablets ST-2116<br />
<strong>Palintest</strong> Photometer<br />
PT 751SOIL<br />
<strong>Soil</strong> Scoop, 2 ml PT 302<br />
<strong>Palintest</strong> Test Tubes, 10 ml PT 595/5<br />
Sample Container PT 506/PT 510<br />
2 ml Syringe PT 362<br />
Filter Funnel PT 607<br />
Filter Paper PT 618<br />
Extract P Procedure<br />
1 Fill the sample container to the 50 ml mark with deionised water.<br />
2 Add five Extraction P tablets, cap tube and shake to disintegrate.<br />
3 Add one level 2 ml scoop of soil. Cap tube and shake for one minute.<br />
With acid soils some effervescence may be produced - release tube<br />
cap periodically to allow any pressure build-up to escape.<br />
4 Filter and collect Extract P in a clean sample container.<br />
Test Procedure<br />
1 Using the plastic syringe take exactly 2 ml Extract P. Discharge the<br />
syringe into a round test tube, then fill tube to the 10 ml mark with<br />
deionised water.<br />
2 Add one Acidifying S tablet, crush and mix to dissolve.<br />
3 Add one Phosphate P tablet, crush and mix to dissolve.<br />
4 Stand for 10 minutes to allow full colour development.<br />
5 Select Test P and take photometer reading in usual manner.<br />
6 The soil Phosphate result is displayed as mg/l P.<br />
18
POTASSIUM (0 - 450 mg/l K)<br />
Potassium, the third of the major nutrients, increases resistance to disease<br />
and hardens plant tissue.<br />
In the <strong>Palintest</strong> Potassium (K) test the soil is extracted using 0.1M<br />
magnesium acetate at a soil:water ratio 1:25. The extracted potassium is<br />
reacted with sodium tetraphenylboron to form an insoluble white complex<br />
which produces a turbidity in the test sample. The degree of turbidity is<br />
proportional to the potassium level in the soil and is measured by using a<br />
<strong>Palintest</strong> <strong>Soil</strong> Test 10.<br />
Reagents and Equipment<br />
<strong>Palintest</strong> Potassium K Tablets ST-2280<br />
<strong>Palintest</strong> Extraction K Powder ST-2127<br />
<strong>Palintest</strong> Photometer<br />
PT 751SOIL<br />
<strong>Palintest</strong> Test Tubes, 10 ml PT 595/5<br />
<strong>Soil</strong> Scoop, 2 ml PT 302<br />
Blue Extraction Scoop<br />
ZP0432<br />
Sample Container PT 506/PT 510<br />
Filter Funnel PT 607<br />
Filter Paper PT 618<br />
Extract K Procedure<br />
A blue extraction scoop is included in the kit for this procedure, however,<br />
it is important that this scoop should NOT be used for measuring soil.<br />
1 Fill the sample container to the 50 ml mark with deionised water.<br />
2 Add one level blue extraction scoop of Extraction K powder, cap<br />
tube and shake to disperse.<br />
3 Add one level 2 ml scoop of soil, cap tube and shake for one minute.<br />
4 Filter and collect Extract K in a clean sample container.<br />
Test Procedure<br />
1 Fill a round glass test tube to the 10 ml mark with Extract K.<br />
2 Add one Potassium K tablet, crush and mix to dissolve.<br />
3 Stand for two minutes, a cloudy solution indicates the presence of<br />
potassium.<br />
4 Select Test K and take photometer reading in usual manner.<br />
5 The soil potassium result is displayed as mg/l K.<br />
19
Notes<br />
1 Photometer readings on turbidity-based tests should be carried out<br />
under shaded conditions to prevent light being reflected into the<br />
instrument. Always use the light cap in brightly lit environments.<br />
2 High levels of ammonia nitrogen may interfere with the potassium<br />
test. The test should not be carried out within two weeks following<br />
the application of farmyard manure or slurry.<br />
20
MAGNESIUM (0 – 500 mg/l Mg)<br />
Magnesium is an essential element for the growth of green plants. The<br />
ratio of calcium to magnesium is also an important factor in determining<br />
the availability of nutrients. If there is an excess of magnesium over the<br />
amount of calcium in the soil, plant growth can be seriously affected.<br />
In the <strong>Palintest</strong> Magnesium test, the soil is extracted using 1M potassium<br />
chloride at a soil:water ratio of 1:5. The extracted and exchanged<br />
magnesium is then reacted to form an orange complex. The reagent<br />
produces a yellow colour in the absence of magnesium. The intensity of<br />
the orange colour produced is proportional to the magnesium level in the<br />
soil sample and is determined by using a <strong>Palintest</strong> <strong>Soil</strong> Test 10.<br />
Reagents and Equipment<br />
<strong>Palintest</strong> Magnecol S Tablets ST-2440<br />
<strong>Palintest</strong> Extraction A Tablets ST-2136<br />
<strong>Palintest</strong> Photometer<br />
PT 751SOIL<br />
<strong>Palintest</strong> Test Tubes, 10 ml PT 595/5<br />
<strong>Soil</strong> Scoop, 10 ml PT 310<br />
Syringe, 1 ml plastic PT 361<br />
Sample Container PT 506/PT 510<br />
Filter Funnel PT 607<br />
Filter Paper PT 618<br />
Extract A Procedure<br />
1 Fill the sample container to the 50 ml mark with deionised water.<br />
2 Add five Extraction A tablets, cap tube and shake to disintegrate.<br />
3 Add one level 10 ml scoop of soil, cap tube and shake for two minutes.<br />
4 Filter and collect Extract A in a clean sample container.<br />
Test Procedure<br />
1 Using the plastic syringe take exactly 1 ml Extract A. Discharge the<br />
syringe into a round test tube, then fill the tube to the 10 ml mark<br />
with deionised water.<br />
2 Add one Magnecol S tablet, crush and mix to dissolve.<br />
3 Stand for five minutes to allow full colour development.<br />
4 Select Test Mg and take photometer reading in usual manner.<br />
5 The soil Magnesium result is displayed as mg/l Mg.<br />
21
CALCIUM (0 – 2500 mg/l Ca)<br />
The amount of exchangeable calcium is an important factor in classifying<br />
soil and in making fertilizer recommendations. Calcium stimulates root<br />
development and influences the uptake of other nutrients. The ratio of<br />
calcium to magnesium is particularly important in determining nutrient<br />
availability.<br />
In the <strong>Palintest</strong> Calcium test the soil is extracted using 1M potassium<br />
chloride at a soil:water ratio of 1:5. The exchanged and extracted<br />
calcium is then determined by the <strong>Palintest</strong> tablet count method. Tablets<br />
are added to a sample of the extract one at a time until the colour<br />
changes from pink to violet. The result of the test is calculated from the<br />
number of tablets added to the extract sample.<br />
Reagents and Equipment<br />
<strong>Palintest</strong> Calcium S Tablets ST-2297<br />
<strong>Palintest</strong> Extraction A Tablets ST-2136<br />
Sample Container PT 510/PT 506<br />
<strong>Soil</strong> Scoop, 10 ml PT 310<br />
Filter Funnel PT 607<br />
Filter Paper PT 618<br />
Extract A Procedure<br />
1 Fill the sample container to the 50 ml mark with deionised water.<br />
2 Add five Extraction A tablets, cap tube and shake to disintegrate.<br />
3 Add one level 10 ml scoop of soil, cap tube and shake for two minutes.<br />
4 Filter and collect Extract A in a clean sample container.<br />
22
Test Procedure<br />
1 Take 10 ml Extract A in the sample container. Add deionised water<br />
to make up to approximately the 50 ml mark. (The amount of<br />
deionised water added is not critical - this is merely to increase the<br />
working volume of the solution to aid dissolving the tablets and<br />
observation of the colour change).<br />
2 Add one Calcium S tablet and shake the container until the tablet<br />
disintegrates.<br />
3 Continue adding tablets one at a time in this manner until the<br />
colour of the solution changes from pink to violet.<br />
4 Note the number of Calcium S tablets used. Calculate the result of<br />
the test using the formula given below. This gives the calcium level<br />
in the soil expressed as mg/l Ca :-<br />
Calcium (mg/l) = Number of Tablets x 250<br />
Low Calcium <strong>Soil</strong>s<br />
For soils with an expected low calcium content, it is preferable to carry<br />
out this test on 50 ml of Extract A, made up to approximately 100 ml<br />
with deionised water. The result should then be calculated as follows :-<br />
Calcium (mg/l) = Number of Tablets x 50<br />
23
SOIL TEST 10 PHOTOMETER INSTRUCTIONS<br />
Your <strong>Palintest</strong> <strong>Soil</strong> Test 10 photometer is designed to give long and<br />
trouble-free operation. To ensure you get the best out of this<br />
photometer, please read these instructions carefully and follow the<br />
procedures recommended.<br />
The photometer is suitable for use in both the laboratory, or in the field.<br />
It is sturdy and robust but should always be regarded as a scientific<br />
instrument. Treat it in the same way that you would a watch or a<br />
camera. It is designed to resist moisture and spills but careless use will<br />
almost certainly result in damage or reduce the life of the instrument.<br />
Getting the Best Results<br />
To get the best results follow these simple guidelines :-<br />
1 Read the test instructions carefully and carry out the tests precisely<br />
as instructed. Become familiar with the instructions for each test.<br />
2 Add the tablets to the sample in the manner described in the instructions.<br />
Crush or allow to disintegrate as indicated. Use a separate crushing rod<br />
for each tube. Do not shake the test tubes in order to dissolve the<br />
tablets.<br />
3 Place cap on the test tube when the tablets have dissolved. For<br />
most tests it does not matter if a few small undissolved particles<br />
remain, provided these have settled to the bottom of the tube.<br />
4 Before taking <strong>Soil</strong> Test 10 readings ensure that the outside of the<br />
tube is clean and dry. Use a tissue to wipe off any water drips or<br />
condensation.<br />
5 Wash test tubes, caps and crushing rods thoroughly under a running<br />
tap after use. Brush off any stains or deposits. Dry on a clean cloth or<br />
rinse with deionised water before re-use.<br />
6 Replace any test tubes which become scratched or permanently<br />
stained.<br />
Use the light cap when in strong, direct sunlight.<br />
24
Carrying Out the Tests Rapidly<br />
The following hints should help in developing a technique for carrying<br />
out the tests rapidly. Once you are familiar with the individual test<br />
procedures it should be possible to carry out a series of tests at the<br />
same time. The following procedure should be adopted :-<br />
1 Note the tests which are required to be carried out.<br />
2 Prepare a sample tube for each of the tests according to the test<br />
instructions.<br />
3 Add test tablets to each tube in the manner described. Crush<br />
or allow to disintegrate as instructed. Cap the tubes.<br />
4 Ensure that the tablets have properly dissolved then take the<br />
photometer reading on each tube in turn.<br />
Diluting the Sample<br />
When the test result is outside the concentration range of the test, the<br />
<strong>Soil</strong> Test 10 will display the '>>' symbol. In such cases it is necessary to<br />
dilute the sample and repeat the test. If the result is close to the top of<br />
the scale and a more accurate result is required, a dilution may be used<br />
to increase the sensitivity of the test :-<br />
1 Take a Dilution Tube (PT 512) and fill to the x2 mark with the extract.<br />
Make up to the ‘Deionised Water’ mark with deionised water. Replace<br />
the tube cap and mix.<br />
2 Carry out the test on the diluted sample in a 10 ml test tube as per<br />
the normal test instructions.<br />
3 Switch the photometer into SYSTEM mode, then select Dilution Factor<br />
‘On’. Press [OK] key to switch back into PHOTOMETER mode.<br />
4 Take the photometer reading in the normal manner. Photometer<br />
display sequence will ask for entry of dilution factor. Key in the factor '2'.<br />
5 The test result displayed will represent the concentration in the<br />
original water sample.<br />
Samples may be diluted to a greater extent if necessary. Enter the<br />
dilution factor appropriate to the dilution used. Note that it is not<br />
possible to dilute samples in the pH/lime requirement tests.<br />
25
Care and Maintenance<br />
<strong>Palintest</strong> kits are designed to give long service and require very little<br />
maintenance. The main requirement is to keep the components in a<br />
clean condition. Spillages of test solutions should be wiped up<br />
immediately with a damp cloth. In addition to routine cleaning, the test<br />
tubes and sample containers should be washed periodically in warm<br />
soapy water.<br />
Deionised Water<br />
Deionised water is required for sample dilution and for the general<br />
rinsing of test tubes, etc. The <strong>Palintest</strong> De-Ion Pack (PT 500) has been<br />
specially developed to provide deionised water for use with test kits<br />
both in the field and in the laboratory.<br />
The <strong>Palintest</strong> De-Ion Pack (PT 500) produces approx five litres of<br />
deionised water in 2 - 5 minutes from mains water or from clean natural<br />
water sources. Instructions for using the De-Ion Pack are given on the<br />
product label and carton.<br />
Power Supply<br />
The photometer is designed to be powered either from alkaline batteries<br />
or via the USB socket. To use mains power, the instrument is connected<br />
using the USB Connection Cable (PT 746) plugged to the Mains Adapter<br />
(PT 745). Alternatively, if the USB connection cable is plugged to a<br />
computer, power will be drawn from the computer.<br />
The photometer features a battery indicator – see ‘System Mode’ functions.<br />
A minimum voltage of 3.0V is needed to operate the photometer.<br />
In addition to the above feature, a battery-warning message will appear<br />
automatically on the display when the battery voltage becomes low.<br />
The batteries should be replaced as soon as possible after the warning<br />
message appears. Stored data in the instrument memory will not be<br />
lost during battery replacement.<br />
26
Replacing the Batteries<br />
The battery compartment in the base of the instrument is secured by<br />
four screws. To replace the batteries, remove the cover and install the<br />
batteries, observing the correct polarity as indicated. Use 3 x 1.5V 'AA’<br />
alkaline batteries or equivalent.<br />
To avoid corrosion damage through leakage, remove batteries from the<br />
instrument if it is to be stored or left unused for a long period of time.<br />
Cleaning the Optics<br />
Any build-up of dirt or deposits may interrupt light transmission and<br />
affect readings.<br />
To clean the optics, undo the two screws to remove the optics base<br />
plate. Gently clean the internal surfaces of the optics with a soft, nonabrasive<br />
cloth. Deposits may be removed with a slightly dampened<br />
cotton bud. Replace the optics base plate and re-fasten the screws.<br />
The photometer is fitted with long-life light sources and contains no userserviceable<br />
components. If the instrument requires servicing or repair,<br />
this can be arranged through our Technical Services Department.<br />
27
Nutrient Level Guide<br />
Parameter<br />
Expression of<br />
Results<br />
Maximum Recommended<br />
Concentration/Value*<br />
<strong>Soil</strong> pH - 7.5<br />
Nitrogen mg/l 20<br />
Phosphate mg/l 40<br />
Potassium mg/l 250<br />
Calcium mg/l 2000<br />
Magnesium mg/l 180<br />
Conductivity µS/cm 2000<br />
* = the maximum limits of each macronutrient will depend upon both the type of crop that is<br />
being cultivated and upon the local environmental conditions. Consult www.palintest.com<br />
for further details.<br />
The five main elements absorbed from the soil by plants are nitrogen<br />
(N), phosphorus (P), potassium (K), calcium (Ca) and magnesium (Mg).<br />
They are all classified as macronutrients due to plants adsorbing them<br />
on a relatively large scale. Nitrogen, phosphate and potassium are the<br />
three that are commonly in sufficiently short supply in soil to inhibit high<br />
crop yields.<br />
Nitrogen (adsorbed as ammonium or nitrate ions) is essential for all plant<br />
growth as it is a major component of amino acids, the building blocks of<br />
proteins. Nitrogen levels need to be sufficiently high as to support plant<br />
growth and photosynthesis, whilst excessive levels of nitrogen in the soil<br />
may lead to increasing plant vulnerability from insect and fungal<br />
organisms.<br />
Plants adsorb phosphorus, as orthophosphate from the soil. Phosphorus<br />
plays a fundamental role in the very large number of enzymic reactions<br />
within the cells of the plant. Phosphorus deficiency results in the<br />
starvation of the plant and can occur with few warning signs in plant<br />
condition.<br />
Potassium is the third essential nutrient a plant requires and is used<br />
primarily in the synthesis of amino acids. It is also thought to be<br />
important the photosynthesis process within plant cells.<br />
28
Calcium deficiency seems to affect the proper growth of the root tips.<br />
It usually occurs in acidic soils and has a detrimental effect on plants<br />
by allowing other substances to accumulate in the plant. Excessively<br />
high calcium content in the soil can suppress the uptake of magnesium<br />
and potassium by the plant roots.<br />
Magnesium is an important constituent of chlorophyll in plants and<br />
therefore deficiency (as with calcium, generally occurring in acidic<br />
soils) reduces crop yields. Magnesium is also thought to be important<br />
in the transport of phosphate throughout the plant.<br />
29
FEATURES AND TECHNICAL SPECIFICATION<br />
Application<br />
For the use of analysing soil samples using<br />
<strong>Palintest</strong> tablet reagent systems.<br />
Instrument Type Single-beam colorimeter with built-in colour filters<br />
and pre-programmed test calibrations.<br />
Peak Wavelengths 445 ± 5nm, 495 ± 5nm, 555 ± 5nm, 570 ± 5nm,<br />
605 ± 5nm and 655 ± 5nm<br />
Range 1 - 100%T<br />
Accuracy ± 1%T<br />
Display<br />
Large graphic display with option of backlight.<br />
Language<br />
Test identification and prompts in English, French,<br />
German, Spanish and Italian.<br />
Timer<br />
Clock and timer feature to log test results and<br />
audible alarm for timing test procedure.<br />
Units<br />
Direct-reading of test results in mg/l or ppm.<br />
User Selectable Options 10 digit sample number entry, dilution factor,<br />
time/date, date format, system lock and rounding of<br />
results.<br />
Date Format Date format selectable as day/month/year or<br />
month/day/year.<br />
Zeroing<br />
Automatic zeroing on blank tube and hold blank<br />
facility for series of tests. Continuation test facility<br />
without the need for reblanking.<br />
Internal Memory Stores 500 previous readings with option to view<br />
logged results on screen, or download to computer.<br />
USB Interface USB 1.1 full-speed, bus-powered device. Software<br />
selectable between either emulation of a removable<br />
hard-drive or emulation of a serial device connected<br />
via a virtual COM port.<br />
Power<br />
3 x 1.5V ‘AA’ alkaline batteries or via USB interface.<br />
Power management system with variable length<br />
auto switch-off or 'continuous' operation.<br />
Size<br />
250 x 150 x 70 mm<br />
Weight<br />
985g<br />
Test Tubes For tablet reagents - 10 ml glass test tubes, 20 mm<br />
OD (PT 595).<br />
Cell Holder Multi-size tube holder accepts test tubes from 12 –<br />
20 mm OD and centres the tube for optimum<br />
optical performance.<br />
30
GENERAL PHOTOMETER OPERATION<br />
The photometer is controlled by a simple intuitive menu system.<br />
<br />
<br />
<br />
<br />
The highlight indicates the active line or section of the screen.<br />
The and keys move the highlight through the menu choices.<br />
The and keys allow selection of options.<br />
The flashing cursor in the ‘Options’ menu at the bottom of the screen<br />
indicates the action which will occur if the [OK] button is pressed.<br />
Operating Modes<br />
The photometer has two distinct operating modes - the PHOTOMETER<br />
mode and the SYSTEM mode.<br />
The PHOTOMETER mode is the normal operating mode for taking<br />
photometer readings. This mode is engaged automatically when the<br />
instrument is turned on by pressing the key.<br />
In order to conserve battery life the photometer will switch off<br />
automatically after use. The switch off period is five minutes in normal<br />
use, but may be adjusted in SYSTEM mode.<br />
The SYSTEM mode is used to set the system options. This mode is<br />
engaged when the photometer is turned on using the key and then<br />
selecting 'System' using the and keys and pressing [OK].<br />
Scroll through the menu box to view all the options available.<br />
System - Quick Start<br />
When the instrument is first used, the SYSTEM mode should be used<br />
to set the preferred operating options :-<br />
• Use the and keys to scroll through the features.<br />
• Use the and keys to select the options.<br />
• Press [OK] to accept the selections and return to PHOTOMETER mode.<br />
• Select the language required from English, French, German, Spanish<br />
or Italian.<br />
• Select the display units required from mg/l or ppm.<br />
31
• Set the sample number option to ‘On’ to allow the entry of a sample<br />
number during normal photometer operation.<br />
• Set the sample increment option to ‘On’ to automatically increase<br />
the sample number.<br />
• Set the dilution factor to ‘On’ or ‘Off’. If the dilution factor option is<br />
set to ‘On’, the instrument will allow the entry of a numerical factor<br />
which will be used in the calculation of the result to be displayed on<br />
the instrument.<br />
• Select the preferred date format. The date may be shown in either<br />
Date/Month/Year or Month/Date/Year.<br />
• To change the date and time, select the date and time line then key in<br />
correct setting using the numeric keys. To correct an error, use the <br />
and keys to move the cursor then key in the correct data.<br />
System - Full Options<br />
The <strong>Soil</strong> Test 10 features a wide range of options which may be<br />
explored at leisure to get the best from the instrument. An explanation of<br />
the application of these options is as follows :-<br />
View Log<br />
The photometer has an internal memory which can hold up to 500 test<br />
results. Once the memory is full, each new result overwrites the oldest<br />
entry.<br />
Select ‘View Log’ to view stored results on screen. The and keys<br />
may be used to scroll through the list of stored results. The ‘Options’<br />
menu offers several choices.<br />
Select ‘Clear’ to empty the memory. Confirmation is requested to<br />
avoid accidentally erasing the data. Select ‘Exit’ to return to SYSTEM<br />
mode. Select ‘Download’ to transmit stored data to a PC. This option<br />
only appears if the USB mode is set to ‘COM Port’. Refer to ‘Interface<br />
Connection and Data Memory’ for further information.<br />
Back Light<br />
The graphic display features a backlight to enhance the display contrast.<br />
This may be switched off to conserve power when working on battery<br />
power.<br />
32
Language Options<br />
The photometer can be operated in a number of different languages.<br />
When a particular language is selected, the test names and operating<br />
commands will appear in that language. Certain tests and unit options<br />
are provided in accordance with the conventions of particular countries<br />
and are only available when the photometer is switched to the<br />
language concerned.<br />
Sample Number<br />
A unique number may be associated with each result record to identify it<br />
in the log. If Sample Number ‘On’ is selected, the user is offered the<br />
choice of entering a number of up to 10 digits for each sample reading.<br />
If this function is set to ‘Off’, a sample number is automatically allocated.<br />
Sample Number Increment<br />
The sample number increment option may be used to determine<br />
whether the instrument does or does not automatically increment the<br />
sample number after each test. Incrementation of the sample number<br />
may be used when the instrument is used for carrying out a series of<br />
similar tests. Alternatively it may be preferable not to increment the<br />
number if typical use involves carrying out a number of different tests<br />
on the same sample.<br />
Dilution Factor<br />
When samples are out of range for the test, a dilution procedure may<br />
be used. If the dilution factor option is set to ‘On’, the instrument will<br />
allow entry of a numerical factor which will be used in the calculation of<br />
the result displayed and stored in the log.<br />
Date and Time<br />
The instrument records the date and time of each reading taken and<br />
associates this with the data record in the log. To correct the date and<br />
time on the internal clock, select the date and time display line.<br />
Date Format<br />
The option of day/month/year or month/day/year date format is available.<br />
33
Battery Level<br />
A battery level indicator shows the power available. At least 3.0V is<br />
required for successful operation of the instrument.<br />
Time-Out<br />
As a power-saving measure, in normal use, the photometer automatically<br />
switches off five minutes after the last key is pressed.<br />
The photometer may be switched to ‘Long’ time-out which allows 15<br />
minutes before shut-down or ‘Off’ which allows continuous use. This is<br />
particularly useful when powering the instrument through the USB<br />
interface.<br />
USB<br />
The USB interface allows communication between the instrument<br />
and a PC. There is a choice of two operating modes – Hard Drive<br />
and COM Port.<br />
In Hard Drive mode, the instrument appears as a removable hard drive<br />
when connected to a PC. No additional software is required on computers<br />
running Windows 2000, ME or XP. A driver to use this option with<br />
Windows 98SE is available from <strong>Palintest</strong> Technical Services Department.<br />
In COM Port mode, the instrument behaves as if connected to the PC<br />
serial port via RS232. This allows backwards compatibility with software<br />
written for earlier models of <strong>Palintest</strong> instruments. In this mode, the PC<br />
requires installation of a USB virtual COM Port driver, available from<br />
<strong>Palintest</strong> Technical Services Department.<br />
See the section on ‘Interface Connections and Data Memory’ below for<br />
full instructions.<br />
User Defined Tests<br />
Users may wish to develop their own test methods and store the<br />
calibration data on the <strong>Soil</strong> Test 10. This will allow direct reading of<br />
user tests. The <strong>Soil</strong> Test 10 has the facility to store up to 30 userdefined<br />
calibrations.<br />
34
To program user-defined calibrations :-<br />
Turn the instrument ‘ON’, select ‘System’ menu and press [OK]. Scroll<br />
through the options to the USB entry and make sure the option is set<br />
to ‘Com Port’.<br />
At the PC, open the HyperTerminal connection for the 7500 (apply to<br />
<strong>Palintest</strong> Technical Department to receive a disk containing virtual<br />
comport drivers for installation to PC).<br />
At the instrument, in the ‘System’ menu, select 'Edit User Defined<br />
Tests' and press [OK]. The instrument will display the tests already<br />
downloaded, or show ‘LIST EMPTY’.<br />
In the ‘Options’ menu, select [Add] to add a new test, or [Edit] to edit<br />
the test which is currently highlighted. Change the highlighted test with<br />
and keys. Press [OK].<br />
The instrument displays a message box instructing the user to download<br />
the new or edited test file.<br />
At the PC, download the calibration file from HyperTerminal using<br />
'Transfer', 'Send Text File' and select the file to be downloaded.<br />
The instrument will check the downloaded data. If it is acceptable, it<br />
will display a message box ‘Accepted’ over the downloaded data. If<br />
there are errors in the file, a list of errors will be displayed. The user<br />
should edit the calibration file to correct the errors then re-send it.<br />
Press [OK] to accept the test. The instrument will change to the ‘User<br />
Test List’ screen (See 3), with a summary of the test displayed. Press<br />
[OK] to accept the test and write to memory. Select [Cancel] at any<br />
time to reject the calibration.<br />
The format of the user calibration file is as follows :-<br />
The file must start with ‘USER CALIBRATION’ and end with ‘END’.<br />
Test Number must be between 900-929 (30 tests).<br />
Test name - up to 18 characters.<br />
Units - must be one of the following - mg/l, ppm, mmol/l, µmol/l or g/l.<br />
Wavelength - must be one of the following – 450 nm, 500 nm, 550 nm,<br />
570 nm, 600 nm or 650 nm.<br />
Chemical symbols - up to 8 characters.<br />
35
Data pairs - up to 10 pairs of data in the form :-<br />
ABSORBANCE x.xxx, CONCENTRATION<br />
(Concentration may be up to five digits).<br />
An example is shown below :-<br />
USER CALIBRATION<br />
900<br />
Chlorine<br />
mmol/l<br />
500nm<br />
Cl2<br />
0,0<br />
0.174,0.50<br />
0.481,1.50<br />
0.733,2.50<br />
0.854,3.00<br />
1.022,4.00<br />
1.086,4.50<br />
1.187,5.00<br />
END<br />
Error Messages<br />
The photometer will display an error message in the unlikely even of<br />
malfunction. These error messages are mainly designed to assist service<br />
staff in diagnosing instrument faults. In the event of an error message<br />
appearing on the photometer display, contact <strong>Palintest</strong> Technical Services<br />
Department for advice.<br />
Error messages are coded 1 – 10. Errors 1, 2, 3, 4, 5 and 6 are internal<br />
self-monitoring checks. In the first instance, the user should change the<br />
instrument batteries. If the error message still appears, it indicates a<br />
potential electronic fault with the instrument.<br />
Errors 7, 8, 9 and 10 relate to blanking in the instrument. In the first<br />
instance, the user should check operating technique and sample clarity. If<br />
these are in order then these errors indicate a fault in the instrument optics.<br />
36
Photometer Upgrade<br />
It is now possible to upgrade the photometer with new test calibrations<br />
using a computer system. This will ensure that users can always keep the<br />
instrument up-to-date with the latest tests. Updates for the photometer<br />
can be supplied on request via e-mail from sales@palintest.com. No<br />
special computer software is required. Full instructions will be supplied<br />
with the upgrade data.<br />
Guarantee<br />
<strong>Palintest</strong> photometers are guaranteed for a period of one year from the<br />
date of purchase, excluding accidental damage or damage caused by<br />
unauthorised repair or misuse. The guarantee specifically excludes<br />
damage caused by water or by ingress of chemical solutions. Should<br />
repair be necessary, contact our Technical Services Department<br />
quoting the serial number shown on the back of the instrument. This<br />
guarantee does not affect your statutory rights.<br />
INTERFACE CONNECTIONS AND DATA MEMORY<br />
Stored data can be accessed by recall to the screen (see ‘View Log’).<br />
Alternatively, data can be accessed using a PC :-<br />
• Connect the instrument to the computer via the USB port, using any<br />
suitable USB cable, eg PT 746<br />
• Turn the instrument ON and select SYSTEM mode from the ‘Options’<br />
menu<br />
• Scroll to ‘USB’ and select either ‘Hard Drive’ or ‘COM Port’.<br />
‘Hard Drive’ – Once this option is selected, simply turning the instrument<br />
ON while it is connected to a PC will cause an extra hard drive containing<br />
the instrument files to appear on the PC. The log of test results is in text<br />
file – ‘<strong>Soil</strong>_log.txt’. The other files shown on screen contain calibration and<br />
operating systems for use when upgrading the instrument and should be<br />
ignored.<br />
The log file can be copied from the instrument by dragging between<br />
windows and once copied can be opened with many text editors, word<br />
processors or spreadsheet programs.<br />
37
Note that deleting this file from the instruments hard drive will clear the<br />
data from the instrument memory.<br />
‘COM Port’ – Once this option is selected, data can be downloaded<br />
from the instrument to the PC :-<br />
• Open the ‘Virtual COM Port – HyperTerminal’ window on the<br />
computer<br />
• In the instrument SYSTEM mode, scroll to ‘View Log’ and select<br />
‘Download’.<br />
The data from the log will appear on the PC screen and can be<br />
transferred to Windows’ applications or printed as required.<br />
Taking Test Readings<br />
1 Press key. The instrument displays the ‘Choose a Test’ menu<br />
box, with the last test program used highlighted as the active line.<br />
The cursor will flash on the [OK] symbol of the ‘options menu' at the<br />
bottom of the screen.<br />
Press [OK] to accept this program.<br />
2 To choose a different test program, either use the and keys to<br />
scroll through the menu options, or use the numeric keys to enter<br />
the Test number of the desired test. The four most recently used<br />
tests are listed at the top of the ‘Choose a Test’ screen for<br />
convenience.<br />
Press [OK] to accept the selected program.<br />
3 If the sample number option is pre-selected, then the following<br />
display will appear, for example :-<br />
Sample Number<br />
1024<br />
OK<br />
Enter or confirm the sample number (up to 10 digits), then press<br />
[OK].<br />
38
4 If the dilution factor option is pre-selected, then the following display<br />
will appear :-<br />
Dilution Factor<br />
x 1<br />
OK<br />
Press [OK] to accept the default value (x1, no dilution), or key in<br />
new dilution factor then press [OK].<br />
5 The following display will now appear :-<br />
Test 001<br />
Aluminium / 50<br />
Insert Blank<br />
OK<br />
Choose a Test<br />
Place a BLANK TUBE in the test chamber, then press [OK].<br />
NOTE: The instrument is designed to hold the blank setting as long<br />
as the instrument is switched on. This stage will be omitted when<br />
further tests are being carried out.<br />
If the instrument is in continuous use mode, it is advisable to reblank<br />
from time to time.<br />
6 The instrument will be set automatically, and after a few seconds<br />
the following display will appear :-<br />
Test 001<br />
Aluminium/ 50<br />
Insert Sample<br />
OK<br />
Blank - Choose a Test - Timer<br />
Place SAMPLE TUBE in the test chamber, then press [OK].<br />
39
7 The instrument will take the reading and display the result as<br />
follows, for example :-<br />
Test 001<br />
Aluminium / 50<br />
10.0<br />
mg/l Al<br />
Choose<br />
Read Blank Follow-On<br />
The following symbols indicate the result is out of test range :-<br />
Result is higher than range > ><br />
Result is lower than range < <<br />
8 The ‘options menu' offers the choice to :-<br />
‘Choose a Test’ - return to the menu of test programs and select<br />
another test<br />
‘Read’<br />
‘Blank’<br />
- read further sample tubes of the currently selected<br />
test<br />
- re-blank the instrument<br />
40
POCKET TESTER INSTRUCTIONS<br />
pH Meter Operating Instructions (PT 151)<br />
Before First Use: Precipitation of the sensor electrolyte may cause<br />
white crystals to form around the cap. This is normal and does not affect<br />
the performance of the sensor.<br />
Conditioning: Condition the sensor before use. Remove the transparent<br />
cap and fill with water to a height of 20 mm. Recap the sensor and soak<br />
(keep sensor and cap upright during this period) for one hour. This will<br />
activate the sensor and dissolve any crystals present. Rinse the cap<br />
afterwards.<br />
Calibration: See page 43 for details on making up buffer solutions for<br />
calibration purposes.<br />
Select pH 7.0 buffer for general testing, select pH 4 for acidic and pH 10<br />
for basic solutions. Press the on/off button to power on. Immerse sensor<br />
in 20 mm of buffer and stir gently. Wait for displayed value to stabilise at<br />
or near pH 7.0. Press the cal button to enter the calibration sequence.<br />
CAL will flash momentarily and then show a flashing default reading. To<br />
complete calibration, press hold/ent button to confirm (Ent). To abort<br />
calibration, press cal button to escape (ESC).<br />
pH Testing: Remove the cap and press the on/off button to turn on the<br />
tester. Dip the sensor in at least 20 mm of test solution. Stir once and<br />
let the reading stabilise, note the value. Press hold/ent button to hold<br />
(HO) the reading. Annunciator will flash to indicate reading is in hold<br />
mode. Press hold/ent again to cancel (HC) the hold mode. Press the<br />
on/off button to turn the sensor off.<br />
Maintenance: Rinse the sensor in tap water after use. In harsh<br />
samples, take readings as quickly as possible, then rinse the sensor<br />
immediately afterwards with deionised water to remove residues and<br />
prevent contamination between samples.<br />
Useful Notes: To maintain sensor accuracy, use tester regularly or<br />
calibrate at regular intervals. For long-term storage, fill the cap with<br />
20 mm of storage solution, and replace cap. This will keep the sensor<br />
conditioned and ready for its next use.<br />
Changing Batteries: To remove batteries, lift up front battery cover and<br />
hold in position before lifting the two sides of the pocket clip. Remove<br />
old batteries and replace with new ones noting polarity as shown in the<br />
battery compartment.<br />
41
Error Messages:<br />
bAt – batteries are weak and need replacing.<br />
Err – wrong buffer value (out of range) and/or sensor is failing, use<br />
fresh buffer.<br />
Or/Ur – over or under range signal. Sensor may be contaminated<br />
/damaged/not fully immersed.<br />
Warranty: this tester is supplied with a warranty against manufacturing<br />
defects for a period of one year from date of purchase<br />
42
Calibrating with Buffer Tablets<br />
<strong>Palintest</strong> rapid dissolving Buffer tablets are the quick modern way to<br />
buffer pH measuring instruments. The tablets provide colour-coded<br />
one-shot buffer solutions for use in standardizing pH meters and<br />
recorders.<br />
Traditional practice has been to prepare a large volume of buffer<br />
solution and to store this for subsequent use. This practice runs the<br />
risk of contamination between use and of different pH buffers being<br />
confused with each other. In either event the result can be an<br />
incorrectly calibrated instrument.<br />
<strong>Palintest</strong> Buffer tablets eliminate these problems by providing a quick,<br />
simple means of preparing one-shot buffer solutions. Each tablet<br />
makes 20 ml of buffer solution sufficient for all standard pH electrodes.<br />
pH 4, pH 7 and pH 10 Buffer tablets are available and the solutions<br />
produced are colour coded to avoid any mix up. After use the solutions<br />
are simply discarded to eliminate storage problems and risk of<br />
contamination.<br />
The colour coding is as follows :-<br />
pH 4 Red solution<br />
pH 7 Yellow solution<br />
pH 10 Green solution<br />
The solution colours act as pH indicators. Any severe user<br />
contamination of the solution can be detected by a change in the<br />
solution colour.<br />
Instructions for Use<br />
1 Fill the 10/20ml plastic tube (PT 526) to the 20 ml mark with<br />
deionised water.<br />
2 Add one Buffer tablet of the required value and shake the tube until<br />
the tablet disintegrates.<br />
3 Stand the tube for approximately two minutes to ensure the buffer is<br />
completely dissolved and to allow any insoluble particles to settle.<br />
4 Check that the solution colour corresponds to the buffer value<br />
required.<br />
5 Insert pH electrode into the tube and calibrate the meter in<br />
accordance with the instructions supplied with the instrument.<br />
43
6 Remove electrode and rinse thoroughly in deionised water. It is<br />
important to rinse the electrode before immersing in buffer solution<br />
of a different value.<br />
7 Discard solution, then rinse and dry tube.<br />
Note: The buffer solution may be transferred to a separate container<br />
when dealing with unusual shaped pH electrodes.<br />
Buffer Values<br />
The pH value of buffer solutions varies with the temperature of<br />
solution. The precise buffer values given by <strong>Palintest</strong> Buffer Tablets at<br />
different solution temperatures are shown in the following table :-<br />
Temperature/pH Chart<br />
For precise calibration the temperature of the solution should be<br />
measured and the meter standardised against the appropriate value.<br />
44
CONDUCTIVITY SENSOR OPERATING INSTRUCTIONS (PT 159)<br />
Operating Range: 0 - 1990 µS/cm<br />
Resolution: 10 µS/cm<br />
Before First Use: Soak sensor for two minutes in alcohol to remove oils.<br />
Rinse in clean water.<br />
Calibration: Remove the cap and unscrew the top battery compartment<br />
cover (the interior is shown below) :-<br />
Press the On/Off button to turn the meter on.<br />
Immerse the sensor in a calibration solution (PT 142/7) and allow the<br />
reading to stabilise.<br />
Use the increase or decrease buttons to adjust the displayed value to<br />
coincide with the standard solution.<br />
Using the Sensor: Remove cap and press the on/off button on the<br />
keypad to turn the meter on. Immerse the sensor in about 20 mm of the<br />
test solution. Stir once and let the display stabilise, note the value.<br />
Press the hold button if you wish to hold the reading. Press again to<br />
release. Press the on/off button to switch the meter off.<br />
To avoid cross contamination between samples, the sensor should be<br />
rinsed with deionised water between uses.<br />
Recalibration: For optimum performance, recalibrate the sensor regularly.<br />
Weekly recalibration is recommended if the sensor is in constant use.<br />
Clean the stainless steel electrodes by periodically washing them in<br />
alcohol for 10 - 15 mins. Rinse with water after each use.<br />
Electrode Replacement: The electrode itself is replaceable. Please<br />
contact <strong>Palintest</strong> for information on how to replace the electrode.<br />
Warranty: This tester is warranted to be free from manufacturing defects<br />
for six months.<br />
V2: 04/09<br />
45